
The Service Allocation screen is the workshop's planning board: one timeline showing what every mechanic is committed to, next to a queue of the work that still needs a slot.
Overview
Most service screens show you one job at a time. This one shows you the whole workload at once, which is why it is where the day gets planned rather than where individual work orders get edited.
-
The screen has two halves: Unscheduled Work Orders on the left, and the allocation board on the right.
-
The board has a row for each of your mechanics under Internal, and a row for each contractor under External.
-
A work order only leaves the queue and appears on the board once it has both a worker and a scheduled start and end time.
-
The colour of a block tells you the status of the work order behind it.
-
Everything you see is scoped by the Branch filter, and all times are shown in that branch's timezone.
-
Nothing is created here. The board schedules work orders that already exist, and every drag saves straight back to the work order.
Before You Begin
The board is only as useful as the people and permissions behind it, so check these first.
|
Requirement |
Where to Find It |
|---|---|
|
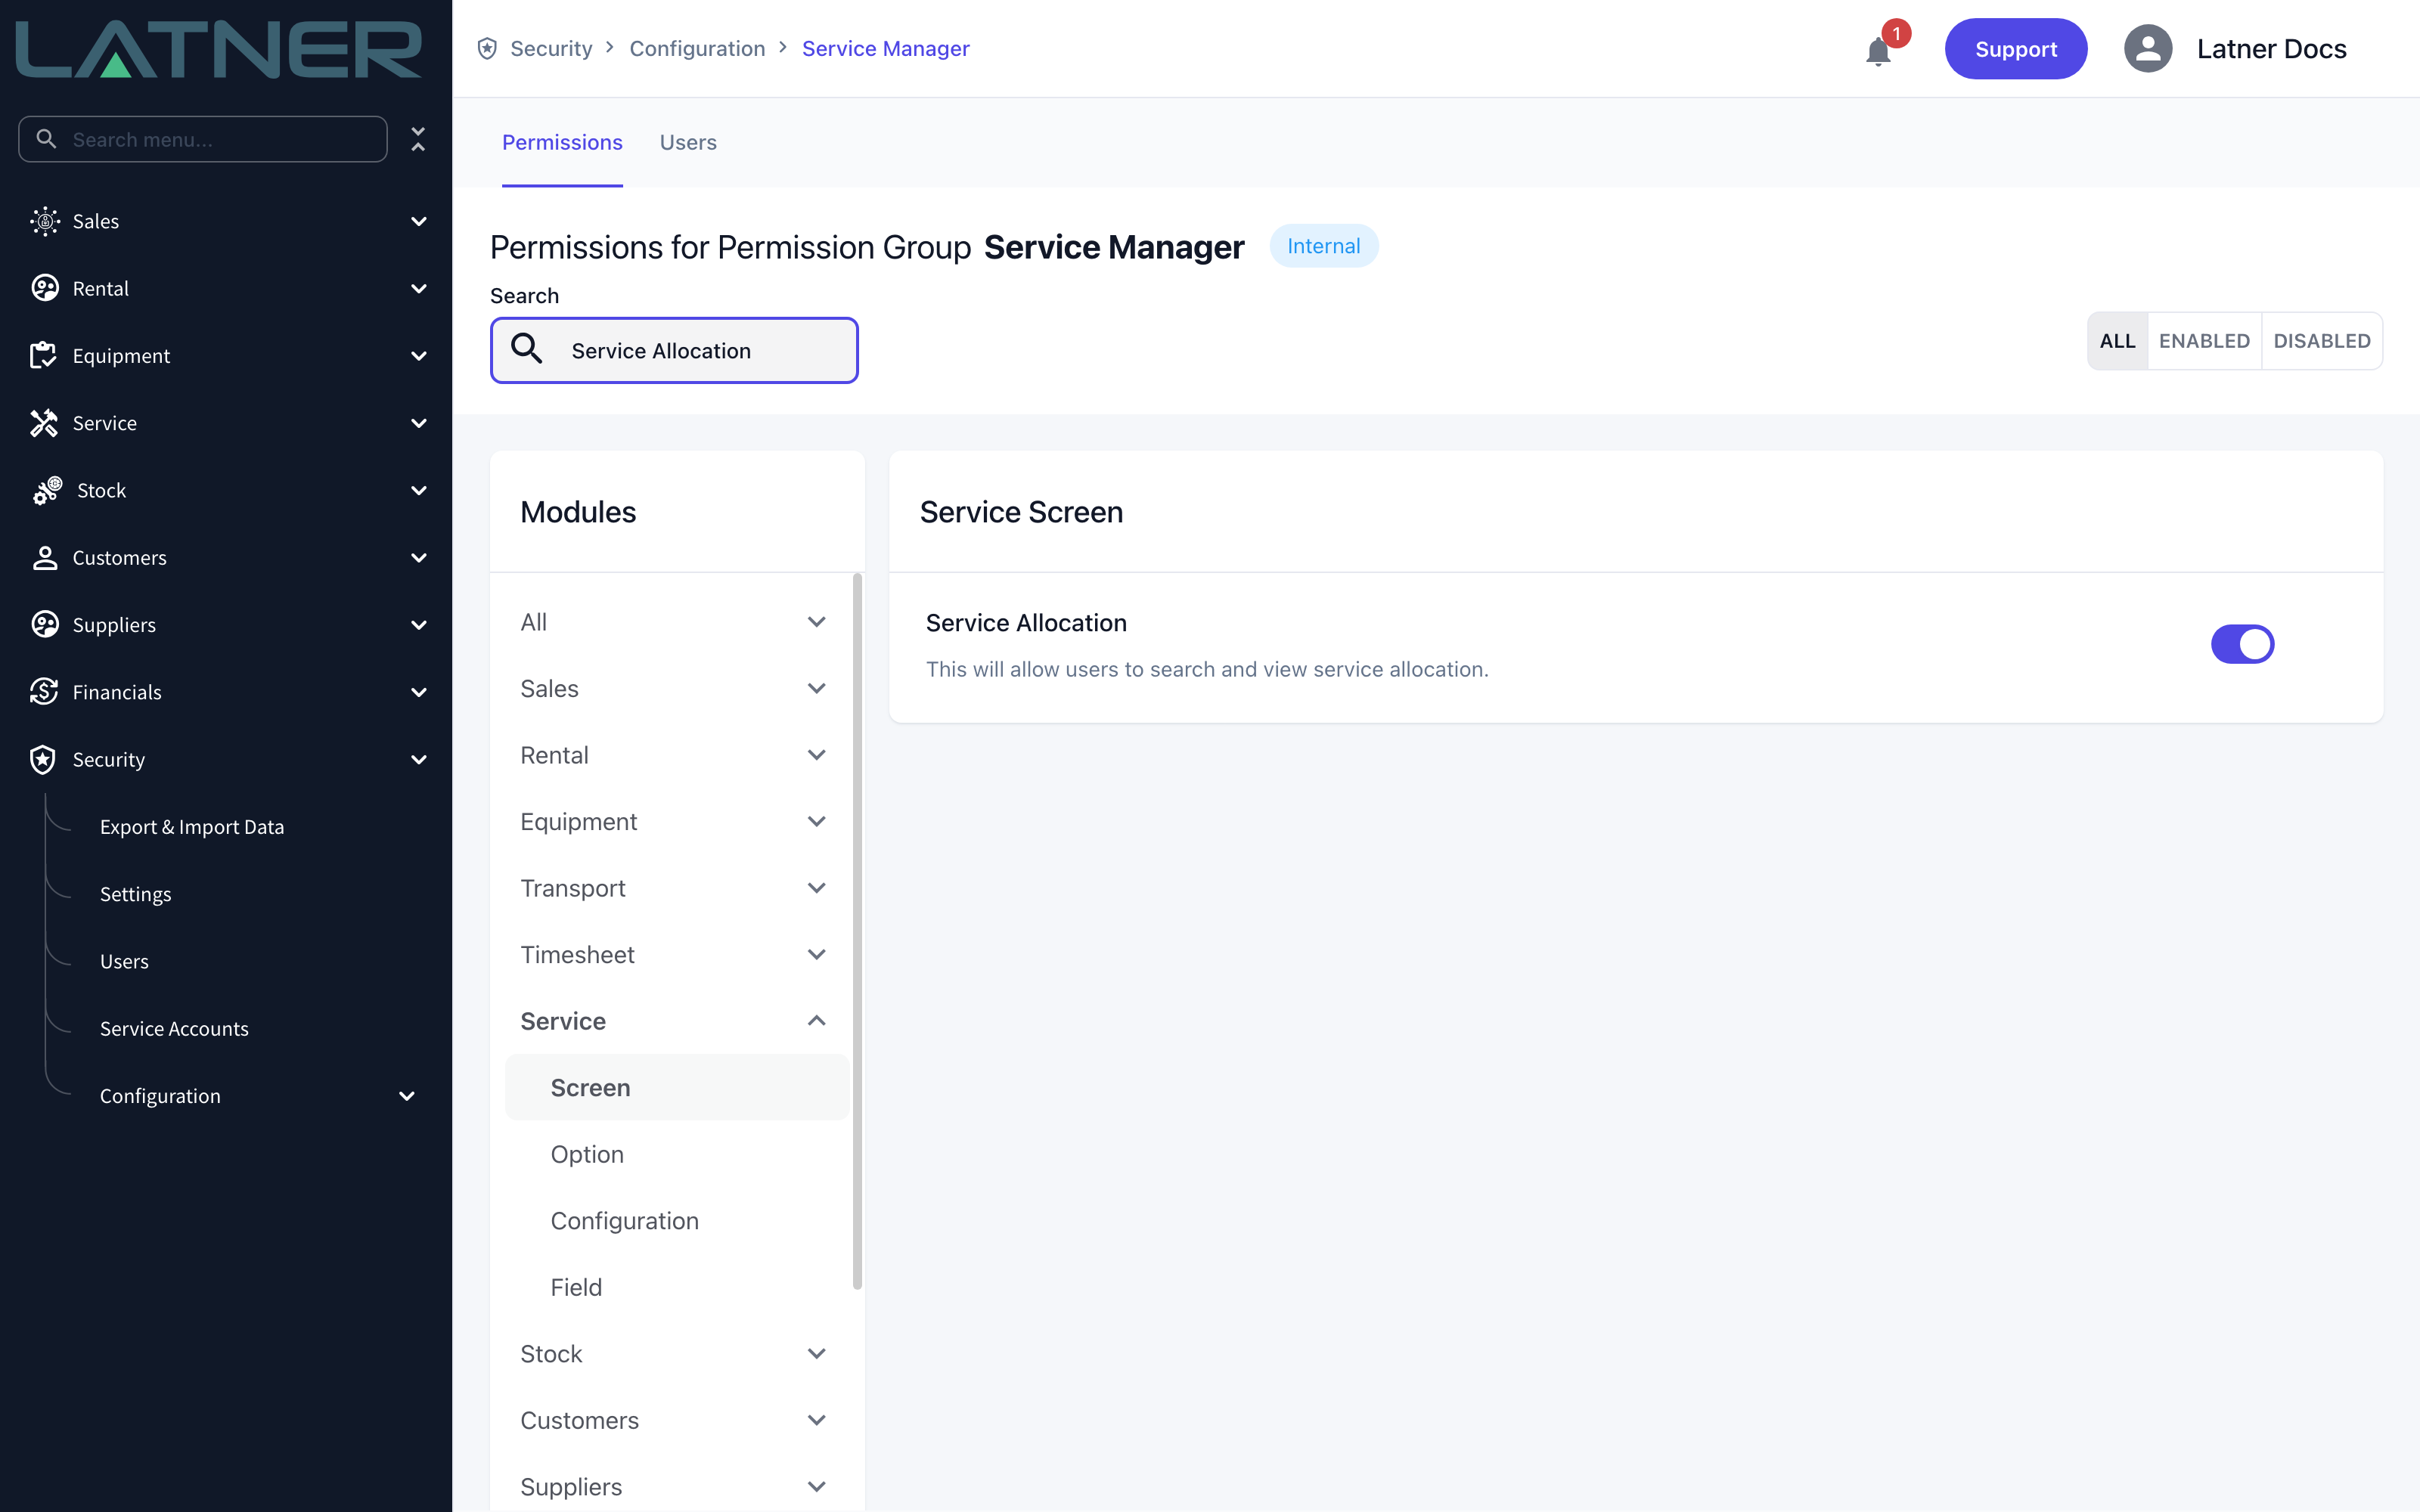
Service Allocation screen permission |
Security › Configuration › Permission Groups, then Service › Screen. Without it the menu item does not appear. |
|
Work Order screen permission |
Security › Configuration › Permission Groups, then Service › Screen. The board reads work orders, so it stays empty without it. |
|
Edit Work Order permission |
Security › Configuration › Permission Groups, then Service › Option. Needed to move anything on the board, because every drag saves a change to the work order. |
|
Mechanics set up as skilled persons |
Service › Configuration › Skilled Persons. They need a status of Active and the Field Technician or Workshop Technician role. |
|
Contractors set up as suppliers |
Suppliers. Same two roles, and a status of Active. |
|
Service Scheduler Default Duration (Minutes) |
Security › Settings › Service. Sets how long a block is when you first drop it on the board. It is 120 minutes unless your organisation has changed it. |
Only skilled persons with the Field Technician or Workshop Technician role get a row on the board. Someone whose only role is Driver or Yard Staff can still be chosen as the Mechanic on a work order, but you will not be able to schedule their job here.
Finding Your Way Around
Step 1 - Open the screen
Go to Service › Service Allocation. The screen opens on the current week with your own branch already selected, so what you see first is your branch's week.
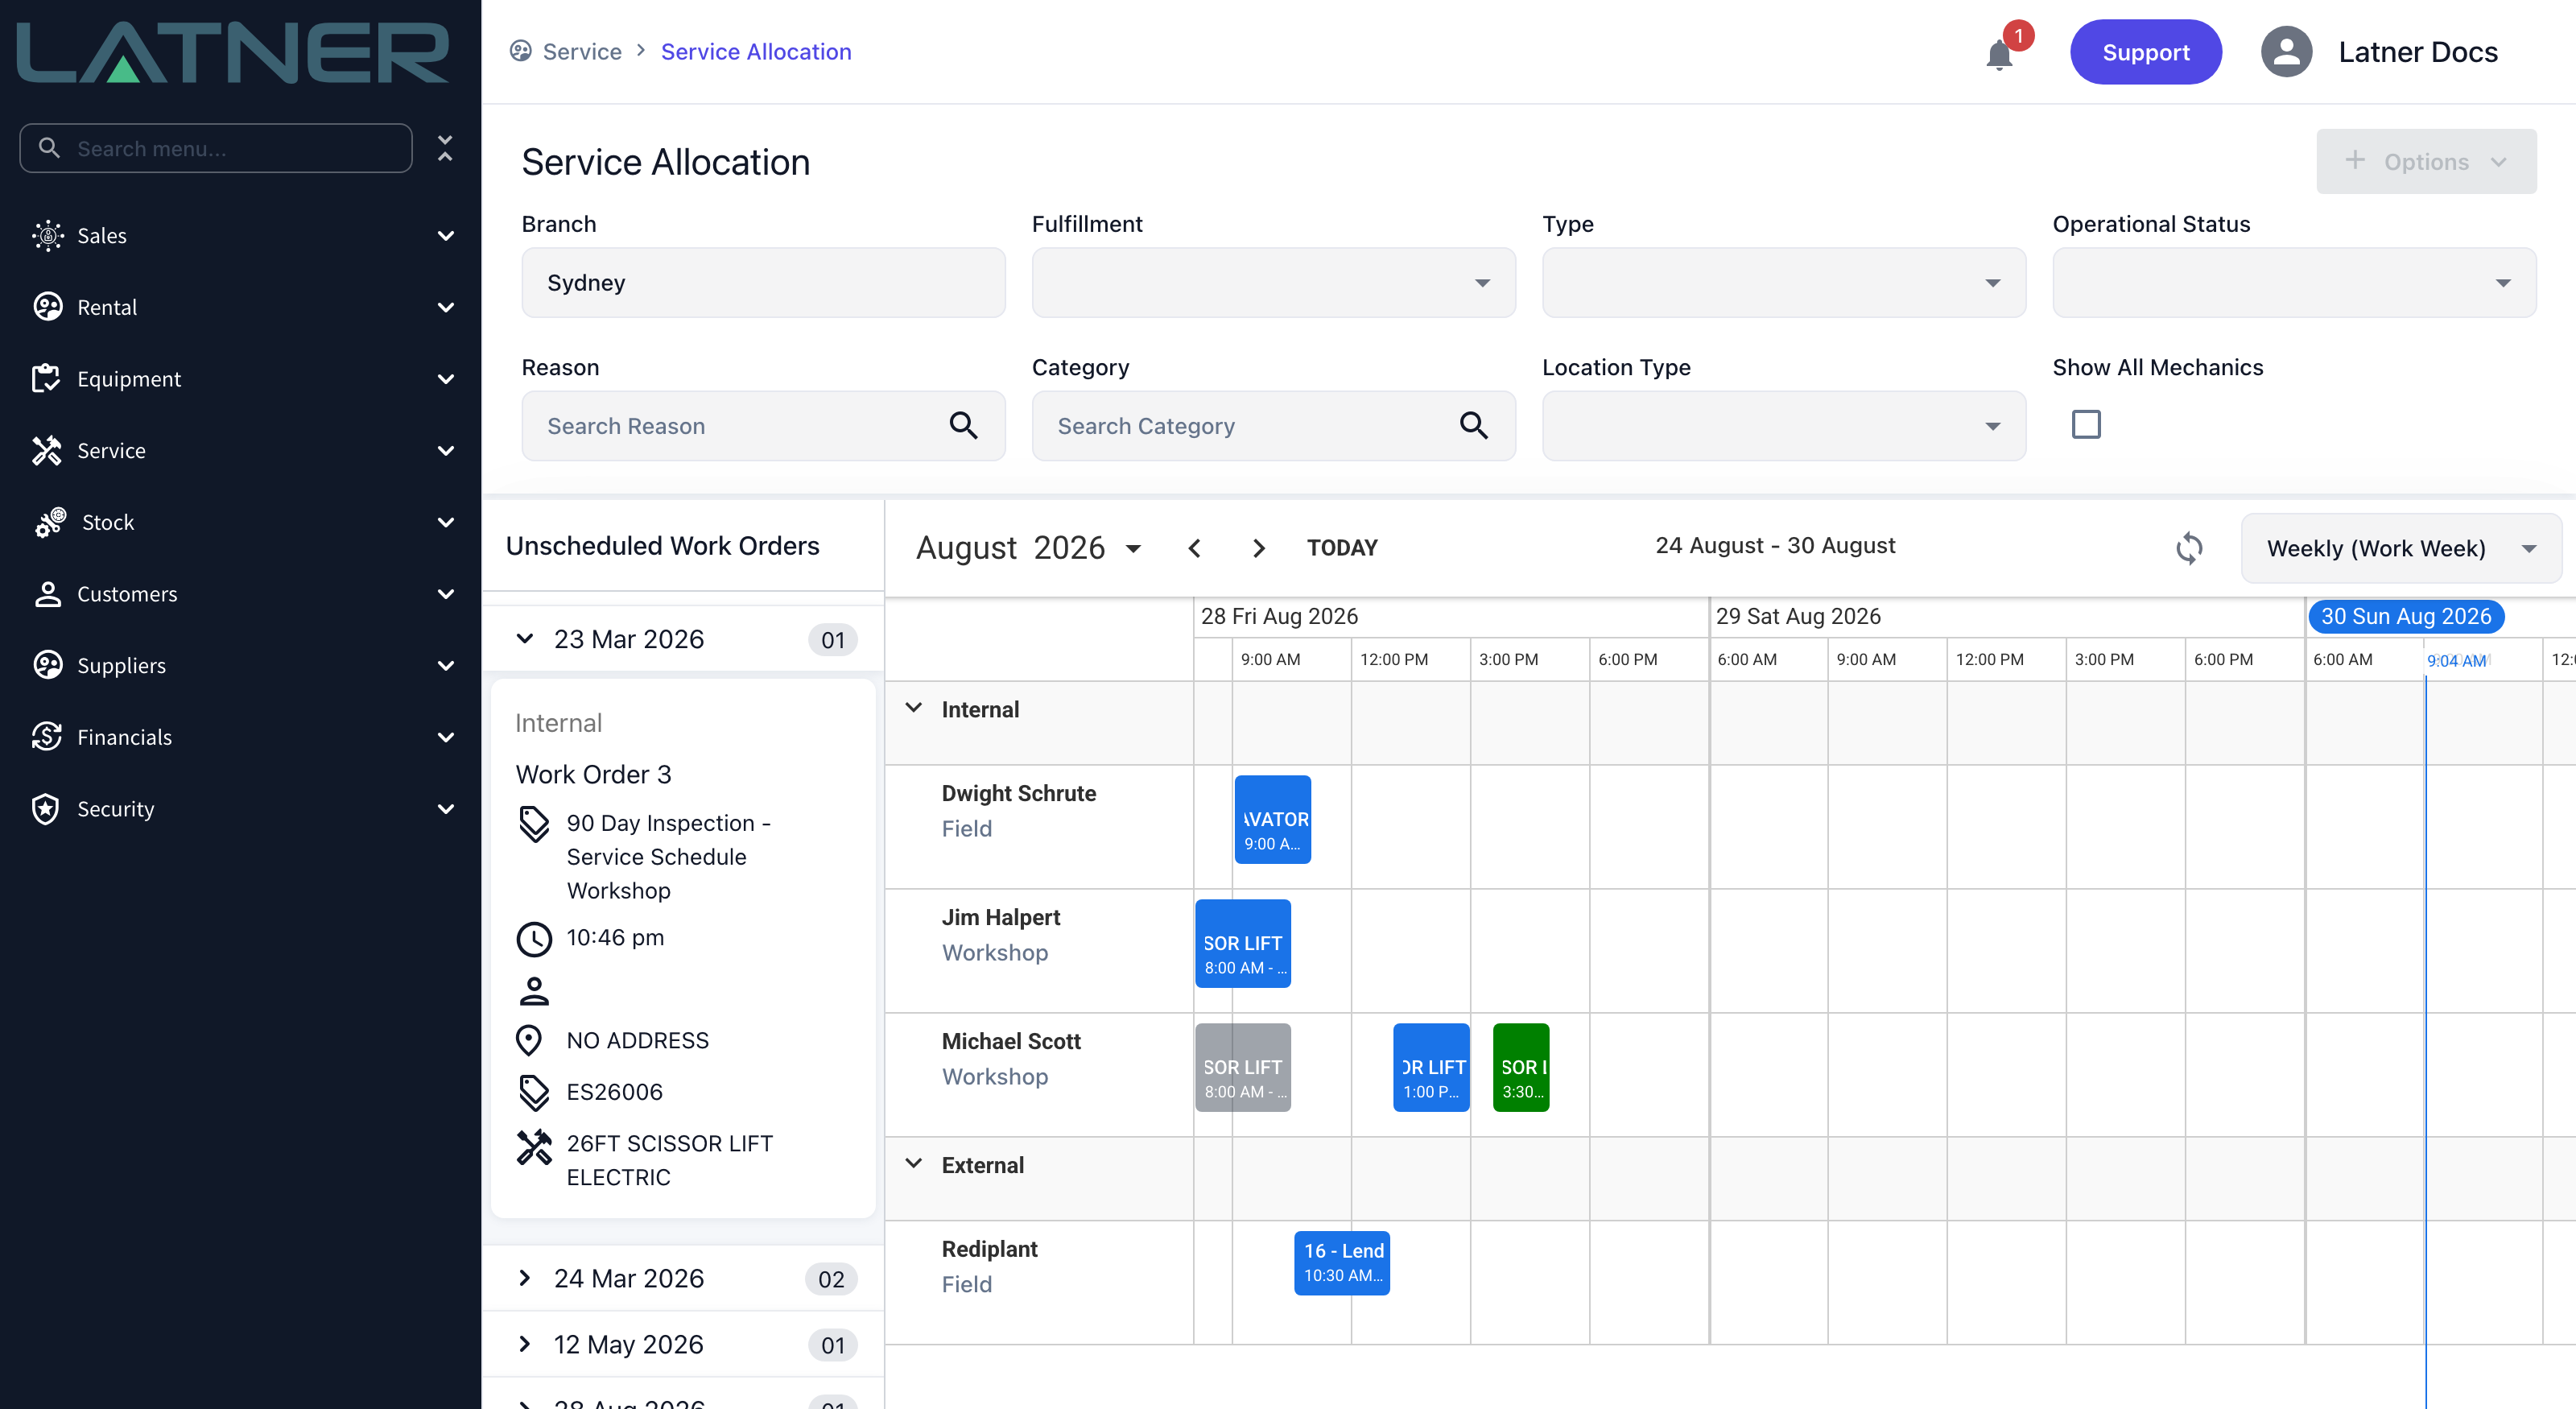
Three areas do all the work: the filters across the top, the Unscheduled Work Orders queue down the left, and the timeline that fills the rest of the screen.
Step 2 - Narrow the board with the filters
The filters at the top apply to both halves of the screen at once, so the queue and the board always agree with each other.
-
Branch - the branch whose work you are planning. This one cannot be cleared, and it also decides the timezone the board is drawn in.
-
Fulfillment - Internal for your own mechanics, External for work sent to a contractor.
-
Type - Internal, Chargeable, Customer Damage or Capital Preparation. You can pick more than one.
-
Operational Status - Operational or Non-Operational, for when you want to see the machines that are down first.
-
Reason and Category - the work order's reason and category. Choosing a reason narrows the categories on offer.
-
Location Type - Workshop or Field Service.
-
Show All Mechanics - adds mechanics from every branch to the board, not just the branch you are planning.

Step 3 - Work through the Unscheduled Work Orders queue
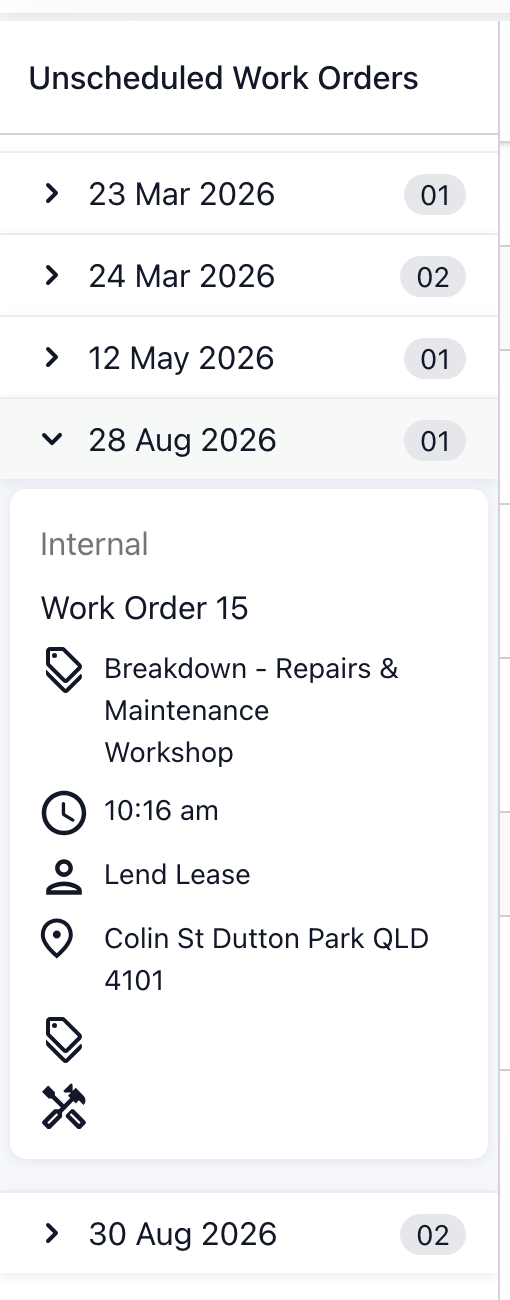
The left panel is your backlog. It lists every open work order in the branch that has not been fully scheduled yet, grouped by due date, with the number of jobs in each group on the right of the heading. Click a date to open or close it.
Each card carries enough to decide where the job should go:
-
Internal or External at the top, with the mechanic or supplier beside it if one has already been chosen.
-
The work order number, then its category, reason and location type.
-
The due time, the customer, and the address the job is at.
-
The equipment number and description, so you can see what you are working on.
Double-click a card to open the work order itself.
Step 4 - Read the board
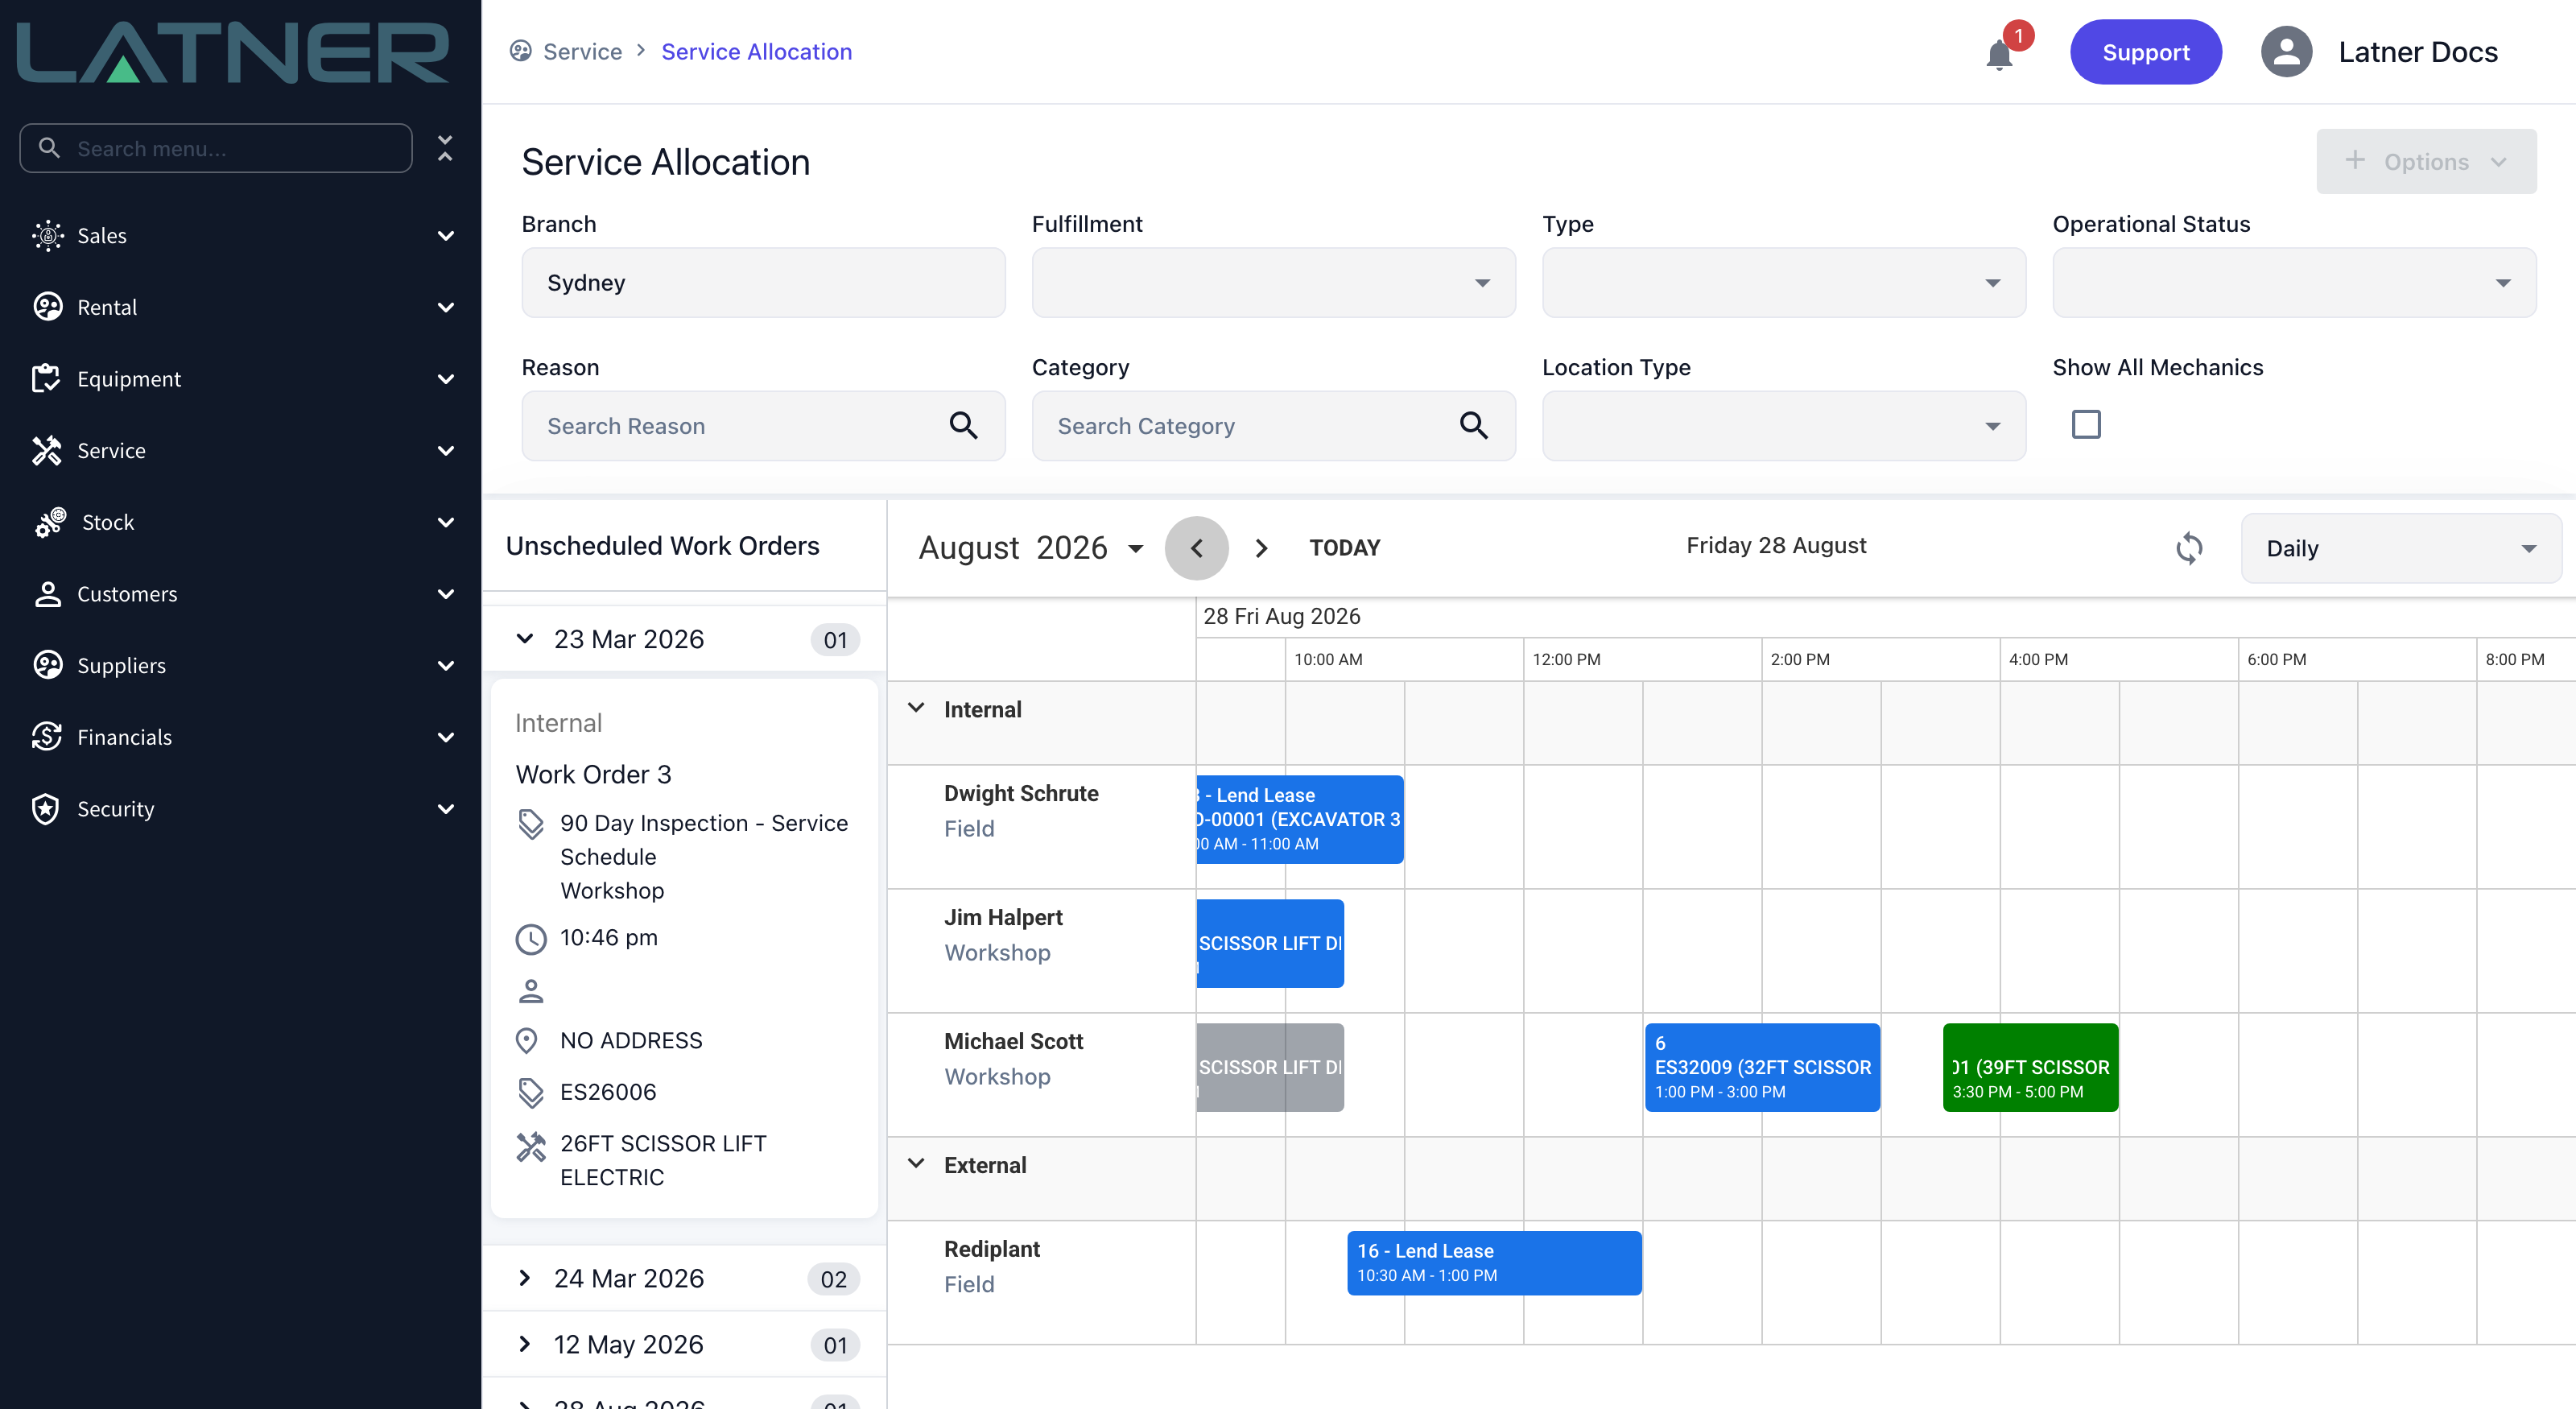
The board is split into Internal and External sections, and each row is one mechanic or one contractor. Under the name is the role they can be scheduled for, shortened to Field or Workshop. Use the arrow beside a section heading to collapse it.
Each block shows the work order number and customer on the first line, and the machine on the second. The colour is the work order's status:
-
Blue - open, the normal state of scheduled work.
-
Green - completed.
-
Amber - pending approval.
-
Red - cancelled. Cancelling a work order does not take it off the board.
-
Grey - a secondary technician's copy of someone else's job. It appears on their row so you can see they are busy, and it cannot be dragged.
Hover a block for the full picture without leaving the screen: work order number, type, description, operational status, machine type, equipment and serial number, the scheduled and due times, and the customer, contact and address. Double-click it to open the work order.
Step 5 - Change the date range and the view
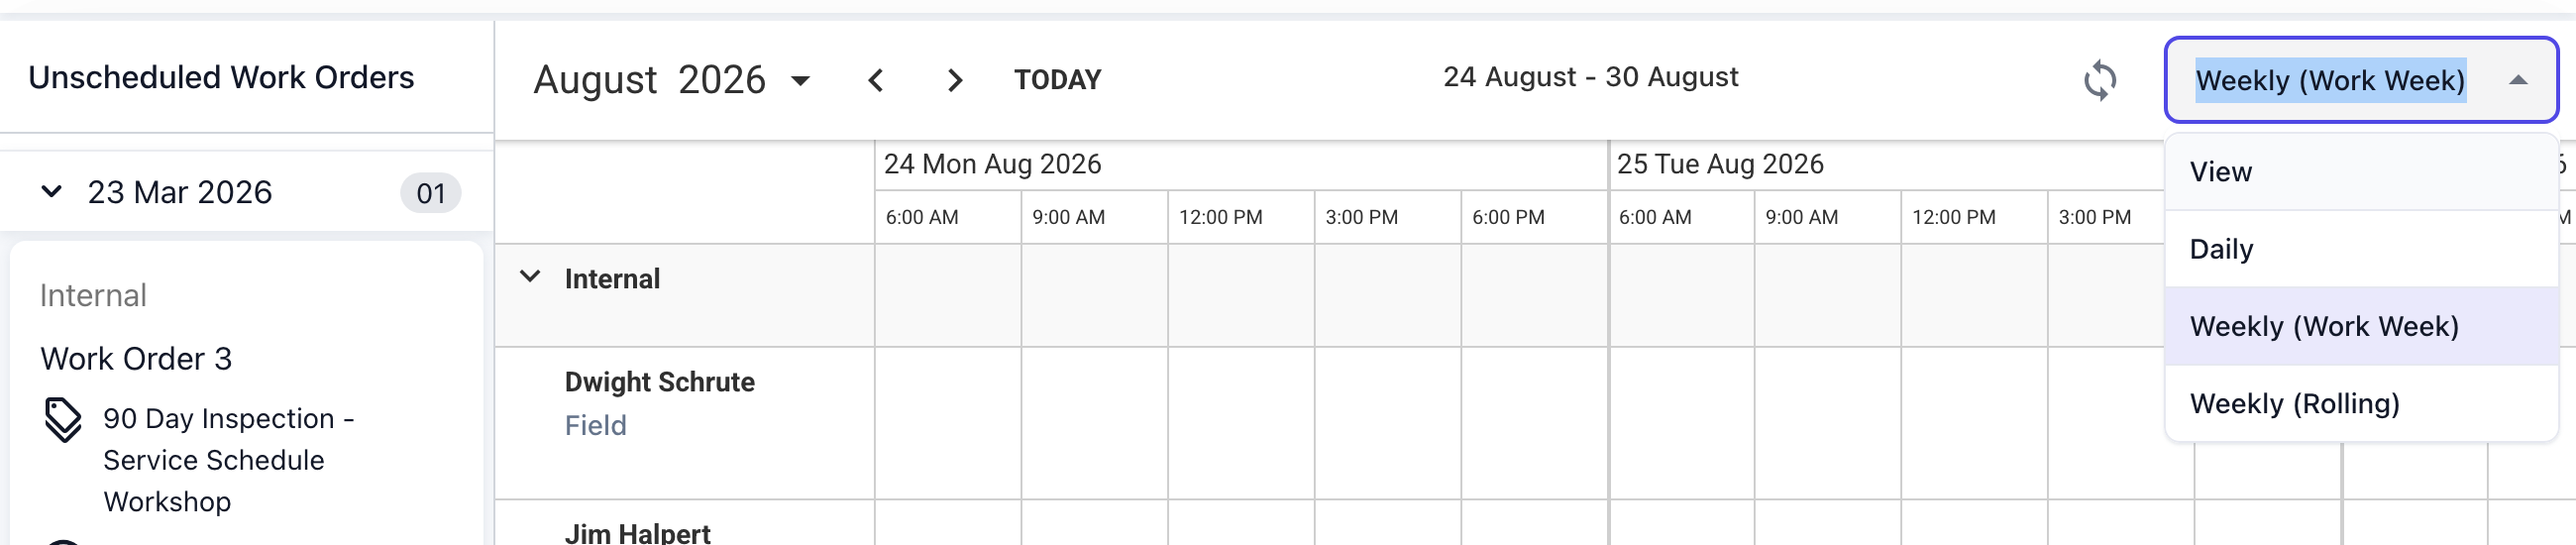
The View selector at the top right sets how much you look at:
-
Daily - one day, hour by hour. Use this to plan a day in detail; an hour-long job is only a sliver in a weekly view.
-
Weekly (Work Week) - Monday to Sunday. This is what the screen opens on.
-
Weekly (Rolling) - seven days starting yesterday, so today sits near the front of the window instead of in the middle of a fixed week.
Move around with the arrows either side of the month, or jump back with TODAY. The month and year at the far left open a date picker for a bigger jump. Whatever you choose, the board is drawn from 6:00 AM to 9:00 PM, and the range you are looking at is spelled out in the middle of the toolbar.
Step 6 - Keep the board current
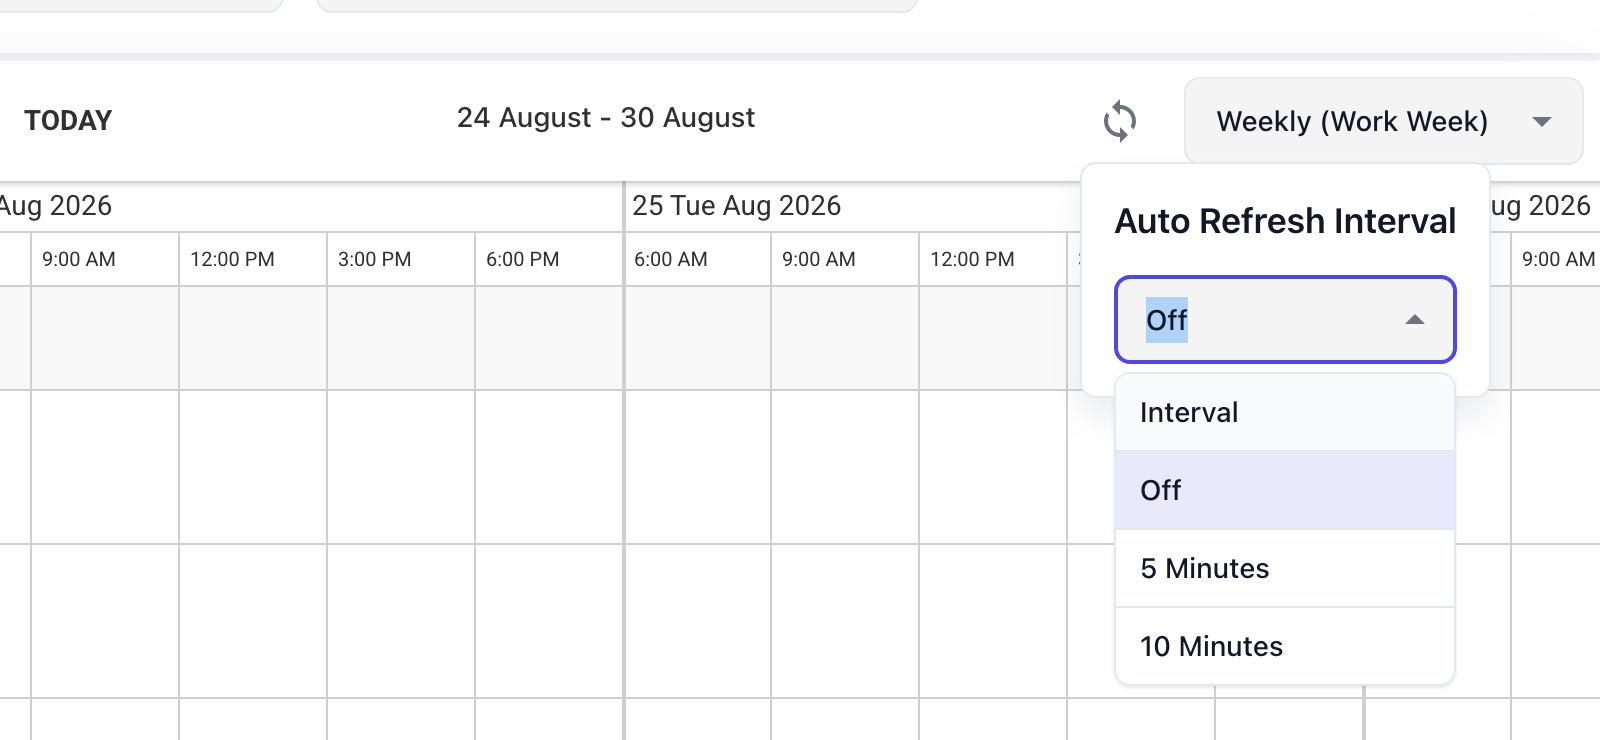
An allocation board is usually left open all day, and other people are changing work orders while you look at it. The circular arrow beside the View selector opens Auto Refresh Interval, where you can have the screen reload itself every 5 Minutes or 10 Minutes. It is Off until you set it, and while it is on the icon turns green and shows the interval.
What Changes When You Move Something
-
Dropping a card from the queue onto a row sets the mechanic or supplier and the scheduled start and end time on the work order in one action, and moves its Tech Status to Allocated.
-
Dragging a block to a different time or a different row reschedules or reassigns it. Dragging its edge changes how long the job is booked for.
-
The work order's Scheduled Start Date and Scheduled End Date are read-only on the work order itself, because this board is where they are set.
-
Completed and cancelled blocks are fixed in place. Reopen the work order if you need to reschedule it.
-
For the step-by-step version of allocating a job, see How to Allocate a Single Work Order to a Mechanic.
Dragging a block off the board and back into Unscheduled Work Orders clears the mechanic as well as the times, and the work order goes back to Unallocated. If you only meant to move the job to another day or another mechanic, drag it to its new spot on the board instead of unscheduling it first.
FAQs
Watch the Demo
Prefer to watch it? Step through the same screen here.