
Adding a part to a work order records the stock a mechanic used on a job, so the cost lands on the work order and the quantity is reserved out of your warehouse straight away.
Overview
A service job is rarely just labour. Filters, hoses, seals and oil all come off a shelf somewhere, and Latner wants to know which shelf, so the job costs what it really cost and the storeman isn't surprised at stocktake.
-
Parts are added from the work order's Options menu and appear as Stock lines on the Actuals tab.
-
Every part comes from a specific warehouse, and only warehouses attached to the work order's branch can be chosen.
-
Adding the part allocates the quantity immediately - it moves from Qty Available to Qty Allocated on the stock record. It isn't consumed until the work order is completed.
-
Cost, Retail Price and Description default from the stock item and can be changed on the line.
-
Cost feeds the work order's Actuals Cost and retail price feeds Actual Retail, which is what a chargeable work order invoices.
-
Parts can only be added, edited or deleted while the work order is Open.
Before You Begin
Make sure the following are in place before you start.
|
Requirement |
Where to Find It |
|---|---|
|
Add Stock to Work Order permission |
Security › Configuration › Permission Groups › your group › Service › Option |
|
A work order in Open status |
Service › Work Orders |
|
Stock on hand in a warehouse belonging to the work order's branch |
Stock › Stock, on the part's Warehouses tab |
|
Enable Picking Lists for Work Orders (optional) |
Security › Settings › Service |
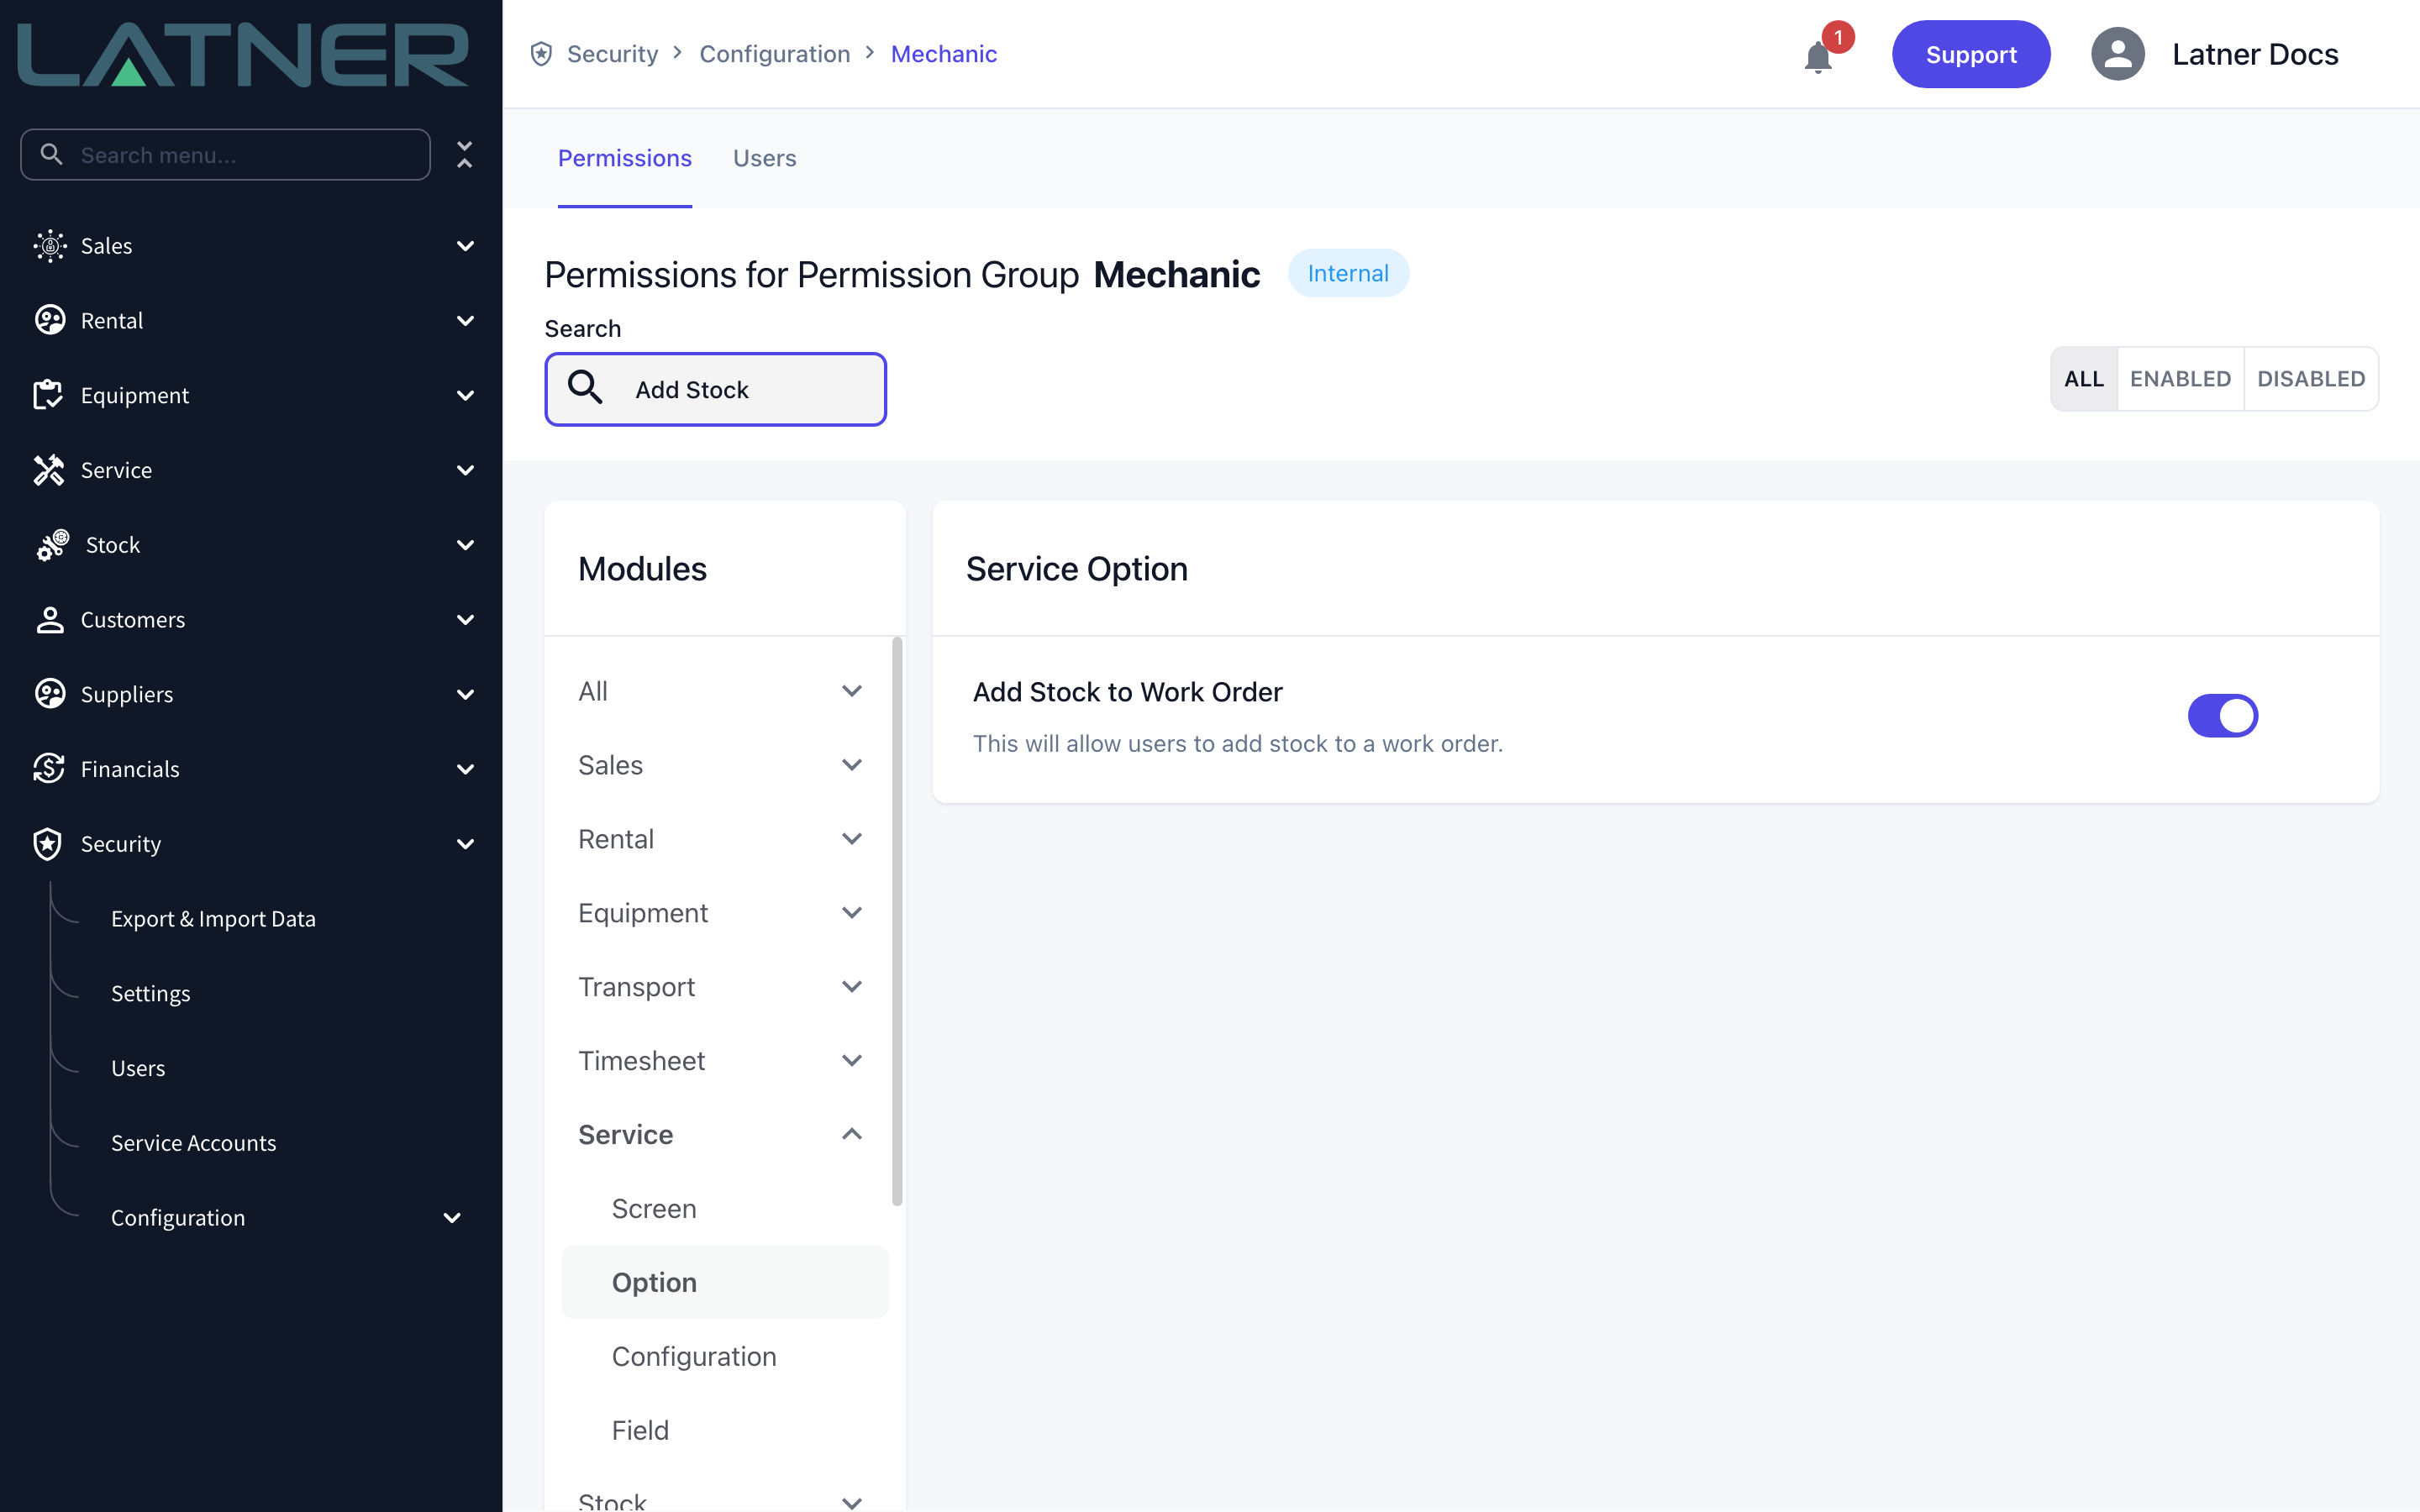
The Warehouse list on the Add Parts form is filtered to the work order's branch, and the parts search is filtered to that warehouse. If the warehouse list comes up empty, the branch on the work order has no warehouse attached to it.
Adding the Part
Step 1 - Open the work order
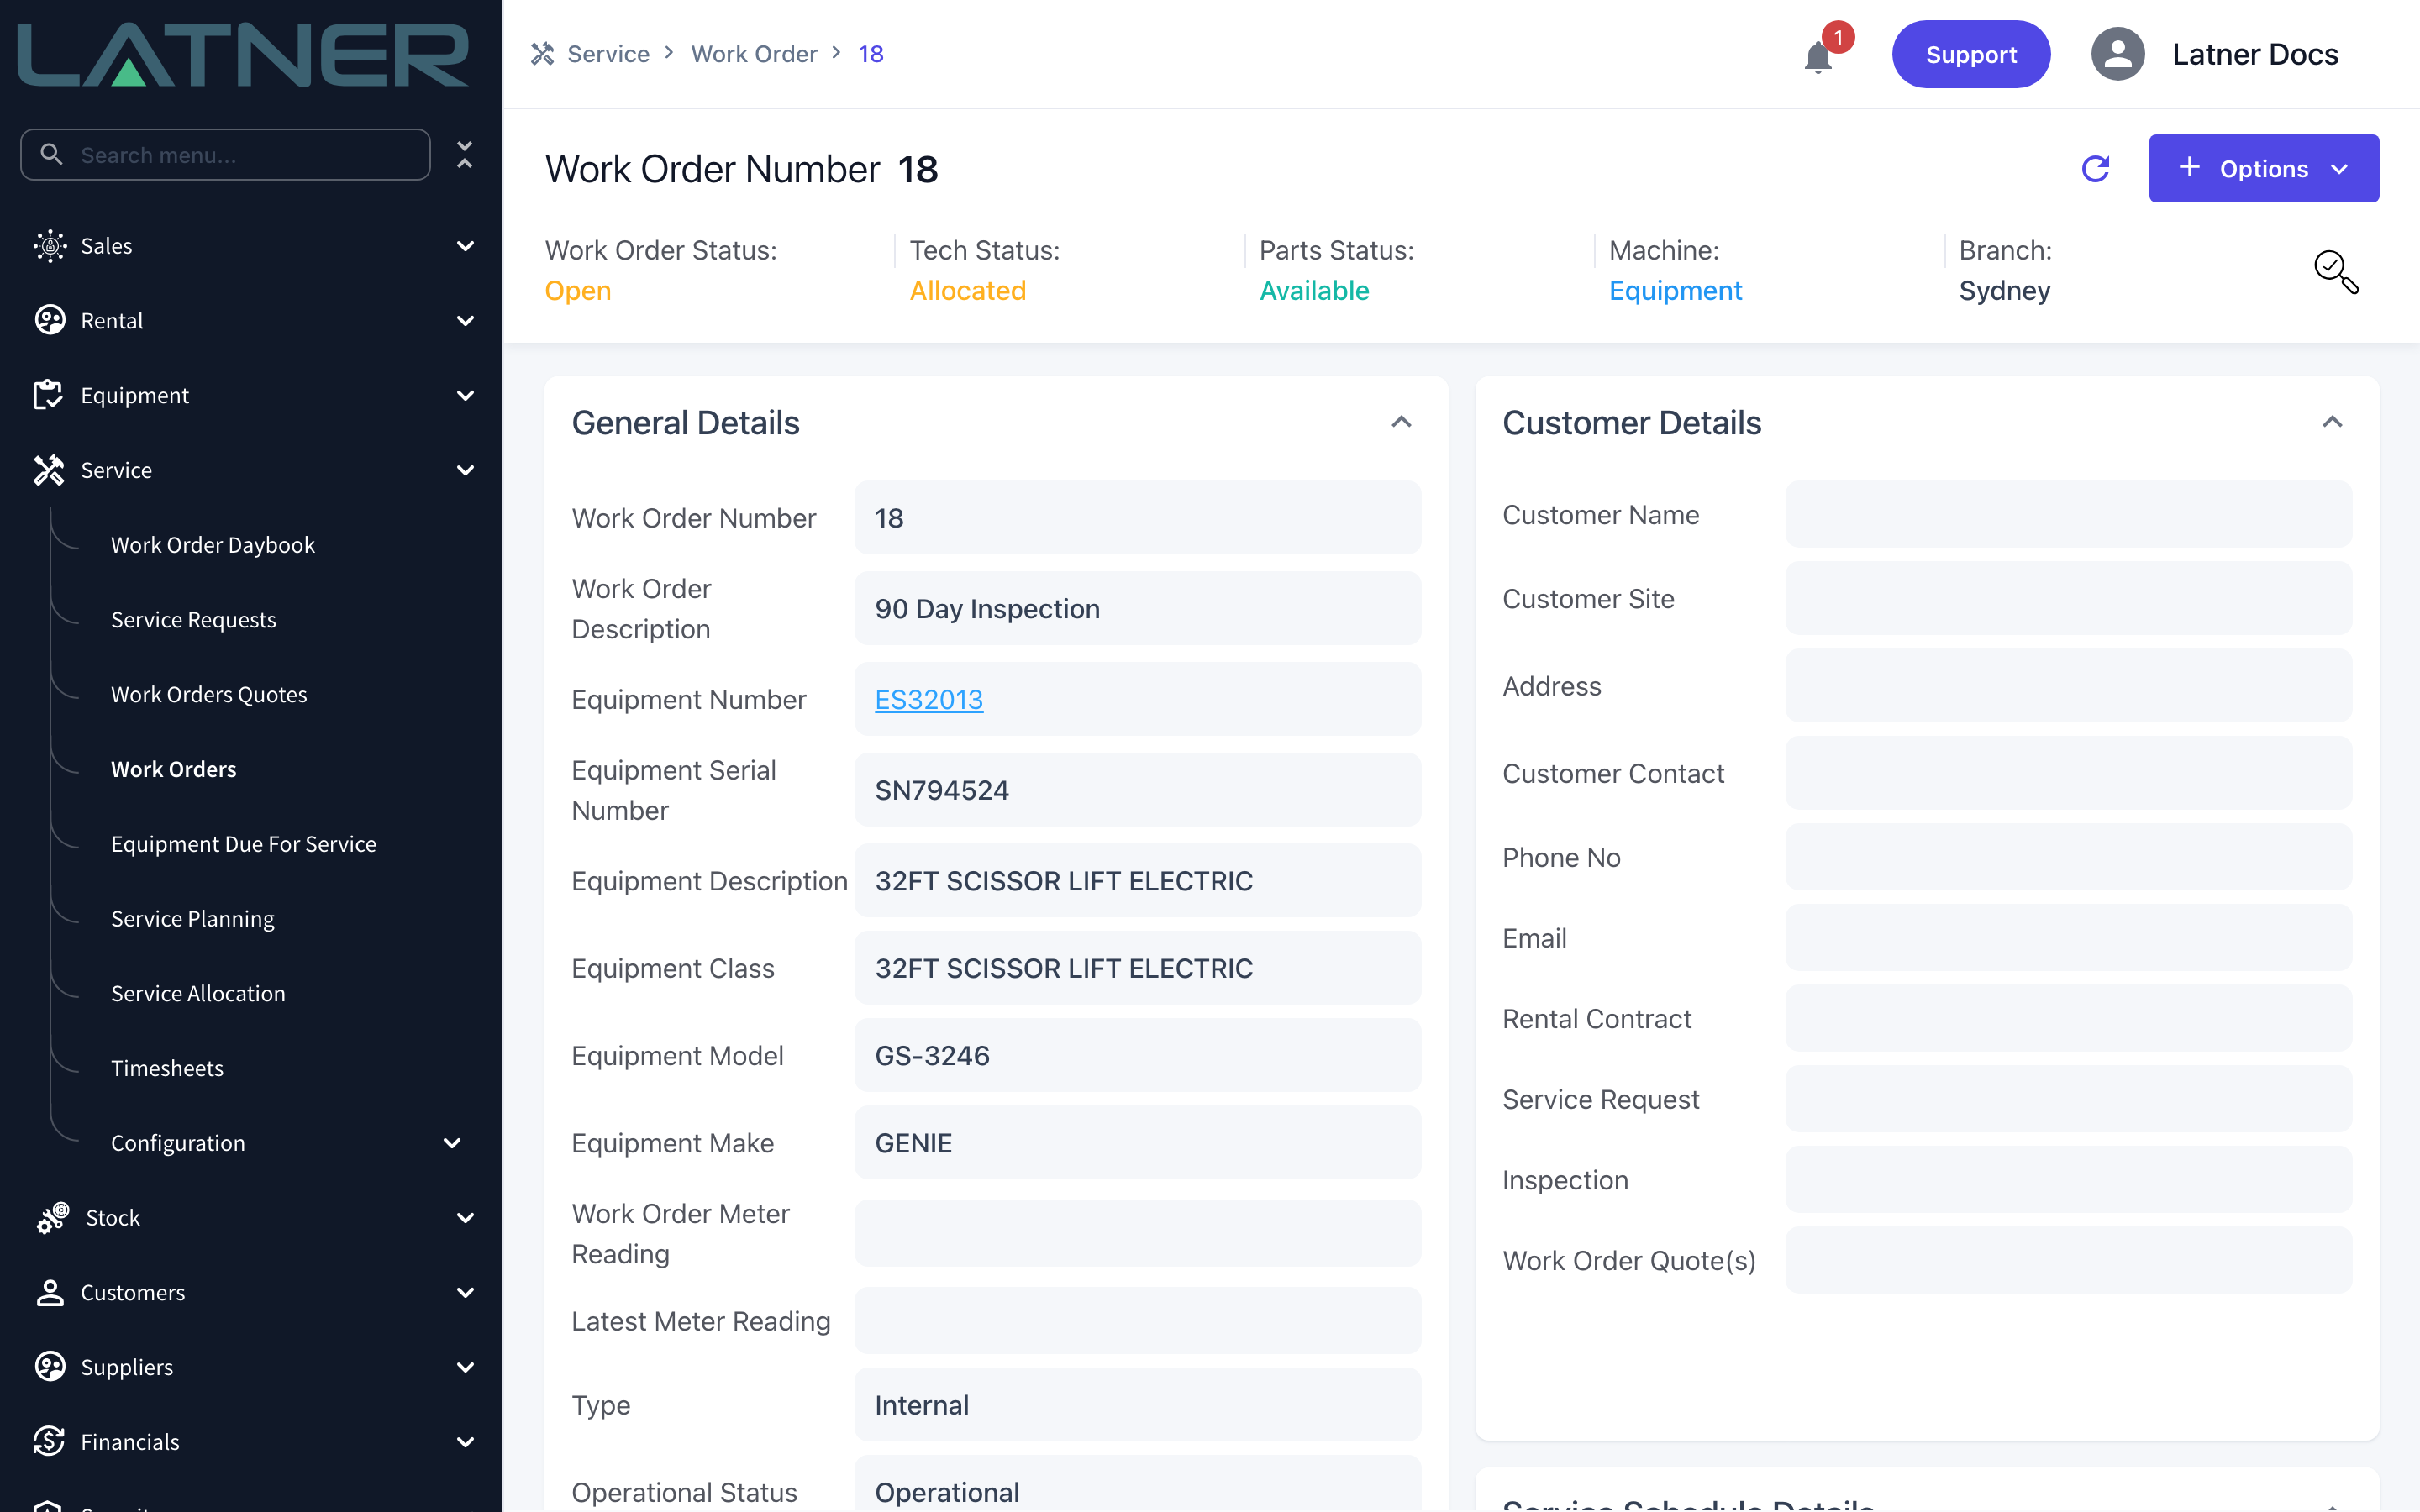
Go to Service › Work Orders and open the job the part belongs to. Check the Work Order Status banner at the top reads Open - parts can't be added to a work order that has been completed or cancelled.
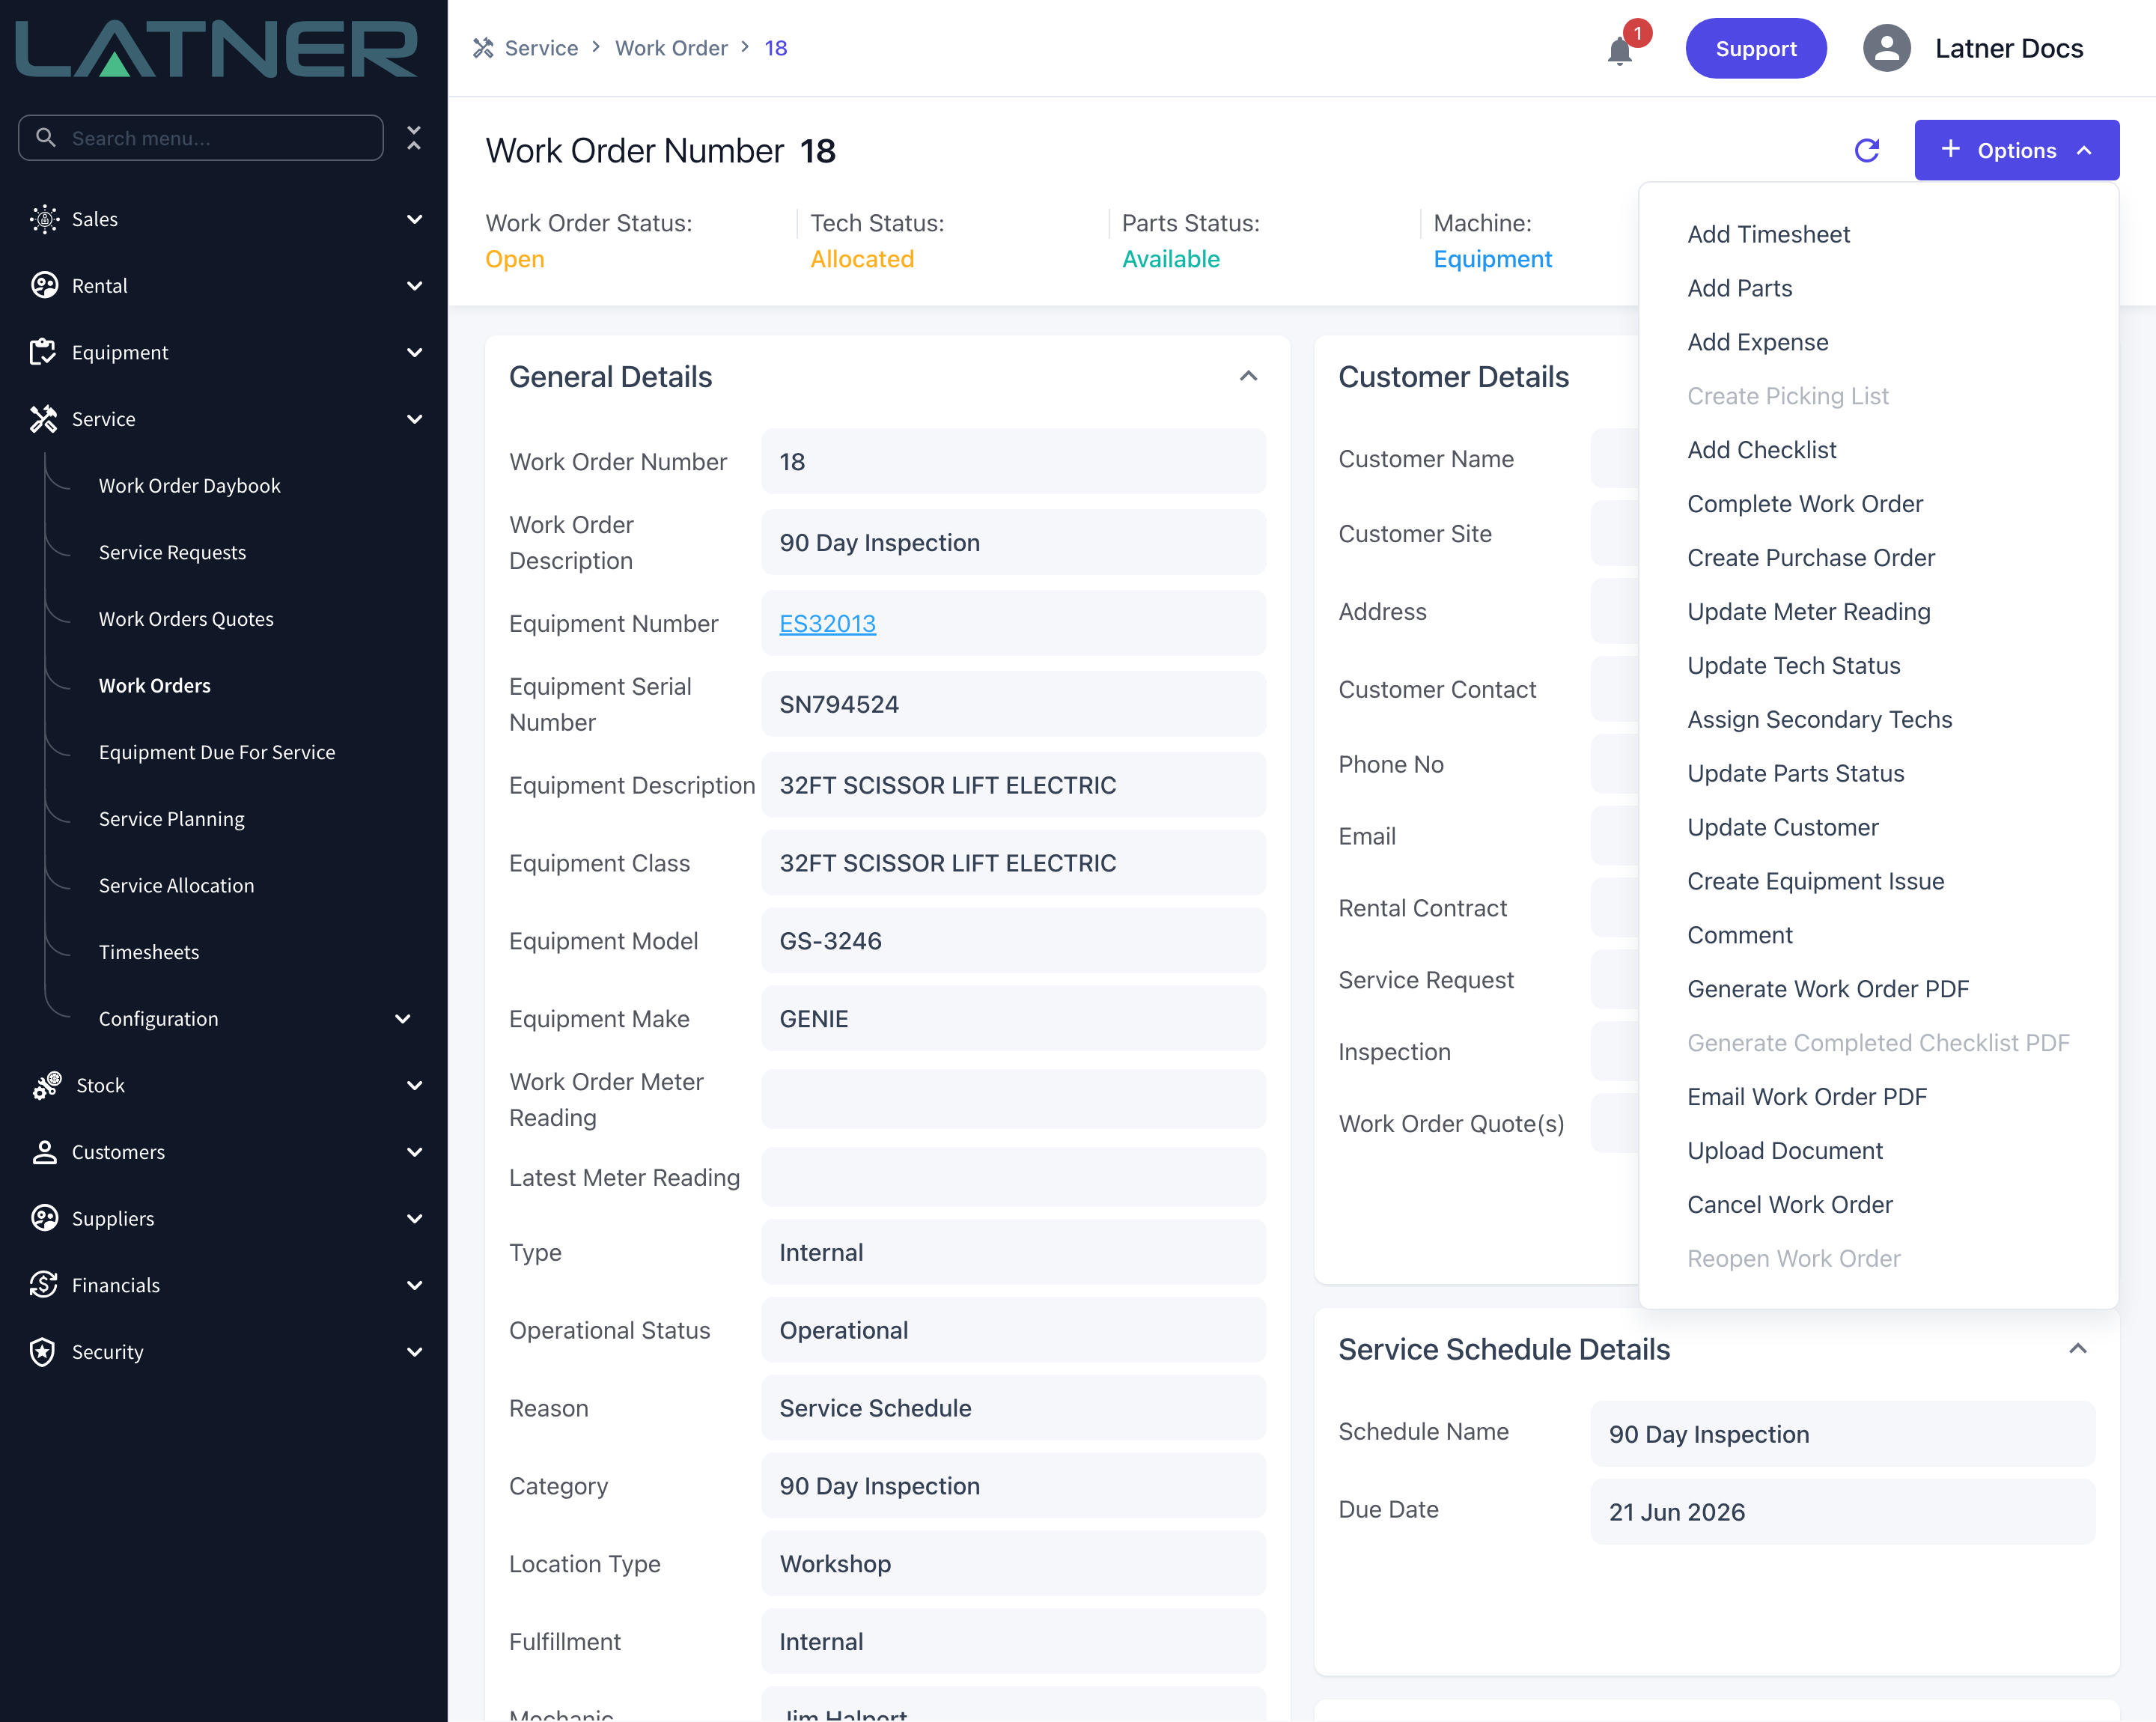
Step 2 - Choose Options › Add Parts
Click Options at the top right and choose Add Parts.
Step 3 - Check the job details
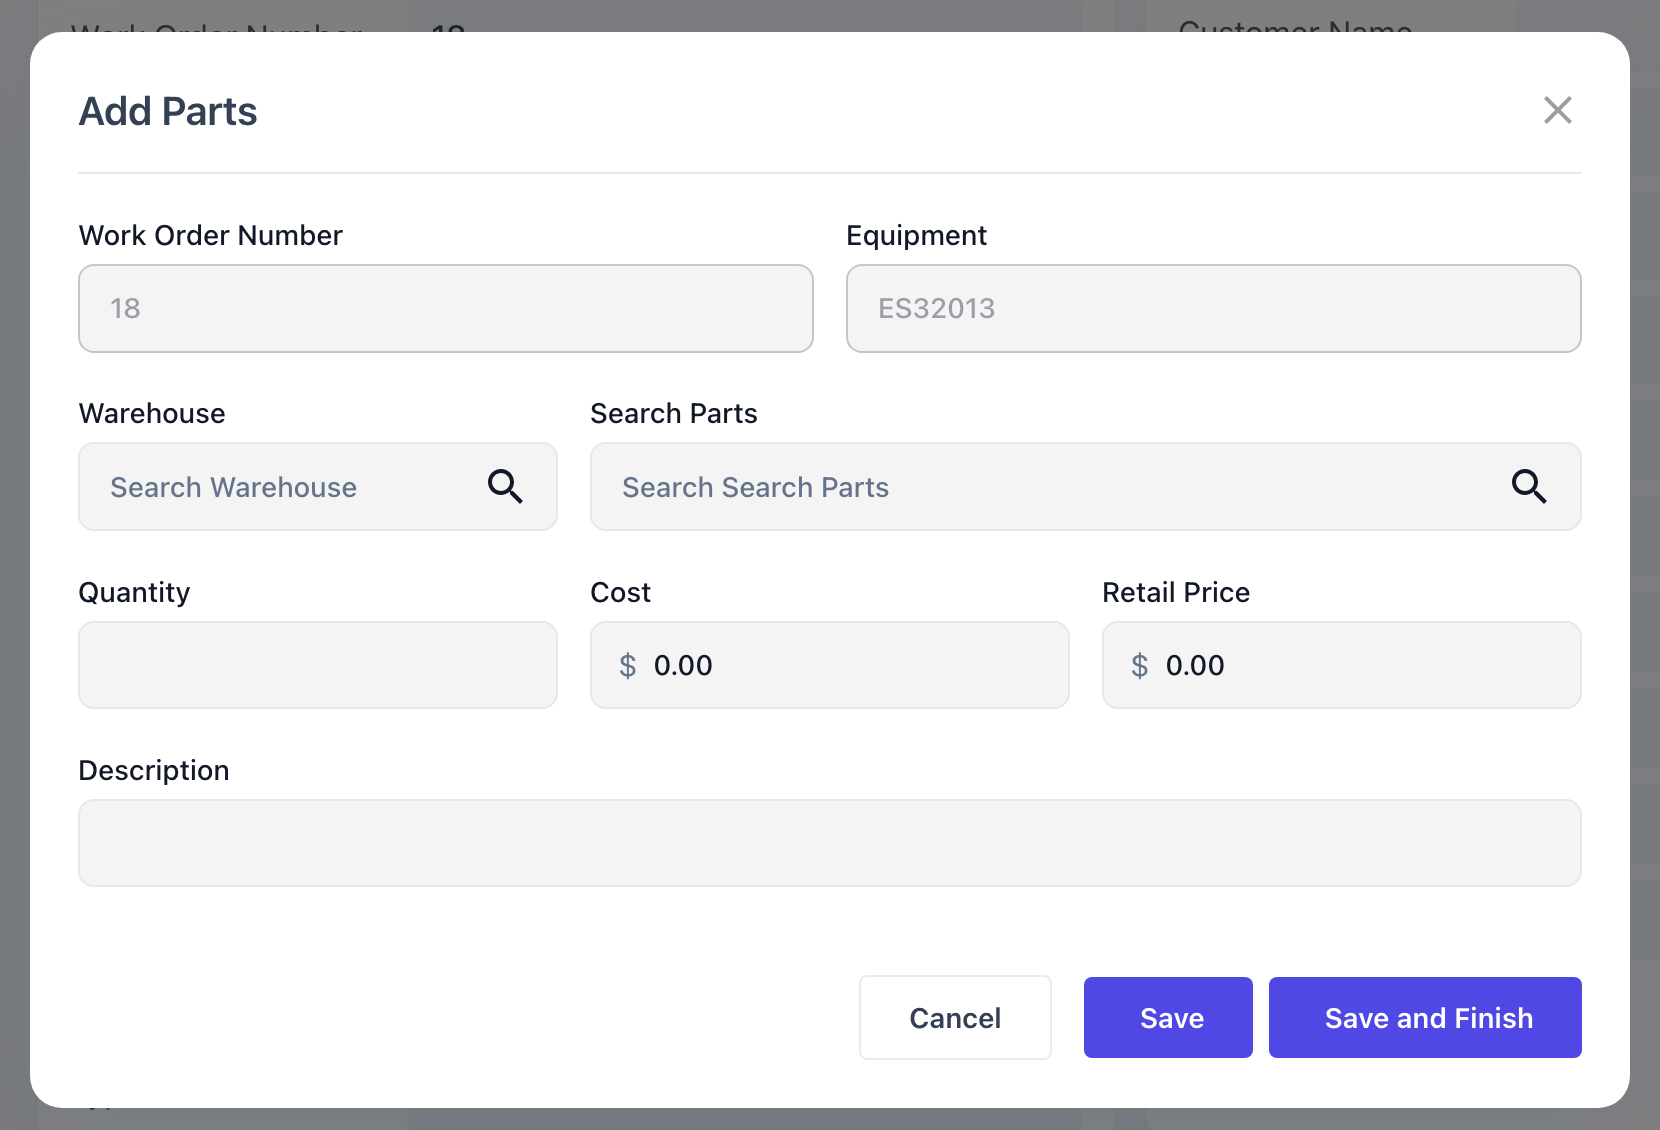
The Add Parts form opens with the job it belongs to already filled in and locked.
-
Work Order Number - the work order you're adding to, read only.
-
Equipment - the machine on the work order, read only. On a capital preparation work order this is replaced by Serial Number, showing the serialised stock item being prepared instead.
Step 4 - Choose the warehouse and search for the part
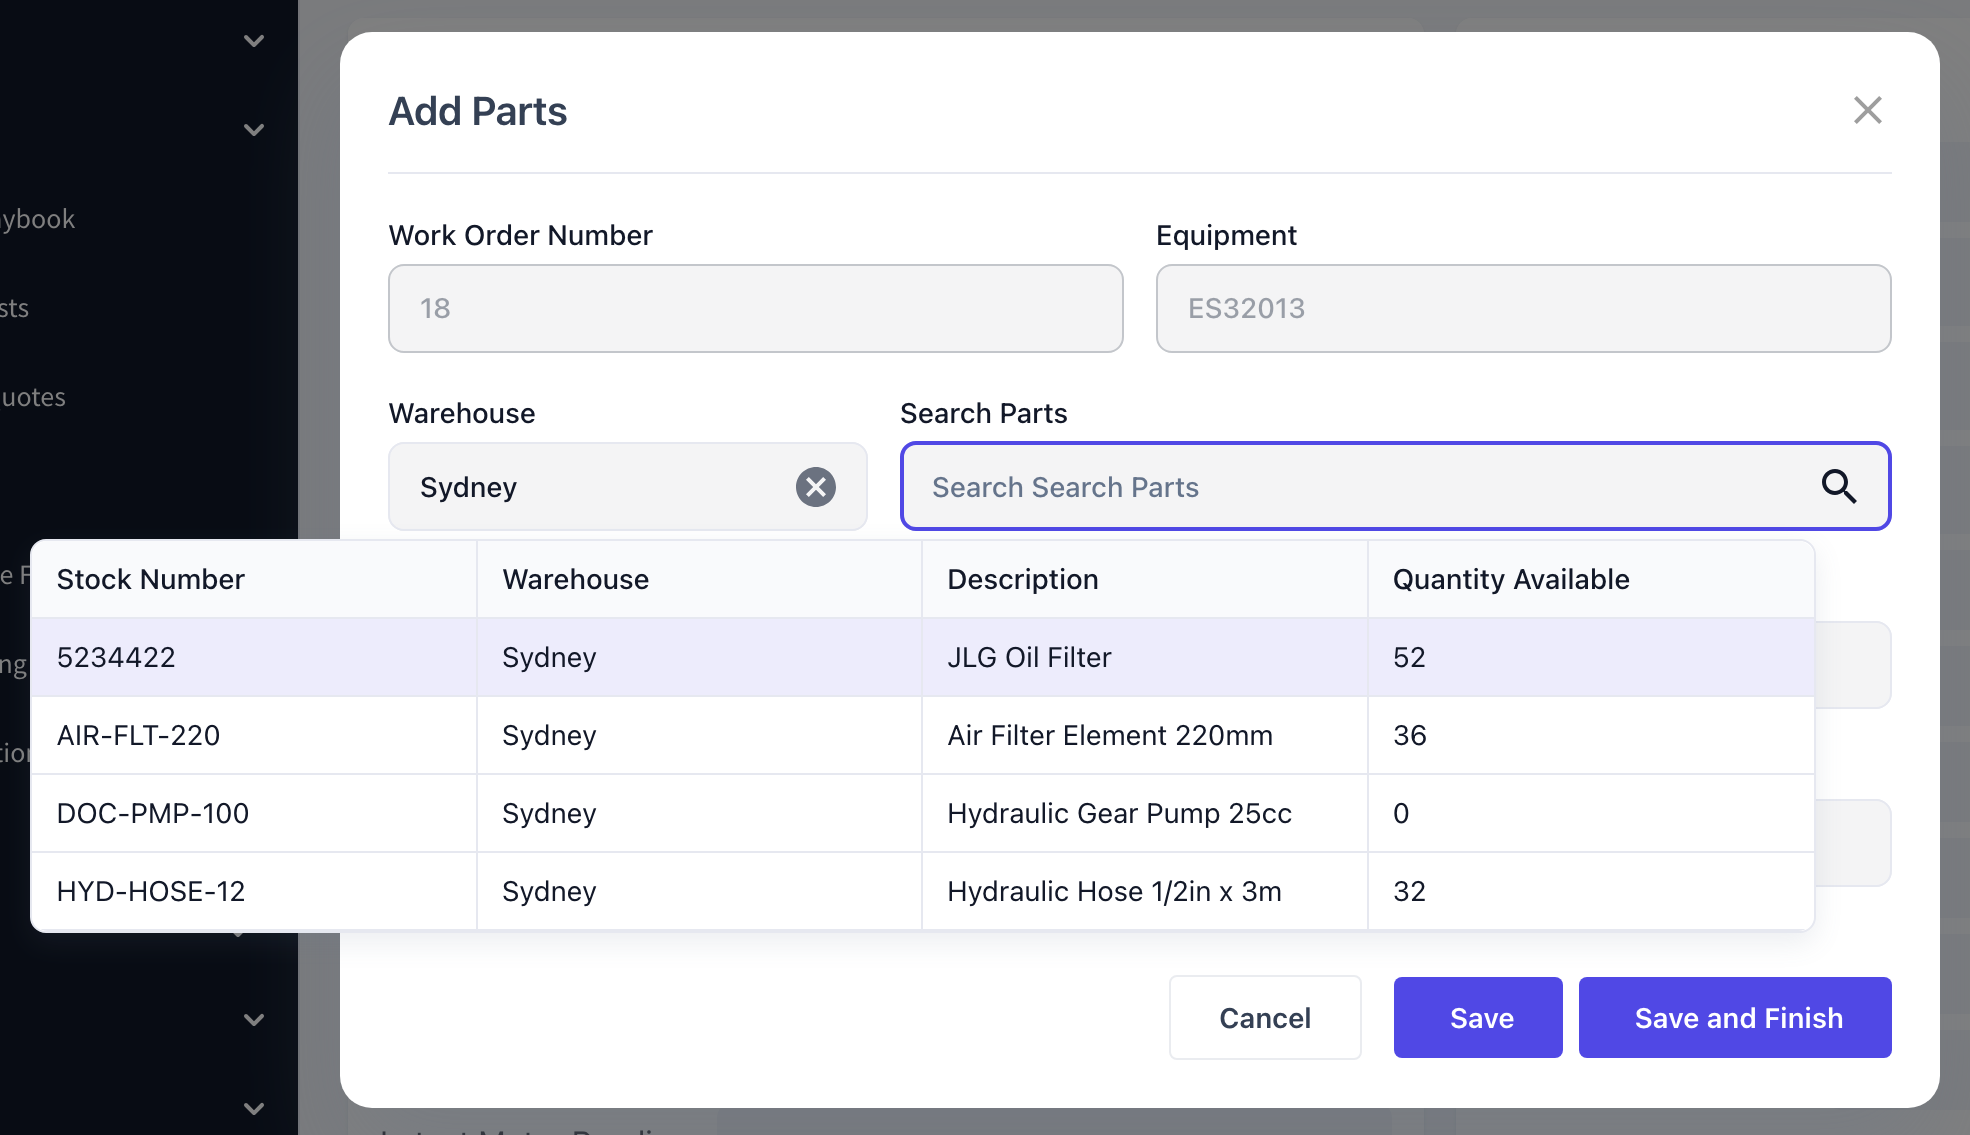
Pick the Warehouse the part is coming out of, then click Search Parts and choose the part. The search results show Stock Number, Warehouse, Description and Quantity Available, so you can see whether the part is actually on the shelf before you commit to it.
-
Warehouse - required. Changing it clears whatever part you had selected, so choose the warehouse first.
-
Search Parts - required. Type any part of the stock number or description to narrow the list.
Step 5 - Enter the quantity and check the prices
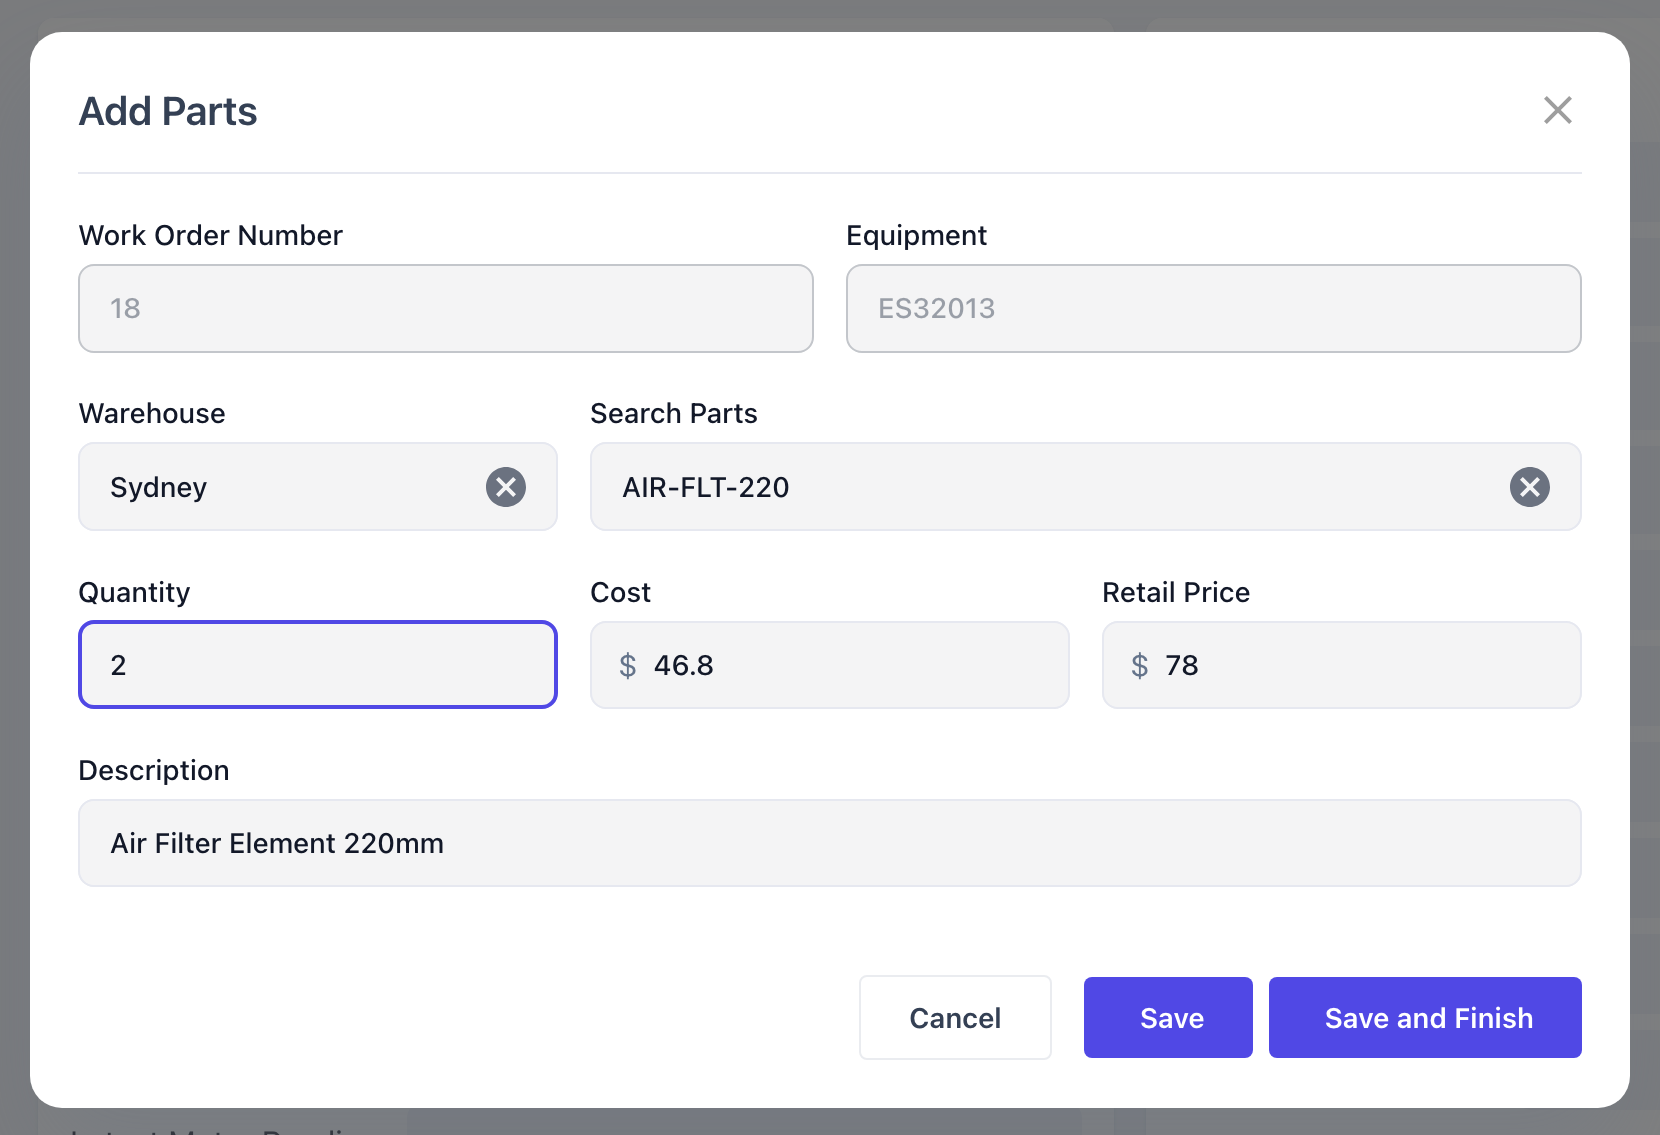
Choosing a part fills in Cost from the stock item's average cost, Retail Price from its retail price and Description from the part description. All three can be overridden on the line without changing the stock record itself.
-
Quantity - required. Must be a whole number greater than zero, and no more than the quantity available in that warehouse.
-
Cost - what the part cost you. Feeds Actuals Cost on the work order.
-
Retail Price - what the part is charged out at. Feeds Actual Retail, and is the figure a chargeable work order invoices.
-
Description - required. This is the wording that appears on the work order line and on the customer's invoice.
Step 6 - Save
You have two ways to finish:
-
Save - saves the line and hands you a fresh, empty form, ready for the next part. Use this when a job needs several parts.
-
Save and Finish - saves the line and closes the form.
After Adding the Part
-
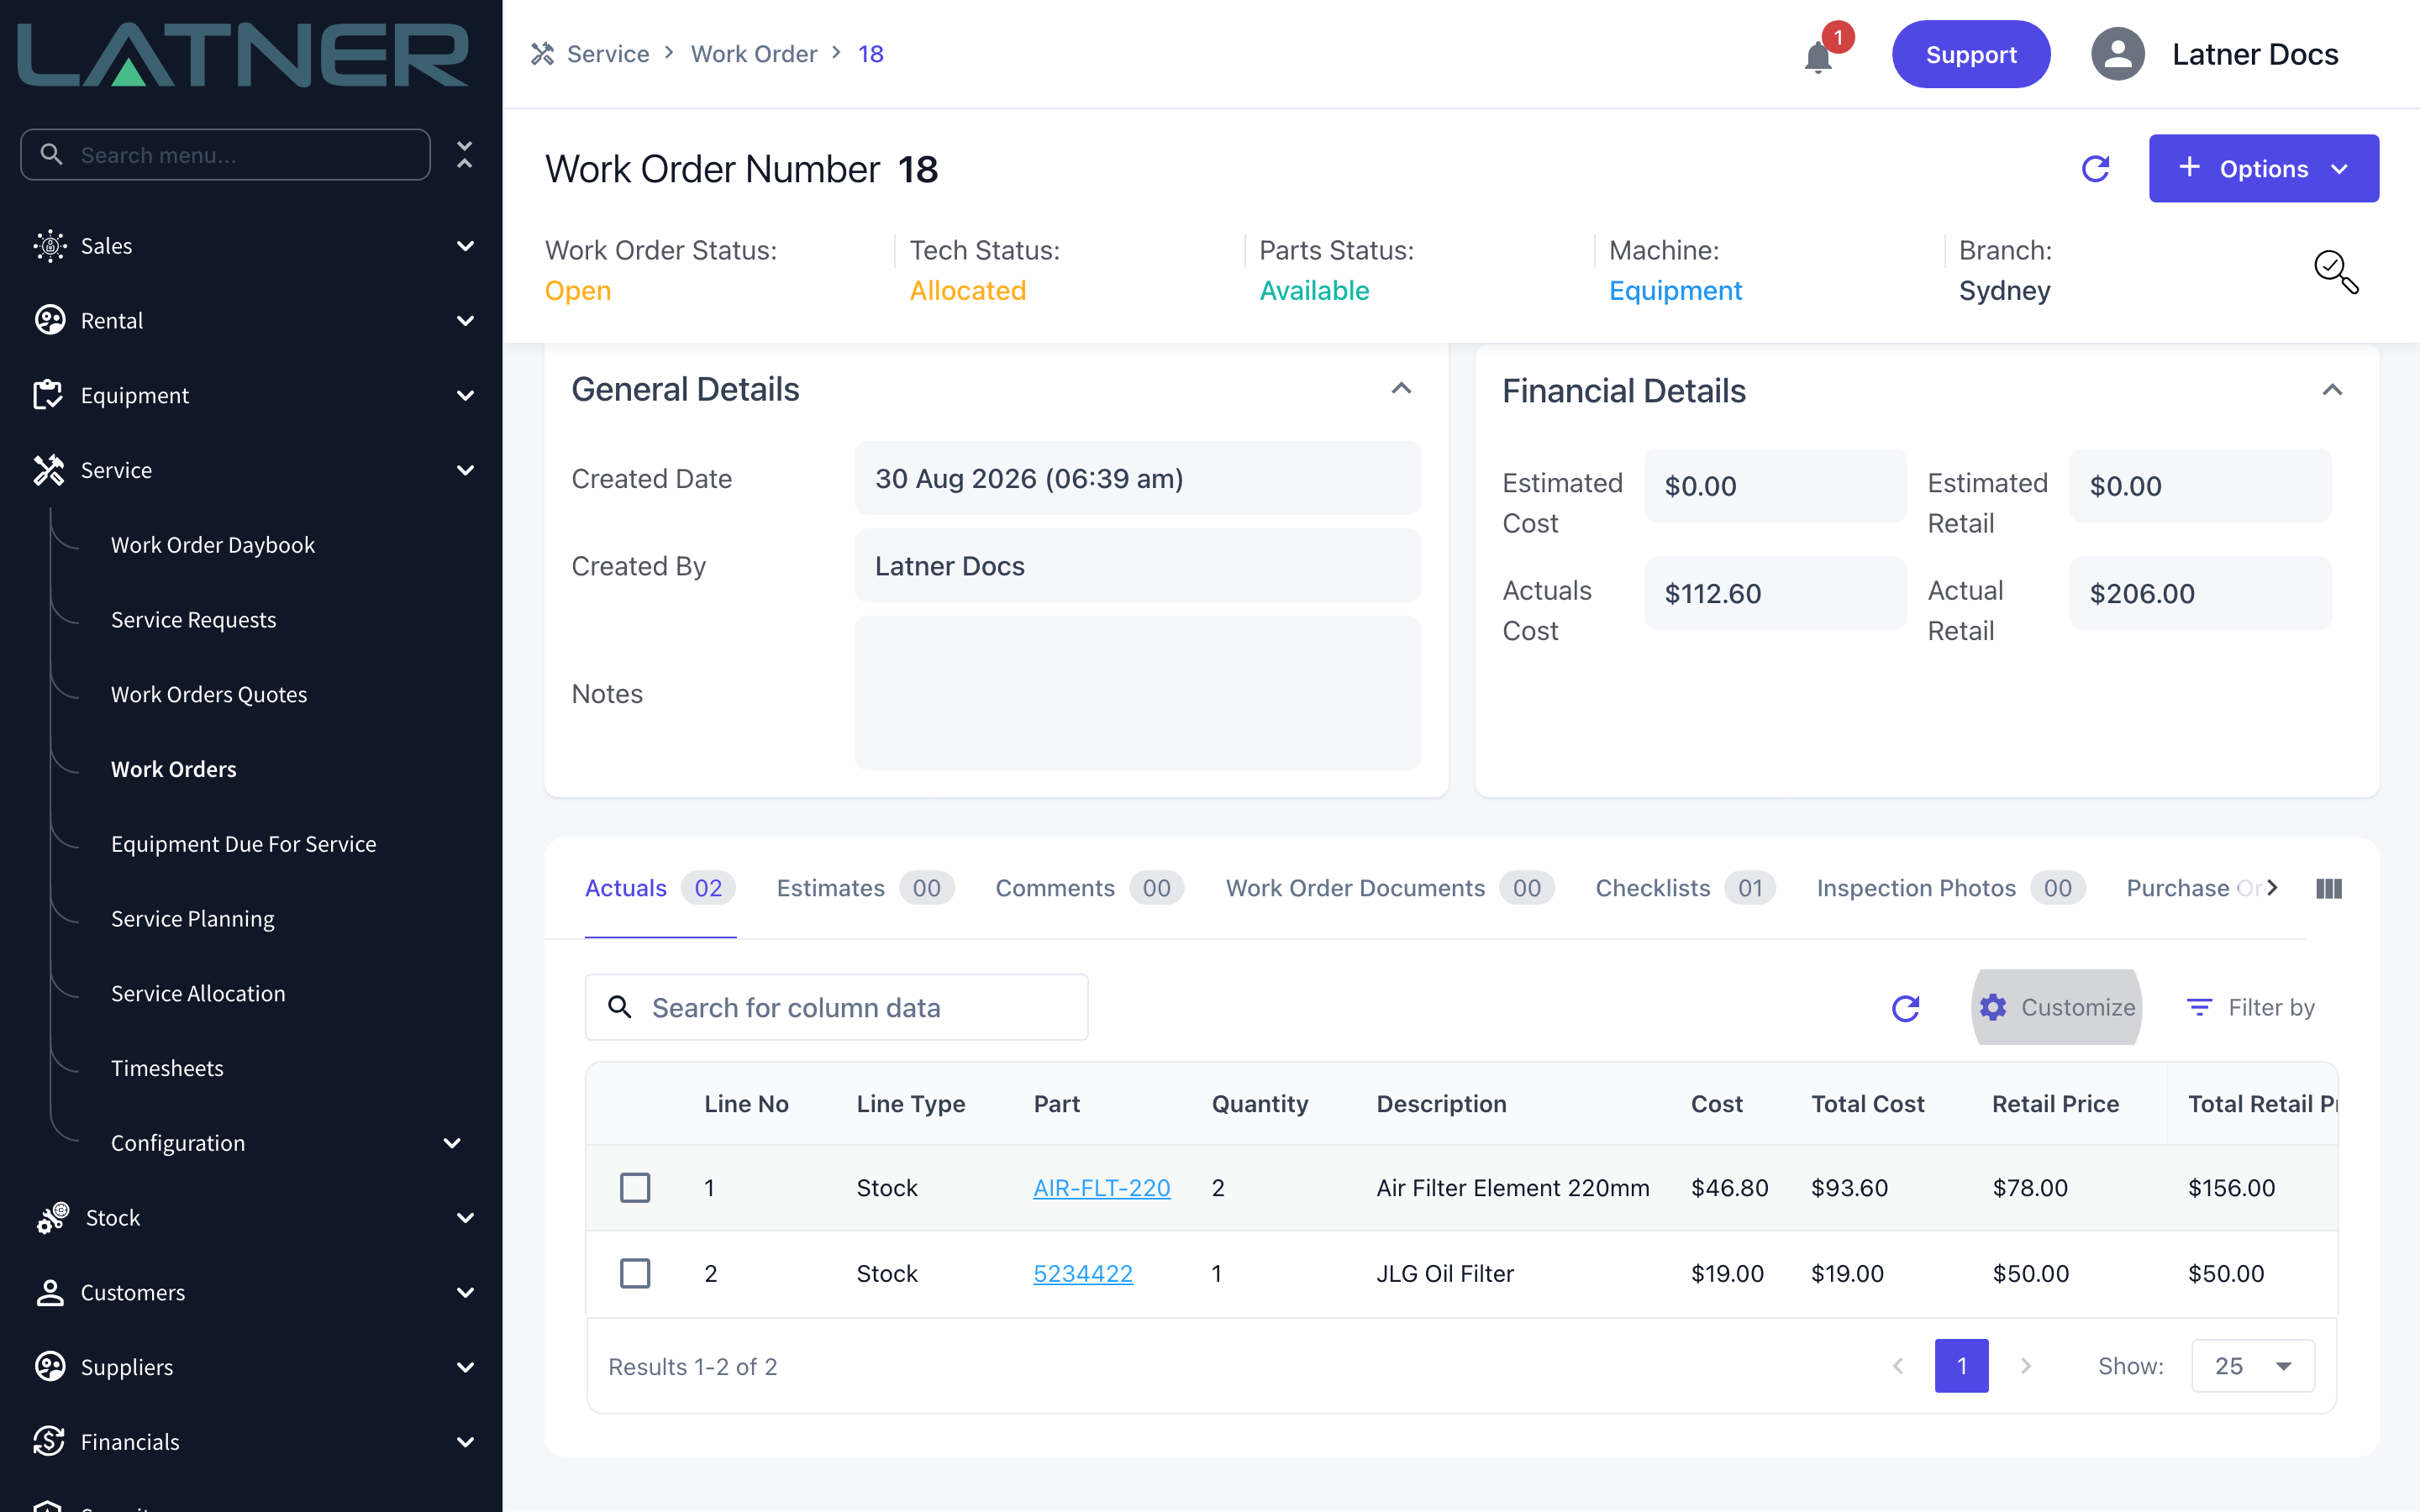
The part appears on the work order's Actuals tab as a Stock line, with Total Cost and Total Retail Price calculated as the unit figure multiplied by the quantity.
-
The Financial Details card updates - Actuals Cost and Actual Retail now include the part.
-
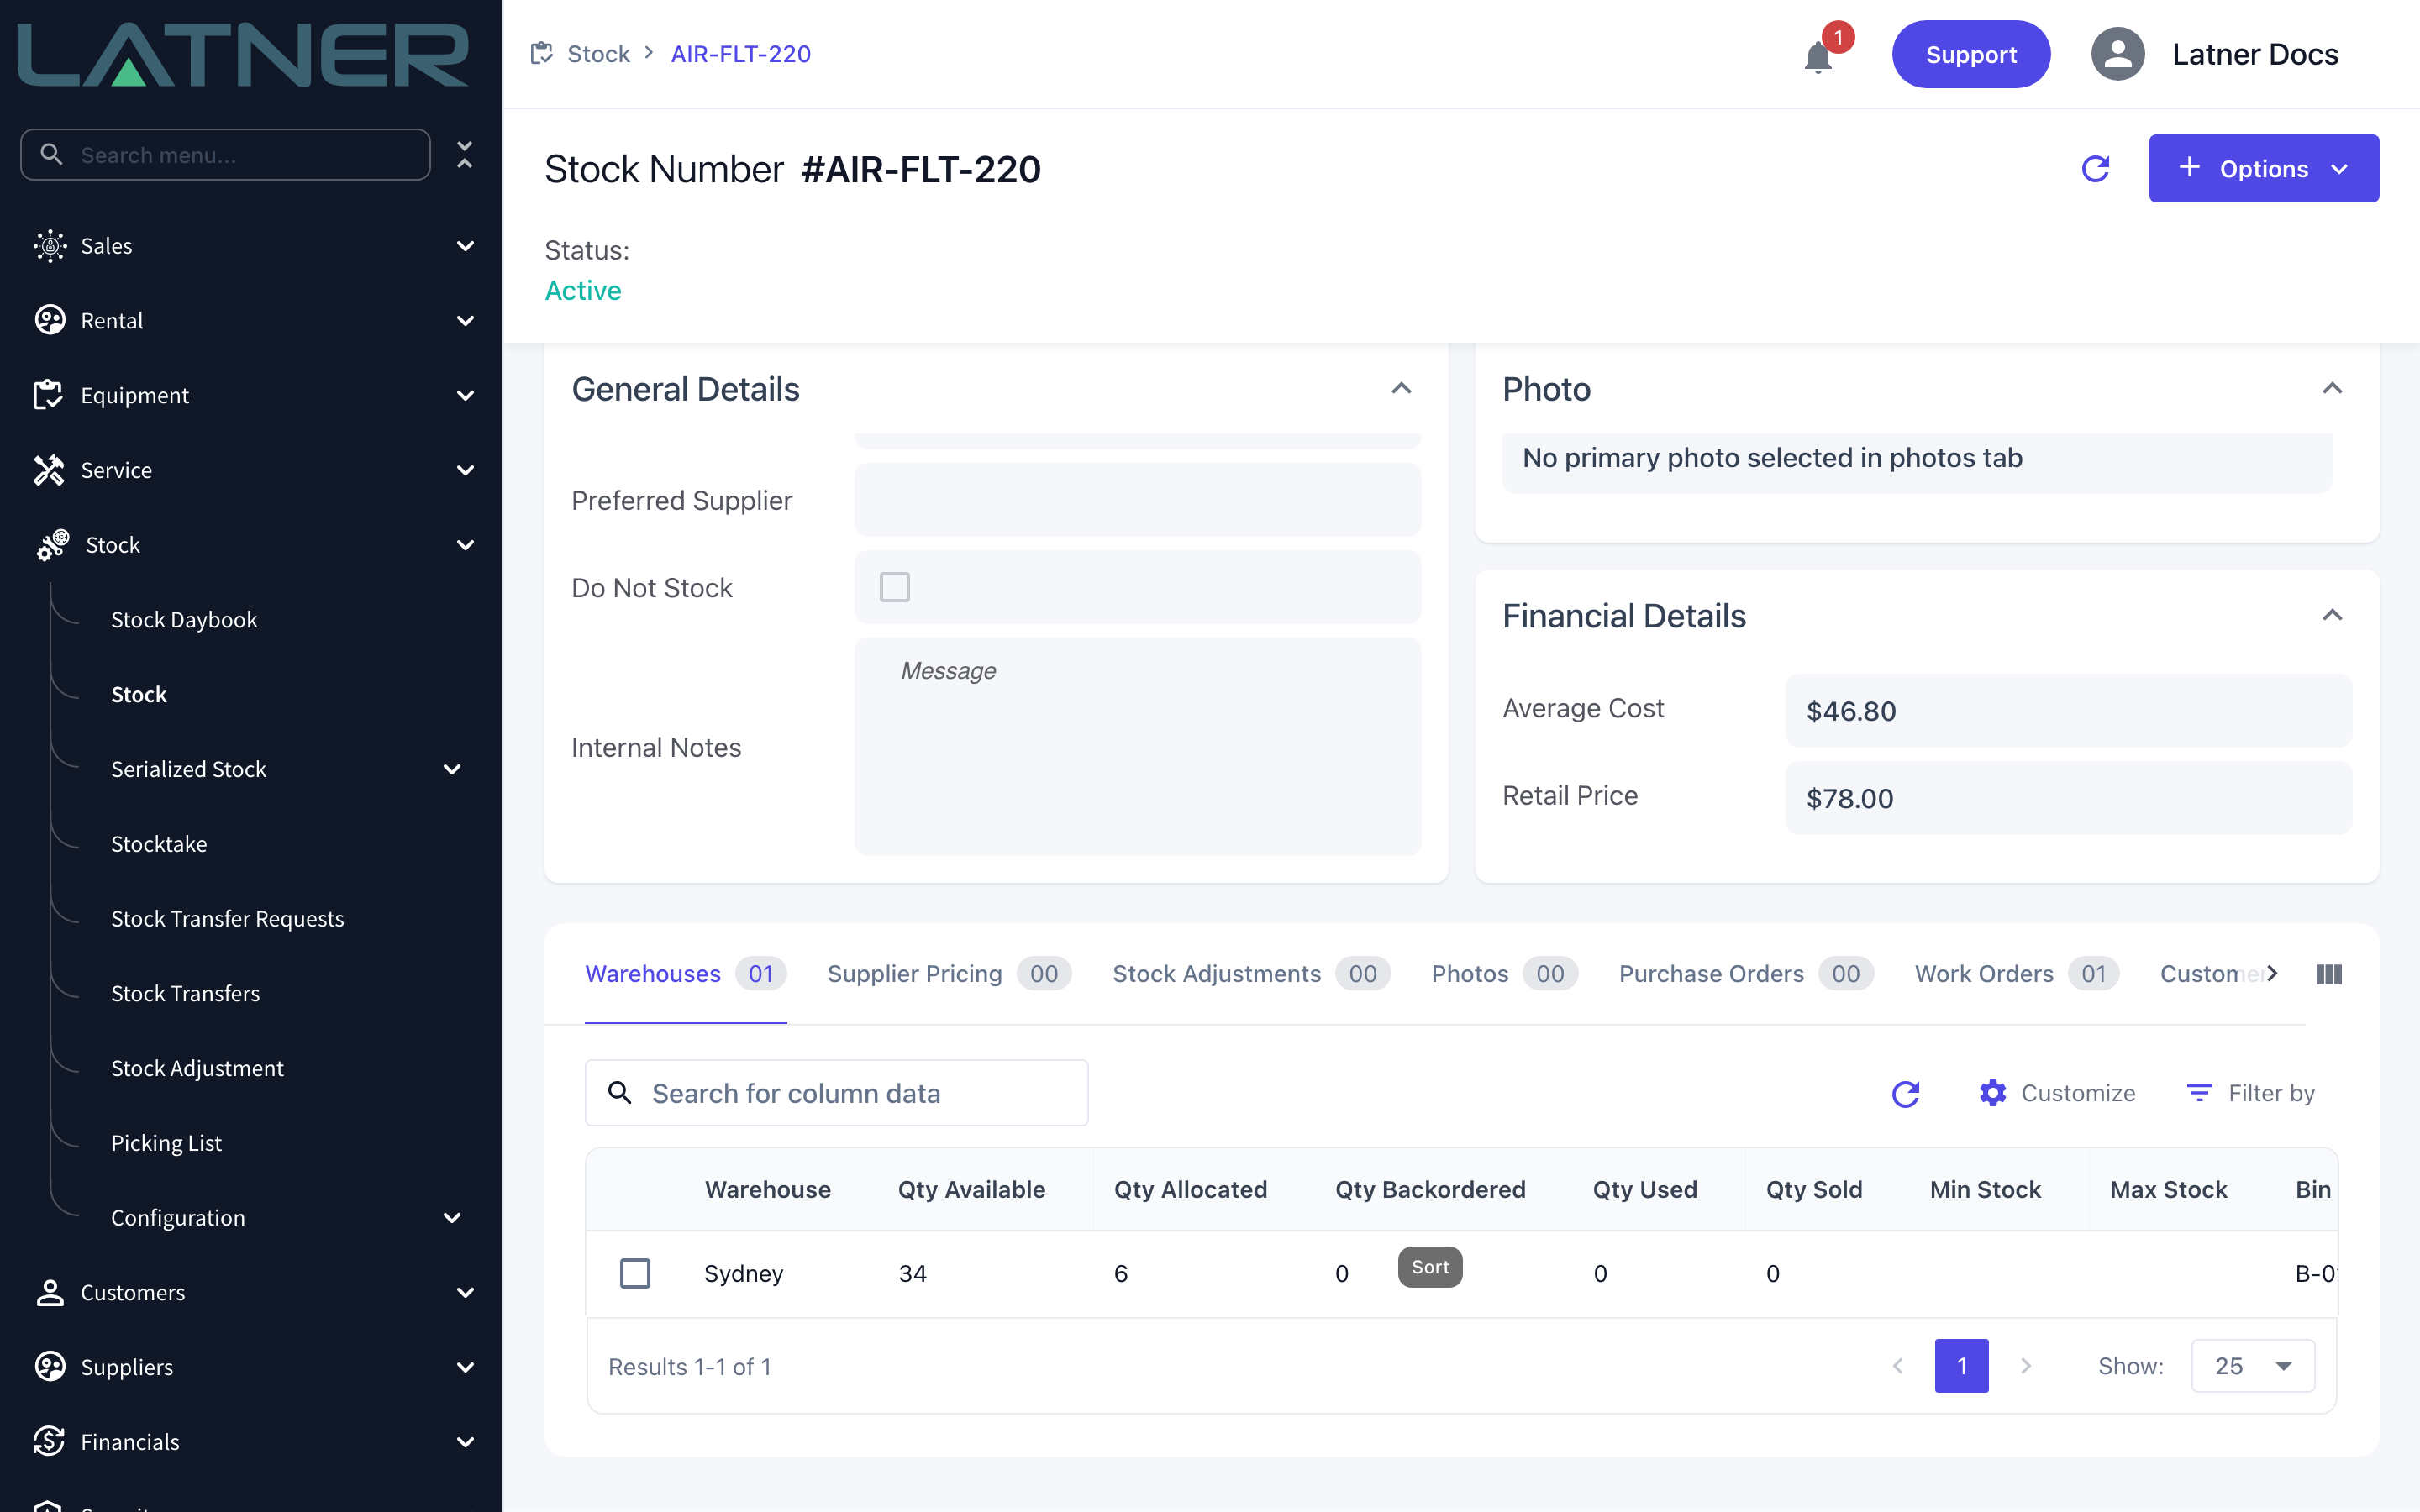
On the stock record, Qty Available drops and Qty Allocated rises by the quantity you added. The work order also shows up on the part's Work Orders tab.
-
The stock isn't actually consumed yet. Qty Used and the stock movement are only written when the work order is completed, and reopening a completed work order puts the allocation back.
-
Adding a part does not change the work order's Parts Status. That is maintained separately through Options › Update Parts Status, and moves to Requested on its own when a technician sets the tech status to Parts Requested.
-
To edit or remove a line, tick it on the Actuals tab and use the pencil or bin icon above the grid - double-clicking the row opens the same form in update mode.
Parts can only be added, changed or deleted while the work order is Open. Once it is completed or cancelled, Latner refuses the change with a message beginning Cannot add detail line to work order in. If a part was missed, use Options › Reopen Work Order first - reopening also returns the previously used stock to allocated, so the figures stay straight.
FAQs
Watch the Demo
Prefer to watch it? Step through the same flow here.