
The mobile Timesheets screen lets you record the hours you have worked, one day at a time, from your phone - so the time that isn't already coming off a Work Order or an Inspection still gets into Latner before you get back to the branch.
Overview
A timesheet on a phone is deliberately simple. You pick the day, tap the plus button, say what you were doing and how long it took, and Latner works out the rest.
-
The screen only ever shows your own timesheets - the ones against the Skilled Person linked to your user - for the single day you have selected.
-
Timesheets reach the screen from four places: Manual (the ones you enter here), Work Order, Inspection and Operator Docket. The card tells you which.
-
Latner fills in your branch, your Skilled Person and the cost and charge rates behind the scenes, so there is nothing on the form about money.
-
Breaks are subtracted: the hours shown on the card are the time between start and finish, less every break you enter.
-
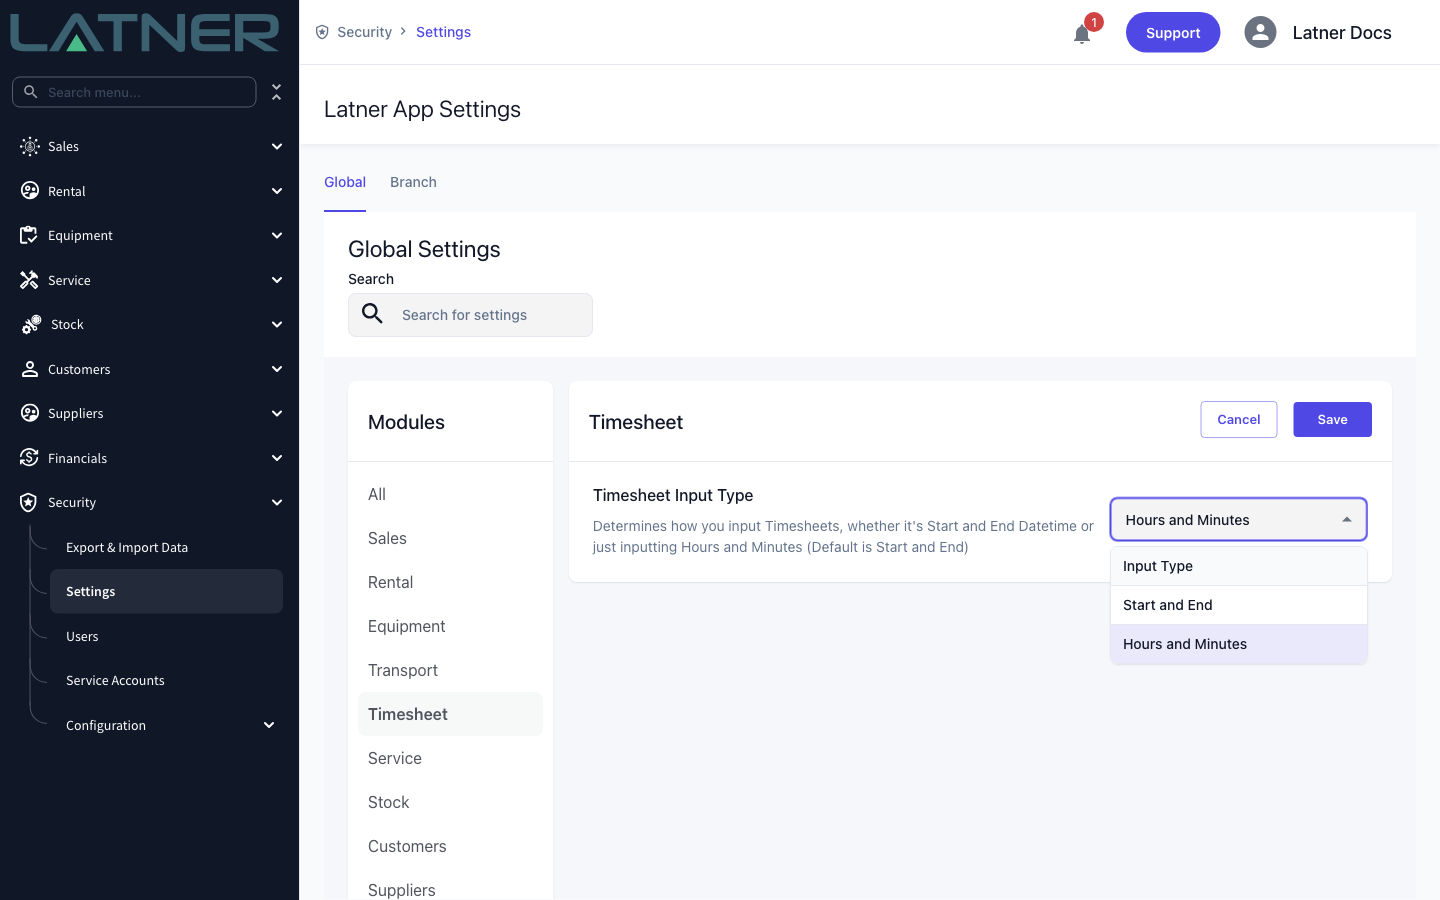
Which time fields you see depends on the Timesheet Input Type setting - either a start and an end time, or a plain hours and minutes count.
-
A timesheet covers one day. There is no overnight timesheet - a shift that runs past midnight is entered as two.
Before You Begin
A few things need to be in place before the screen is any use.
|
Requirement |
Where to Find It |
|---|---|
|
Mobile Timesheet permission - puts Timesheets in the mobile menu |
Security › Configuration › Permission Groups › Service › Screen |
|
Create Timesheet permission - lets you save, edit and delete one |
Security › Configuration › Permission Groups › Service › Option |
|
Your user is linked to a Skilled Person |
Service › Configuration › Skilled Persons |
|
At least one Active Timesheet Group and Sub Group to book the time to |
Service › Configuration › Timesheet Groups and Timesheet Sub Groups |
|
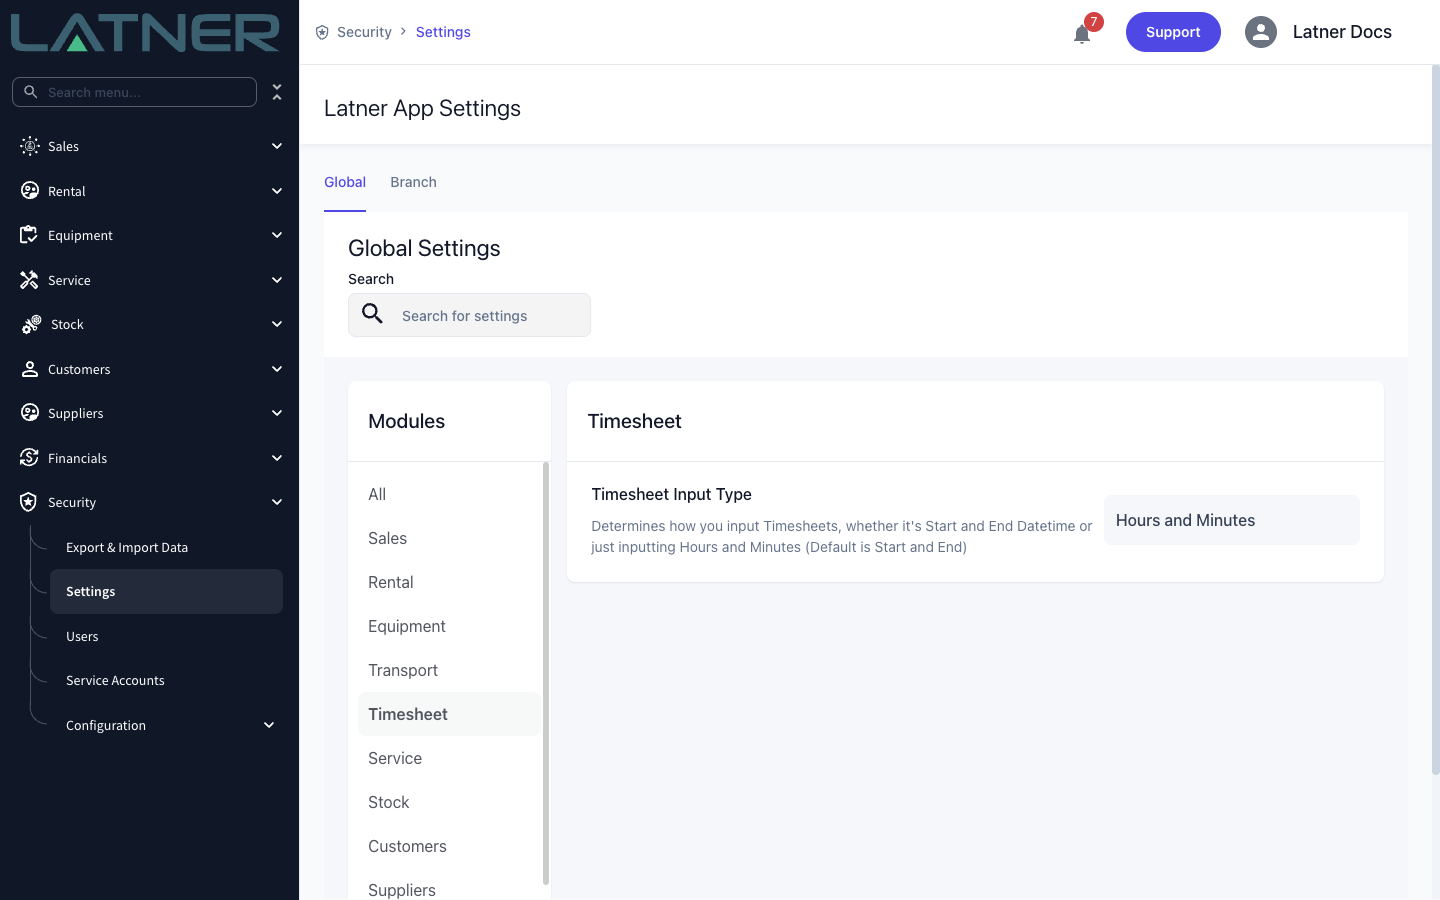
Timesheet Input Type setting - start and end times, or hours and minutes |
Security › Settings › Timesheet |
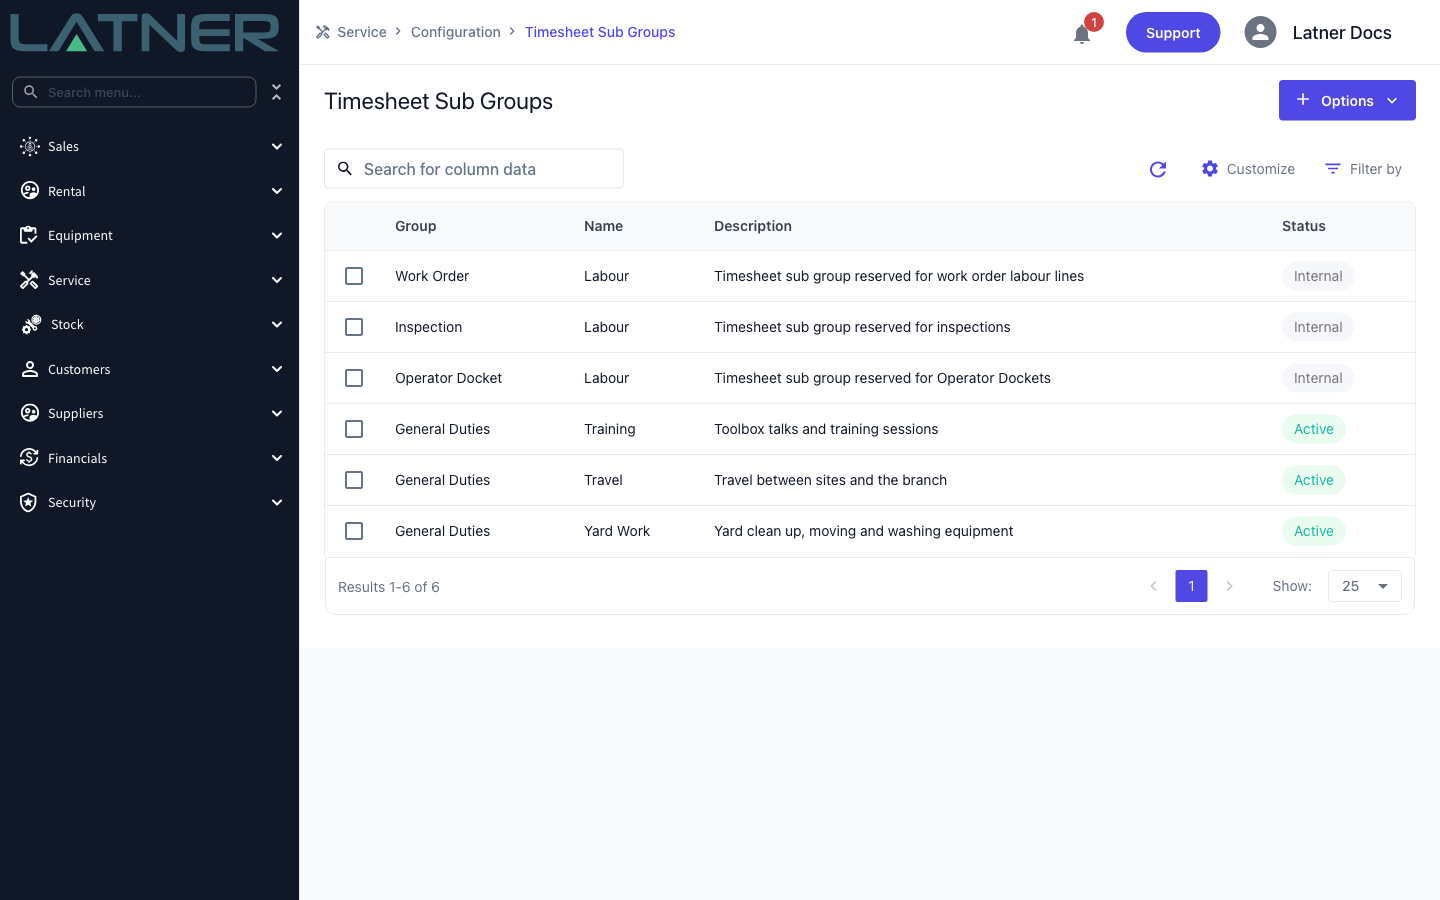
Groups and sub groups with a status of Internal or Inactive never appear in the pickers on the phone. If your crew has nothing to choose from, someone needs to create an Active group and at least one sub group under it first.
Entering a Timesheet
The steps below use the default Start and End input type. If your system is set to Hours and Minutes, steps 1 to 4 are identical and step 5 is replaced by the section further down.
Step 1 - Open the Timesheets screen
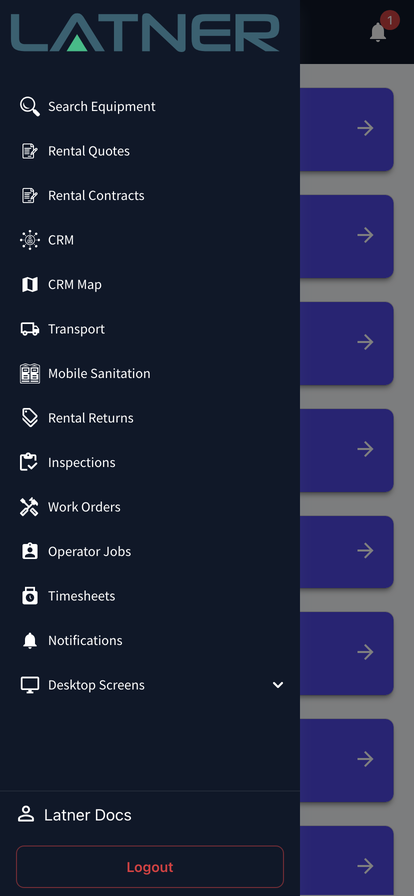
Tap the menu icon at the top left and choose Timesheets. The mobile dashboard also has a Timesheets tile showing how many timesheets you have for today, and it opens the same screen.
Step 2 - Pick the day
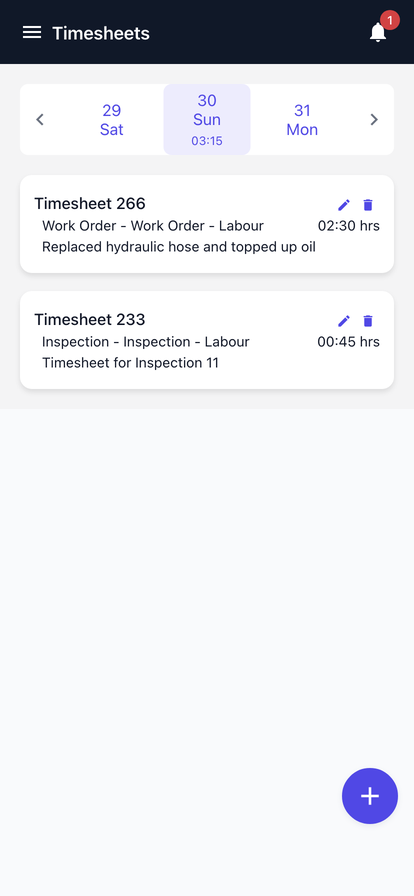
The strip across the top of the screen is the day picker. Tap a date to switch to it, or use the arrows at either end to move a day at a time. The small number under the selected date is the total hours already booked for that day, across every source.
Step 3 - Start a new timesheet
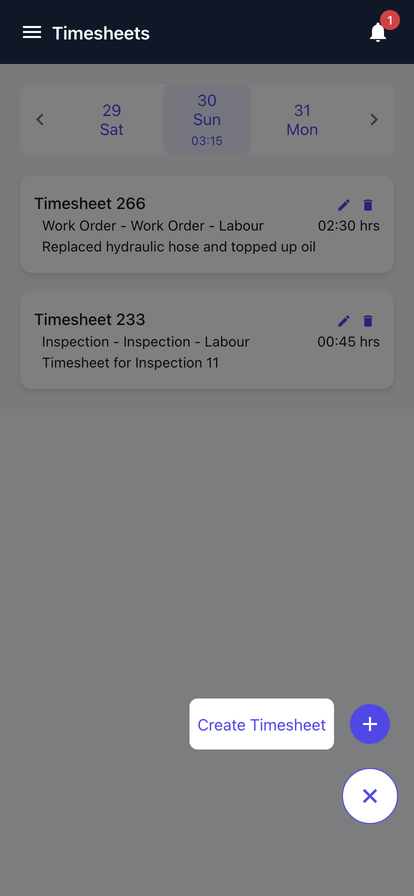
Tap the blue plus button at the bottom right and choose Create Timesheet.
Step 4 - Choose the Group and Sub Group
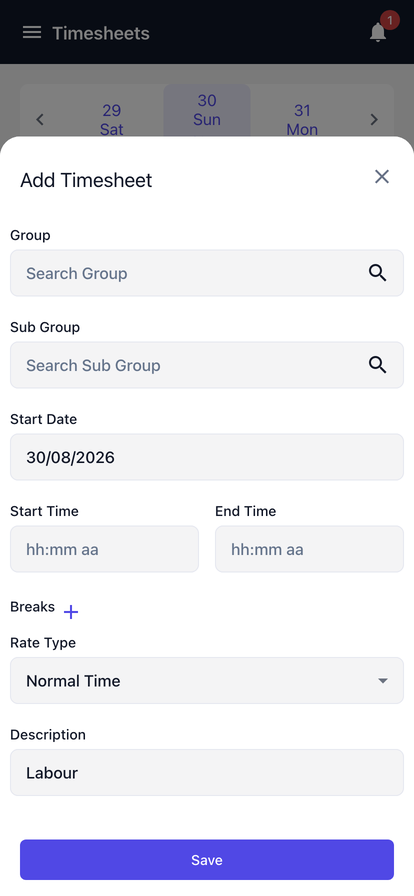
The Add Timesheet form opens from the bottom of the screen. Both pickers are required.
-
Group - the broad bucket the time belongs to, for example General Duties.
-
Sub Group - the specific activity within that group, for example Yard Work. The list is filtered to the group you picked, so choose the group first. Picking a sub group on its own fills the group in for you.
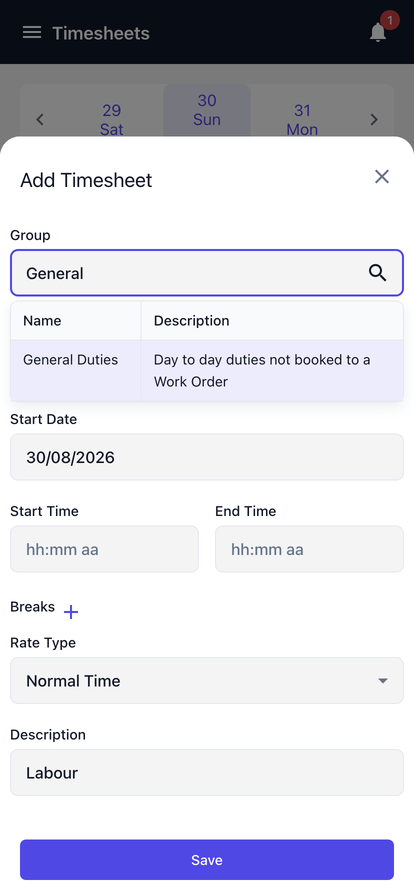
Tap a picker and start typing to narrow the list, or tap it and leave the box empty to see everything available. Results show the name and the description, so a well described group is easier to pick on a small screen.
Step 5 - Set the date and times
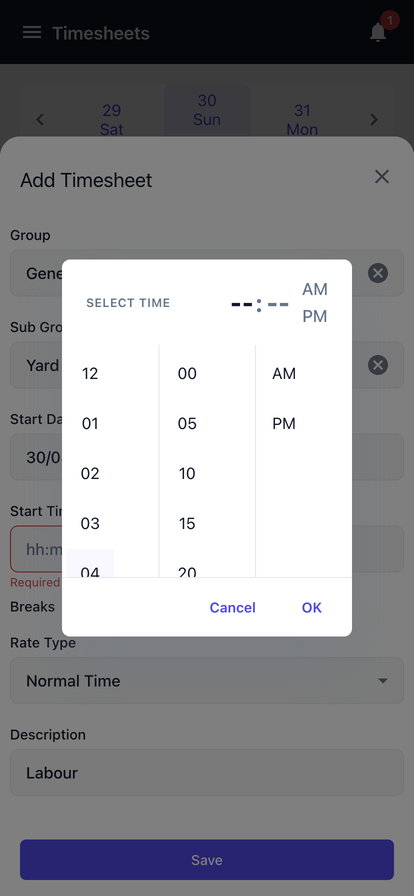
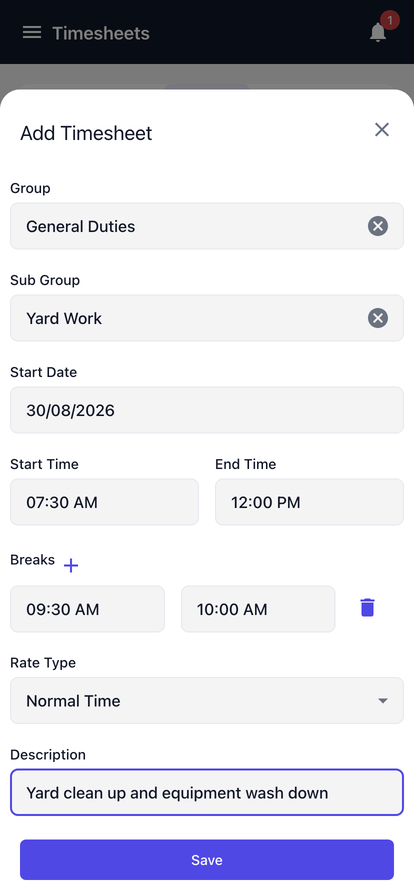
Start Date defaults to the day you selected on the strip - change it here if you are catching up on an earlier day. Tap Start Time and End Time in turn and the time picker opens: scroll the hour, the minute and AM or PM, then tap OK. Minutes are offered in five minute steps.
Step 6 - Add any breaks
Tap the plus beside Breaks to add a row. The two boxes on the row are the start and the end of that break, entered with the same time picker. Add a row for each break; the bin at the end of a row removes it.
Every break has to sit inside the timesheet's own start and end times. Latner subtracts the total break time from the hours worked when it saves.
Step 7 - Set the Rate Type and Description
-
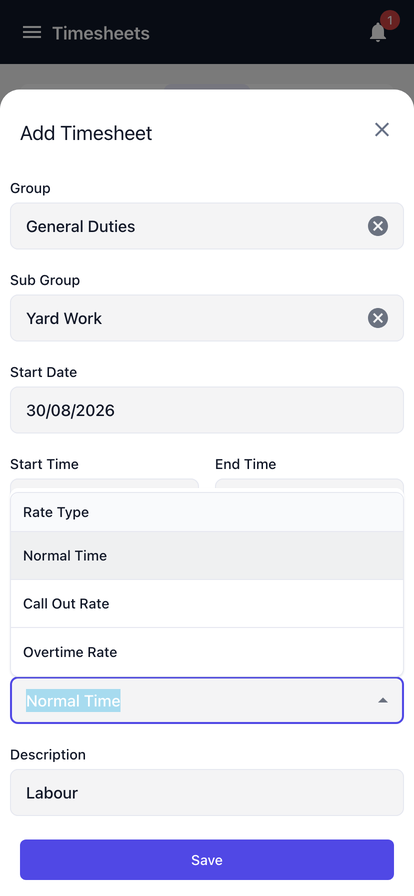
Rate Type - Normal Time, Call Out Rate or Overtime Rate, and it defaults to Normal Time. Call Out Rate charges the time at your Skilled Person's call out price instead of the standard one.
-
Description - what you were actually doing. It is required and starts as Labour, and it is the line the office reads on the card and in reporting, so it is worth replacing with something specific.
Step 8 - Save
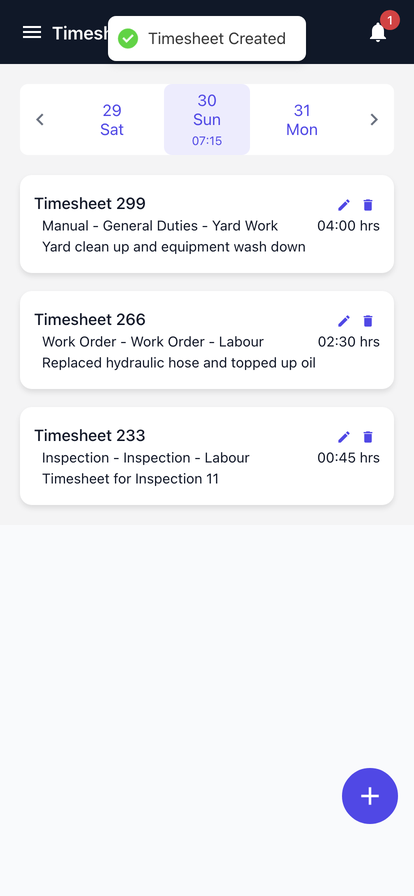
Tap Save. The form closes, Timesheet Created appears at the top of the screen and the new card drops into the day's list.
Entering Hours and Minutes Instead
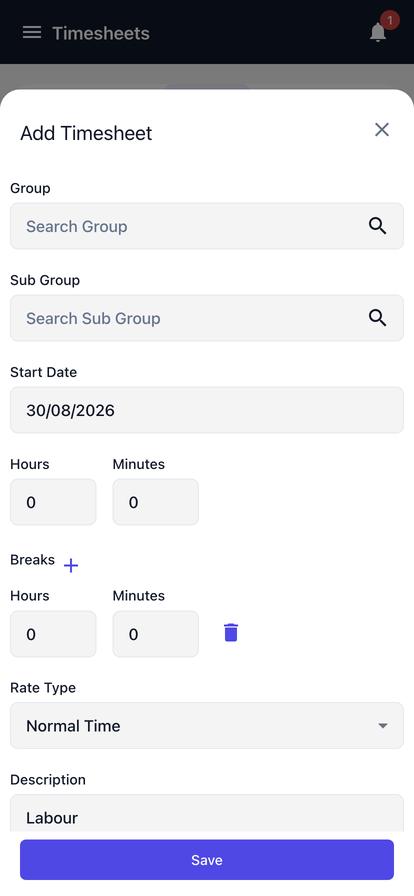
Where Timesheet Input Type is set to Hours and Minutes, the Start Time and End Time fields are replaced by an Hours box and a Minutes box, and break rows are entered the same way. You are recording a duration rather than a clock time, so the timesheet is stored as running from midnight for that many hours and minutes. Everything else on the form behaves exactly as above.
After Saving
-
The card shows the source, the group and sub group, the description and the total hours - hours worked less breaks.
-
The day total under the date on the strip updates straight away.
-
The timesheet is saved against your branch and your Skilled Person, with the cost and charge rates from that Skilled Person record, and its status is Completed.
-
It is immediately visible in the office on Service › Timesheets and feeds the Timesheet dashboard.
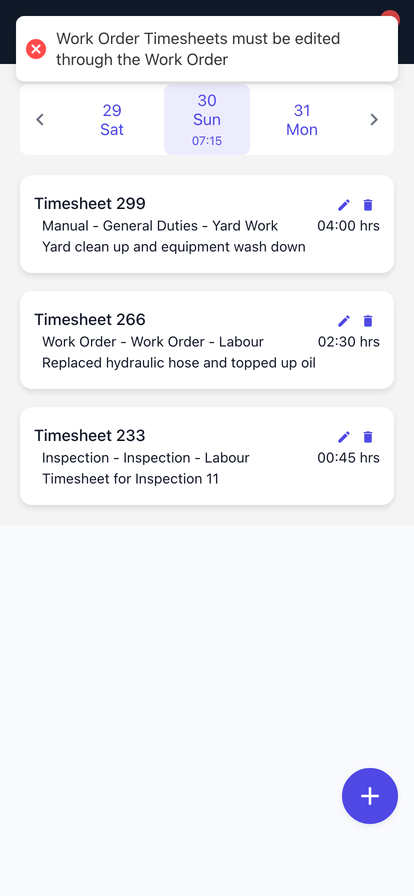
To change one, tap the pencil on its card. The same form reopens as Update Timesheet, breaks included. Timesheets that came from a Work Order can't be edited here.
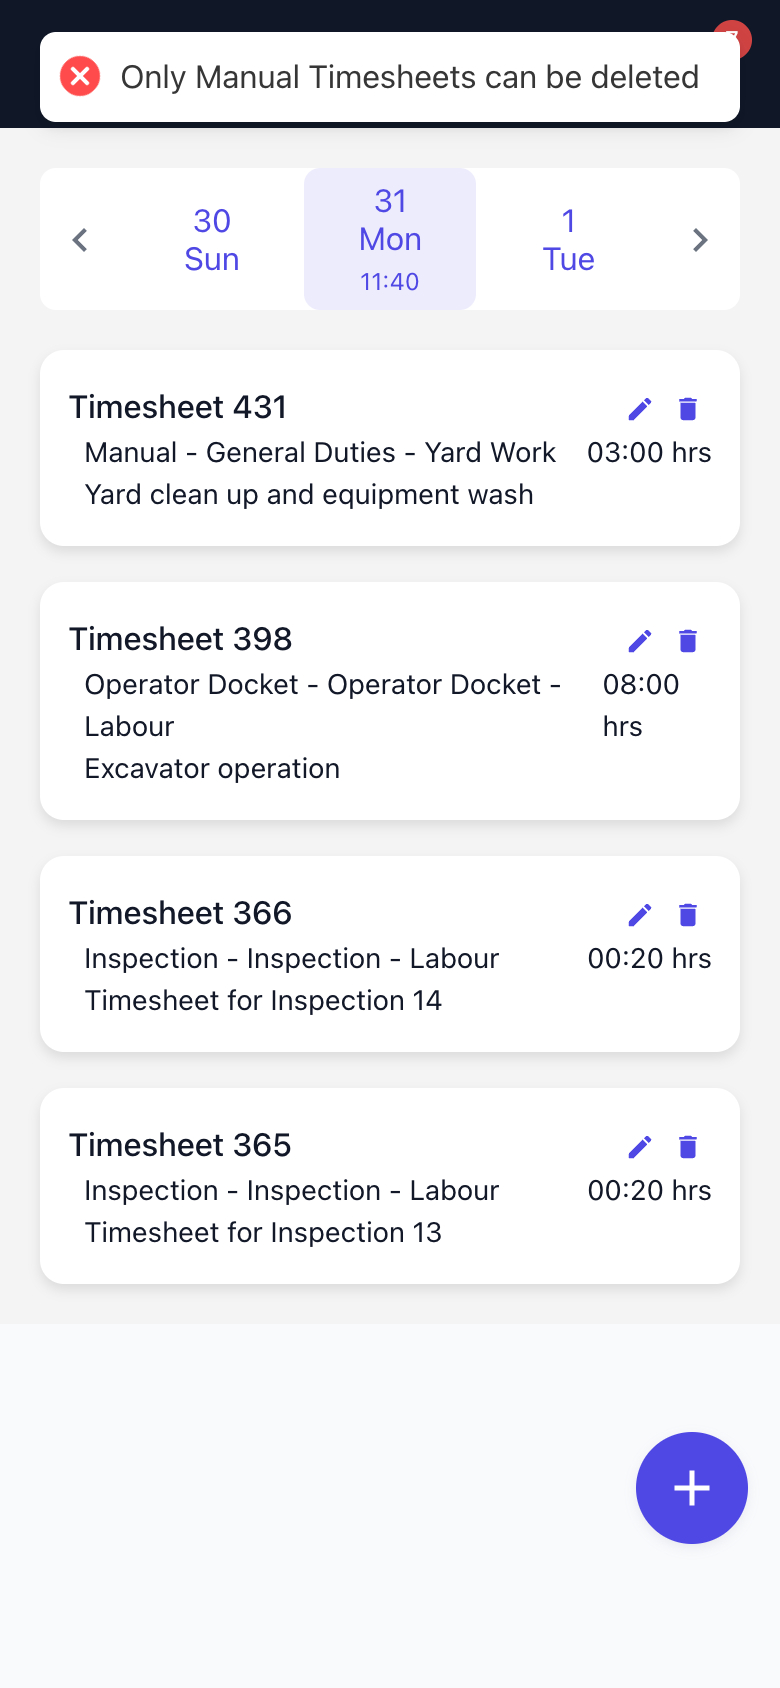
The bin deletes a timesheet, after a confirmation. Only Manual timesheets can be deleted - anything that came from a Work Order, an Inspection or an Operator Docket belongs to that record.
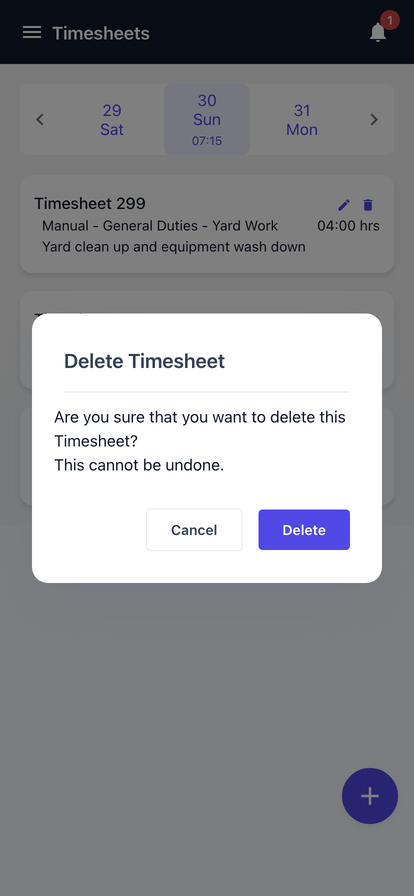
A deleted timesheet is gone - there is no undo and no cancelled state to fall back on. If the hours were simply wrong, edit the timesheet instead of deleting and re-entering it; the edit keeps the record and recalculates the totals.
FAQs
Watch the Demo
Prefer to watch it? Step through the same flow here.
Mobile Timesheets lets you record the hours you have worked straight from your phone, so your day is booked before you leave site.
Overview
Not every hour of your day belongs to a work order. Yard work, travel, toolbox talks and general duties all still need to be captured, and the mobile Timesheets screen is where you do that without going back to a desk.
-
The screen shows your own timesheets only, one day at a time, with a running total for the day you are looking at.
-
Timesheets you create here are Manual timesheets. Timesheets raised automatically by a work order, an inspection or an operator docket also appear in the list, labelled with where they came from.
-
You say what the time was spent on by picking a Group and a Sub Group, for example General Duties and Yard Work.
-
Breaks are recorded on the timesheet itself and are subtracted from the total hours.
-
Cost and charge rates come from your Skilled Person record, so you never type a rate in.
-
Only Manual timesheets can be edited or deleted from your phone.
Before You Begin
A few things need to be in place before the screen is useful.
|
Requirement |
Where to Find It |
|---|---|
|
Timesheet Input Type - controls whether you enter Hours and Minutes or a Start Time and End Time |
Security › Settings › Global › Timesheet |
|
Mobile Timesheet permission - to open the screen at all |
Security › Configuration › Permission Groups › Service › Screen |
|
Create Timesheet permission - to add and change timesheets |
Security › Configuration › Permission Groups › Service › Option |
|
Manage Other Timesheets permission - only needed to change a timesheet that belongs to somebody else |
Security › Configuration › Permission Groups › Service › Option |
|
A Skilled Person record linked to your user, with cost and charge rates on it |
Service › Configuration › Skilled Persons |
|
At least one active timesheet Group and Sub Group |
Service › Configuration › Timesheet Groups and Timesheet Sub Groups |
The list is filtered to the Skilled Person attached to your user. If your user is not linked to a Skilled Person, the screen will always come back empty and a timesheet cannot be saved against you.
Creating a Timesheet
Step 1 - Open the Timesheets screen
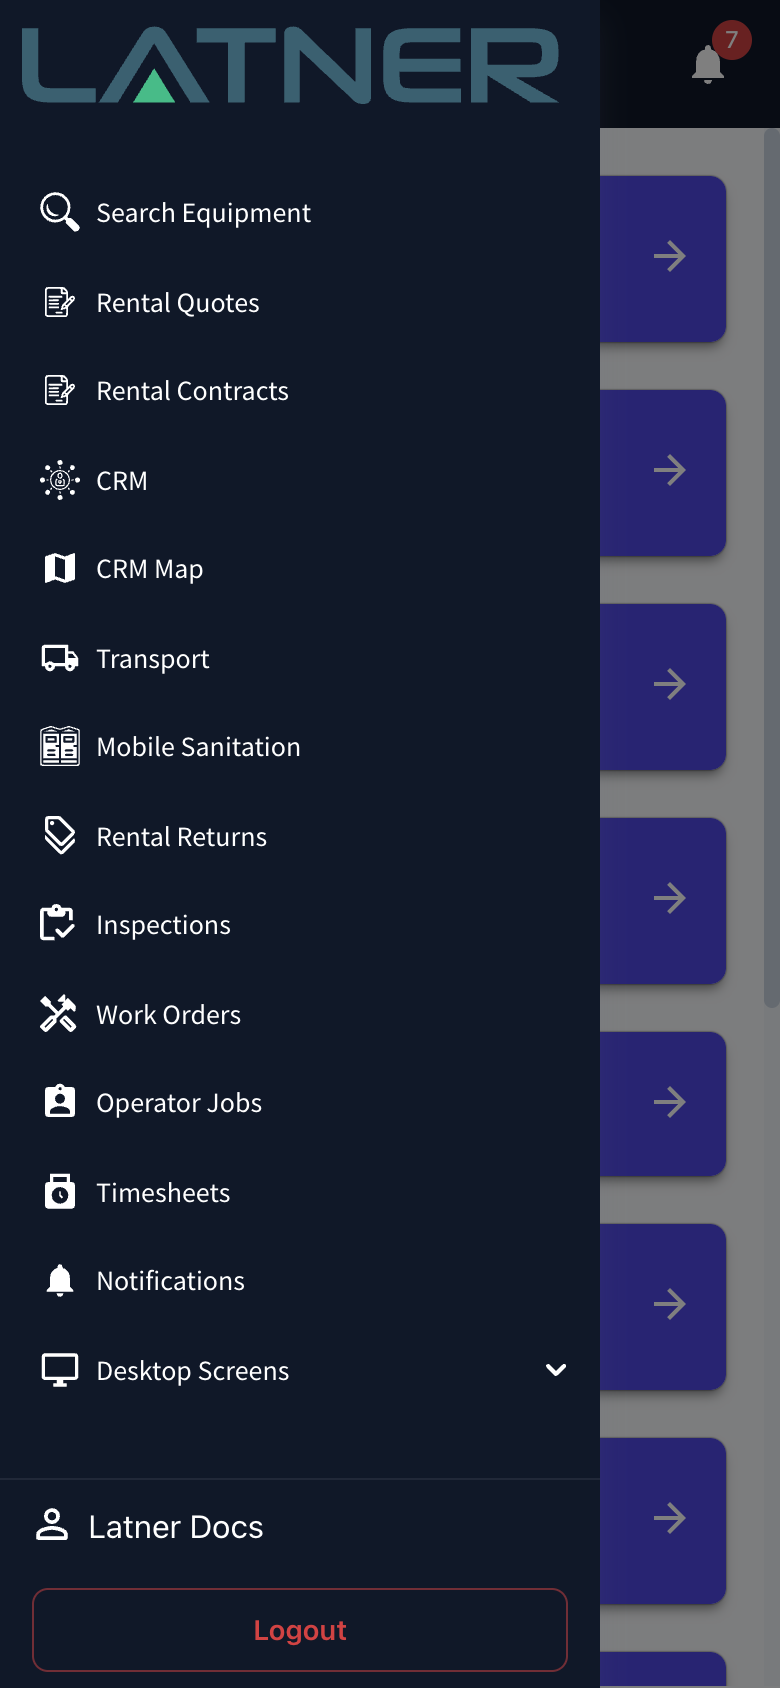
Sign in to Latner on your phone and open the menu. Latner serves the mobile screens off the device you are using, so the menu you see on a phone is the short mobile menu rather than the full desktop one. Tap Timesheets. You can also get there from the Timesheets tile on the mobile dashboard, which shows how many timesheets you already have for today.
Step 2 - Pick the day
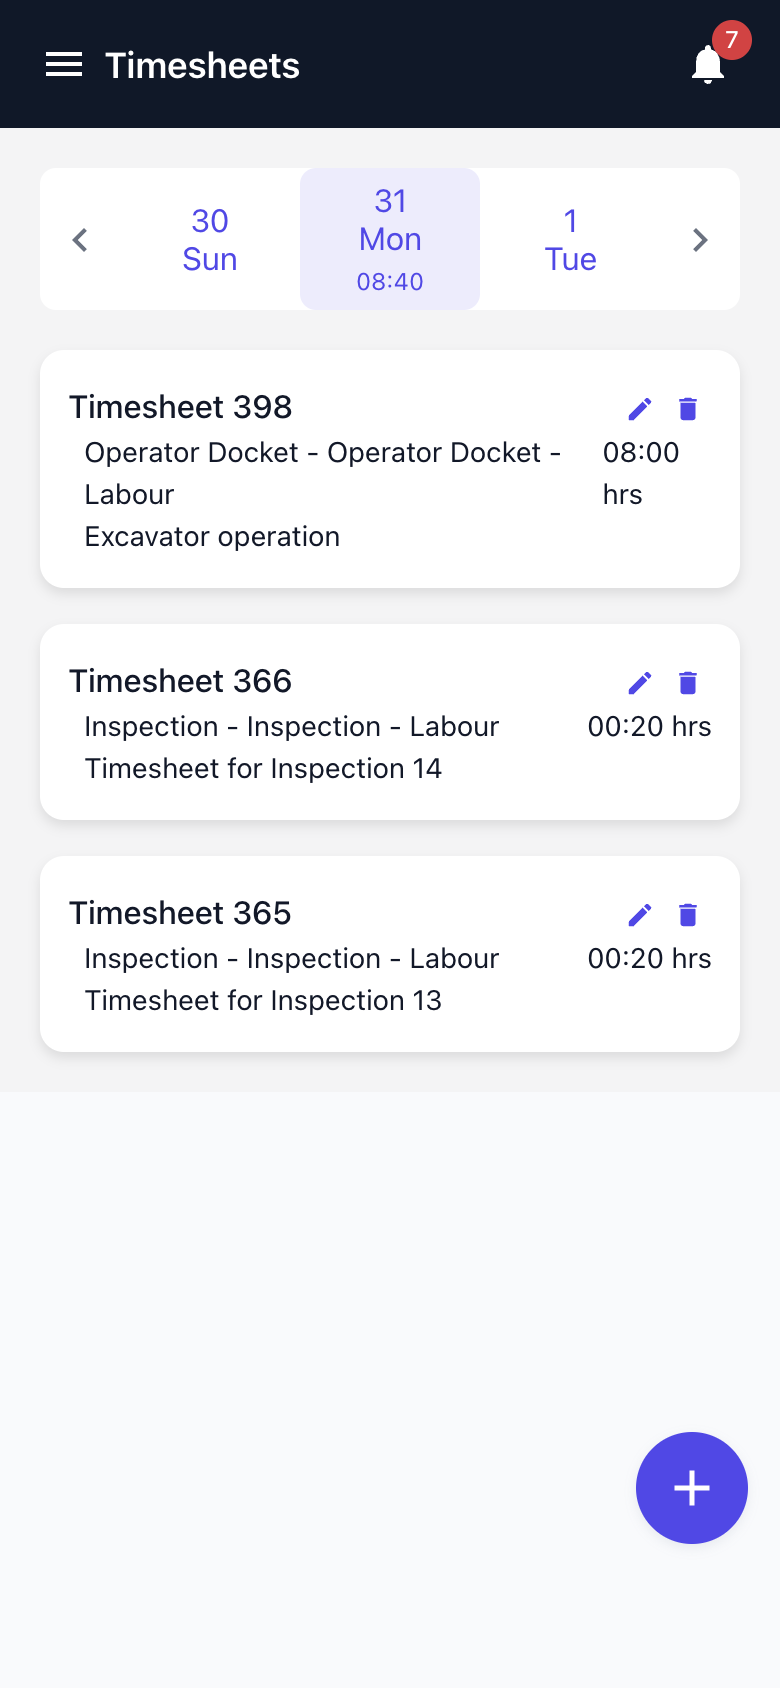
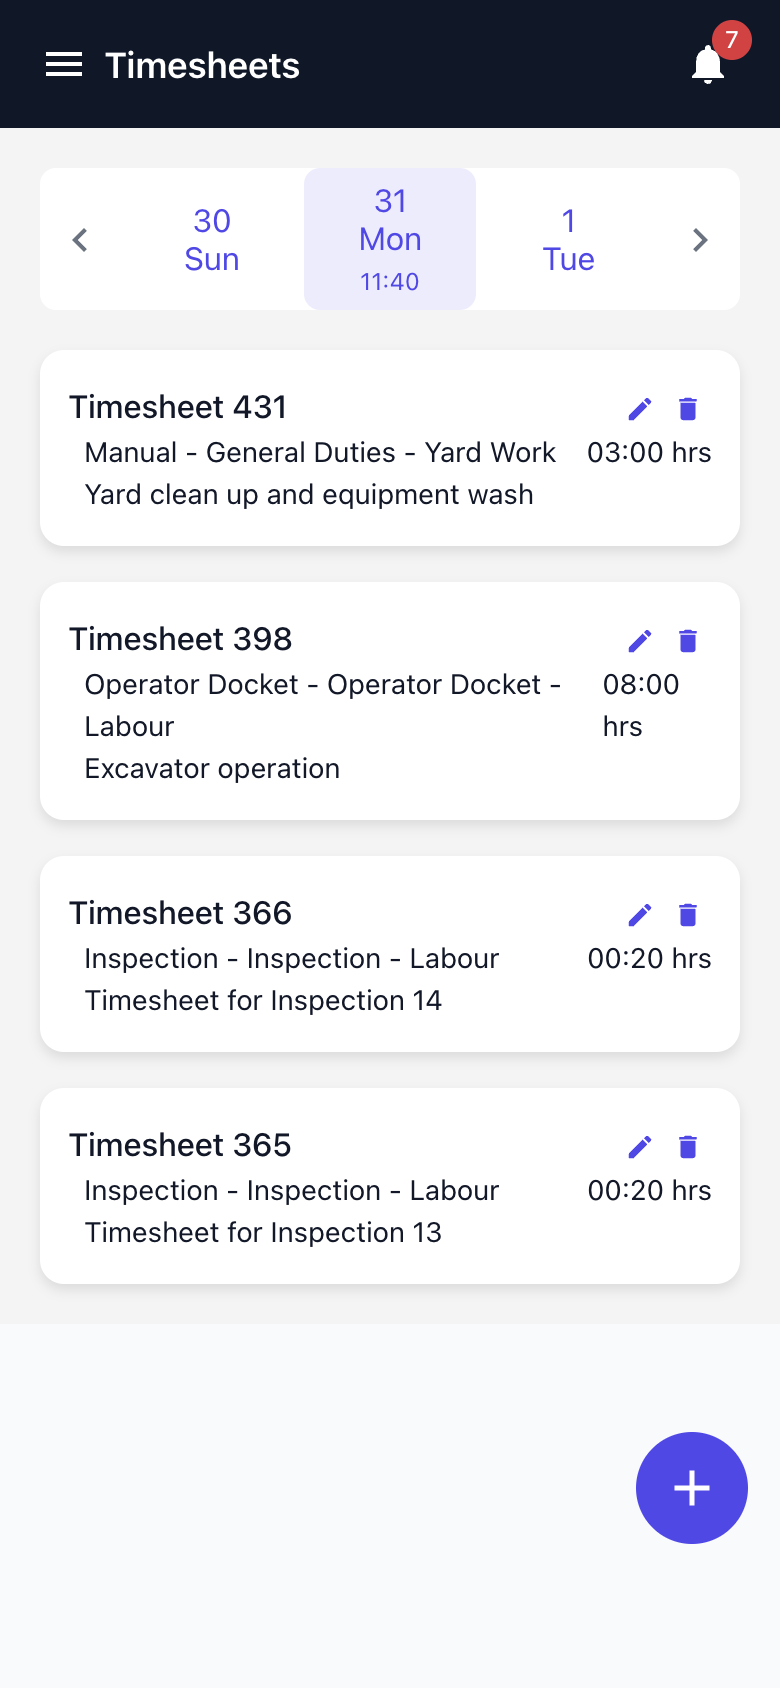
The screen opens on today. The date strip across the top shows yesterday, the selected day and tomorrow. Tap either neighbour, or use the arrows, to move a day at a time. The figure under the selected date is the total hours already recorded for you on that day, and it updates as you add and remove timesheets.
Each card in the list shows the timesheet number, the source and the Group and Sub Group it was booked to, the total hours and the description.
Step 3 - Start a new timesheet
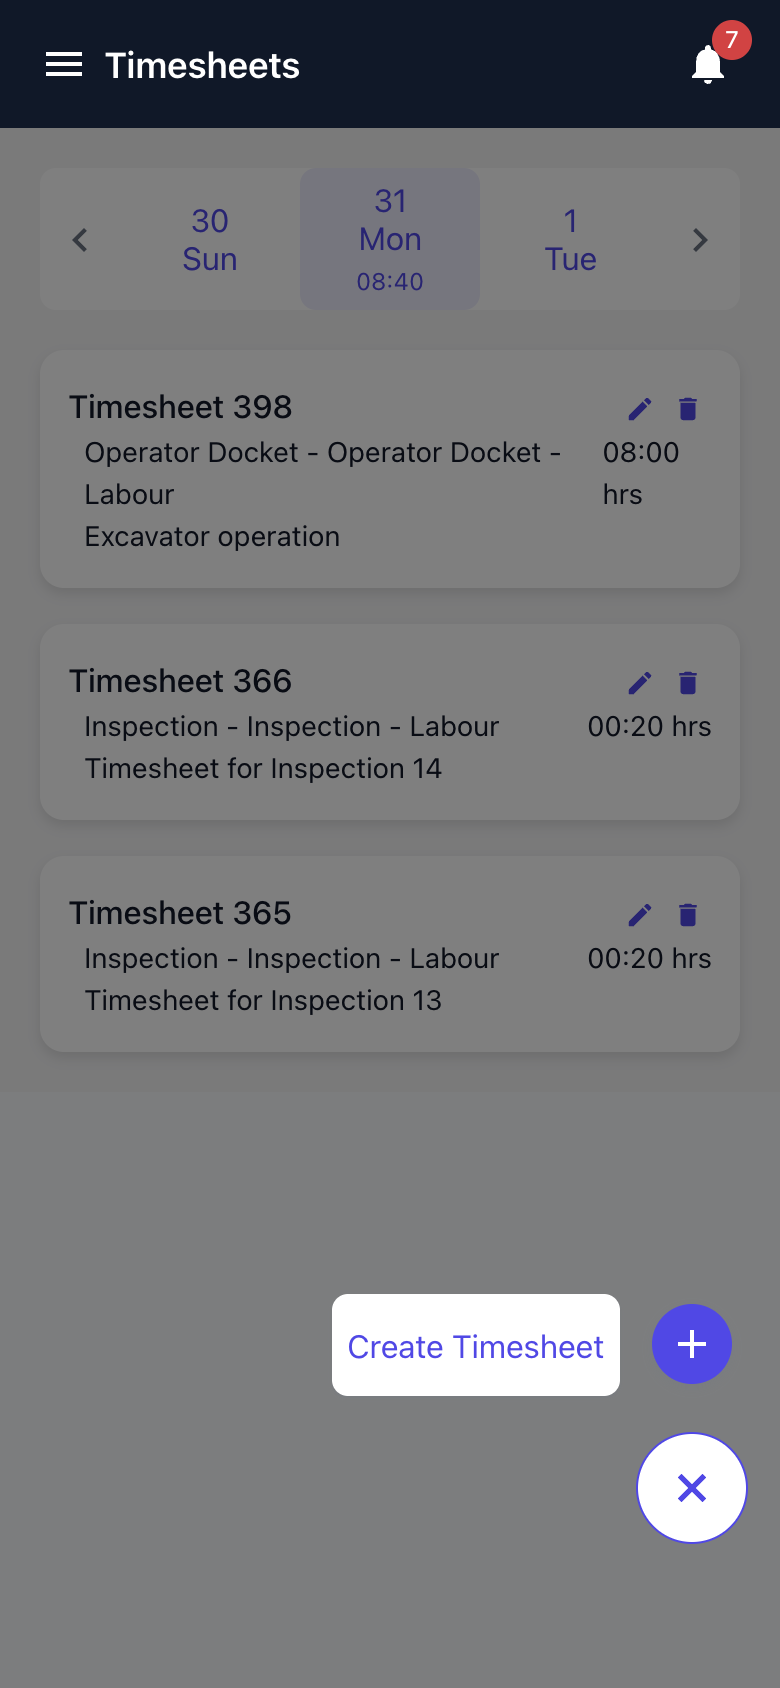
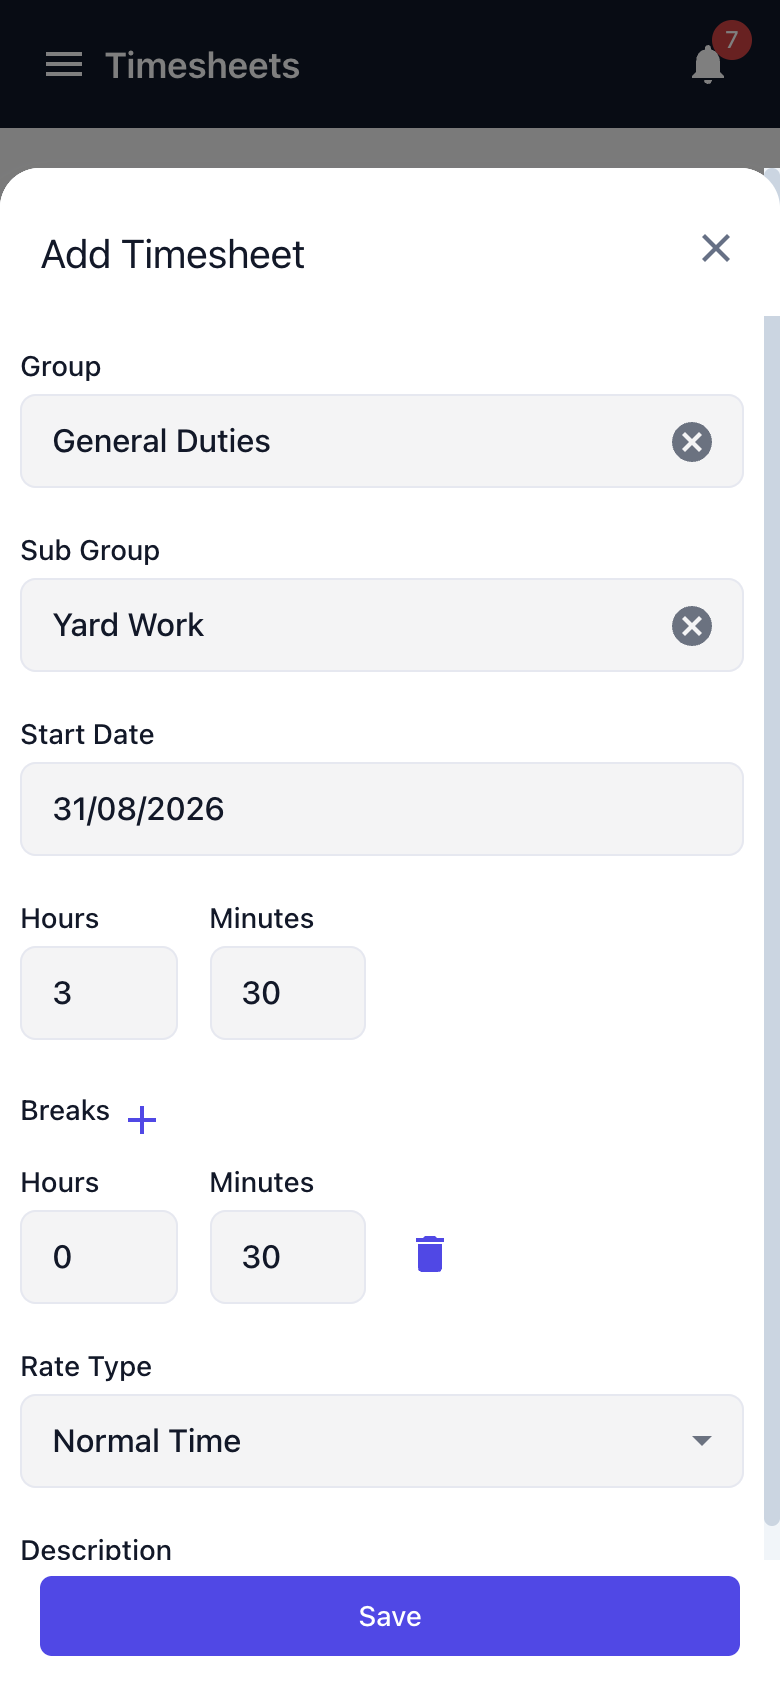
Tap the round action button in the bottom right corner and choose Create Timesheet. The Add Timesheet form slides up from the bottom of the screen.
Step 4 - Choose the Group and Sub Group
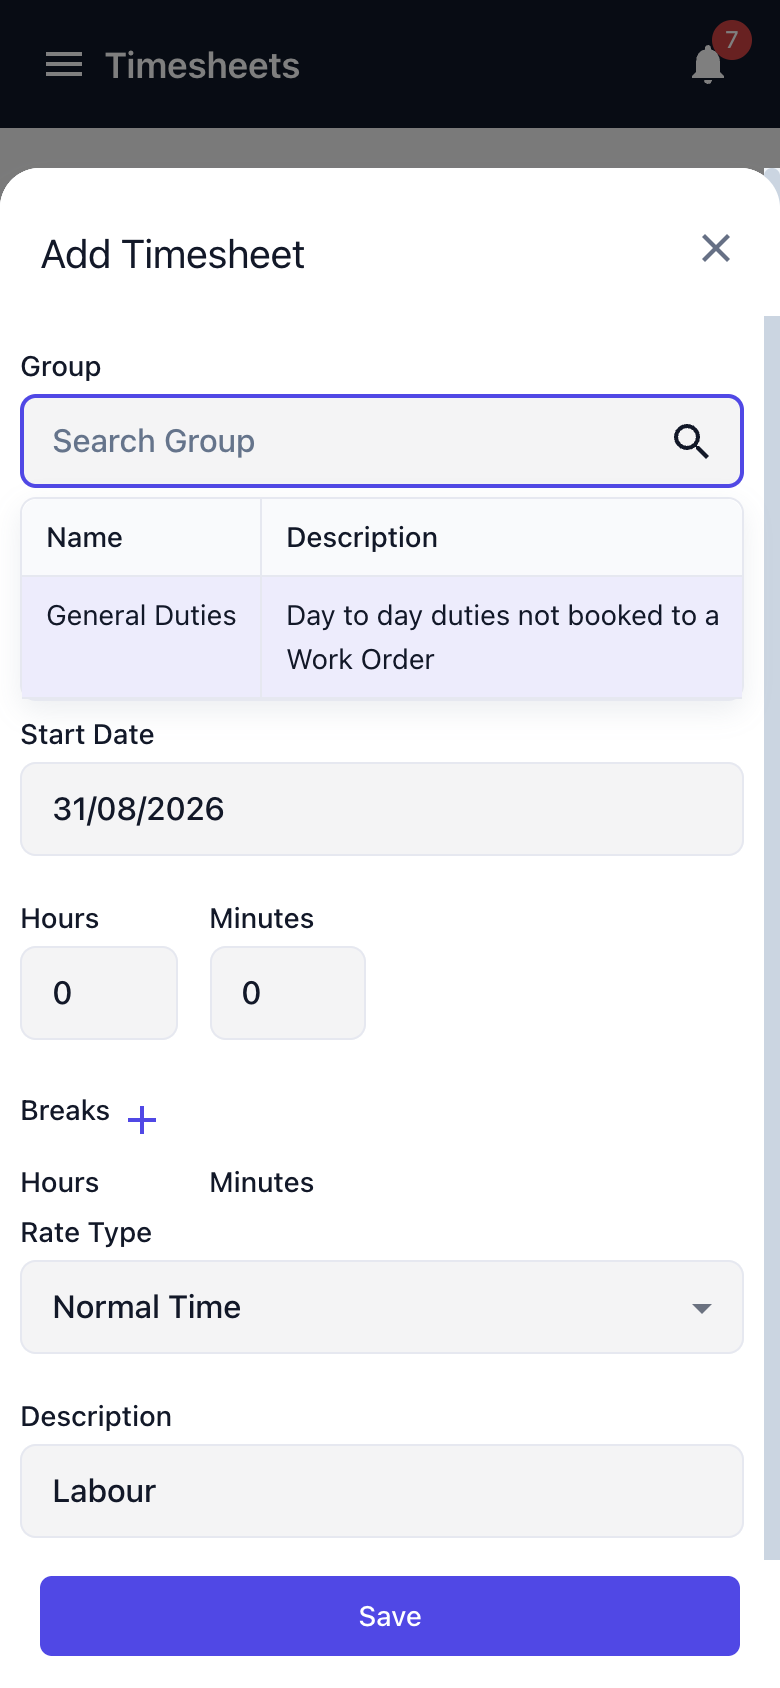
Tap Group and pick from the list, then tap Sub Group. Both are required.
-
Group - the broad bucket the time belongs to, for example General Duties.
-
Sub Group - the specific activity within that group, for example Yard Work. The list is filtered to the group you chose, and changing the group clears the sub group so you cannot end up with a mismatched pair.
Only groups and sub groups with a status of Active are offered. The reserved Work Order, Inspection and Operator Docket groups are internal, so they never appear here - Latner books those itself when the source document creates the timesheet.
Step 5 - Enter the time worked
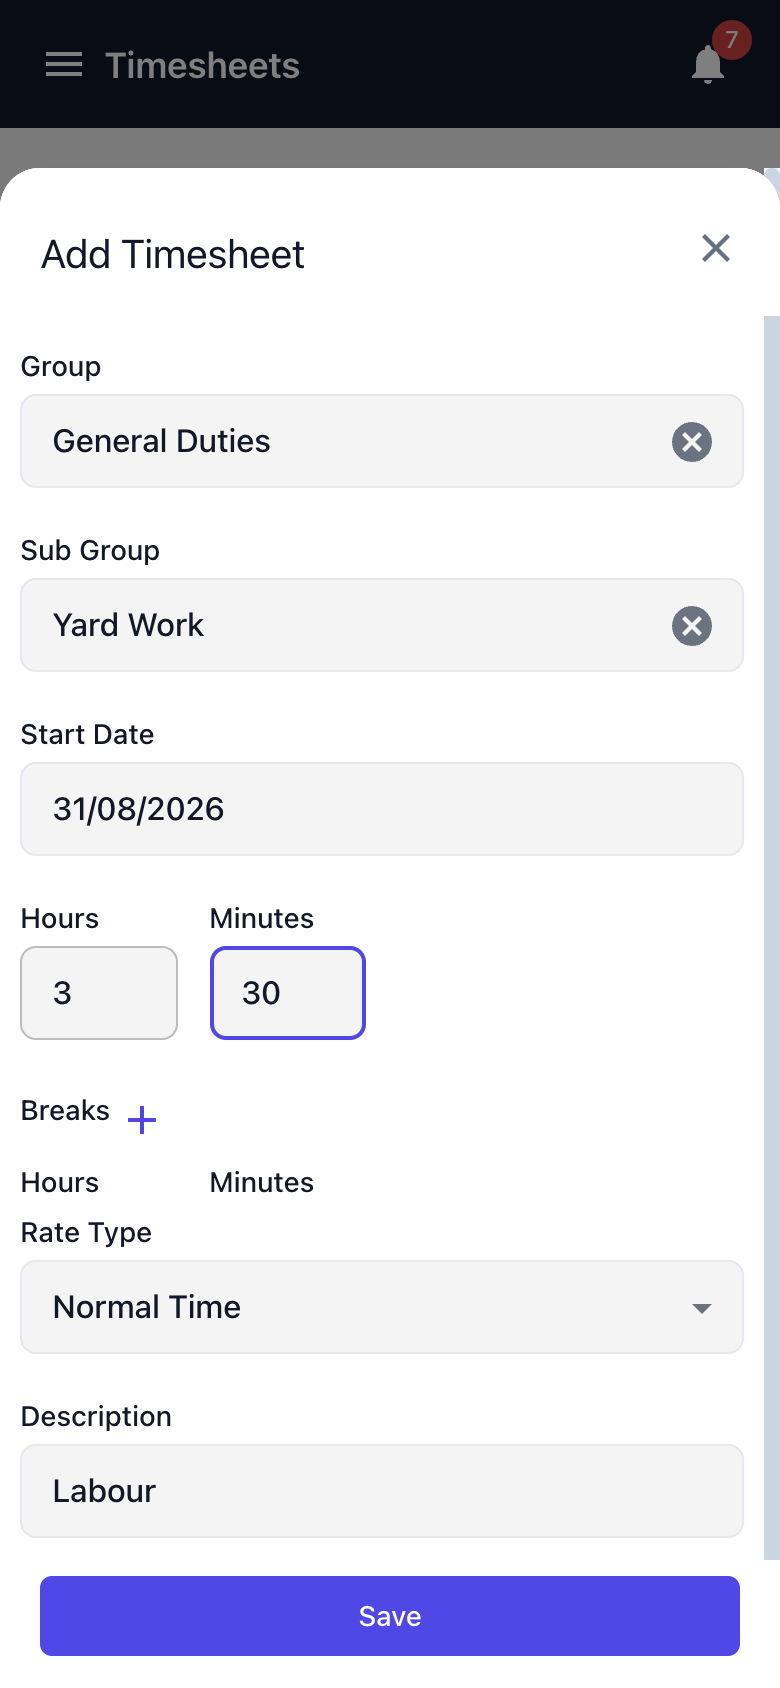
Start Date defaults to today in your branch time zone. Change it if you are catching up on an earlier day.
What comes next depends on the Timesheet Input Type setting:
-
Hours and Minutes - enter how long you worked. Hours accepts 0 to 23 and Minutes accepts 0 to 59.
-
Start and End - enter a Start Time and an End Time instead. The start must be before the end.
Step 6 - Add any breaks
Tap the plus beside Breaks to add a break row, and enter its length the same way you entered the time worked. Add a row per break, and use the bin icon to remove one. Breaks are stored against the timesheet and taken off the total, so a three and a half hour timesheet with a thirty minute break is recorded as three hours.
Step 7 - Set the Rate Type and Description
-
Rate Type - Normal Time, Call Out Rate or Overtime Rate. It defaults to Normal Time. Normal Time and Call Out Rate each pull the matching charge rate off your Skilled Person record.
-
Description - what you actually did. It defaults to Labour, and it is worth replacing with something a supervisor will recognise later.
Your branch, your Skilled Person and the cost and charge rates are filled in behind the scenes, so there is nothing else to complete.
Step 8 - Save
Tap Save. Latner confirms with Timesheet Created and the new timesheet appears at the top of the day with its total hours, and the day total lifts to match.
After You Save
-
The timesheet is recorded as a Manual timesheet against you, at your branch.
-
Total hours are calculated as the elapsed time less every break on the timesheet.
-
Total cost and total charge are worked out from the rates on your Skilled Person record, so the hours are ready to be costed and reported on without anyone re-keying them.
-
The timesheet shows on the desktop Service › Timesheets screen and feeds the Timesheet dashboard alongside timesheets from work orders, inspections and operator dockets.
In Hours and Minutes mode, Latner records the timesheet as running from midnight on the start date for the length you entered. That is fine for costing and for day totals, but if the actual clock times matter to you, switch Timesheet Input Type to Start and End.
Editing and Deleting a Timesheet
Each card carries a pencil and a bin in its top right corner.
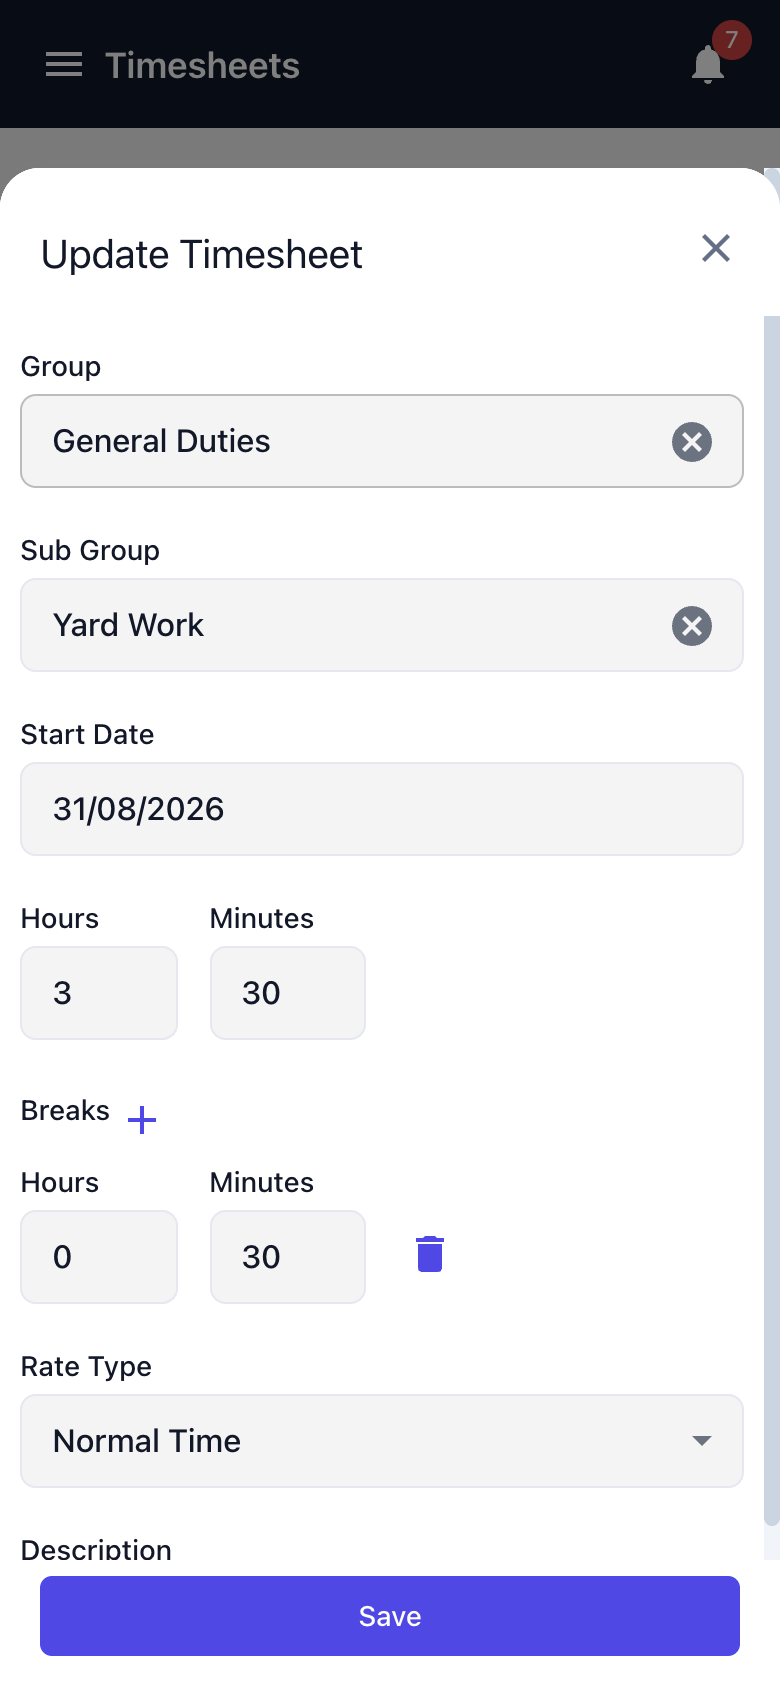
The pencil reopens the timesheet as Update Timesheet with everything as you left it, breaks included. Change what you need and tap Save. Timesheets that came from a work order cannot be edited here - Latner tells you they must be edited through the work order, because the work order line owns those hours.
The bin deletes the timesheet after a confirmation. Only Manual timesheets can be deleted from this screen.
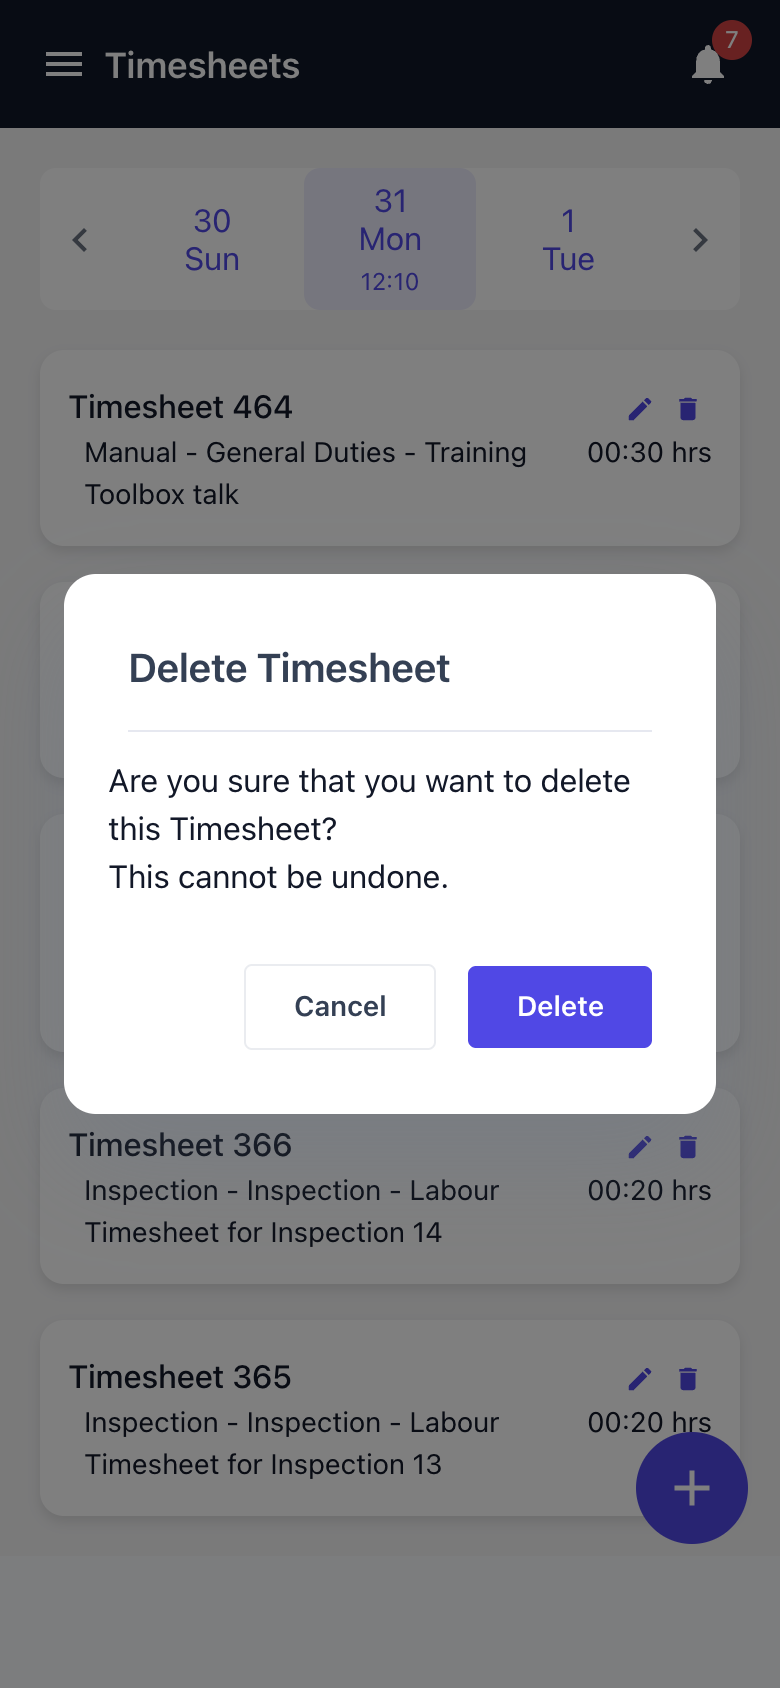
A deleted timesheet cannot be recovered, and the hours come straight back out of the day total and the timesheet reporting. If you only need to correct the length or the description, edit the timesheet instead of deleting and re-entering it.
FAQs
Watch the Demo
Prefer to watch it? Step through the same flow here.