
Equipment Issues let you log a defect against a machine the moment someone spots it, so the problem is recorded against the equipment itself rather than lost in a phone call or a note on a job sheet.
Overview
Machines break in small ways long before they break in big ways. A worn tyre, a slow hydraulic leak, a beacon that no longer flashes - none of them stop the machine today, but all of them need to be seen by whoever schedules the next service. An Equipment Issue is how you park that observation on the machine's record until someone deals with it.
-
An issue belongs to the equipment, not to the work order or inspection it was noticed on, so it stays visible no matter which job it came from.
-
Every issue has a status of Open, Resolved or Rejected. New issues always start as Open.
-
The only thing you must enter to raise one is a description of the problem.
-
You can attach one or more photos to an issue so the next person can see what you saw.
-
Closing an issue means either resolving it or rejecting it, and both require resolution notes.
-
Open issues are collected on the Work Order Daybook, so the workshop can work through them as a queue.
Before You Begin
Equipment Issues need no system setting turned on, but they are gated by a single permission.
|
Requirement |
Where to Find It |
|---|---|
|
Create Equipment Issue permission |
Security › Configuration › Permission Groups, then the Option module |
|
A serialized equipment record |
Equipment › Equipment |
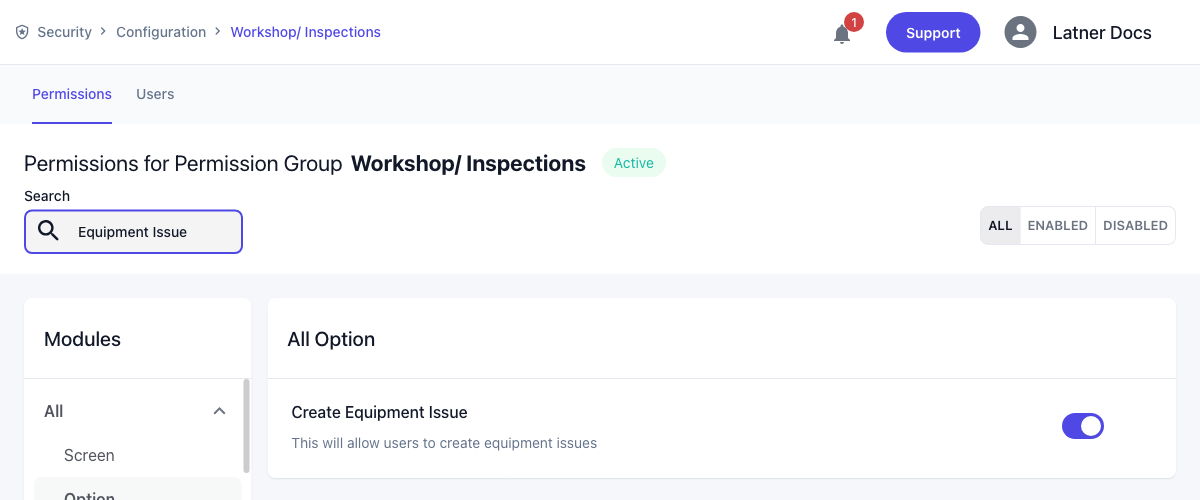
The Create Equipment Issue permission does more than its name suggests. It also controls editing an issue, uploading photos to it, and resolving or rejecting it. A user without it can still see issues on the equipment record, but on a mobile device the Equipment Issues section is hidden altogether.
Creating an Equipment Issue
The most direct route is from the machine's own record.
Step 1 - Open the equipment record
Go to Equipment › Equipment and open the machine, then choose Options › Add Equipment Issue.
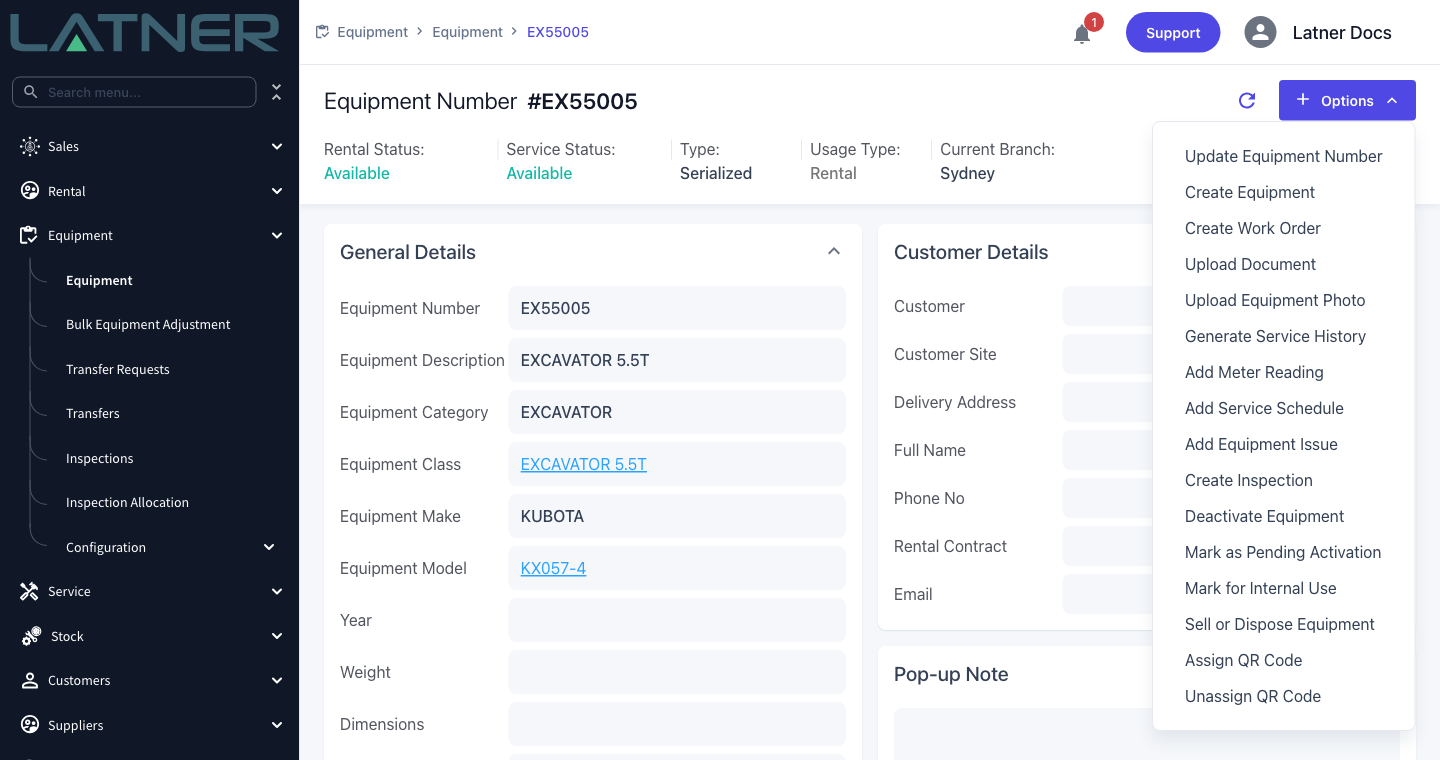
Add Equipment Issue only appears for equipment with a Type of Serialized. Bulk equipment is tracked by quantity rather than as individual machines, so there is nothing for an issue to attach to.
Step 2 - Describe the issue
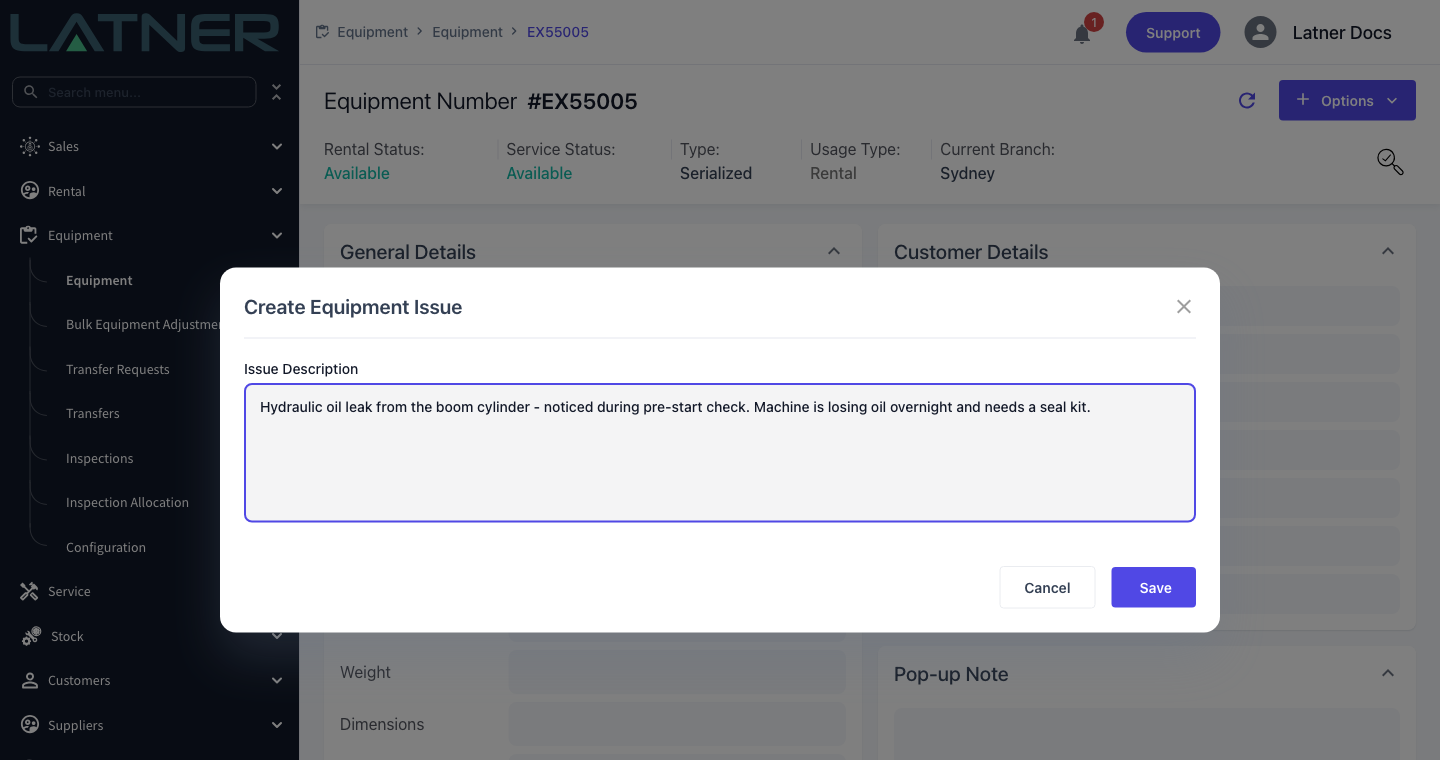
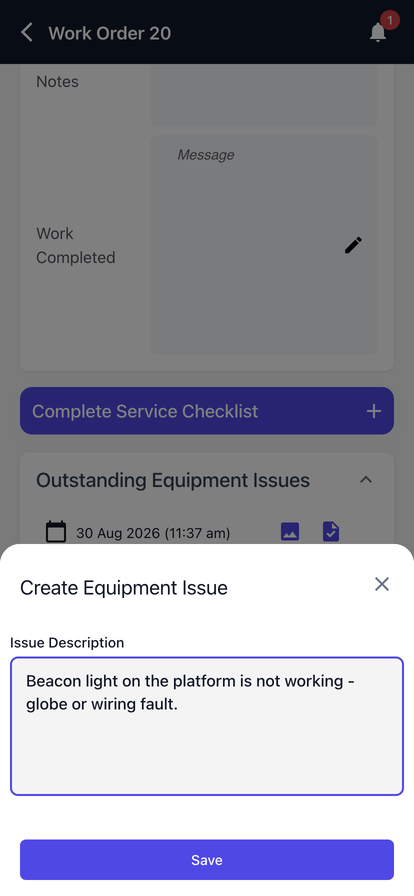
The Create Equipment Issue dialog has one field.
-
Issue Description - what is wrong with the machine. Write it for the mechanic who will pick it up cold, not for yourself: what the fault is, where it is and how you noticed it.
Step 3 - Save
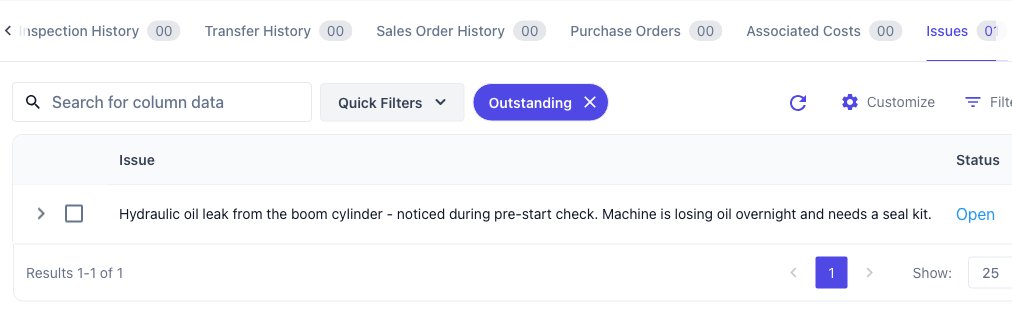
Click Save. Latner confirms with Equipment Issue Created and drops you back on the equipment record with the Issues tab already selected.
The new row shows a status of Open, the date it was raised and your name as Created By. The tab opens with the Outstanding quick filter switched on, so you are looking at open issues only - clear it to see everything the machine has ever had raised against it.
Other Ways to Raise an Issue
Most issues are spotted while someone is already working on the machine, so you can raise one without leaving the job.
From a work order
On a work order, choose Options › Create Equipment Issue. You get the same single-field dialog. The option appears while the work order is Open or Pending Approval and has equipment on it - a manual work order with no machine attached has nothing to raise an issue against.
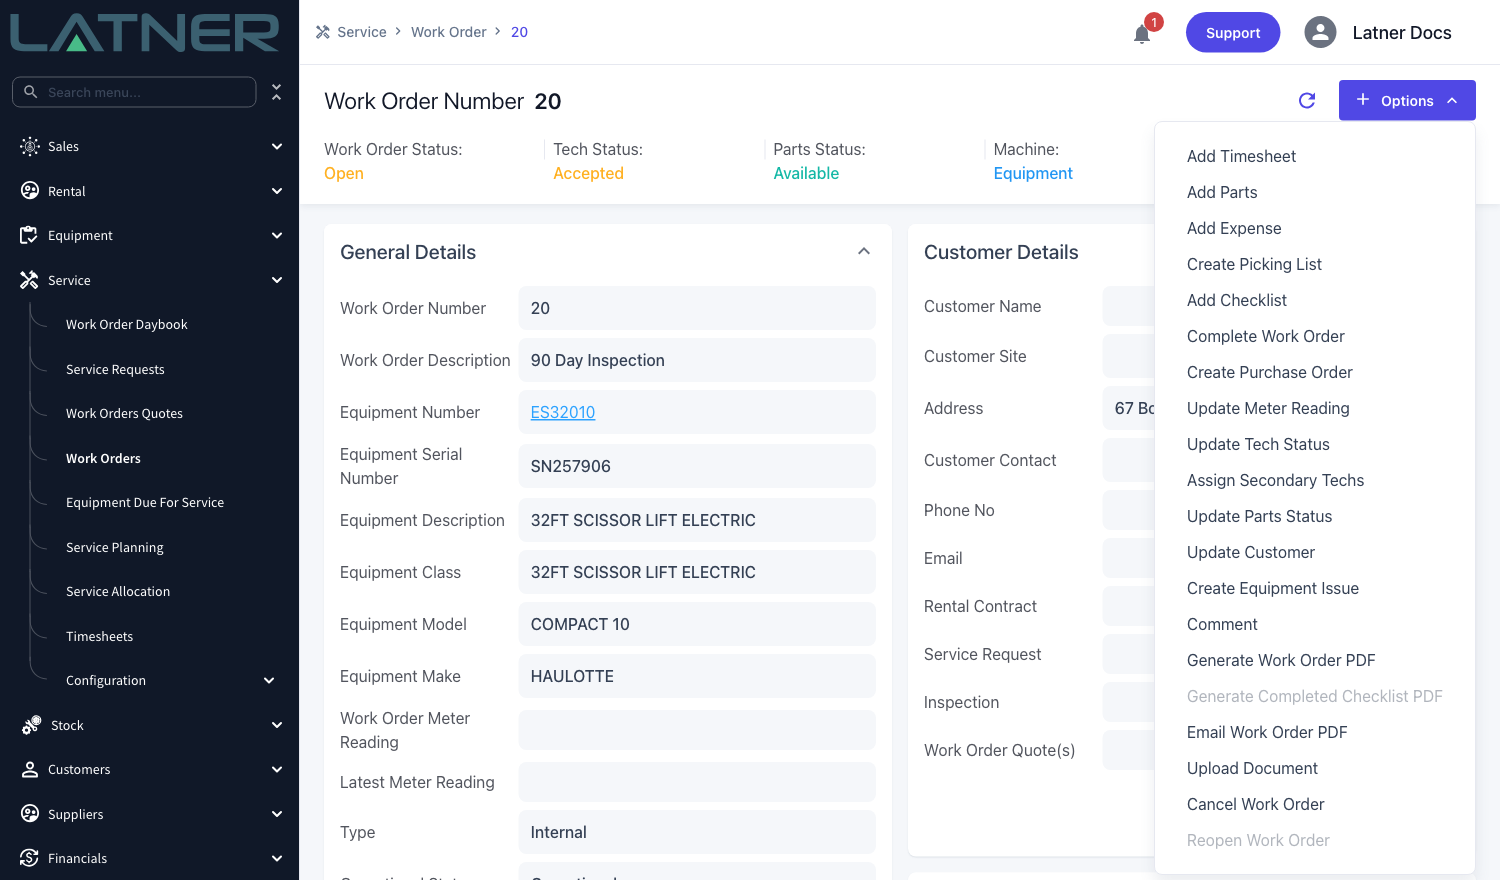
Work orders and inspections both carry an Outstanding Issues tab. It lists every open issue for that machine, not only the ones raised from that job, which is exactly what you want when you are deciding how much to do while the machine is in front of you.
On a mobile device
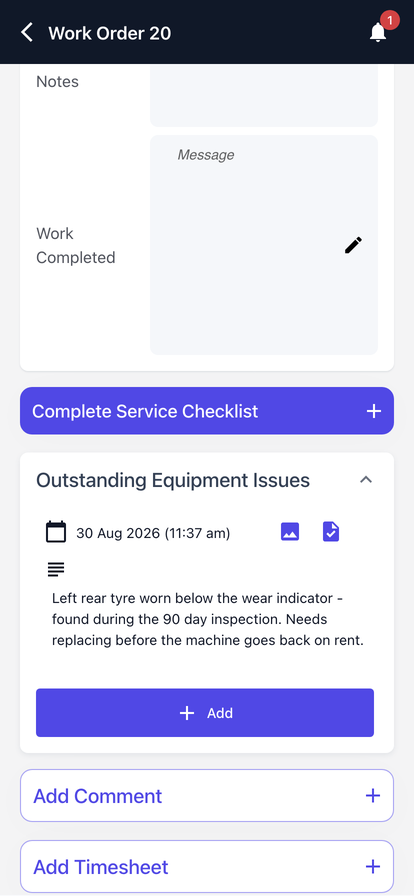
This is where most issues actually get raised. Open a work order or an inspection on your phone and scroll to Outstanding Equipment Issues.
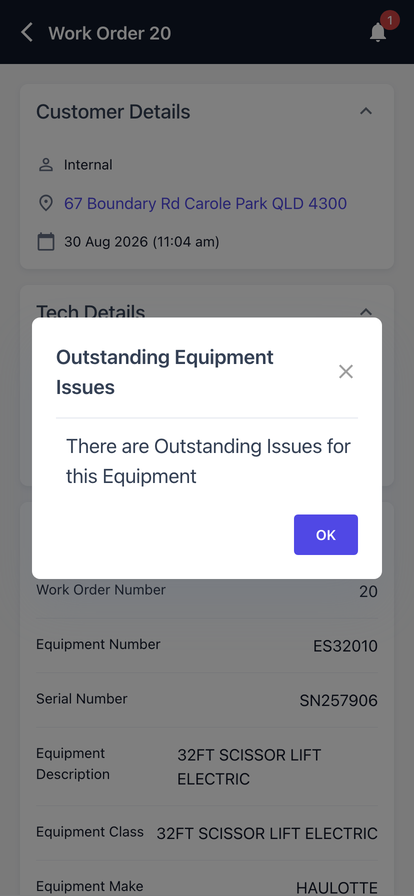
If the machine already has open issues, a work order warns you as soon as you open it, before you have started work.
The section lists each open issue with its date and description, and gives you a picture icon for photos and a tick icon to close it off.
Tap Add and the same Create Equipment Issue form slides up from the bottom of the screen.
The mobile equipment screen has Create Equipment Issue in its menu too, for when you are standing at the machine rather than working a job on it.
Adding Photos to an Issue
A photo saves an argument later. On the Issues tab, tick the issue's row - three icons appear above the table.
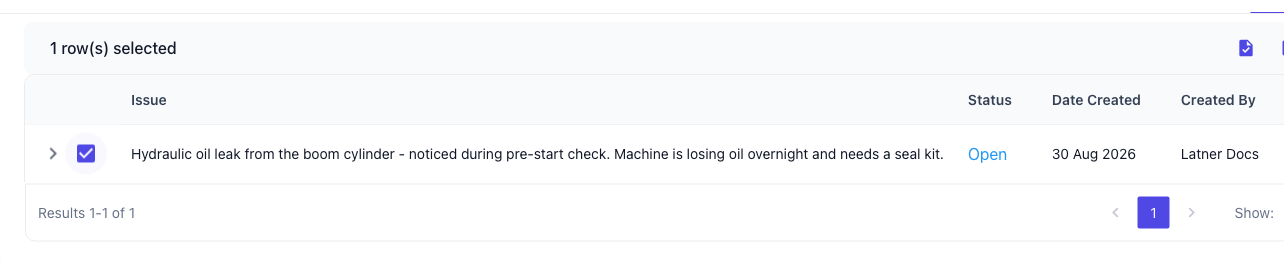
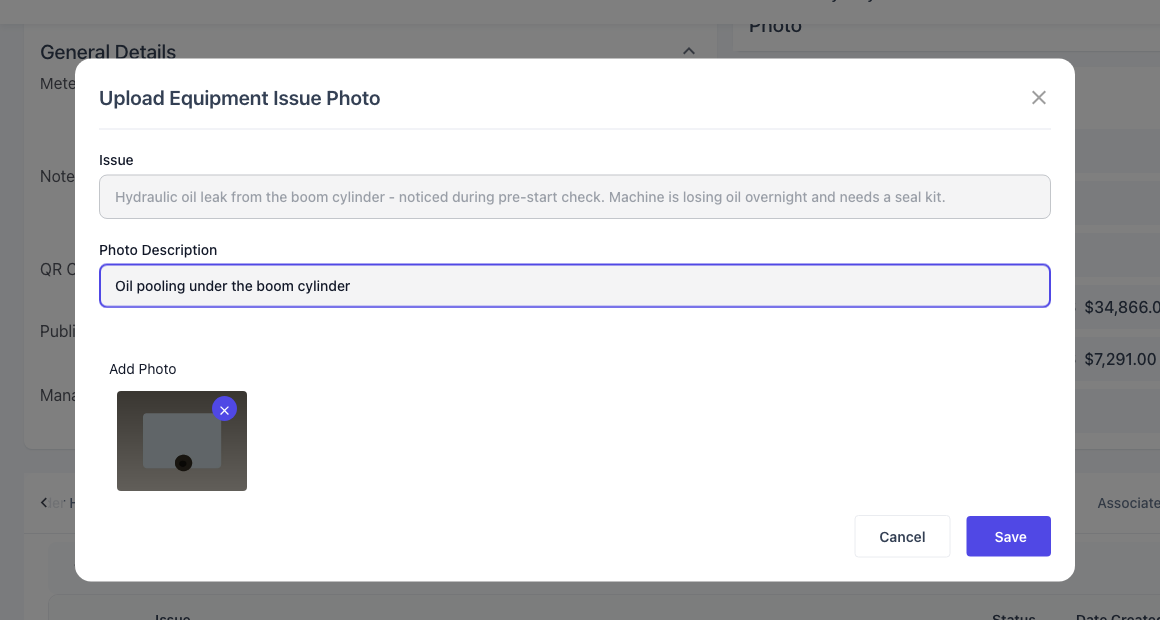
Click the picture icon to open Upload Equipment Issue Photo. The issue's description is shown at the top so you know which one you are attaching to, and you fill in:
-
Photo Description - what the photo shows.
-
Add Photo - drag the file in or click to browse. Photos must be JPG, JPEG or PNG.
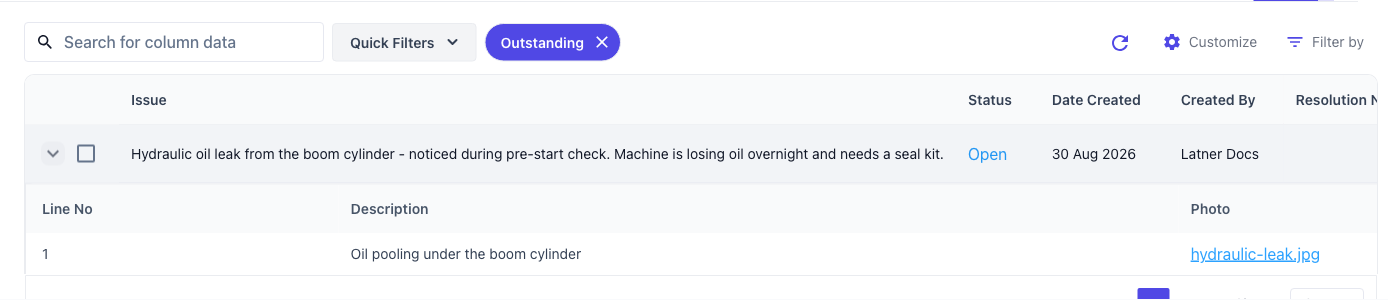
Photos are numbered in the order you add them and are listed underneath the issue. Click the arrow at the left of the row to expand it.
Resolving or Rejecting an Issue
Select the issue's row and click the tick icon to open Action Equipment Issue.
-
Status - Resolved if the fault was fixed, Rejected if it was not a fault after all or will not be actioned. Resolved is preselected.
-
Issue - the original description, shown read-only so you cannot rewrite history while closing it.
-
Resolution Notes - required. Latner will not let you save without them.
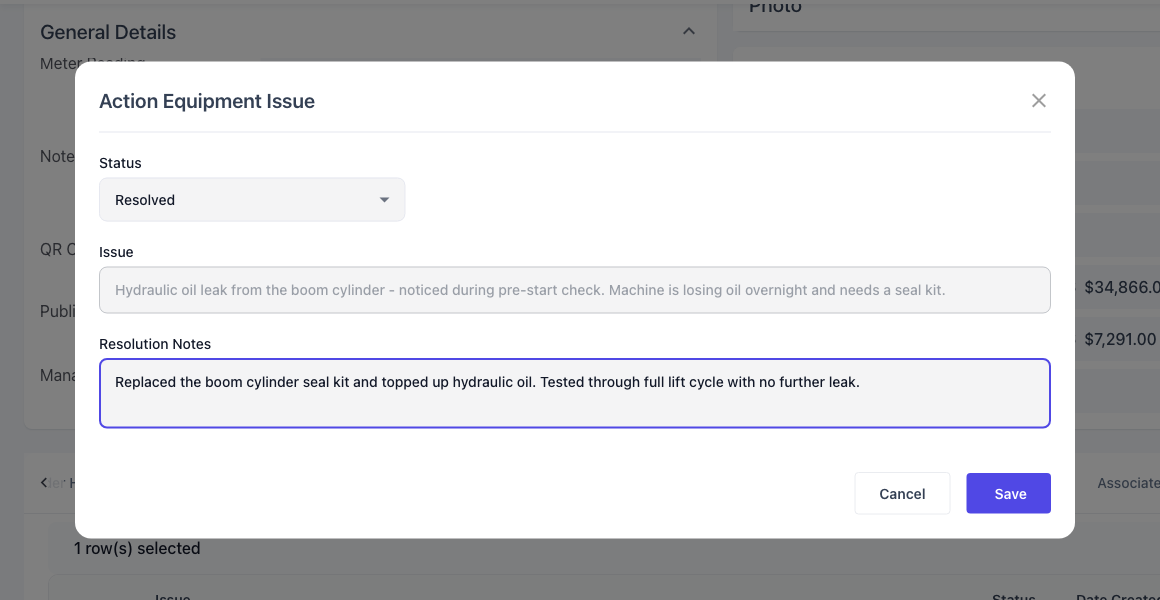
On save the issue is stamped with Date Actioned and Actioned By, and it drops out of every outstanding list.
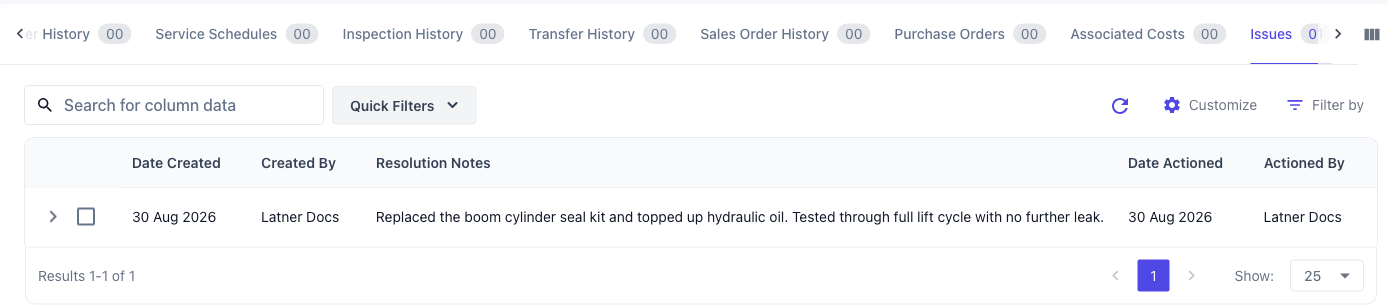
An issue cannot be put back to Open once it has been actioned, and issues cannot be deleted. If you closed one by mistake, run Resolve Equipment Issue again to correct the status and notes, or raise a fresh issue describing the fault that is still there.
Where Issues Show Up
Once raised, an issue appears in several places:
-
The Issues tab on the equipment record, filtered to outstanding issues by default.
-
The Outstanding Issues tab on any work order or inspection for that machine.
-
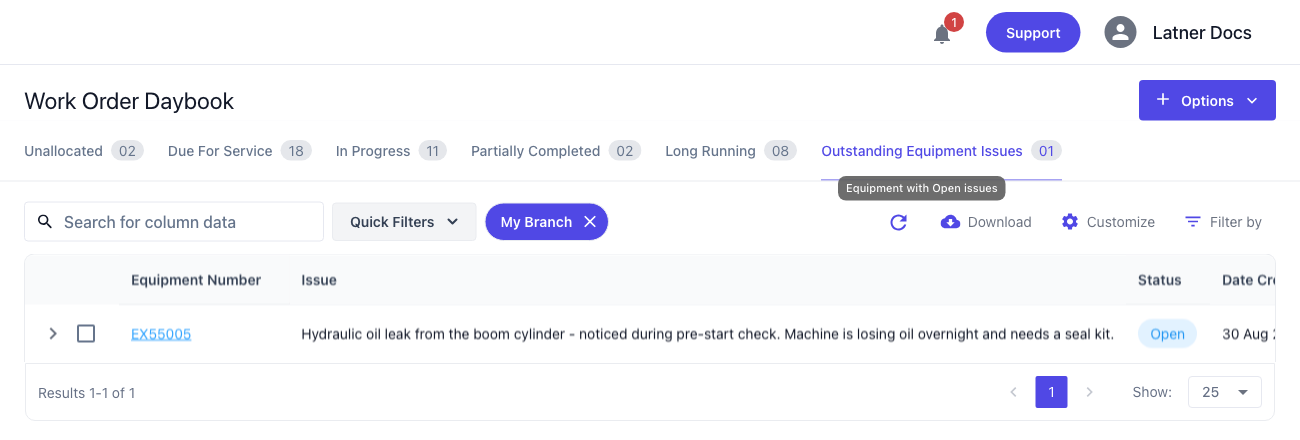
The Outstanding Equipment Issues tab on the Work Order Daybook, which is the workshop's working queue of every machine with an open issue.
The Daybook tab opens filtered to My Branch, so you see the machines sitting in your own yard. Clear the filter to see the whole business. Double-click any row to jump straight to that machine's Issues tab.
FAQs
Watch the Demo
Prefer to watch it? Step through the same flow here.