
Generating a work order PDF turns the job on screen into a tidy one-page document you can send straight to the customer, without leaving the work order.
Overview
Once the mechanic has written up what they did, the customer usually wants it in writing. Latner does both halves of that for you: it renders the work order as a PDF from your own template, and it emails that PDF to the customer's contact using a subject and message you have already agreed on.
-
Generate Work Order PDF and Email Work Order PDF are two separate actions on the work order's Options menu. You can use either on its own.
-
Every PDF you generate is kept. They are listed on the Work Order PDF History tab and numbered, so you always have the version you sent.
-
You don't have to generate a PDF before emailing. Leave the attachment blank in the email form and Latner generates a fresh one and attaches it.
-
The subject line and message body come from your Email settings and can include the work order number, the customer name and the contact name.
-
Every send is recorded on the Sent Emails tab, together with the exact PDF that went out.
Before You Begin
A few things need to be in place before the customer receives anything.
|
Requirement |
Where to Find It |
|---|---|
|
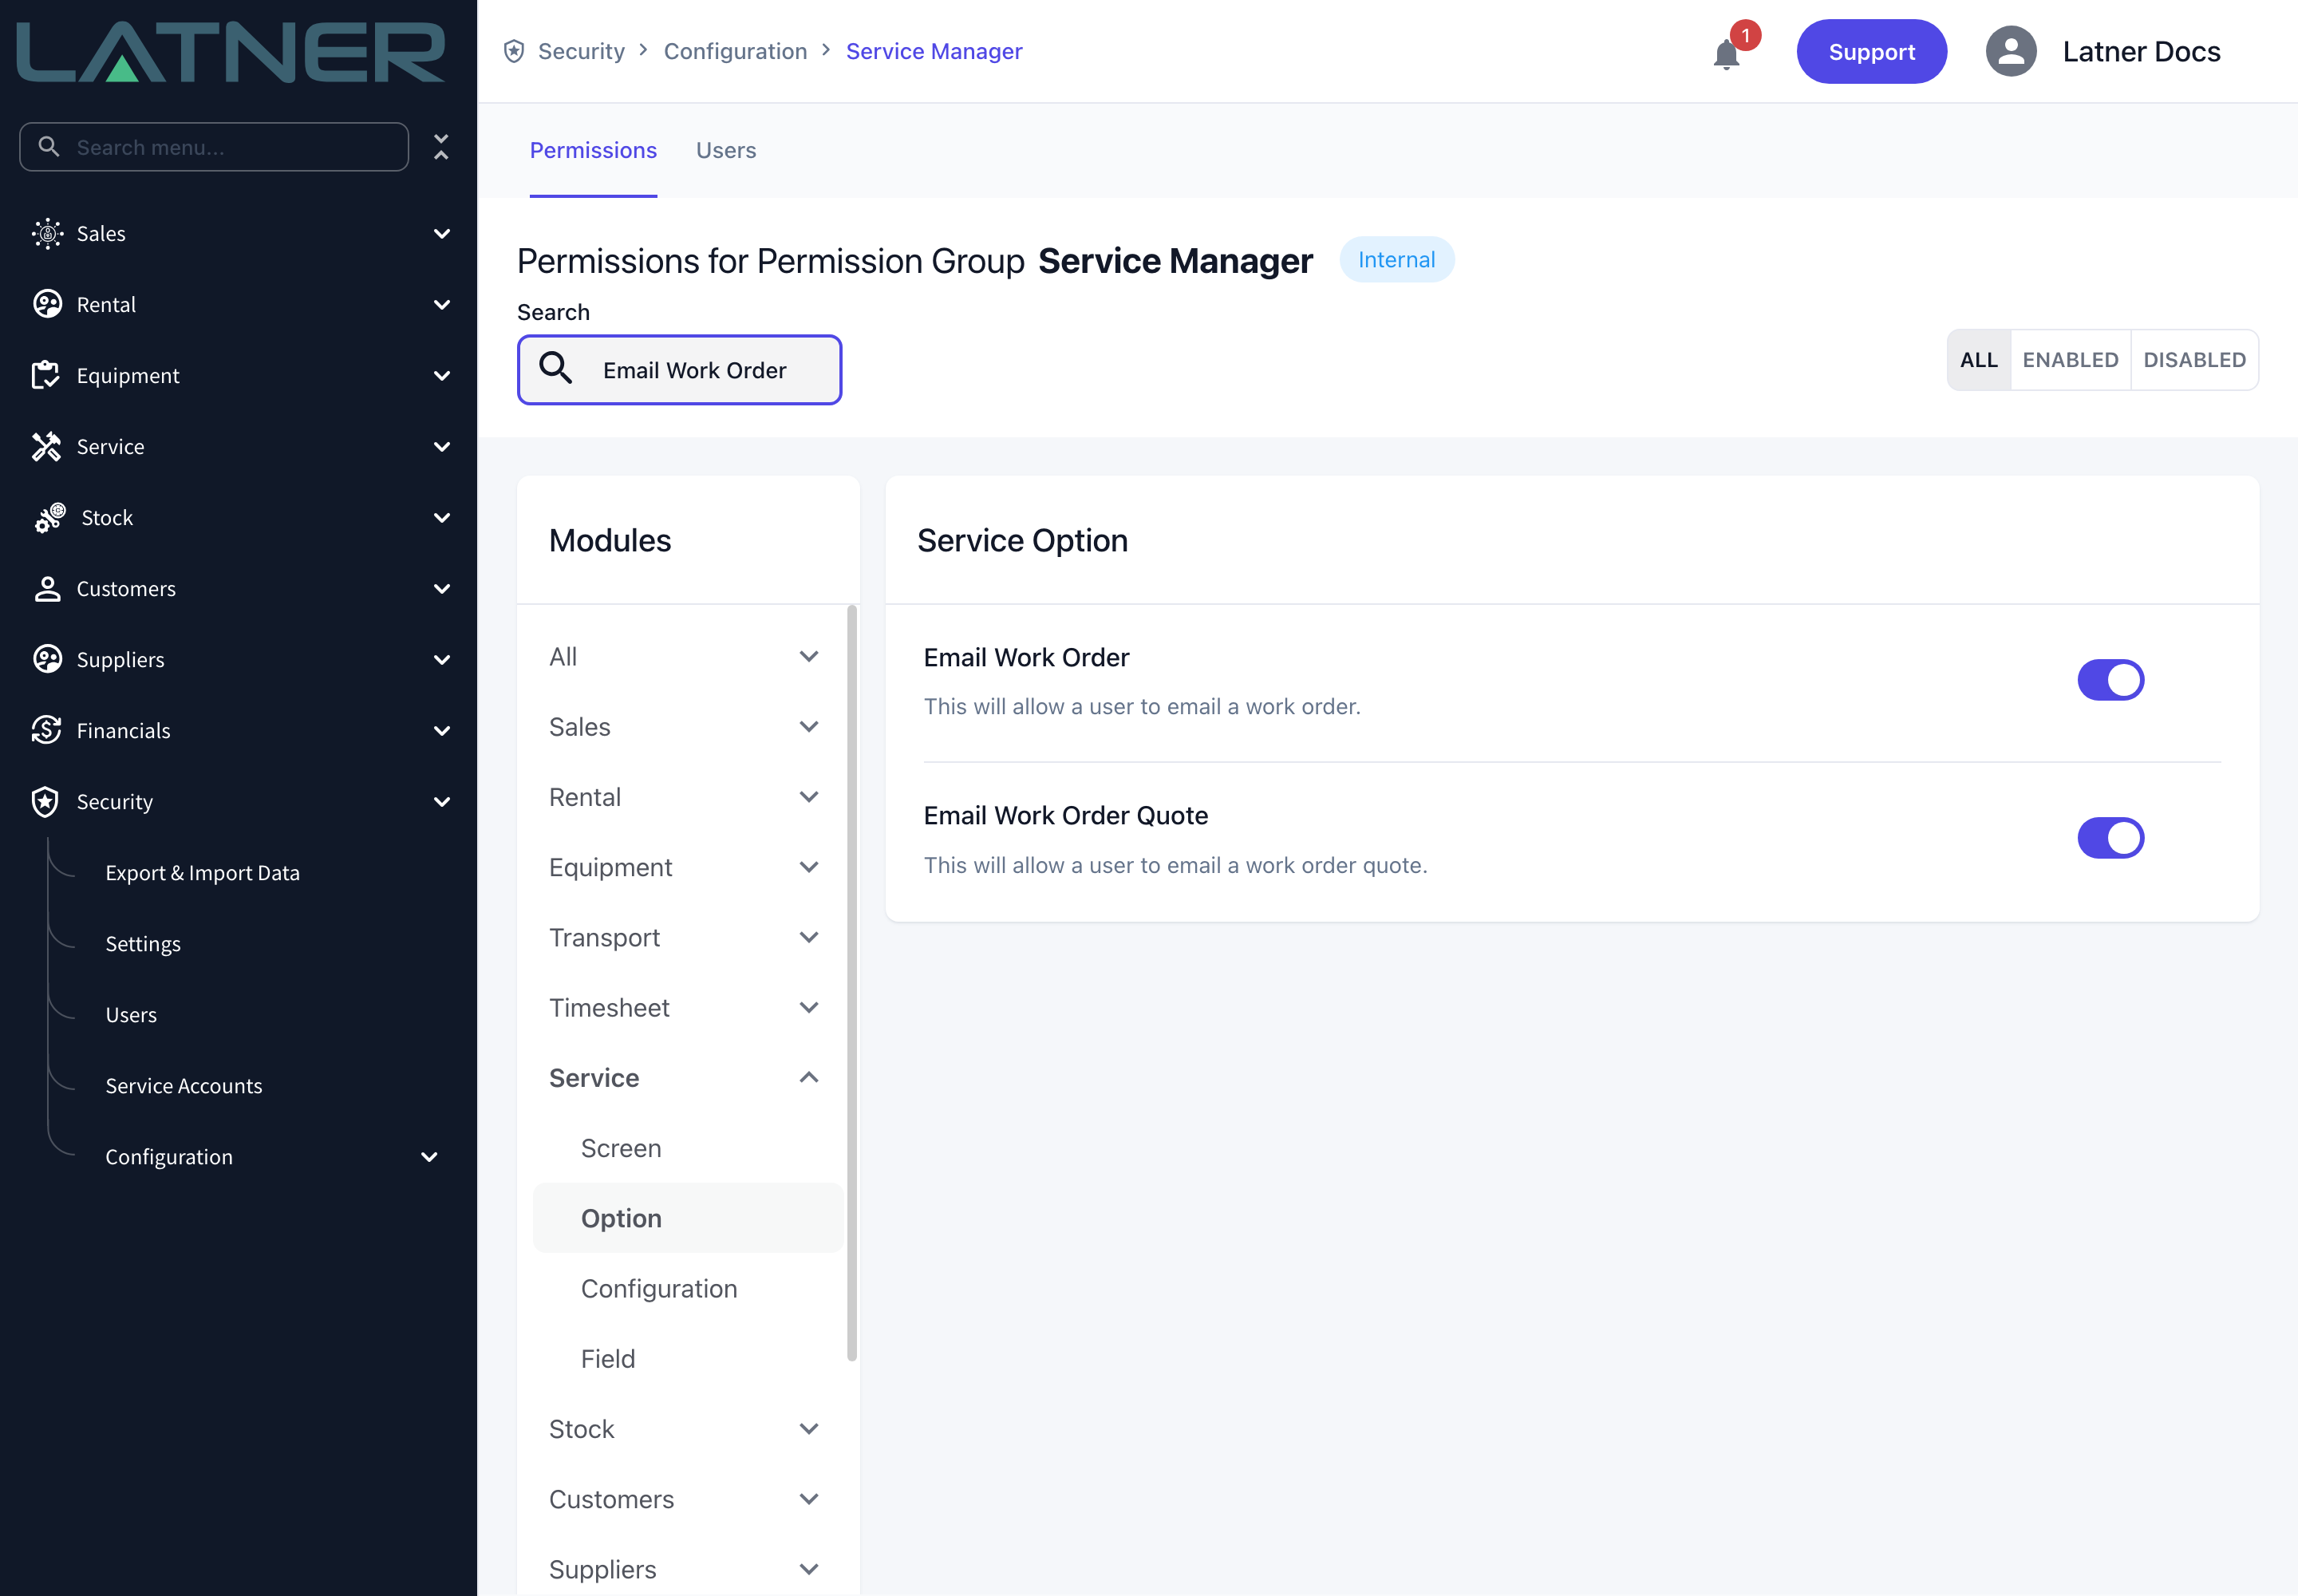
Edit Work Order permission - required to generate a PDF |
Security › Configuration › Permission Groups › your group › Service › Option |
|
Email Work Order permission - required to email one |
Security › Configuration › Permission Groups › your group › Service › Option |
|
SendGrid Email API Key - Latner sends all email through SendGrid |
Security › Settings › Email |
|
Work Order Email - Subject and Work Order Email - Body - the default wording |
Security › Settings › Email |
|
Work Order PDF Template ID - only if you use your own template |
Security › Settings › PDF Templates |
|
A Customer Contact with an email address on the work order |
The Customer Details card on the work order |
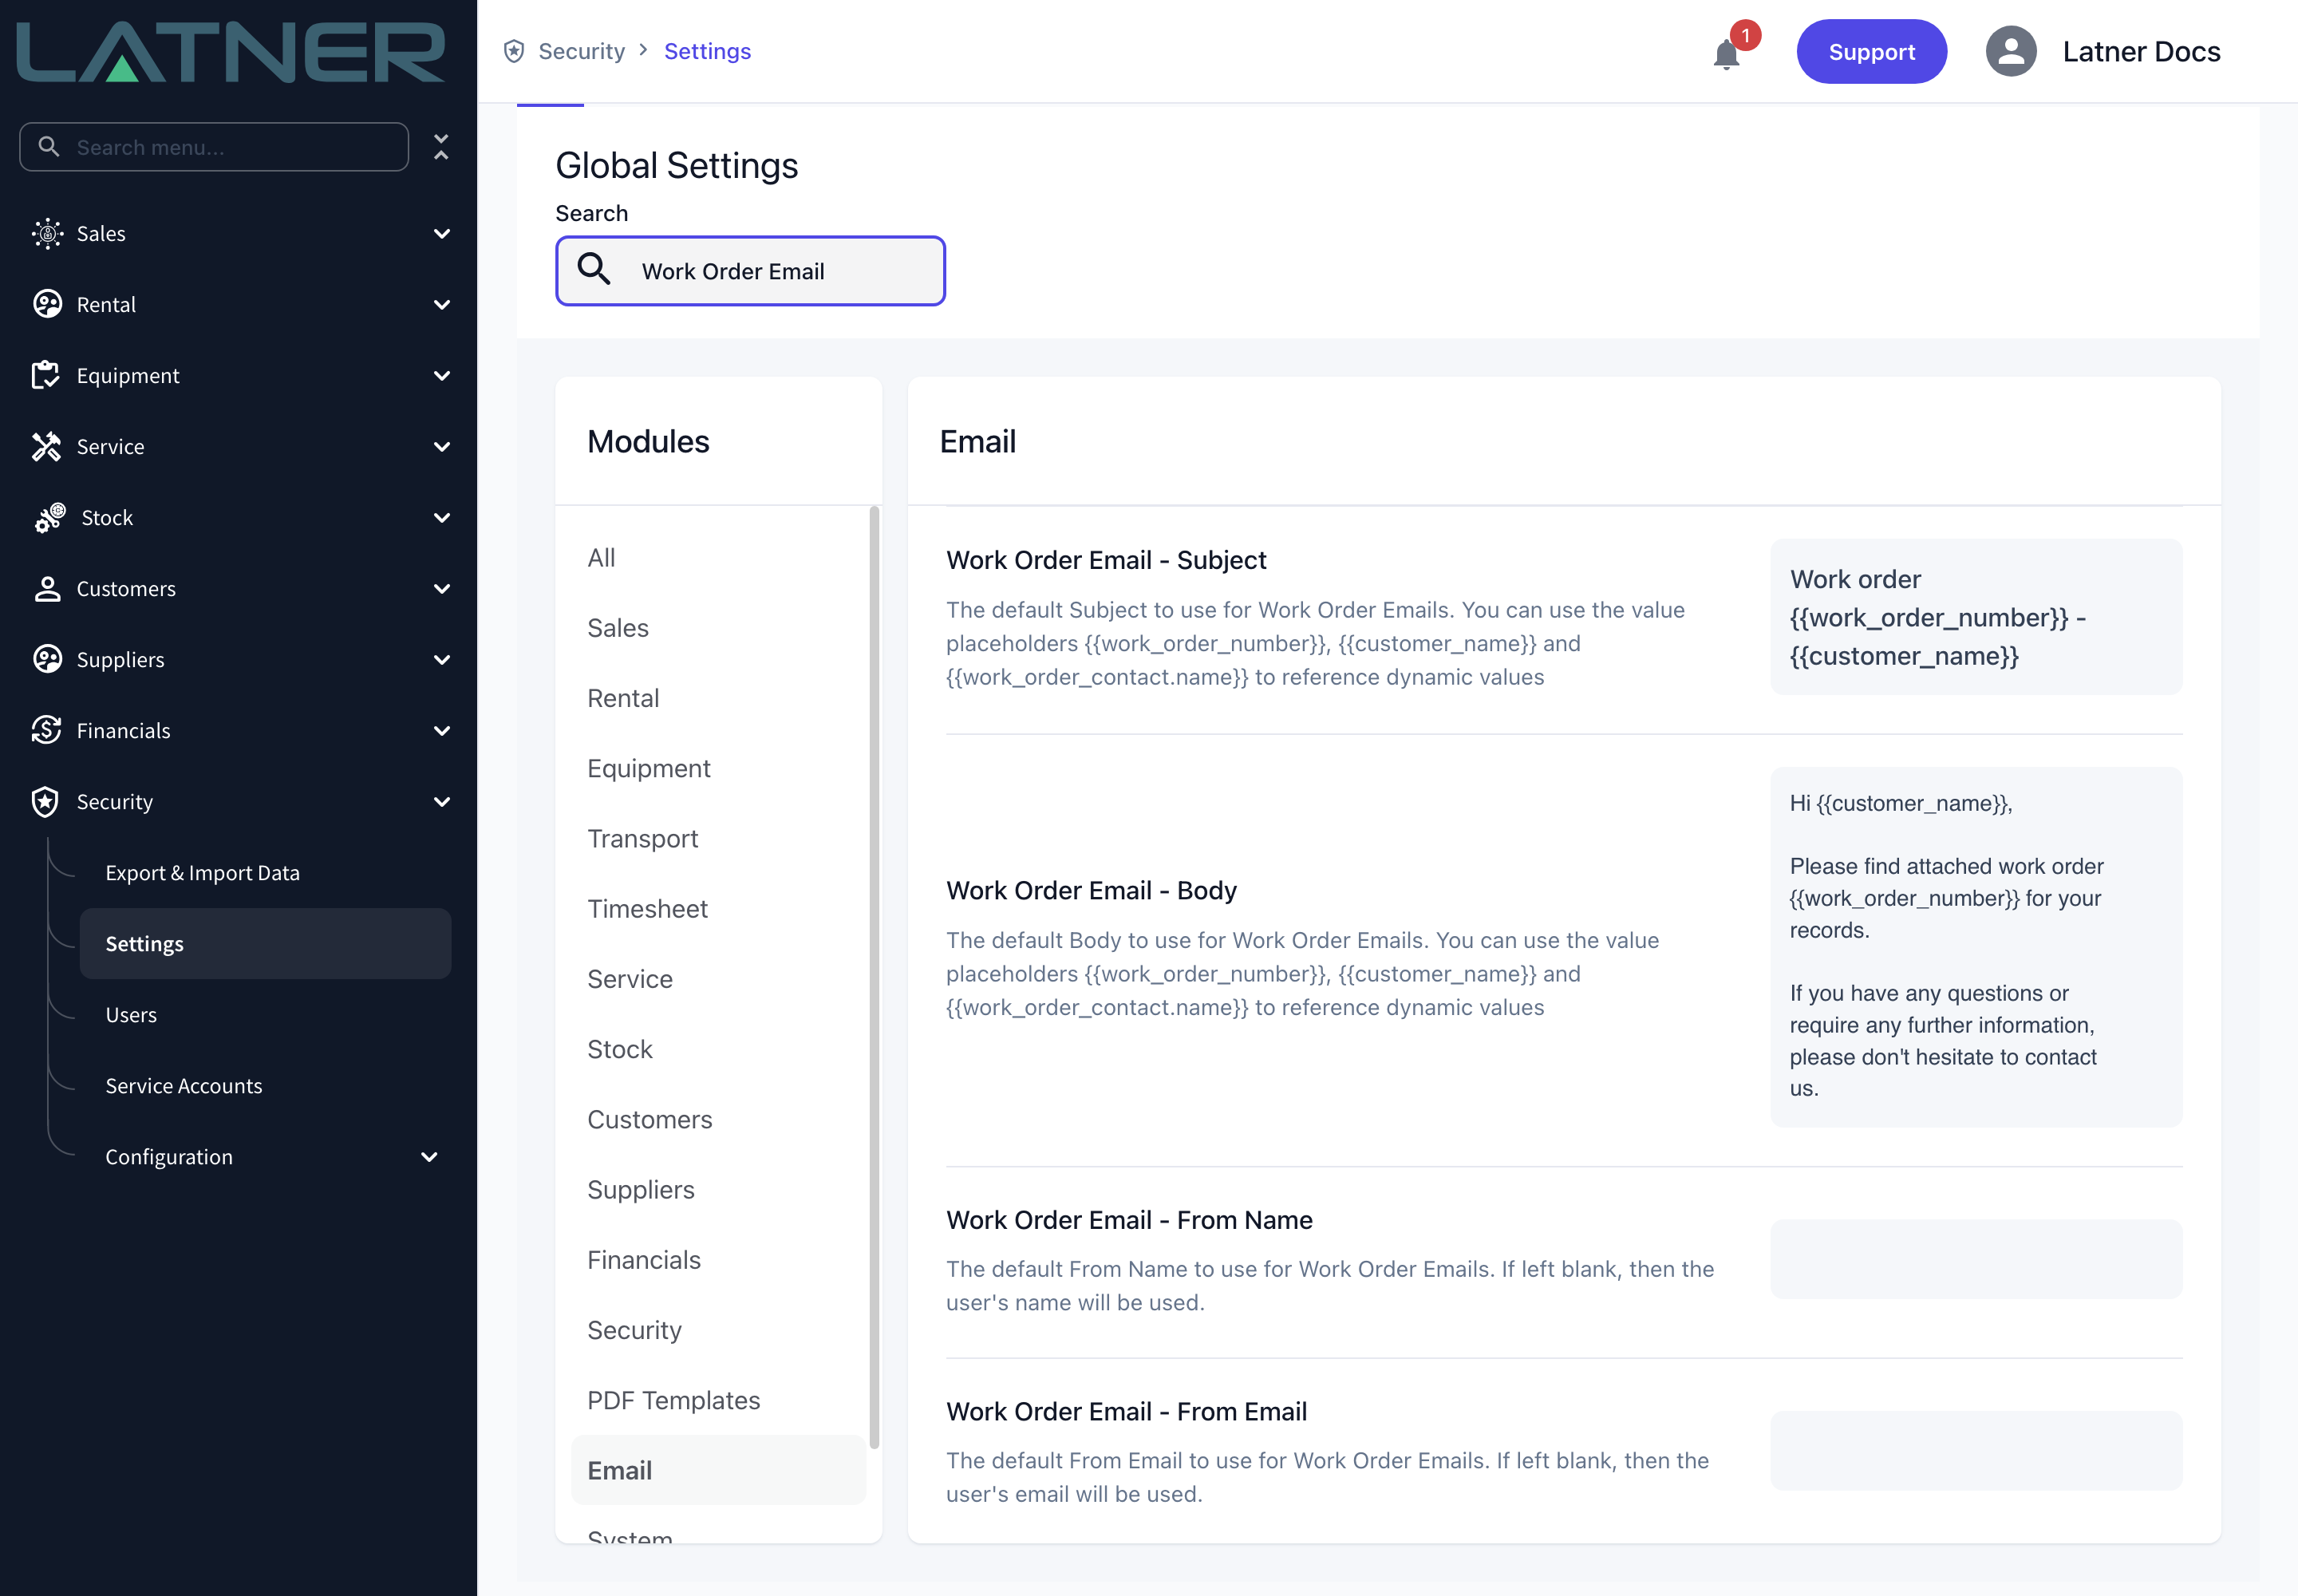
All four Email settings can also be set per branch, so a branch that signs off differently doesn't have to share head office's wording.
You don't need to set Work Order PDF Template ID to get started. Latner falls back to a standard work order template when the setting is blank, and only refuses to generate if there is no template at all.
Generating the Work Order PDF
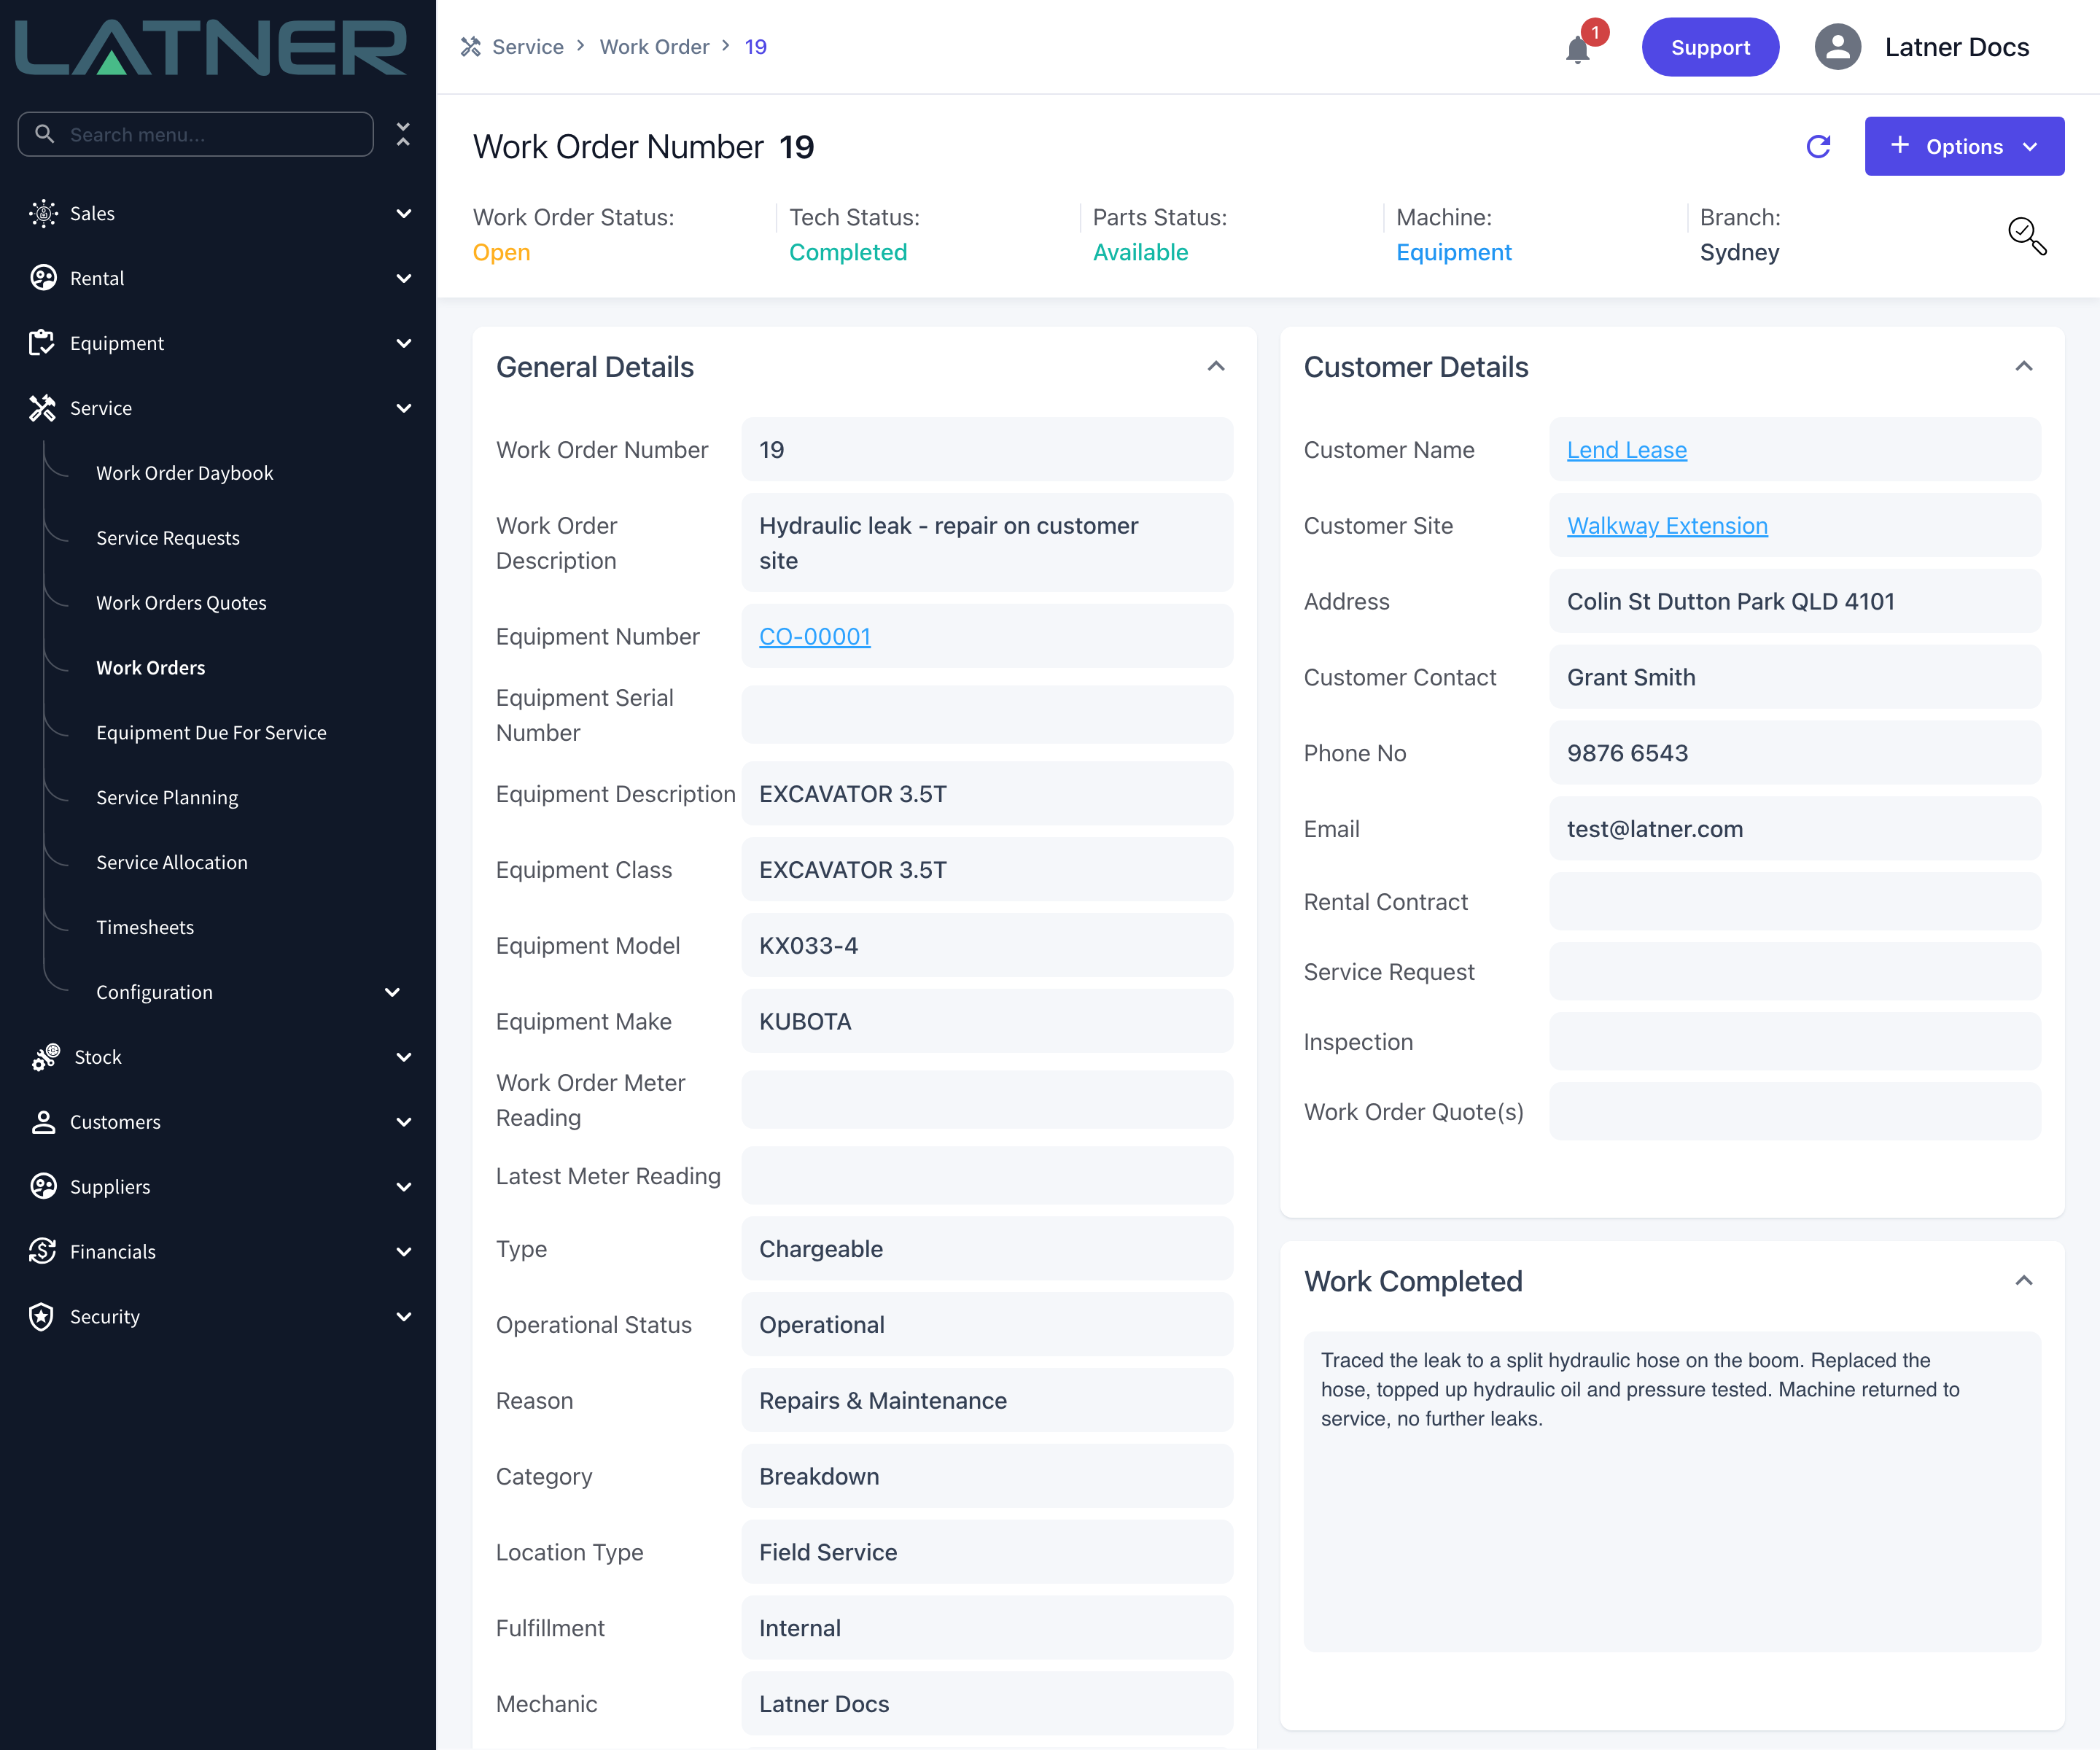
Step 1 - Open the work order
Go to Service › Work Orders and open the work order you want to send. The PDF is rendered from what is on the record at that moment, so it's worth checking that Work Completed is filled in and the parts and labour lines on the Actuals tab are right before you generate it.
Step 2 - Generate the PDF
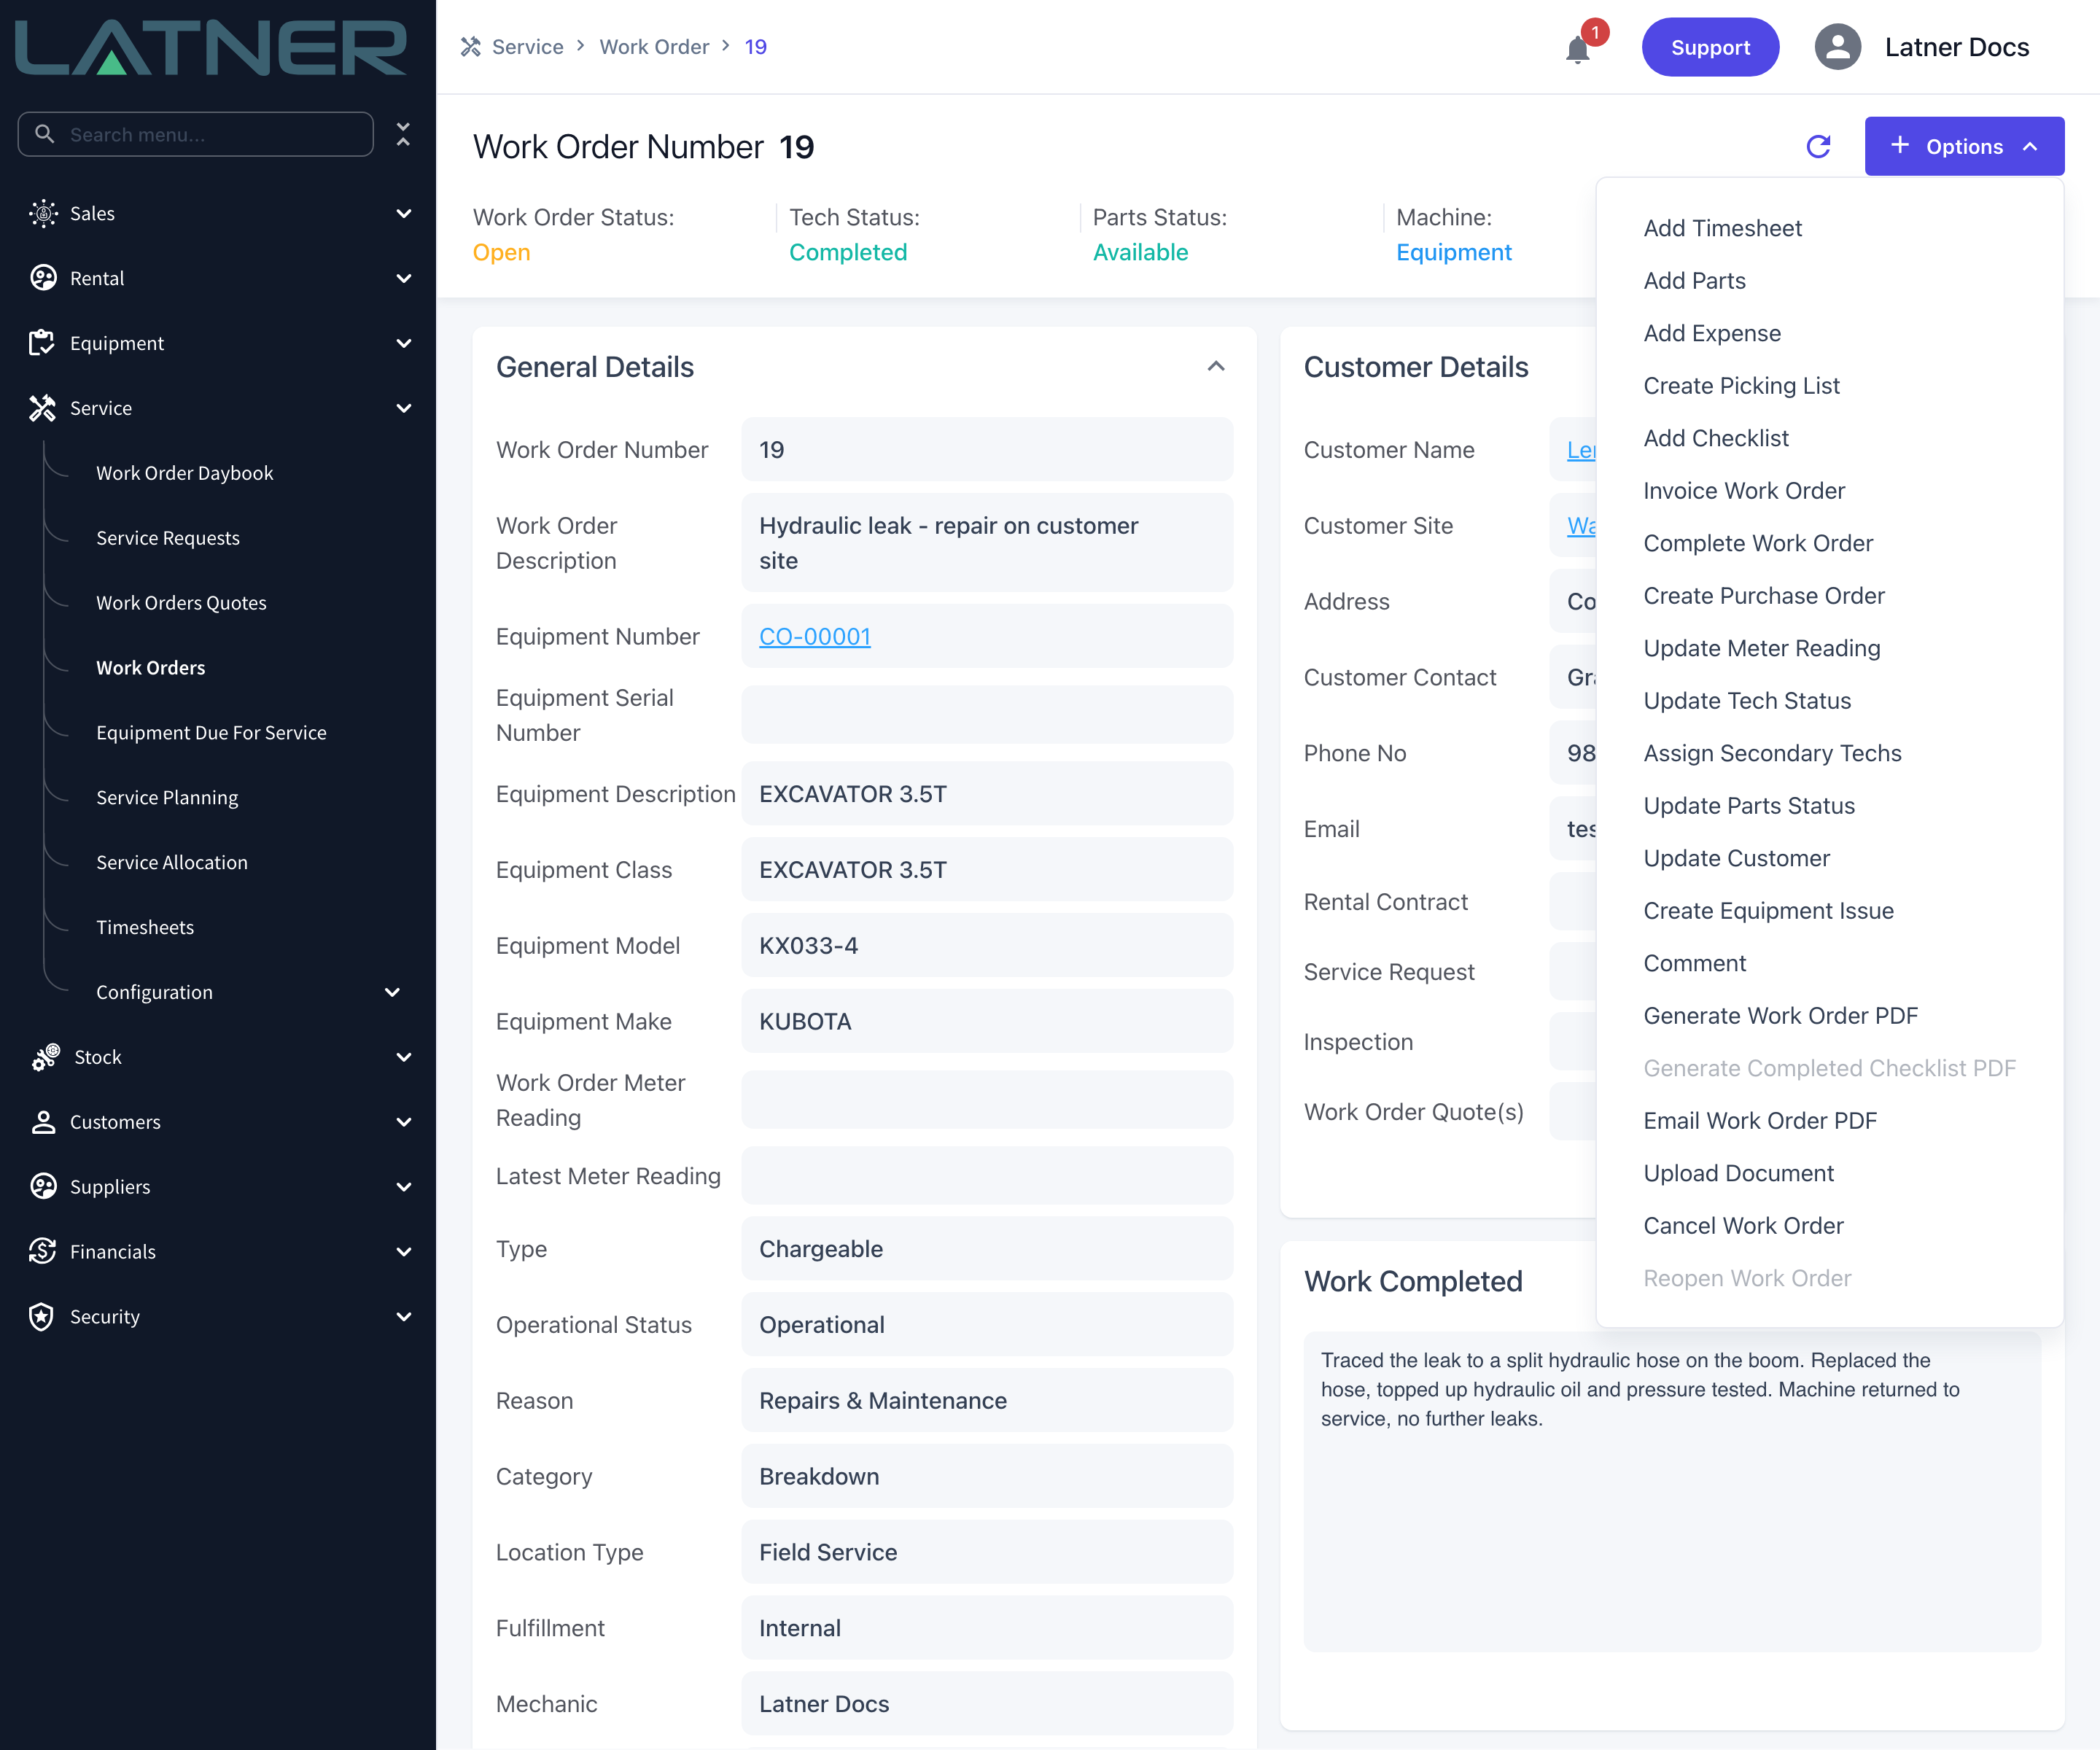
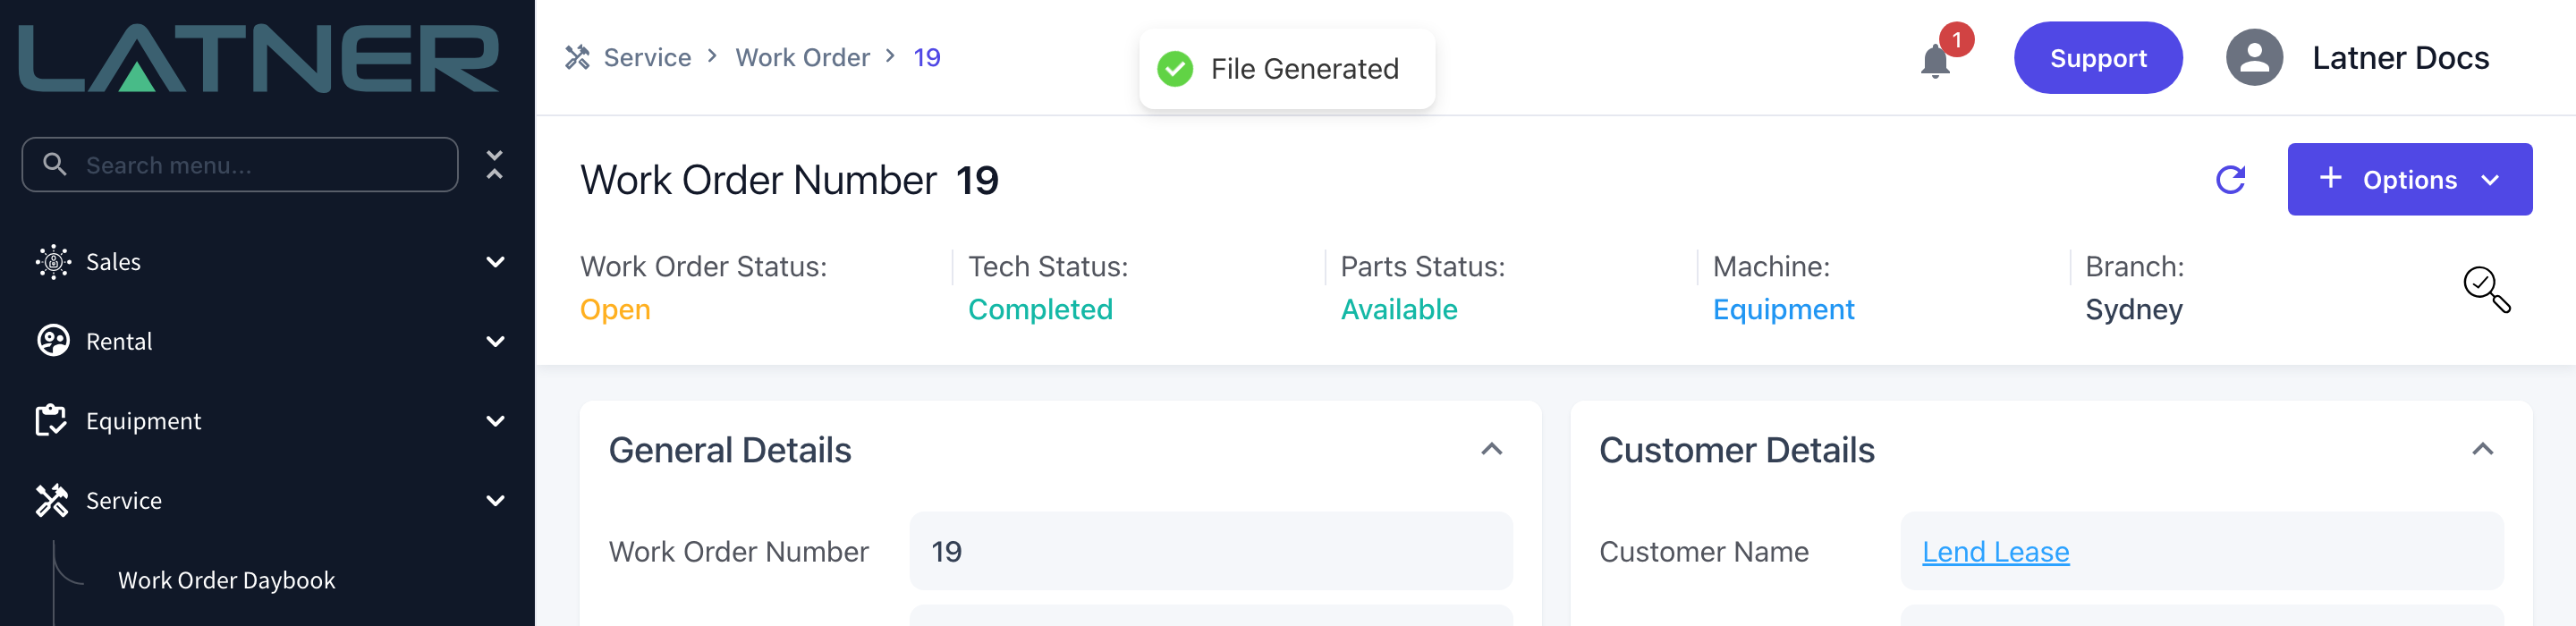
Select Options › Generate Work Order PDF. Latner renders the document in the background and shows a Generating PDF message while it works.
When it finishes you'll see File Generated and the PDF opens in a new browser tab. If you have ticked Auto-download files on your user profile, it downloads instead of opening.
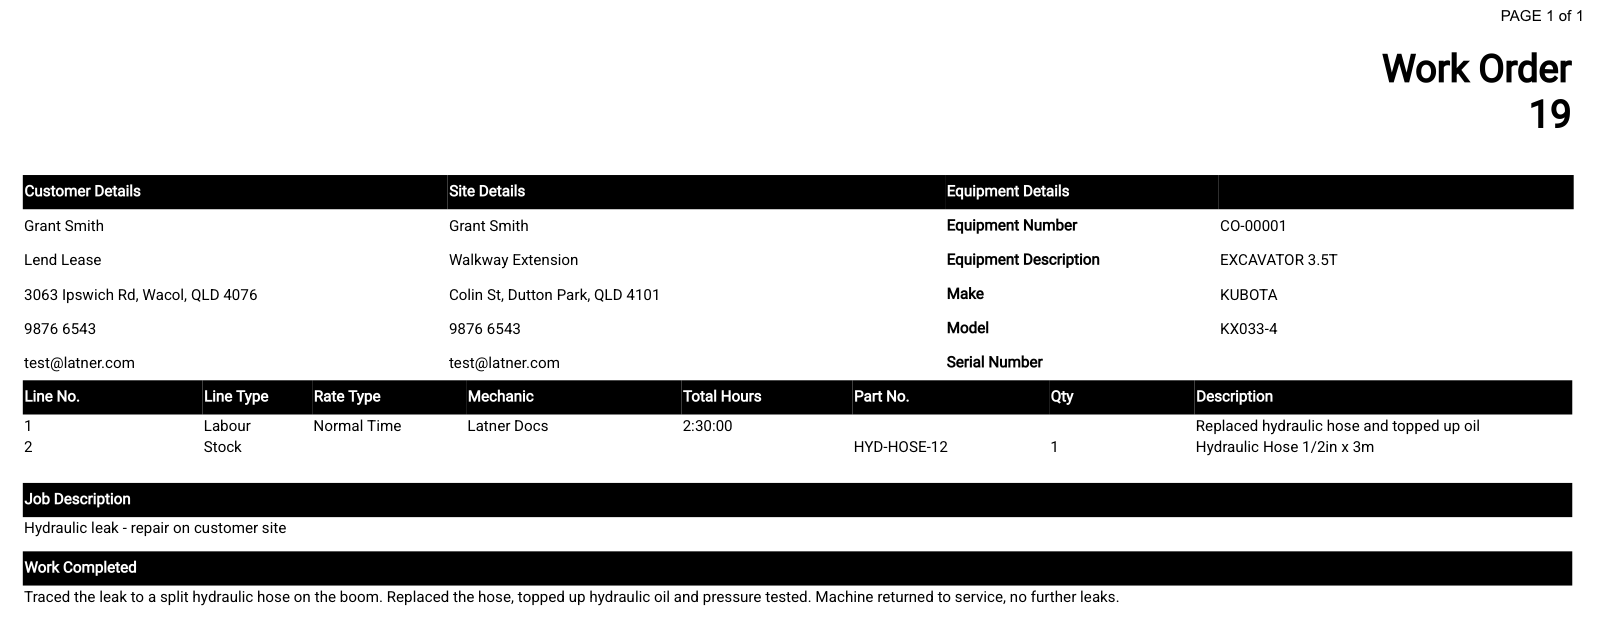
The finished document pulls together the customer and site details, the equipment, every labour and parts line, the job description and the work completed write-up.
Step 3 - Check the PDF History tab
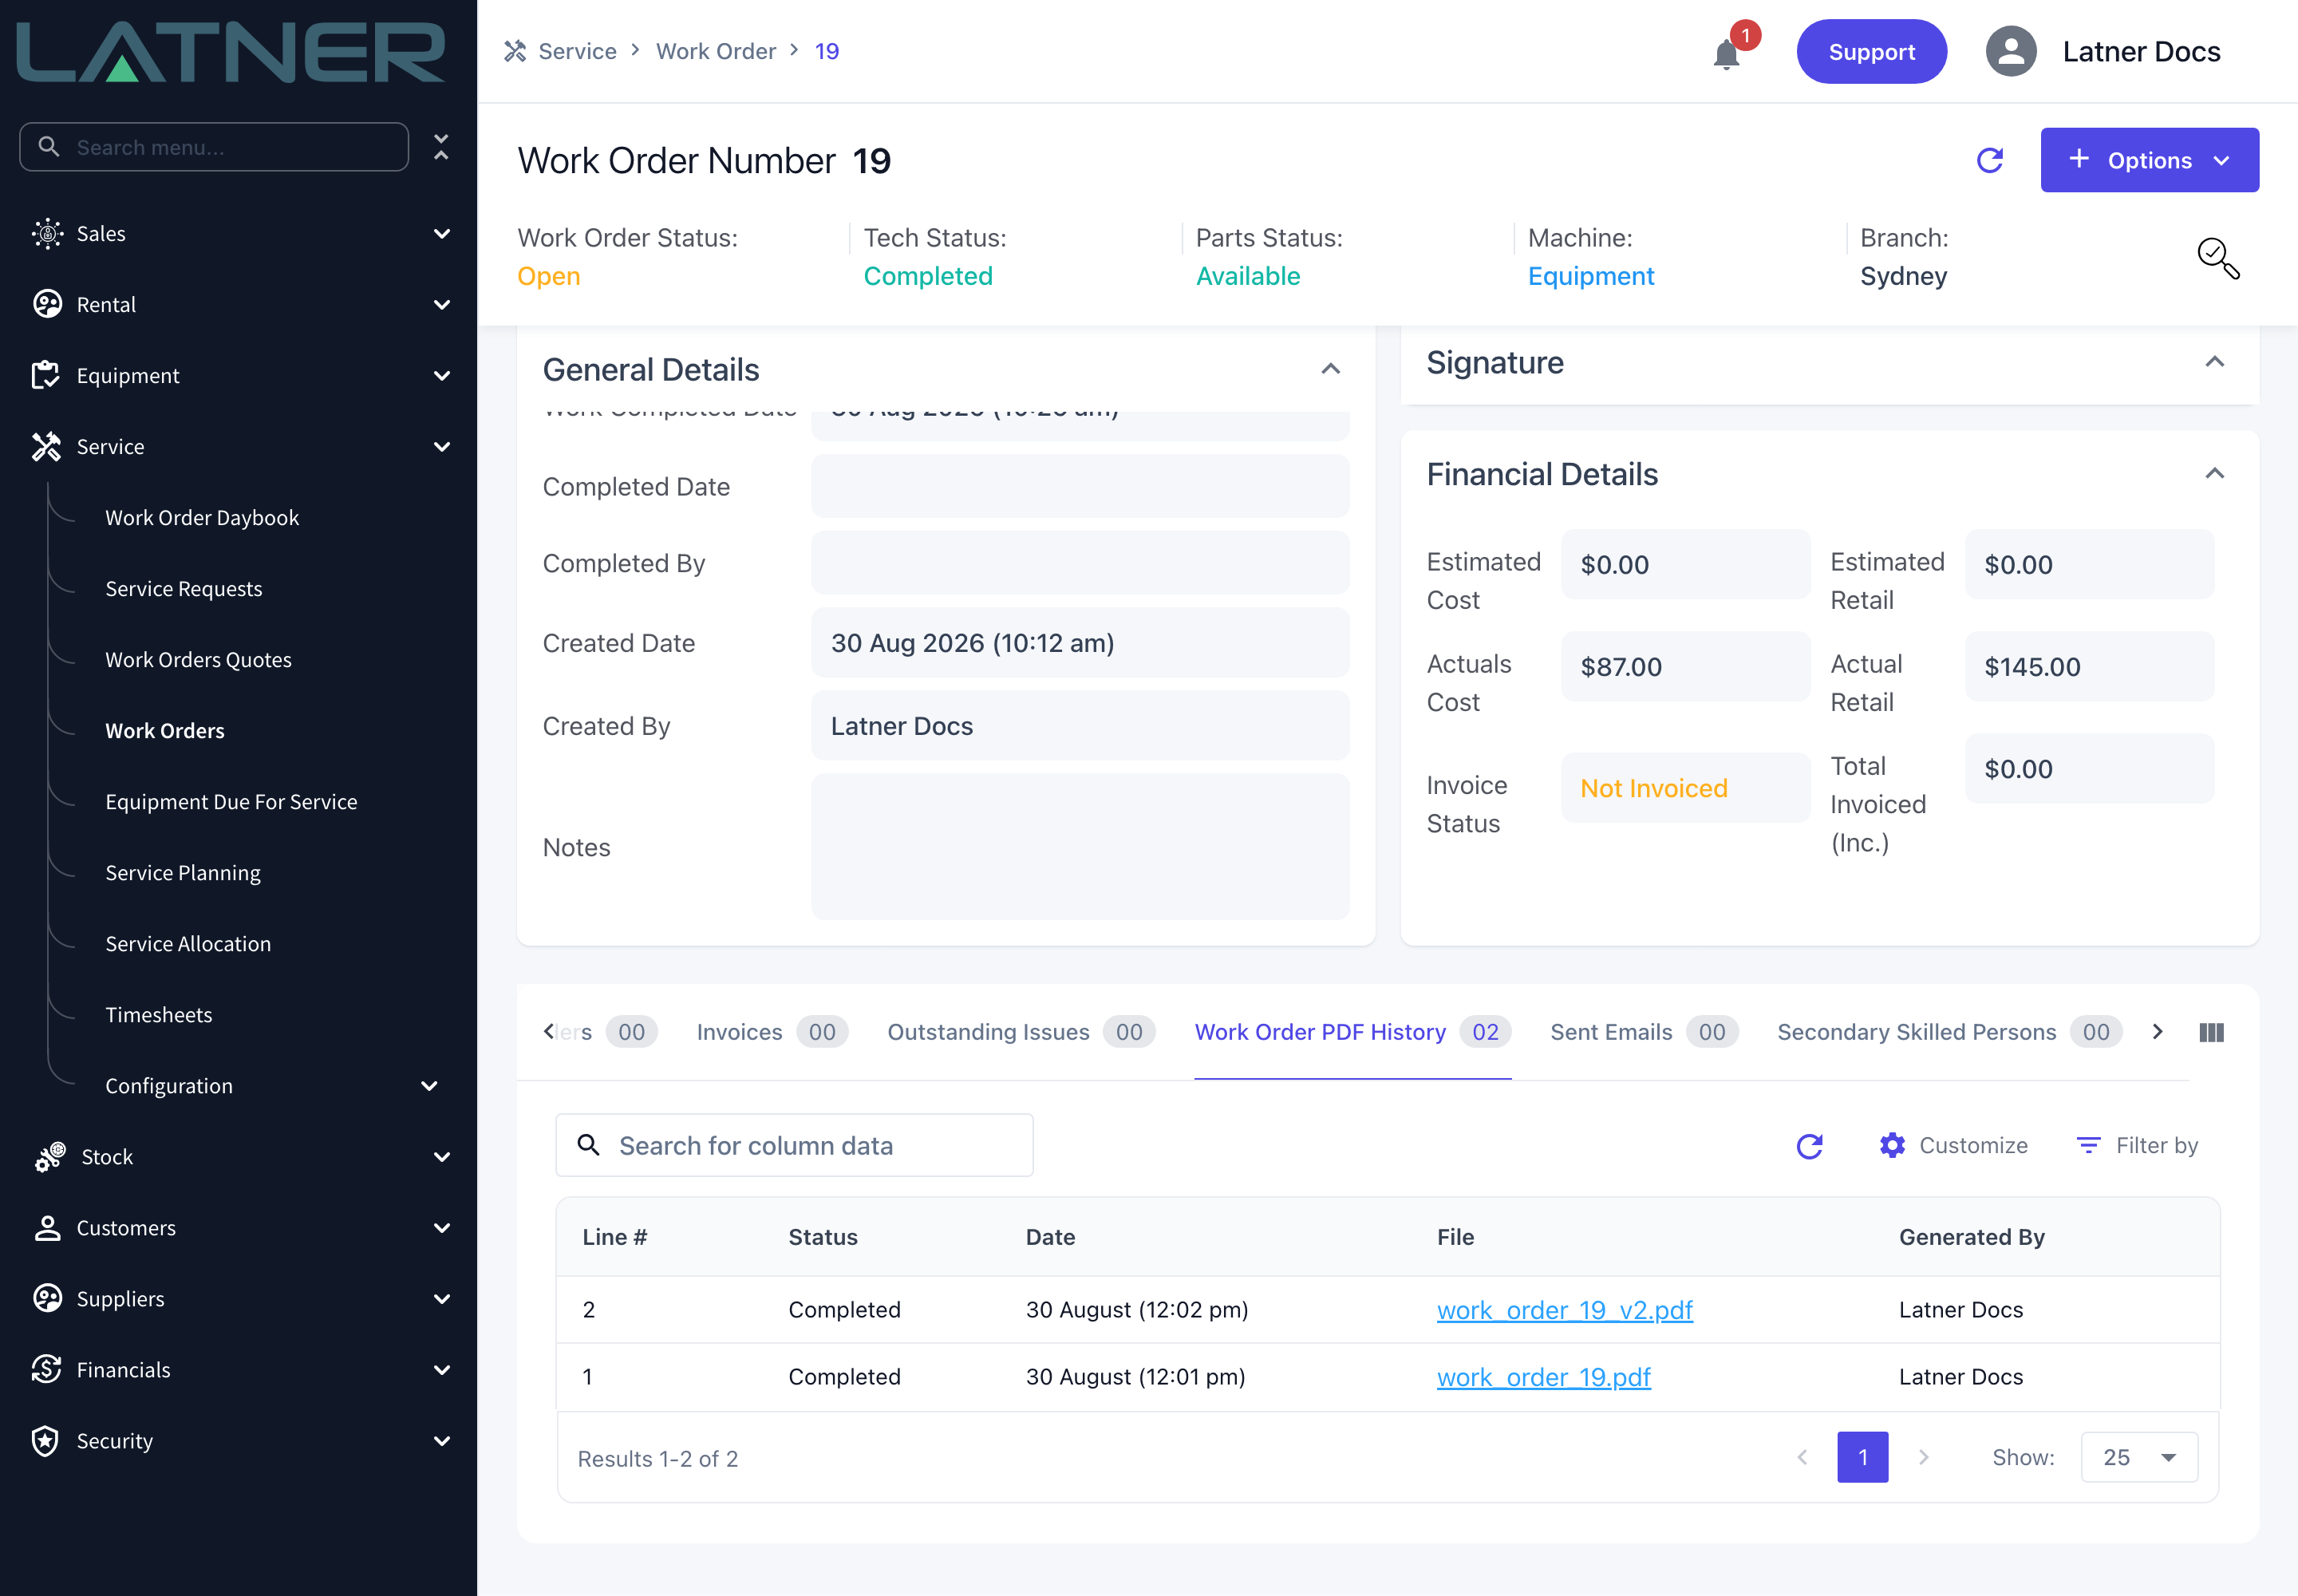
Scroll down to the Work Order PDF History tab. Every PDF you have generated for this work order is listed there with its line number, status, the date and who generated it, and the file name is a link you can reopen at any time.
Generating again doesn't overwrite anything. The new PDF is added as the next line number, and its file name picks up a version suffix so you can tell the two apart.
Emailing the Work Order to the Customer
Step 4 - Open the email form
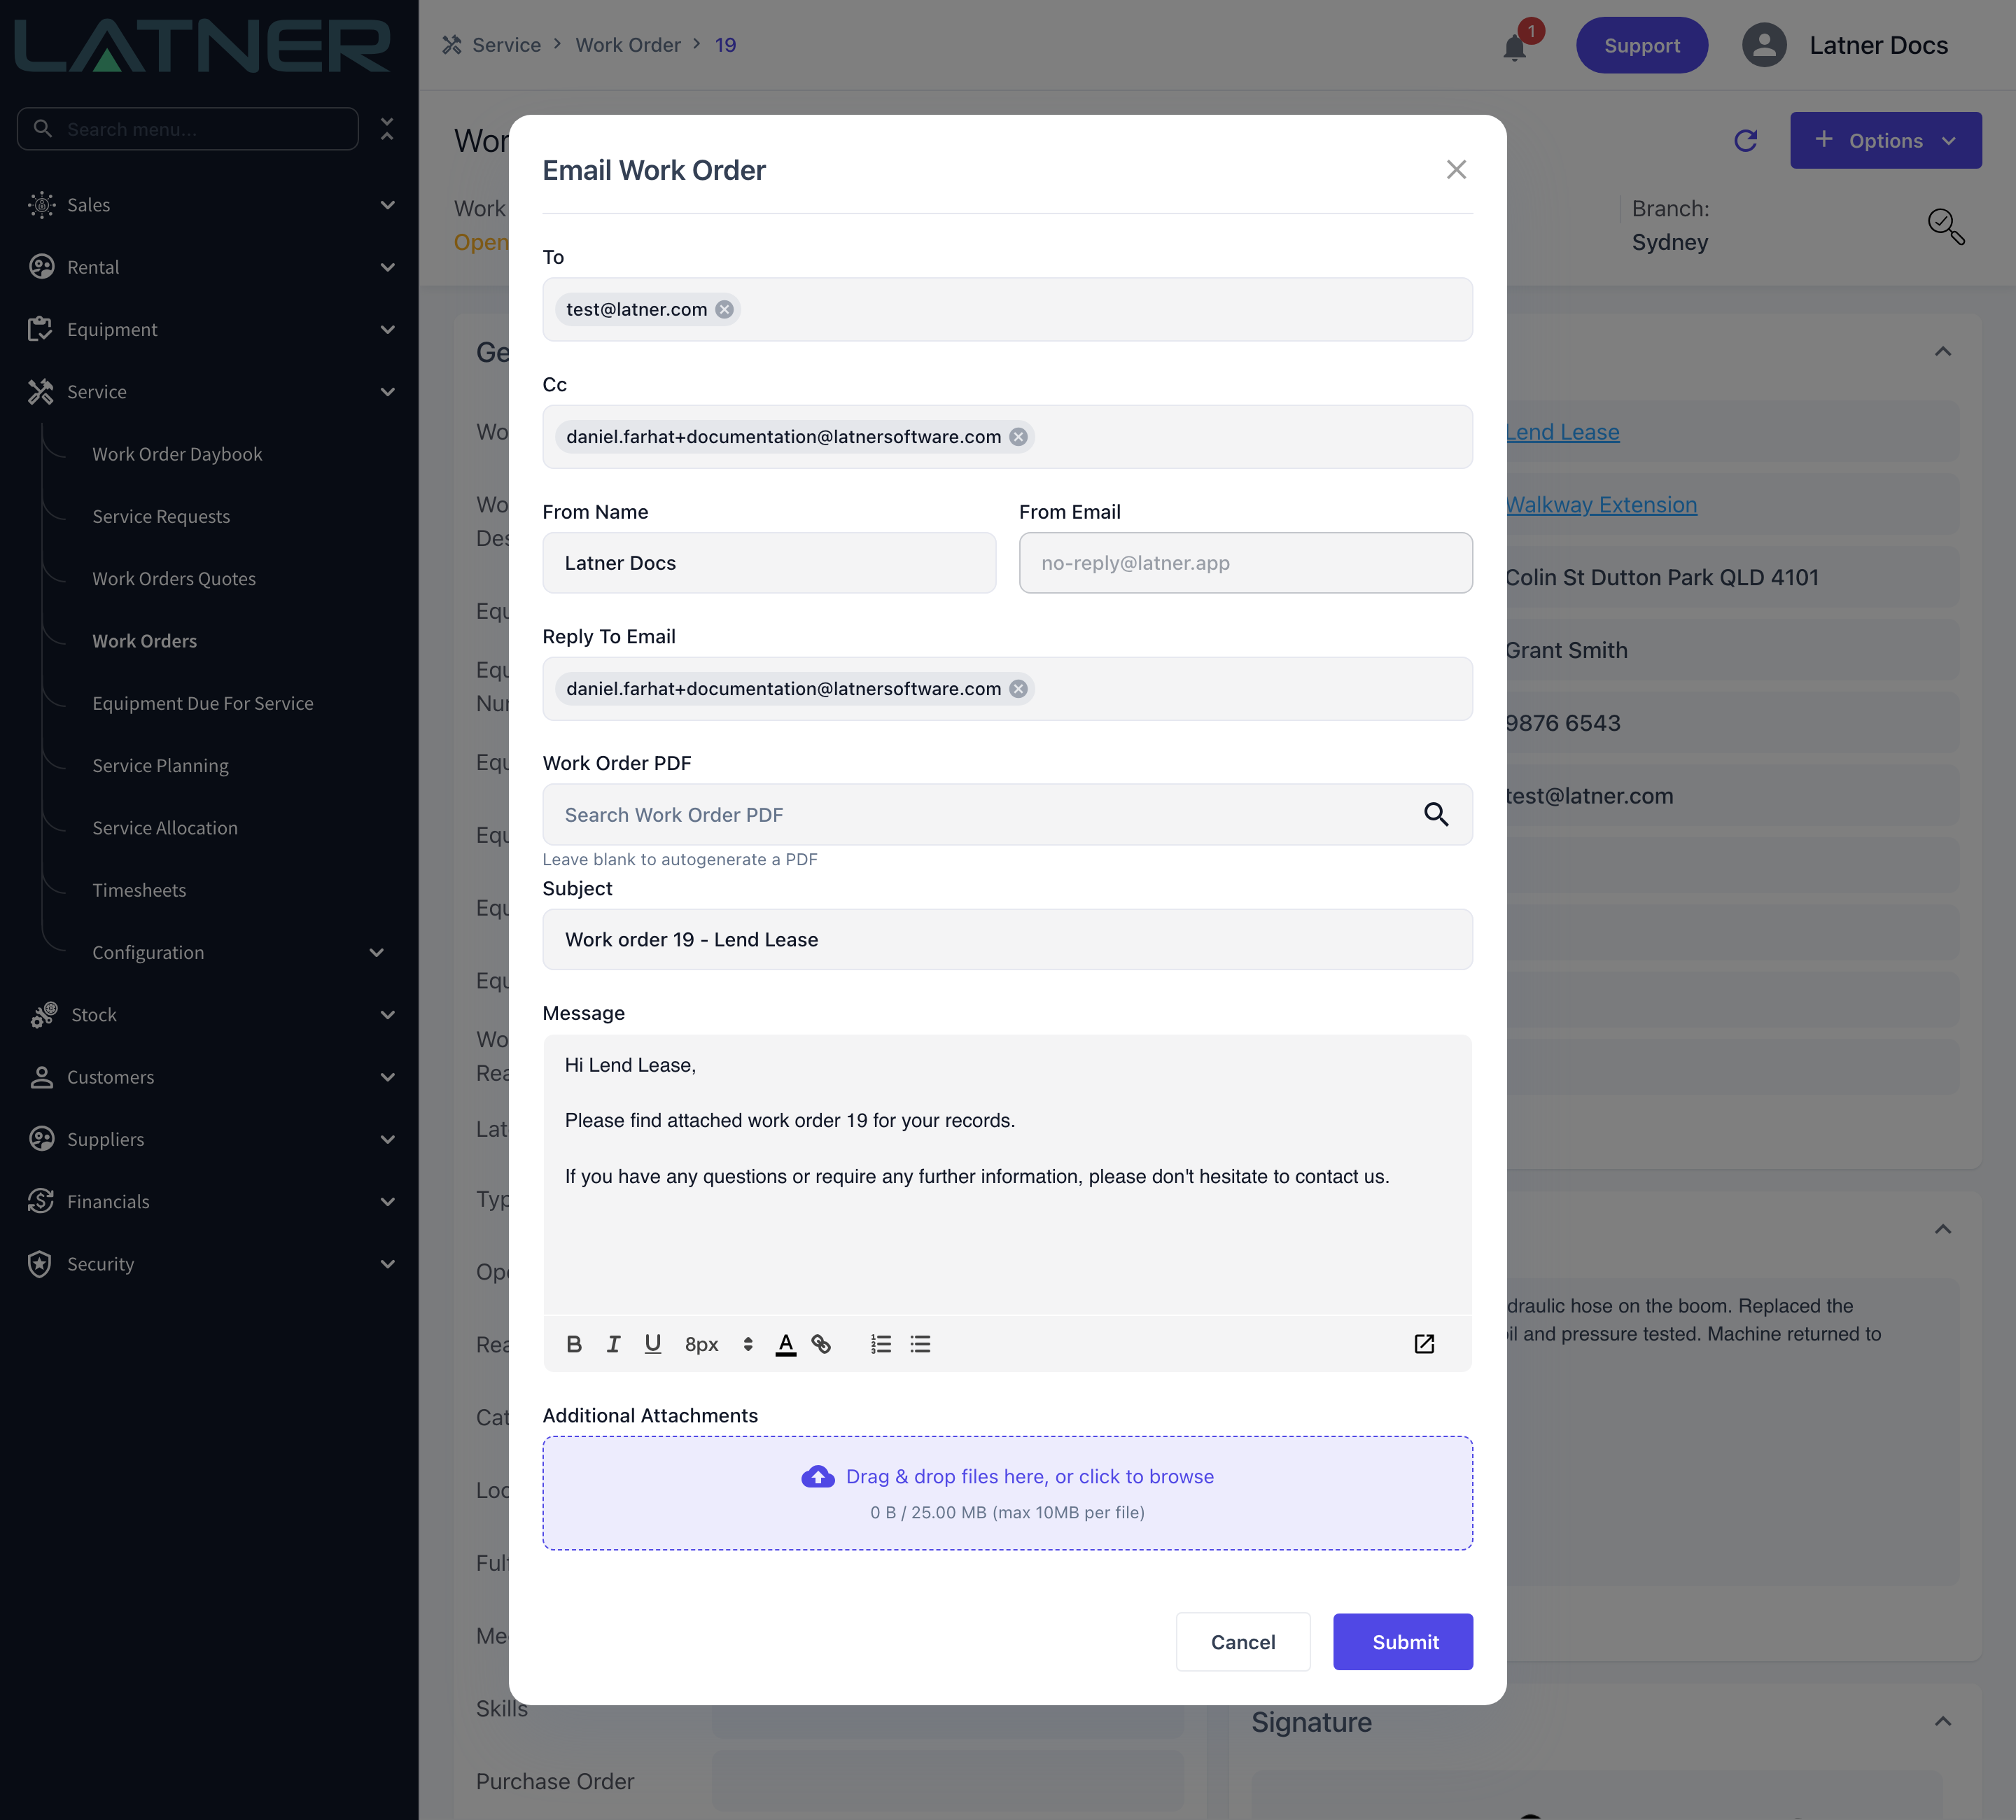
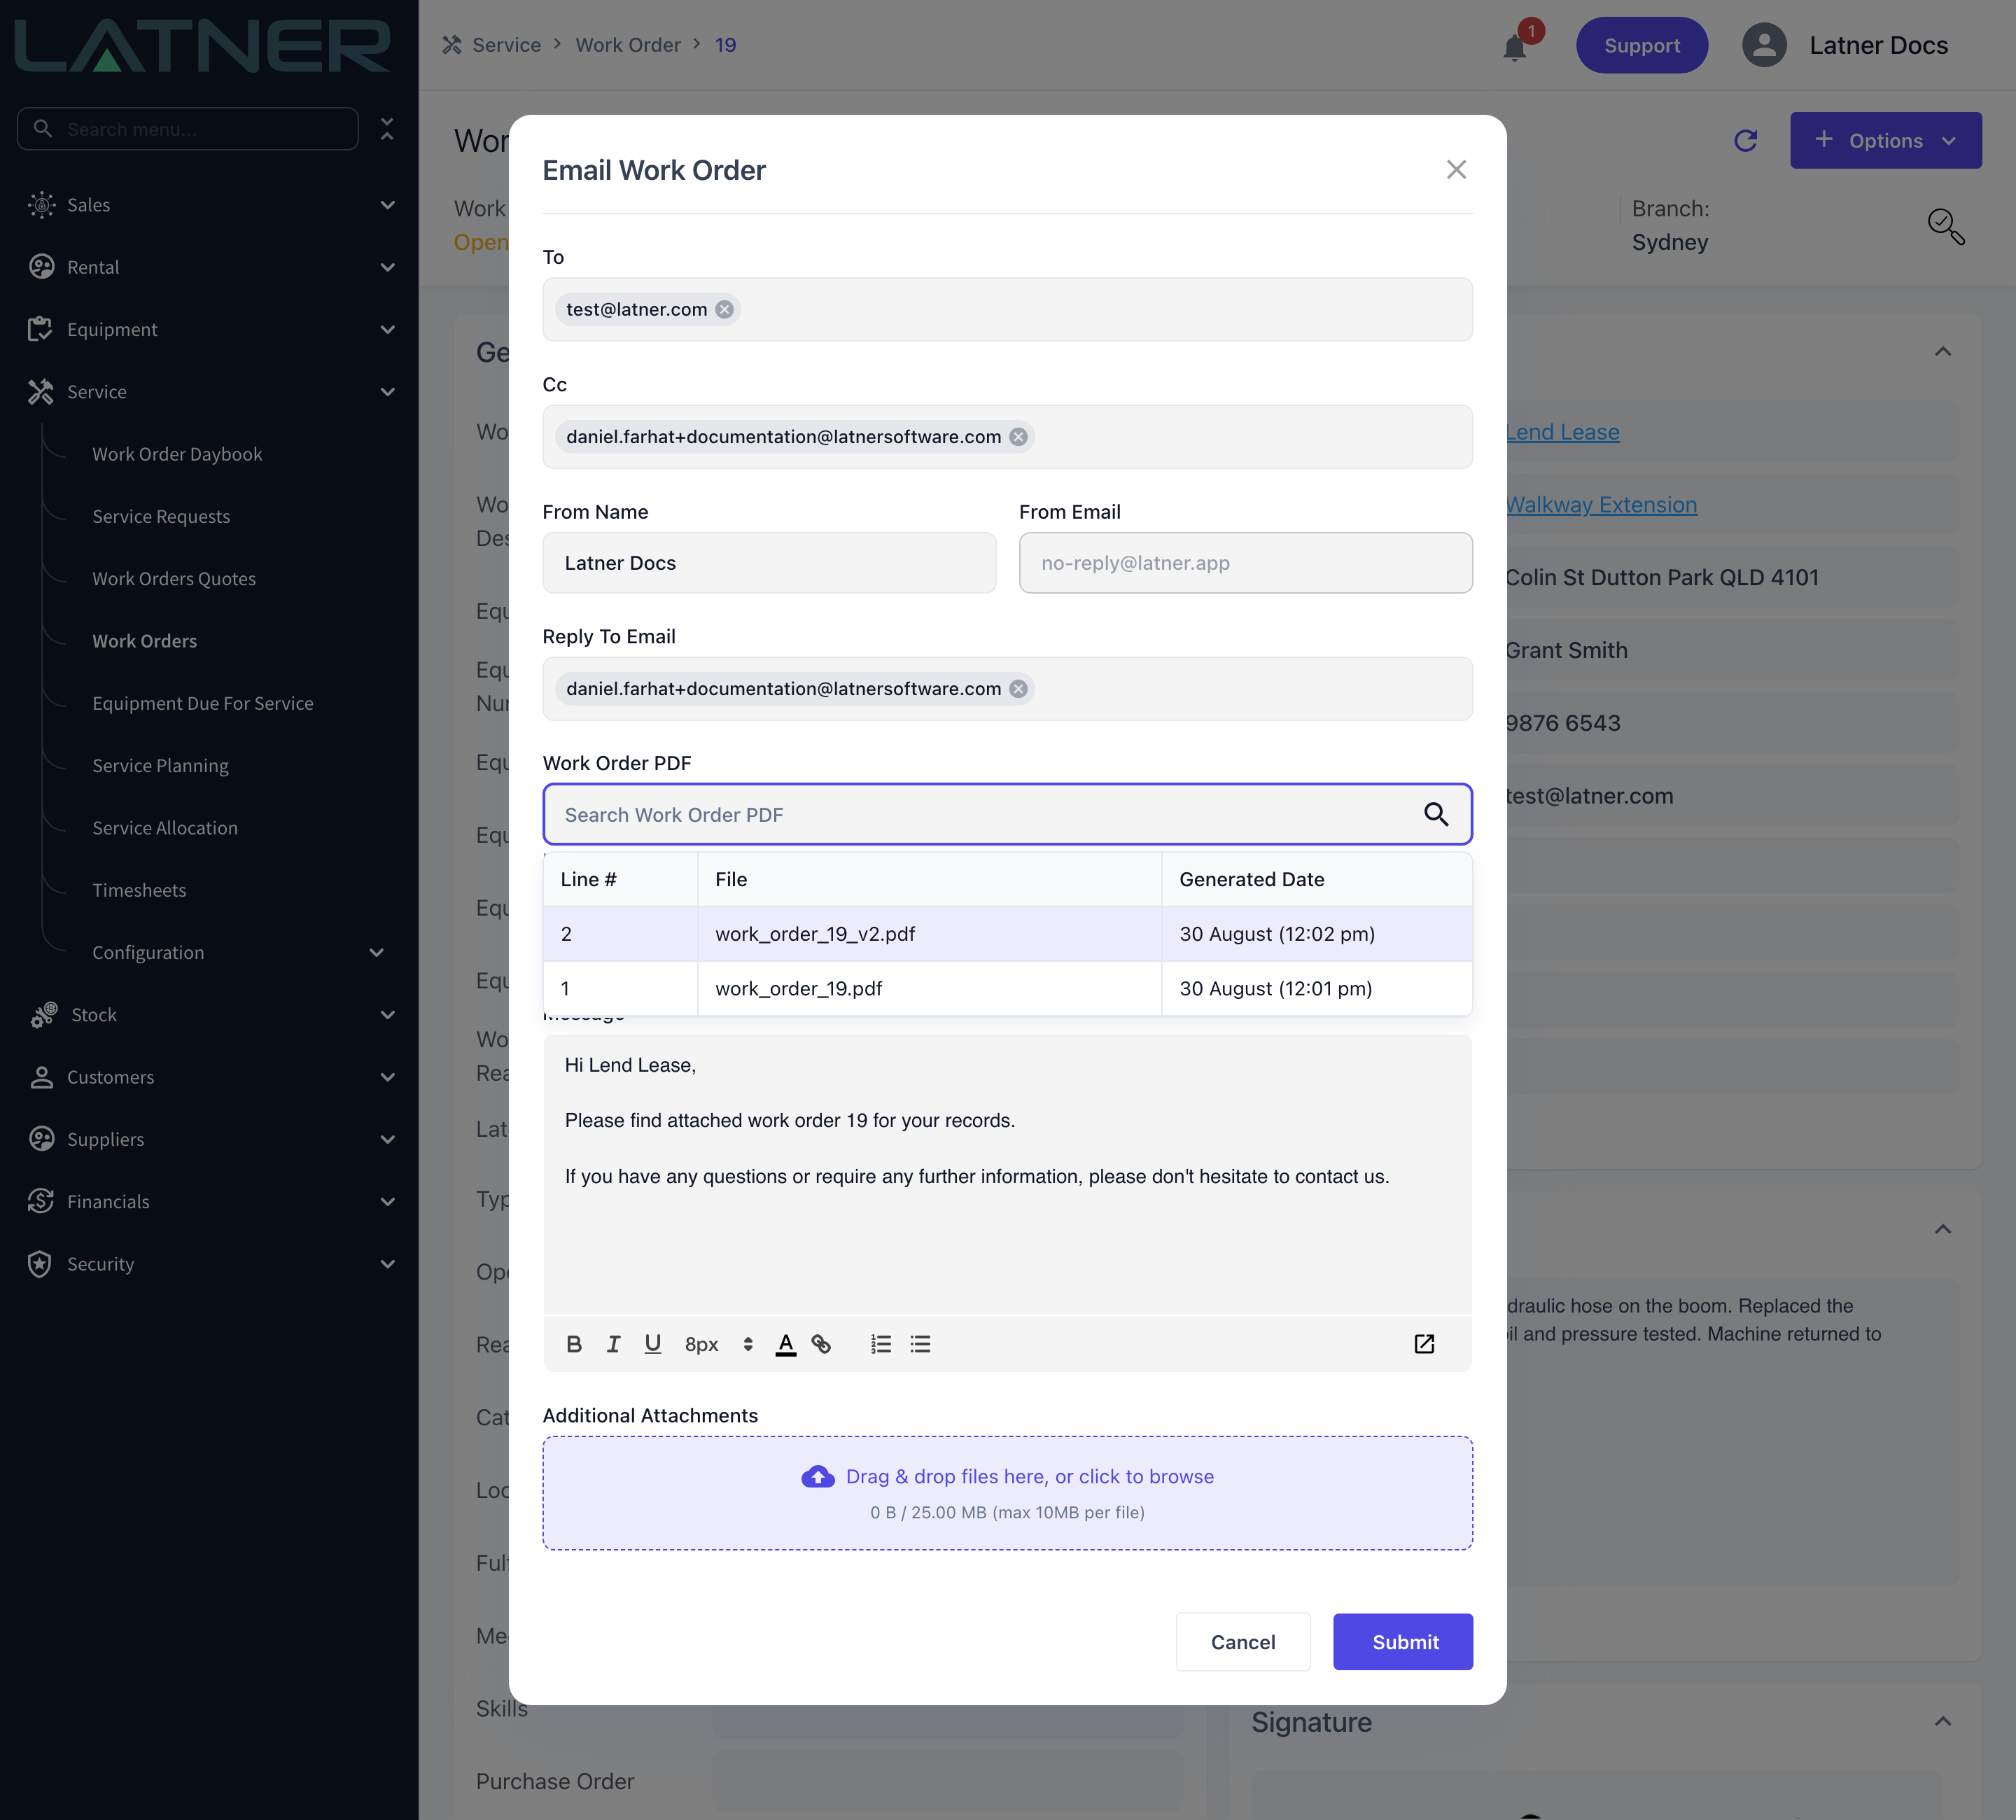
Select Options › Email Work Order PDF. The Email Work Order form opens with most of the work already done for you.
-
To - prefilled with the work order's customer contact. Start typing to search the customer's other contacts, or type any address and press Enter. At least one address is required.
-
Cc - prefilled from the Work Order Email - From Email setting, or your own email address if that setting is blank. You can also search your Latner users here.
-
From Name - prefilled from the Work Order Email - From Name setting, or your own name if that setting is blank.
-
From Email - read-only. It shows your SendGrid Sender Email if you have authenticated your own domain, and no-reply@latner.app otherwise.
-
Reply To Email - defaults the same way as Cc, and is where the customer's reply actually lands. Required.
-
Work Order PDF - which saved PDF to attach. Leave it blank and Latner generates a new one.
-
Subject and Message - filled in from your Email settings with the work order number and customer name already substituted. Both are required and both can be edited before you send.
-
Additional Attachments - drag in anything else the customer needs, up to 10MB per file and 25MB in total.
Step 5 - Choose which PDF to attach
Click Work Order PDF to pick one of the PDFs you generated earlier. The list shows the line number, the file name and when it was generated, so you can send the exact version the customer has already discussed with you.
If you skip this field entirely, Latner generates a brand new PDF from the current state of the work order and attaches that - which is usually what you want.
Step 6 - Send it
Click Submit. If you chose an existing PDF, the email goes out immediately. If you left the field blank, Latner shows Sending Email while it generates the PDF and sends it in the background, so you can carry on working.
After Sending
-
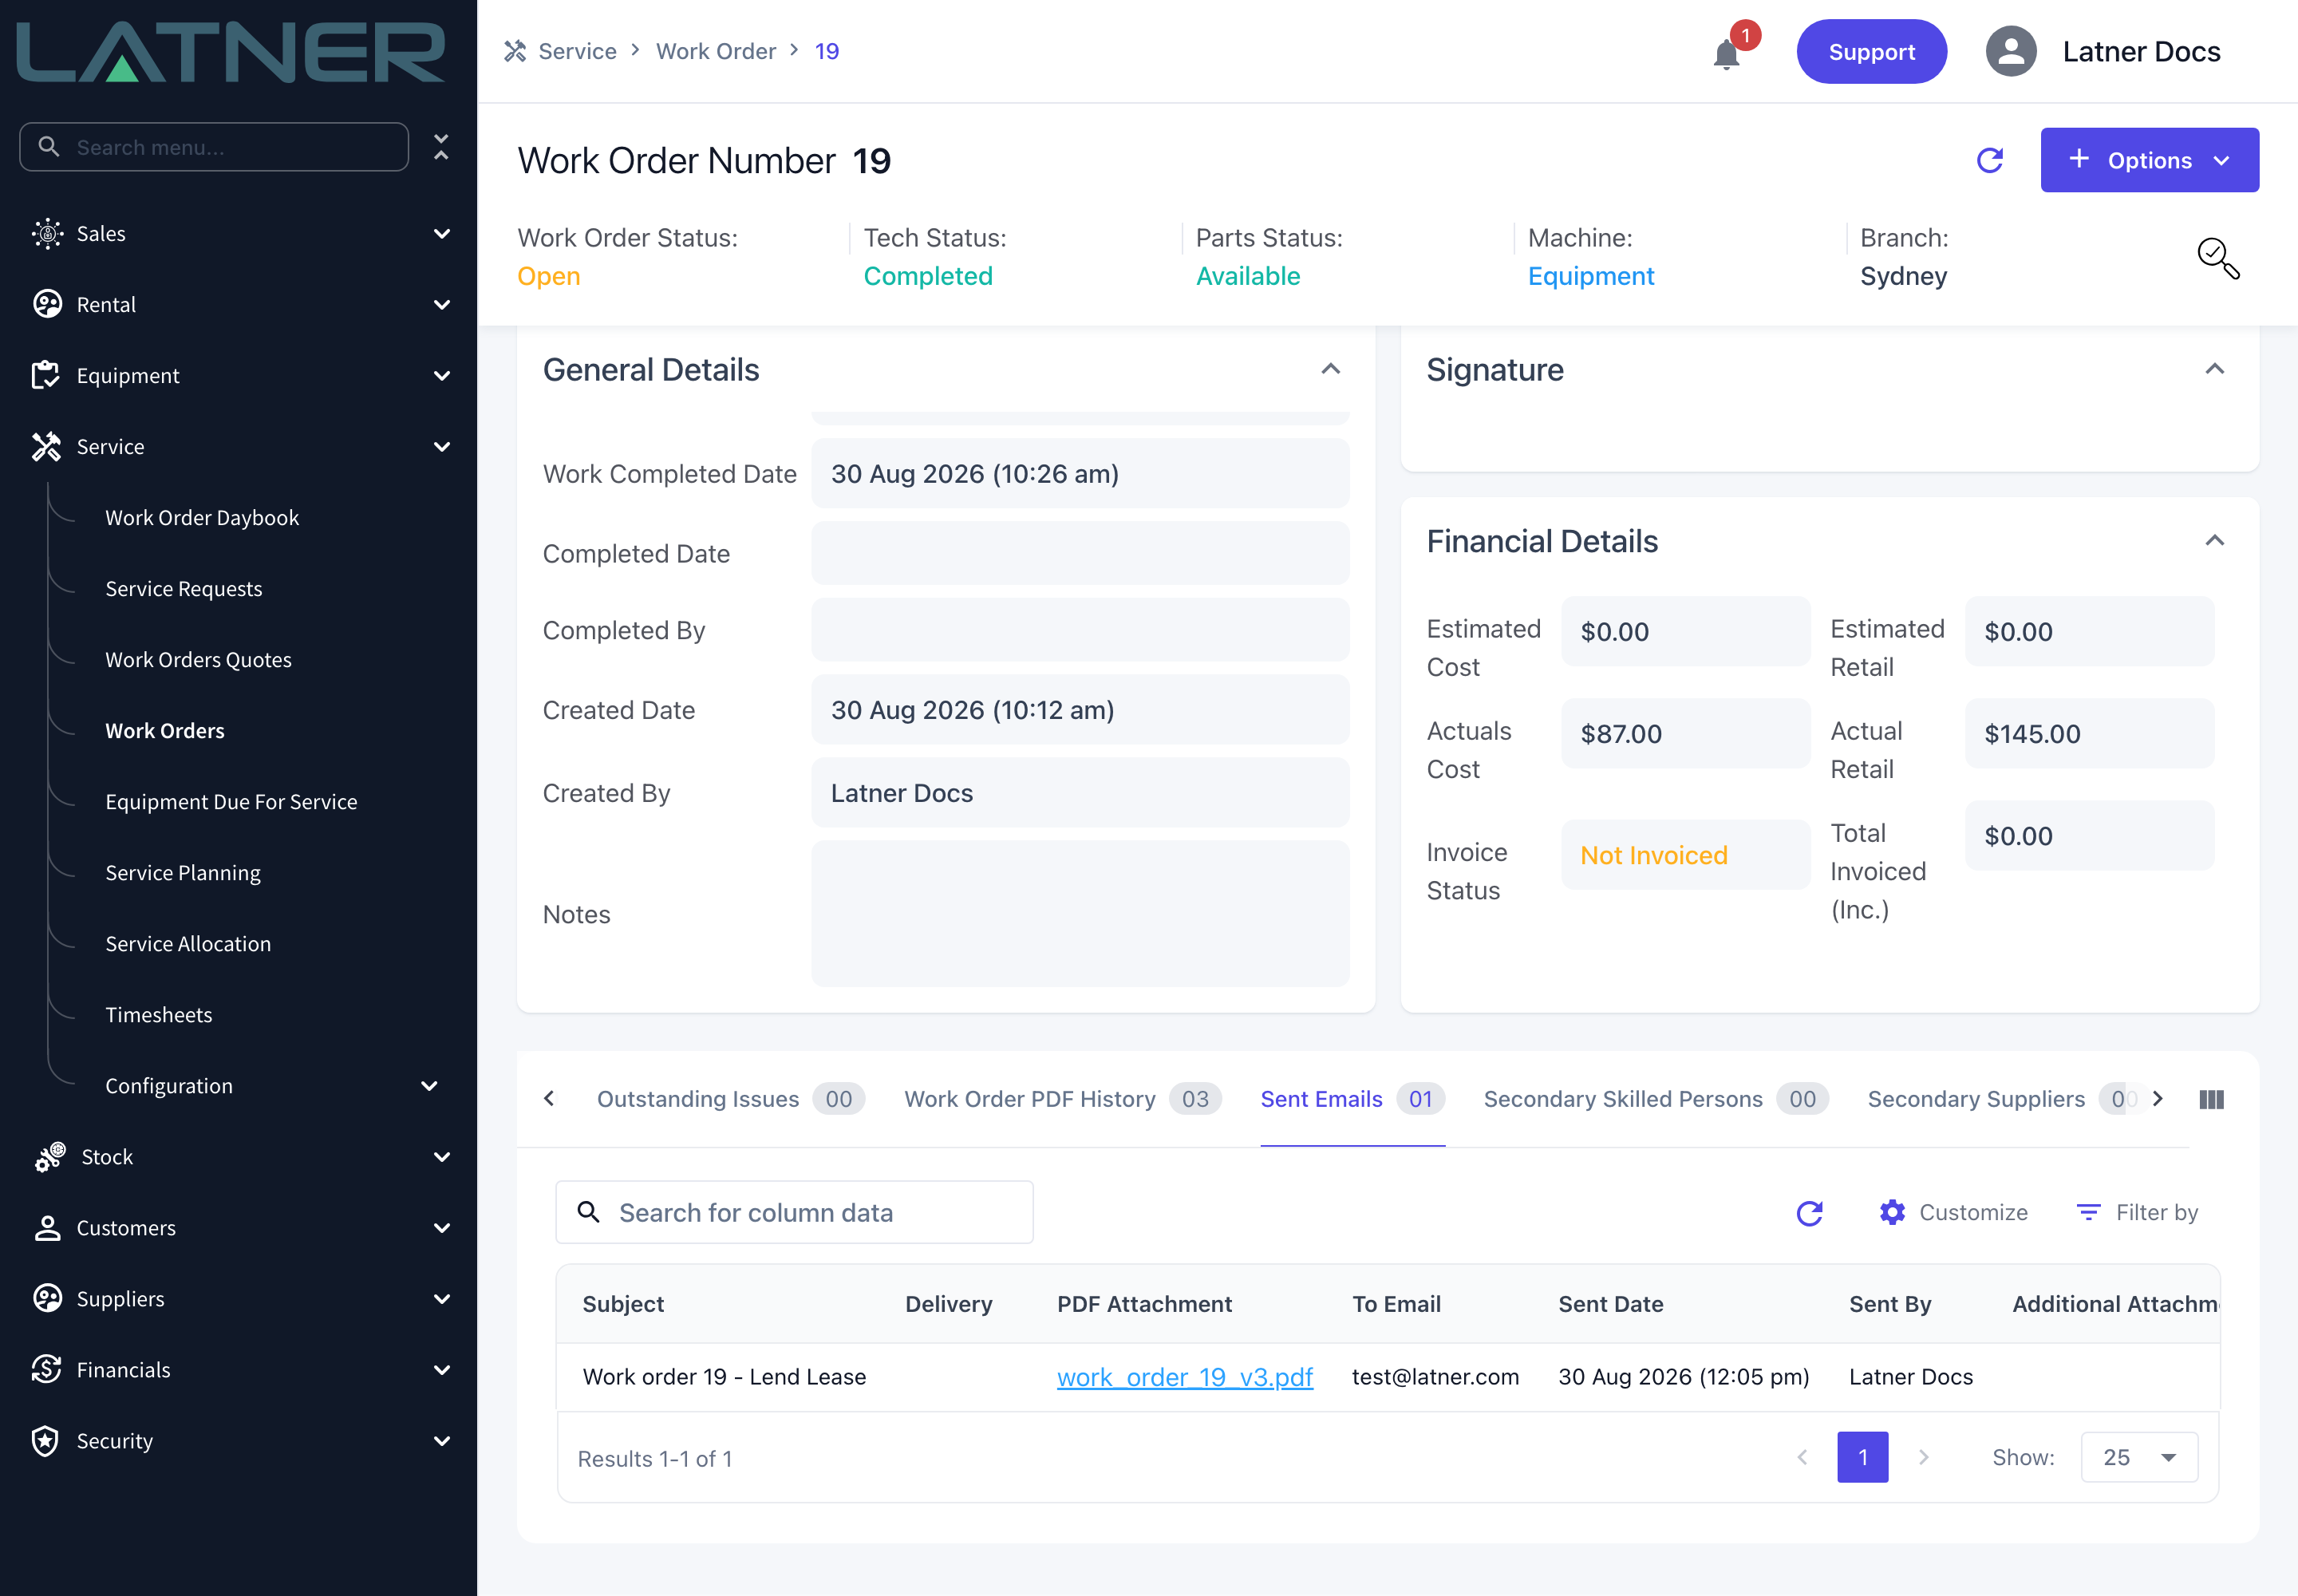
The email is recorded on the work order's Sent Emails tab with its subject, the PDF that was attached, the recipient, the date and who sent it.
-
The Delivery column starts empty and fills in as the mail provider reports back - Processing, Delivered, Bounced and so on. Hover over it for the detail and the timestamp.
-
If you let Latner generate the attachment, that new PDF also appears on the Work Order PDF History tab, so the emailed version is on file alongside the rest.
-
The attachment name on both tabs is a link, so you can open exactly what the customer received.
A sent email can't be recalled or edited from Latner, and cancelling the work order afterwards doesn't retract it. If you spot a mistake, correct the work order, generate a new PDF and send it again - the second email is recorded as its own line on the Sent Emails tab, so the history stays honest.
FAQs
Watch the Demo
Prefer to watch it? Step through the same flow here.