
The Equipment Due for Service screen lists every machine whose next service is coming up or already overdue, so you can raise the work orders for a whole branch's worth of servicing in one action instead of one machine at a time.
Overview
Servicing is the part of the fleet that quietly falls behind. Every serialized machine that carries a service schedule generates a schedule line that falls due on a date, at a meter reading, or both, and this screen is where those lines wait until somebody turns them into work.
-
The screen only lists schedules that are still waiting for a work order. As soon as you raise one, the line disappears from the list.
-
Equipment that is Inactive, Sold, Disposed, Converted or Pending Activation is left out, so retired machines never clutter the list.
-
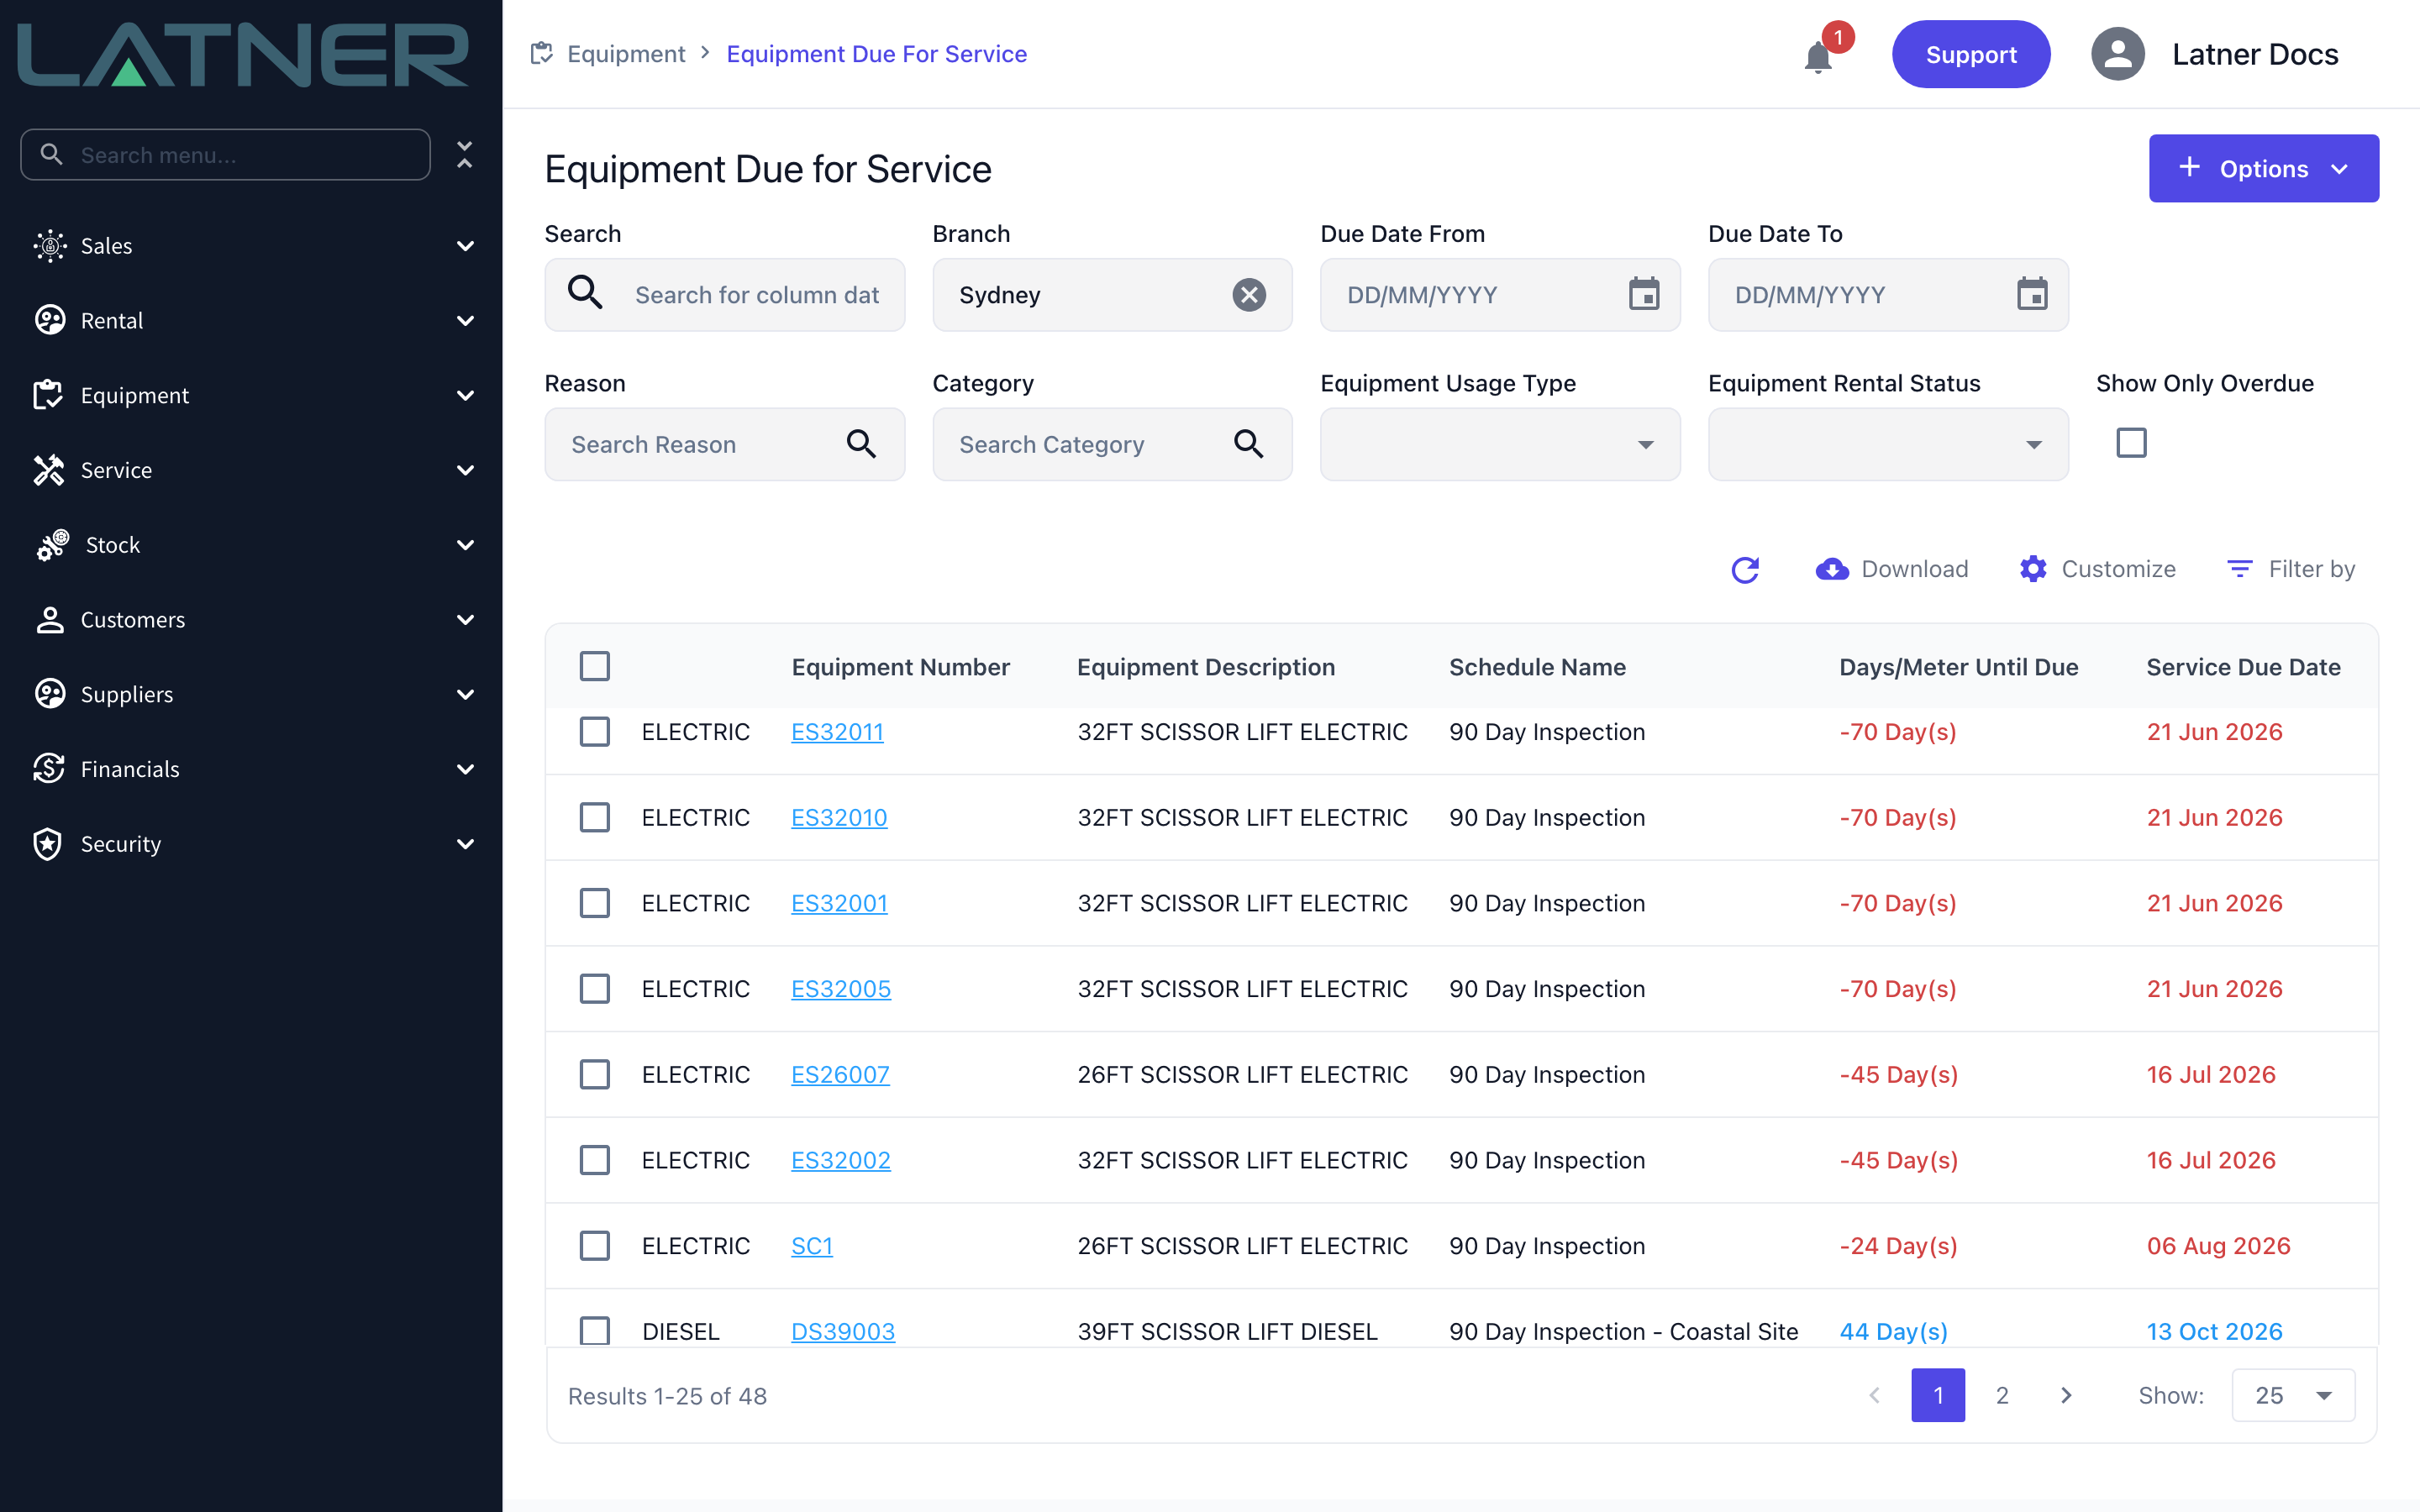
Rows are sorted by how urgent the service is, most overdue first, and the Days/Meter Until Due column is colour coded: red once the service is late, amber when it is close (within seven days for a date-based service), and blue for anything further out.
-
Where a schedule is driven by hours rather than a date, Latner forecasts the remaining days from the machine's average daily meter usage, so a date-based and an hours-based service can be ranked against each other.
-
You can tick as many rows as you like and raise a work order for each of them in a single step, optionally allocating them all to the same mechanic.
-
The same work order can also be raised from a mobile device, one machine at a time, so a mechanic already in front of the machine does not have to come back to a desk.
-
Each work order is created as an Internal work order, with its description, category and reason taken from the service schedule.
Before You Begin
Two permissions and a service schedule need to be in place.
|
Requirement |
Where to Find It |
|---|---|
|
Equipment Due For Service permission |
Security › Configuration › Permission Groups, under Service › Screen. Without it the menu item does not appear at all. |
|
Create Service Schedule Work Order permission |
Security › Configuration › Permission Groups, under Service › Option. This is a separate permission from the screen itself, so a user can be given read-only visibility of what is due. |
|
A service schedule on the equipment |
The Service Schedules tab of the equipment record, added through Options › Add Service Schedule on the equipment, model or class. Needs the Create Equipment Service Schedule permission. |
|
Serialized equipment |
Service schedules can only be added to serialized equipment, so bulk equipment never appears on this screen. |
|
A skilled person, if you want to allocate |
Service › Configuration › Skilled Persons. Allocating a mechanic is optional, so this is only needed if you want the work orders to come out already assigned. |
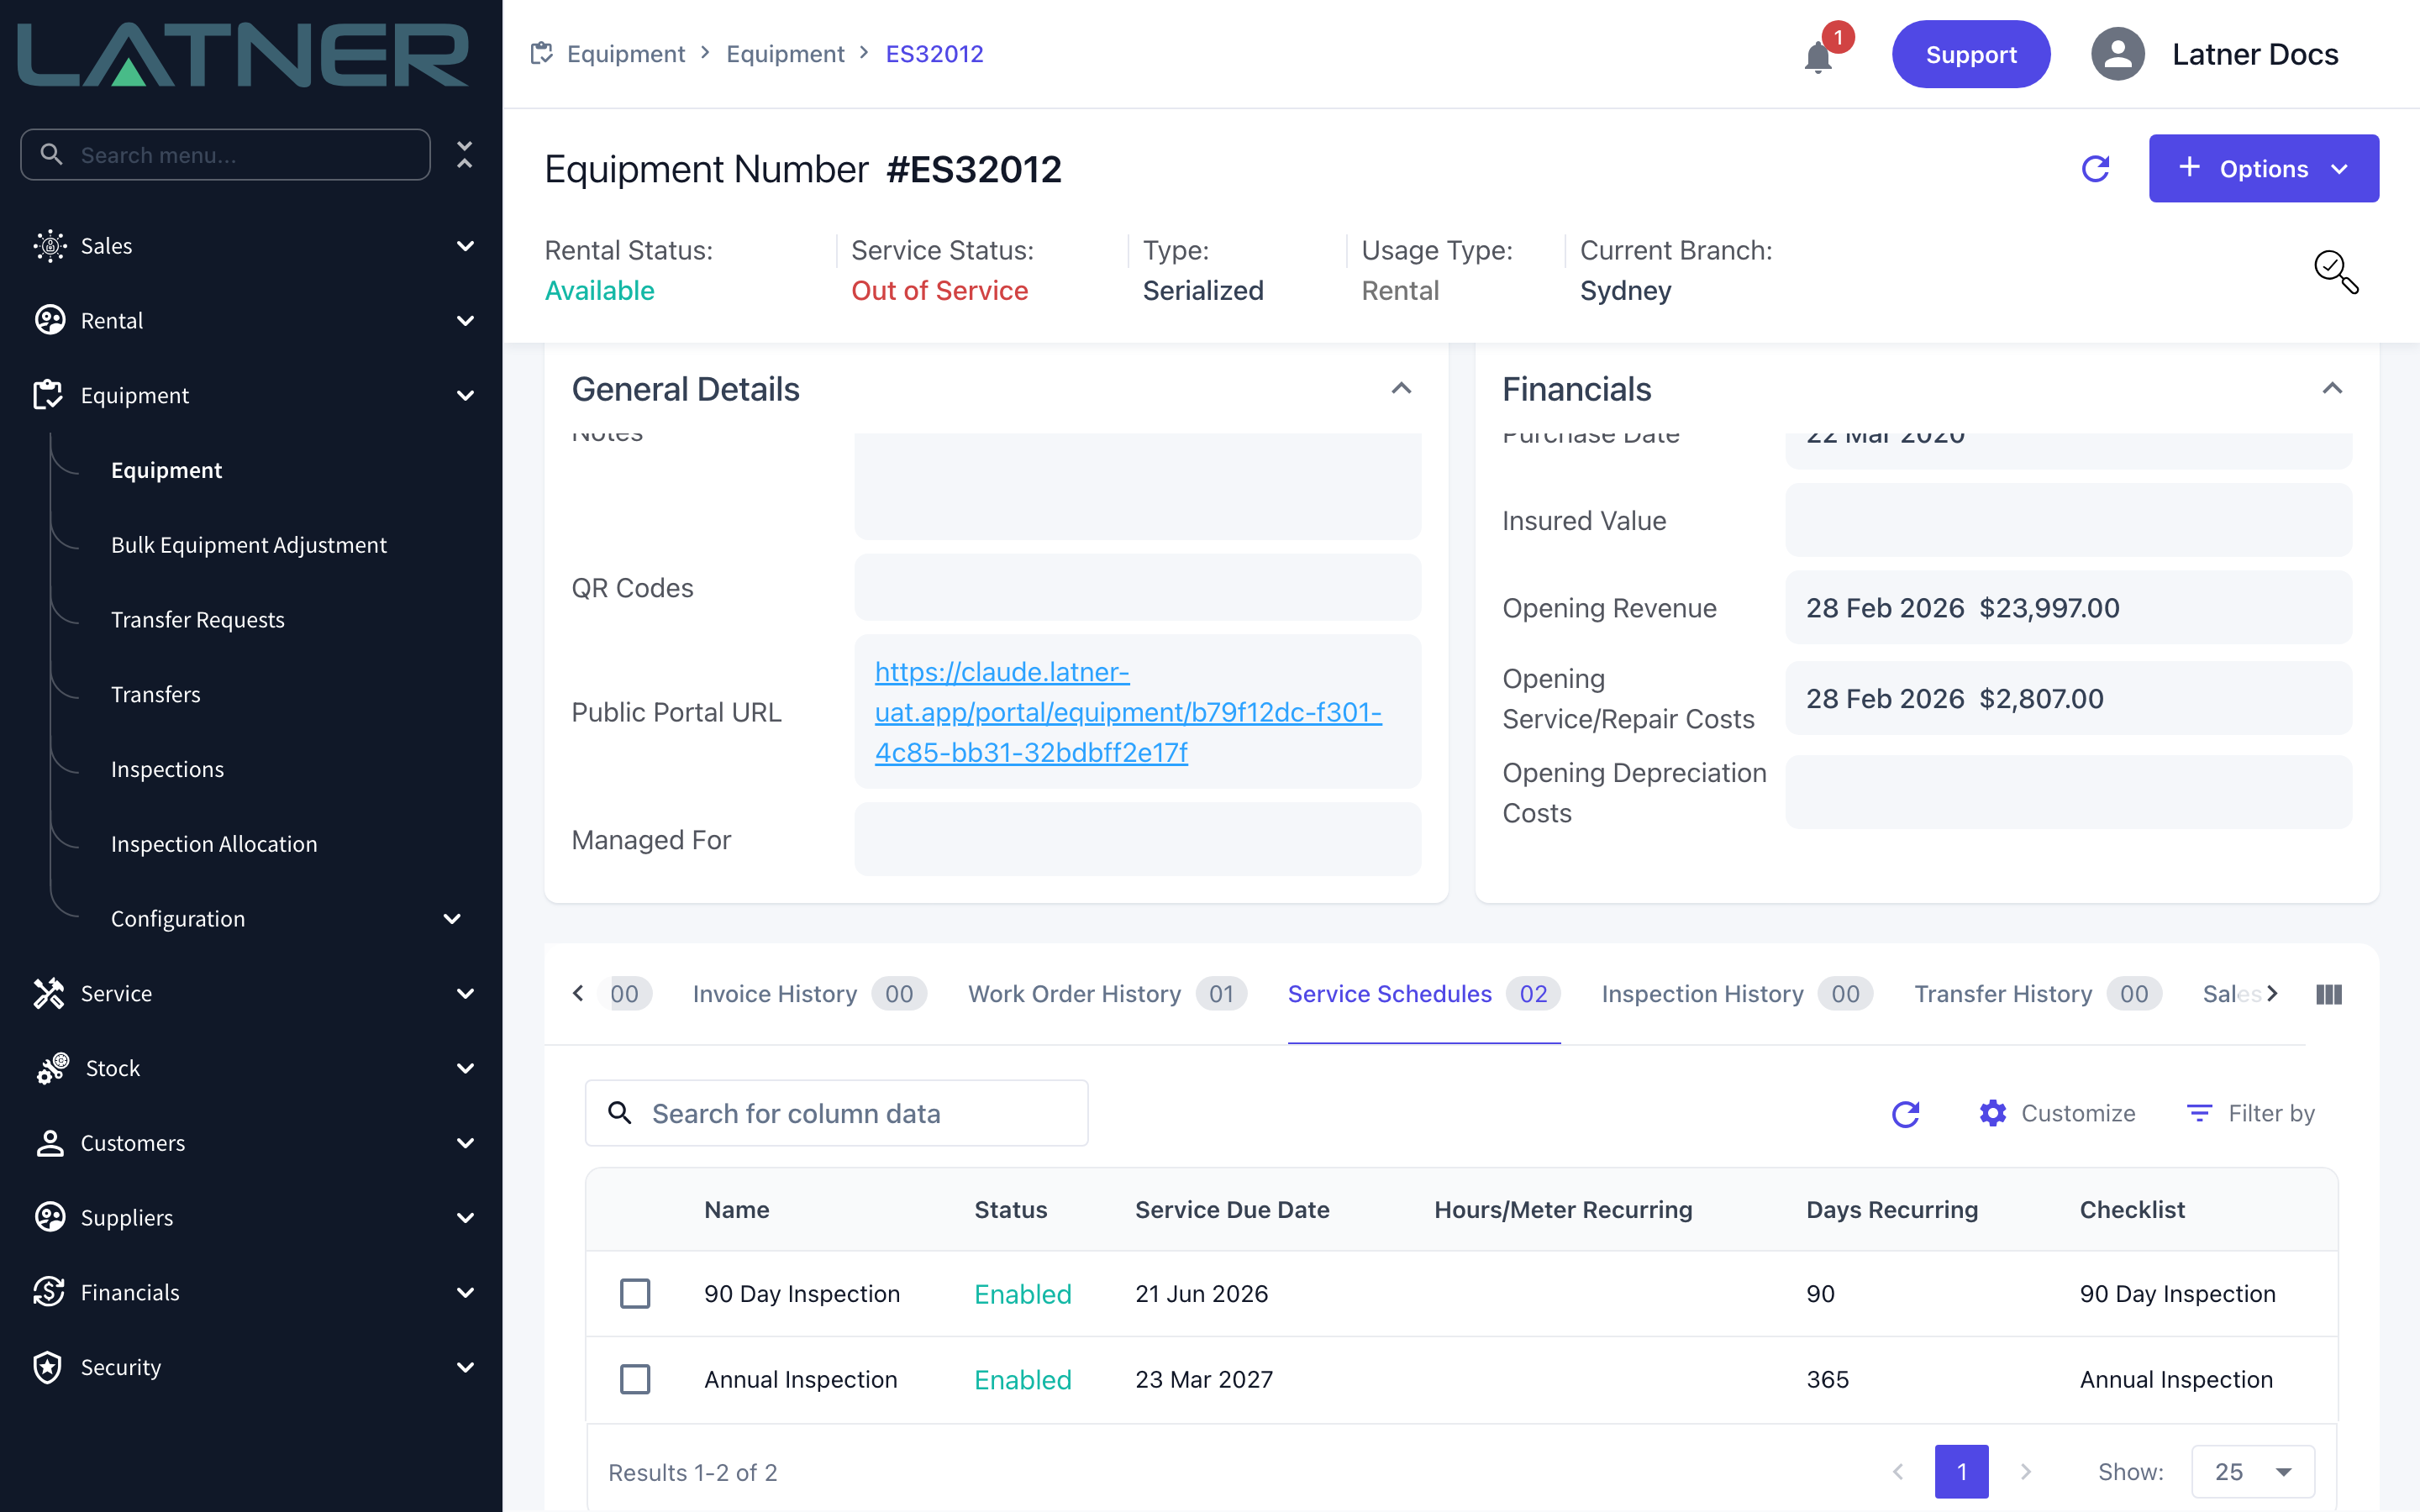
A schedule added against an equipment class or model creates a schedule line for every serialized machine in that class or model, so one schedule can put a whole fleet on this screen at once.
Creating the Work Orders
Step 1 - Open the Equipment Due for Service screen
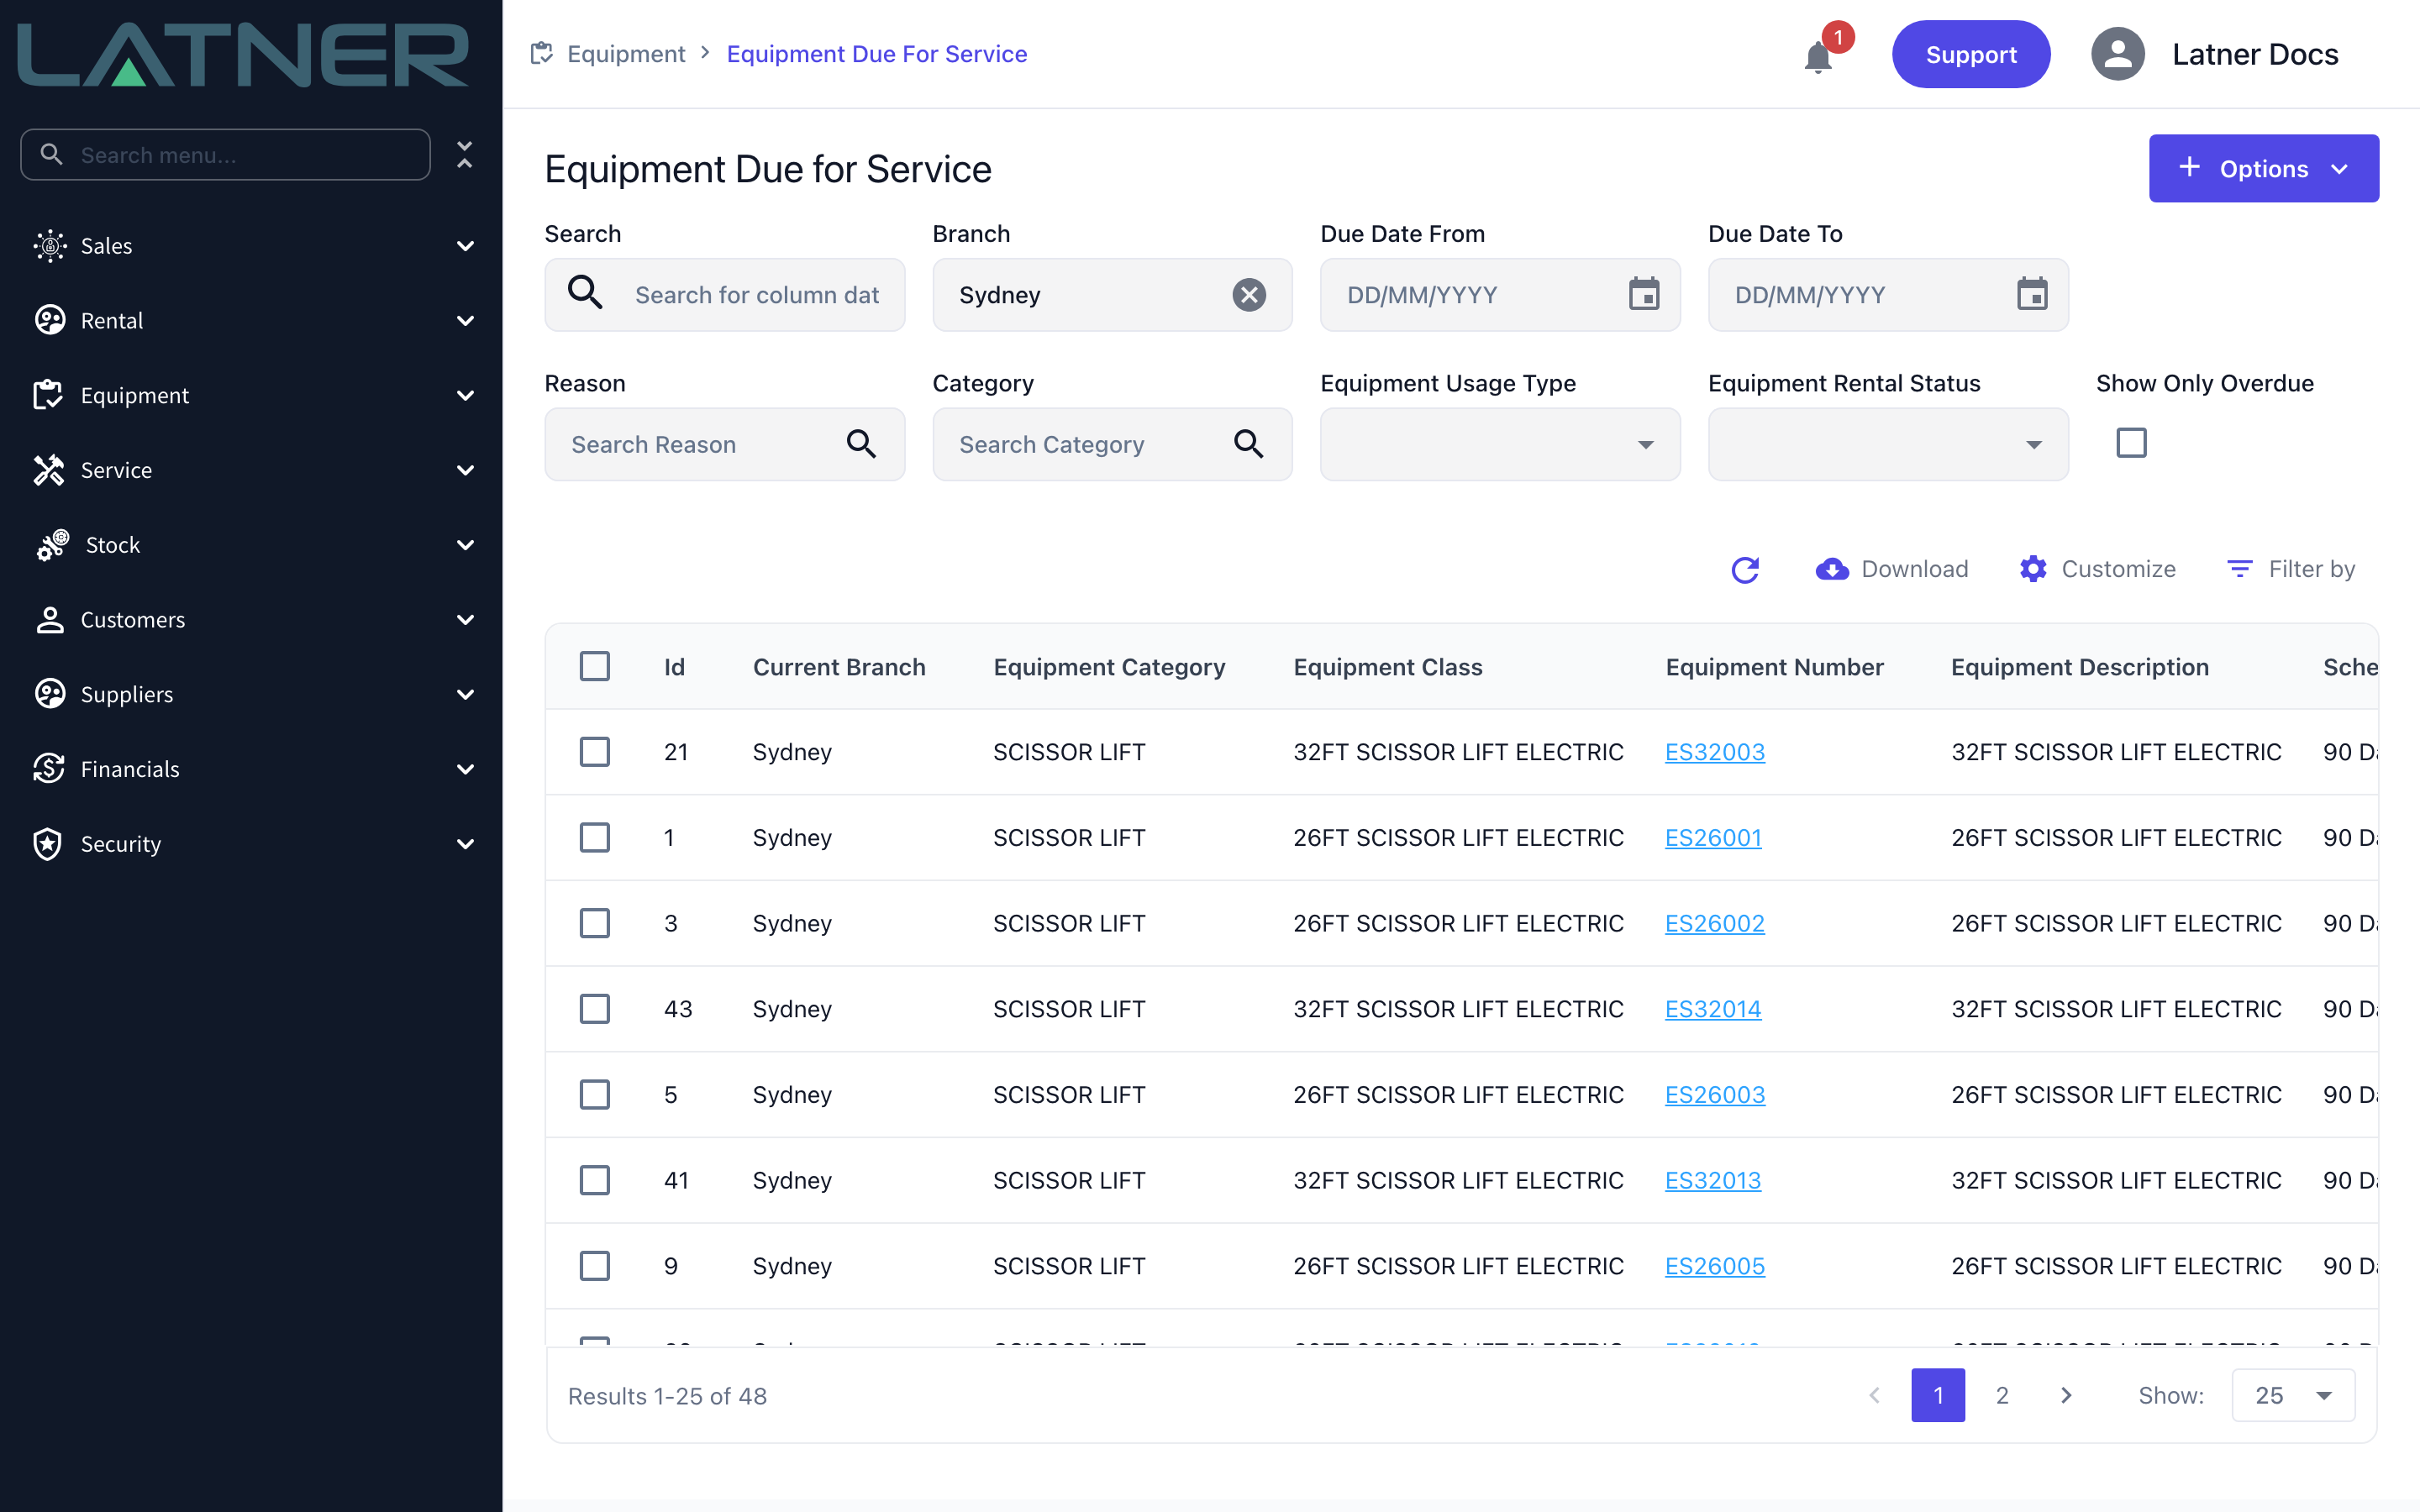
Go to Service › Equipment Due For Service. The list opens filtered to your own branch and shows every schedule still waiting for a work order, whether it is overdue or simply coming up.
Step 2 - Narrow the list to the work you want to raise
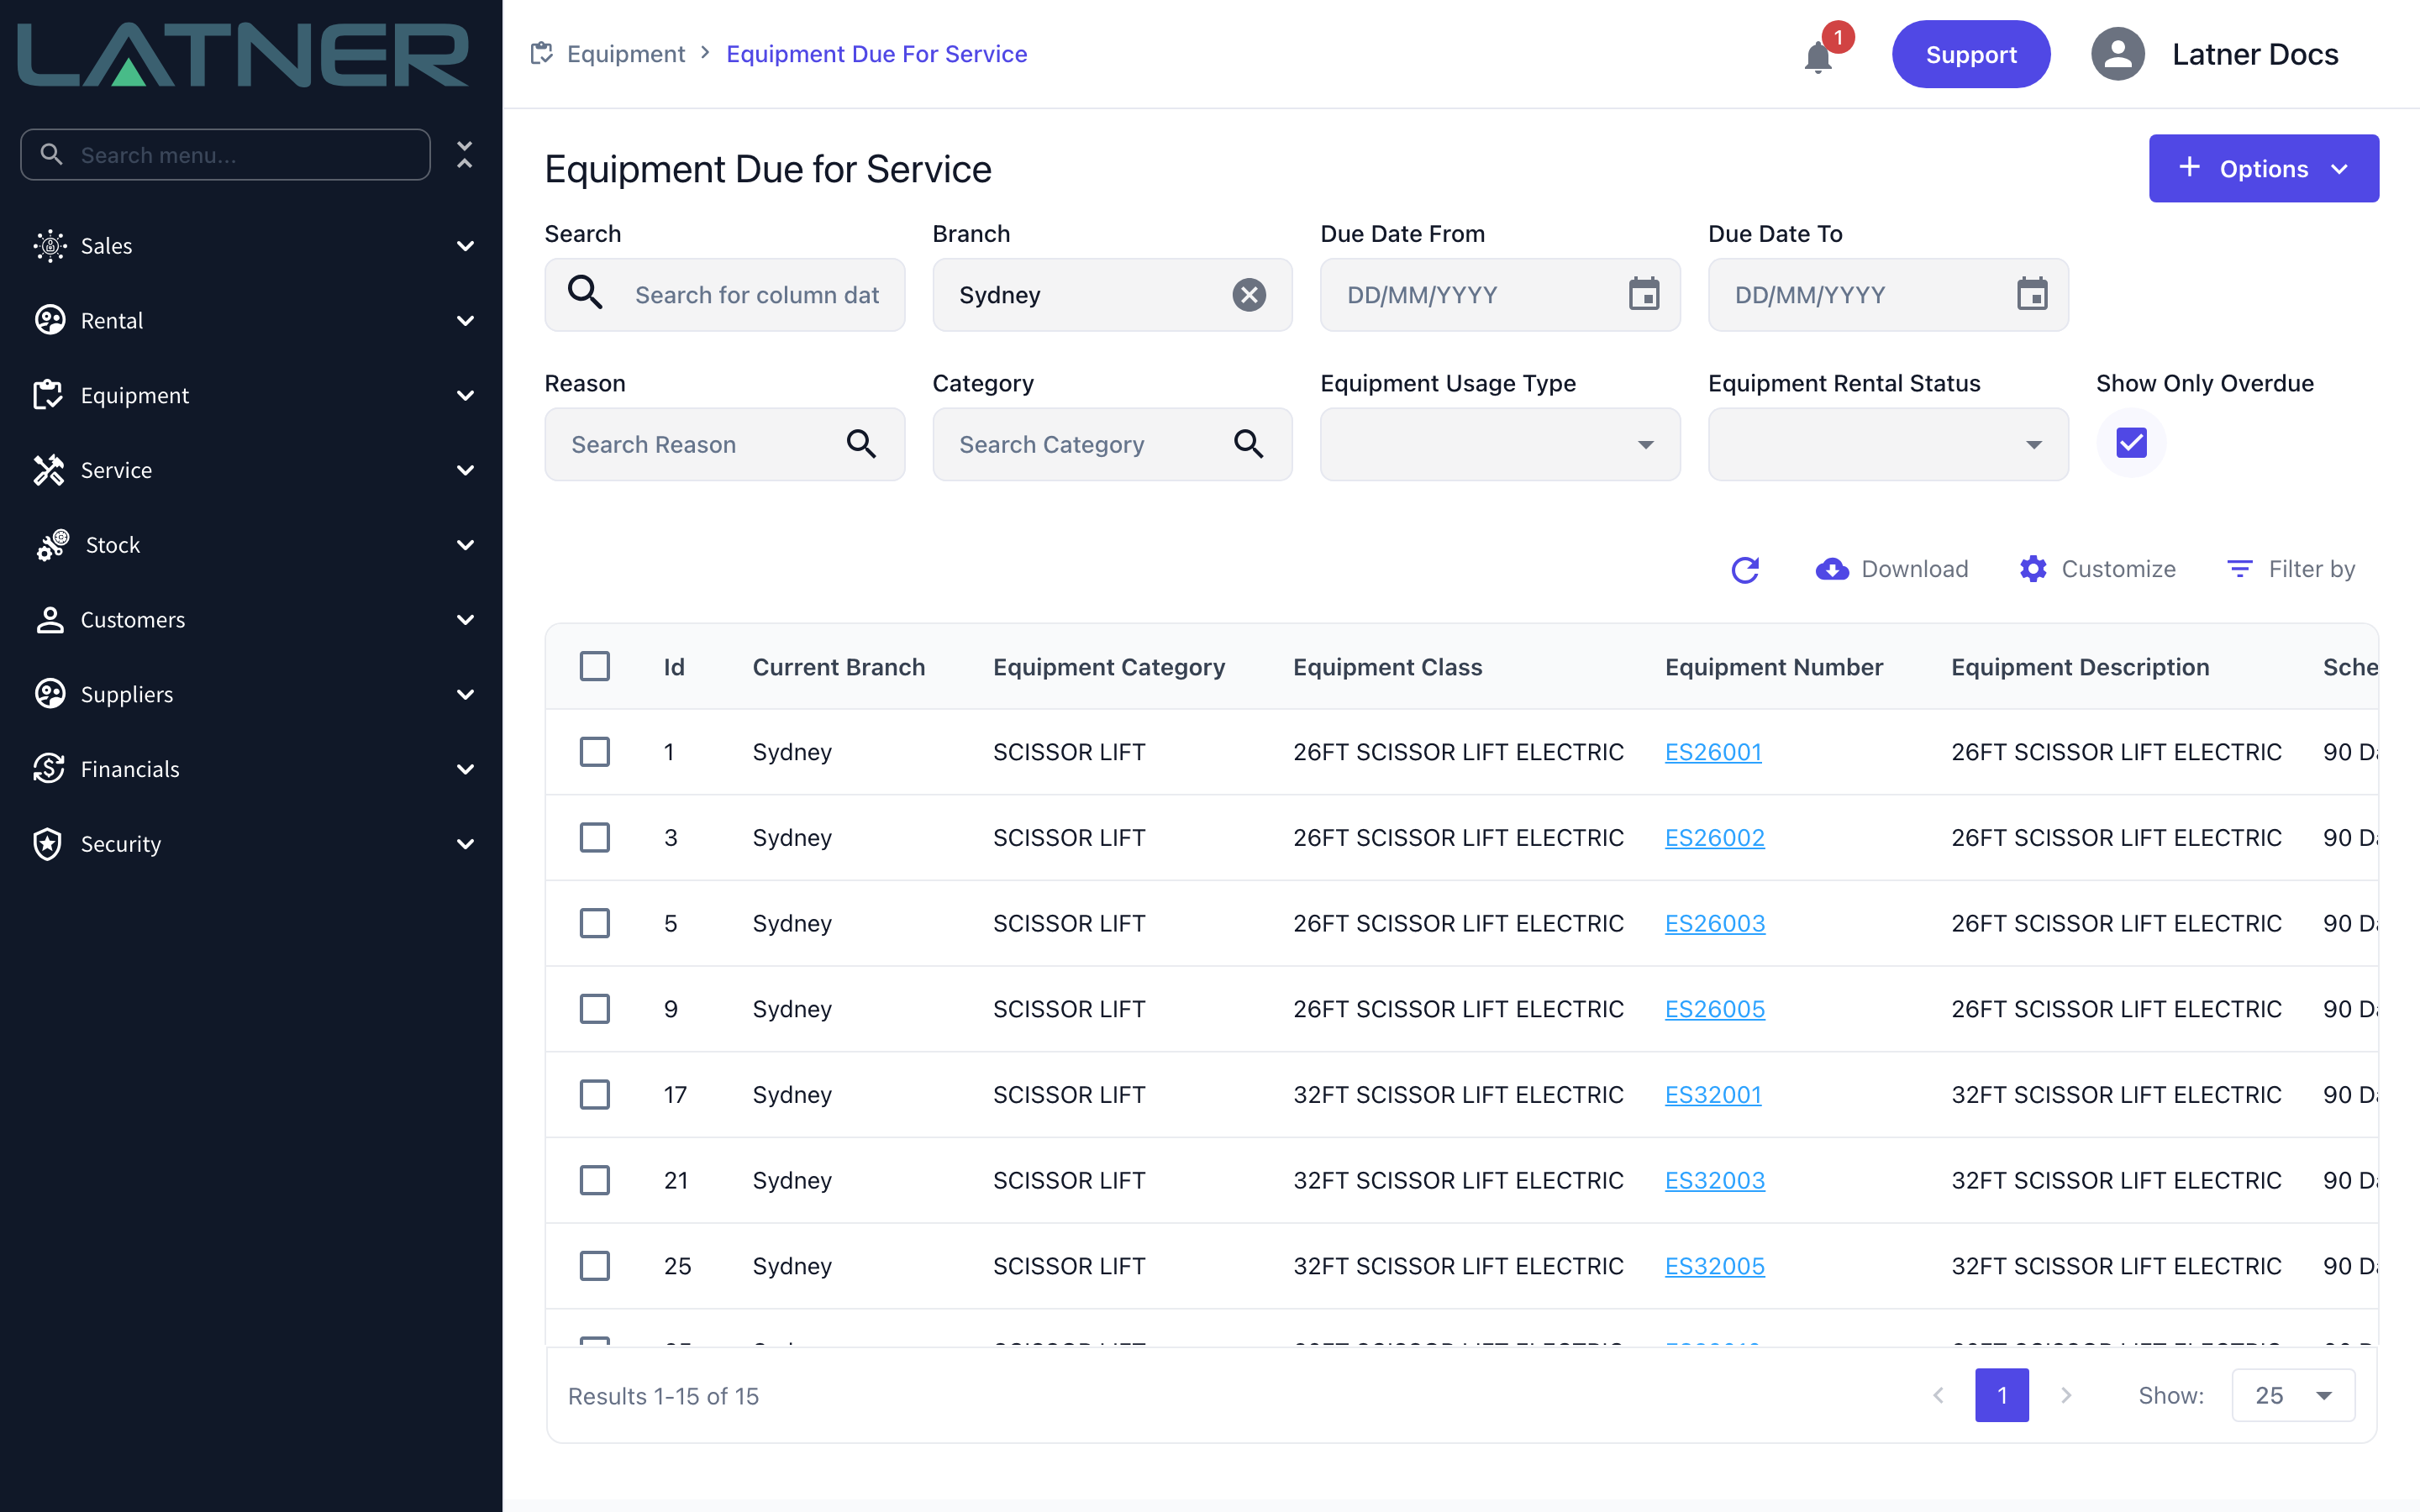
The filters across the top all combine, and the list refreshes as you change them.
-
Search - free text across the columns in the table.
-
Branch - defaults to your own branch, and takes more than one. Clear it to see the whole business.
-
Due Date From and Due Date To - limit the list to services falling due in a window.
-
Reason and Category - the work order reason and category the schedule will pass on to the work order. Choosing one narrows the choices in the other.
-
Equipment Usage Type - Rental, Internal Use, and Customer Owned where customer owned equipment is switched on.
-
Equipment Rental Status - useful for keeping the list to machines that are actually in the yard, for example Available.
-
Show Only Overdue - hides everything that is not already past its due date or due meter reading.
Step 3 - Check what is actually due
Scroll the table across to the service columns before you tick anything. They tell you how the service was triggered and how far past due it is.
-
Schedule Name - the schedule the line came from, for example 90 Day Inspection.
-
Days/Meter Until Due - days remaining for a date-based service, or hours remaining for a meter-based one. Negative numbers mean the service is late.
-
Service Due Date and Service Due Meter/Hours - the targets the schedule set.
-
Current Meter/Hours - the machine's latest meter reading, so you can see how close it is to the due meter.
-
Rental Status, Rental Contract, Customer, Site, Address, Contact Name and Phone Number - where the machine is right now and who to ring, which is what tells you whether the service can be done in the workshop or has to go out to site.
Step 4 - Select the schedules to raise work orders for
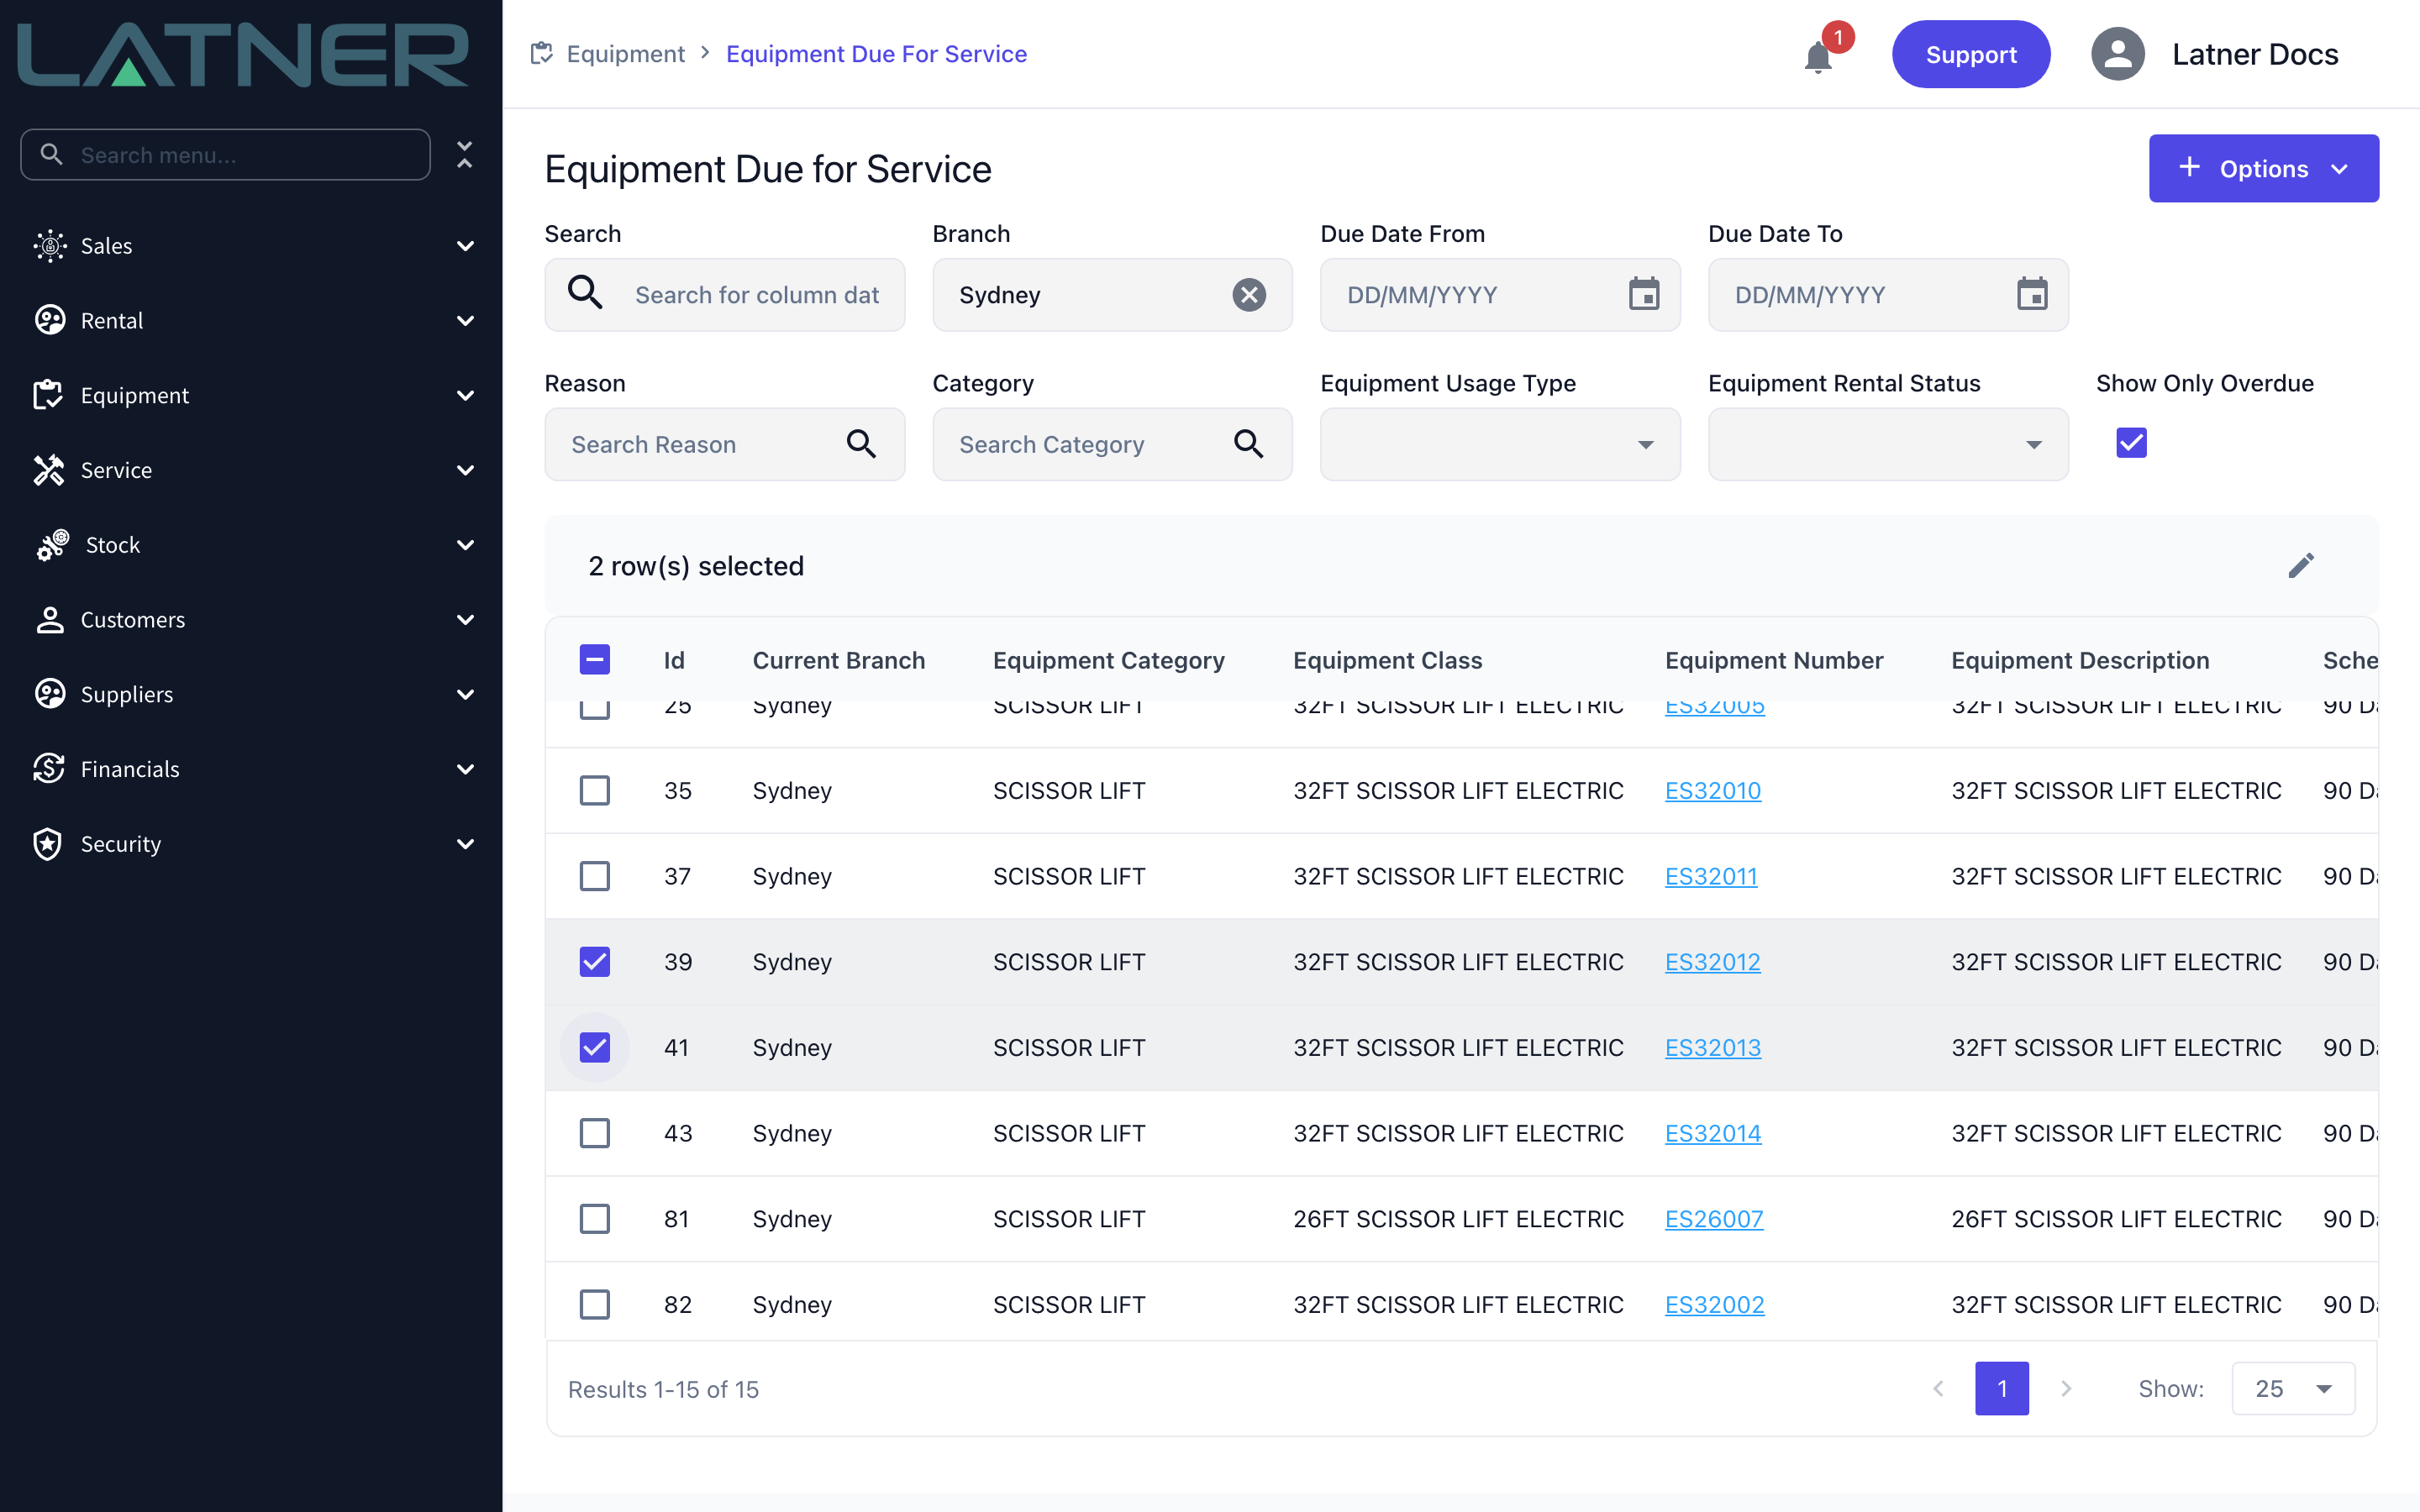
Tick the checkbox on each row you want a work order for. A count of selected rows appears above the table. You can tick a single machine or the whole page, and one machine can appear more than once if it has several schedules due.
Step 5 - Choose Create Work Order
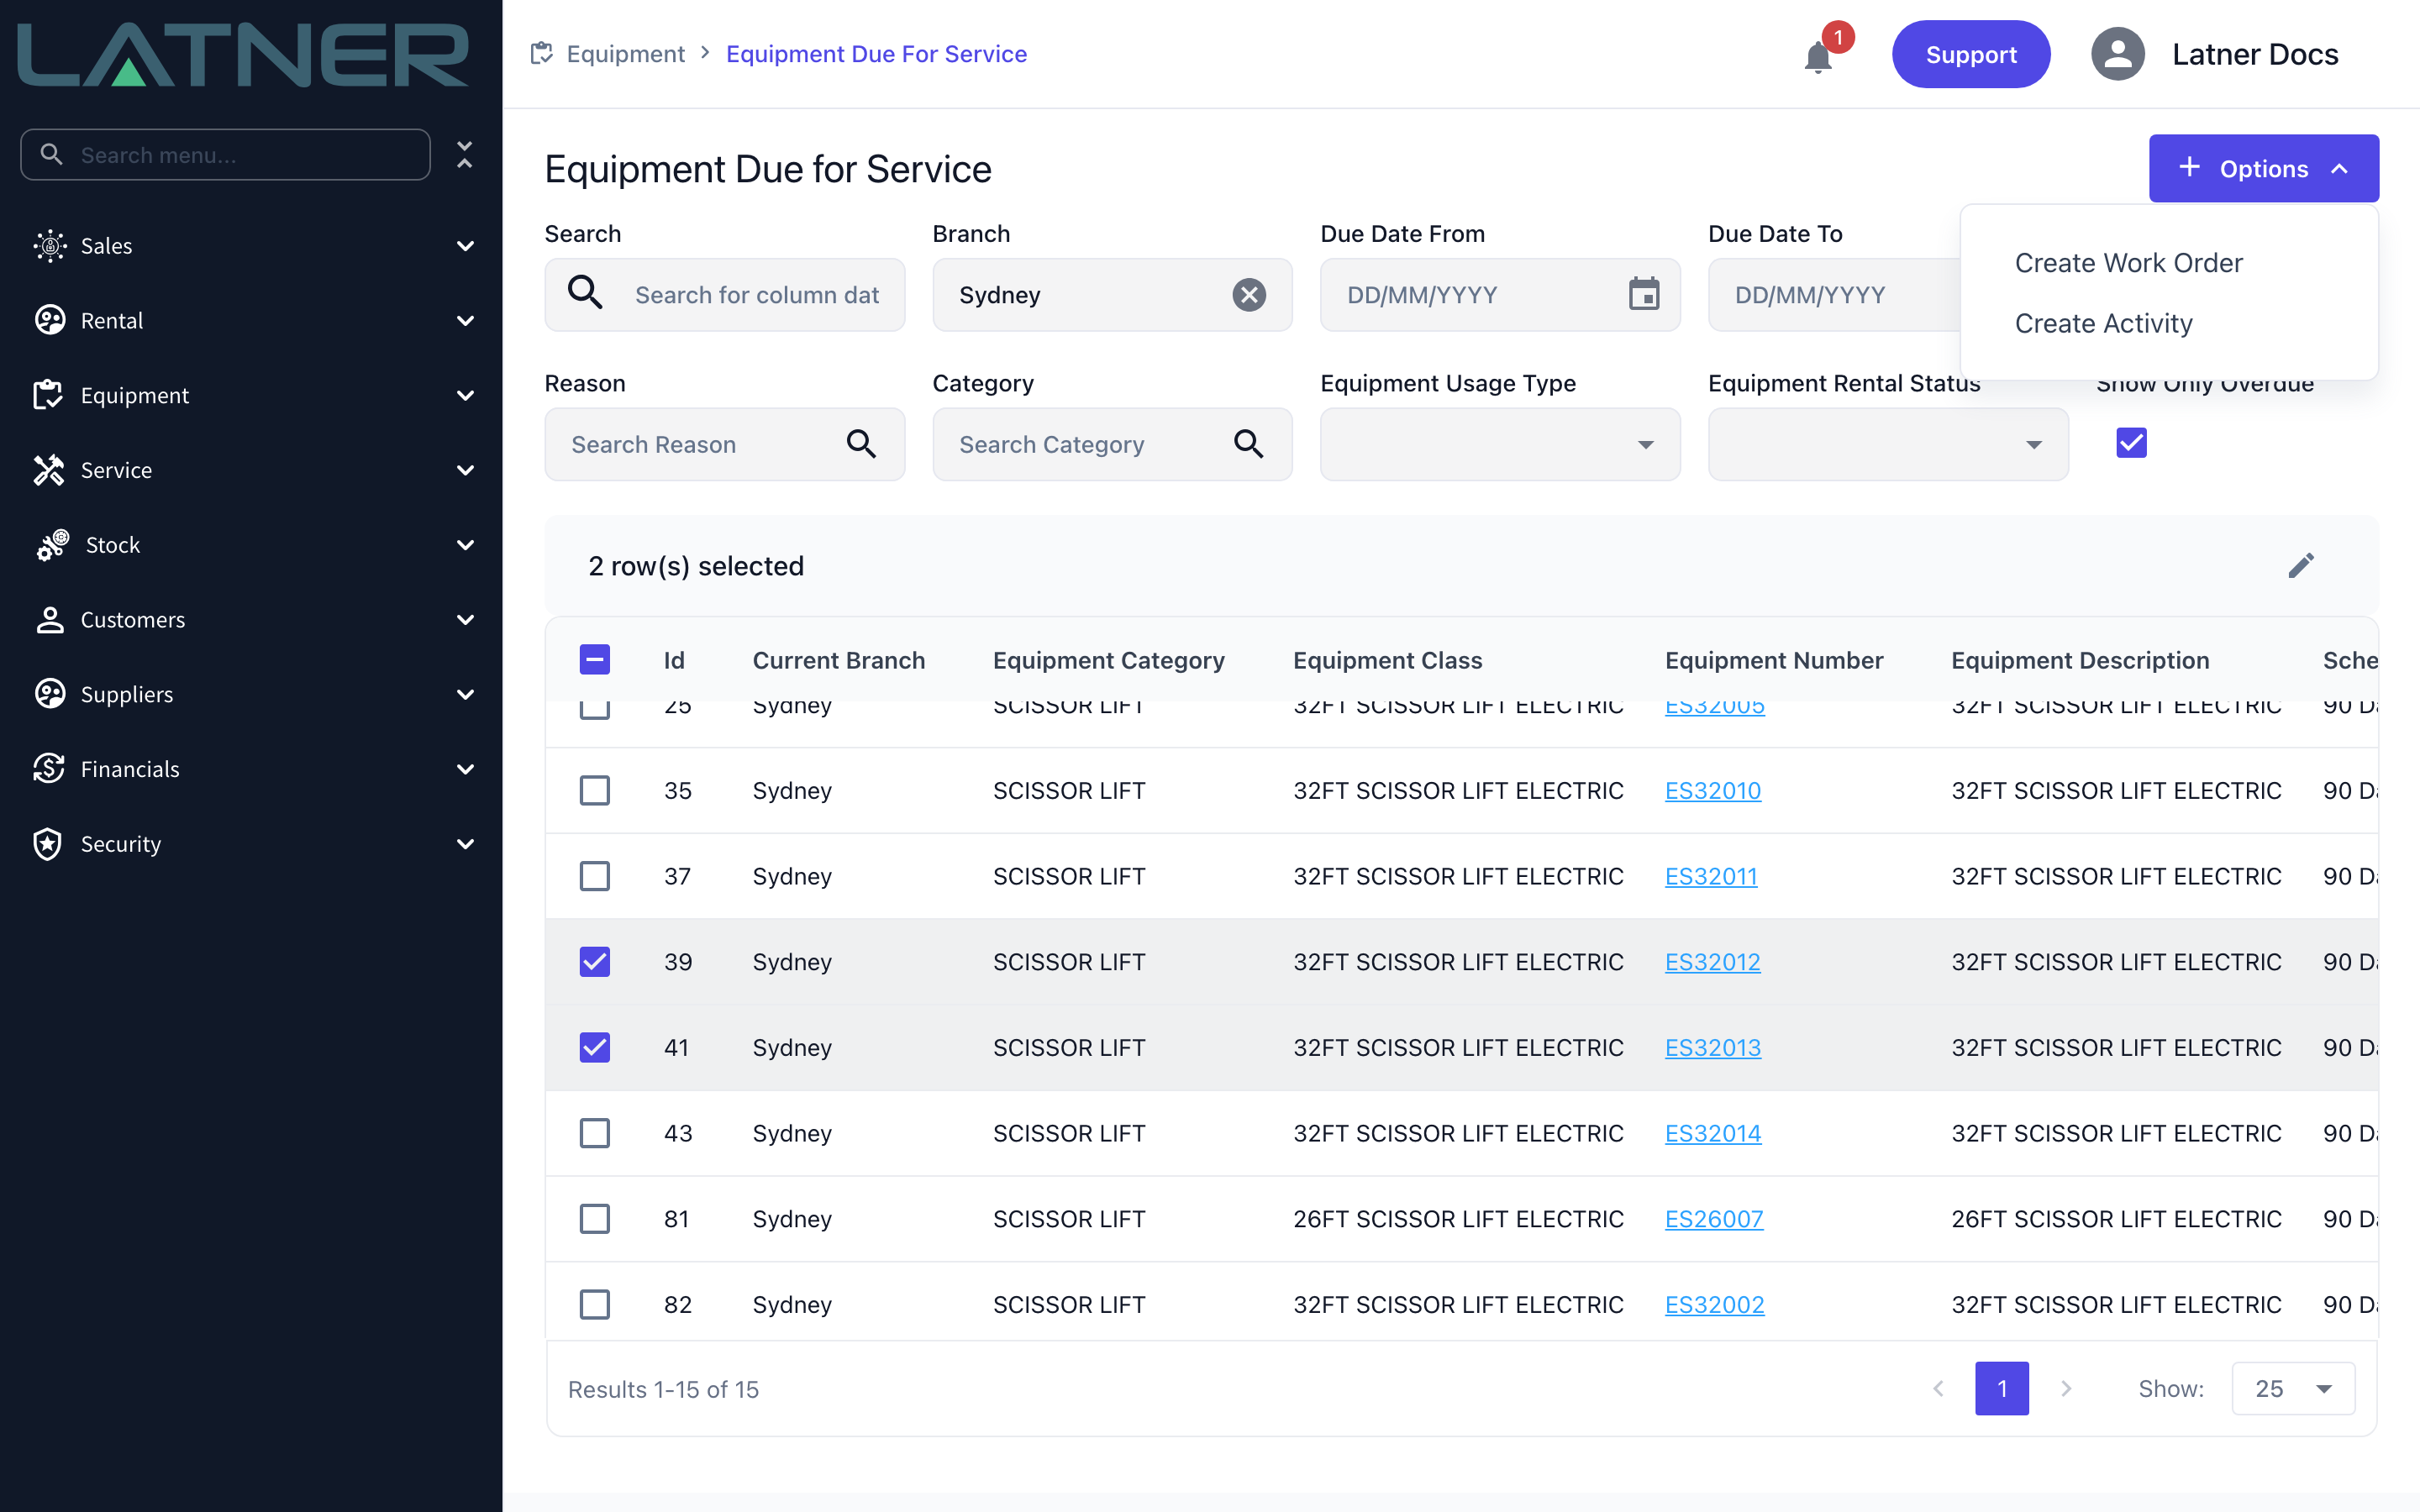
Open Options › Create Work Order. The option stays greyed out until at least one row is ticked, with a tooltip telling you so.
Step 6 - Allocate a mechanic, or leave it unallocated
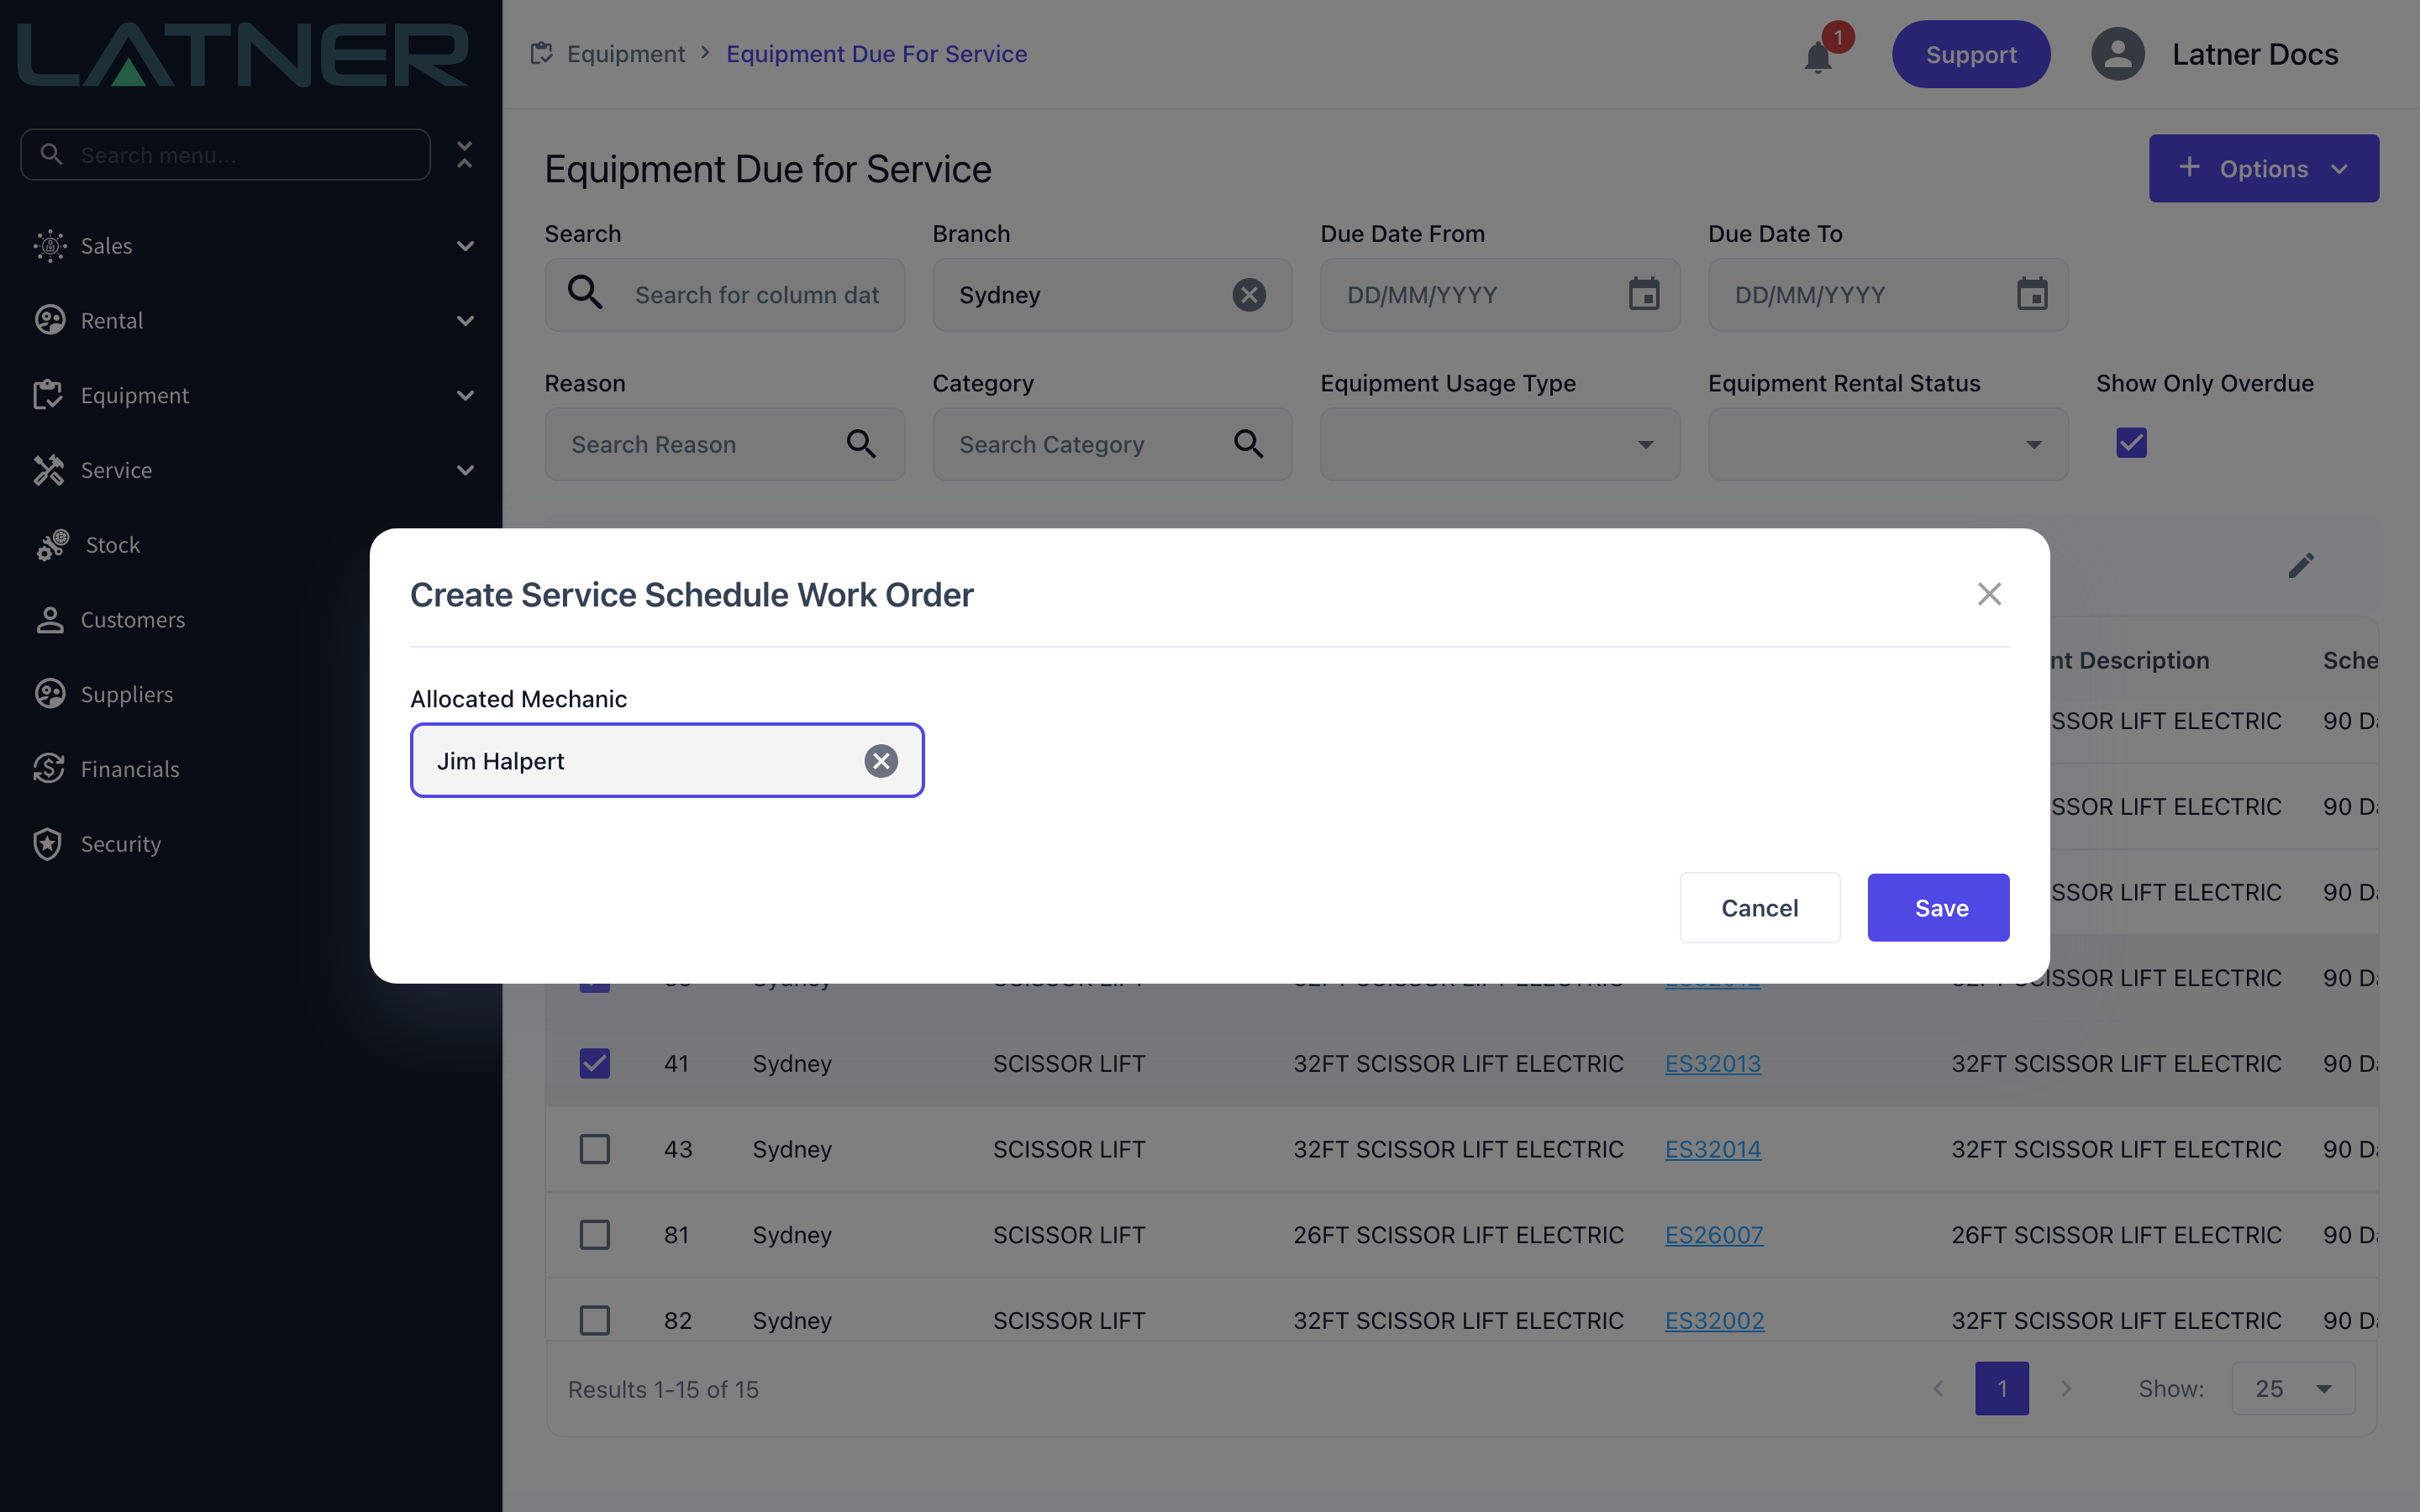
The Create Service Schedule Work Order dialog asks for one thing.
-
Allocated Mechanic - optional. Whoever you pick is allocated to every work order in the batch, and each one is created with a tech status of Allocated. Leave it blank and the work orders come out Unallocated, ready to be scheduled on the Service Allocation screen.
Choose Save to create the work orders.
Step 7 - Check the confirmation
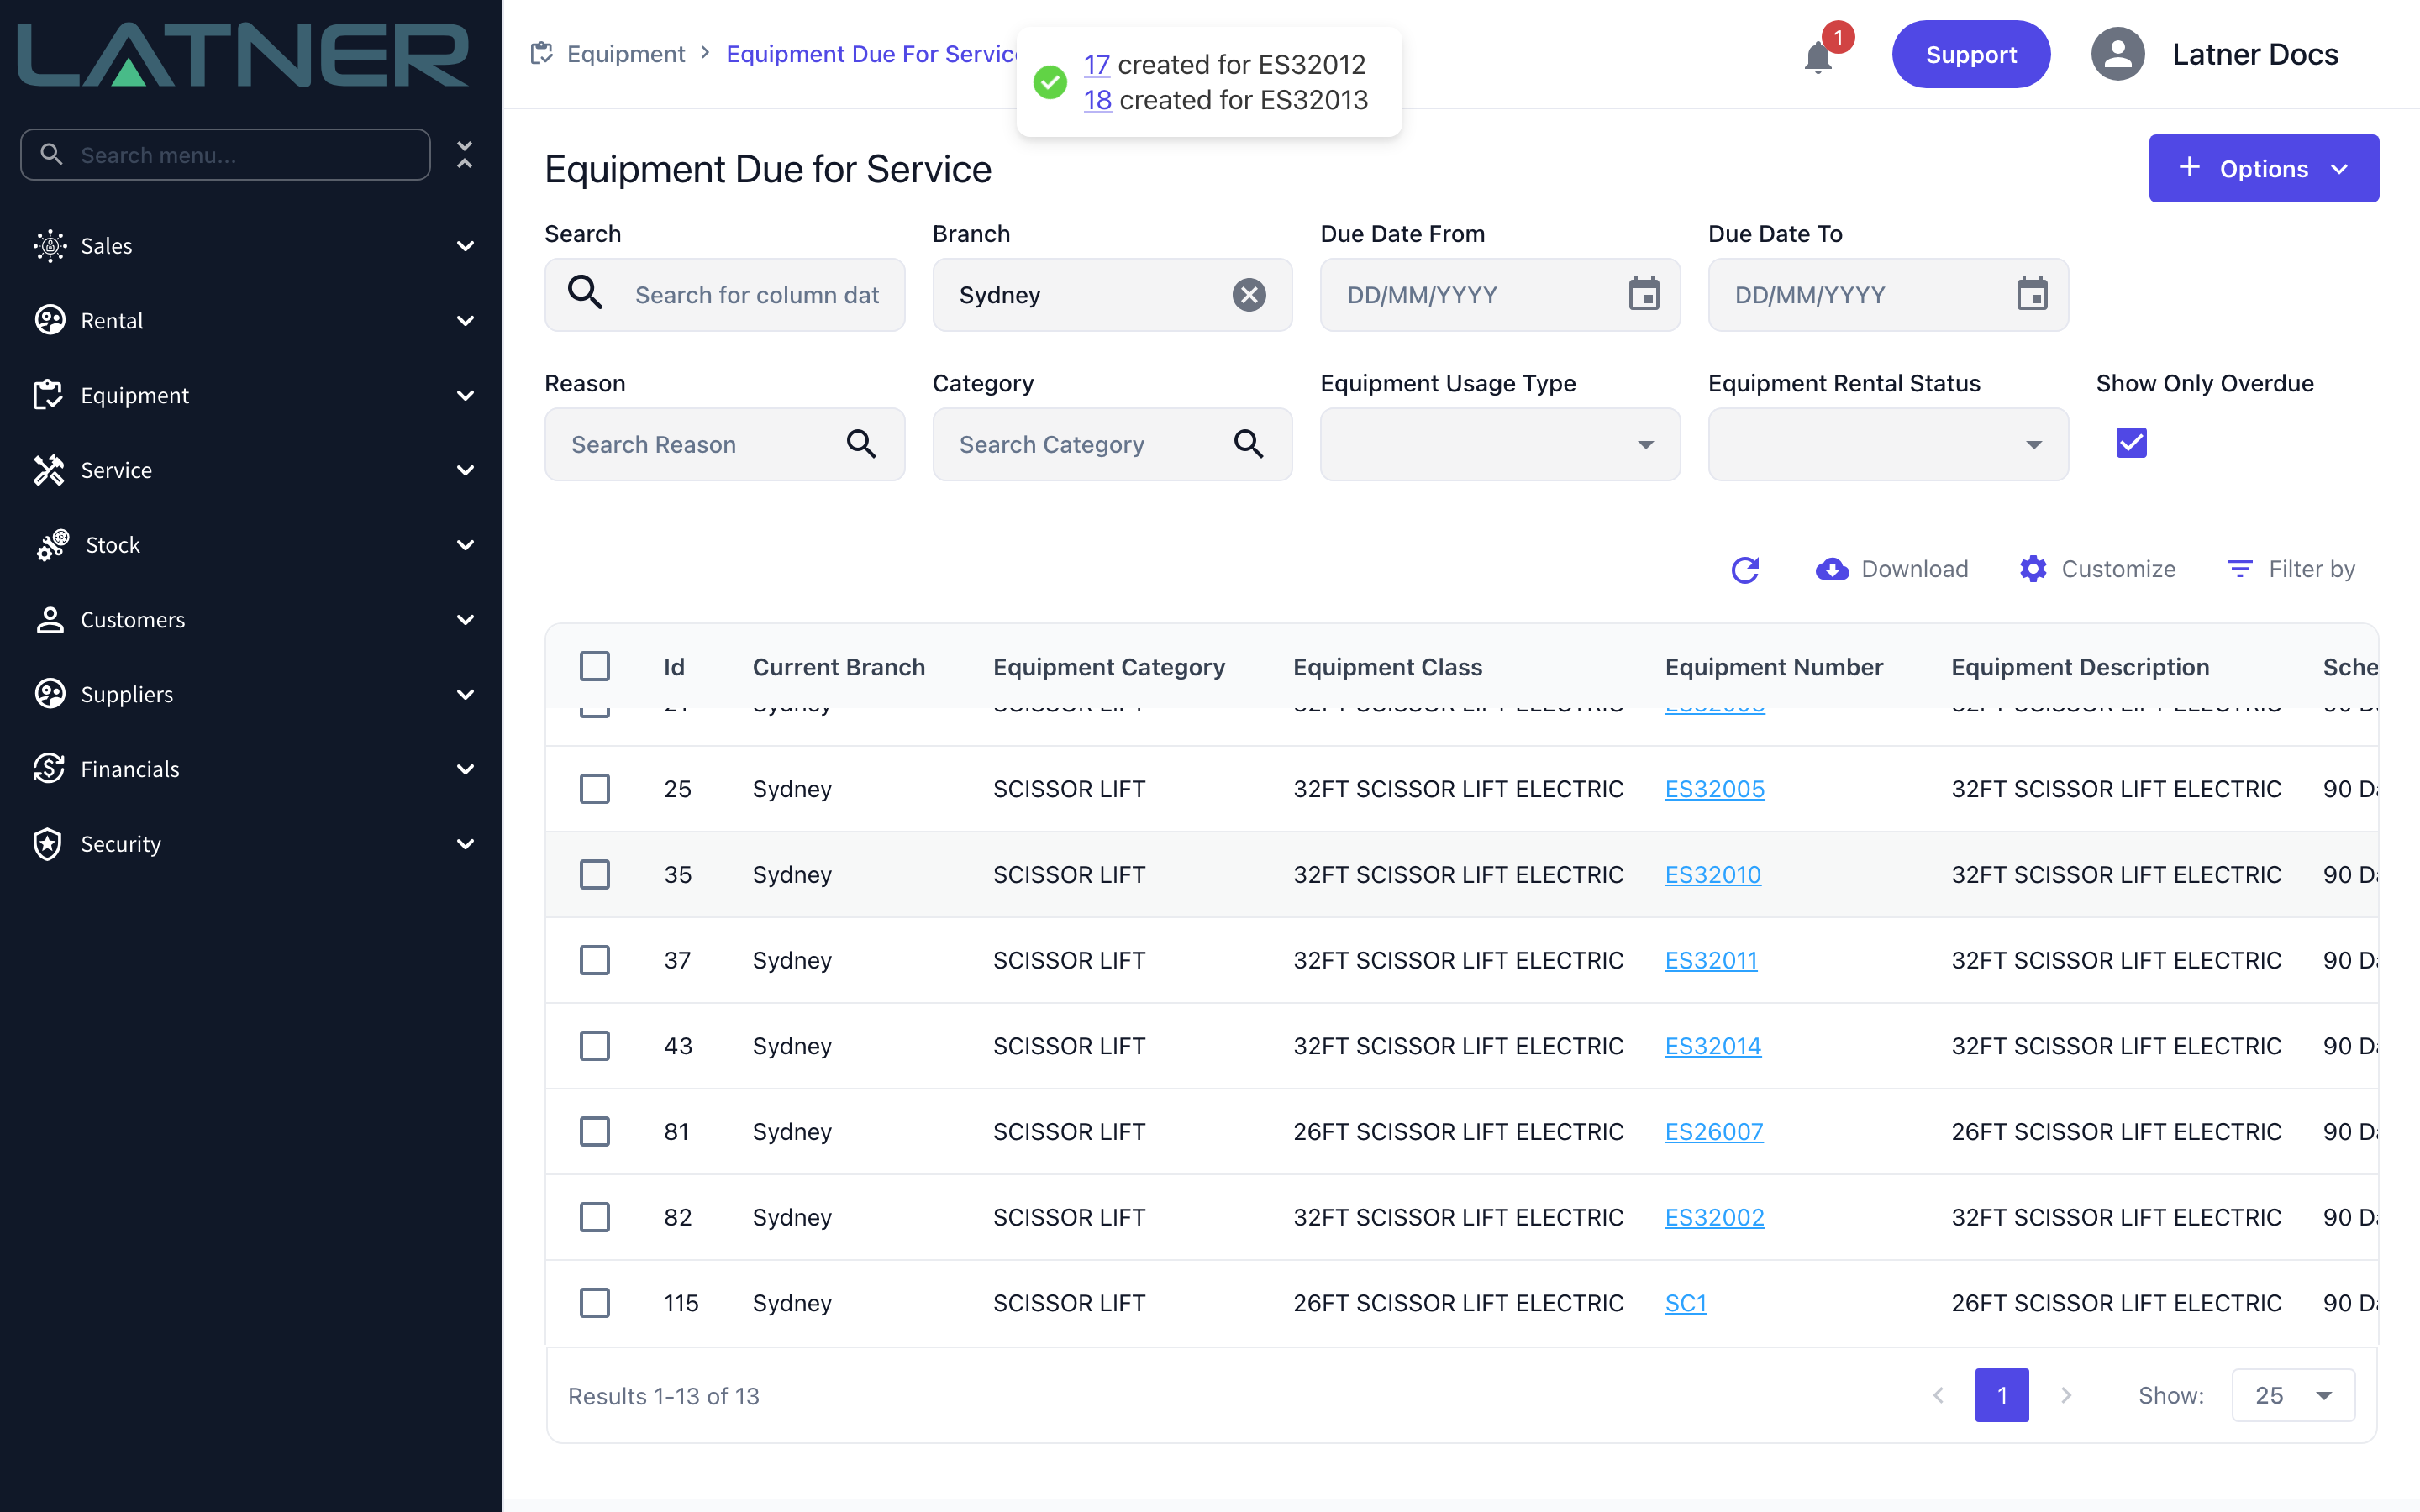
A confirmation lists each work order created and the machine it was raised for, with the work order number as a link straight to the new record. Where more than five were created, the first five are listed and the rest link through to the Work Orders list.
After Creation
-
One Internal work order is created per selected line, at the equipment's current branch, in Open status and due today.
-
The work order description, category and reason all come from the service schedule, and the schedule line is linked to the work order.
-
Where the machine is on rent, the customer, site and rental contract are copied onto the work order. Where it is customer owned, the customer, site, address and contact come off the equipment record instead. A machine sitting in the yard gets no customer details at all.
-
The equipment's service status changes to Out of Service, and if the work order is marked non-operational the machine's rental status follows.
-
If the service schedule has a checklist template, the checklist is created on the work order automatically.
-
The schedule line moves out of the due for service list and shows on the work order under Service Schedule Details, with the schedule name and the due date or due meter it was raised against.
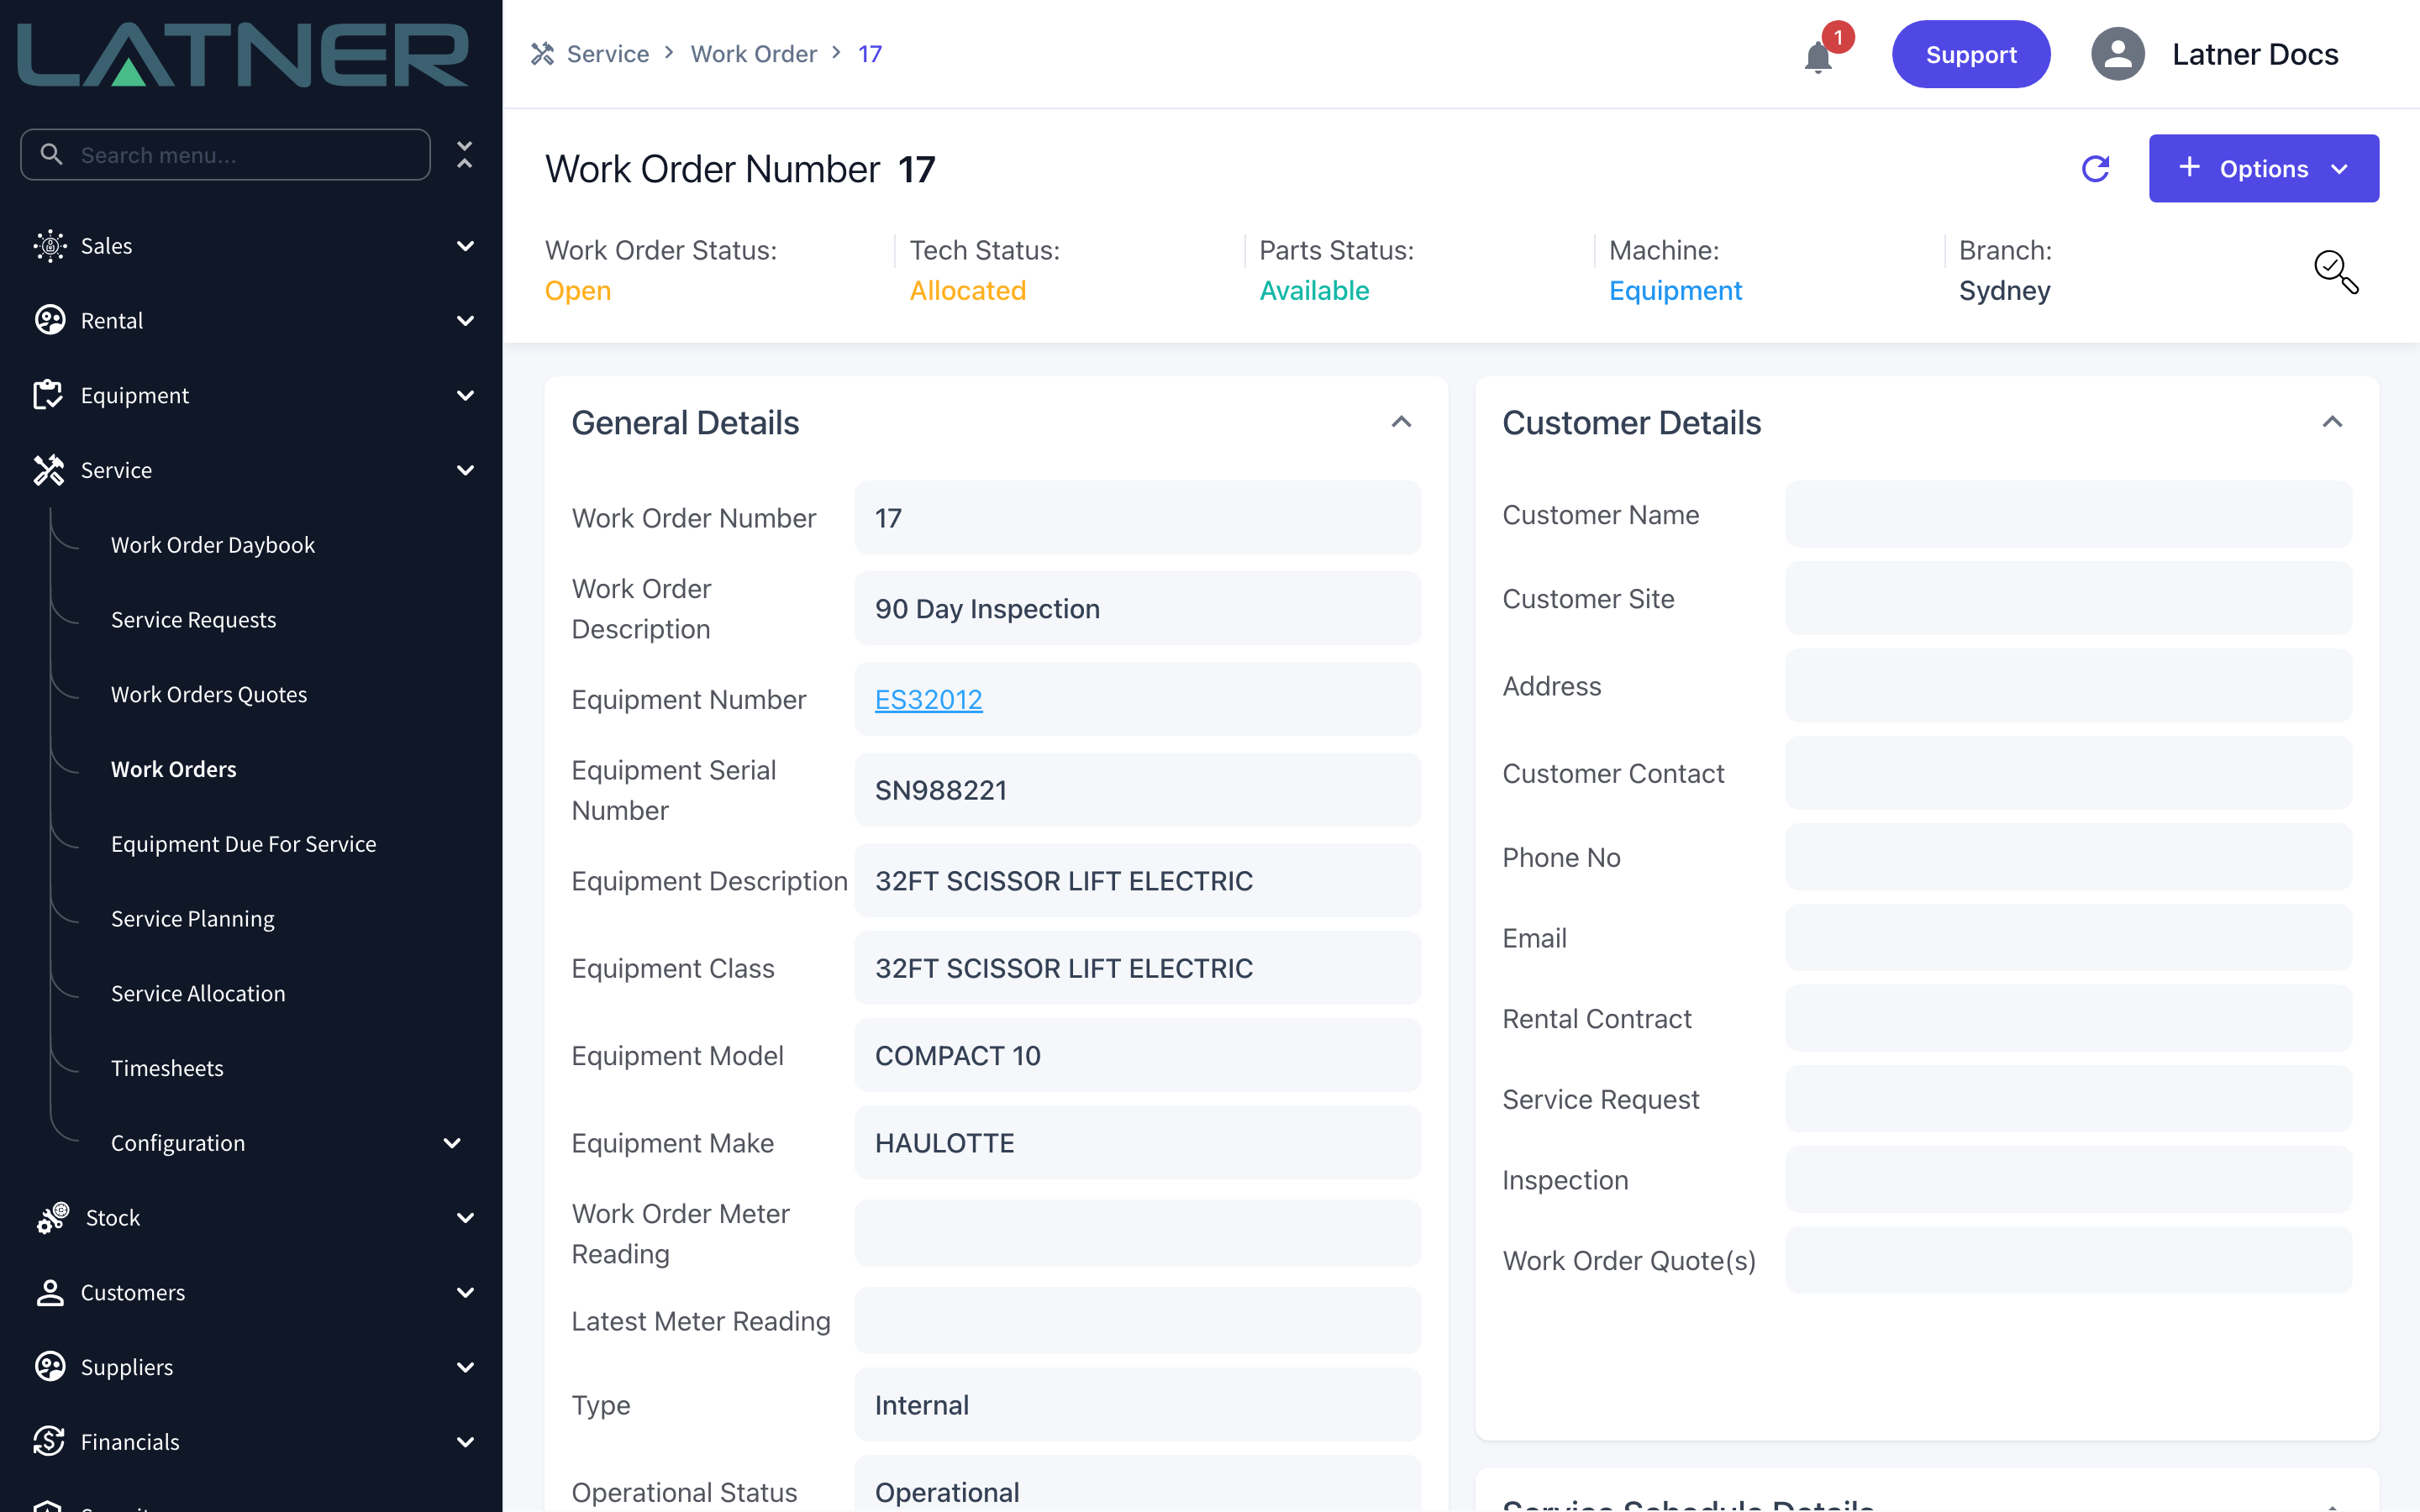
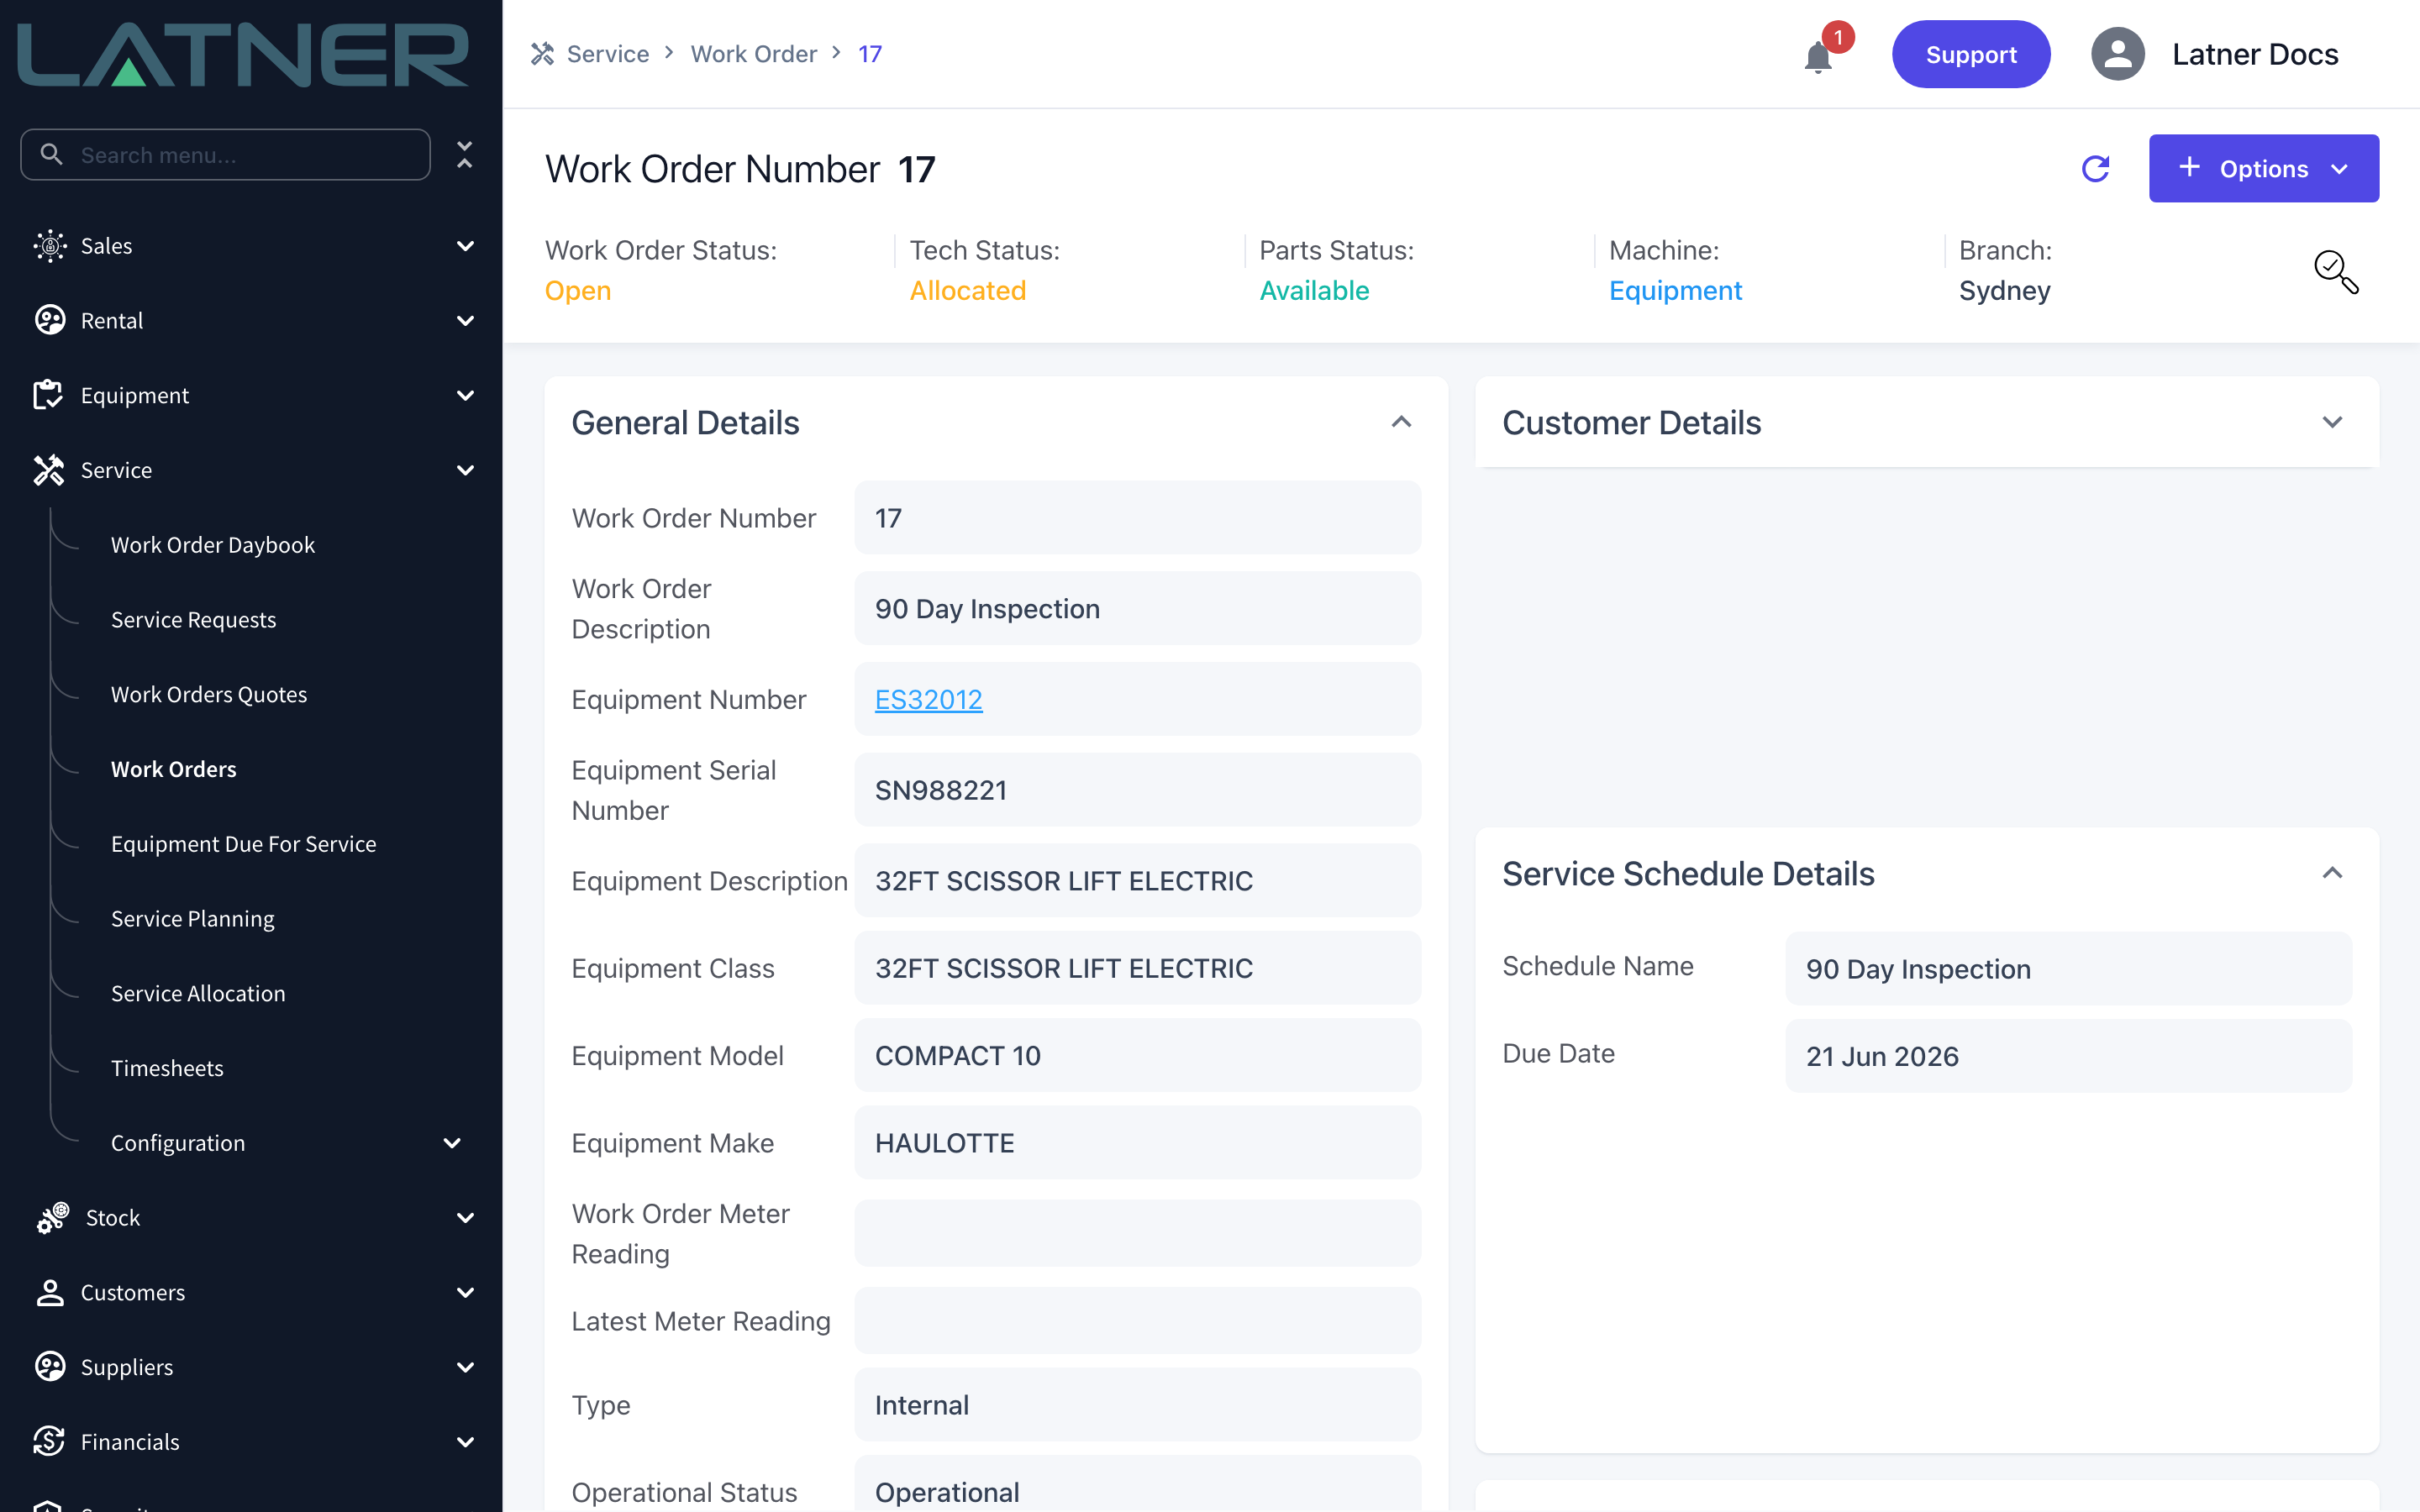
The type, reason and category of a work order raised this way cannot be edited afterwards, because they belong to the service schedule rather than to the work order. If you picked the wrong service, cancel the work order instead of editing it - cancelling puts the schedule line back on the Equipment Due for Service list so you can raise the right one.
Doing the Same Thing From the Work Order Daybook
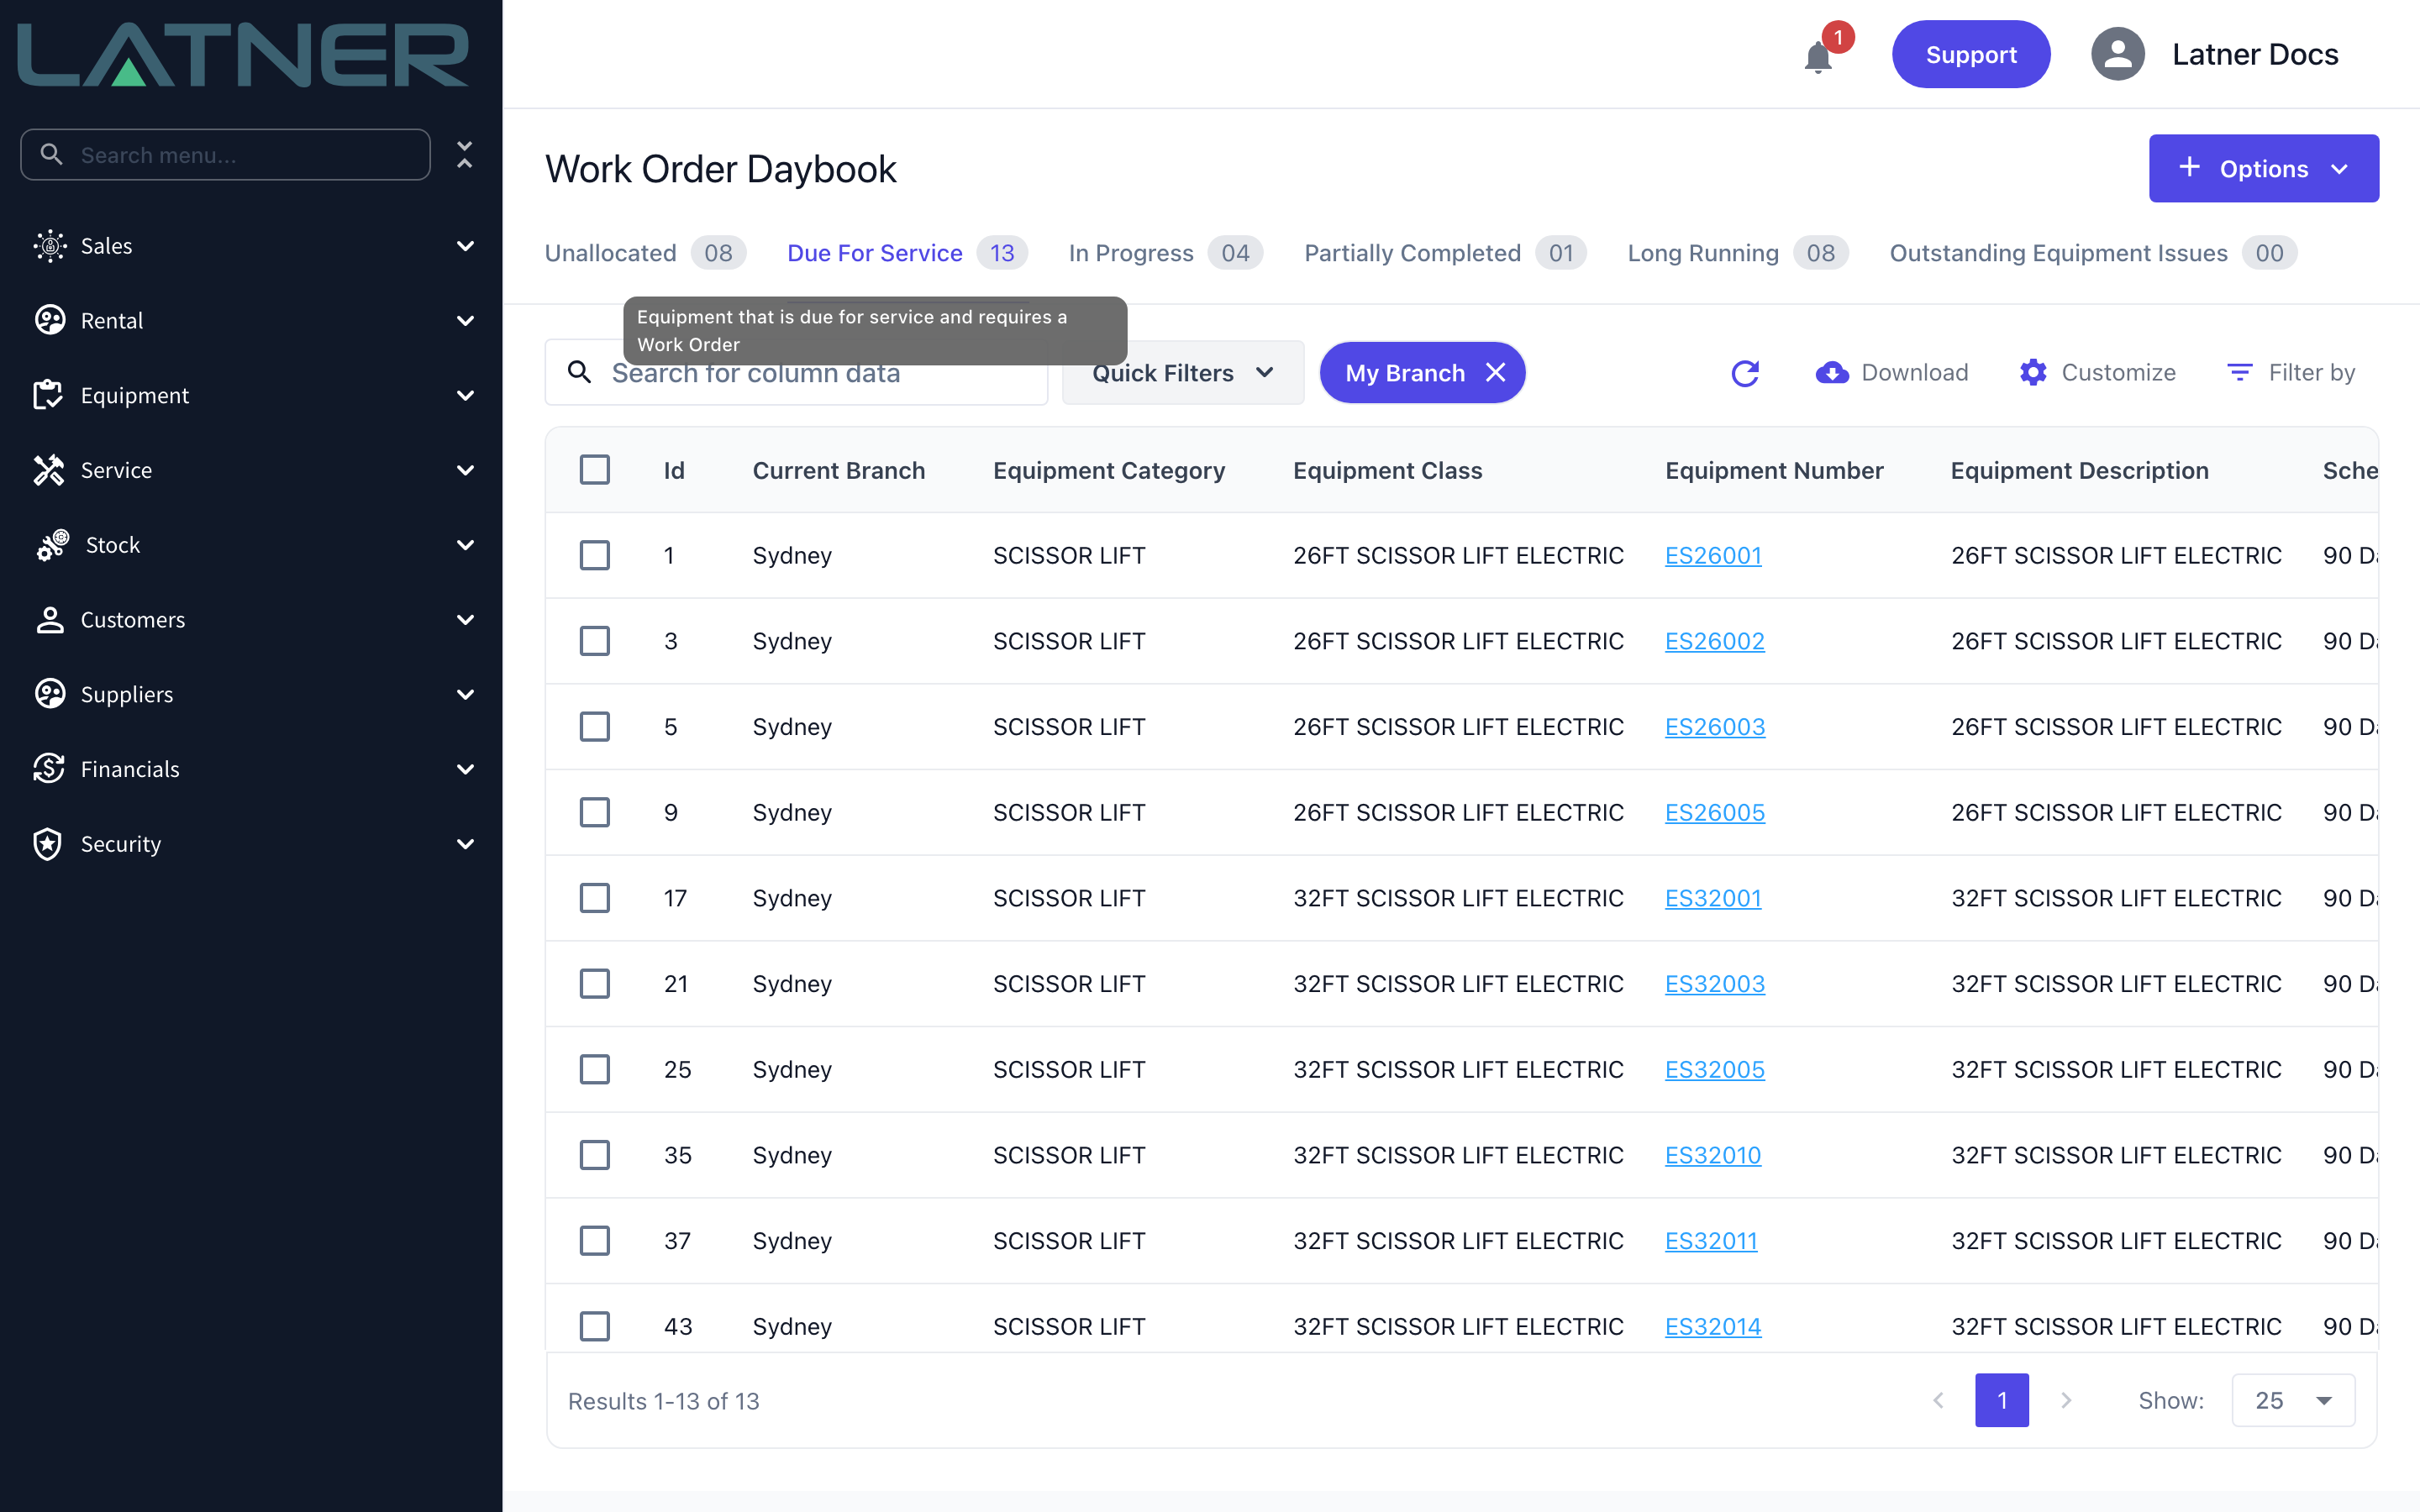
The Due For Service tab of Service › Work Order Daybook carries the same list and the same Options › Create Work Order action, so a mechanic working out of the daybook does not have to change screens. The difference is that the daybook tab only ever shows equipment that is already overdue, and it filters with quick filter chips (My Branch, On Rent, Off Hired, Available in Branch and the usage types) rather than the full filter bar. Use the daybook for catching up on late servicing, and the Equipment Due for Service screen when you want to plan ahead.
Creating One From a Mobile Device
A mechanic who is already standing in front of the machine does not have to go back to a desk. The mobile app can raise a service schedule work order too, and it links to the same schedule line, so the service is recorded against the schedule exactly as it would be from the desktop screen.
Open Service › Mobile Work Orders, tap the + button at the bottom right and choose Create Work Order. The form runs over three steps.
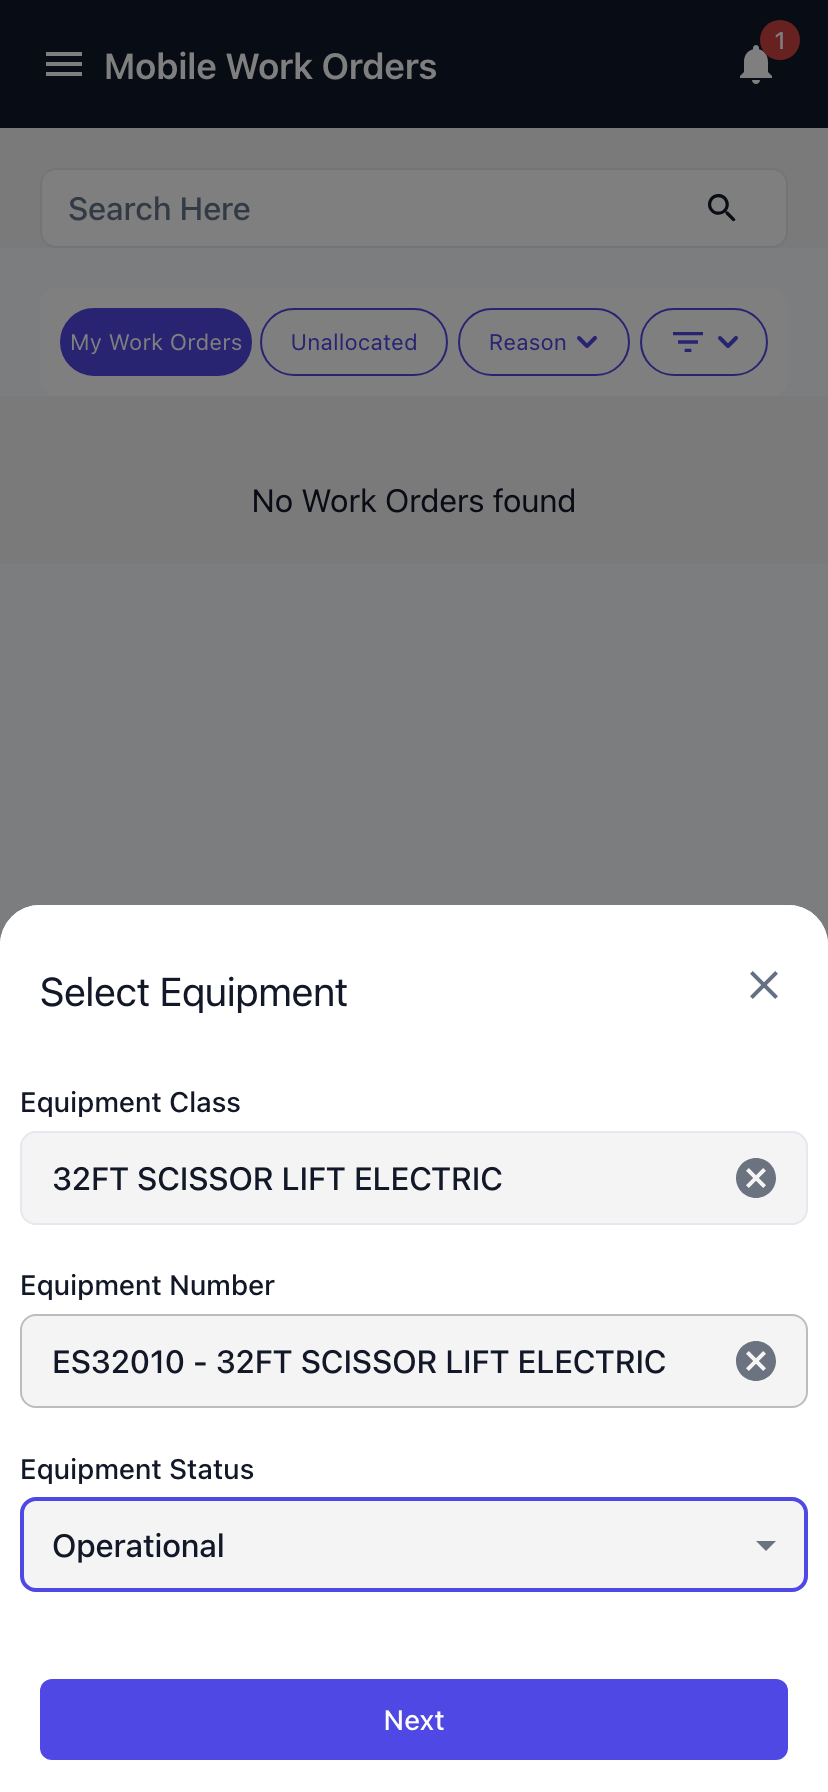
Step 1 - Select Equipment
Search for the machine by Equipment Class or straight by Equipment Number, then set its Equipment Status. Equipment number is required here, and only serialized equipment can be chosen - machines that are Sold, Disposed, Converted or Pending Activation are left out of the search.
Step 2 - Pick the service schedule
Service Schedule (Optional) lists the services still waiting on that machine, with the due date and due meter of each, so you can see which one you are about to do. The field only appears if you hold the Create Service Schedule Work Order permission; without it the form still works, it just raises an ordinary work order.
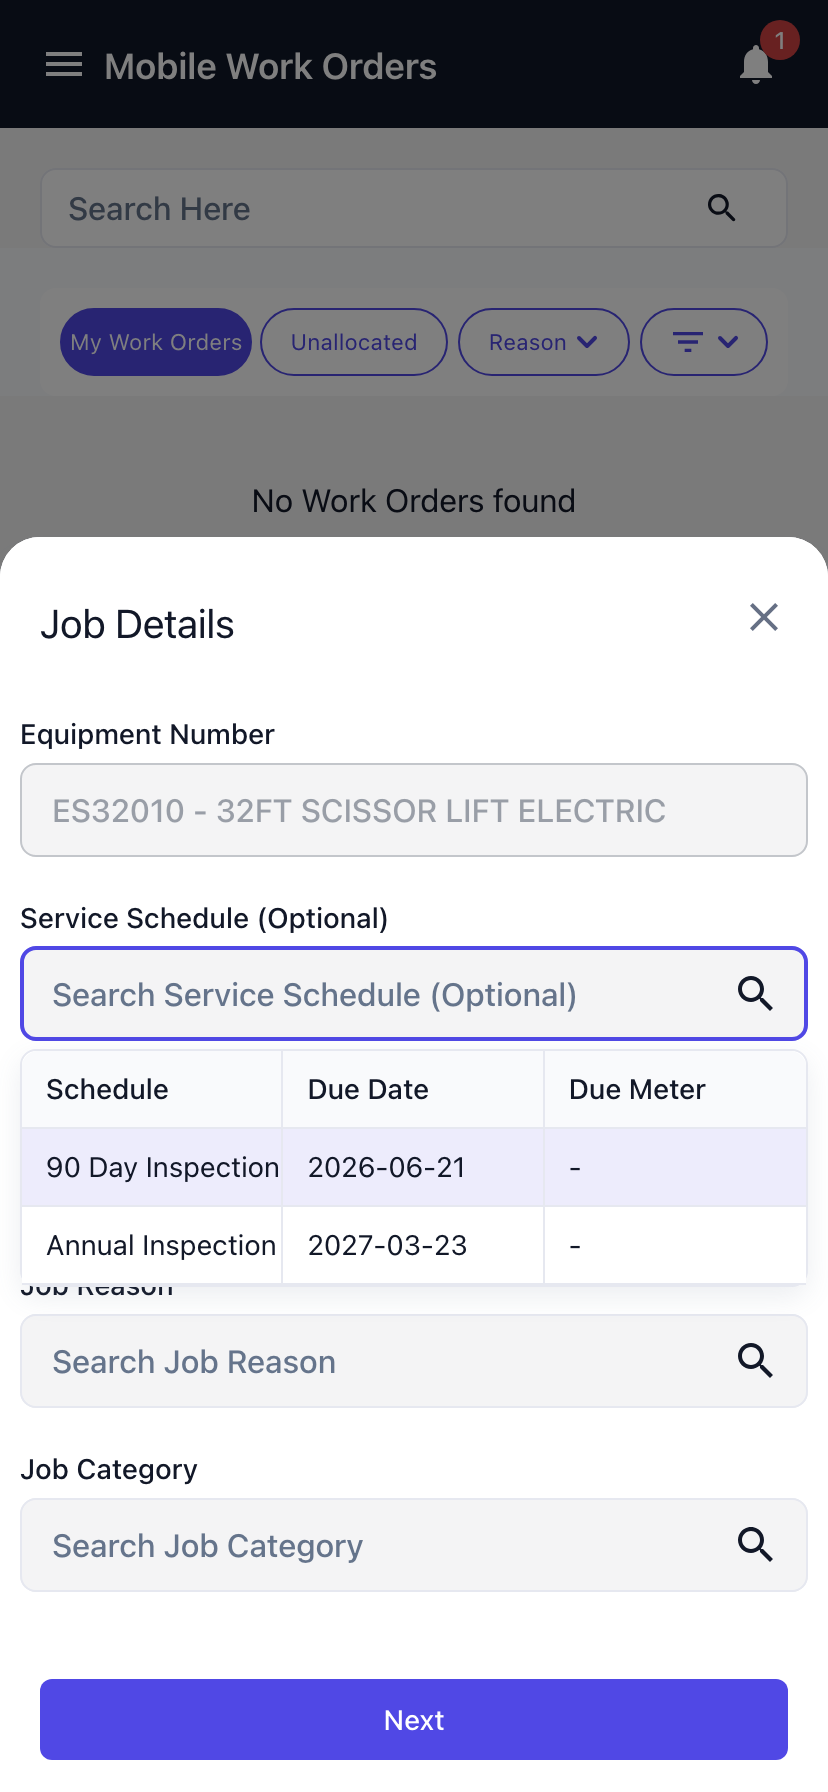
Choosing a schedule fills in the rest of the job for you. Job Reason and Job Category are taken from the schedule and locked, and the schedule name is copied into the work order description on the next step. You still choose the Job Type yourself.
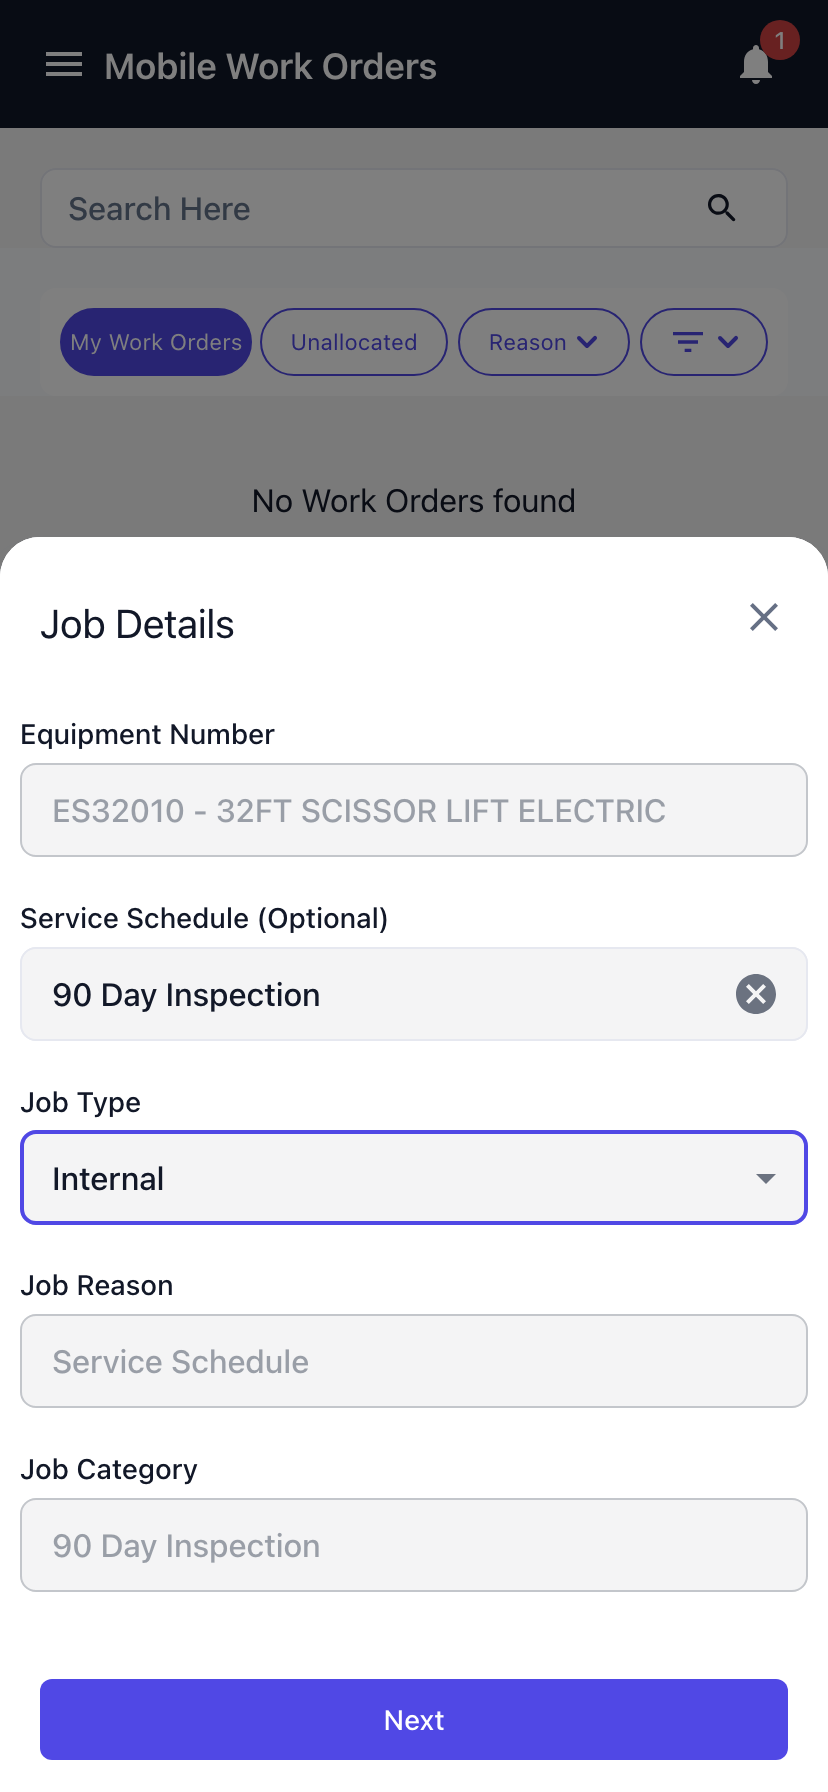
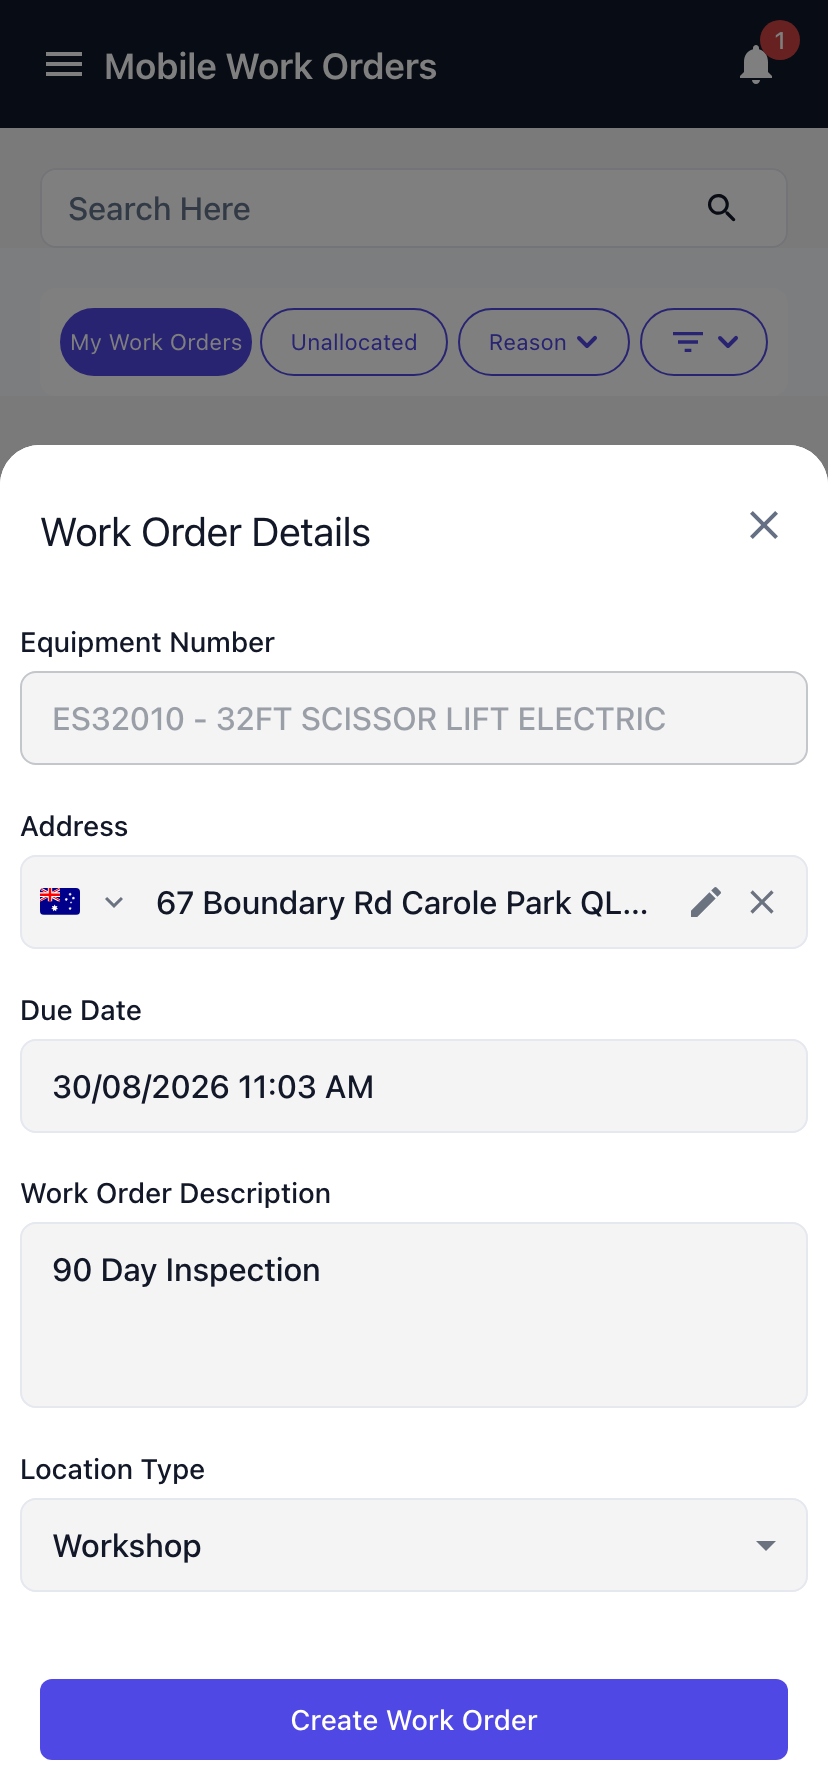
Step 3 - Work Order Details
The last step carries the Address (from the rental contract, the customer site, or the machine's branch), a Due Date of now, the Work Order Description already filled from the schedule, and a Location Type of Workshop. Adjust what you need and tap Create Work Order.
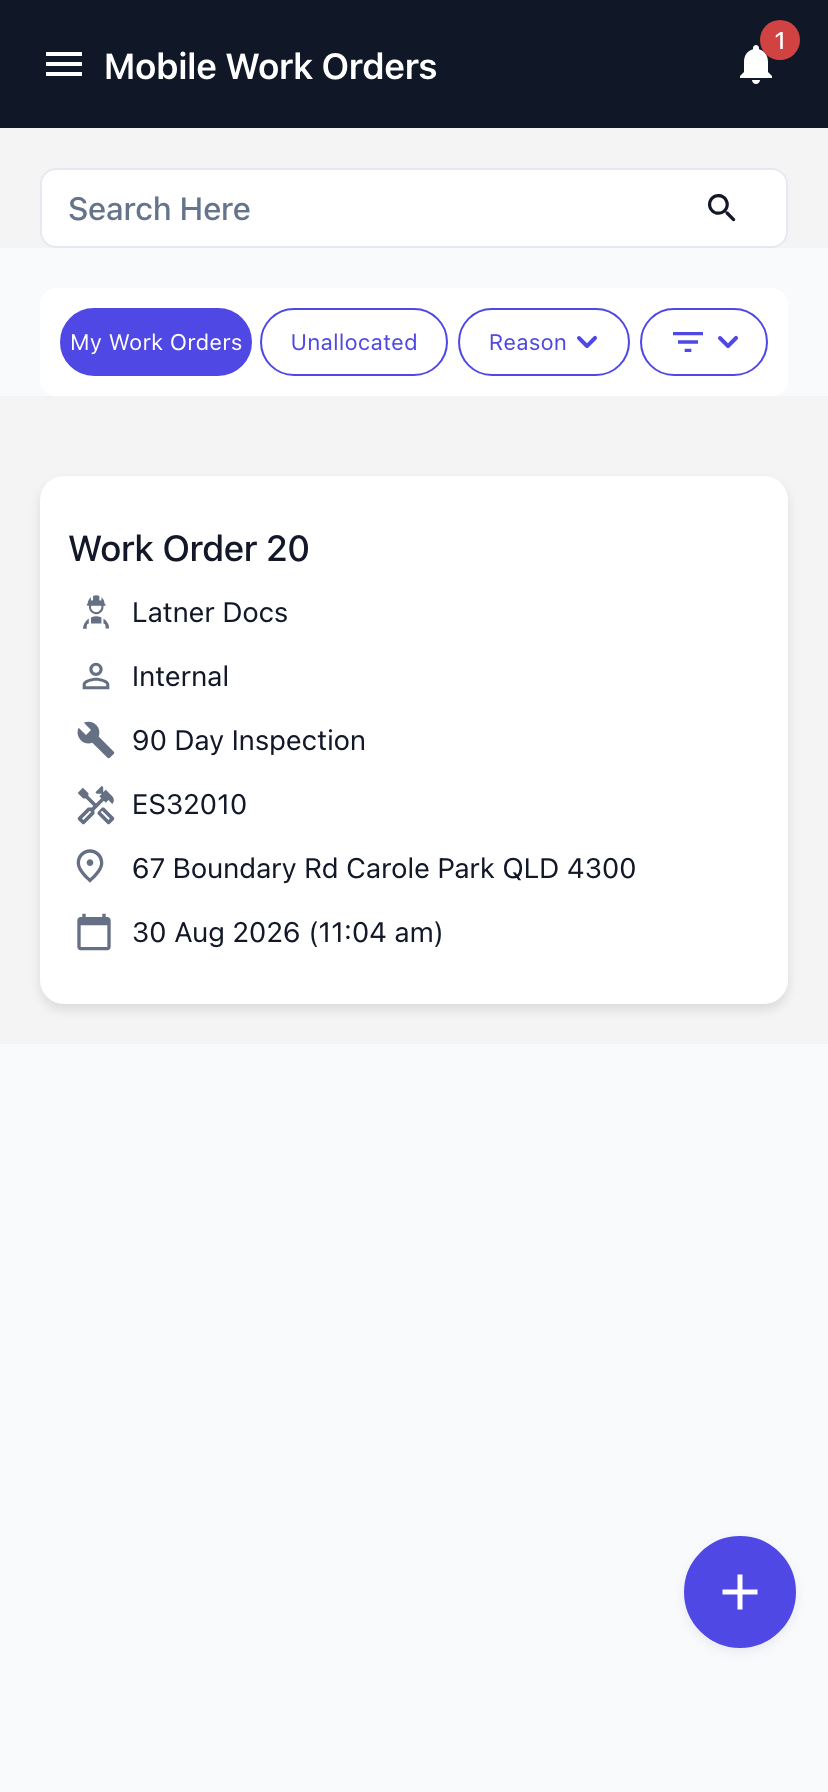
Latner opens the new work order straight away. If your user is linked to a skilled person, the work order is allocated to you with a tech status of Accepted, so it is on your My Work Orders tab and ready to work on. Everything the desktop flow does still happens: the schedule line comes off the due for service list, the machine goes Out of Service, and any checklist on the schedule is created on the work order.
The mobile form handles one machine at a time. When a batch of servicing is due across the yard, the Equipment Due for Service screen is still the quicker way in - raise them all there, then pick them up on the phone.
FAQs
Watch the Demo
Prefer to watch it? Step through the same flow here.