
Manual Work Orders let you raise a job that is not attached to any machine, so labour, parts and expenses for site work, deliveries and general tasks can still be tracked, costed and invoiced through Service.
Overview
Not every job in the yard involves a machine. Someone still has to deliver a set of keys, tidy a site, or repair a customer's fencing, and that work needs a Work Order so the hours and costs land somewhere. A manual Work Order gives you exactly that: the full Work Order record, minus the equipment.
-
A manual Work Order has a Machine Type of Manual instead of Equipment, and is not linked to any piece of equipment, sub hire equipment or serialized stock.
-
The option only appears once the Allow Work Orders that are not linked to a piece of machinery setting is switched on.
-
You can create one from the Work Orders screen, or directly from a Rental Contract so the job is tied to that contract and customer.
-
Everything else behaves like a normal Work Order: timesheets, parts, expenses, purchase orders, quotes and invoicing all work the same way.
-
Because there is no equipment, nothing is taken out of service, no meter reading is asked for, and no service schedule can be attached.
Before You Begin
Two things need to be in place before the Manual option will appear.
|
Requirement |
Where to Find It |
|---|---|
|
Allow Work Orders that are not linked to a piece of machinery switched on |
Security › Settings › Global, under the Service module |
|
Create Work Order permission |
Security › Configuration › Permission Groups, under Service › Options |
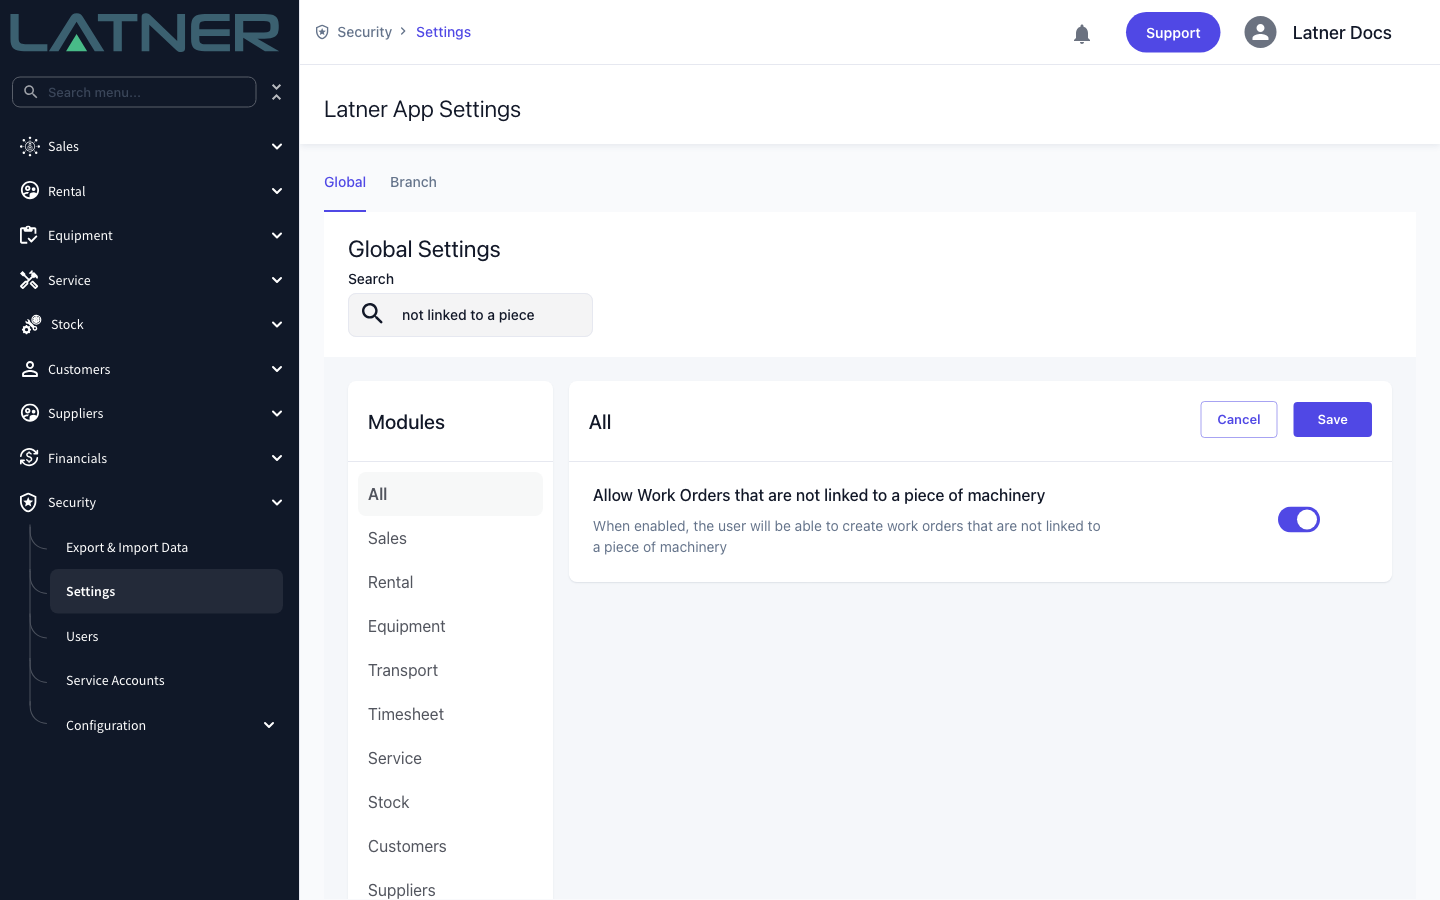
If the setting is later switched off, manual Work Orders you have already created are untouched and keep working. You just lose the ability to make new ones: the Machine Type field disappears from the Create Work Order form altogether, because Equipment becomes the only choice left.
Creating a Manual Work Order
Step 1 - Open the Work Orders screen
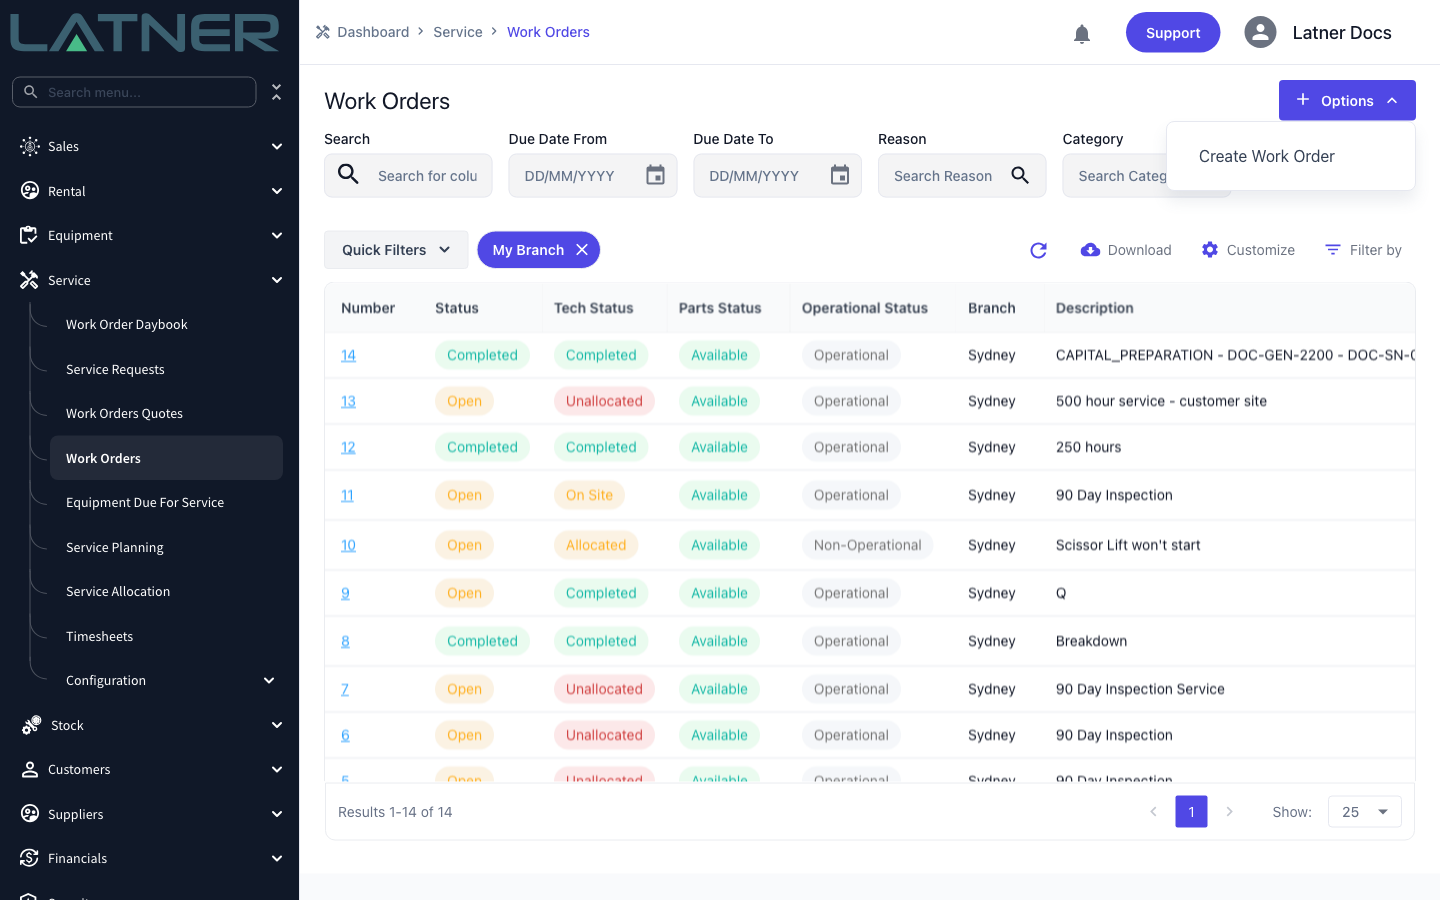
Go to Service › Work Orders and choose Options › Create Work Order.
Step 2 - Set Machine Type to Manual
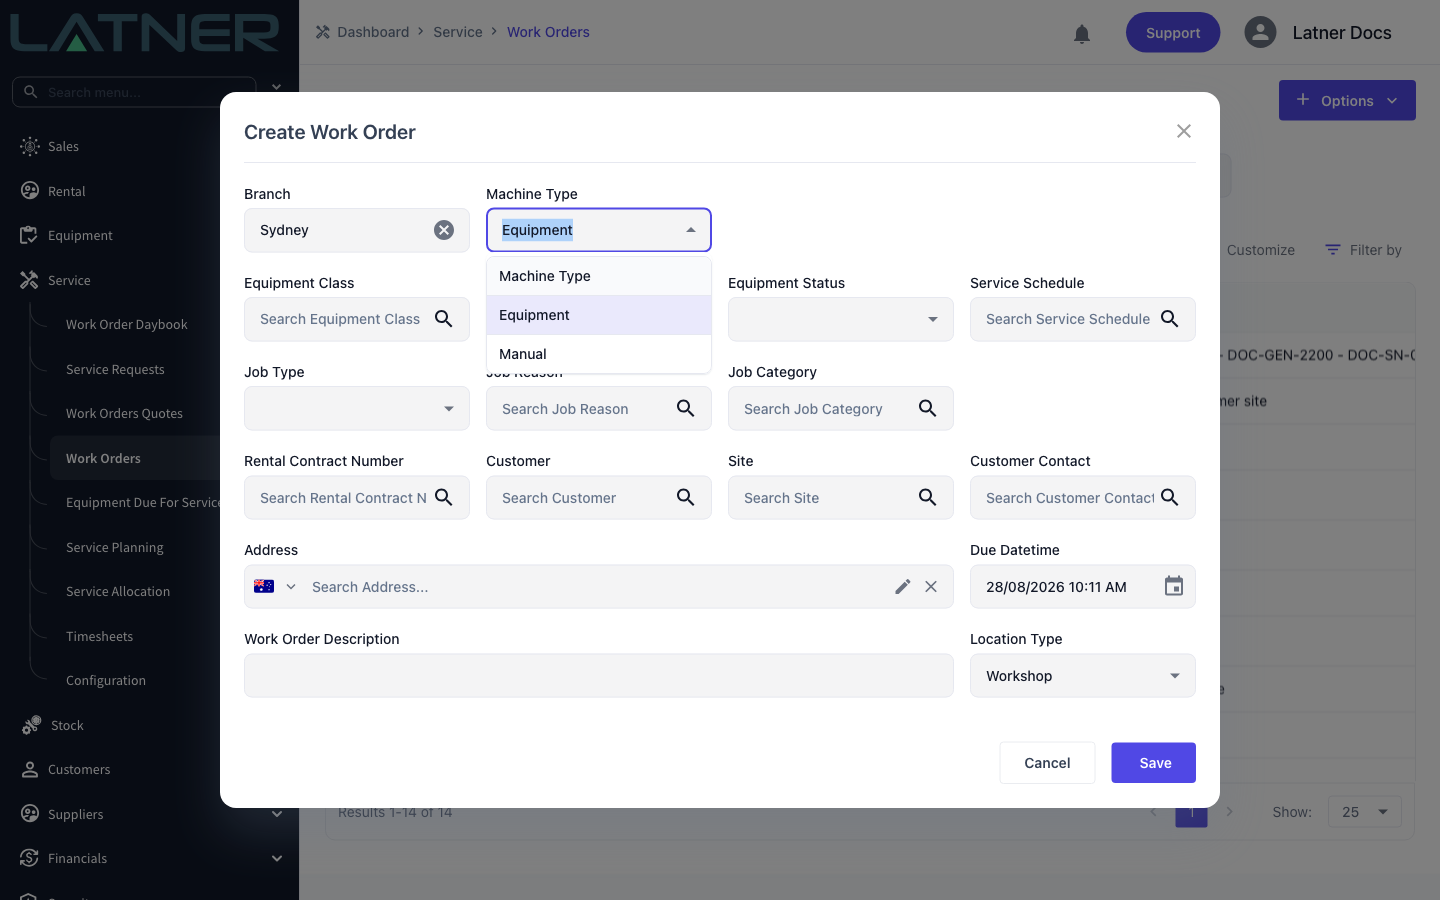
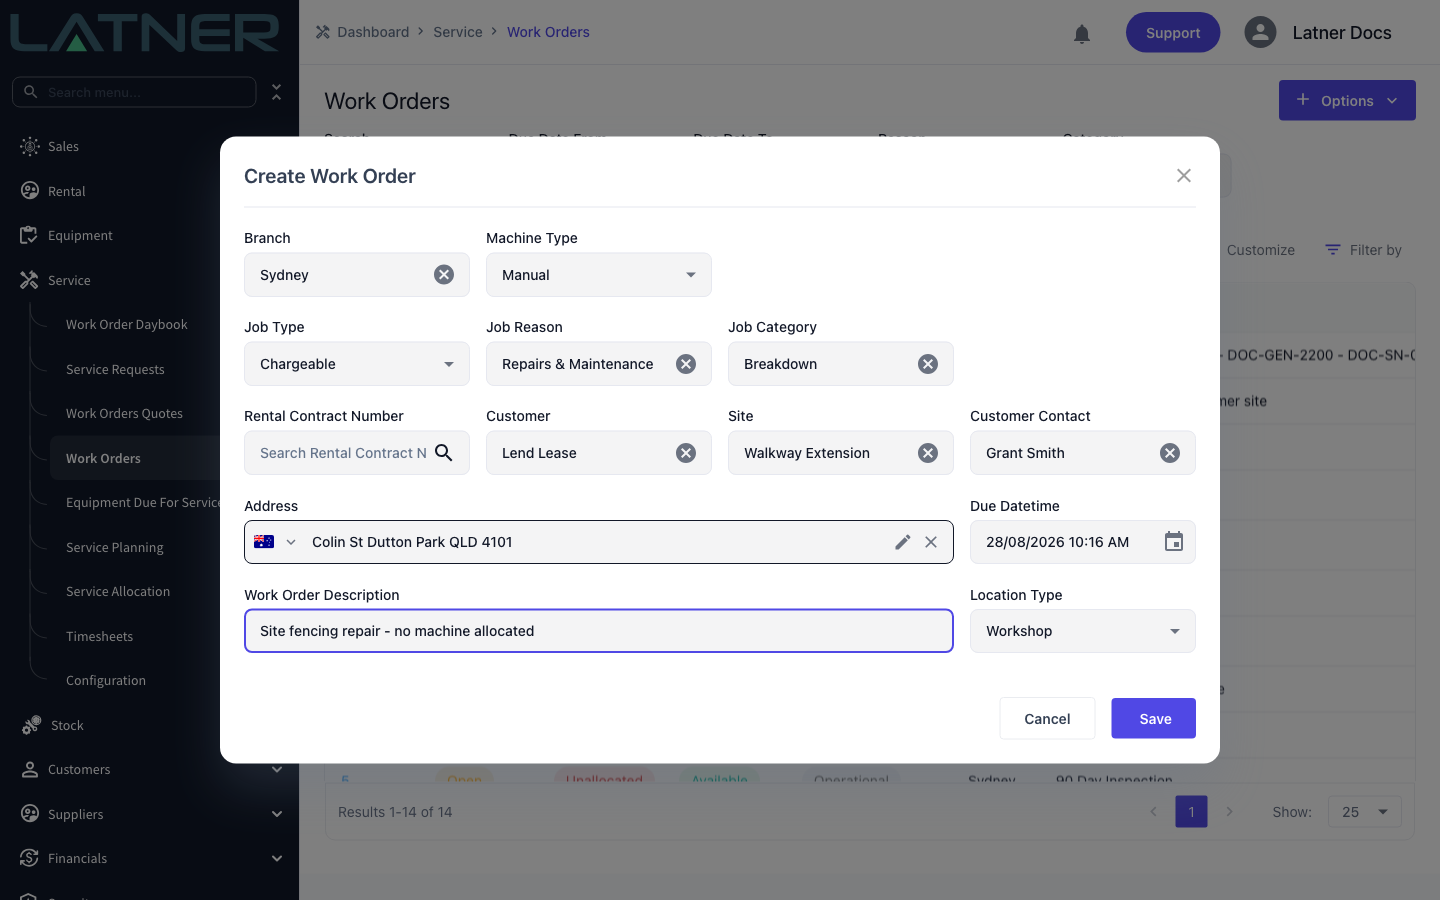
The form opens on Machine Type of Equipment. Change it to Manual.
Step 3 - Note which fields disappear
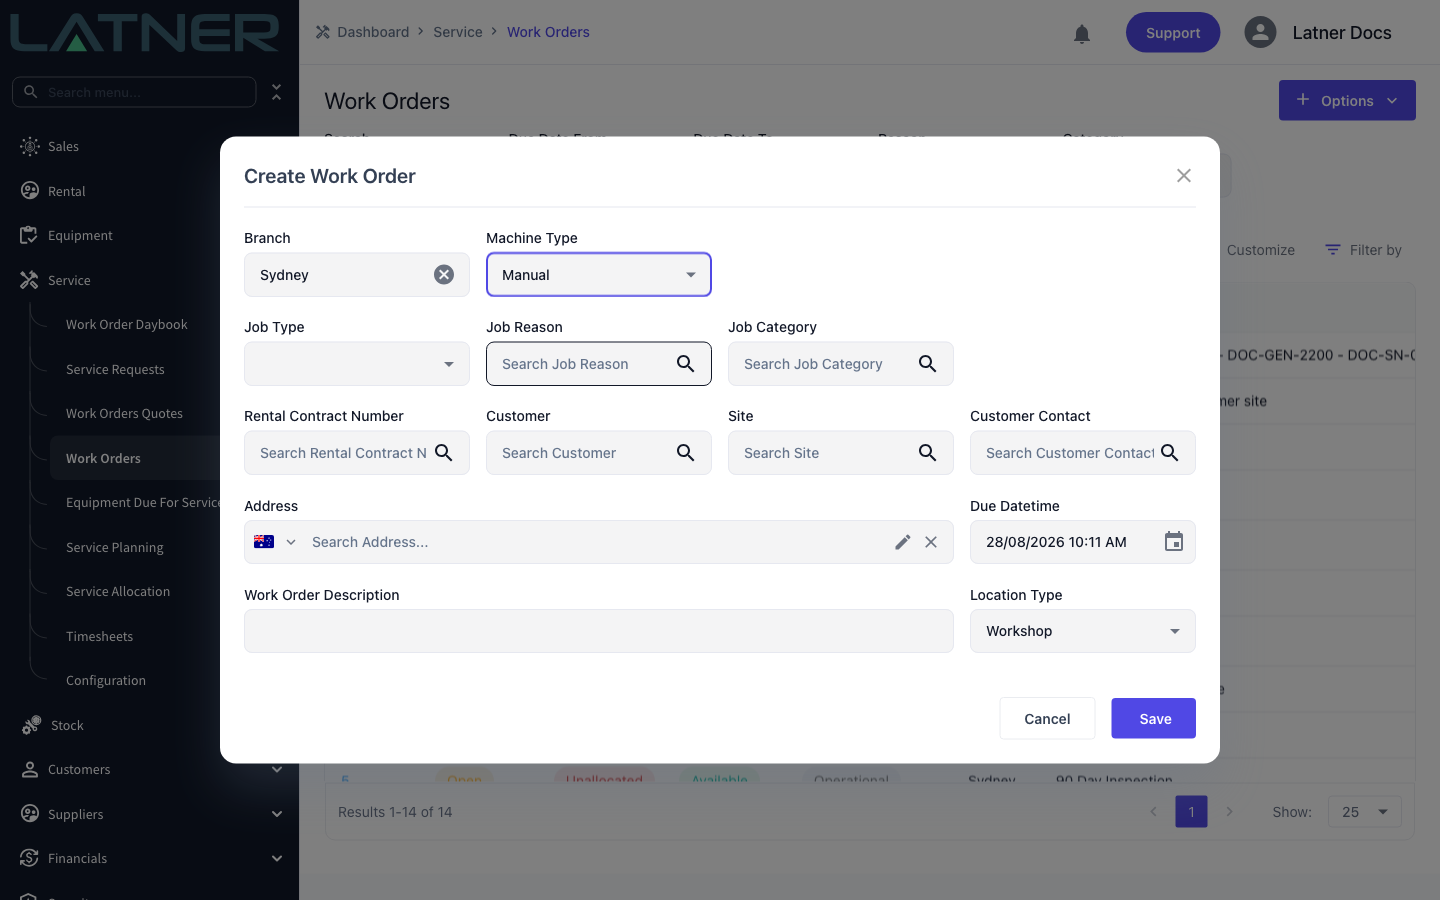
As soon as you pick Manual, the equipment fields are removed from the form and will not be saved against the Work Order:
-
Equipment Class and Equipment Number
-
Equipment Status (the operational / non-operational flag)
-
Service Schedule
Step 4 - Fill in the job details
Complete the remaining fields. These are the ones that matter:
-
Branch - required, and defaults to your own branch.
-
Job Type - required. Choose Internal, Chargeable or Customer Damage.
-
Job Reason and Job Category - both required. The Job Category list is filtered to the categories that belong to the reason you picked.
-
Customer, Site and Customer Contact - optional for an Internal job, but all three become required as soon as you choose Chargeable or Customer Damage.
-
Rental Contract Number - optional. Use it when the job belongs to a contract but not to one particular machine on it.
-
Work Order Description - required. This is what everyone sees on the daybook and allocation screens, so describe the job, not the machine.
-
Address, Due Datetime and Location Type - the address and contact details fill themselves in from the site or contract you pick.
Step 5 - Save and confirm
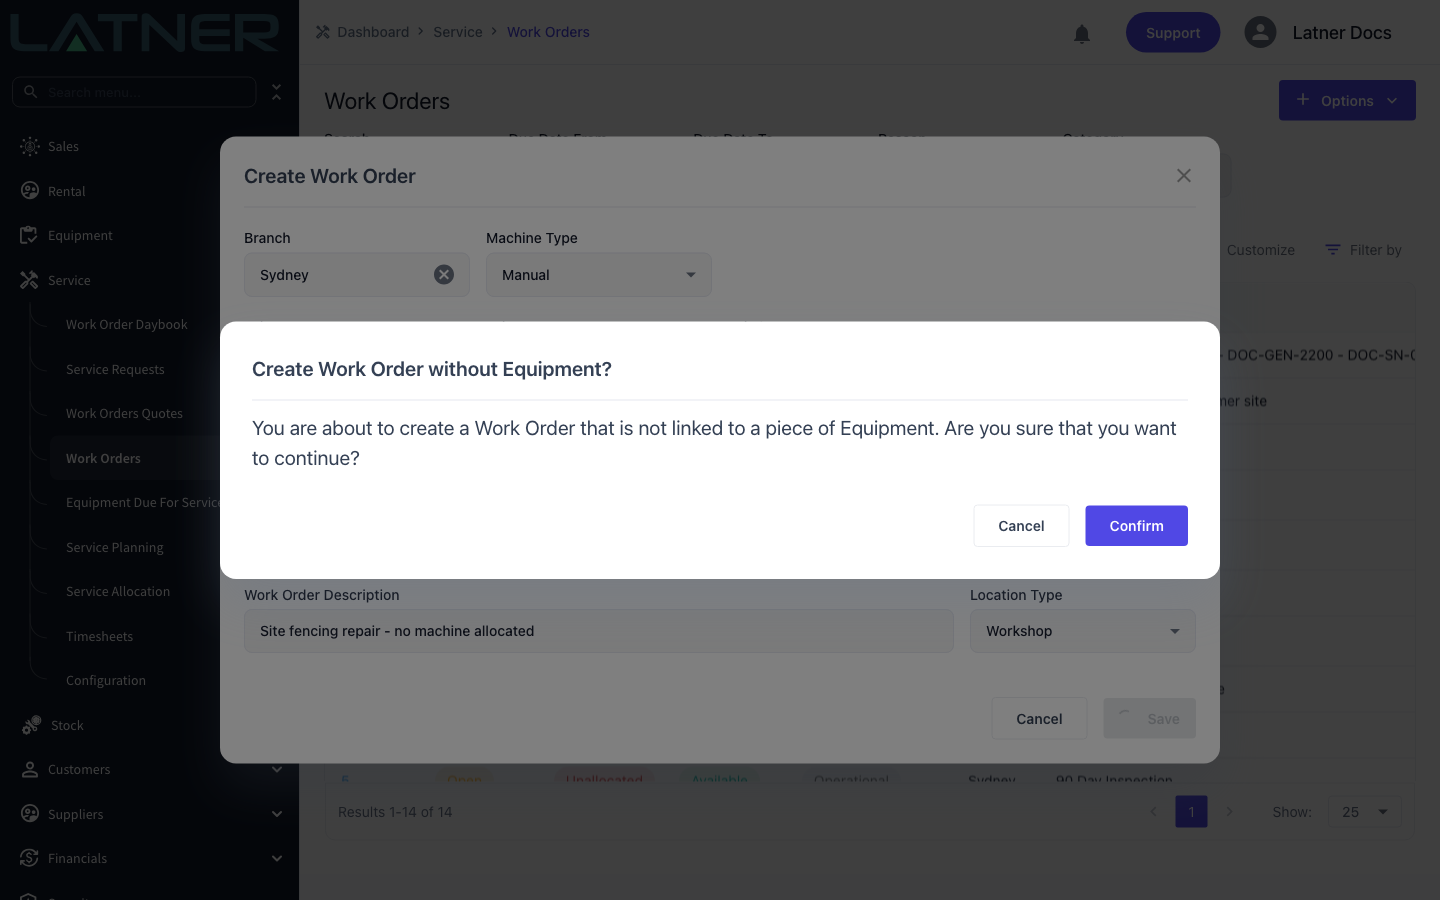
Click Save. Because you are about to raise a job with no machine attached, Latner asks you to confirm. Choose Confirm to continue, or Cancel to go back and add an equipment number.
Step 6 - Review the new Work Order
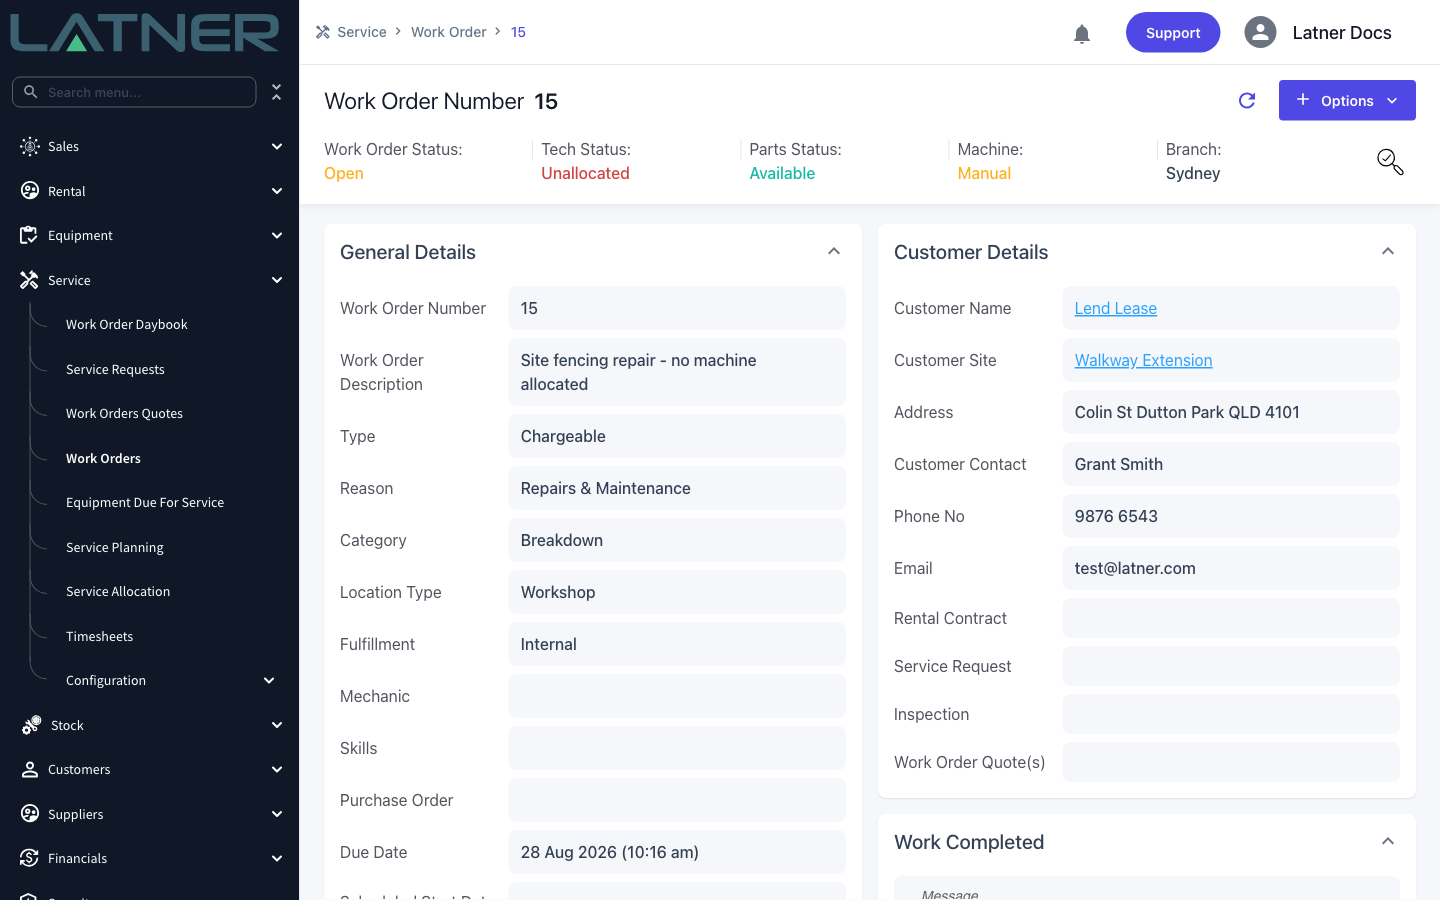
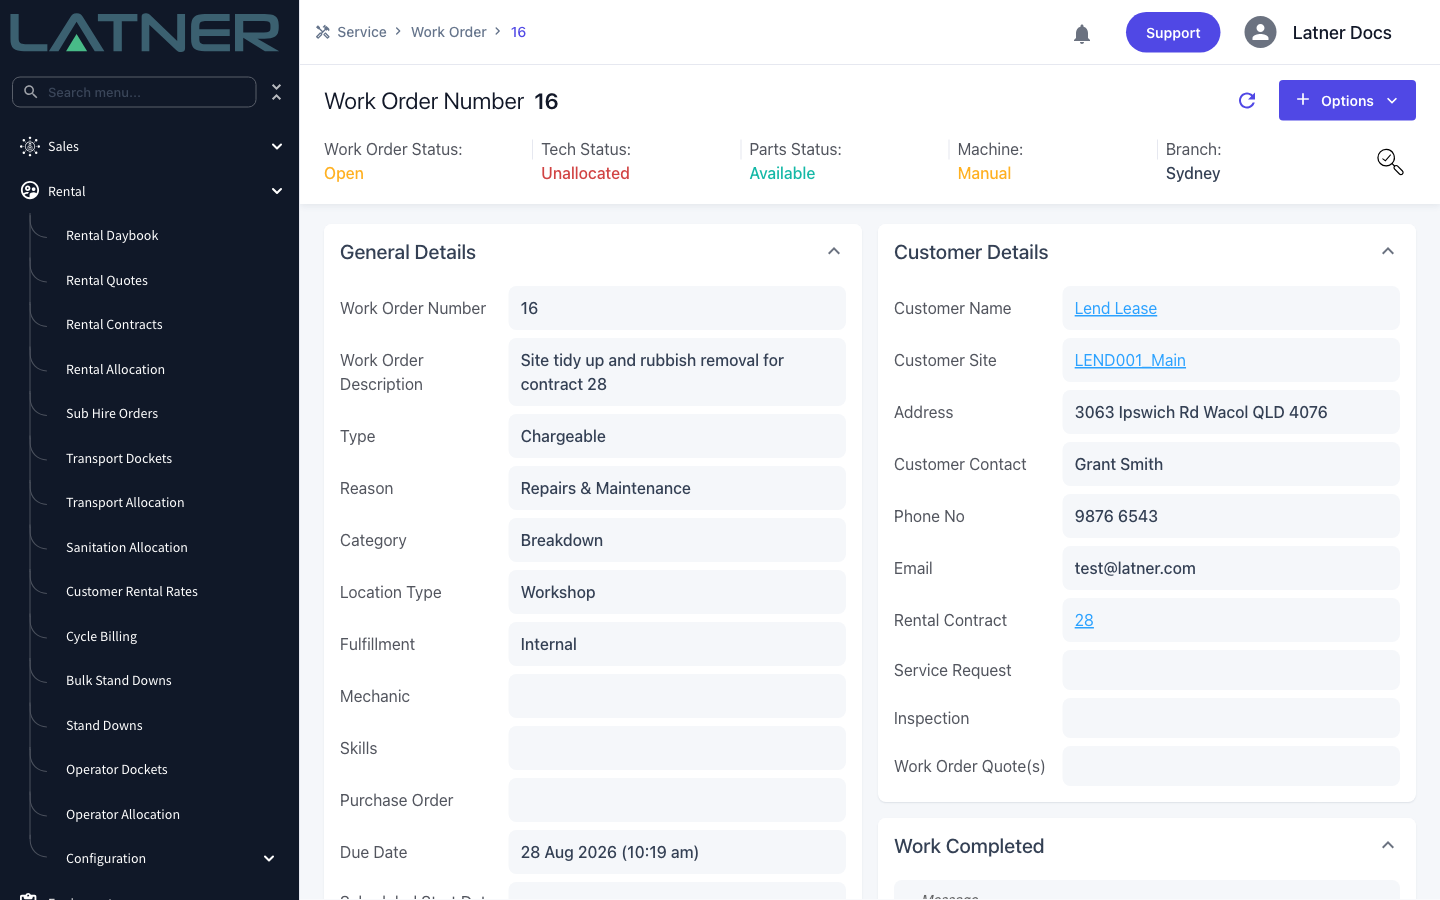
Latner opens the new Work Order. The header shows Machine: Manual, and the General Details panel has no Equipment Number row at all.
Creating a Manual Work Order From a Rental Contract
When the job belongs to a contract - a site clean up, a delivery, a job across several machines - raise it from the contract instead. The contract, customer, site and branch come across automatically and cannot be changed on the form.
Step 1 - Open the contract and choose Create Work Order
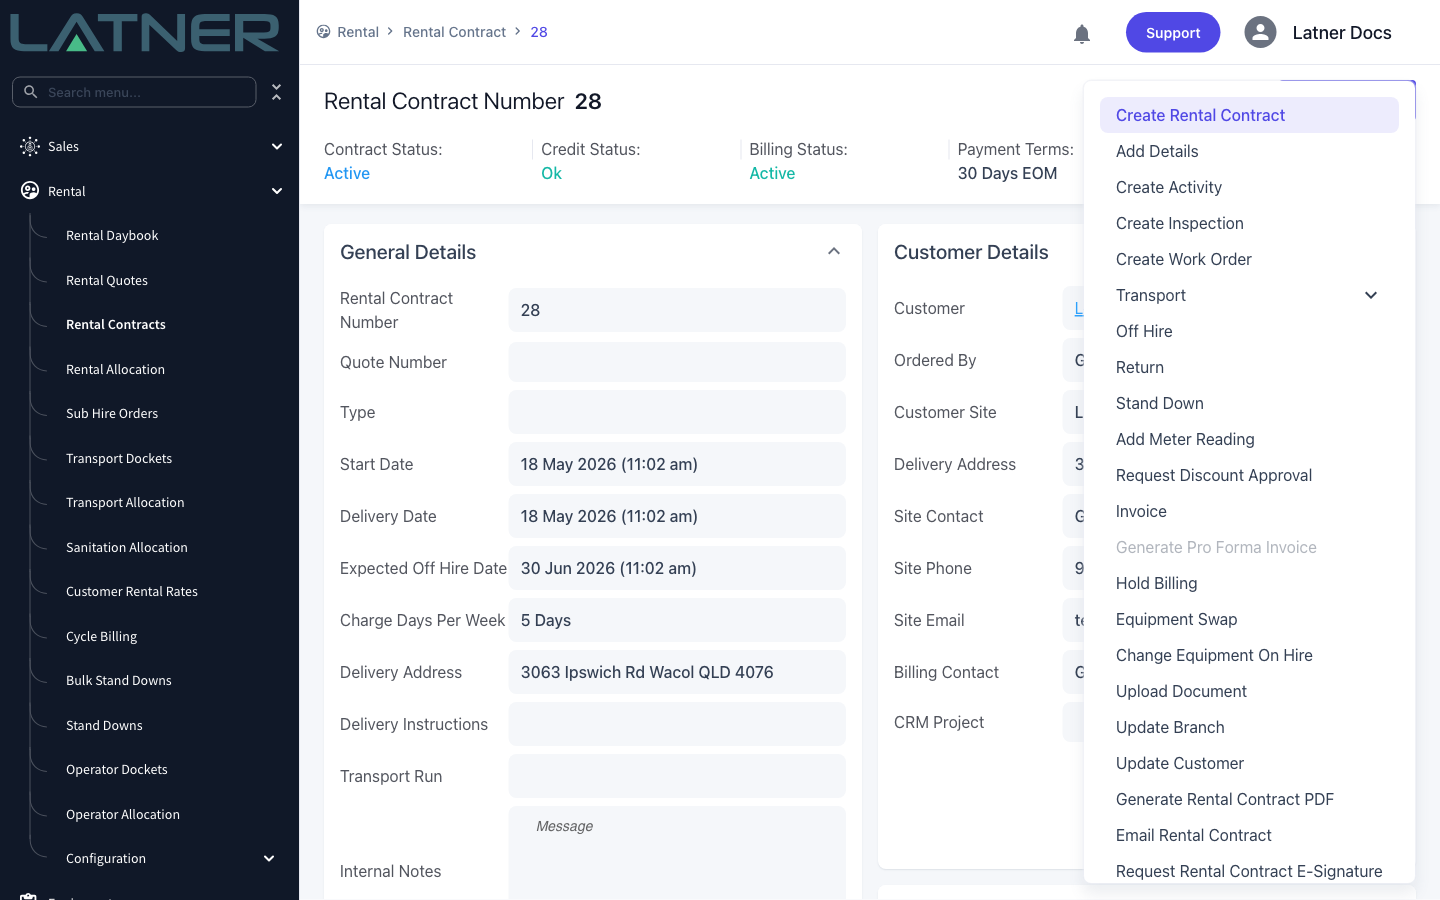
Open the contract from Rental › Rental Contracts, then choose Options › Create Work Order. The option is hidden once the contract is closed.
Step 2 - Switch Machine Type to Manual and complete the job
Set Machine Type to Manual. The Detail Line picker (which is how you would normally choose the machine on the contract), Equipment Status and Service Schedule all drop off the form. Fill in Job Type, Job Reason, Job Category, Customer Contact and Work Order Description.
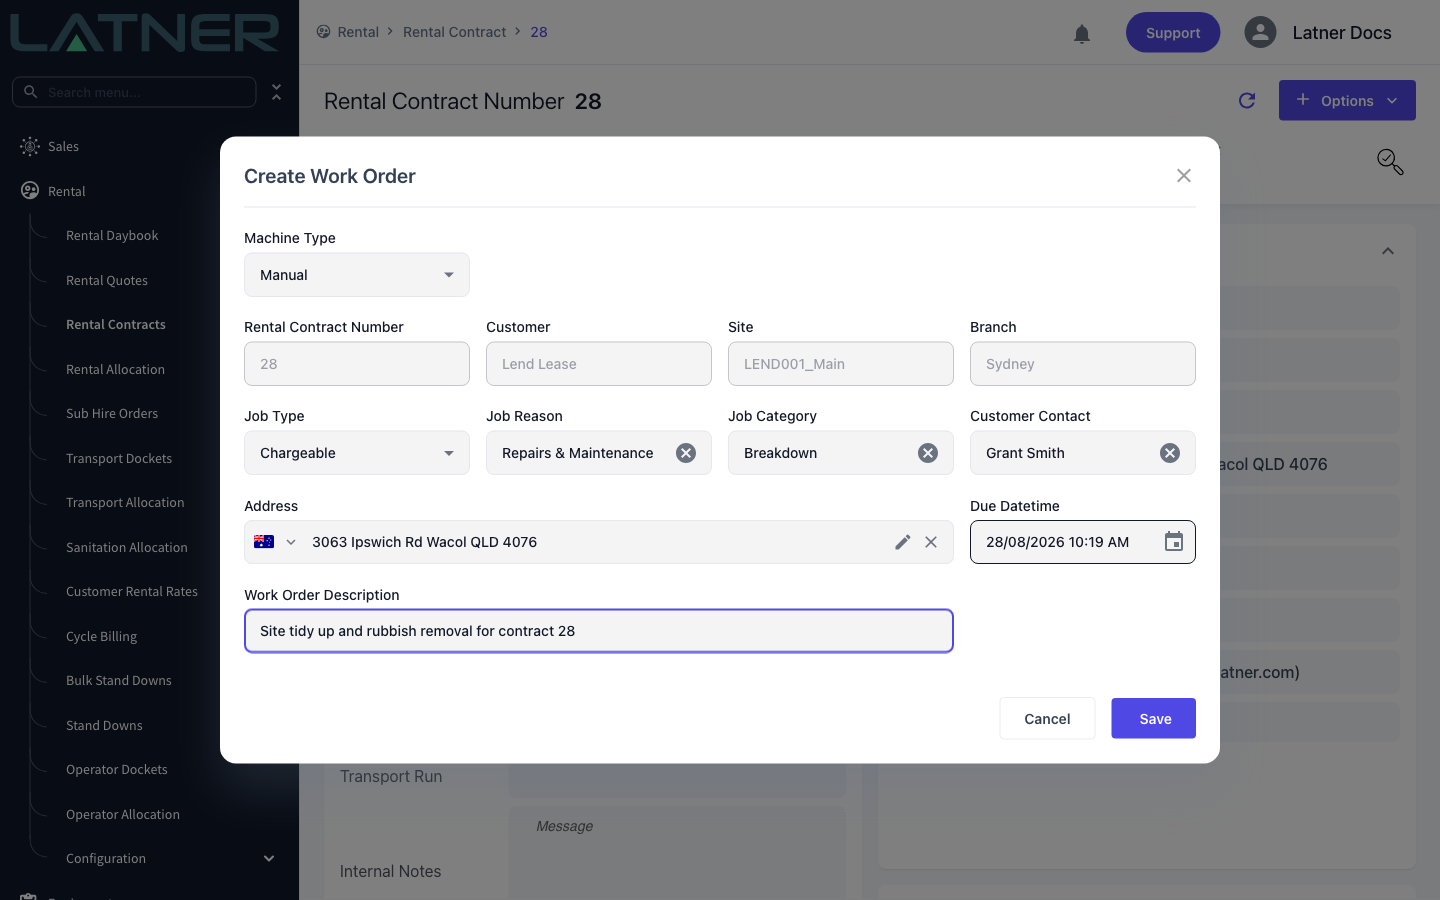
Step 3 - Save and confirm
Click Save and then Confirm at the same "without Equipment" prompt. The new Work Order opens with the contract shown under Customer Details.
After Creation
-
The Work Order opens with a status of Open and a Tech Status of Unallocated, and appears on the Work Order Daybook, Service Planning and Service Allocation screens like any other job.
-
No equipment is affected. Nothing is set out of service or non-operational, because there is no machine on the Work Order.
-
Timesheets, parts, expenses, picking lists, purchase orders, checklists and Work Order Quotes can all be added as normal.
-
Chargeable manual Work Orders invoice exactly like equipment ones, against the customer on the Work Order.
-
The job will not appear in any equipment's service history, since service history is built per piece of equipment.
The Machine Type is fixed when the Work Order is created and cannot be changed afterwards, and equipment cannot be attached to a manual Work Order later. If it turns out the job really was against a machine, cancel the manual Work Order and raise a new one with the equipment number on it.