
Allocating a work order tells Latner who is doing the job, so the mechanic sees it on their list and the workshop can plan the day around it.
Overview
Every work order starts life unallocated, and somebody has to decide who picks it up. In Latner that decision lives on the work order itself: set the Fulfillment, choose a Mechanic, and the work order is theirs.
-
A work order has one primary mechanic. Extra hands are added separately as secondary technicians.
-
Choosing a Mechanic moves the Tech Status from Unallocated to Allocated on its own. You never set that status by hand.
-
The Mechanic dropdown lists every active skilled person, so anyone set up as a skilled person can take a work order.
-
Allocating and scheduling are two different things. Allocating names the mechanic; scheduling gives the job a start and end time, and that happens on the Service Allocation screen.
-
Switching Fulfillment to External replaces the Mechanic field with a Supplier field, for work you send out to a contractor.
Before You Begin
Allocating is a permission-gated action, and the person you are allocating to has to exist as a skilled person first.
|
Requirement |
Where to Find It |
|---|---|
|
Work Order screen permission |
Security › Configuration › Permission Groups, then Service › Screen. Lets you open Service › Work Orders. |
|
Edit Work Order permission |
Security › Configuration › Permission Groups, then Service › Option. Required to save any change to a work order. |
|
Assign Work Order Technician permission |
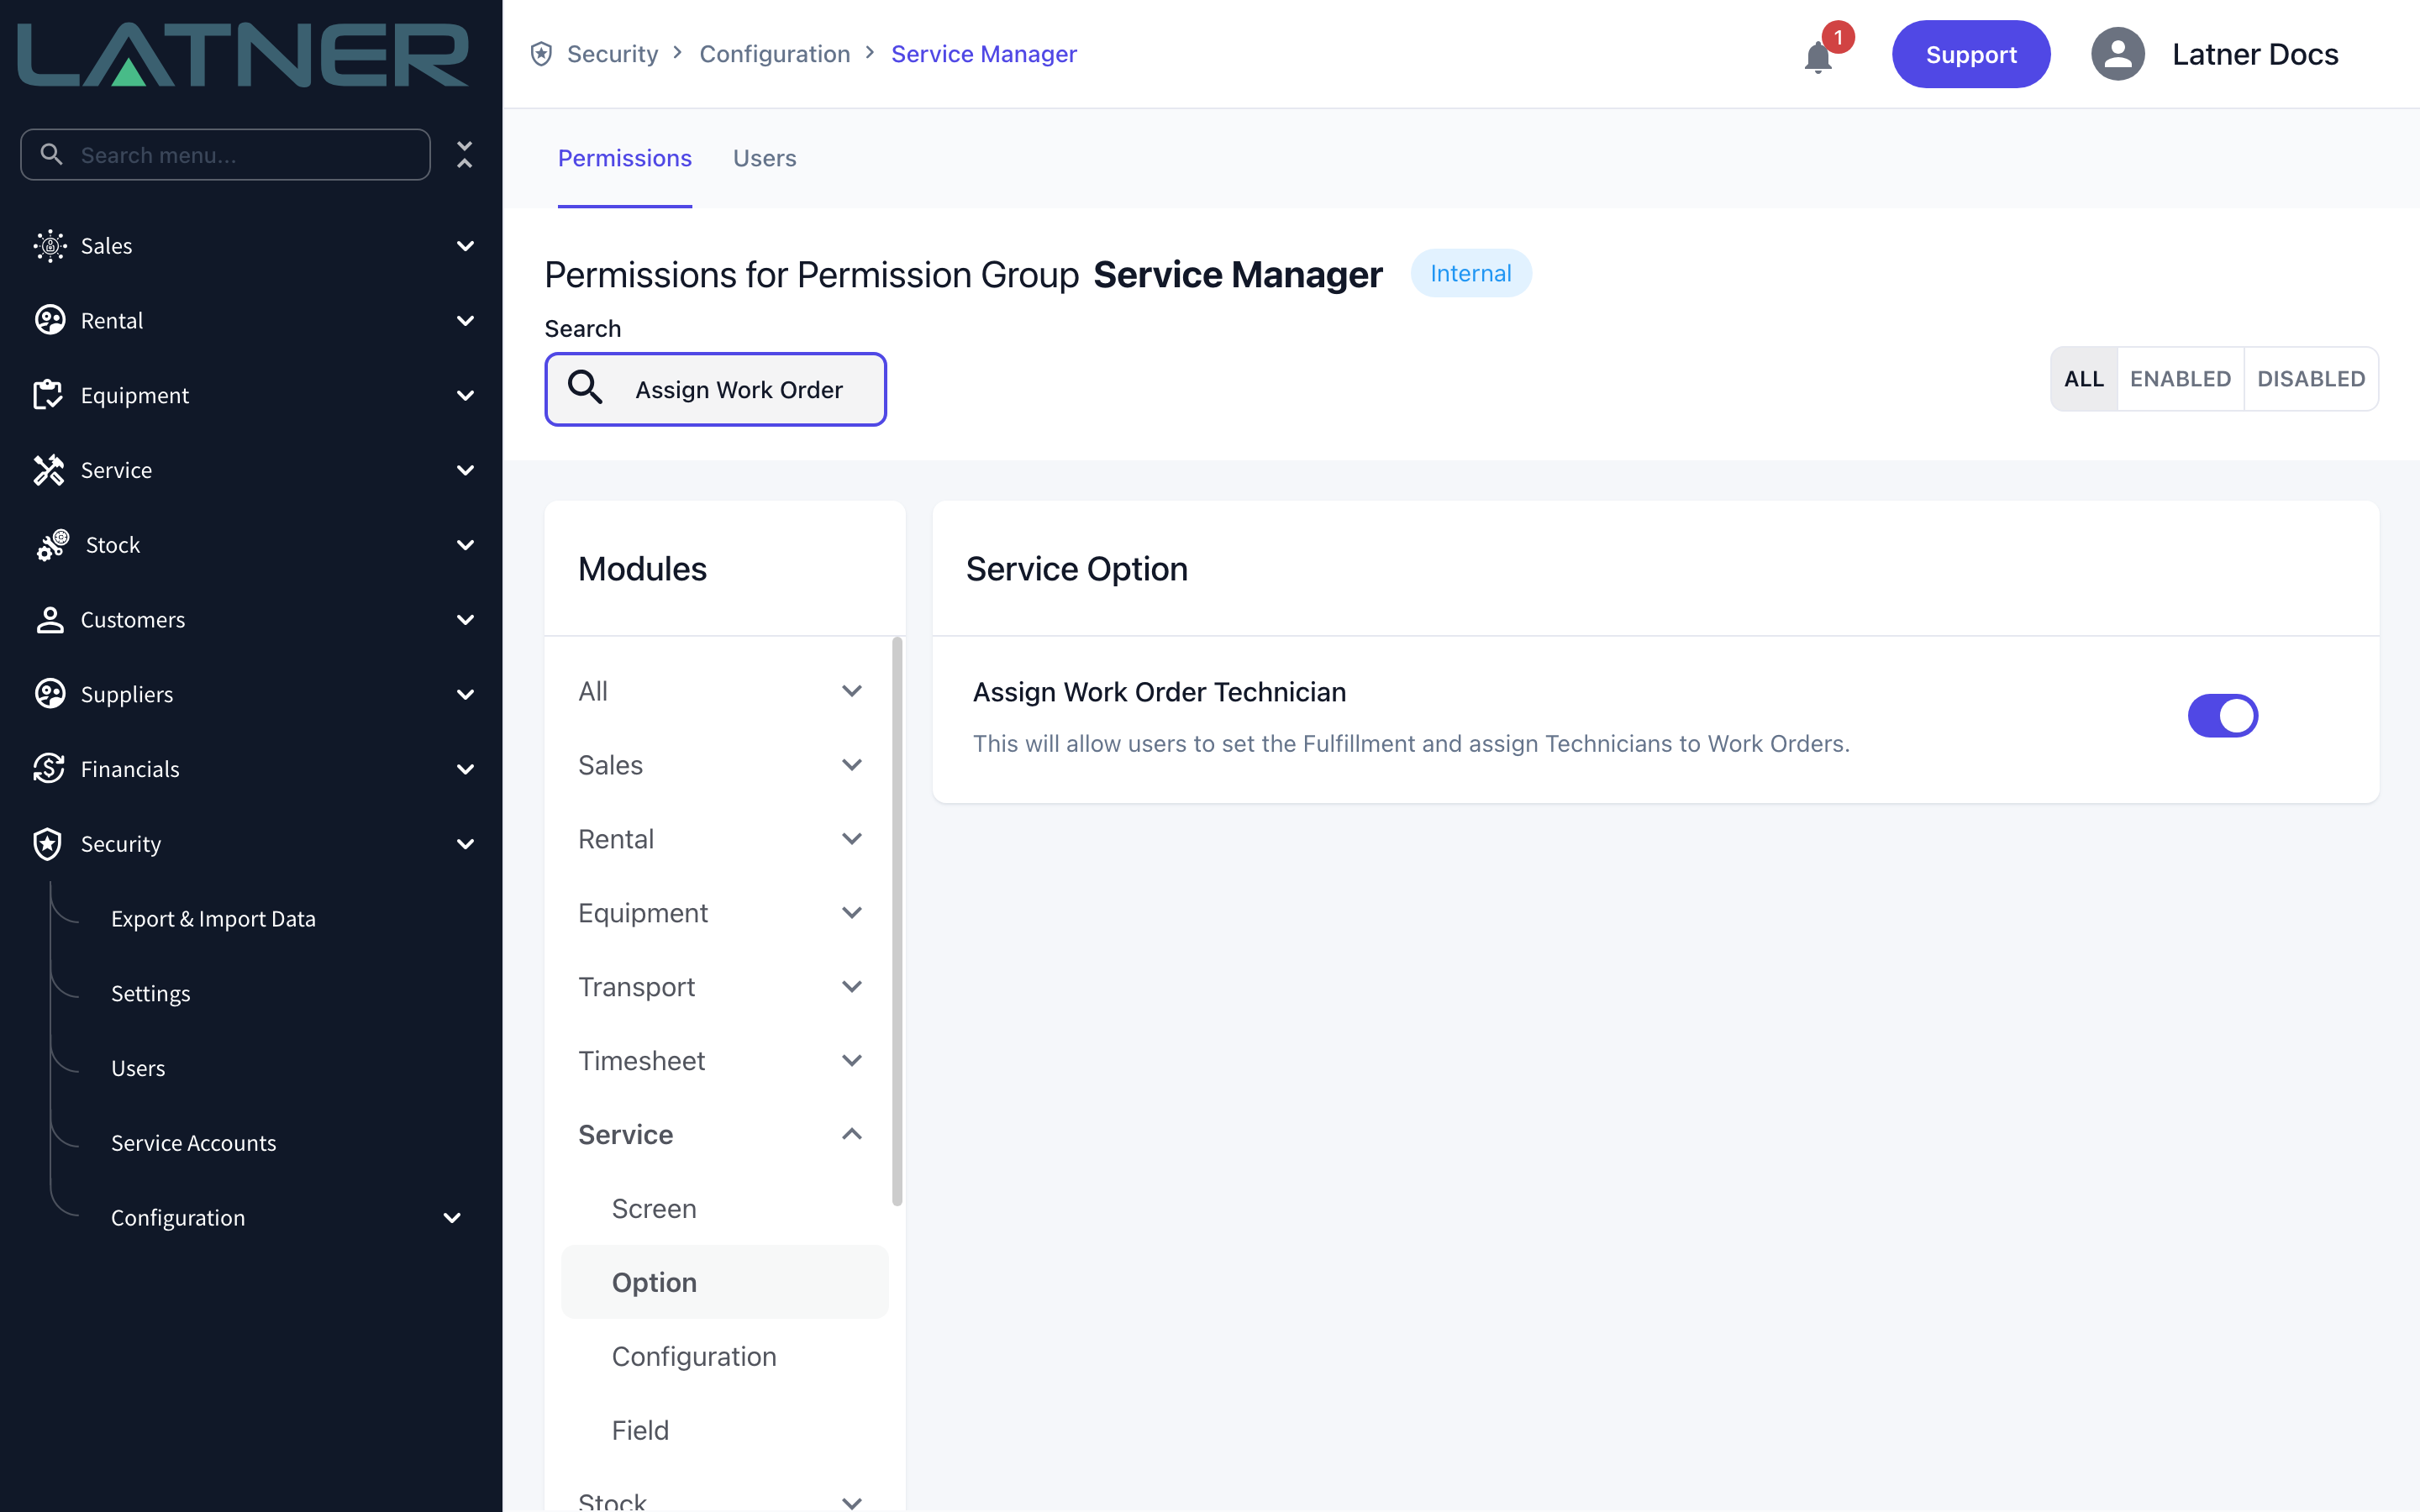
Security › Configuration › Permission Groups, then Service › Option. Unlocks the Fulfillment and Mechanic fields. |
|
Service Allocation screen permission |
Security › Configuration › Permission Groups, then Service › Screen. Only needed for the scheduling step. |
|
The mechanic set up as a skilled person |
Service › Configuration › Skilled Persons. The person must be Active to appear in the dropdown. |
|
A work order in Open status |
Service › Work Orders. The Mechanic field is read-only once a work order is completed or cancelled. |
Only Field Technician and Workshop Technician skilled persons appear as lanes on the Service Allocation screen. Someone whose only role is Driver or Yard can still be picked in the Mechanic dropdown, but you will not be able to schedule their job on the allocation board.
Allocating the Work Order
Step 1 - Find the work order
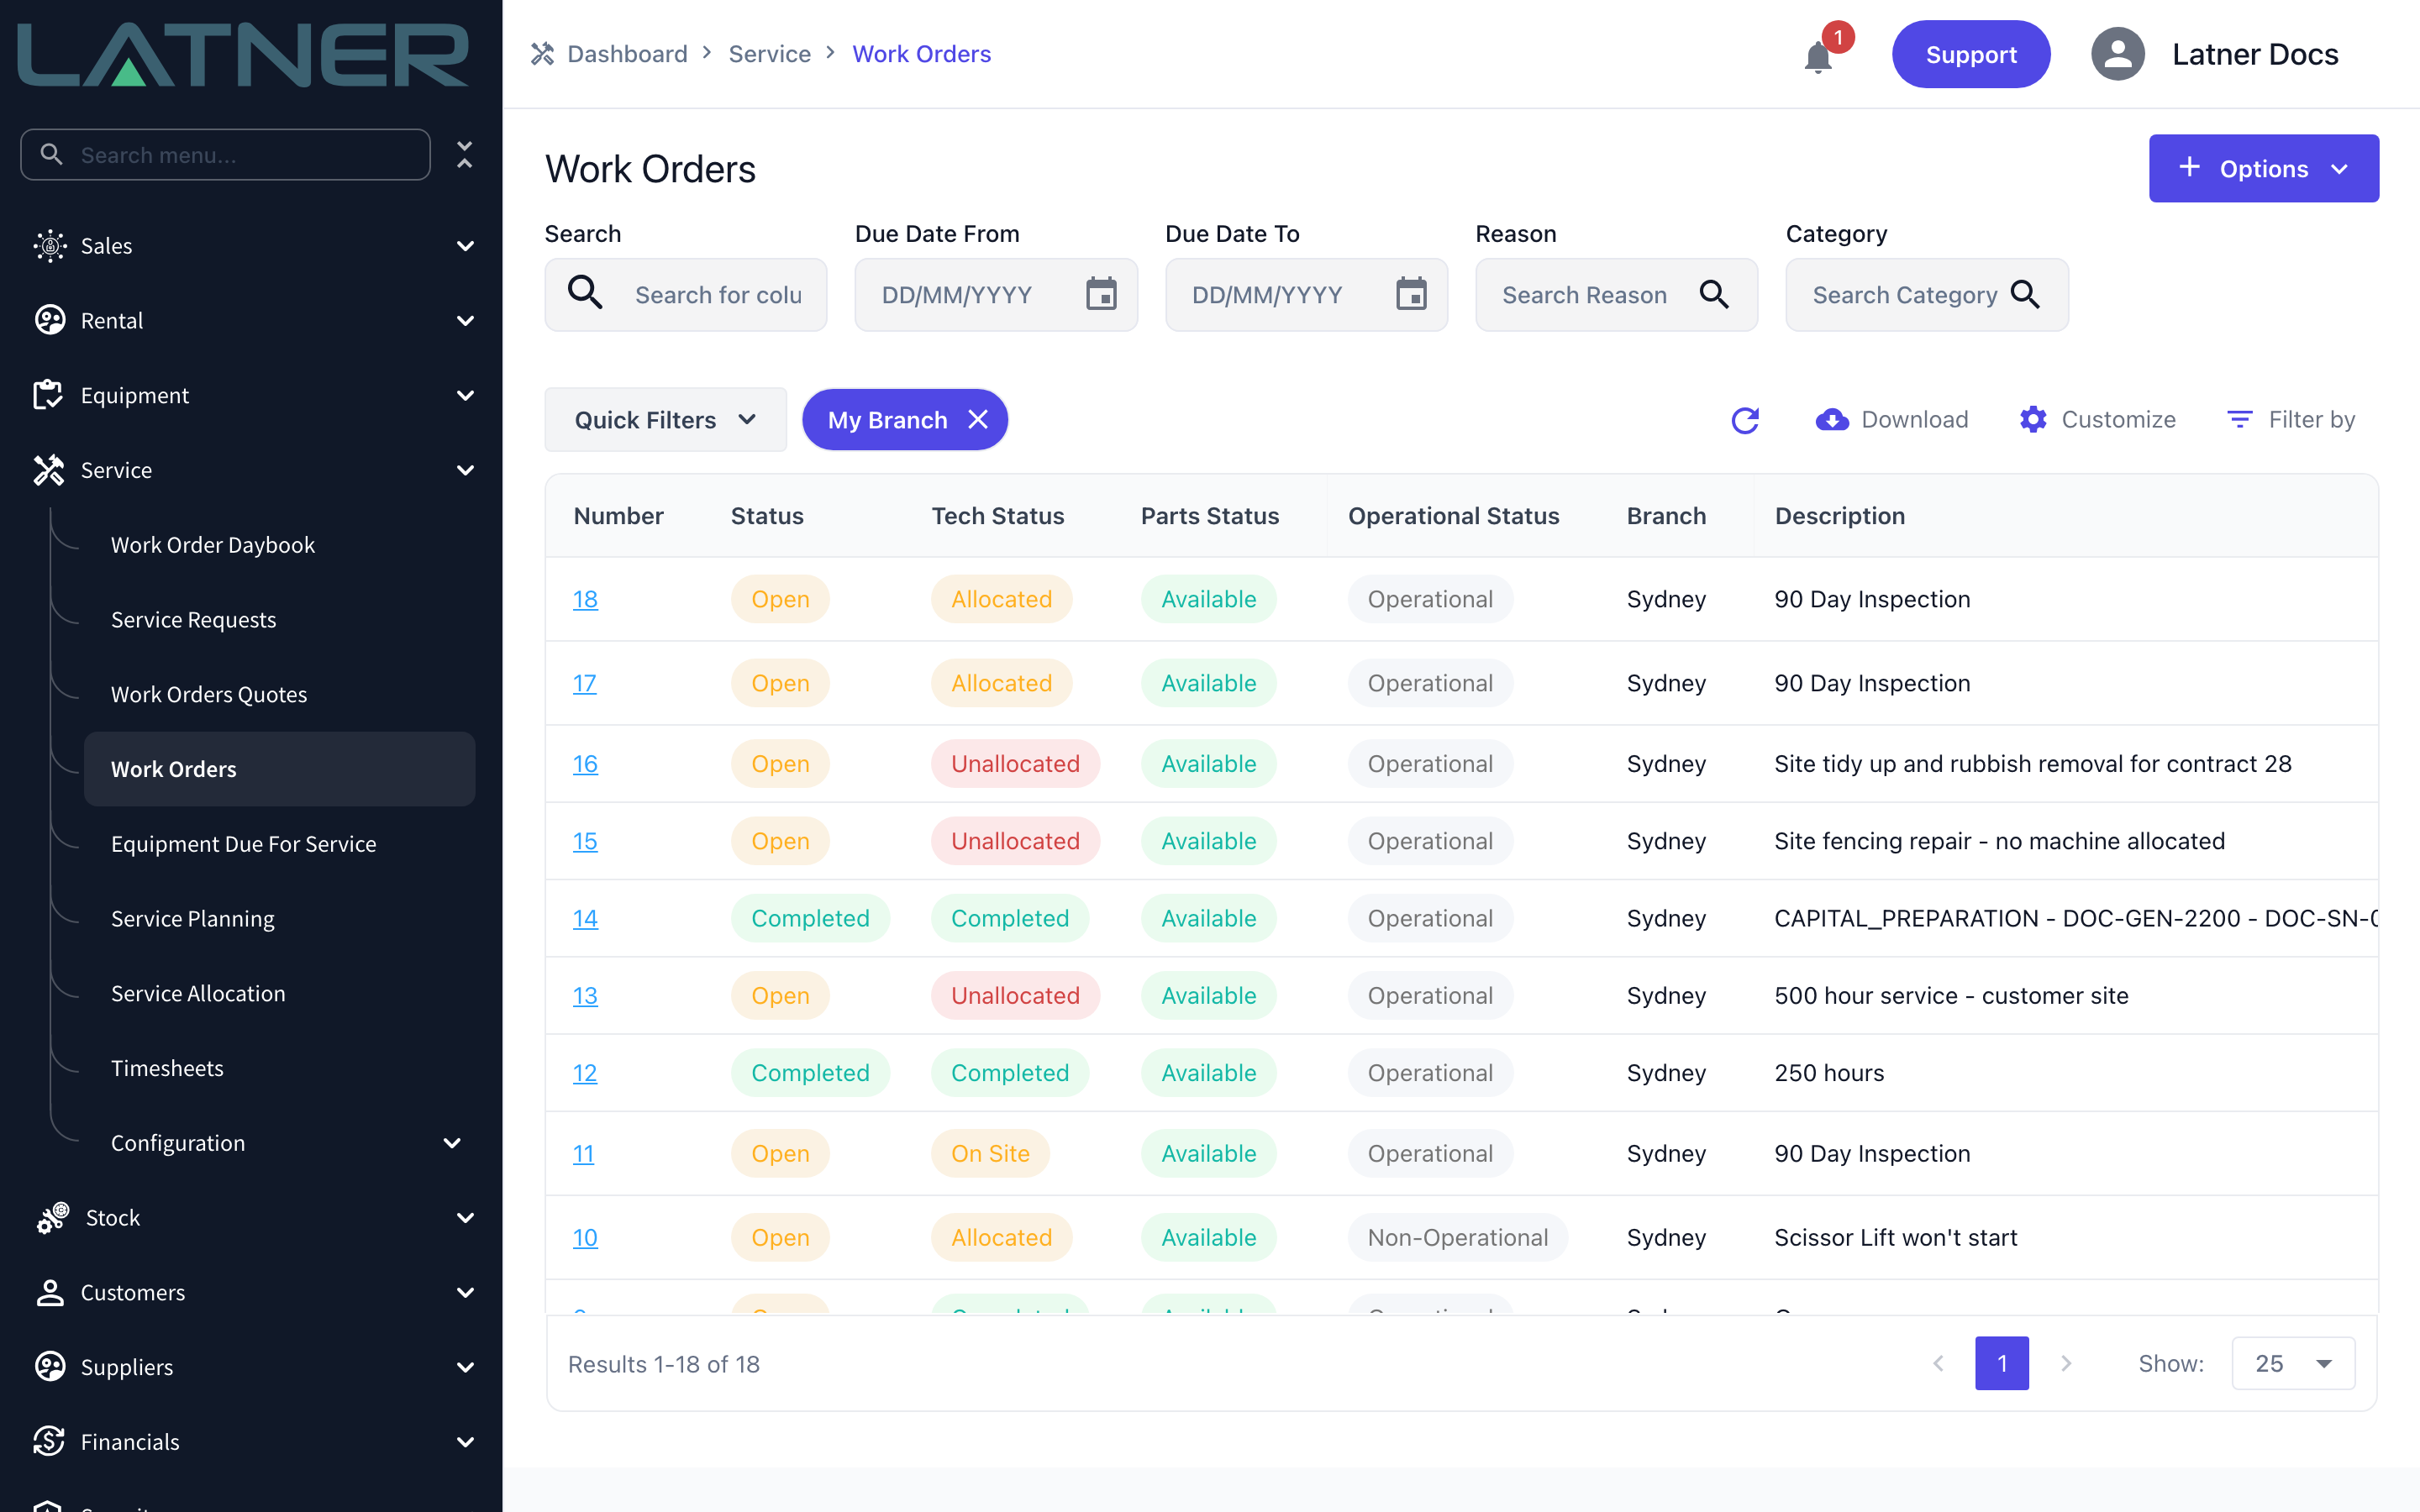
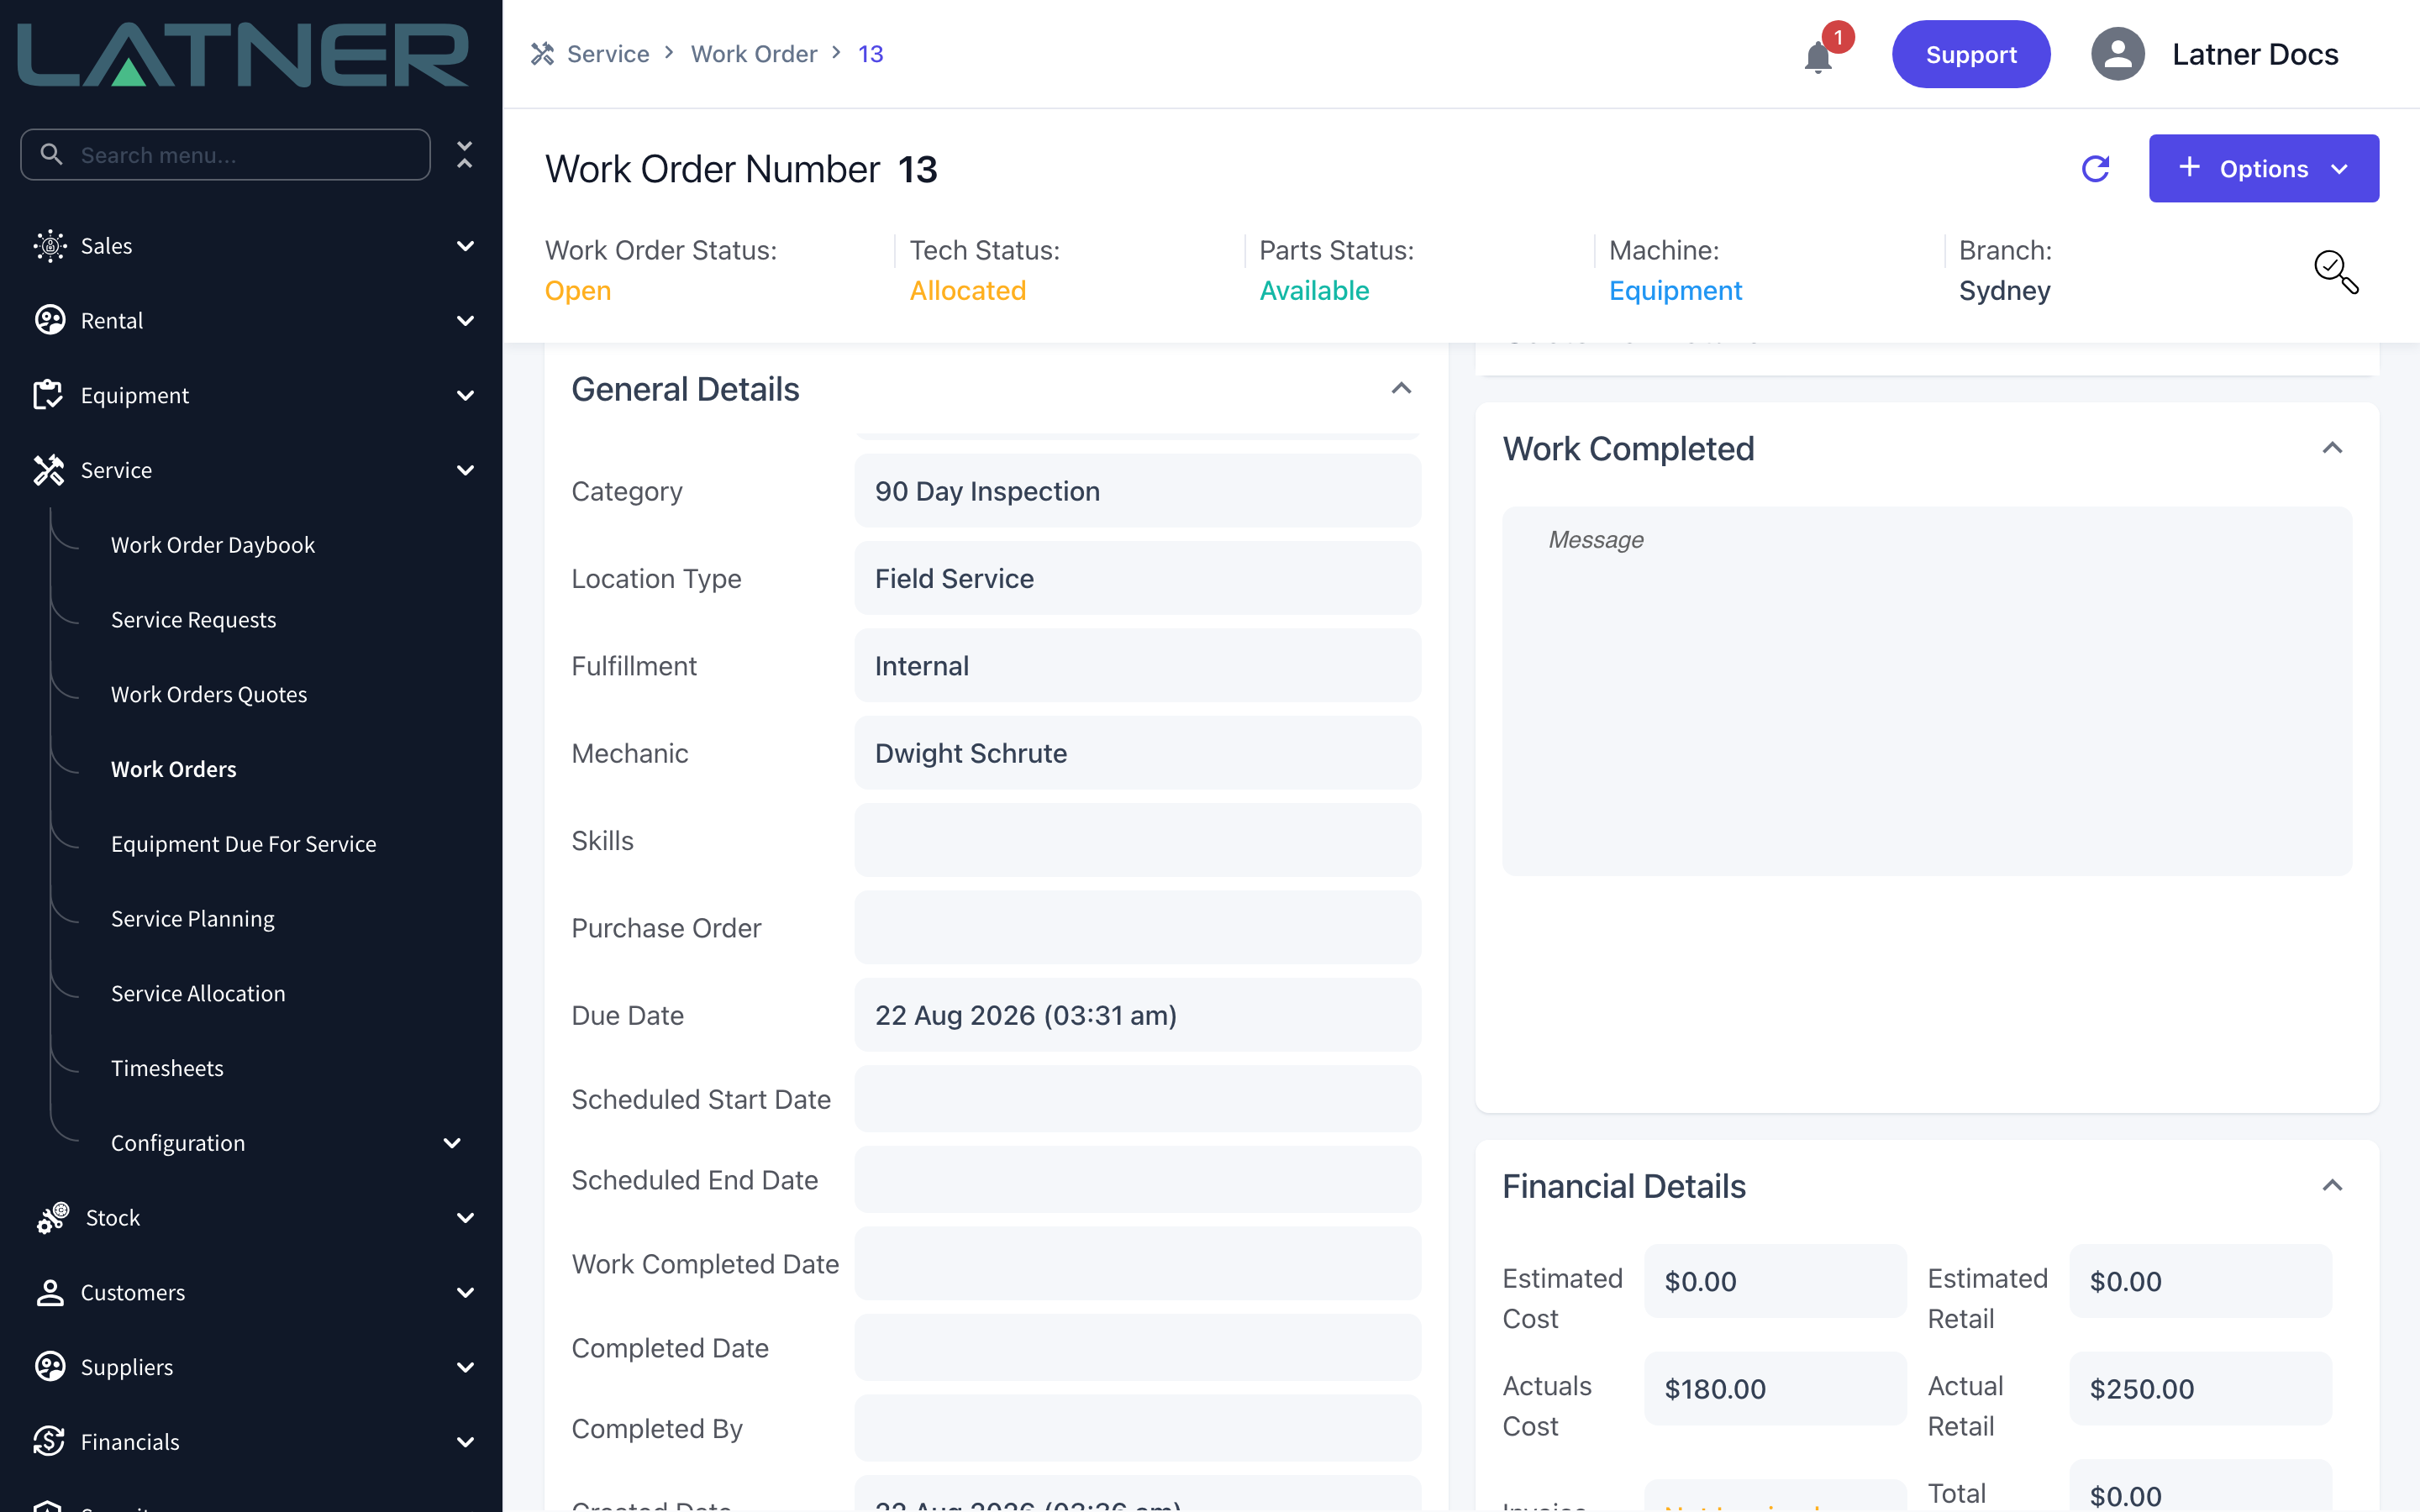
Go to Service › Work Orders and look for the jobs with a Tech Status of Unallocated. Click the work order number to open it.
Step 2 - Check the Fulfillment
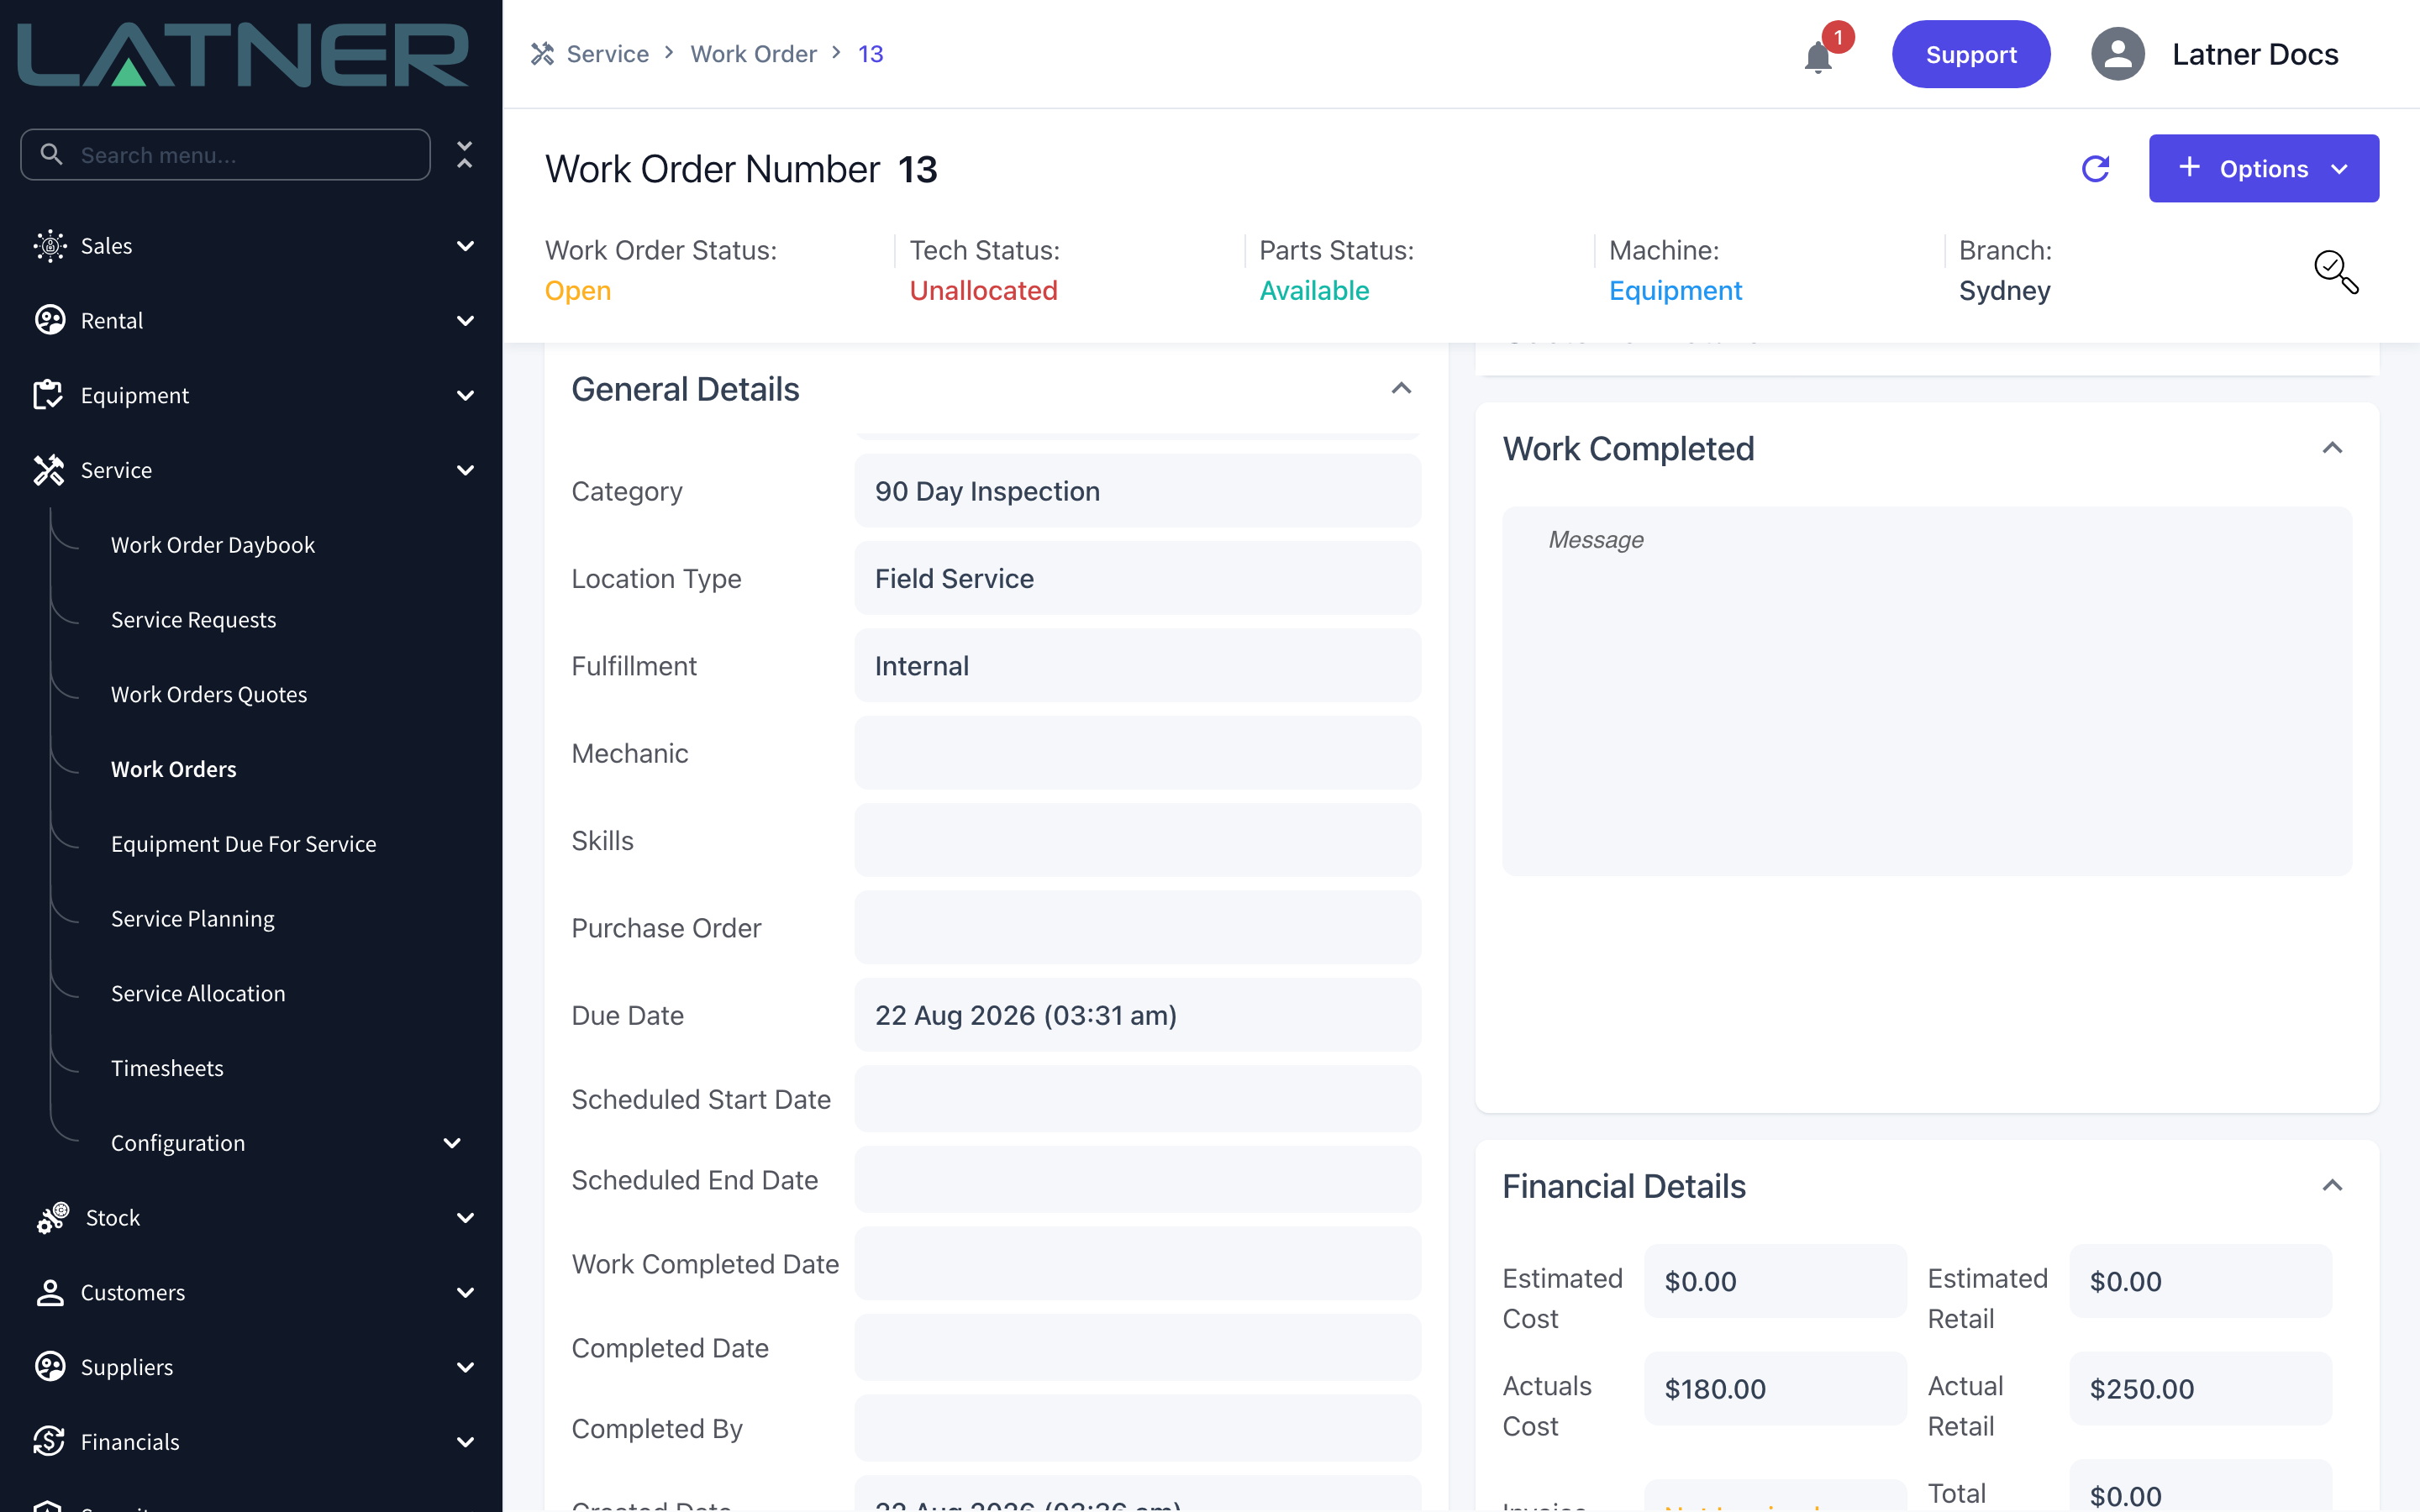
On the work order, scroll the General Details card down to Fulfillment. Leave it on Internal to allocate the job to one of your own mechanics. The field directly beneath it changes to suit: Mechanic for internal work, Supplier for external.
Step 3 - Choose the mechanic
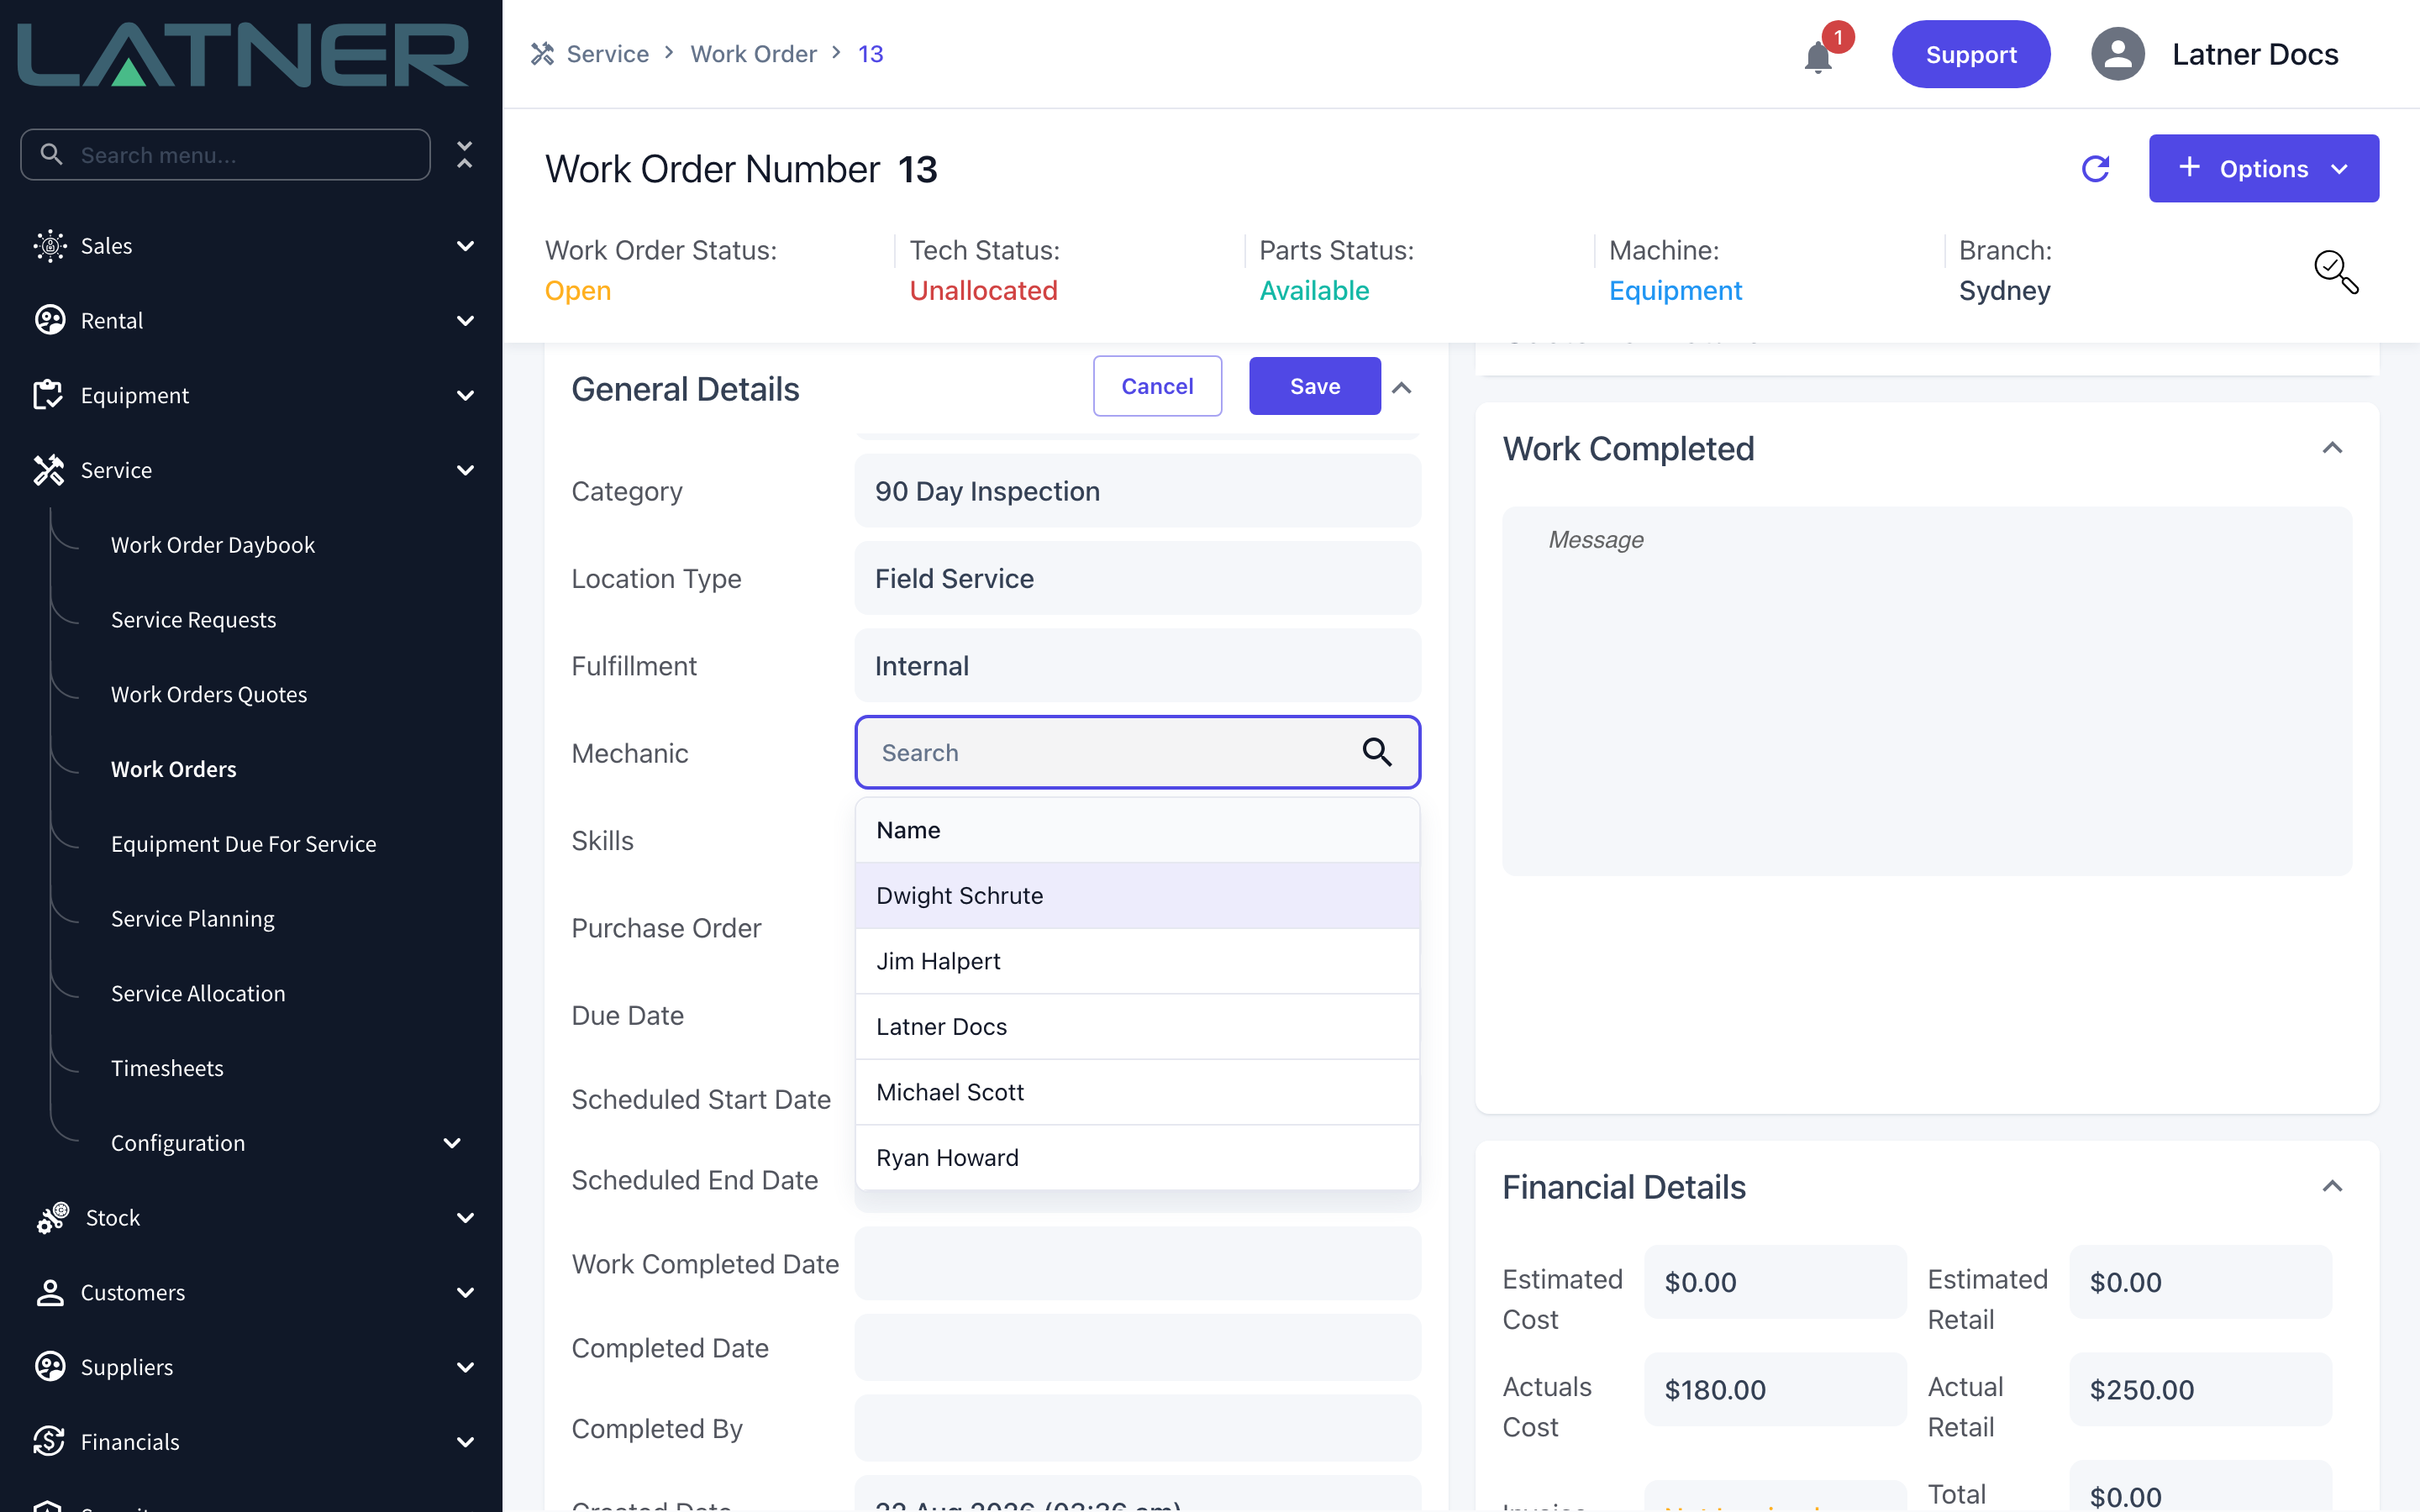
Click the Mechanic field. The card switches into edit mode, Cancel and Save appear in the card header, and a search box opens listing your active skilled persons. Type a name to narrow the list, then click the person you want.
Step 4 - Save
Click Save in the General Details header. The Tech Status at the top of the page changes from Unallocated to Allocated, and the mechanic's name now sits in the Mechanic field.
Scheduling the Allocated Work Order
Allocating names the mechanic but does not book any time. Scheduled Start Date and Scheduled End Date are read-only on the work order on purpose - they are set by dragging the job onto the Service Allocation board.
Step 5 - Open the Service Allocation screen
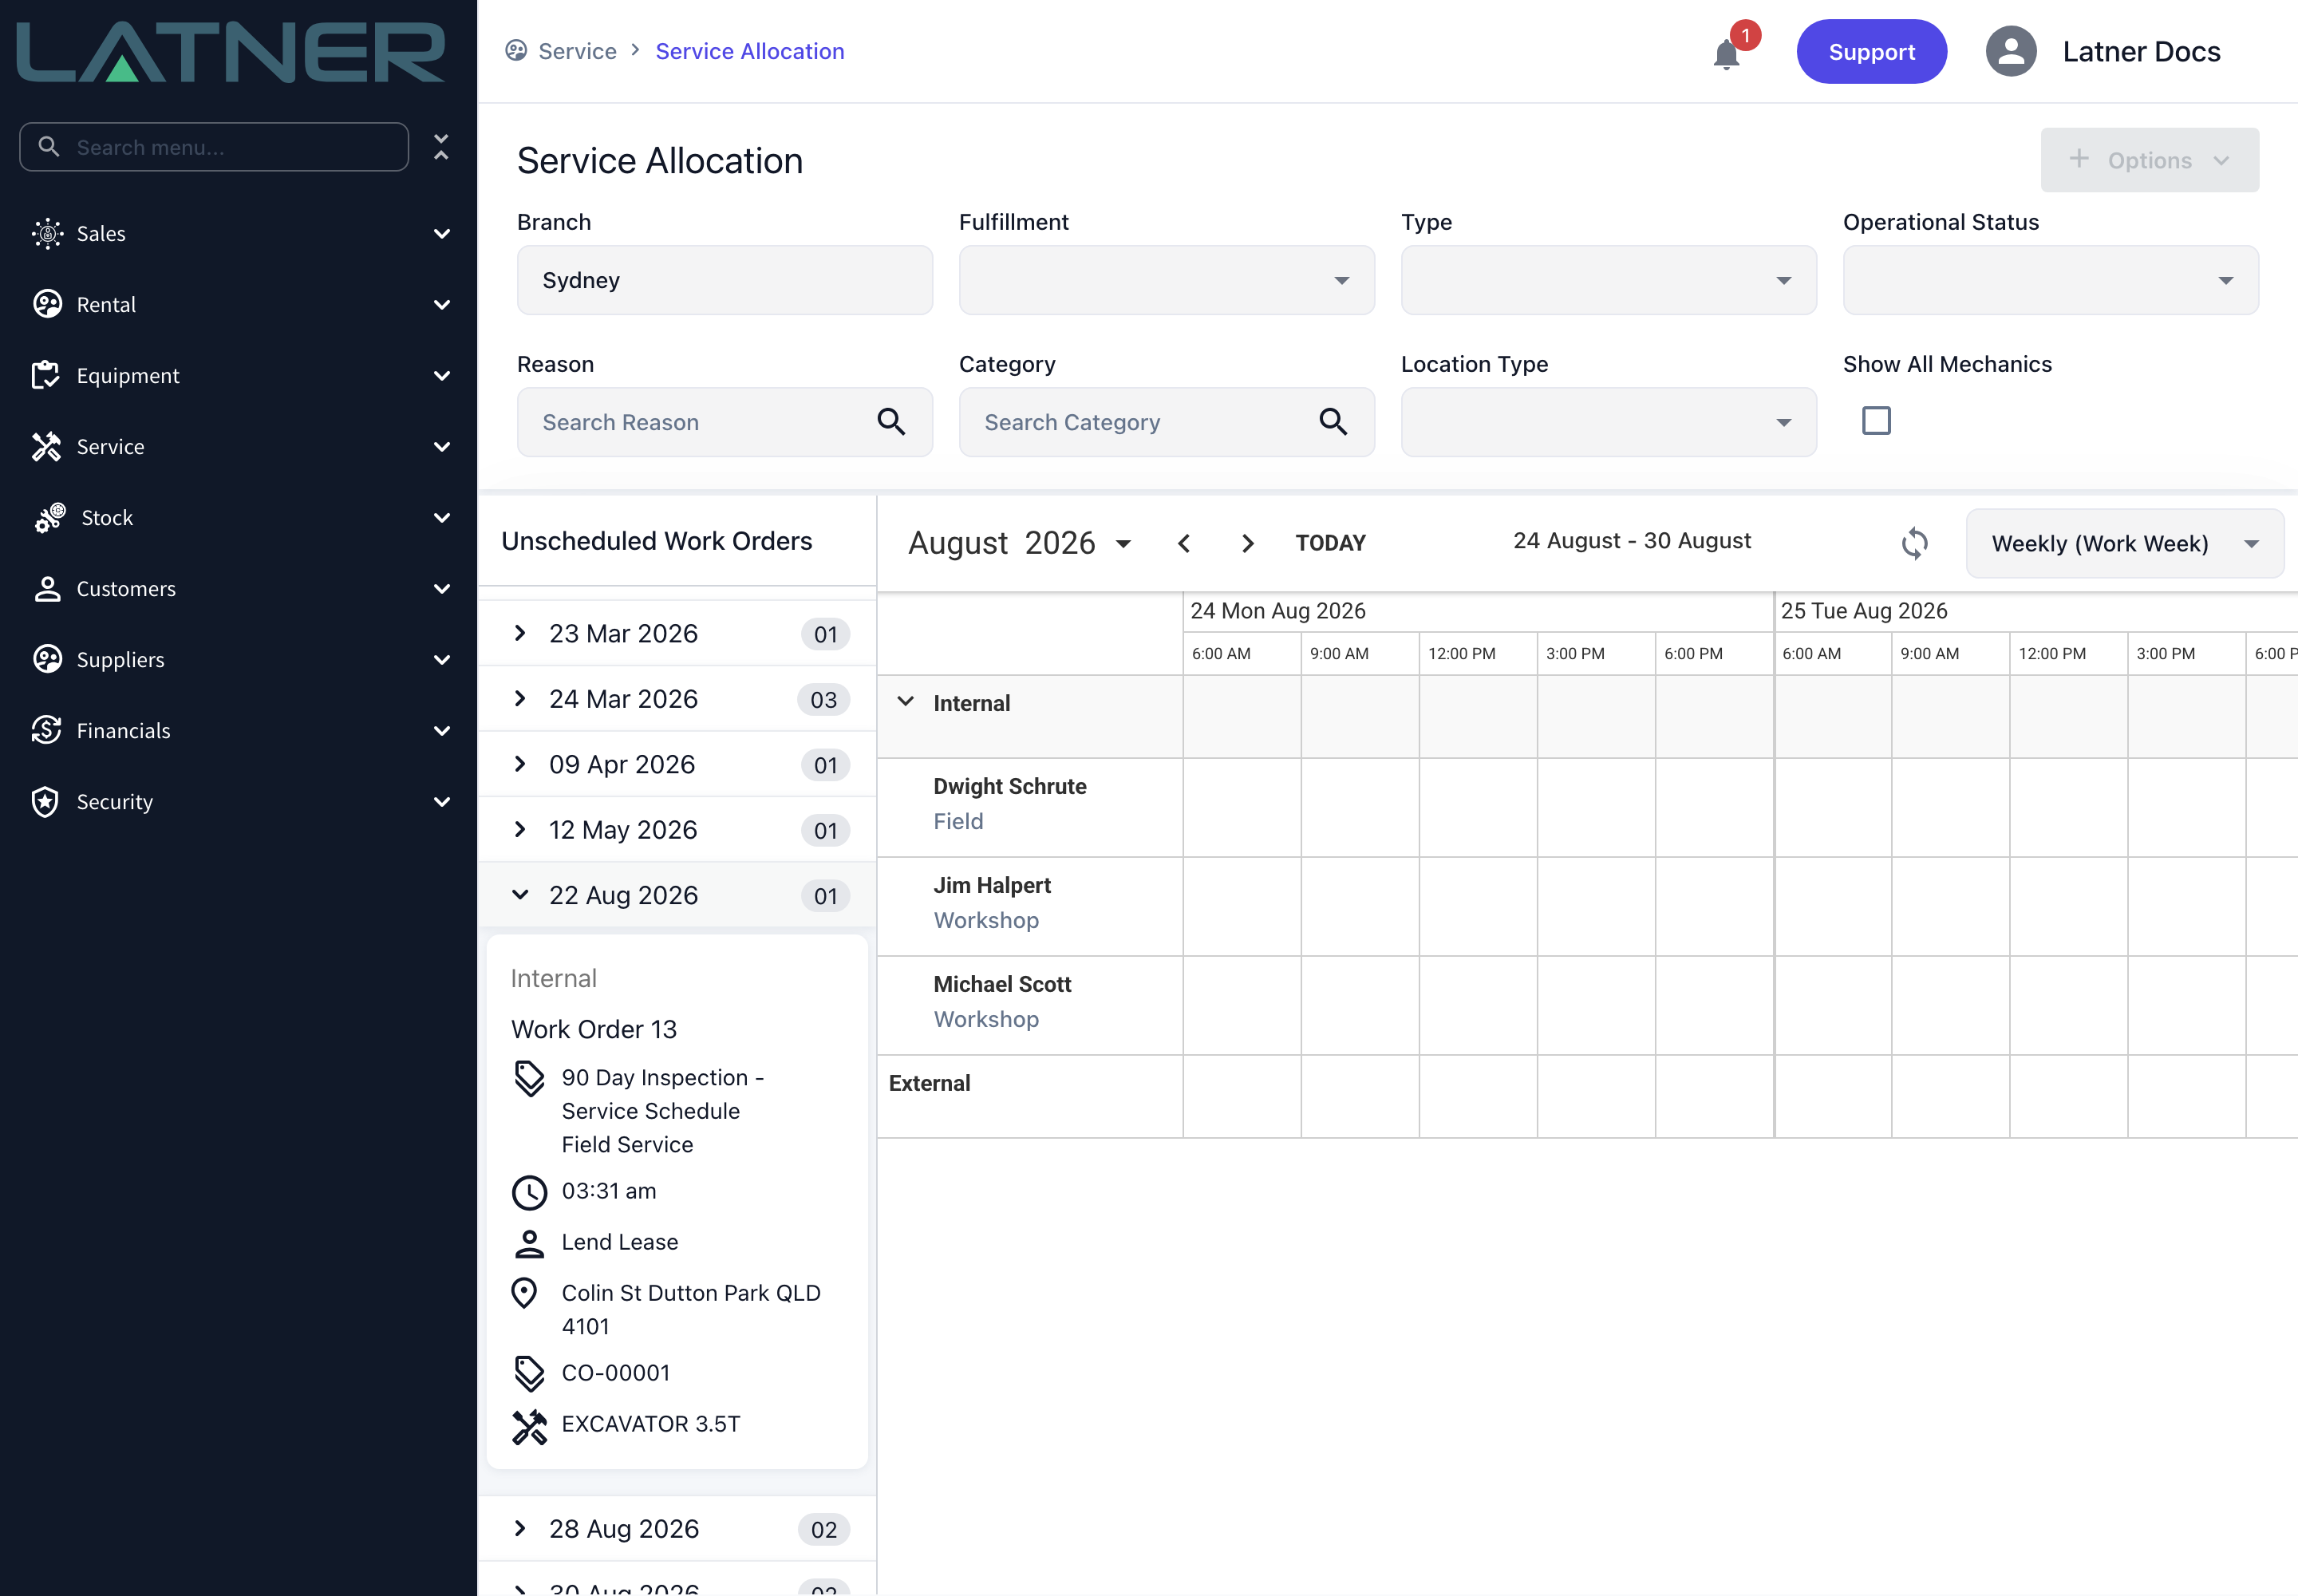
Go to Service › Service Allocation. The panel on the left, Unscheduled Work Orders, groups work orders by due date. Your newly allocated work order is still in that list, because a job only leaves it once it has both a mechanic and a scheduled start and end time.
Step 6 - Drag it onto the mechanic's row
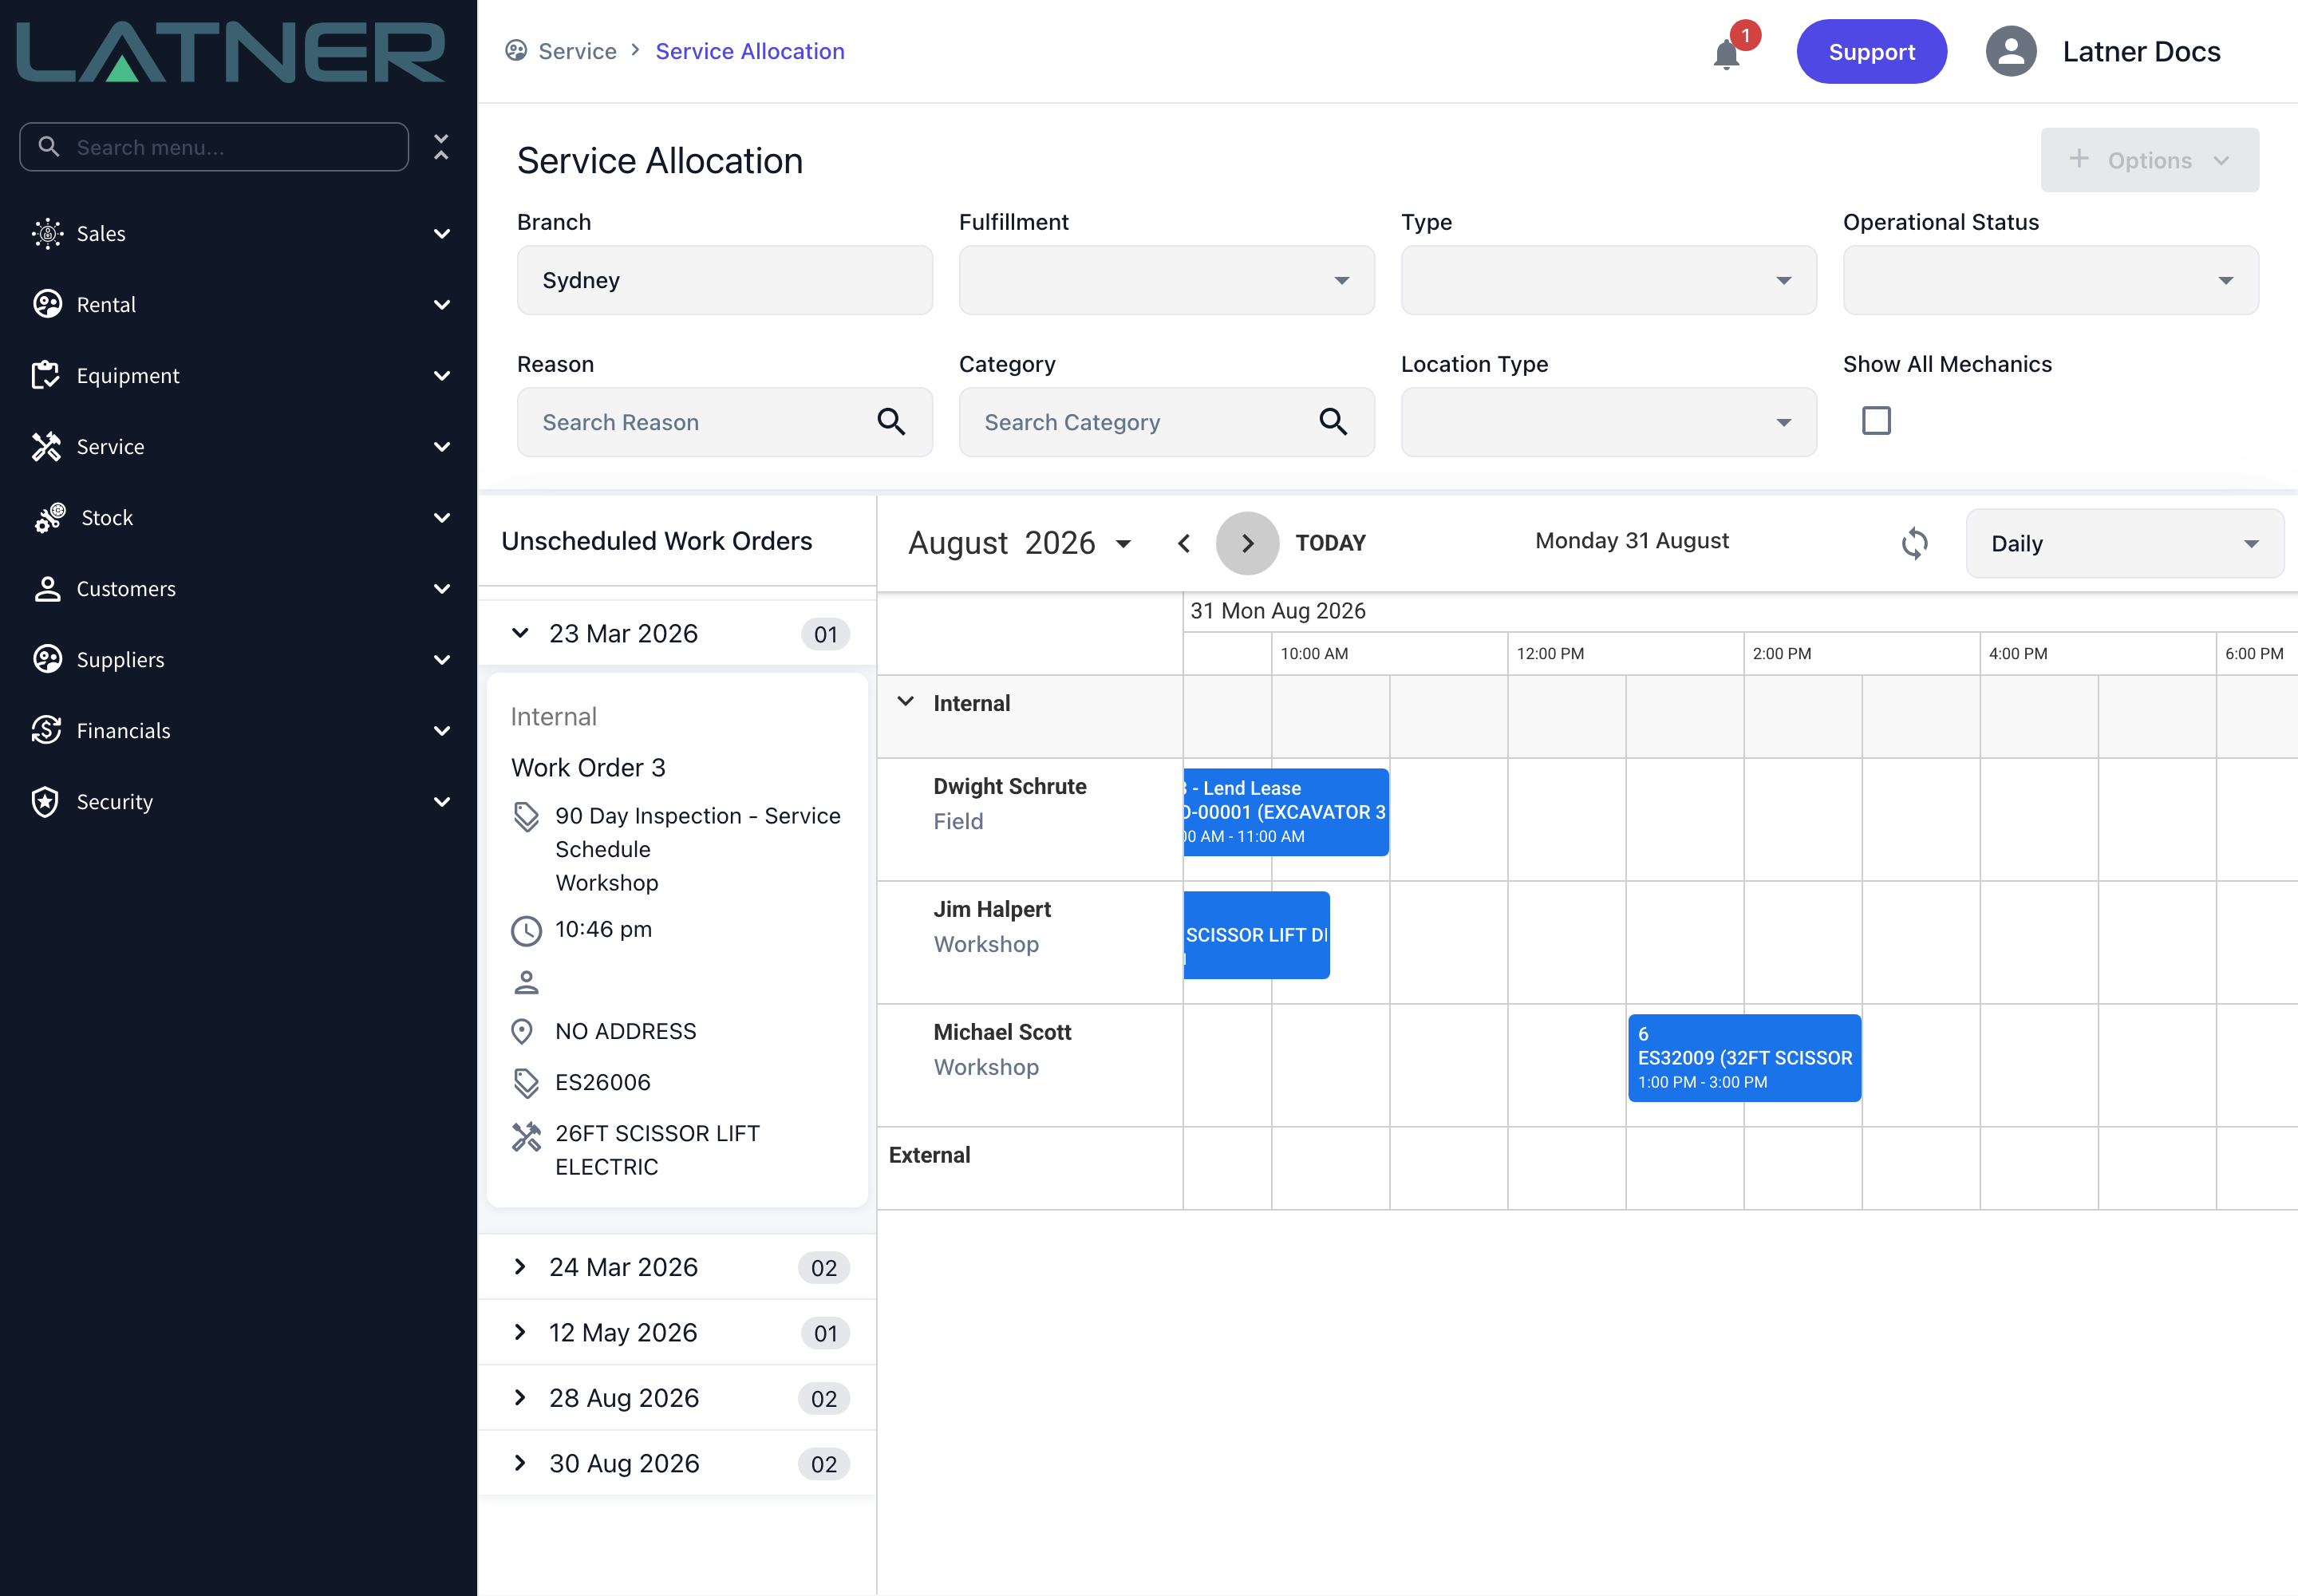
Pick the day you want with the arrows or the Today button, switch the view selector to Daily for an hour-by-hour timeline, then drag the card from Unscheduled Work Orders onto the mechanic's row at the time the job should start. The block is created at the duration set in Security › Settings › Service › Service Scheduler Default Duration (Minutes), which is 120 minutes unless your organisation has changed it.
Once it is on the board you can drag the block to move it, drag its edge to resize it, and double-click it to jump back to the work order.
After Allocation
-
The work order's Tech Status is Allocated, and it shows that way on Service › Work Orders and in the Work Order Daybook.
-
The job appears in the mechanic's list on the mobile work order screen, so they can accept it and update their own tech status as they travel and work.
-
Once scheduled, the work order leaves Unscheduled Work Orders and shows as a block on the mechanic's row on the Service Allocation screen.
-
The Mechanic stays editable while the work order is Open, so reallocating is just a matter of picking someone else and saving again.
Dragging a scheduled block back into the Unscheduled Work Orders panel does more than clear the times. It removes the mechanic as well and puts the work order back to Unallocated. If you only meant to move the job to another day or another mechanic, drag the block to its new spot on the board instead of unscheduling it first.
FAQs
Watch the Demo
Prefer to watch it? Step through the same flow here.