
Adding equipment to a rental contract is how you put a machine on hire: you pick the class of equipment, agree the rates, choose the dates and (optionally) name the exact unit that is going out the door.
Overview
A rental contract is really a header plus a list of lines, and the equipment lines are the ones that earn the revenue. Everything else on the contract - transport, fuel, admin charges, damage - hangs off those lines.
-
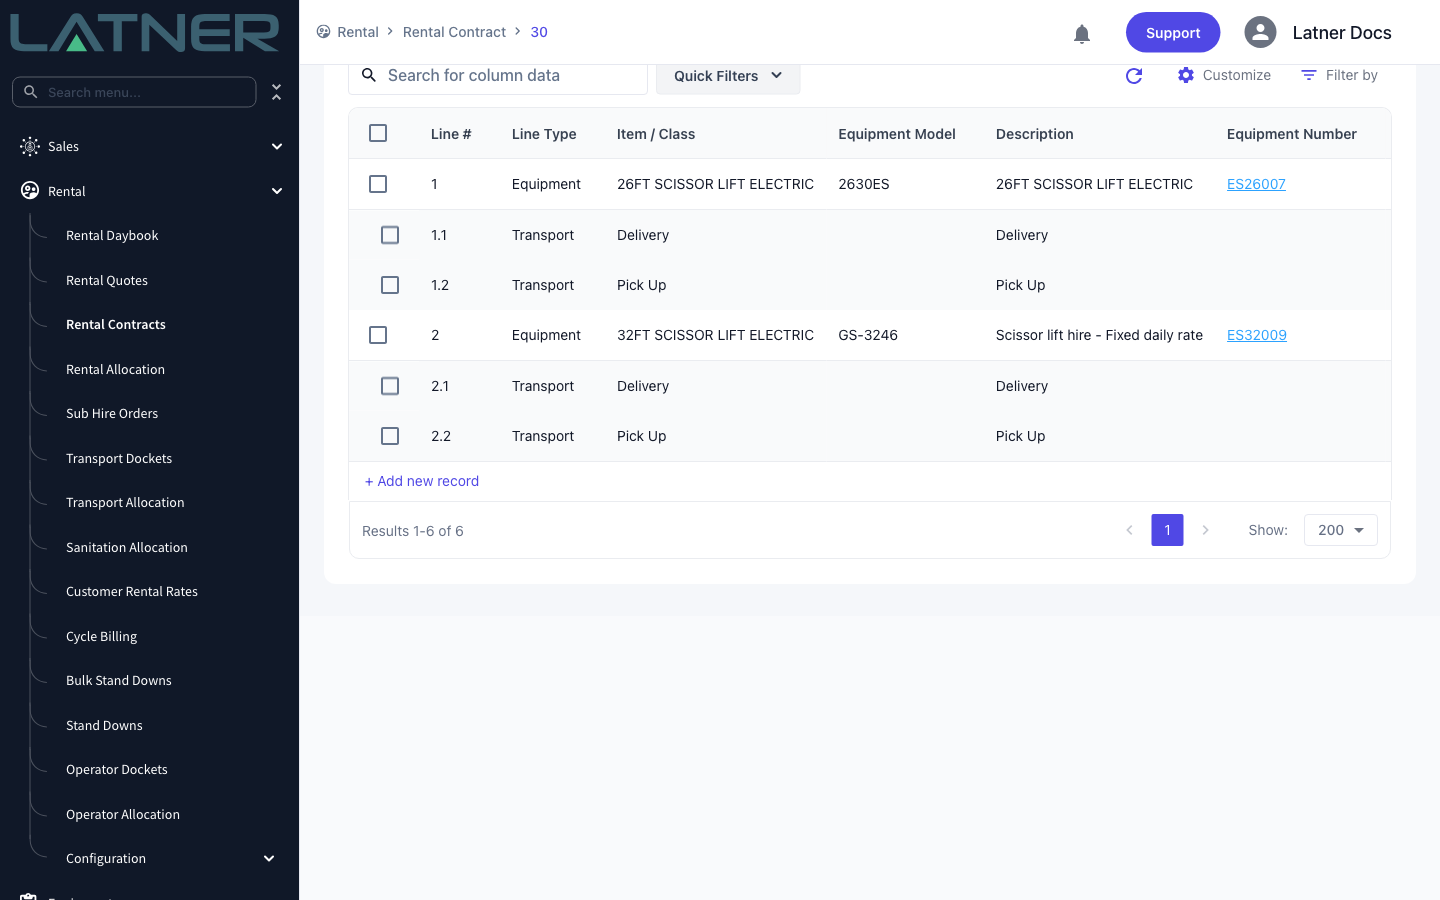
Equipment lines are added from the Details grid on the rental contract, either from Options › Add Details or from the + Add new record row at the bottom of the grid.
-
You must choose an Equipment Class. Naming a specific Equipment Number is optional - leave it blank and the line waits to be allocated later.
-
Rental rates are pulled from the rate book for the branch, customer, site and equipment you have chosen, so the line is priced before you save it.
-
Anything configured as an additional item against the equipment class (buckets, delivery, pick up) is offered on the same form and added as sub-lines.
-
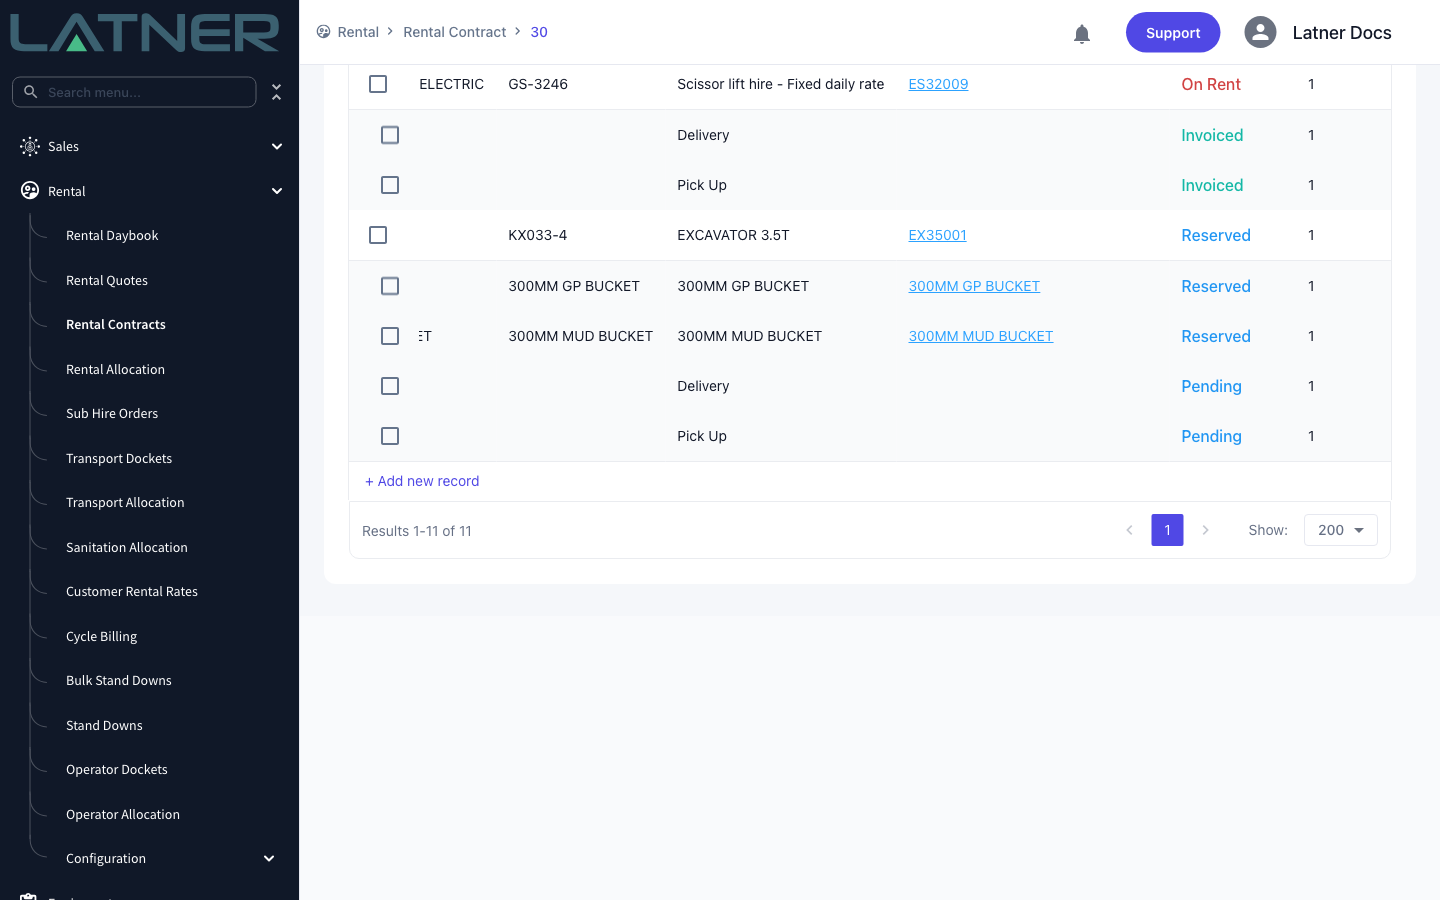
A saved equipment line lands in Reserved status and reserves quantity against the equipment record.
Before You Begin
Adding a line needs one permission, and a couple of settings change what the form offers you.
|
Requirement |
Where to Find It |
|---|---|
|
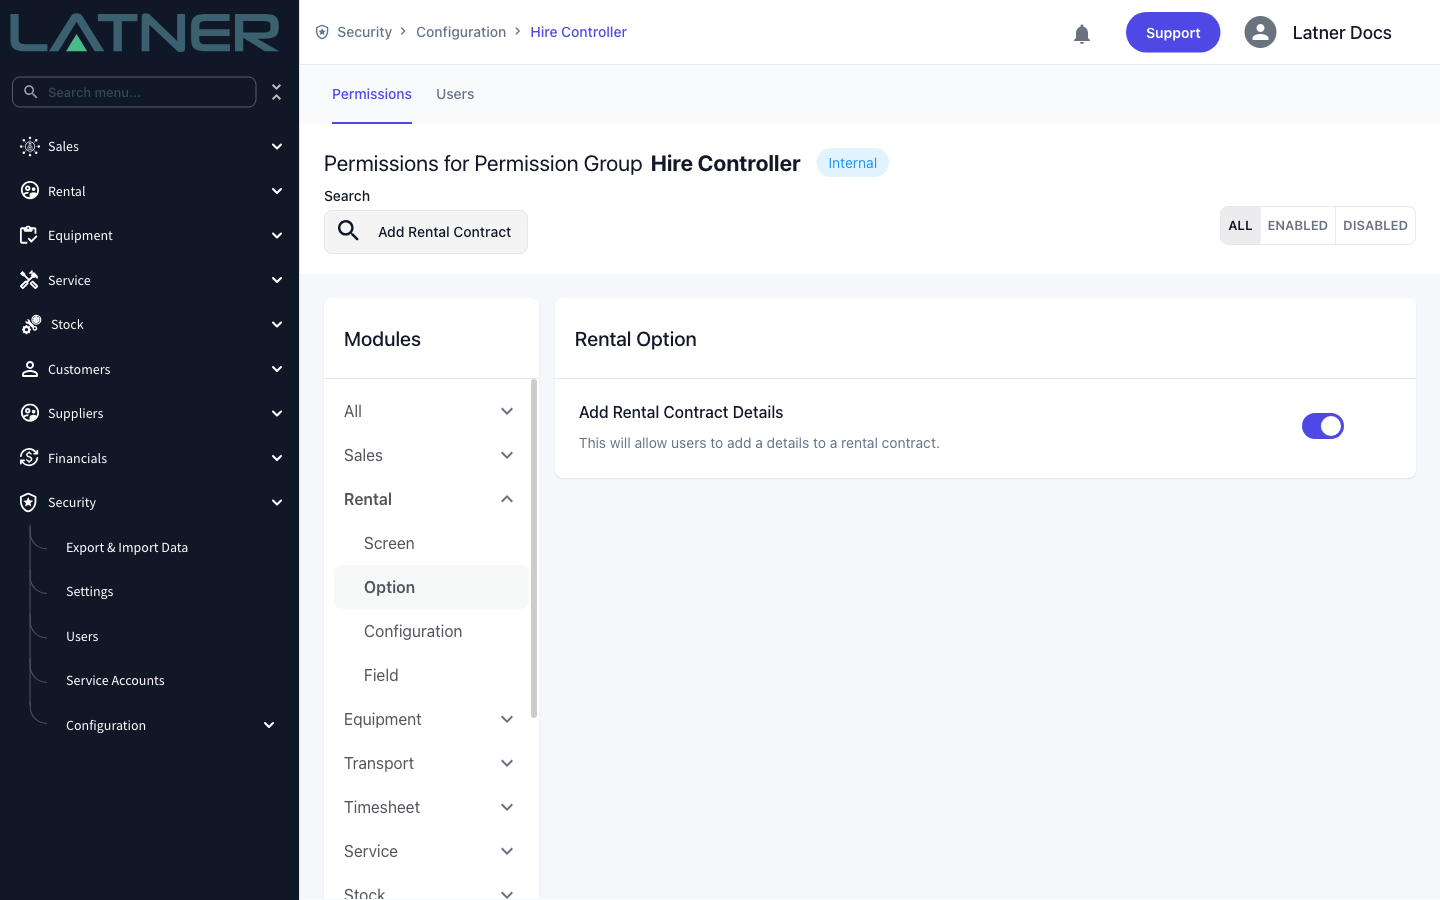
Add Rental Contract Details permission |
Security › Configuration › Permission Groups › [group] › Rental › Option |
|
Rental Contracts screen permission |
Security › Configuration › Permission Groups › [group] › Rental › Screen |
|
The contract must be Reserved or Active |
The Contract Status field at the top of the rental contract |
|
Allowed Detail Line Types (optional) |
Security › Settings › Rental |
|
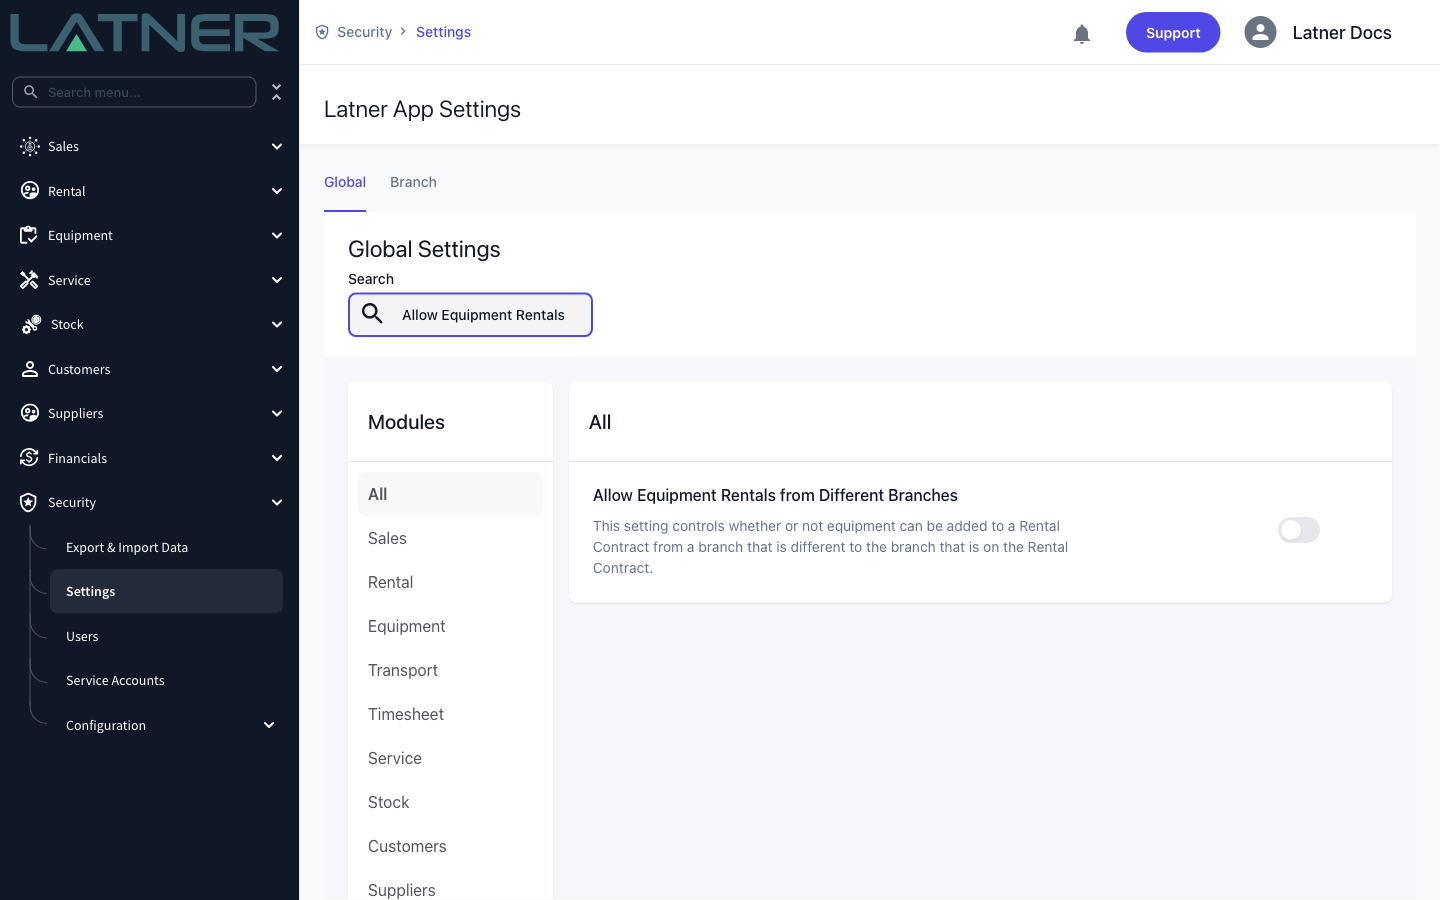
Allow Equipment Rentals from Different Branches (optional) |
Security › Settings › Rental |
|
Allow Pre-Allocated Equipment (optional) |
Security › Settings › Rental |
|
Default Rental Rate Variation (optional) |
Security › Settings › Rental |
Allowed Detail Line Types is a filter, not a switch. Leave it empty and every line type is available; populate it and the Line Type dropdown is cut down to just those values, on both quotes and contracts.
Contract already Completed? Reopen it first (see How to Reopen a Completed Rental Contract) - you can't add or delete a line on a Completed contract. A late charge such as a fuel recharge goes on as a Fuel or Admin line and is invoiced from the contract with Options › Invoice, not raised as a manual invoice.
Adding an Equipment Line
Step 1 - Open the Add Details form
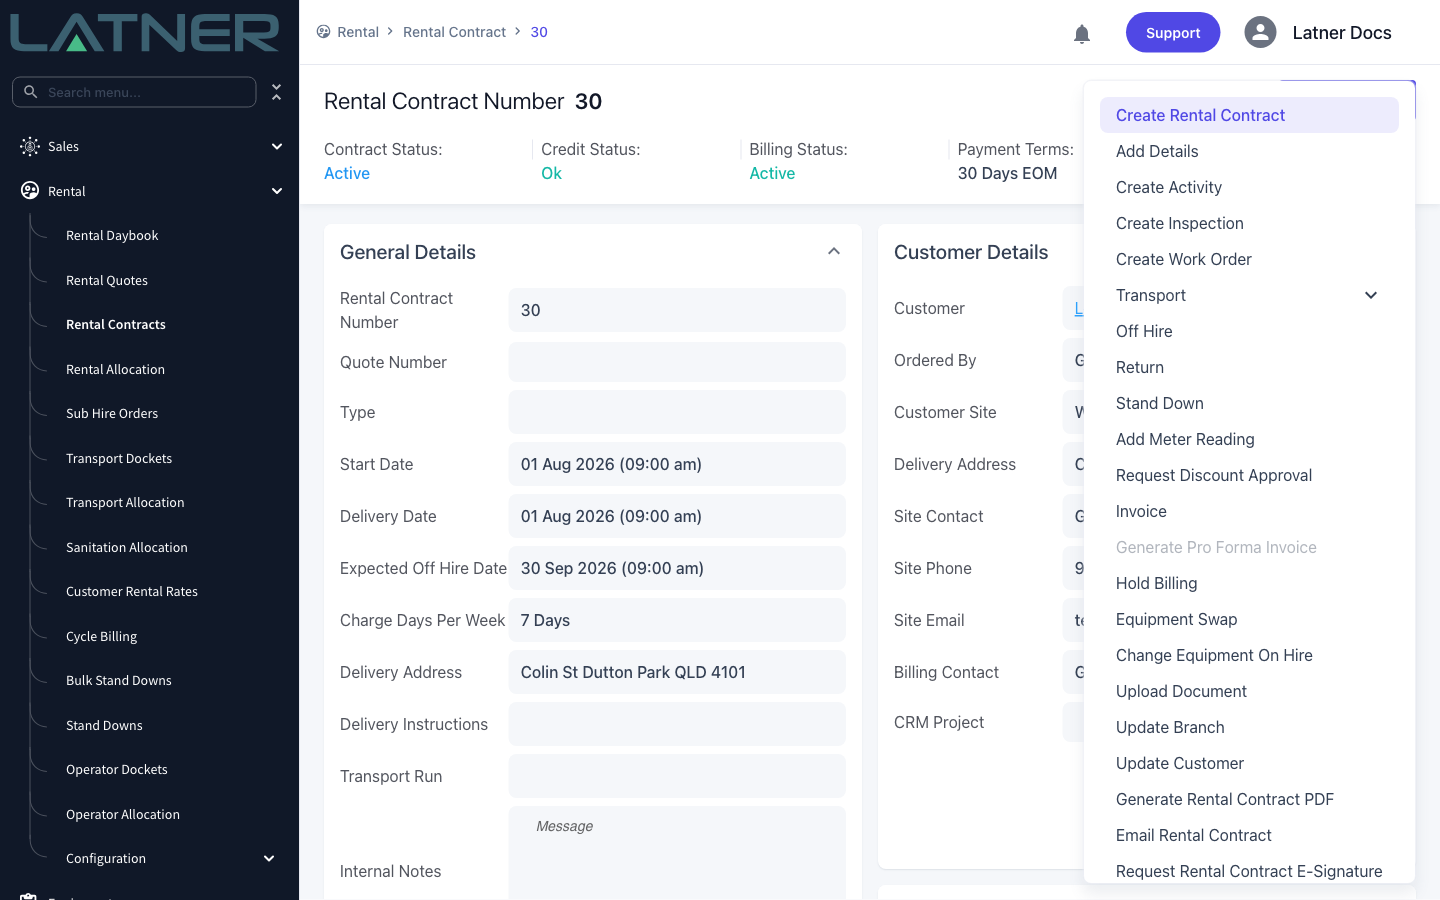
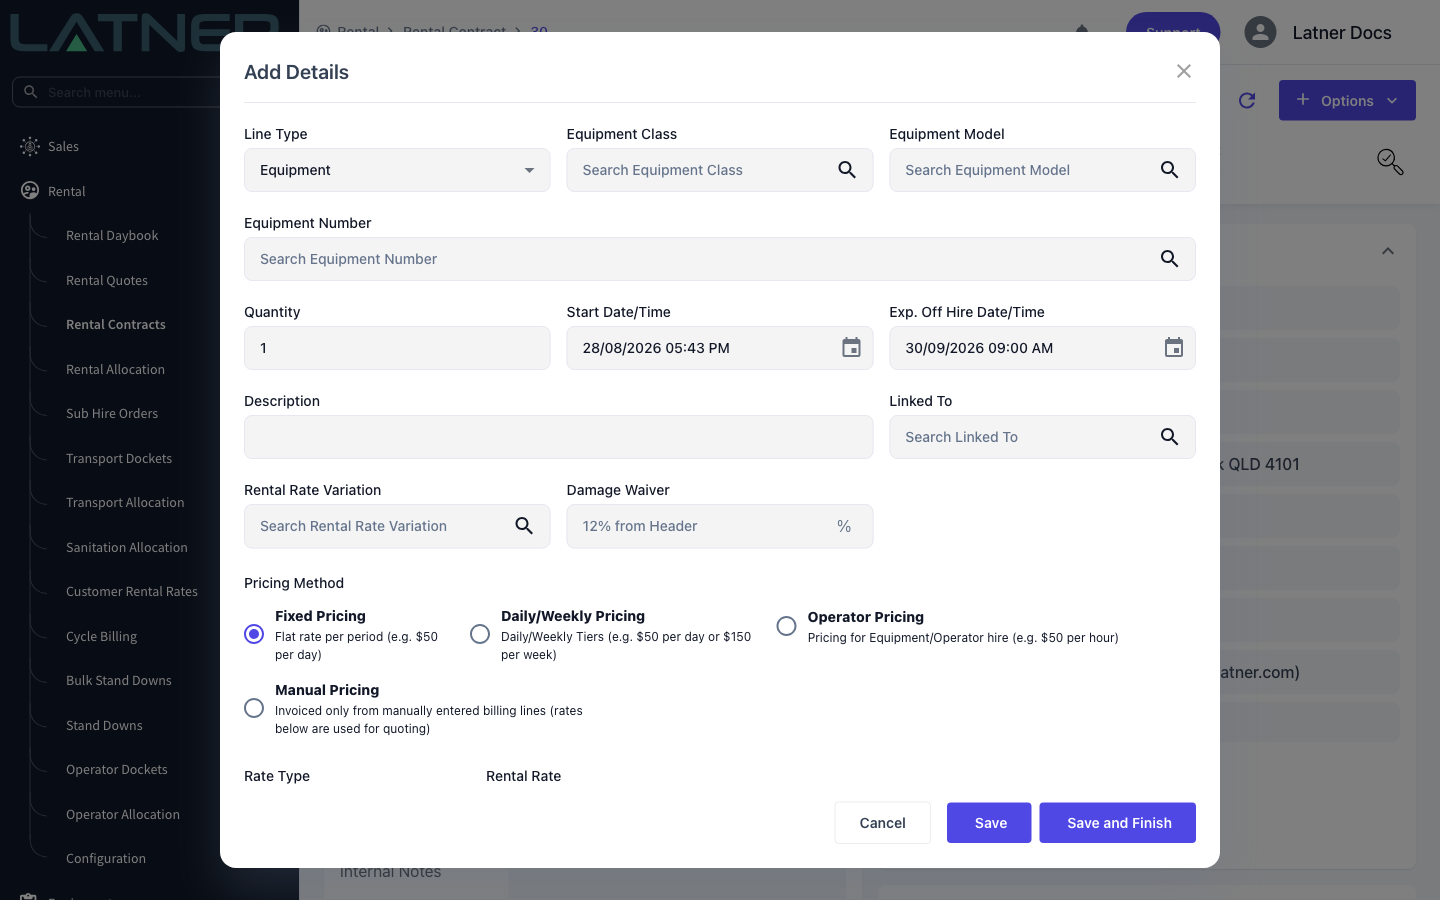
Open the rental contract and choose Options › Add Details. If you prefer to work from the grid, scroll to the Details tab and click the + Add new record row at the bottom of it - both open the same Add Details form.
Step 2 - Check the line type
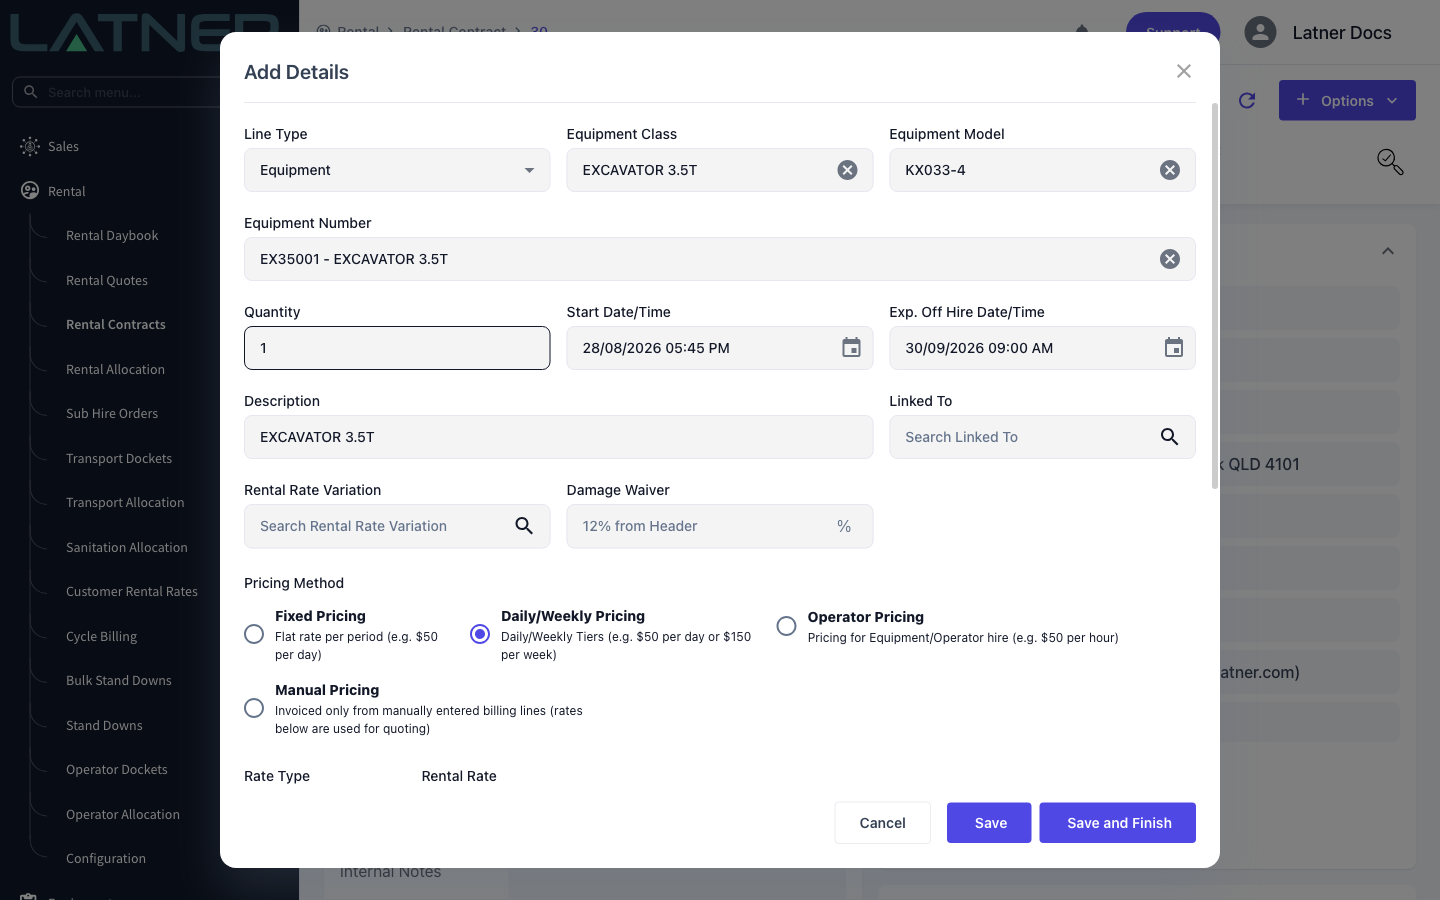
Line Type defaults to Equipment, which is what you want for a machine from your own fleet. The other types on the list serve different purposes - Sub Hire Equipment for gear you are hiring in from a supplier, Package for a preconfigured bundle, and Transport, Fuel, Admin, Labour, Damage, Sanitation and Stock for the charges that sit alongside the hire.
Step 3 - Choose the equipment class
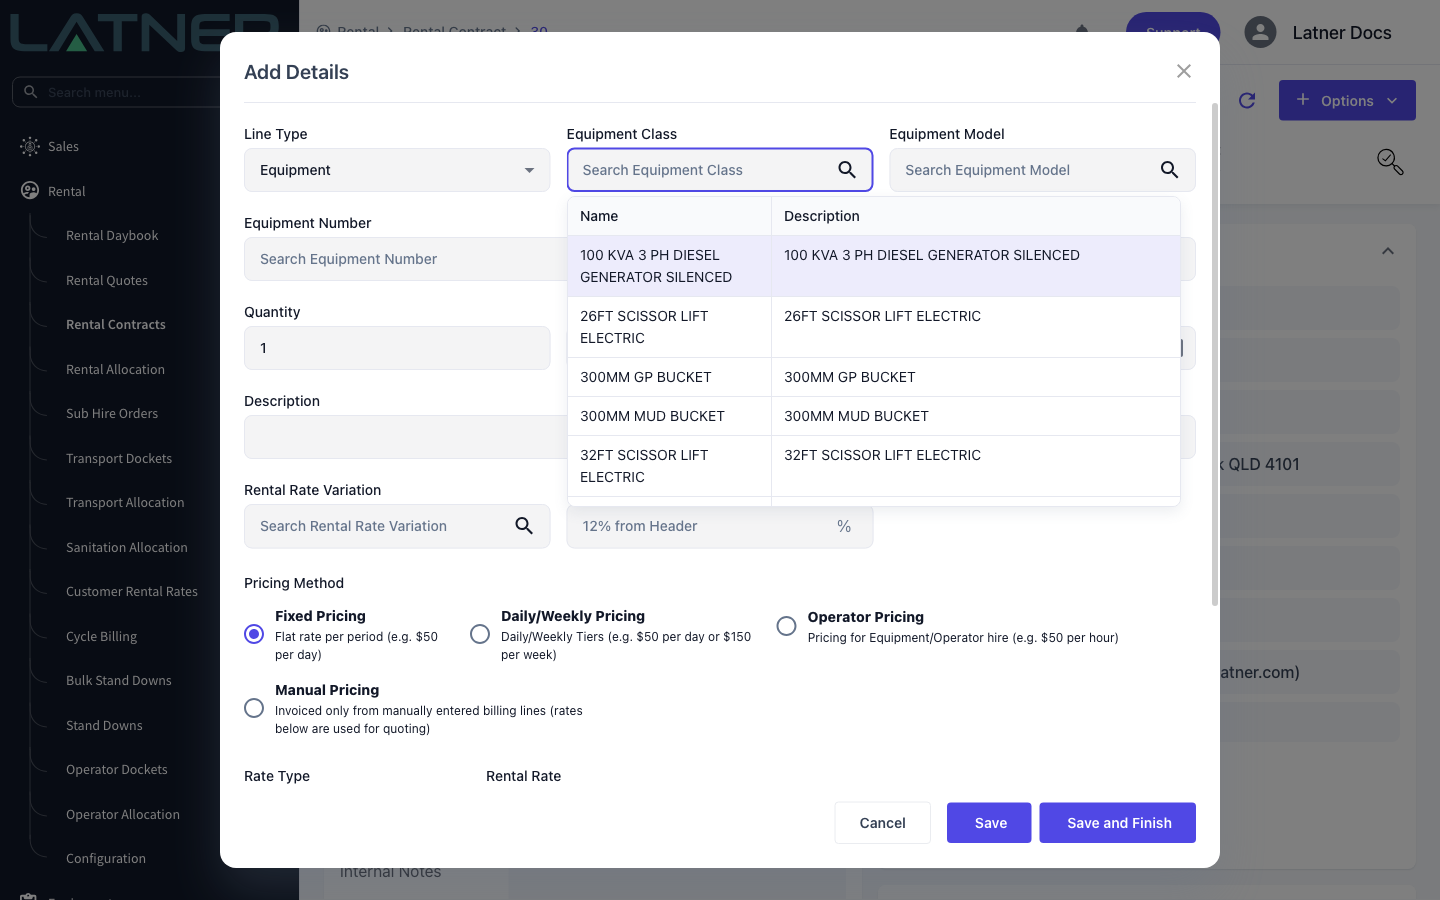
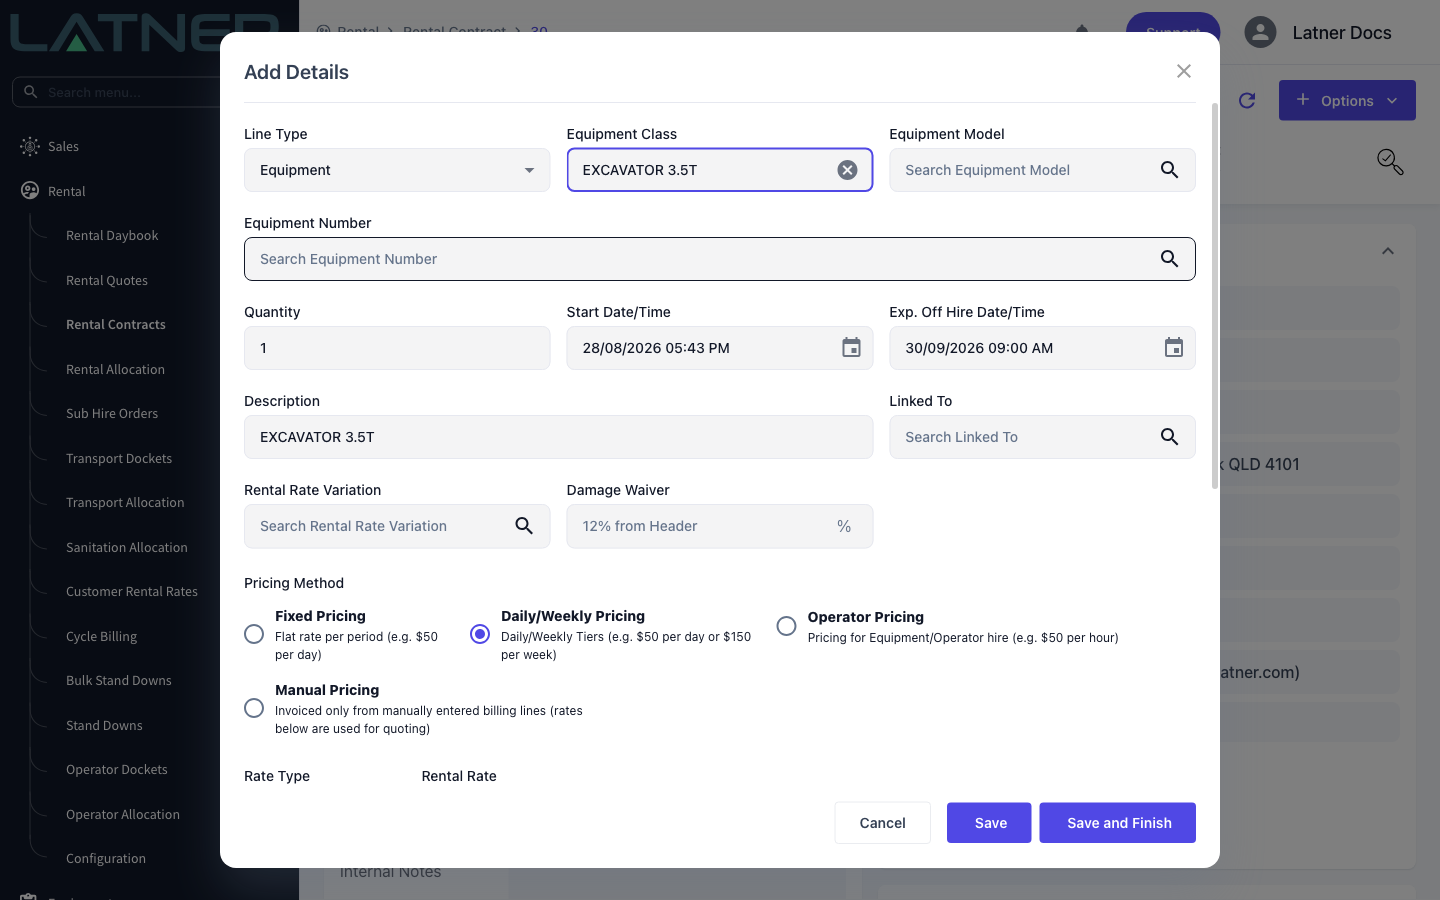
Click Equipment Class and pick the class you are hiring out. This is the one field you cannot skip on an equipment line, and choosing it does three things at once: it fills Description, it loads the rental rates, and it loads the additional items configured against that class.
-
Equipment Class - required. The category of machine, for example EXCAVATOR 3.5T.
-
Equipment Model - optional. Narrows the line to one model within the class, and narrows the equipment search below it.
Step 4 - Set the quantity and hire dates
Quantity, Start Date/Time and Exp. Off Hire Date/Time are all required, and the dates default from the contract header. On an active contract whose start date has already passed, the line's start date defaults to now instead, so you are not backdating charges by accident.
-
Quantity - required, and must be a whole number greater than zero on an equipment line.
-
Start Date/Time - required. Must not be after the expected off hire date.
-
Exp. Off Hire Date/Time - required. Must not be before the start date.
-
Description - filled from the class (or from the specific unit, once you choose one). Type over it if you want something the customer will recognise on the invoice.
-
Linked To - optional here. Use it to hang this line off an existing equipment line as a sub-line.
-
Rental Rate Variation - optional. Prefilled from the Default Rental Rate Variation setting, and changing it reloads the rates.
-
Damage Waiver - prefilled from the equipment class and capped at the customer's own damage waiver. It is greyed out when damage waiver has been switched off for the contract.
Step 5 - Allocate a specific machine (optional)
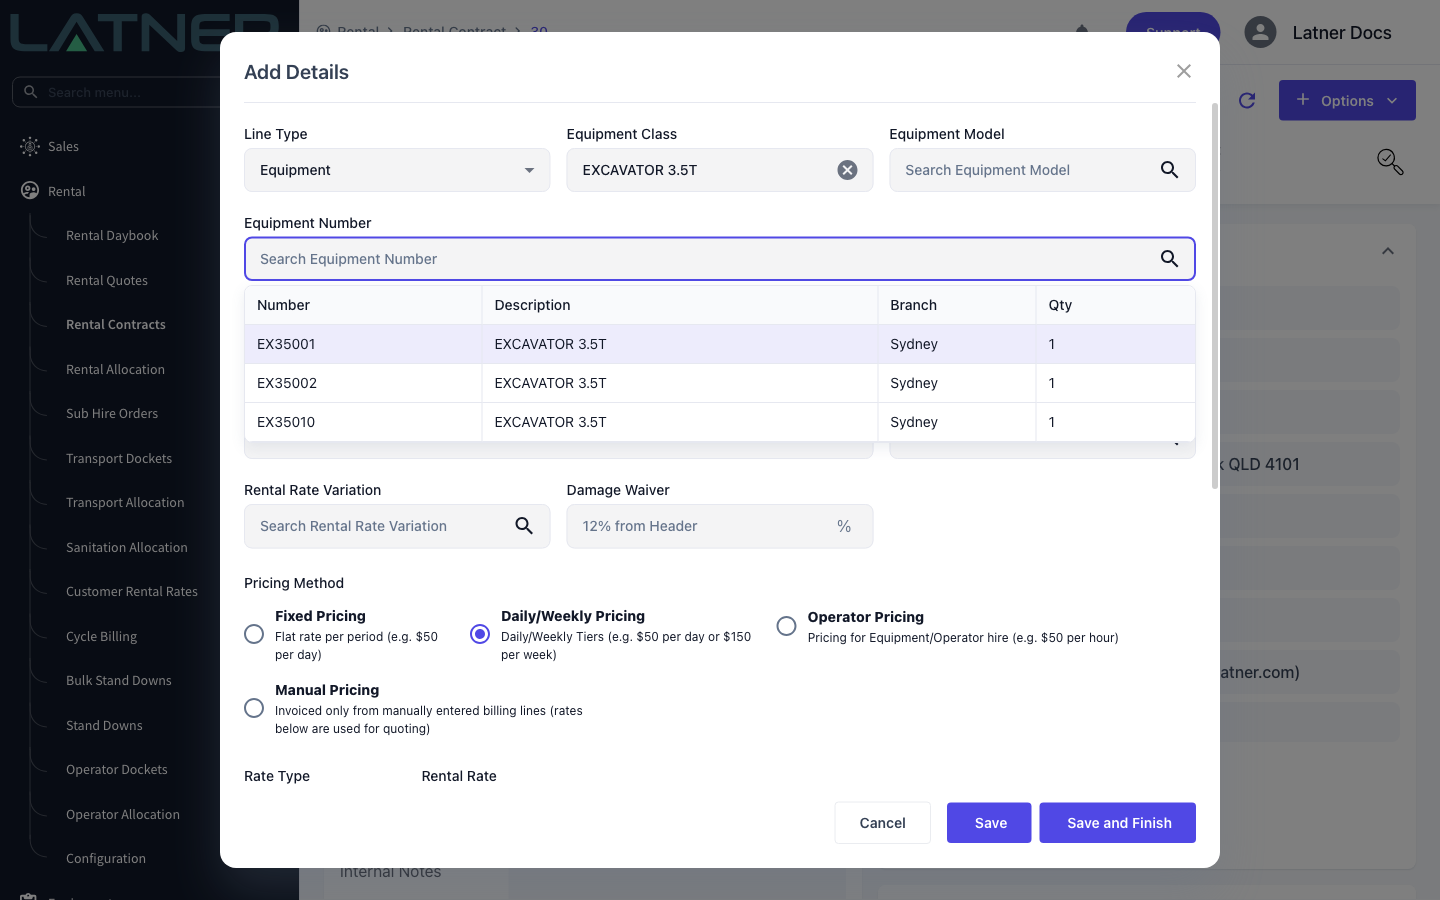
If you already know which unit is going out, click Equipment Number and pick it. The lookup shows the number, description, branch and quantity available, and only offers equipment that can actually go on hire. Choosing a unit fills Equipment Model and Description for you.
Leave it blank if you do not know yet. The line is still reserved against the class, and you allocate the unit later from the rental allocation screen or by editing the line.
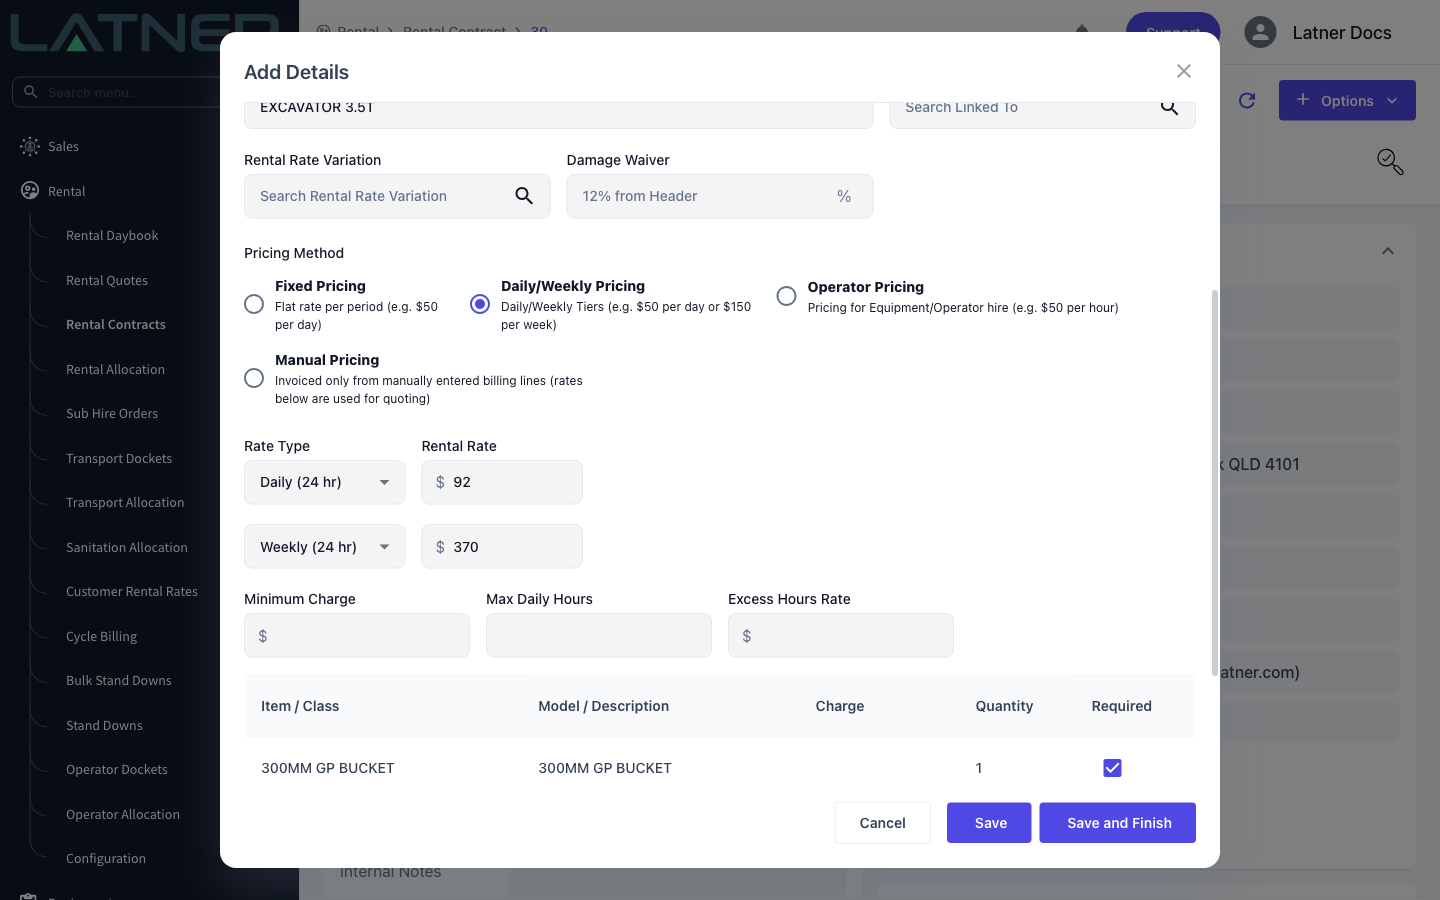
Step 6 - Review the rates
The pricing block is filled from the rate book that matches this branch, customer, site, equipment and rate variation. Check it rather than retyping it - if the numbers look wrong, the rate book is usually the thing to fix.
-
Pricing Method - required. Fixed Pricing is a flat rate per period, Daily/Weekly Pricing uses daily and weekly tiers, Operator Pricing is for equipment hired with an operator, and Manual Pricing invoices only from manually entered billing lines.
-
Rate Type and Rental Rate - required on each rate row.
-
Minimum Charge, Max Daily Hours and Excess Hours Rate - optional, and also come from the rate book where they are configured.
Step 7 - Choose the additional items
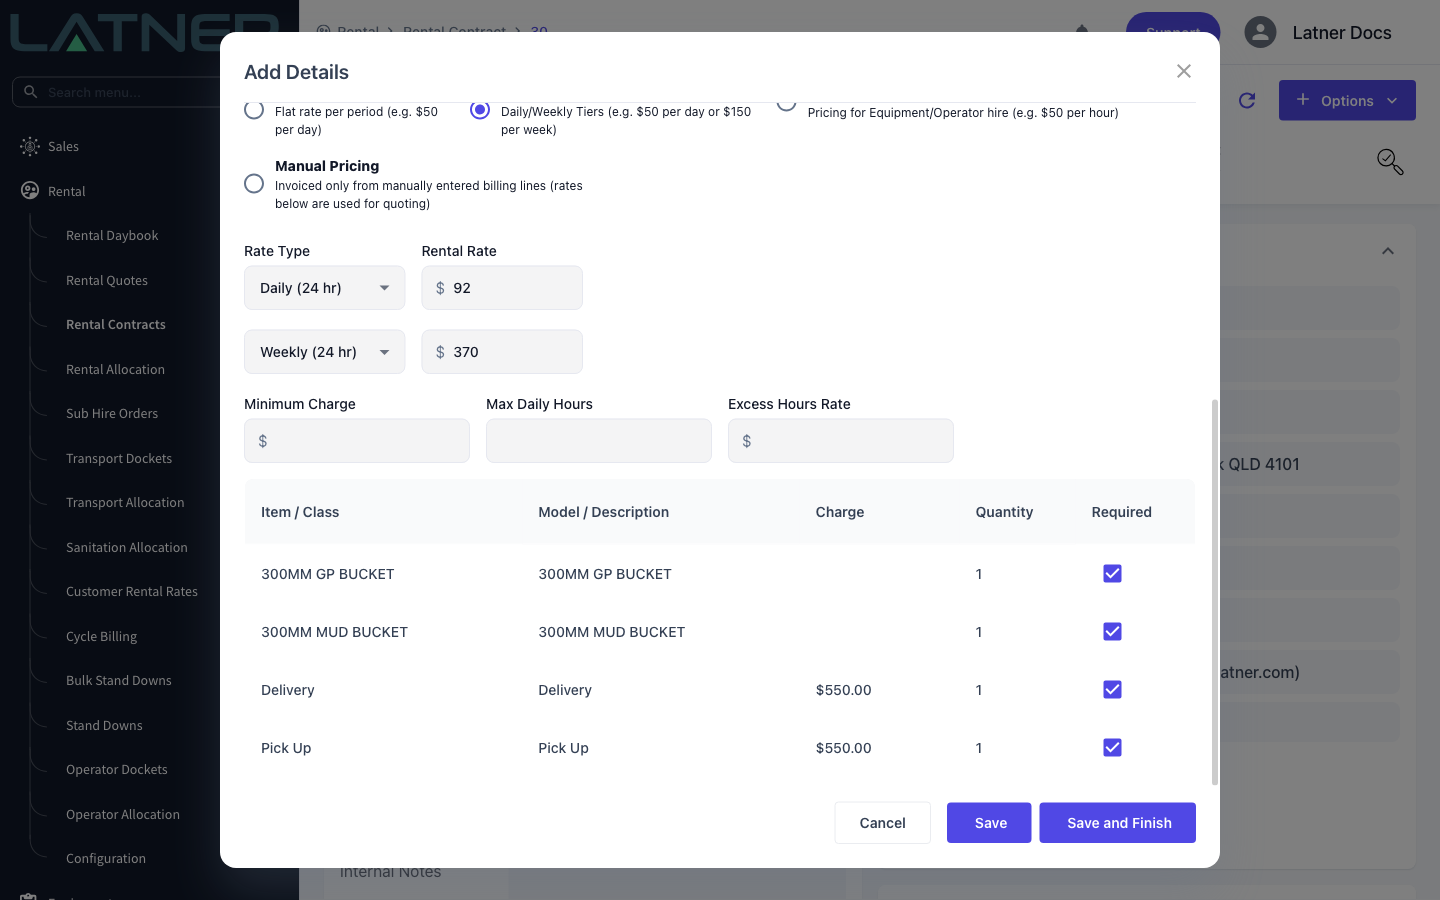
The table at the bottom lists the additional items configured against the equipment class, each with the Required box ticked by default. Only ticked rows are added to the contract. Untick anything the customer is not taking.
Charge is editable for charge-based rows such as delivery and pick up, and every one of those rows needs a price before you can save. It is greyed out for rows that are themselves equipment, because those are priced from the rate book when the line is created.
Step 8 - Save
Click Save and Finish to add the line and close the form. Save adds the line and, when you opened the form from Options › Add Details, reopens it ready for the next line - handy when a contract needs several machines. Opened from the + Add new record row, both buttons simply save and close.
Step 9 - Create the transport docket
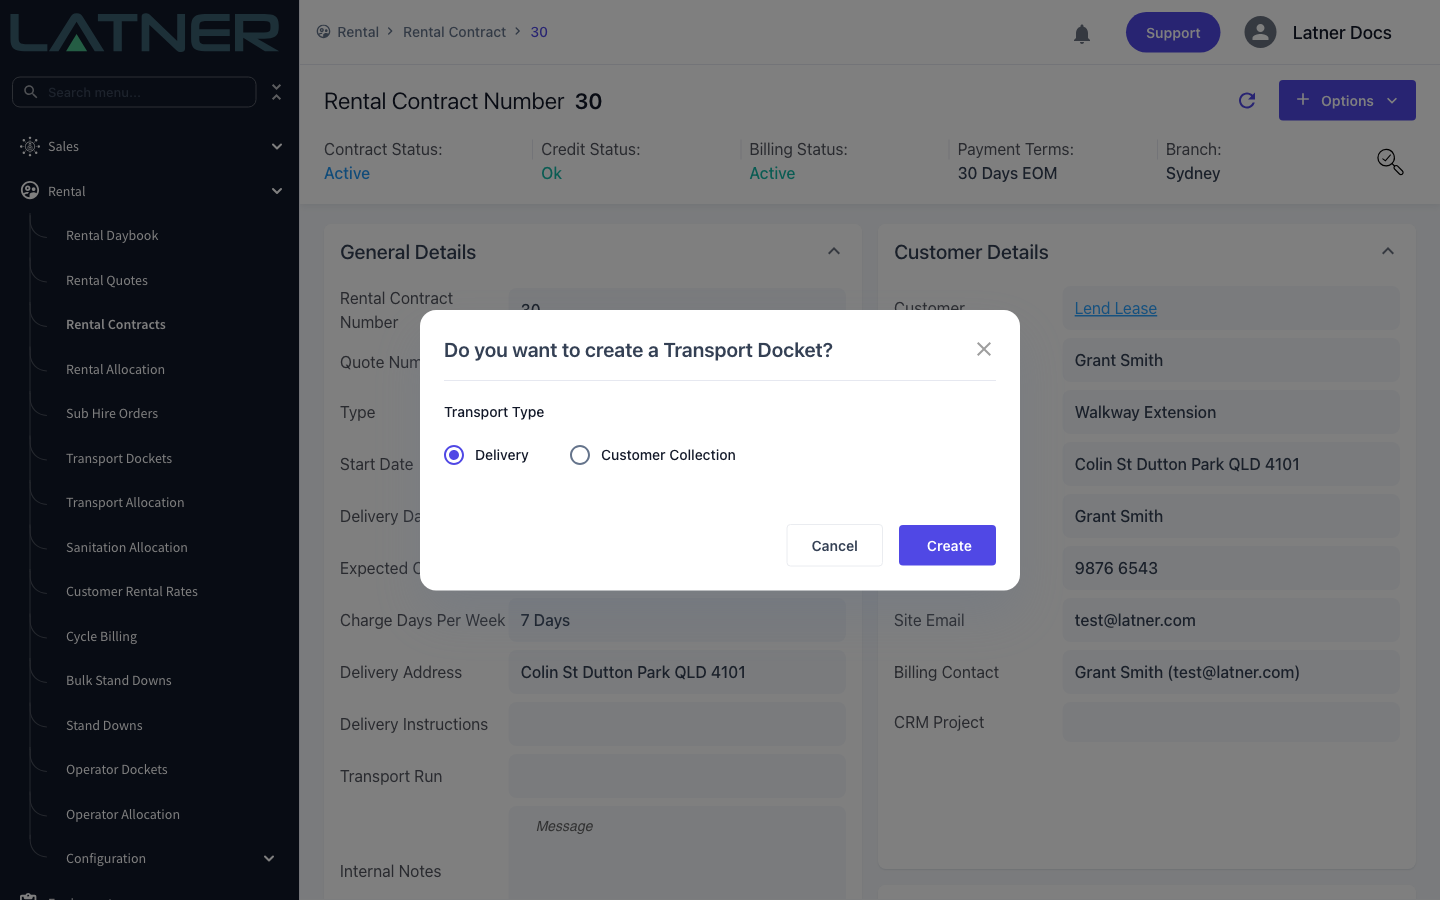
If you used Save and Finish from Options › Add Details and the contract now has a reserved equipment line, Latner asks Do you want to create a Transport Docket? Choose Delivery or Customer Collection and click Create, or click Cancel and arrange transport later.
After Creation
-
The line takes the next available line number on the contract and lands in Reserved status.
-
Its sub-status tells you what is holding it up: Pending PO or Payment while the contract has no purchase order or paid invoice, then Pending Delivery Creation until a transport docket exists.
-
If you named a specific unit, that quantity is now reserved against the equipment record and will not show as available to anyone else.
-
Every additional item you left ticked is created as a sub-line beneath the equipment line - 3.1, 3.2 and so on - sharing the same dates.
-
A run up inspection is raised where the Create Run Up Inspection for Rental Contract Reservations equipment setting calls for one and the model or class is configured for run up inspections.
-
If the unit you chose was not available and Allow Pre-Allocated Equipment is on, the line is created as Pre-Allocated instead, and is promoted to Reserved automatically once the equipment frees up.
Once a line has been invoiced, the fields that drive billing - Quantity, price and Start Date/Time - are locked, and editing them fails with Fields that affect billing cannot be edited after invoicing. Check the quantity, the dates and the rates before the first invoice run. If a billed line turns out to be wrong, correct it with a credit note rather than trying to edit it, and use Change Equipment On Hire if only the machine itself was wrong.
FAQs
Watch the Demo
Prefer to watch it? Step through the same flow here.