
The Create Rental Contract form lets you add a customer who isn't in Latner yet without leaving the form, so a walk-in or a brand new account can be on hire in one pass.
Overview
Not every hire starts with an account that already exists. Someone rings up, the job starts tomorrow, and the customer has never dealt with you before. Rather than stopping to set them up in the Customers module and coming back, you can create them from inside the contract.
-
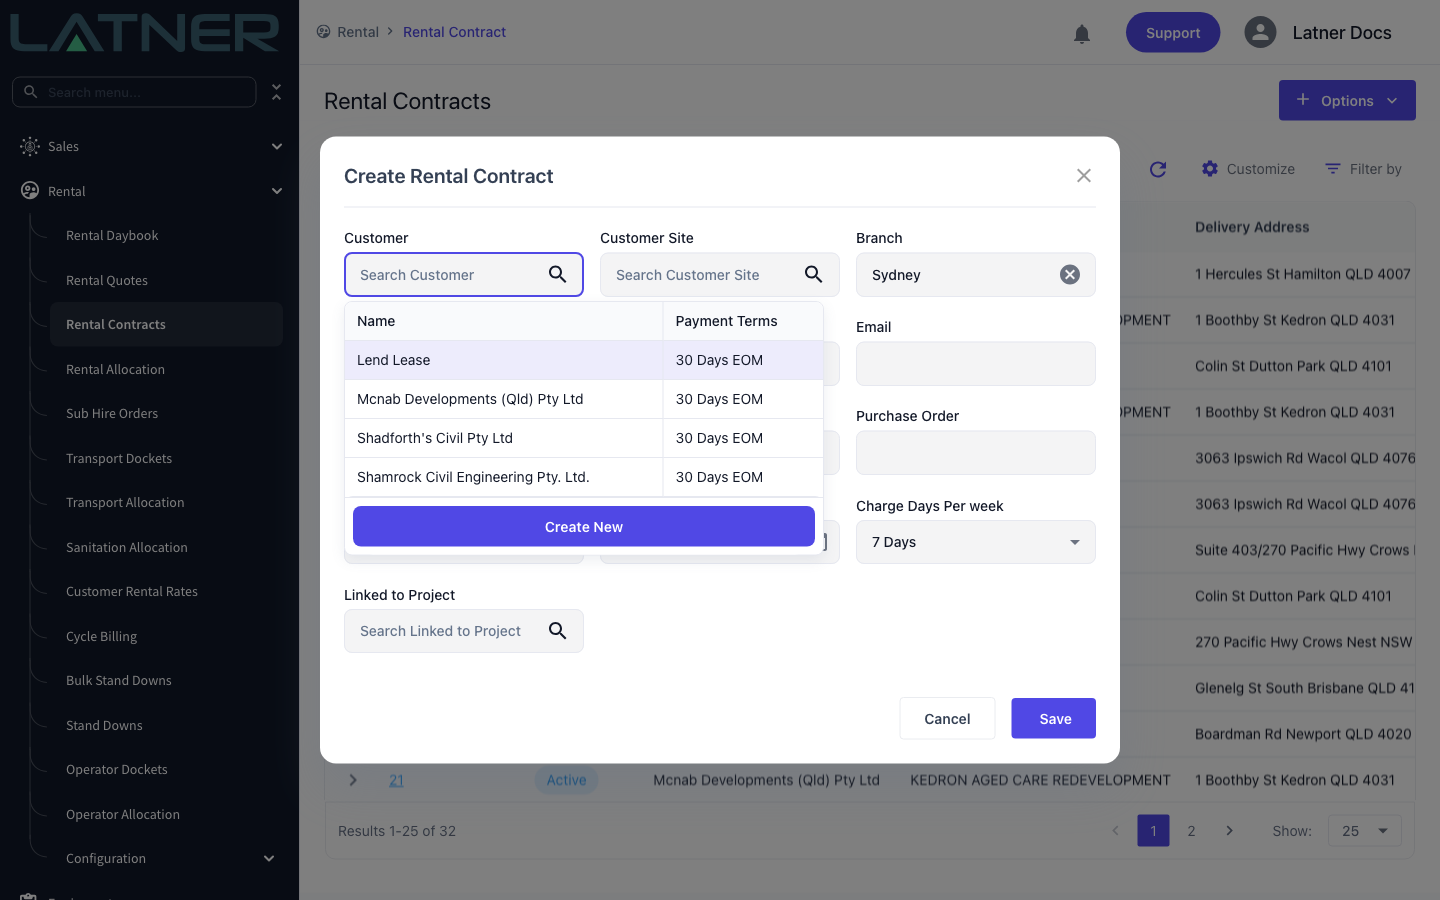
The Customer dropdown on the Create Rental Contract form has a Create New button underneath the search results.
-
It opens the same Create Customer form you'd use from the Customers module, layered over the contract you're already filling in.
-
For a business you can look the company up on the Australian Business Register and have the name and ABN filled in for you.
-
Saving creates the customer, its billing contact and a main site in one go, then selects the new customer on the contract behind it.
-
The same Create New button appears on the Customer Site and Site Contact fields, and on the Create Rental Quote form.
Before You Begin
Creating a customer from a contract touches two permissions and a handful of settings.
|
Requirement |
Where to Find It |
|---|---|
|
Create Rental Contract permission |
Security › Configuration › Permission Groups |
|
Create Customer permission - required for customers on an account (non-COD) payment term |
Security › Configuration › Permission Groups |
|
Create Cash (COD) Customer permission - allows cash on delivery customers only |
Security › Configuration › Permission Groups |
|
Default Payment Term - the term the new customer starts on |
Security › Settings › Customers |
|
Customer Code Generation Method and COD Customer Code Prefix - how the customer code is built |
Security › Settings › Customers |
|
Mandatory CRM Account Fields - makes Lead Source and/or Industry compulsory |
Security › Settings › Sales |
|
Mandatory Customer Billing Contact Fields - makes Last Name and/or Email compulsory on the contact |
Security › Settings › Customers |
|
Lead Sources - the list the Lead Source field draws from |
Rental › Configuration › Lead Sources |
|
Industries - the list the Industry field draws from |
Sales › Configuration › Industries |
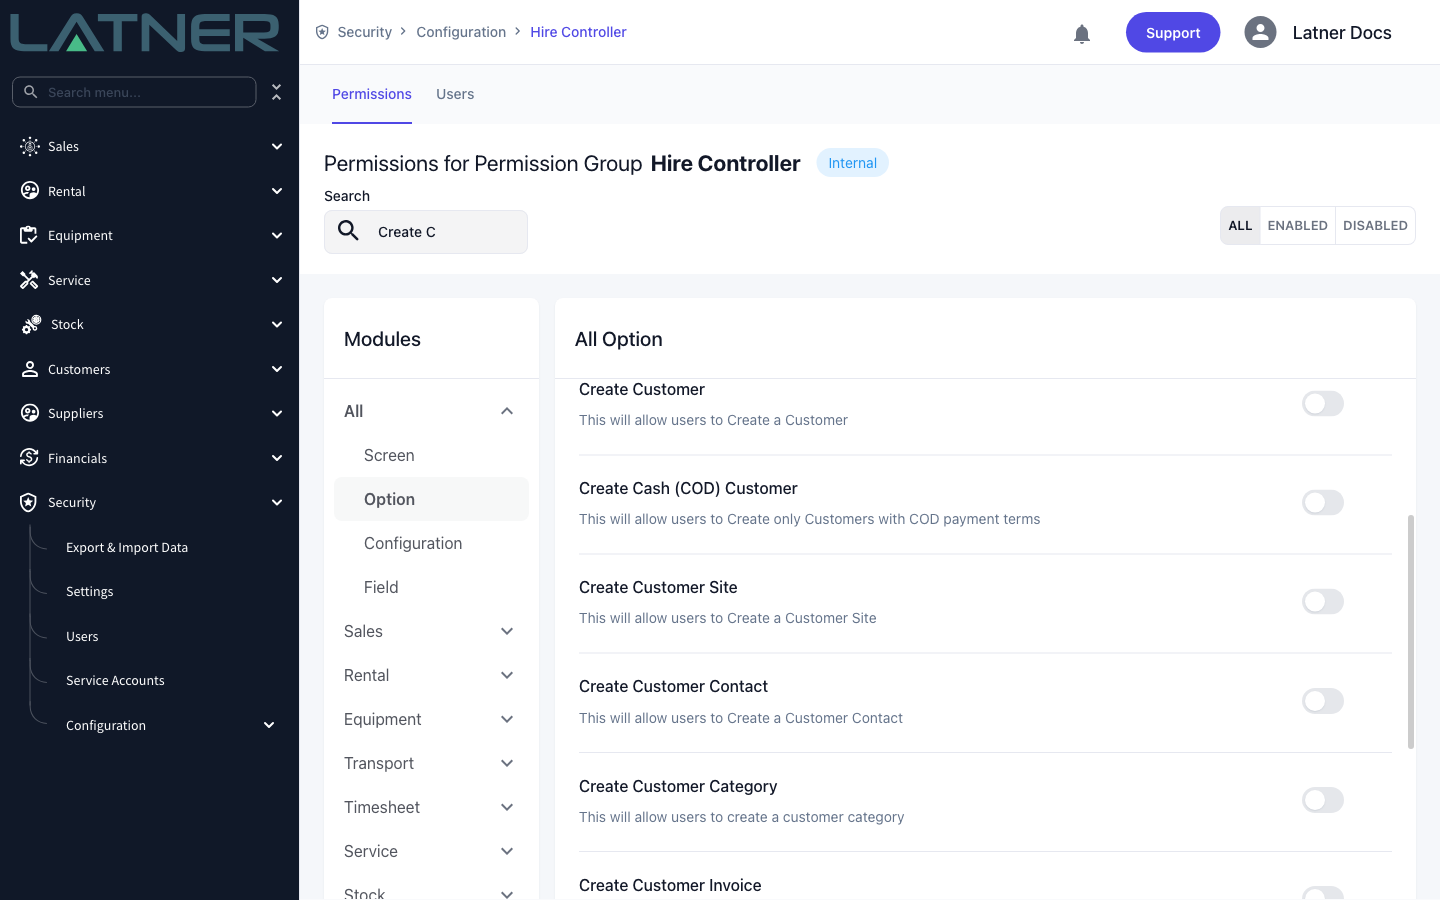
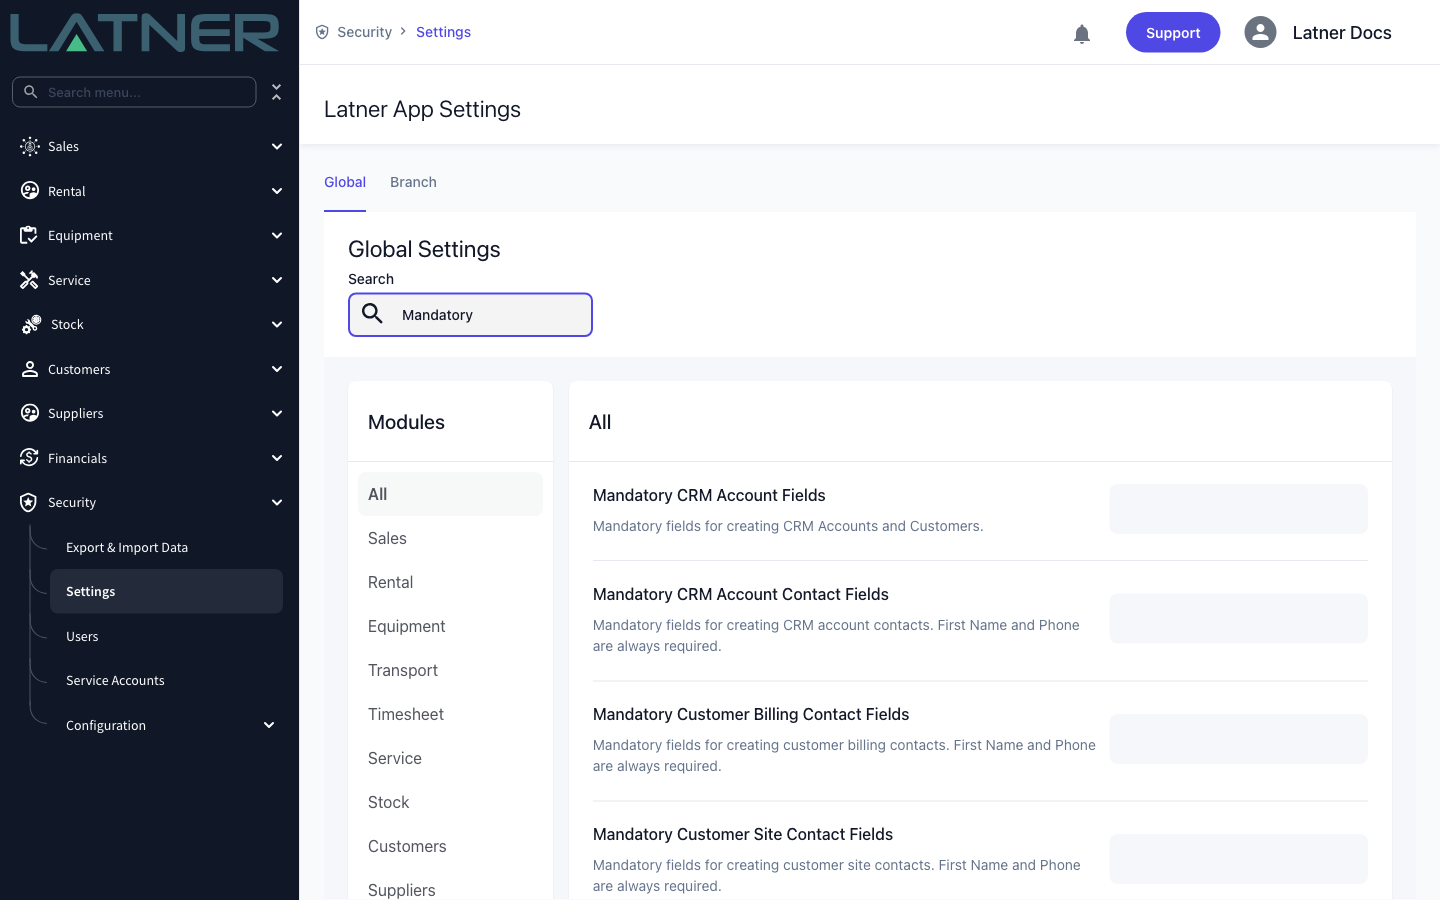
The Create New button is not hidden when you lack the permission. If you have neither Create Customer nor Create Cash (COD) Customer, the form still opens and the check happens when you press Save, which fails with "You don't have permission to create/edit Account Customers".
Creating the Customer
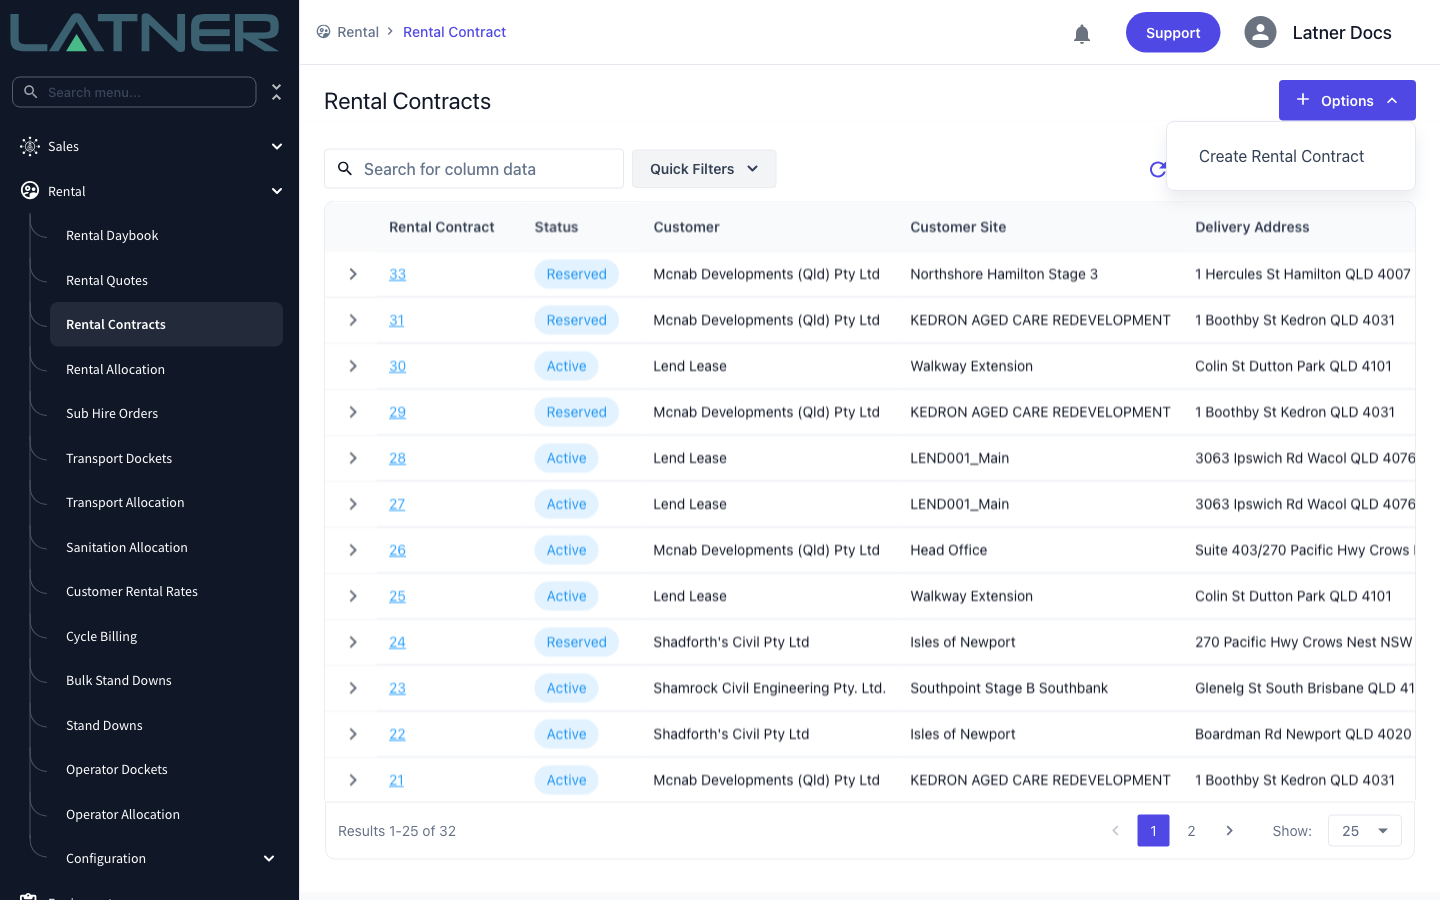
Step 1 - Open the Create Rental Contract form
Go to Rental › Rental Contracts and choose Options › Create Rental Contract.
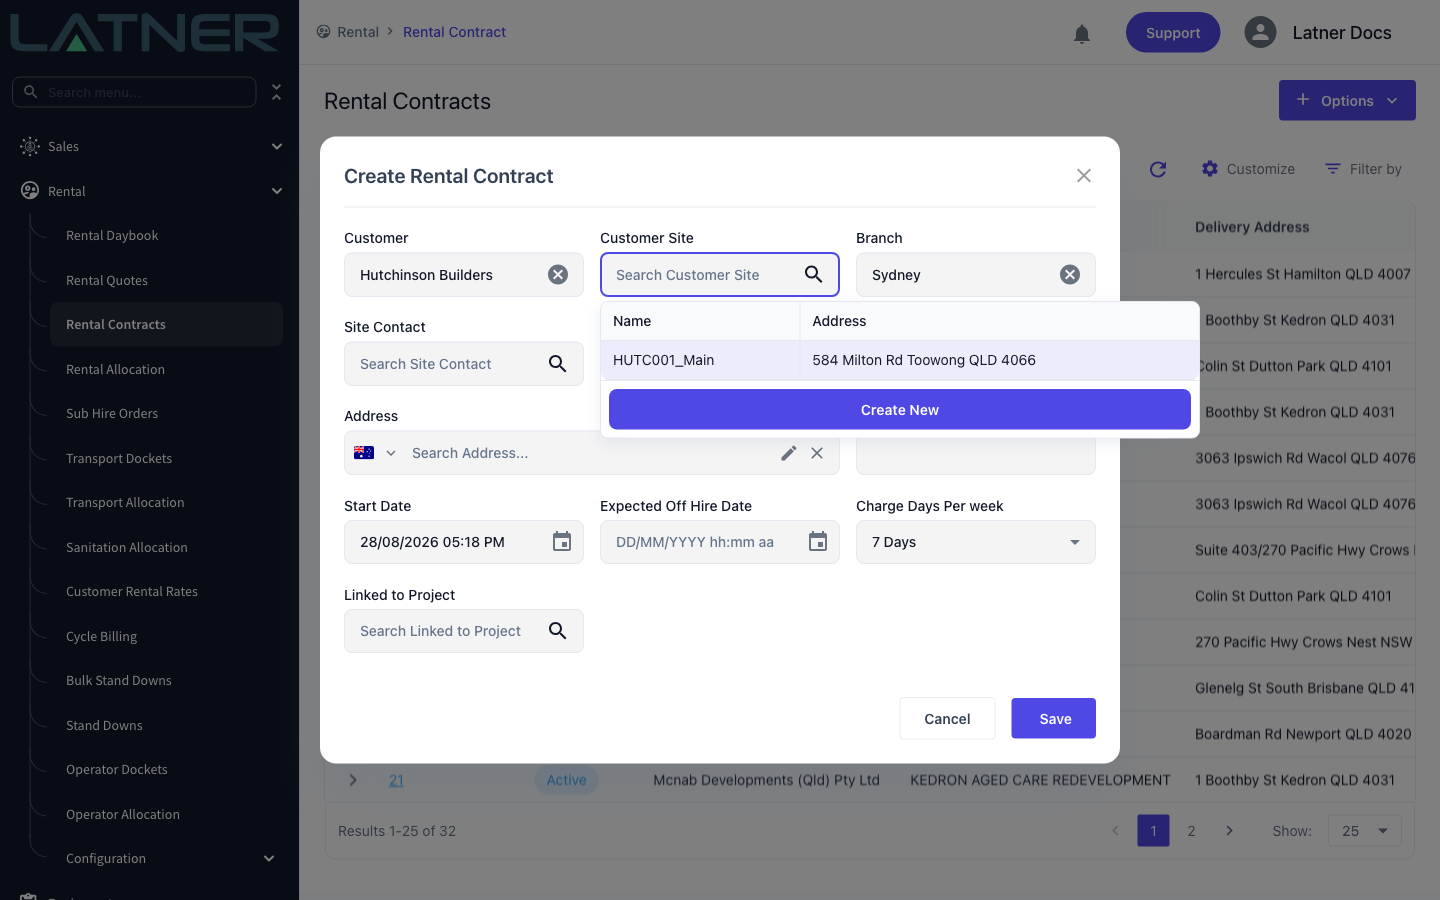
Step 2 - Open the Customer dropdown and choose Create New
Click into Customer. The dropdown lists your active customers with their payment terms, and customers on cash on delivery terms are shown in red so you can spot them at a glance. Type the company name first to be sure they really are new - it's much easier than merging duplicates later. When nothing matches, click Create New at the bottom of the list.
Step 3 - Choose the customer type
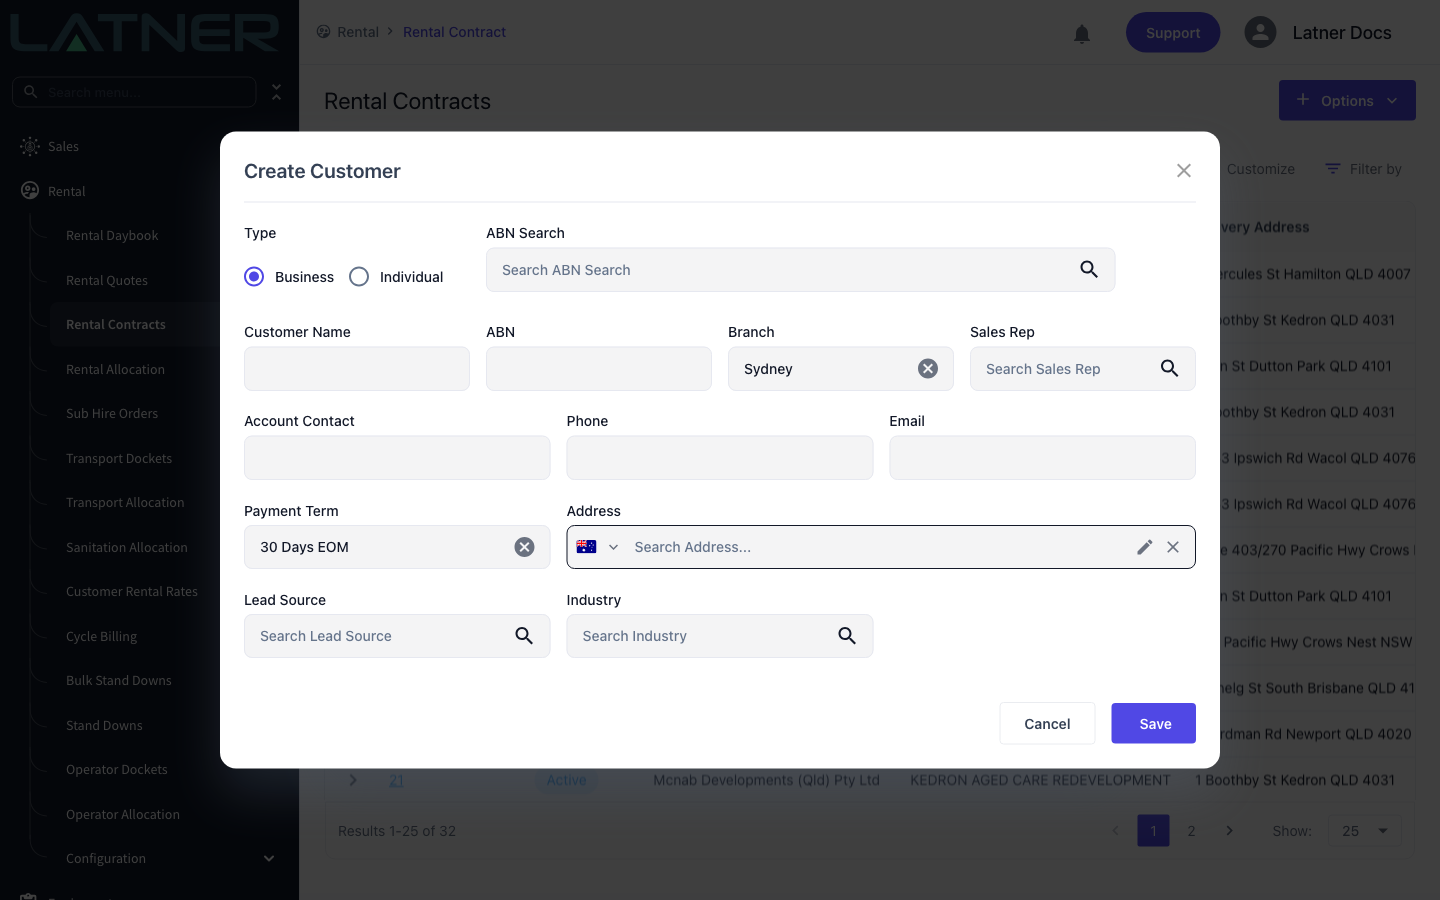
The Create Customer form opens over the contract. Set Type to Business or Individual - Business shows the ABN Search field, Individual hides it. Branch is already set to your own branch and Payment Term to the Default Payment Term setting.
These fields are required:
-
Type - Business or Individual.
-
Customer Name - the trading name the contract and invoices will show.
-
Branch - the branch that owns the account.
-
Account Contact - the person invoices go to.
-
Payment Term - decides whether this is an account or a cash customer.
-
Address - the billing address.
And these are optional unless a setting makes them compulsory:
-
ABN - checked for a valid ABN format when you save.
-
Sales Rep, Phone, Email.
-
Lead Source and Industry - required when listed in Mandatory CRM Account Fields.
Step 4 - Look the business up by ABN
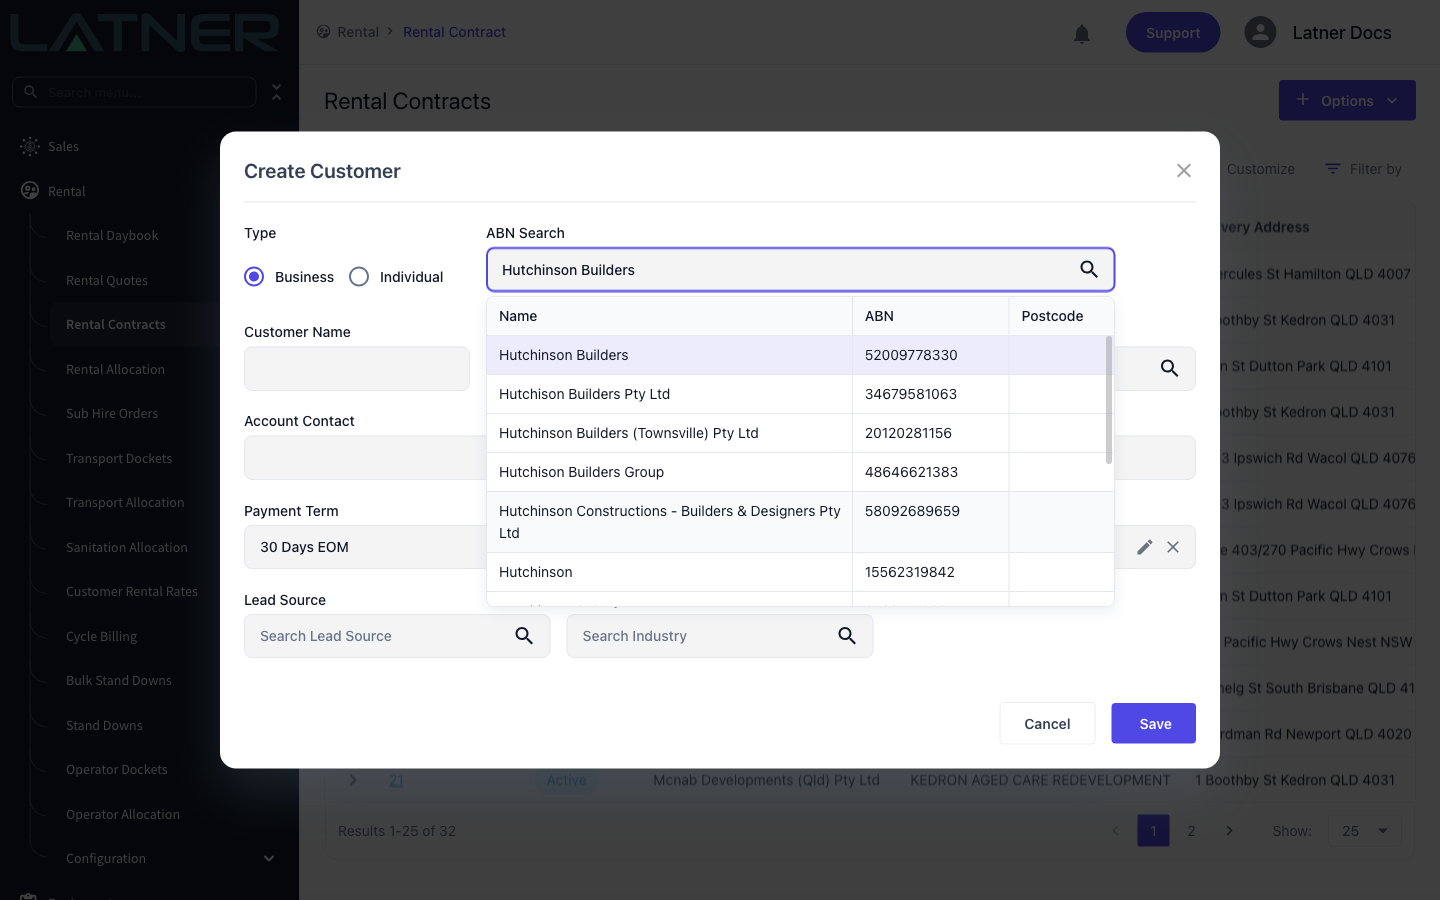
For a Business, type the company name or an ABN into ABN Search. Latner queries the Australian Business Register and lists matching entities with their ABN and postcode. Pick the right one and Customer Name and ABN are filled in for you. The search itself isn't saved against the customer, and you can skip it entirely and type the name by hand.
Step 5 - Enter the account contact and address
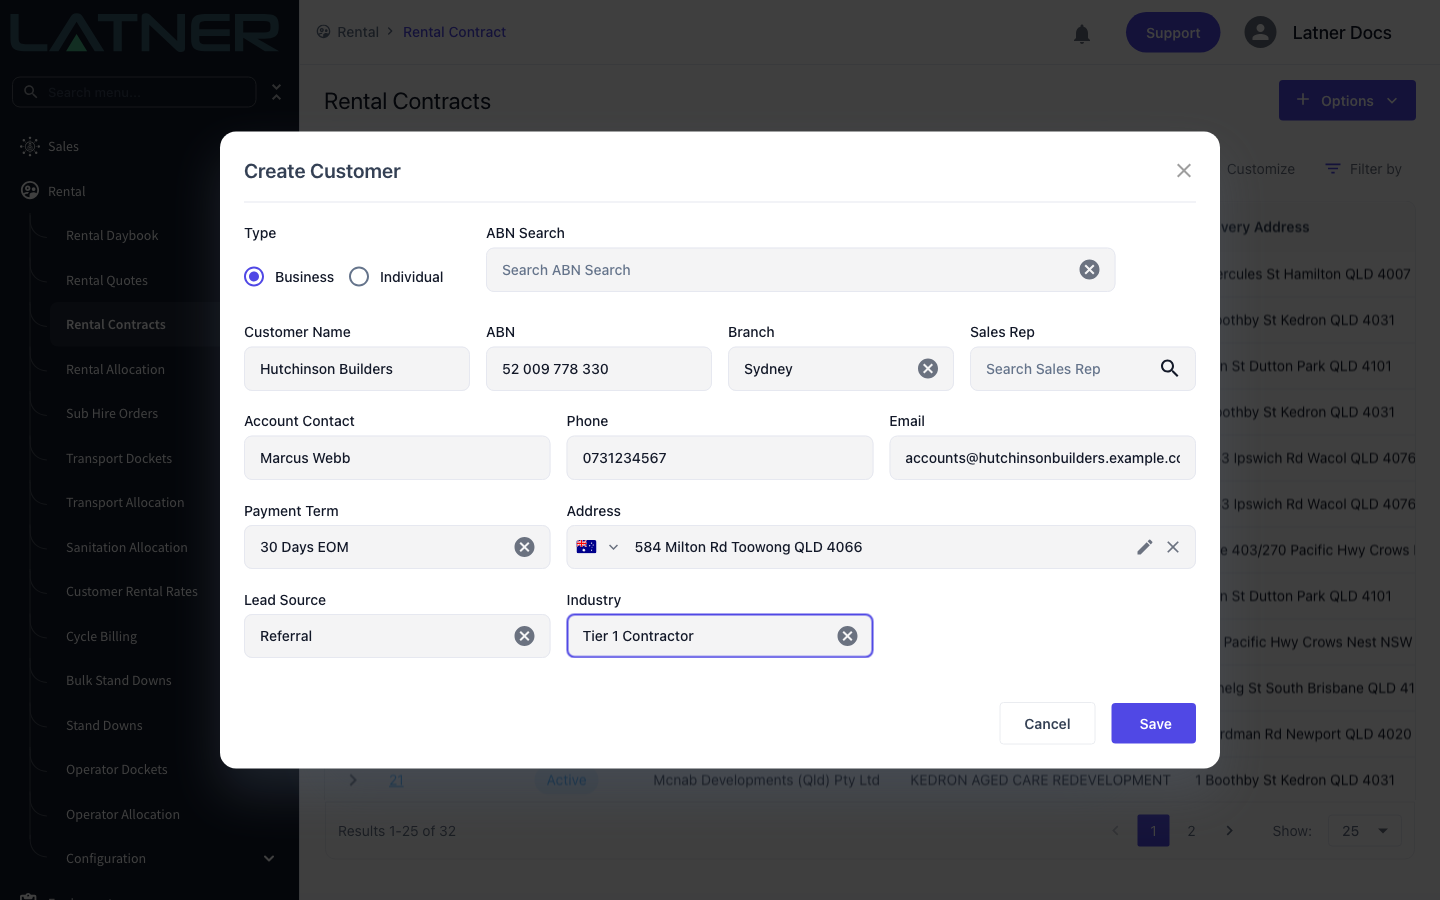
Fill in Account Contact with the contact's full name, plus Phone and Email. Latner splits the name on the space, so "Marcus Webb" becomes first name Marcus and last name Webb. Search for the billing address in Address, or use the pencil icon to type one in manually.
Step 6 - Set the payment term, lead source and industry
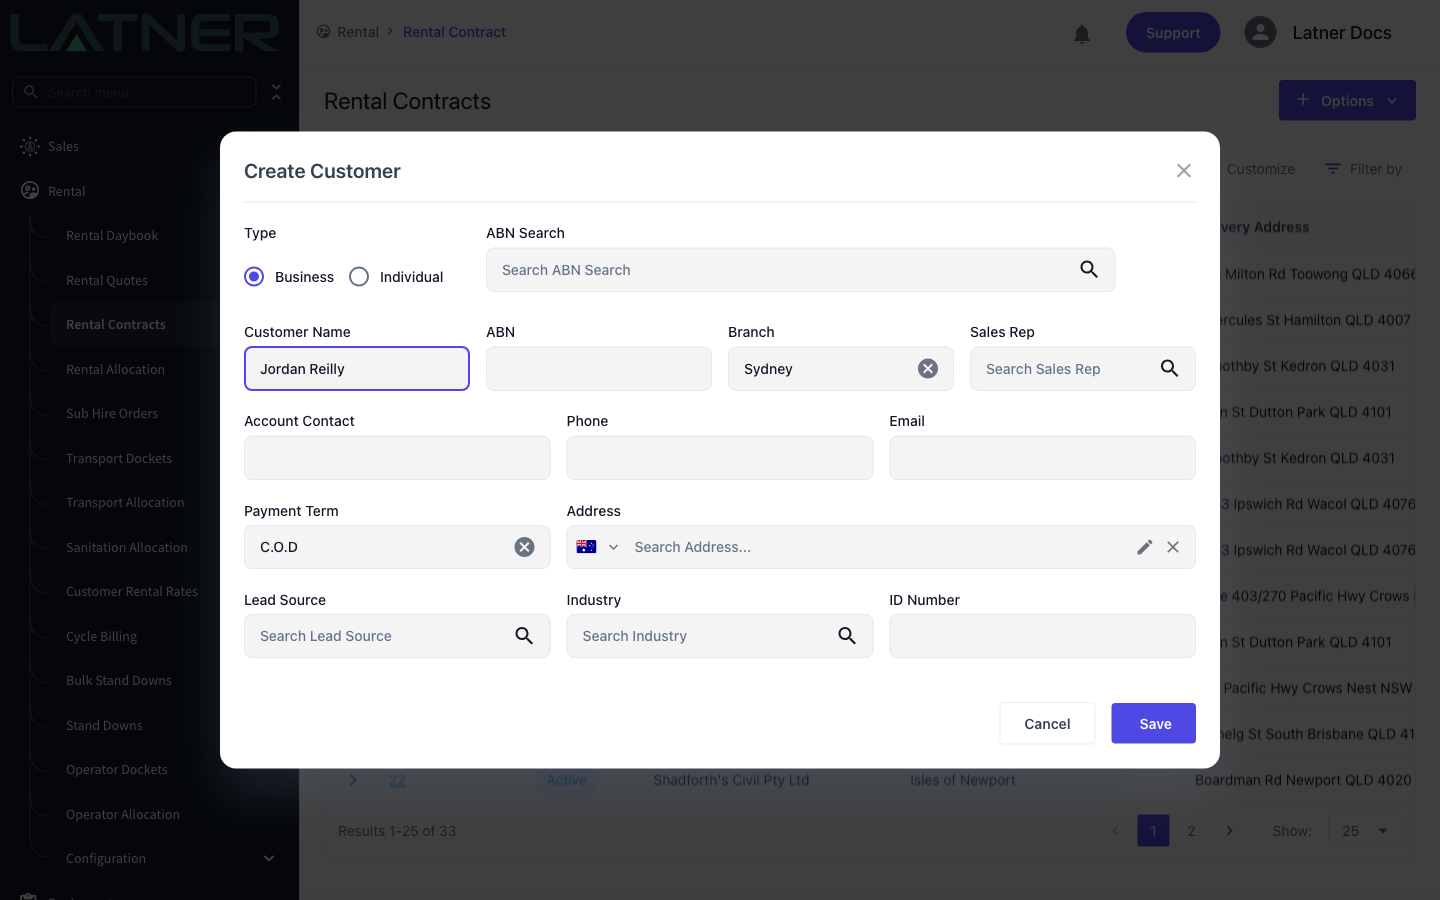
Payment Term is the field that decides what kind of customer this is. Choosing a cash on delivery term reveals an extra ID Number field for recording the licence or ID you sighted, sets the credit limit to $0.00 and puts the account on Immediate Payment. If Default COD Customer Address to Branch is enabled, the address is prefilled with the branch's address.
Step 7 - Save the customer
Check the form over and click Save. Latner generates the customer code, creates the billing contact and a main site, and drops the new customer straight into the Customer field on the contract behind.
Step 8 - Finish the rental contract
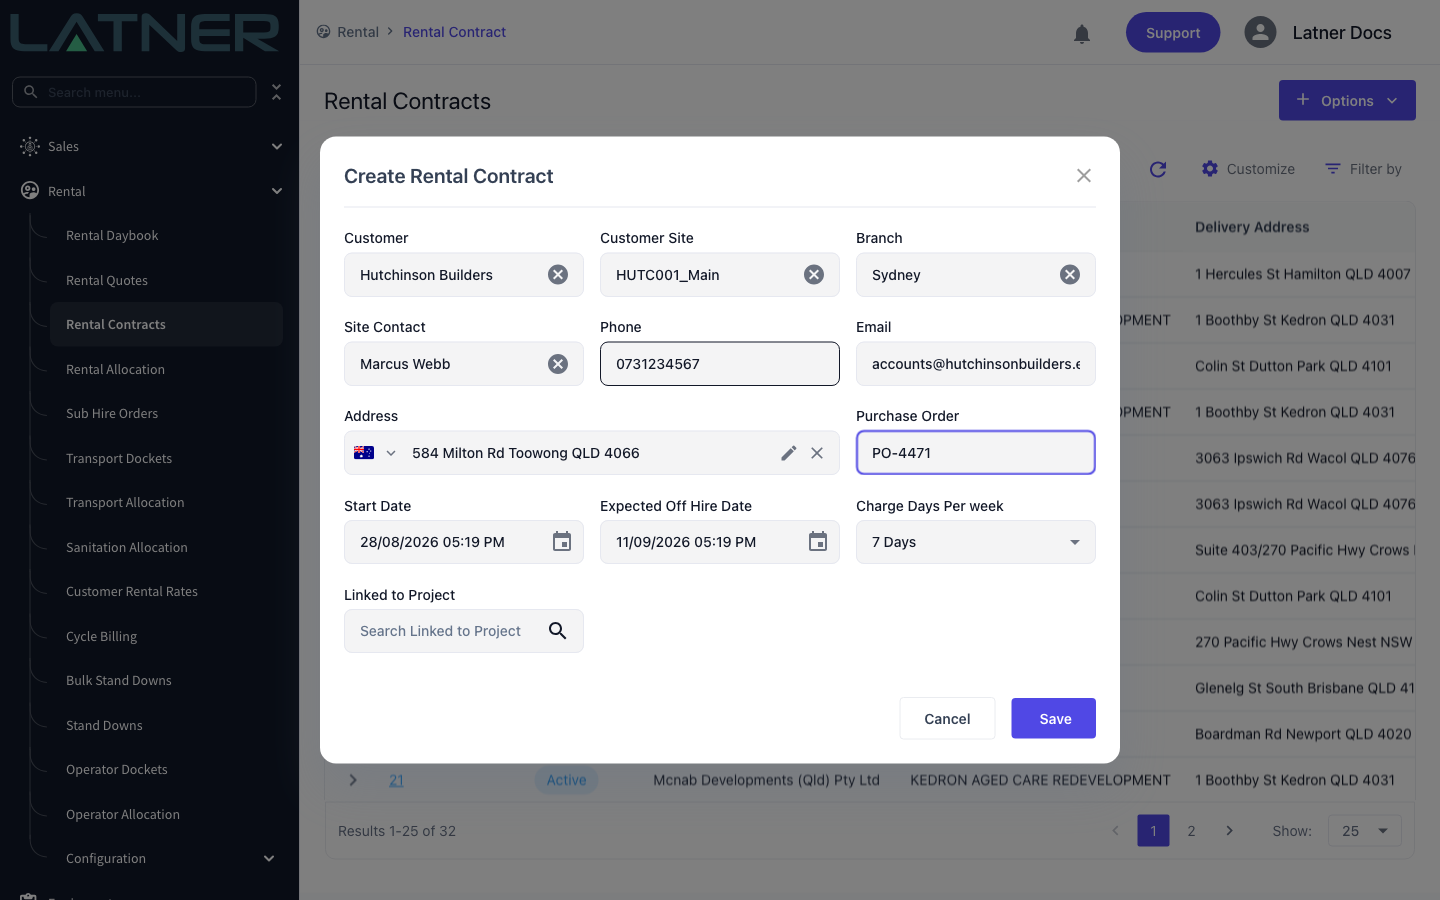
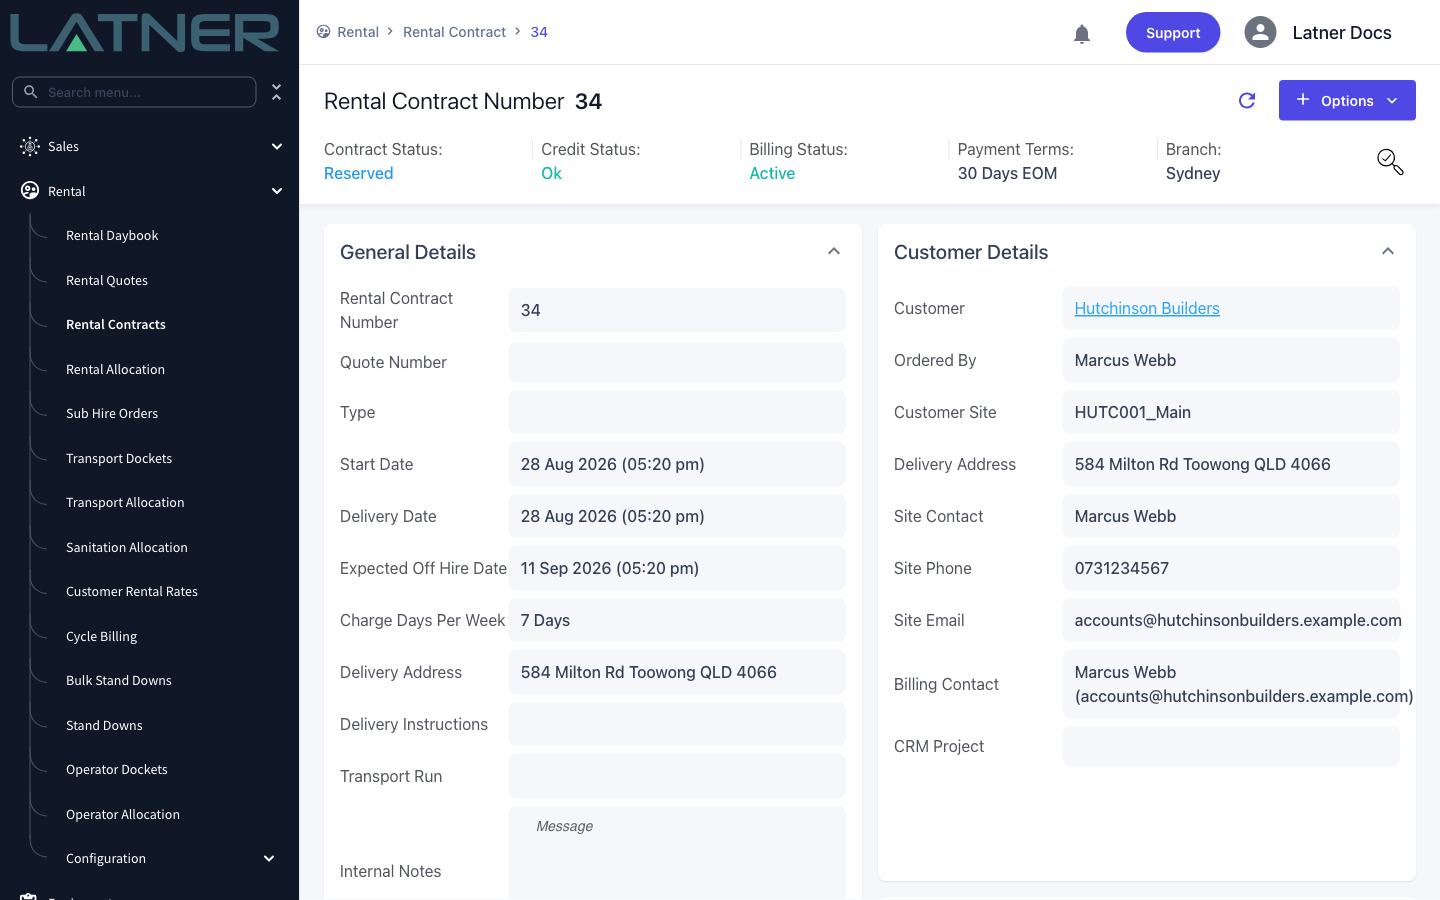
Pick the main site under Customer Site, or use Create New again to add the real delivery site. Choosing the site fills Site Contact, Phone, Email and Address from the contact you just created. Set the Expected Off Hire Date, add a Purchase Order if you have one, then Save.
After Creation
-
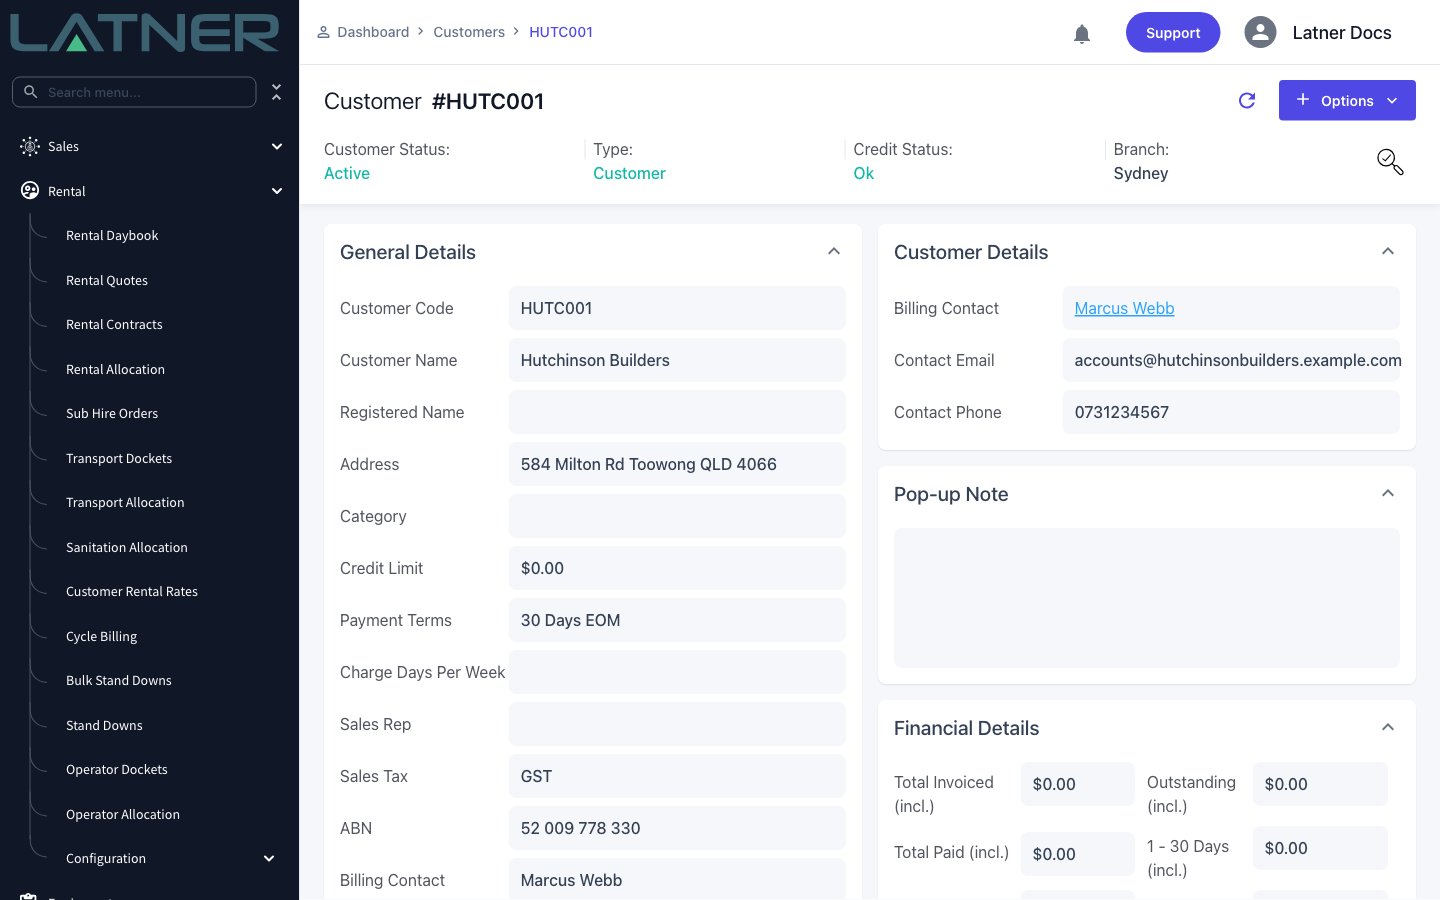
The customer appears under Customers › Customers with status Active and credit status Ok - or Immediate Payment if you chose a cash on delivery term.
-
The customer code is built by the Customer Code Generation Method setting. The default takes the first four letters of the name and adds a unique number, so Hutchinson Builders becomes HUTC001. COD customers also pick up the COD Customer Code Prefix.
-
A main site named after the code, such as HUTC001_Main, is created at the billing address on the same branch.
-
The Account Contact is saved as the customer's billing contact and is also set as the delivery contact, account contact and default reporting contact, and linked to the main site.
-
The billing address is copied to the delivery and account addresses.
-
The GST sales tax is applied if your system has one, and the damage waiver falls back to the Global Damage Waiver rental setting.
-
The credit limit starts at $0.00 until someone sets one on the customer record.
Nothing in this flow runs a credit check or sets a credit limit, so a customer created here starts on a $0.00 limit on your default payment term. Have Accounts review the account before a large or long hire. If you pick the wrong customer on the contract, don't recreate it - use Options › Update Customer on the rental contract, which needs the Update Rental Contract Customer permission.
FAQs
Watch the Demo
Prefer to watch it? Step through the same flow here.