
A rental contract is the record that holds a hire together - who it is for, which site it goes to, when it starts and ends, and what goes out on it - so creating one is the first step of every hire you put through Latner.
Overview
Most of a rental contract writes itself. Once you have picked the customer and the site, Latner brings across the site contact, the delivery address, the charge days and the pricing defaults, and leaves you to confirm the dates.
-
Contracts are created from Rental › Rental Contracts using Options › Create Rental Contract. The same option is on the Rental Daybook, and the Customer Rental Rates screen can start a contract with rate lines already on it.
-
A new contract is created in Reserved status. It moves to Active once equipment on it goes on rent.
-
Choosing a customer site fills in the Site Contact, Phone, Email and Address for you. You can override any of them on the contract without changing the site.
-
Charge days per week, damage waiver and environmental levy default from the customer site first, then the customer, then your global rental settings.
-
Saving takes you straight to the new contract and opens Add Details, ready for you to add equipment.
Before You Begin
You need the right permissions and a few pieces of data in place before the option will appear and the contract will save.
|
Requirement |
Where to Find It |
|---|---|
|
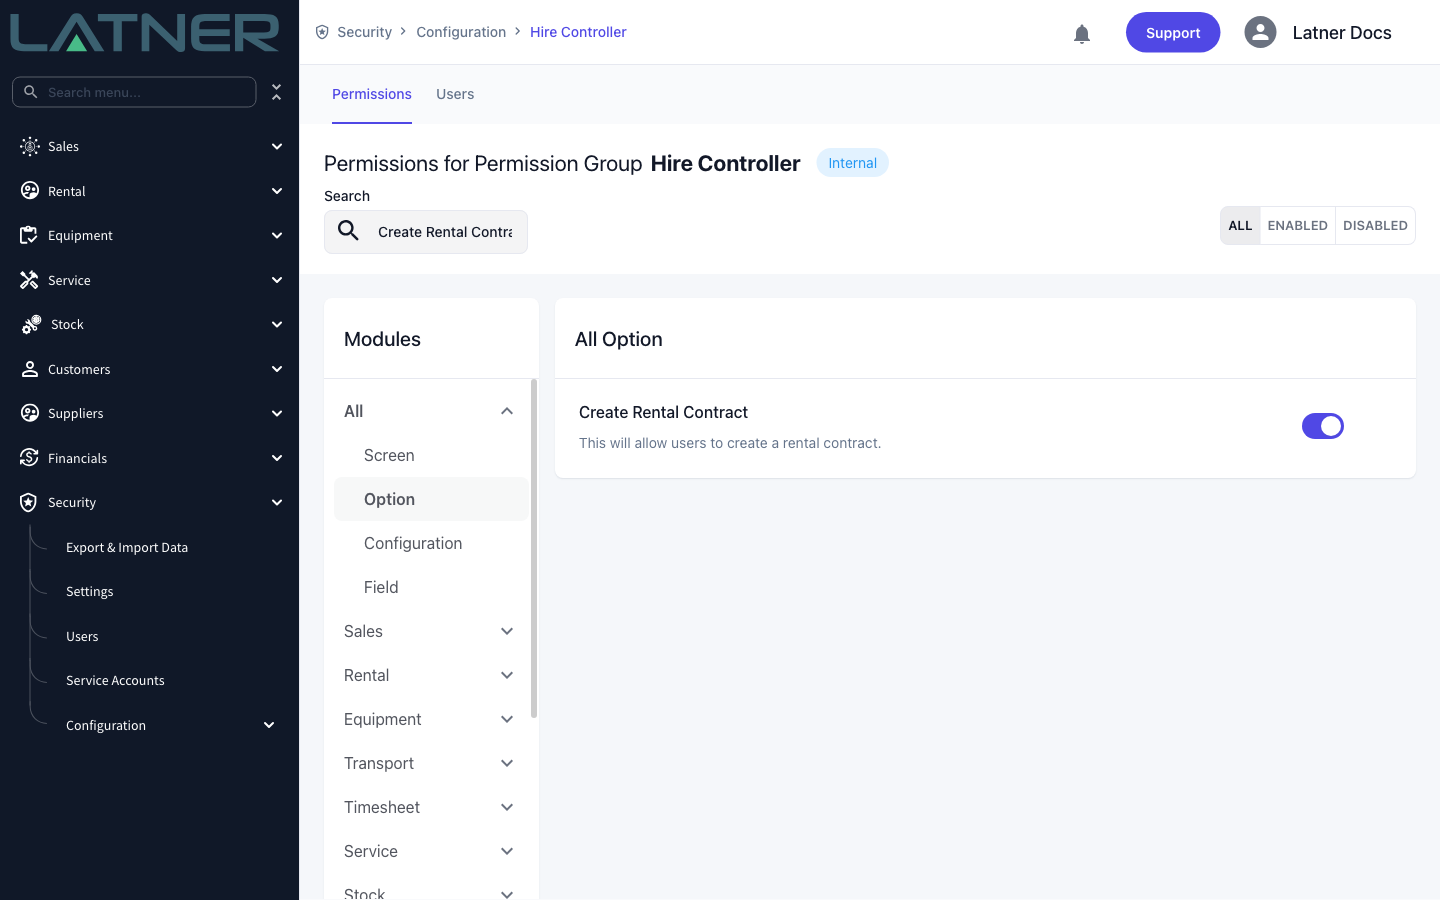
Rental Contracts permission - lets you open the screen |
Security › Configuration › Permission Groups › your group › Screen |
|
Create Rental Contract permission - shows the option in the Options menu |
Security › Configuration › Permission Groups › your group › Option |
|
Default Charge Days Per Week - a fallback used when neither the site nor the customer has one |
Security › Settings › Rental |
|
Show Default Charge Days Per Week - controls whether the field appears on the form |
Security › Settings › Rental |
|
An active customer account that isn't on credit hold |
Customers › Customers |
|
A customer site to deliver to |
Customers › Customers › the customer › Sites, or create one from the form |
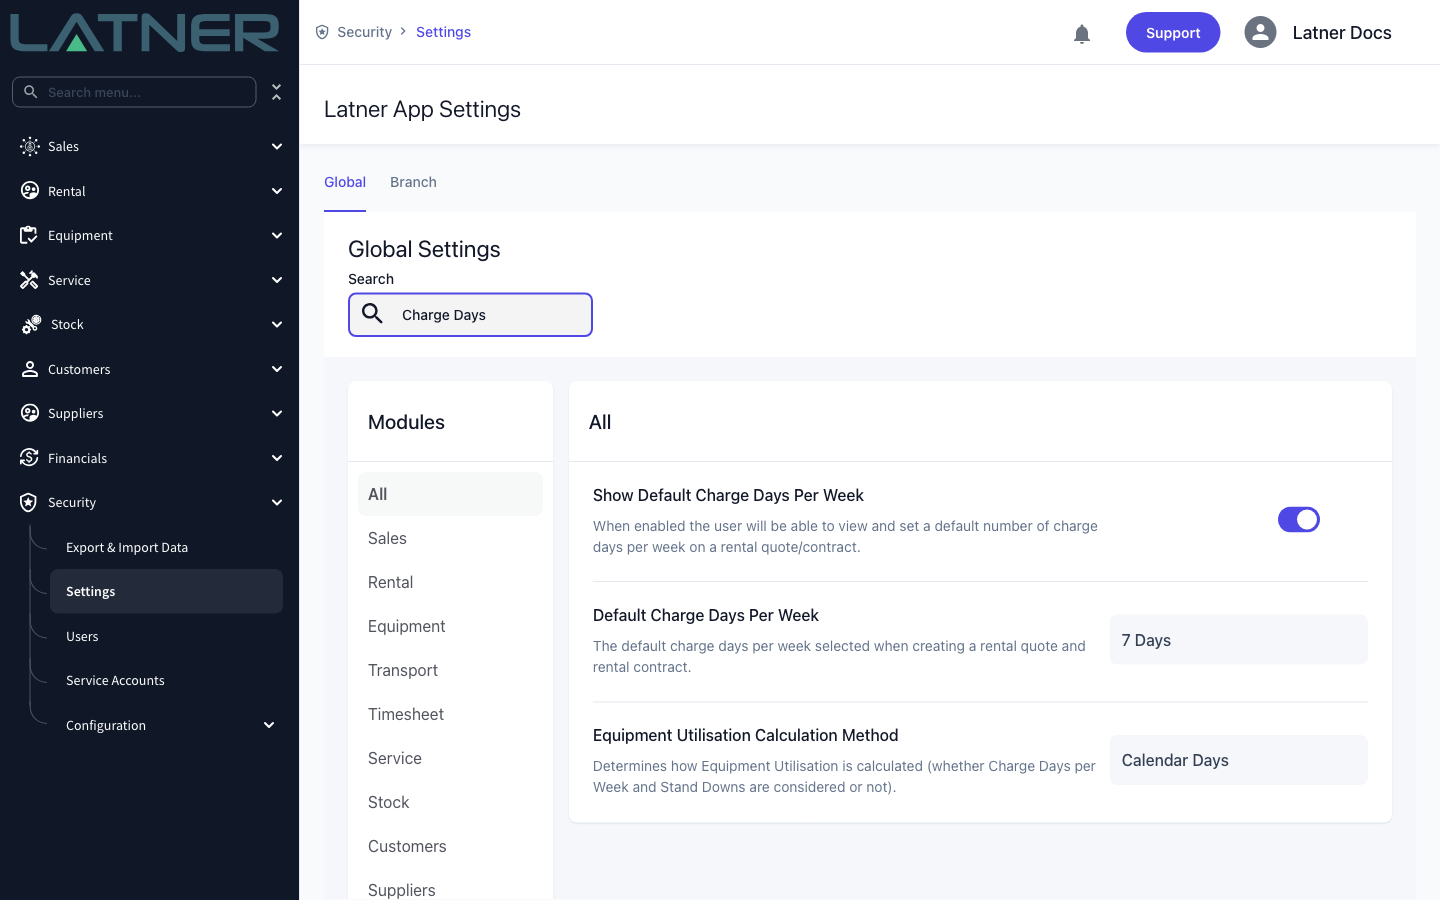
If Show Default Charge Days Per Week is turned off, the Charge Days Per week field is hidden on the form and Latner works the value out for itself - site, then customer, then the global setting. If none of the three has a value, the contract won't save and you'll be told that a global default hasn't been set.
Creating the Rental Contract
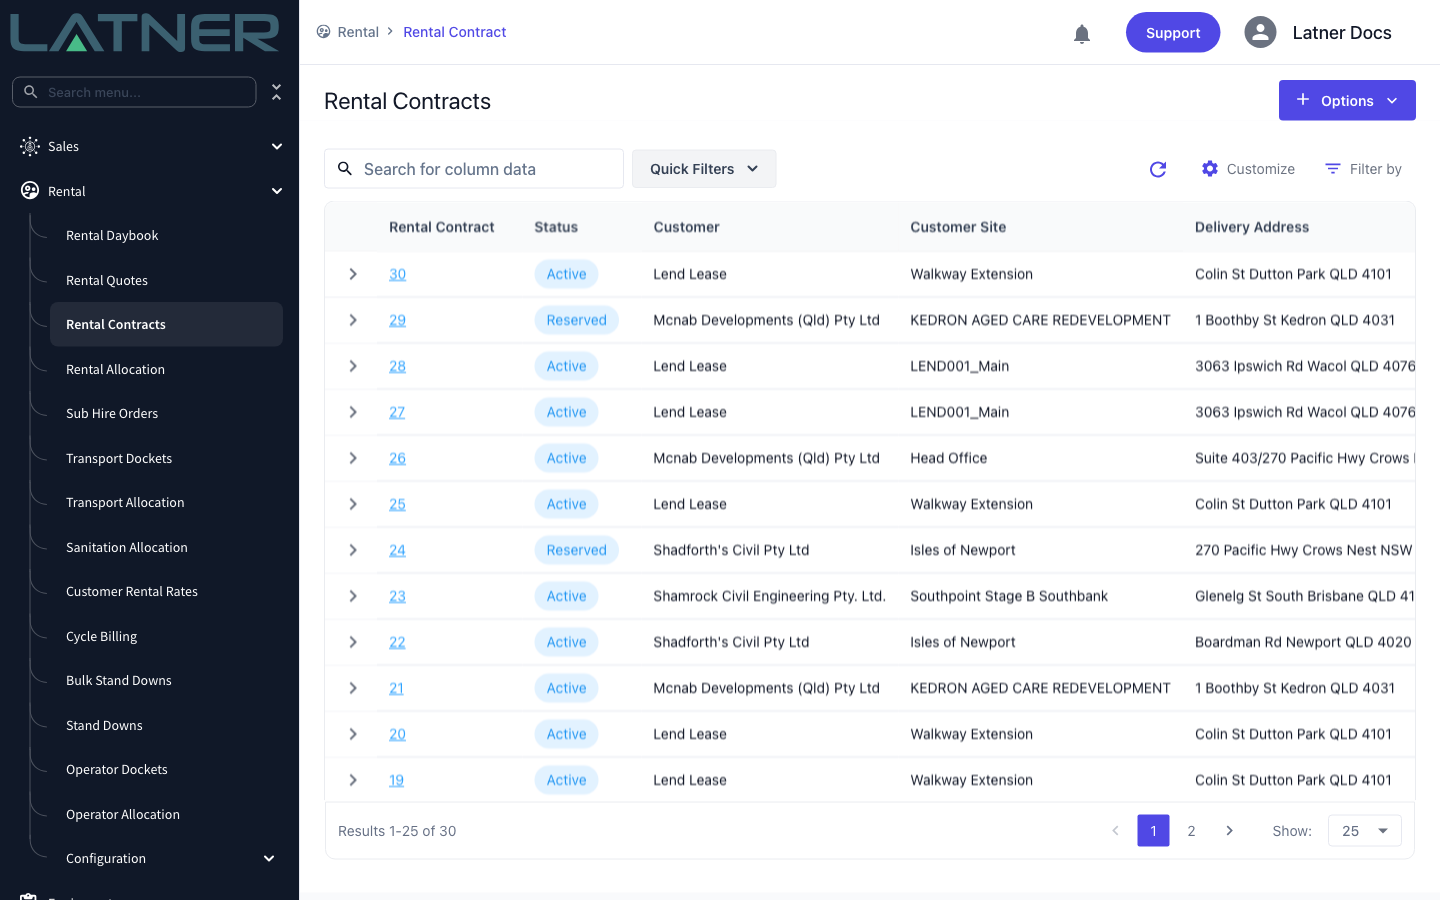
Step 1 - Open the Rental Contracts screen
Go to Rental › Rental Contracts. This is the list of every contract in the system, with its status, customer, site and delivery address.
Step 2 - Start a new contract
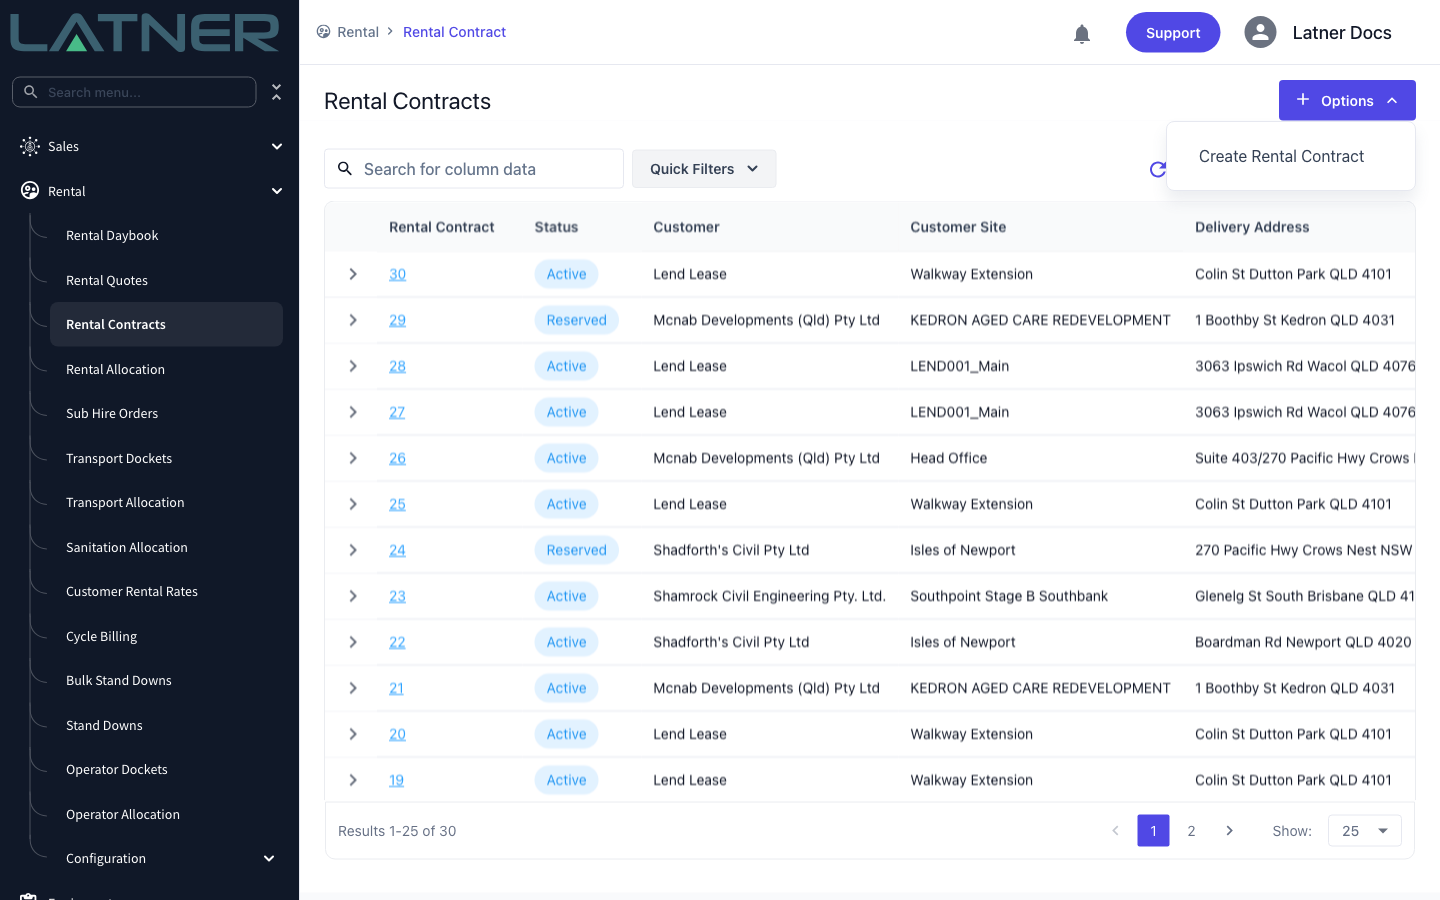
Click Options at the top right, then Create Rental Contract.
Step 3 - Choose the customer
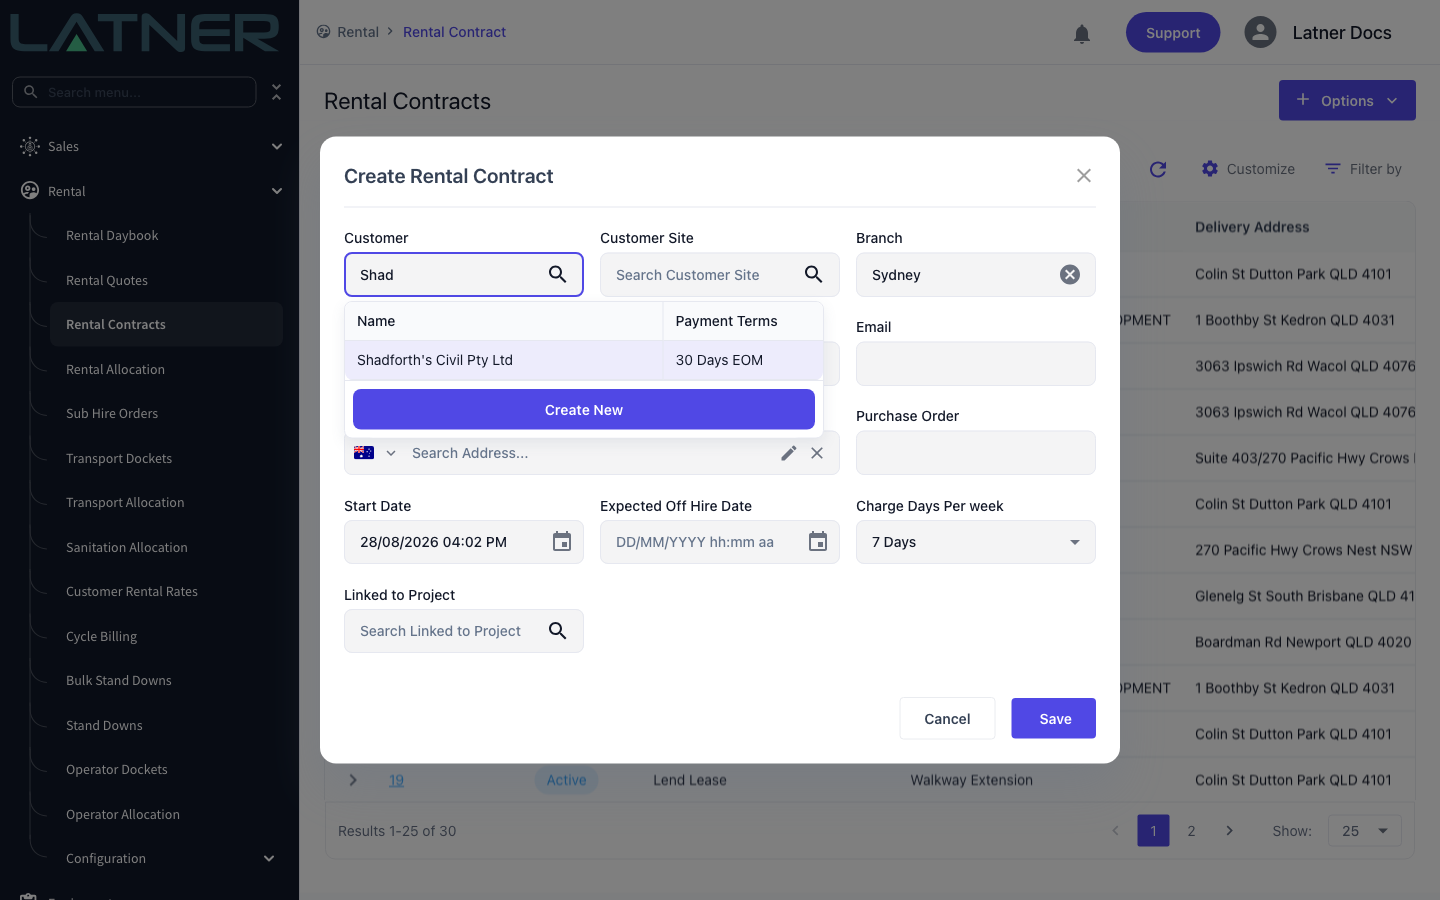
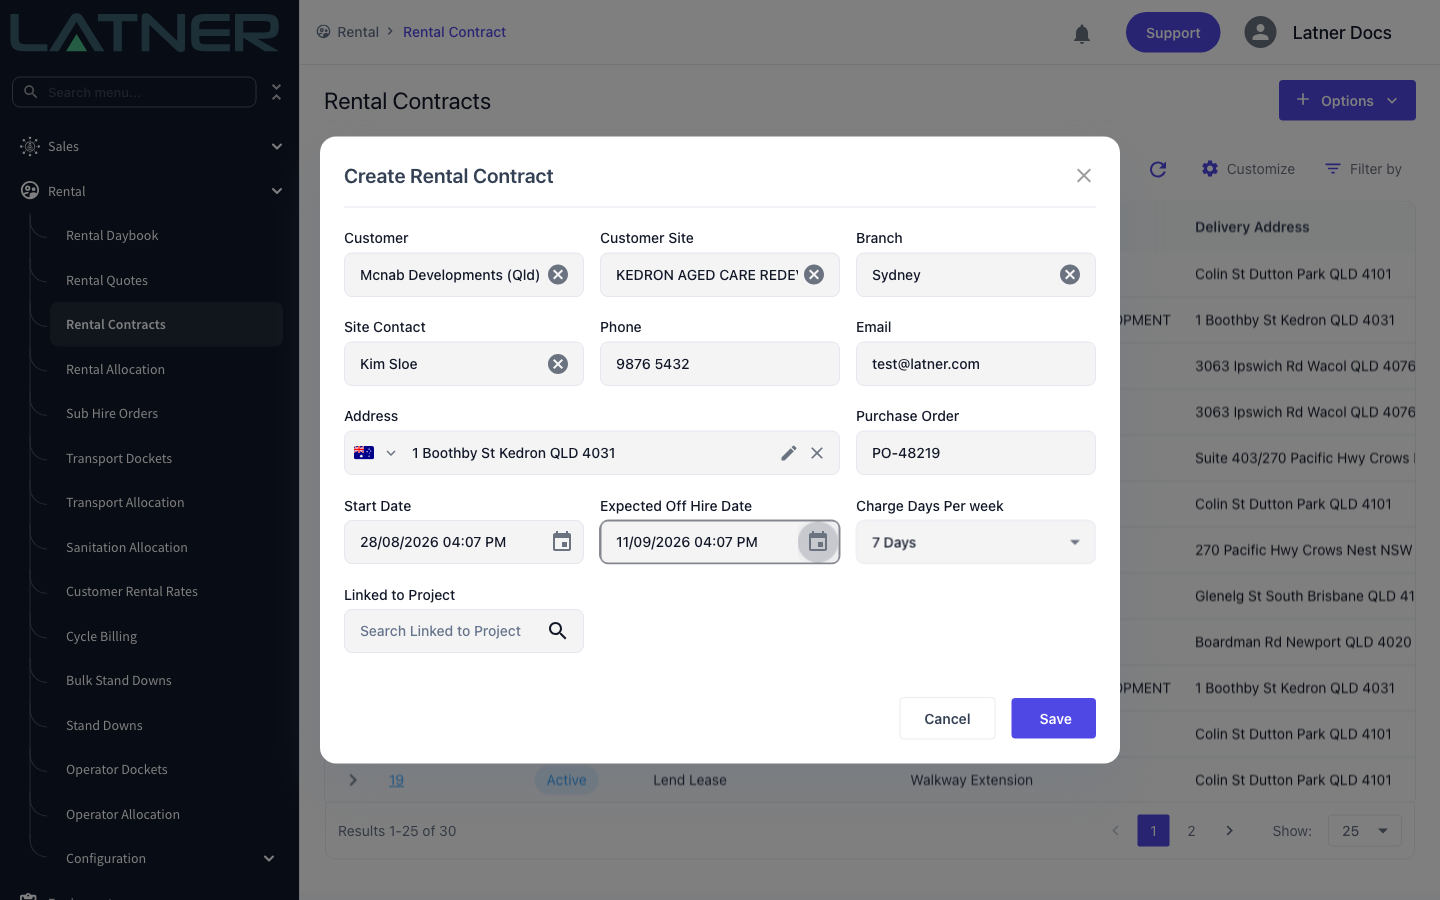
Type into Customer and pick the account from the list. Only active customer accounts appear here, and accounts on cash on delivery terms are shown in red so you can see them at a glance. If the customer isn't in Latner yet, click Create New at the bottom of the list to add them without leaving the form.
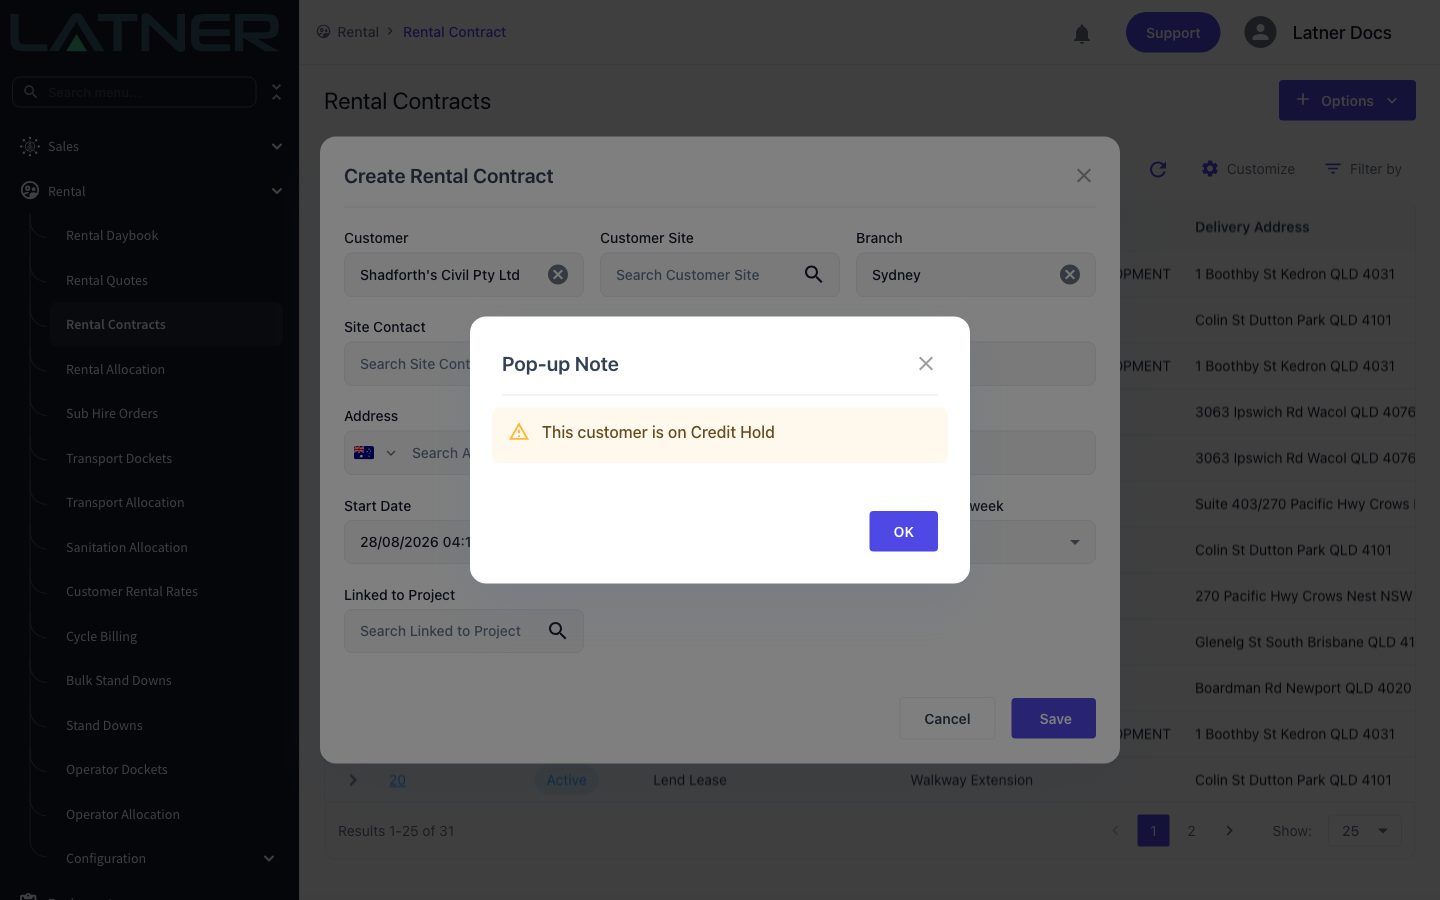
If the customer has a pop-up note against them, or is on credit hold, Latner shows it as soon as you select them.
Step 4 - Choose the customer site
Click Customer Site and pick where the equipment is going. The list is filtered to the sites belonging to the customer you chose. As with the customer, Create New lets you add a site on the spot.
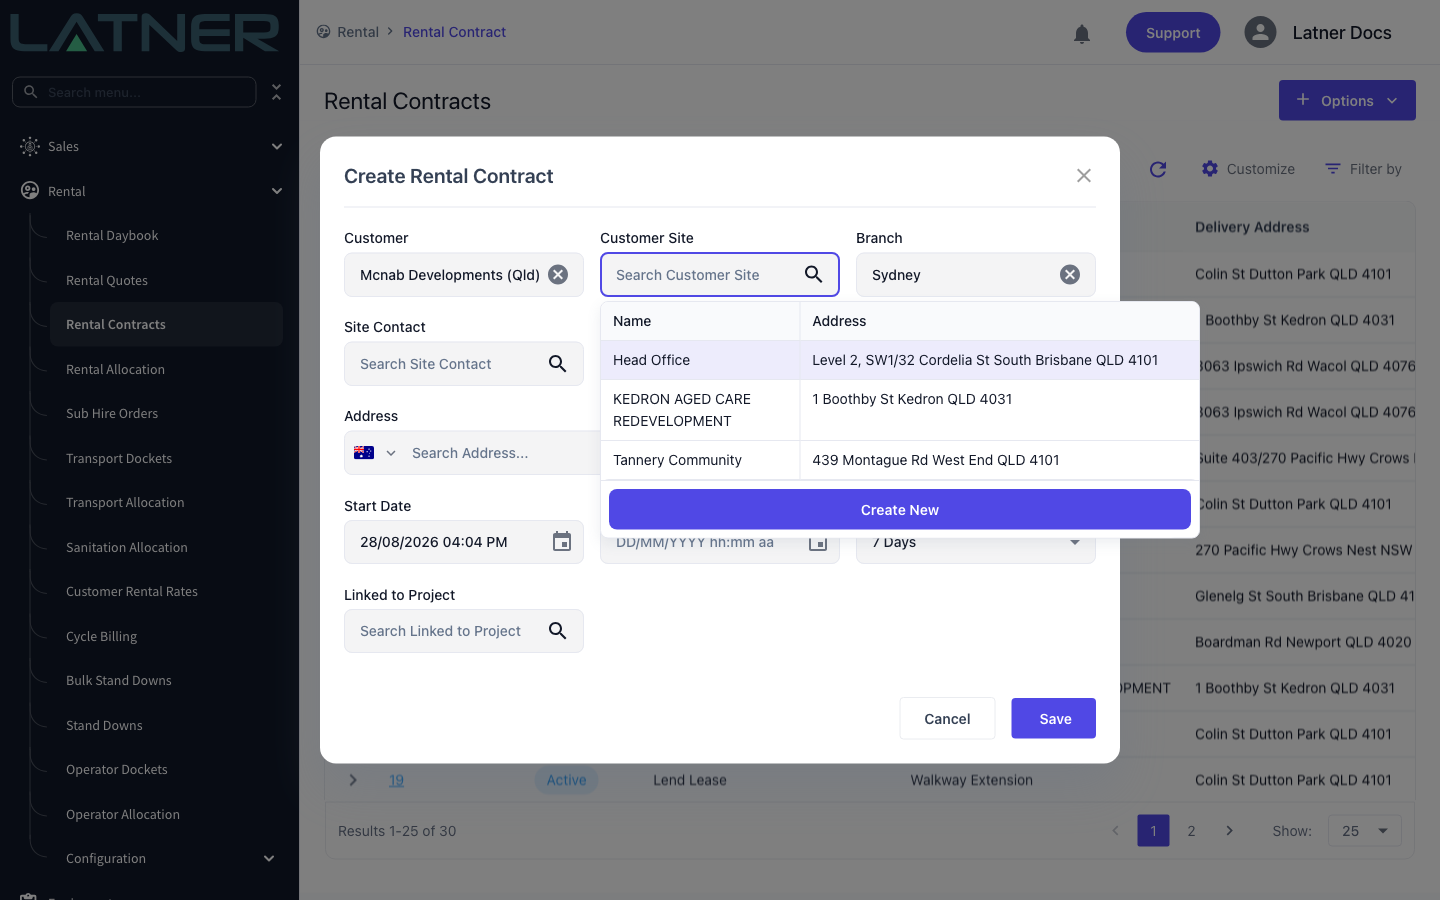
Branch defaults to your own branch and controls which branch the hire belongs to, along with the time zone the dates are read in.
Step 5 - Check the site contact and delivery address
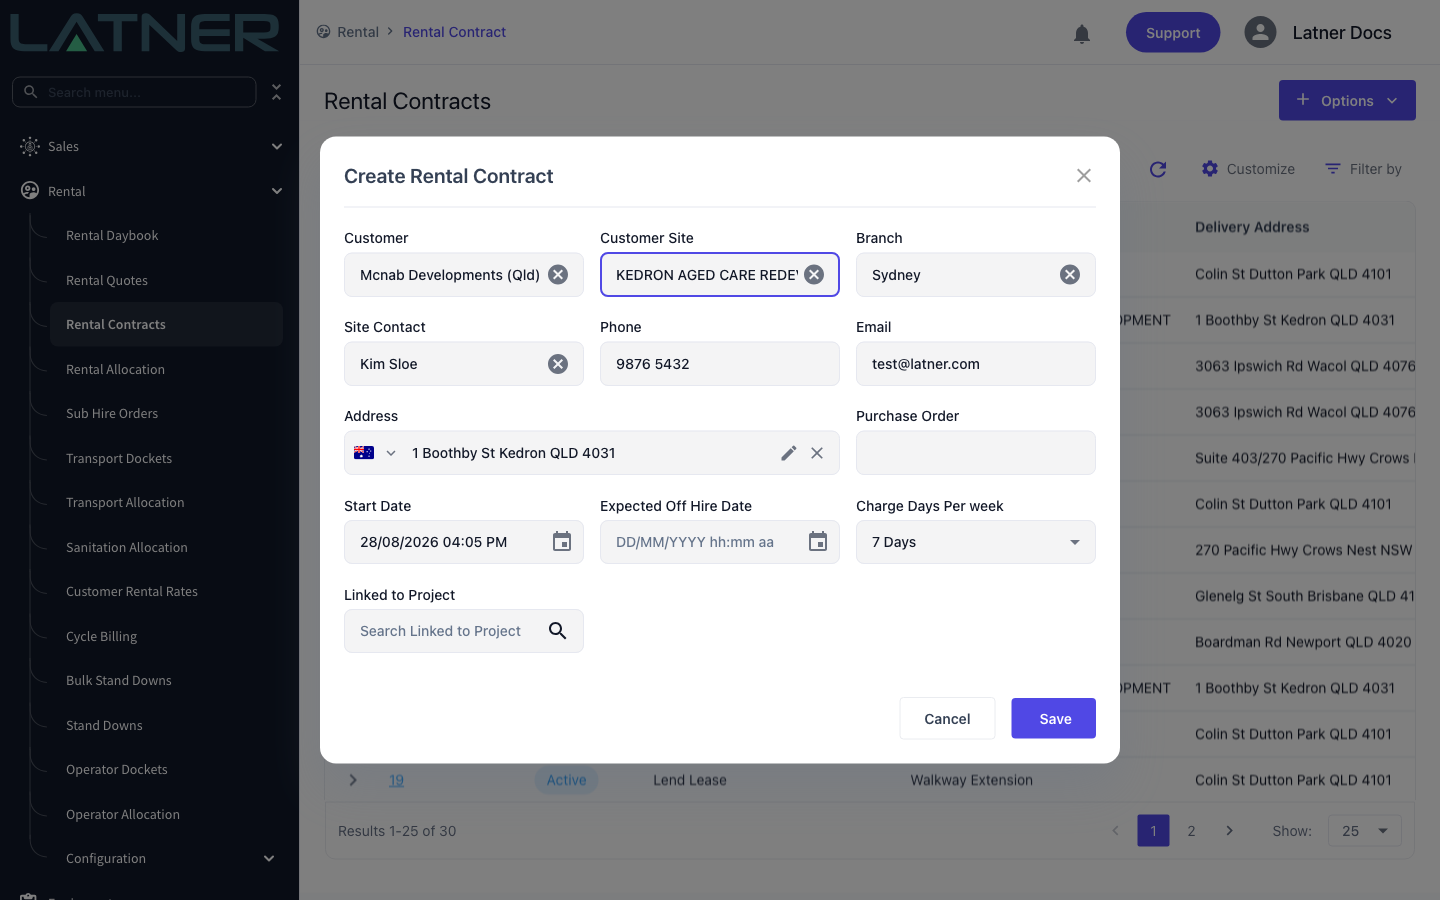
Selecting the site fills in the rest of the delivery block from the site's own details. Check them and change anything that is different for this hire - editing them here does not change the site record.
-
Site Contact - required. The person on the ground. Latner also records them as the contract's Ordered By contact.
-
Phone - required, and pre-filled from the contact.
-
Email - pre-filled from the contact. Whether it is required depends on the Mandatory Customer Site Contact Fields setting.
-
Address - required, and pre-filled from the site.
Step 6 - Set the start and expected off hire dates
Start Date defaults to now, or to tomorrow if Default Rental Quote/Contract Start Date to Tomorrow is enabled. With Use Branch Opening & Closing Times enabled, the start and expected off hire times default to the branch's opening and closing times instead.
Expected Off Hire Date is required. Open the picker and you'll find a shortcut box in the bottom left: type a duration and press Enter to set the date relative to the start date. Use d for days, w for weeks, m for months and we to land on the end of a week - so 2w is a fortnight's hire and 10d is ten days.
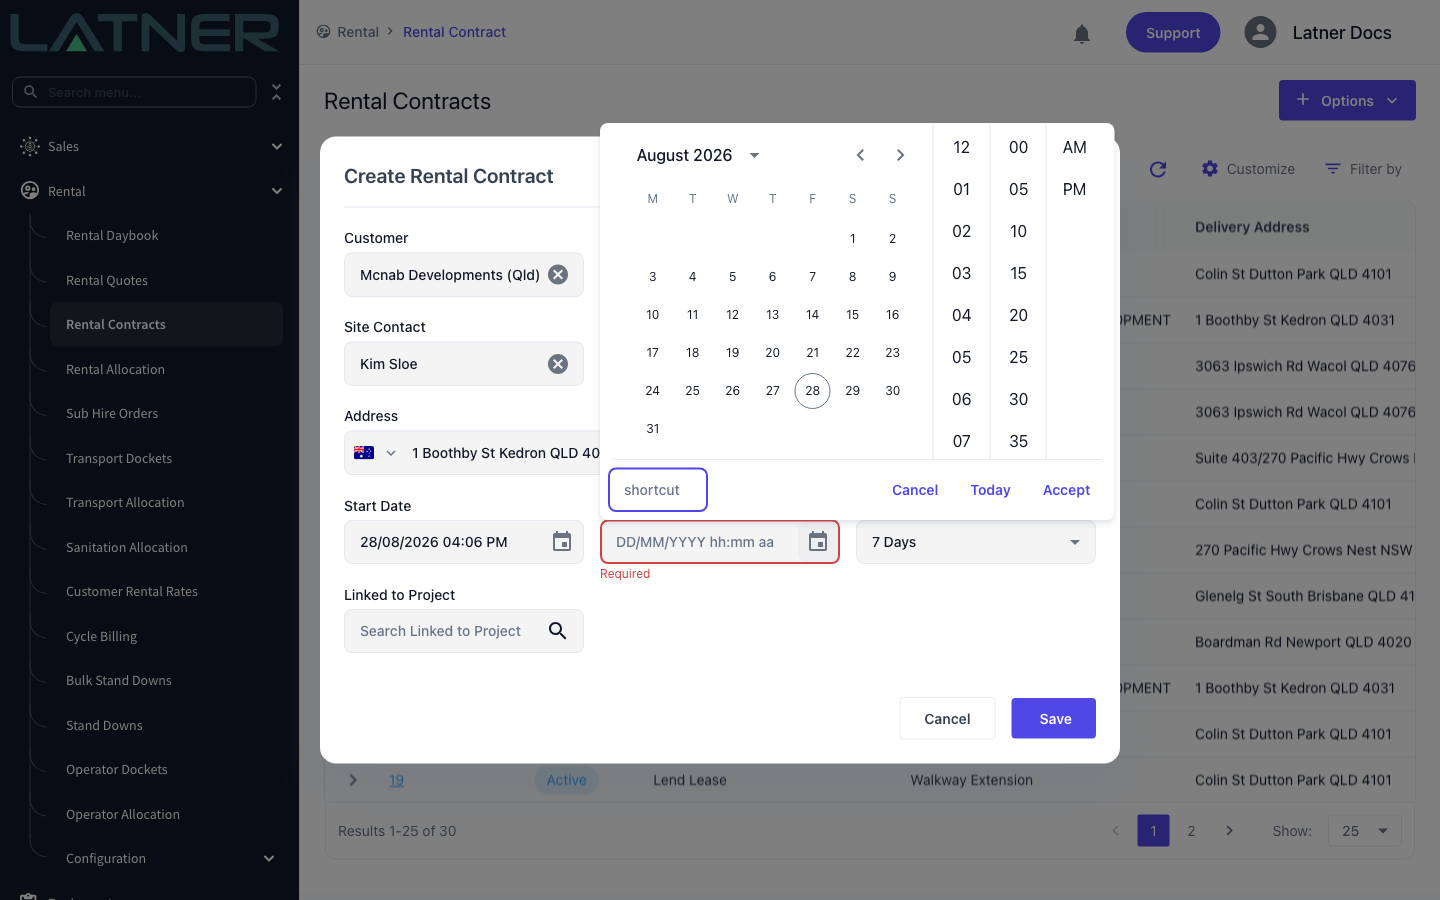
If the start date falls on a day the customer isn't charged for - a Saturday on 5 day billing, say - a warning appears under the dates. It's a warning only, so you can still save; it's there so you don't accidentally start a hire on a day that bills nothing.
Step 7 - Add the purchase order and check the charge days
-
Purchase Order - optional, and can be added later. Many customers won't approve an invoice without one.
-
Charge Days Per week - required when the field is shown. Choose from 5 Days, 6 Days, 7 Days, Saturday or Weekend. It arrives pre-set from the site or the customer, so only change it if this hire is billed differently.
-
Linked to Project - optional, and only visible when Show Link to Project Field When Creating Rental Contracts is enabled. Links the hire to an in-progress project.
Step 8 - Save
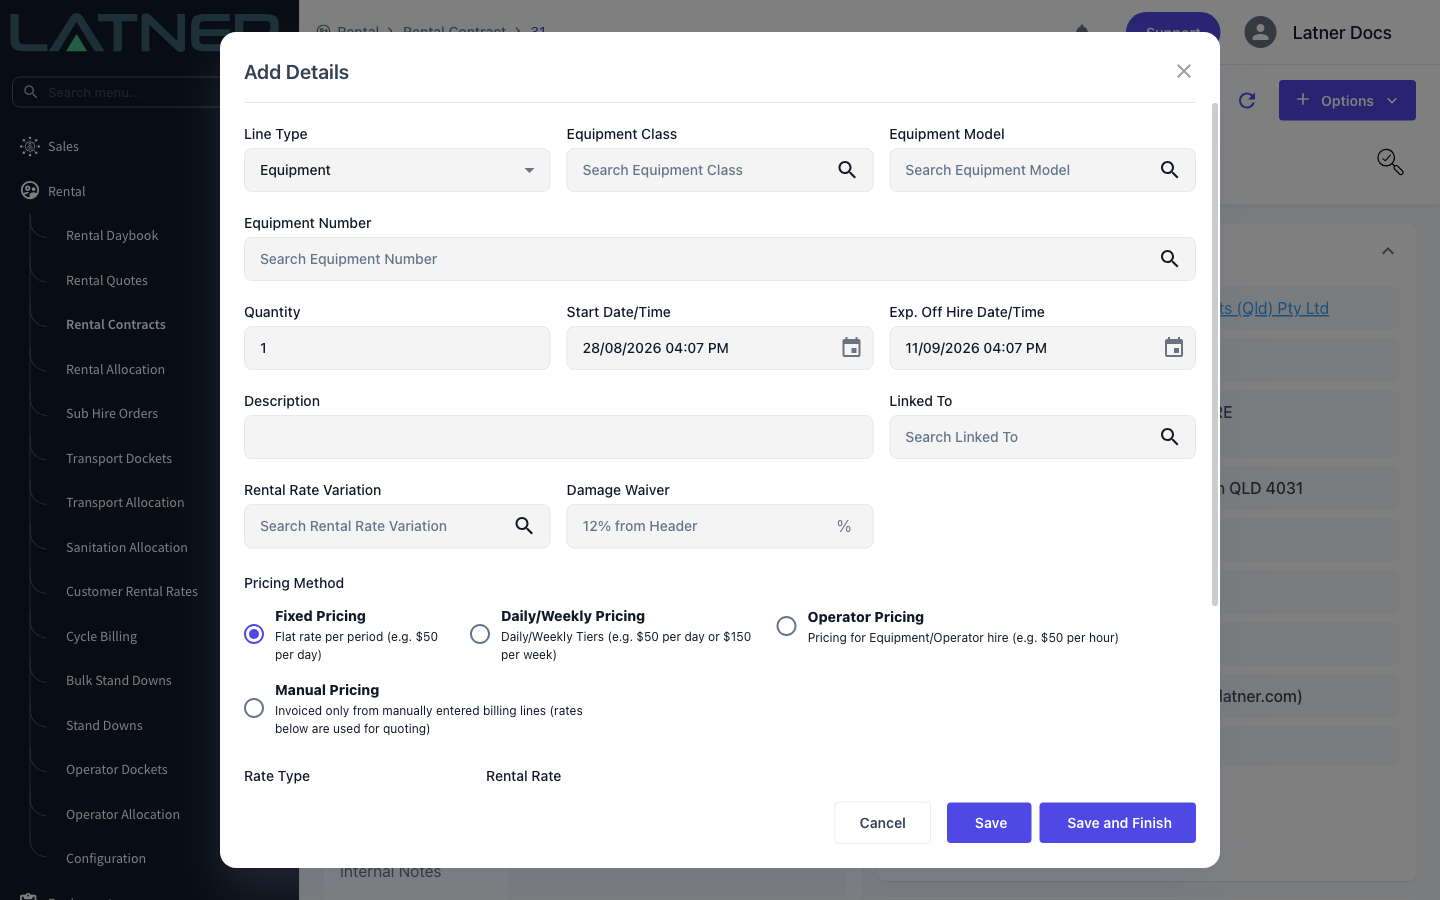
Click Save. Latner creates the contract, takes you to it, and opens Add Details so you can put the first line on straight away. The dates and damage waiver you just set are carried down onto the line for you. See How to Add Equipment to a Rental Contract for what to do next.
After Creation
-
The contract is given the next rental contract number and starts in Reserved status. It appears on the Rental Contracts list and on the Rental Daybook straight away.
-
Tax, transport run and delivery instructions are copied from the customer site.
-
The damage waiver and environmental levy percentages are taken from the site, then the customer, then the global rental settings, and are applied to lines you add.
-
The sales rep is set from the site, then the customer, then you as the logged-in user. With Default Sales Rep to User enabled, you are used first.
-
Everything else on the contract - notes, billing options, additional items - can be edited afterwards from the contract itself.
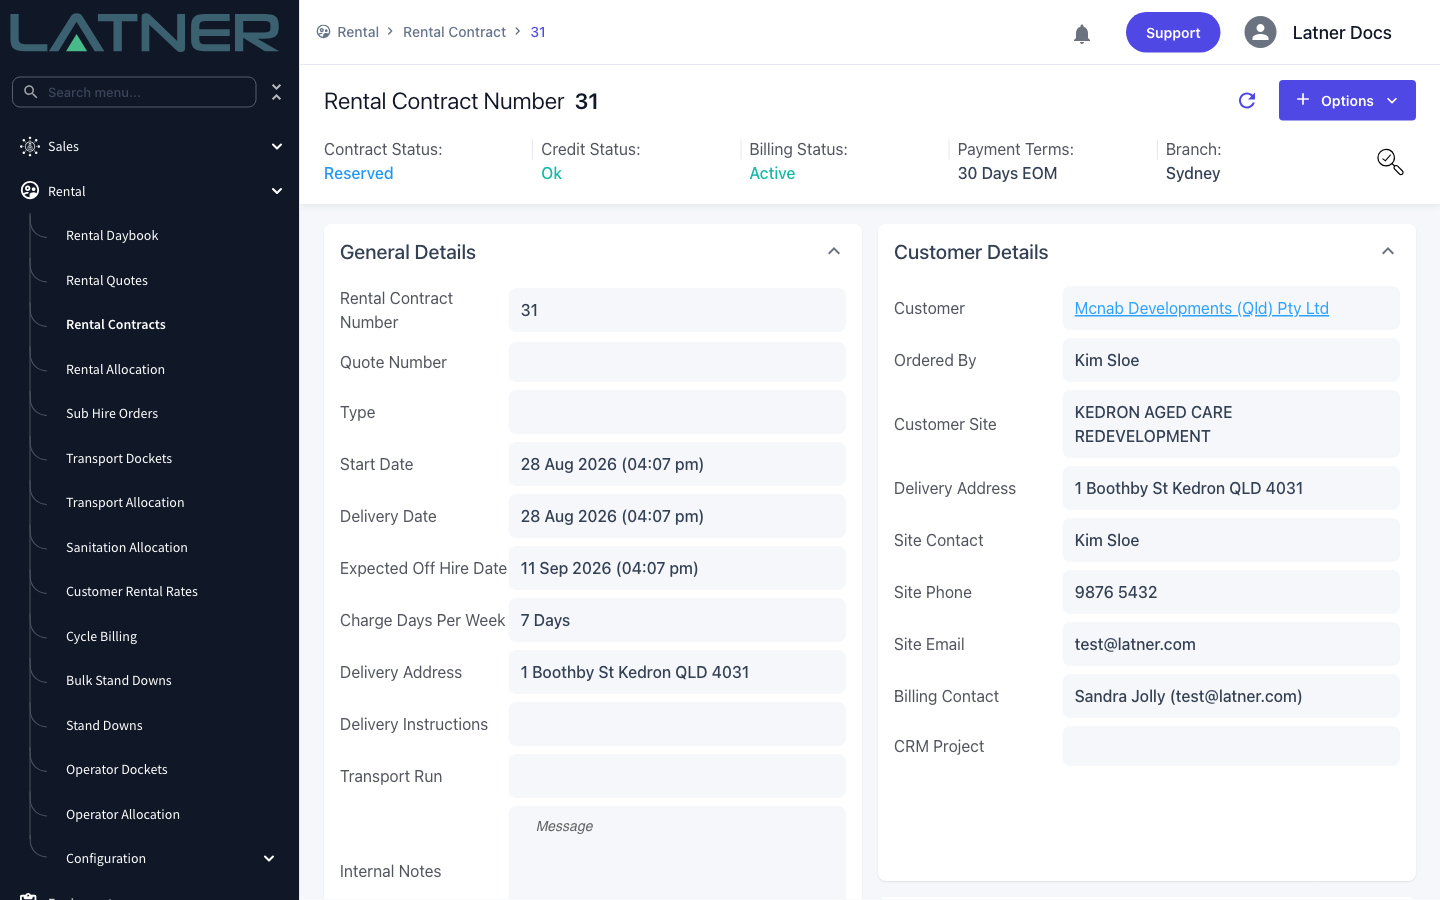
The Customer and Branch on a saved contract can't be edited the way the other fields can - changing them affects pricing, tax and where the hire is reported. If you picked the wrong one, use Update Customer or Update Branch from the contract's Options menu rather than cancelling and starting again.
FAQs
Watch the Demo
Prefer to watch it? Step through the same flow here.