
An Additional Item is the standing list of extras that travel with a piece of equipment - delivery and pick up, fuel, admin fees, accessories - so that every time that machine goes on a quote or a contract, the same charges are offered without anyone having to remember them.
Overview
Most hire businesses charge for more than the machine. Rather than re-keying a delivery fee on every contract, you set the extras up once against your fleet and let Latner offer them.
-
An Additional Item record has two parts: what it applies to (an equipment class, optionally narrowed to a model or to a single equipment number) and what comes with it (a list of lines).
-
Each record must name an Equipment Class. Model and equipment number are optional and only narrow the record further.
-
You can only have one record per combination, so a second record for the same class is refused with Duplicate Item already exists.
-
Each line carries a Required? flag, which decides whether the line arrives pre-ticked when the machine is added to a quote or contract.
-
Creating the record and adding its lines are two separate permissions, and Latner walks you straight from one into the other.
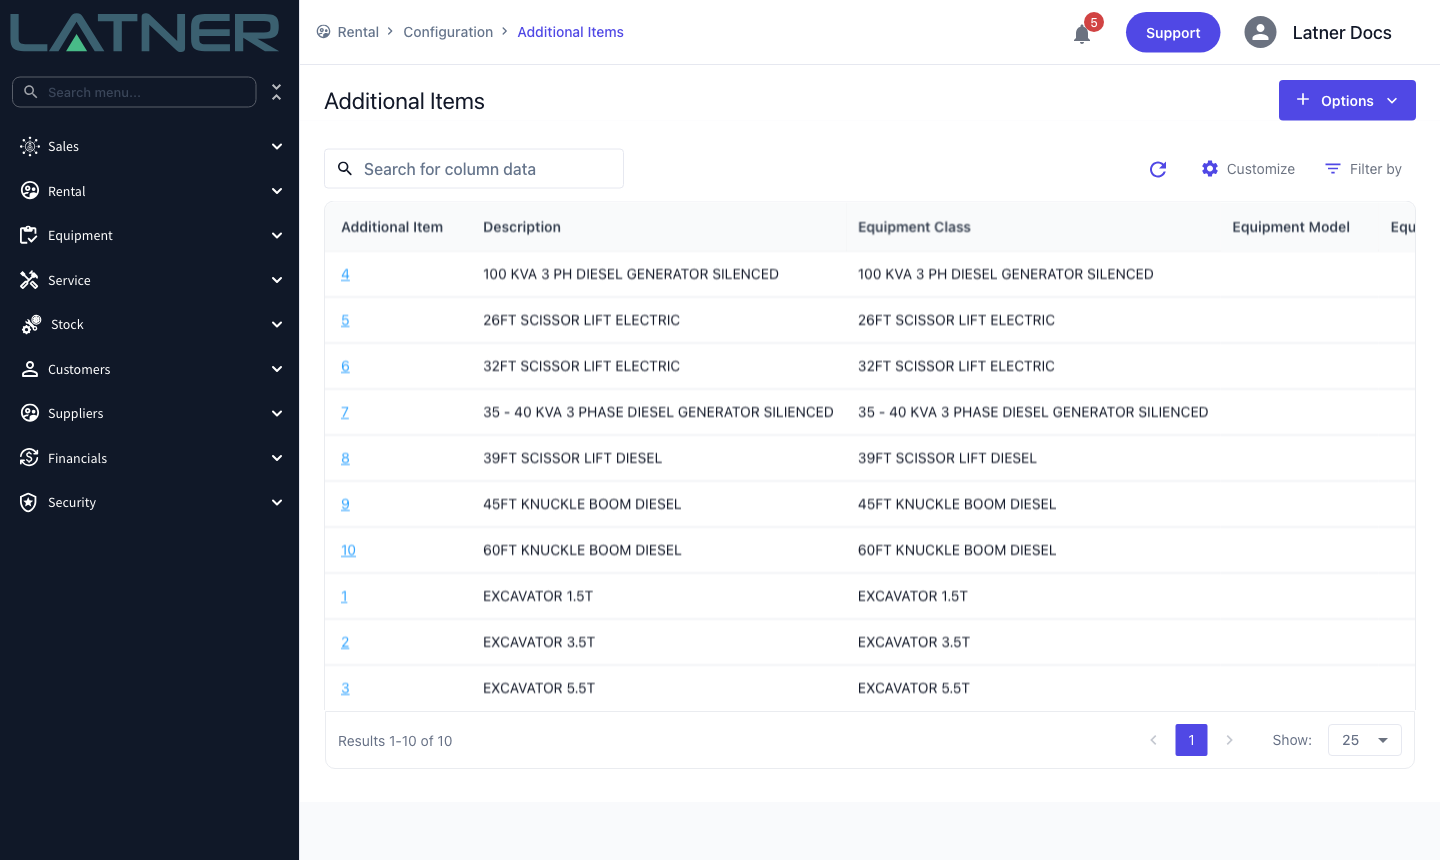
Additional Items live under Rental › Configuration › Additional Items, not under Equipment › Configuration. This is the most common reason people can't find the screen.
Before You Begin
There is no setting to switch on for Additional Items, but you do need the right permissions and a little reference data in place.
|
Requirement |
Where to Find It |
|---|---|
|
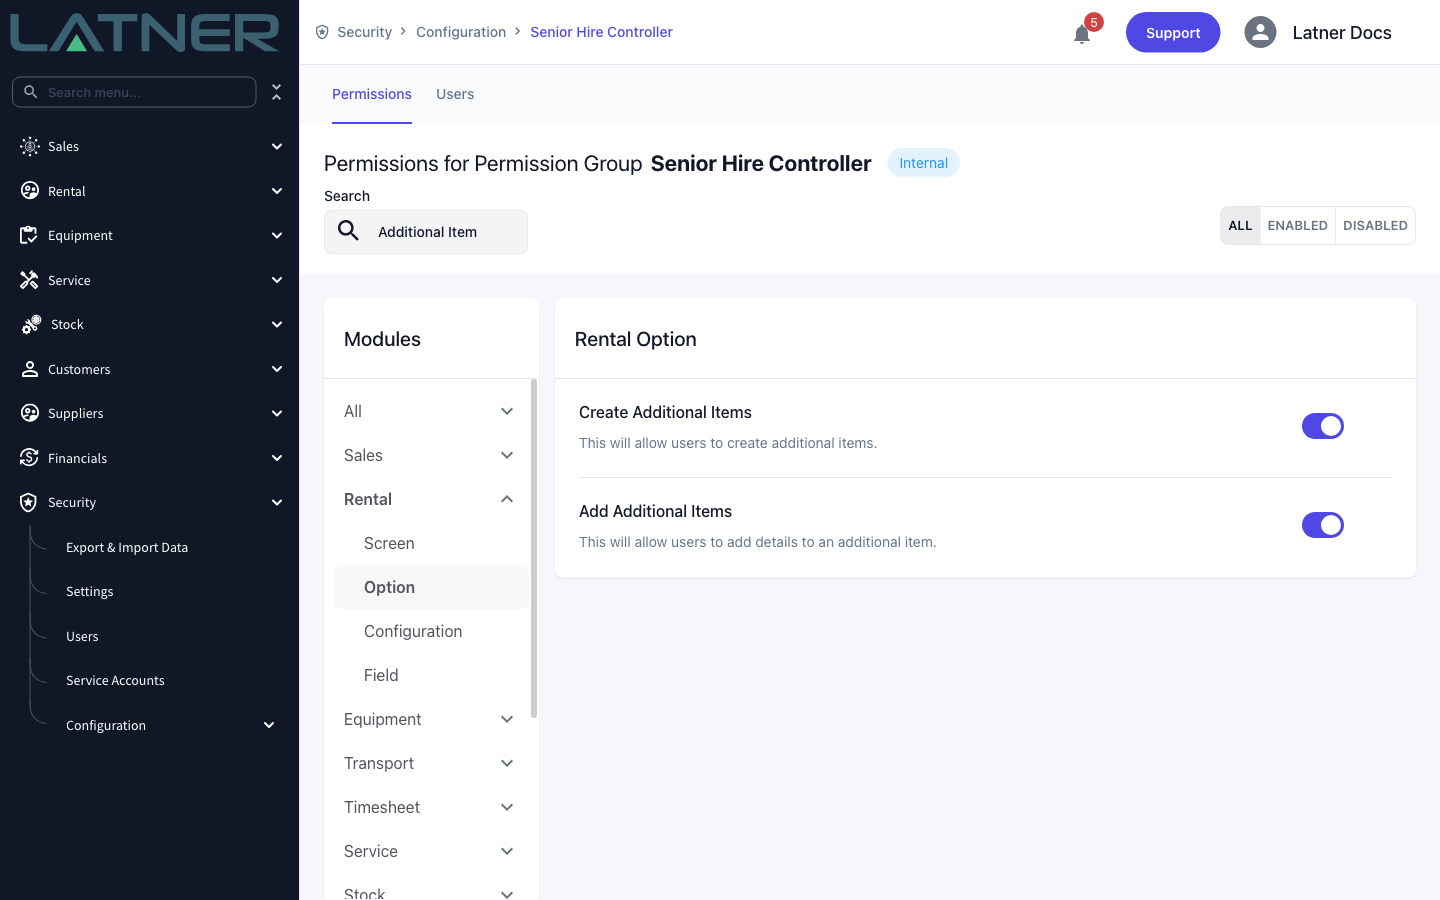
Additional Items permission - lets you open the screen |
Security › Configuration › Permission Groups, under Rental › Configuration |
|
Create Additional Items permission - lets you create the record |
Security › Configuration › Permission Groups, under Rental › Option |
|
Add Additional Items permission - lets you add, edit and delete its lines |
Security › Configuration › Permission Groups, under Rental › Option |
|
The equipment class (and model or equipment number, if you're narrowing it) |
Equipment › Configuration |
|
Whatever the lines will reference - transport types, admin charges, fuel types, labour types, sanitation types or stock items |
Rental › Configuration and Stock |
Have your Rental Rates in place too. Transport, admin and sanitation lines are re-priced from your rental rates when the extras are loaded onto a quote or contract, so the charge you type on the line is not the charge the customer sees.
Creating the Additional Item
Step 1 - Open the Additional Items screen
Go to Rental › Configuration › Additional Items. Each row is one set of extras, showing the equipment class, model or equipment number it applies to, along with its Description and Status. Most businesses end up with one record per equipment class.
Step 2 - Choose Create Additional Item
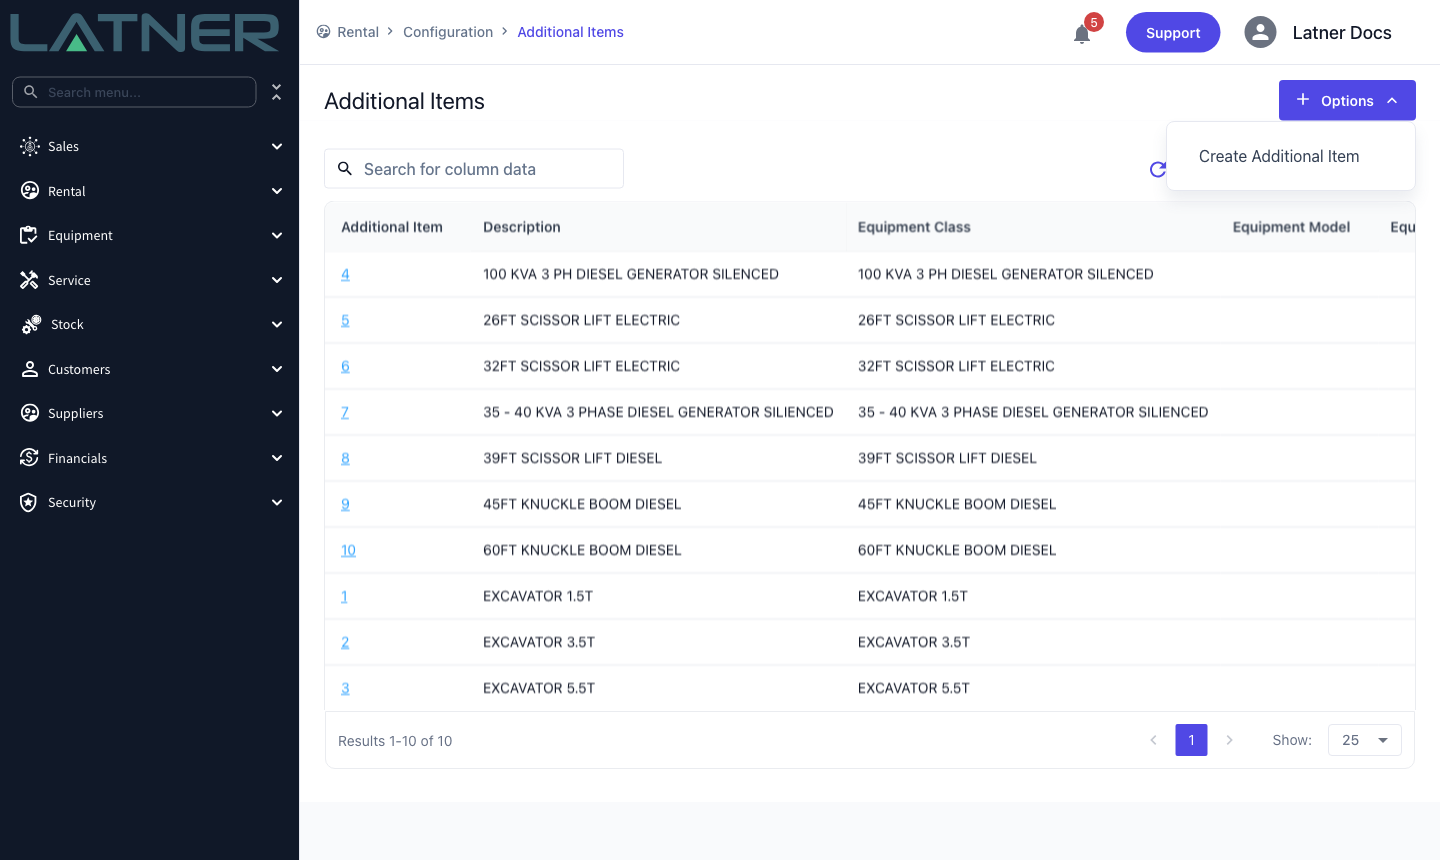
Select Options › Create Additional Item in the top right.
Step 3 - Say what the record applies to
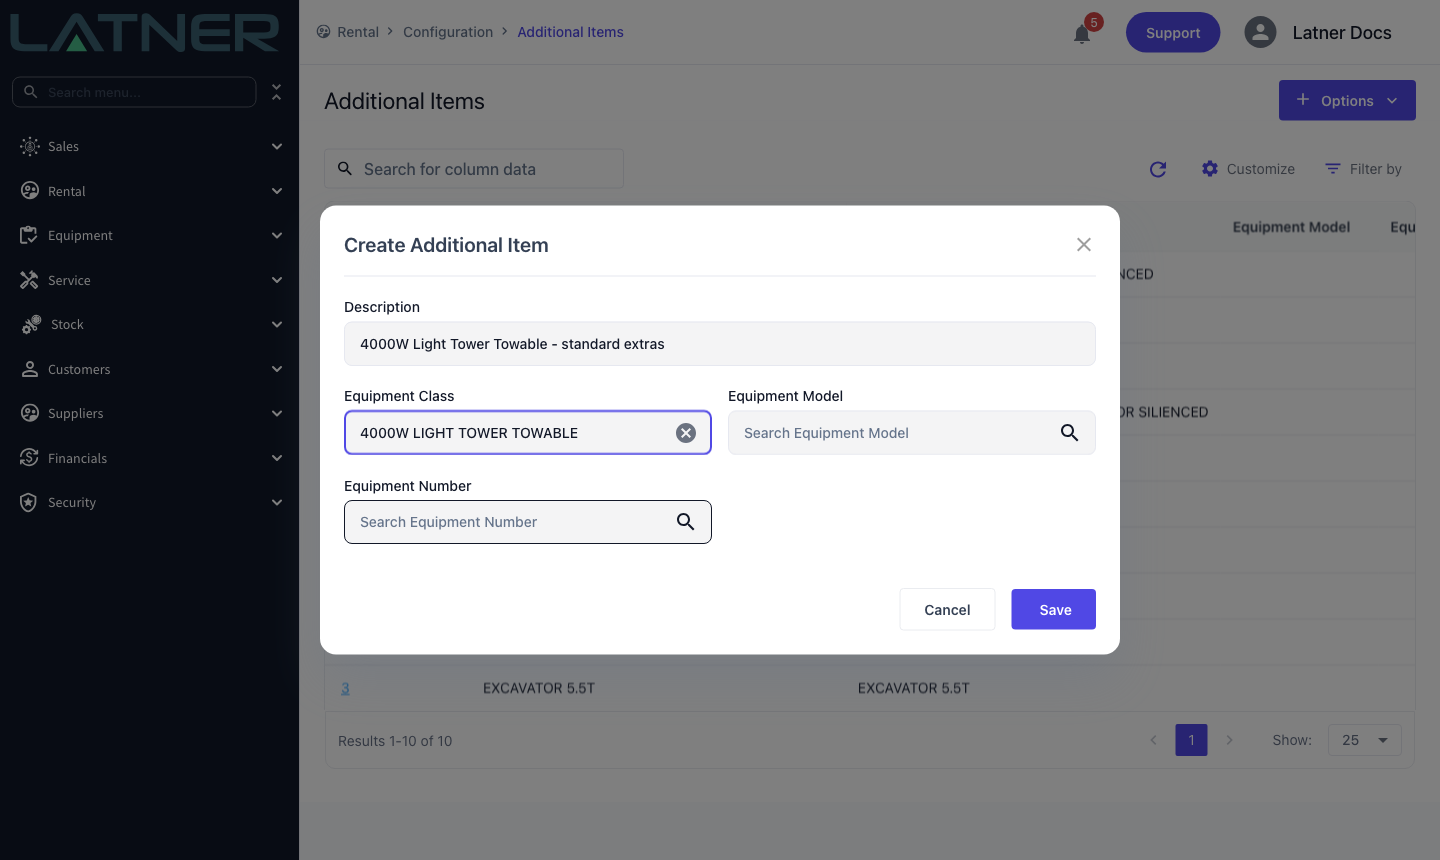
The Create Additional Item window has four fields. Only the first two are required:
-
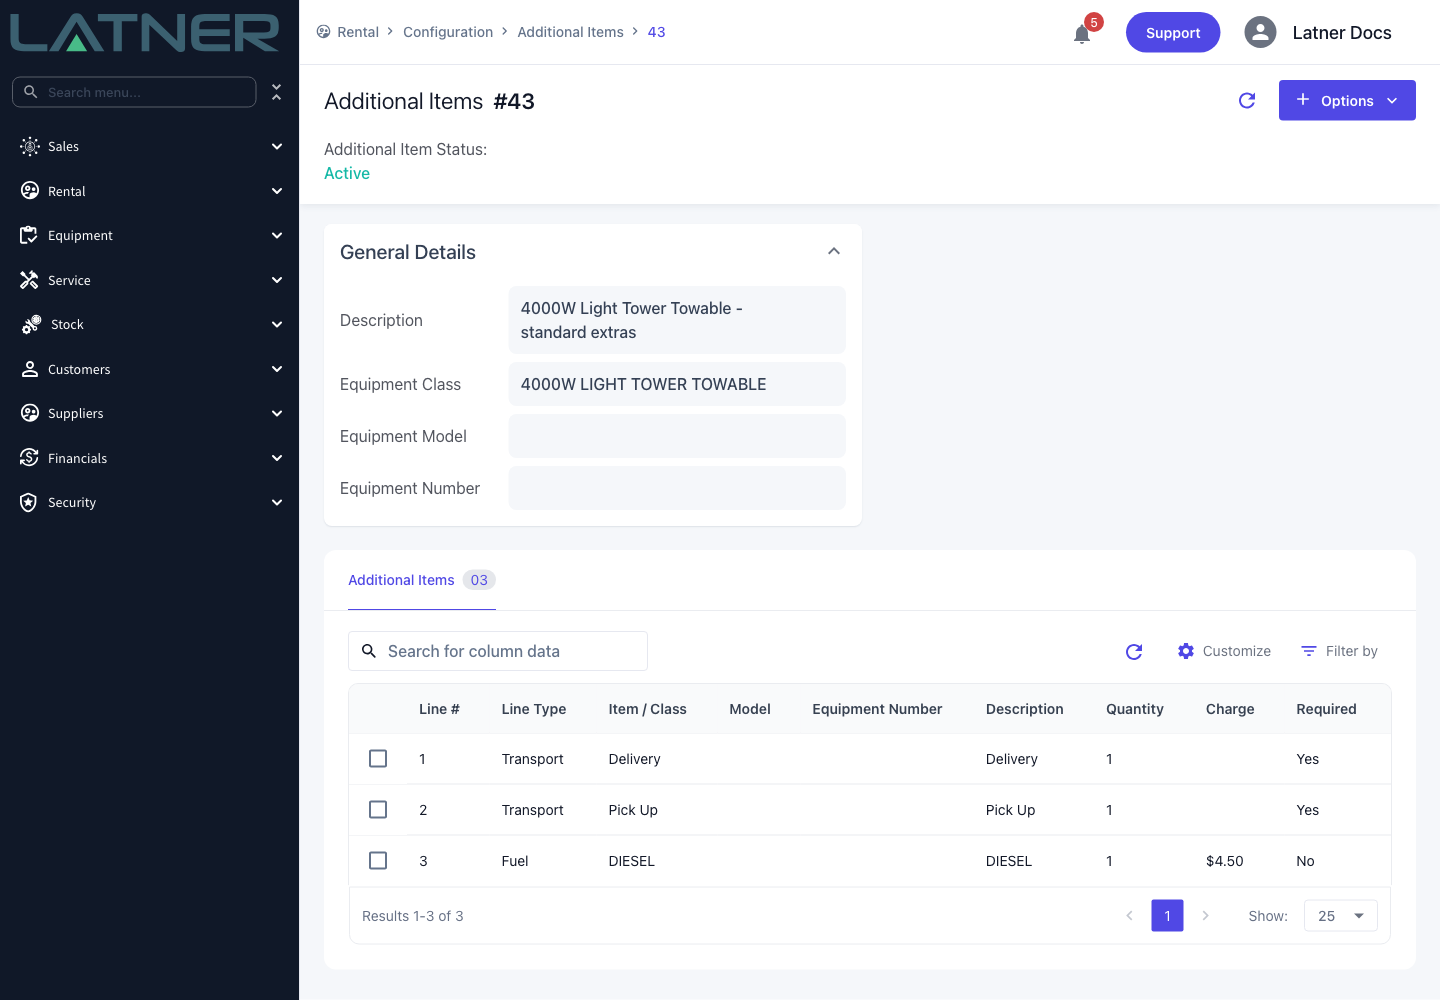
Description (required) - how the record reads in the list. Name it after the machine it covers, for example 4000W Light Tower Towable - standard extras.
-
Equipment Class (required) - the class the extras apply to. On its own, this covers every machine in the class, which is the normal choice.
-
Equipment Model (optional) - narrows the record to one model, for when a model needs different extras from the rest of its class.
-
Equipment Number (optional) - narrows the record to a single machine. Use this for an accessory that physically lives with one unit.
The three targeting fields fill each other in. Pick a model and Latner sets its class for you; pick an equipment number and it sets both the model and the class. Changing the Equipment Class clears the model and equipment number underneath it, and each list is filtered by the choice above it. Machines that can't be hired out - Sold, Disposed, Customer Owned, Internal Use, Converted and Pending Activation - are left out of the Equipment Number list.
The most specific record wins, and it replaces the broader one rather than adding to it. If you create a record for a single equipment number, that machine offers only the lines on its own record - the class-wide list is ignored for it. Repeat any lines you still want, such as delivery and pick up.
Step 4 - Save
Select Save. Latner creates the record with a status of Active, opens it, and opens the Add Additional Items window for you straight away - a new record is not much use empty, so you land ready to add the first line.
Step 5 - Add the lines
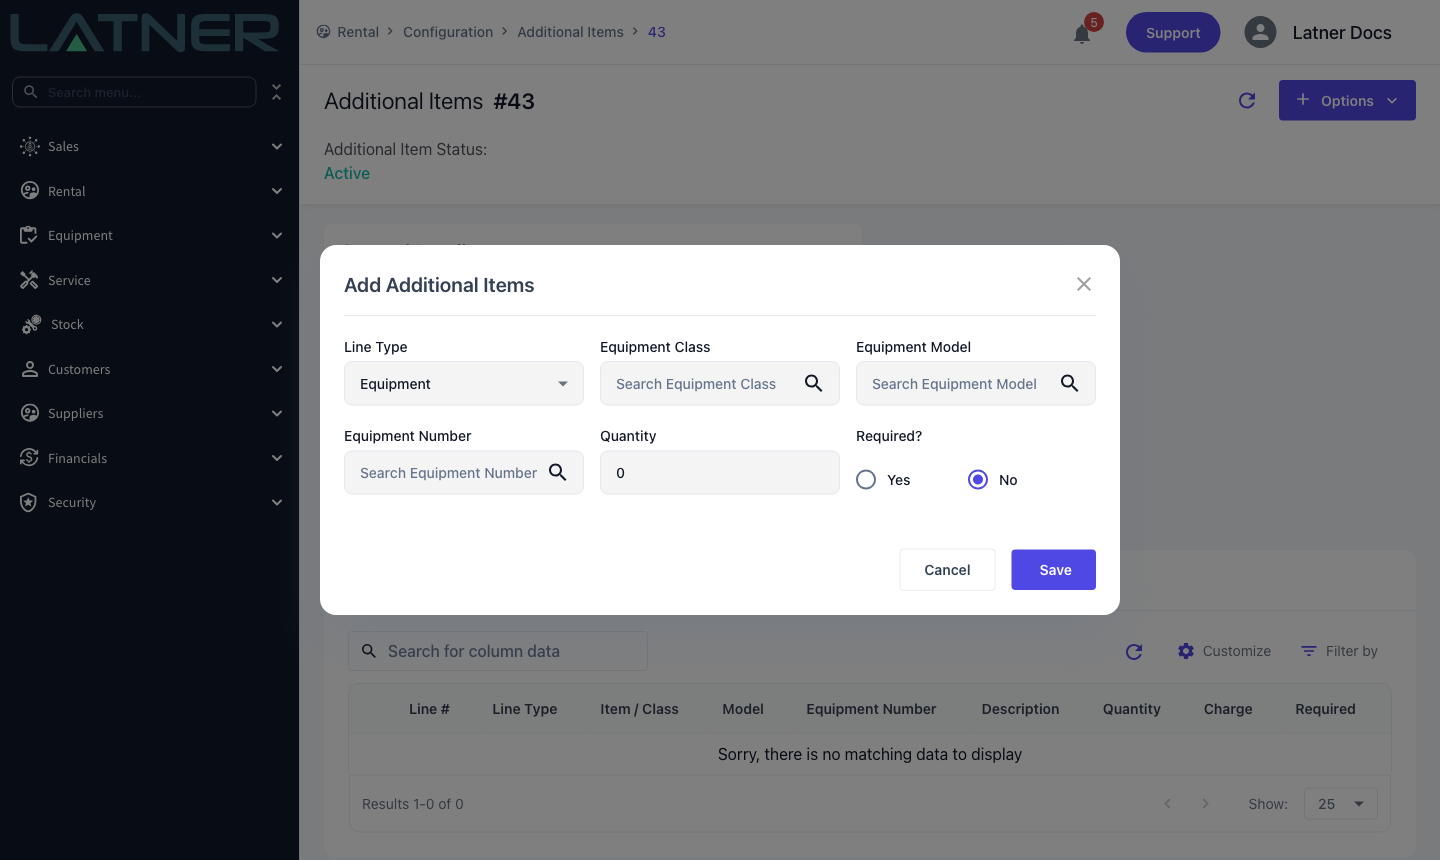
Start with Line Type. It decides what the rest of the window asks for, so choose it first:
-
Equipment - an accessory, chosen by Equipment Class, Equipment Model or Equipment Number. There is no charge field; accessories are priced from the rental rate for their own class.
-
Transport - asks for a Transport Type (Delivery, Pick Up, Customer Collection or Site Move) and a Transport Charge.
-
Admin - asks for the Item, and defaults the Admin Charge and description from the admin charge you pick.
-
Fuel - asks for a Fuel Type and a Fuel Charge.
-
Labour - asks for a Line Sub-Type and a Labour Charge.
-
Sanitation - asks for a Sanitation Type, a Sanitation Service Frequency, a Charge and an optional Futile Price.
-
Stock - asks for a Stock Number, with the Charge defaulted from the item's retail price.
-
Damage, Package and Sub Hire Equipment are also available and take a description, quantity and charge.
Then finish the line:
-
Quantity - starts at 0 and must be changed before you can save. Equipment, Sub Hire Equipment, Package, Stock and Damage lines take whole numbers only; the rest accept decimals.
-
Description - required on every line type except Equipment and Sanitation, where it isn't shown. Admin, Labour and Fuel lines fill it in from the item you pick, but a Transport line does not, so type what you want the line to say, such as Delivery.
-
Required? - Yes means the line arrives pre-ticked whenever the machine is added to a quote or contract; use it for things that nearly always apply, like delivery and pick up. No (the default) means the line is offered but not selected.
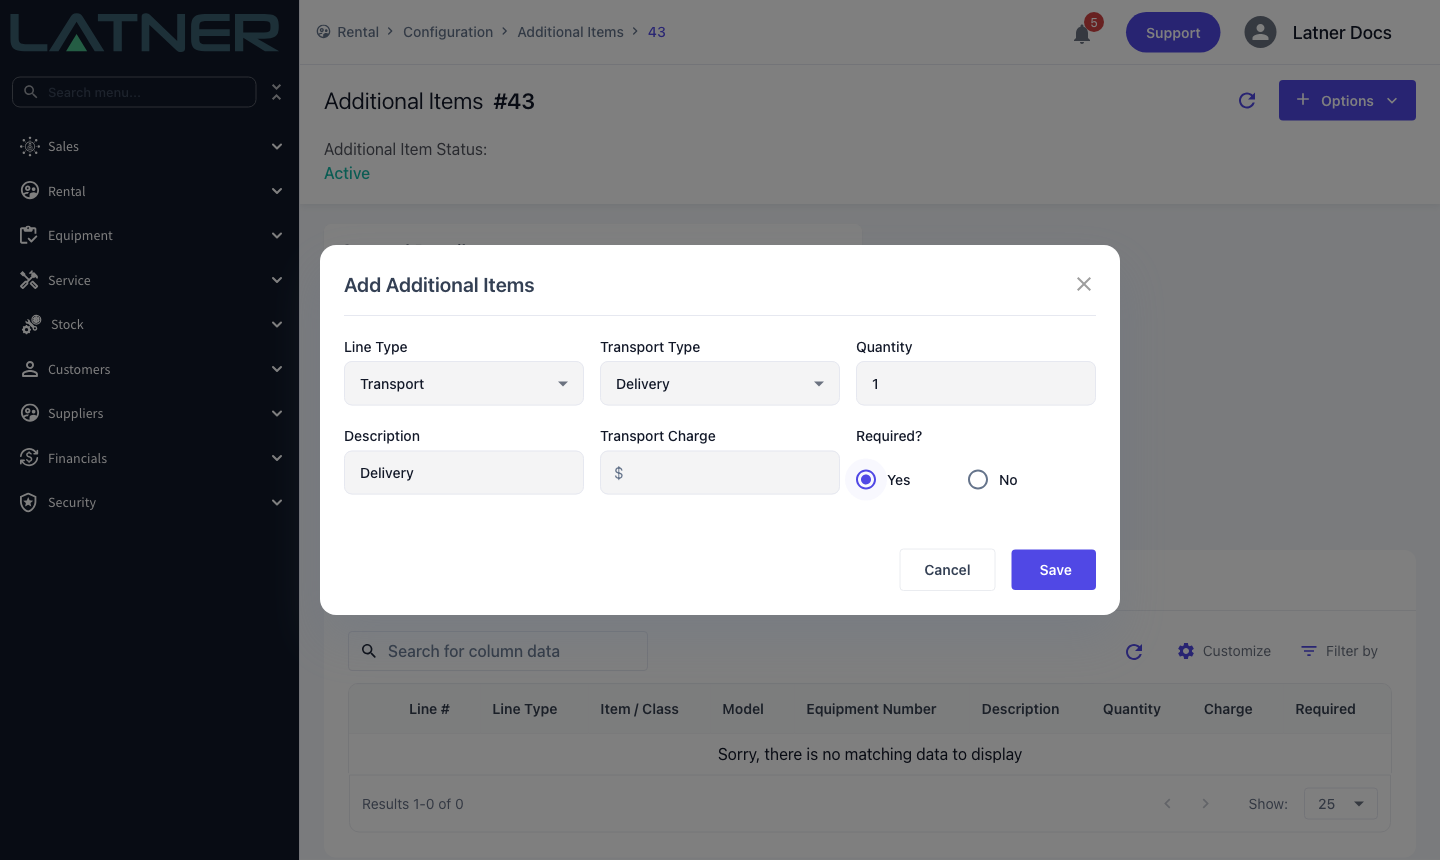
Select Save. The window closes and the line appears in the table. Repeat from Options › Add Additional Items for each extra you want.
Step 6 - Check the finished record
Lines are numbered in the order you added them. Right-click a row for Move Up and Move Down to reorder them, double-click a row to edit it, or tick a row and delete it - deleting asks you to confirm, then renumbers the lines below.
After Creation
-
The record shows up on Rental › Configuration › Additional Items and applies immediately - there is nothing to activate.
-
Whenever equipment of that class, model or number is added to a rental quote or rental contract, the lines appear underneath with their quantity and charge. Anything marked Required is already ticked; everything else is offered.
-
The extras are created as sub-lines of the equipment line, so line 1 gains 1.1, 1.2 and so on, keeping each charge attached to the machine it belongs to.
-
Nothing is added behind your back. The hire controller still saves the line, so someone always sees the charges before they land on the contract.
-
You can add the extras to a line that already exists from Add Additional Items on the contract's Details tab, but there every box starts empty, because you are choosing what to add at that moment.
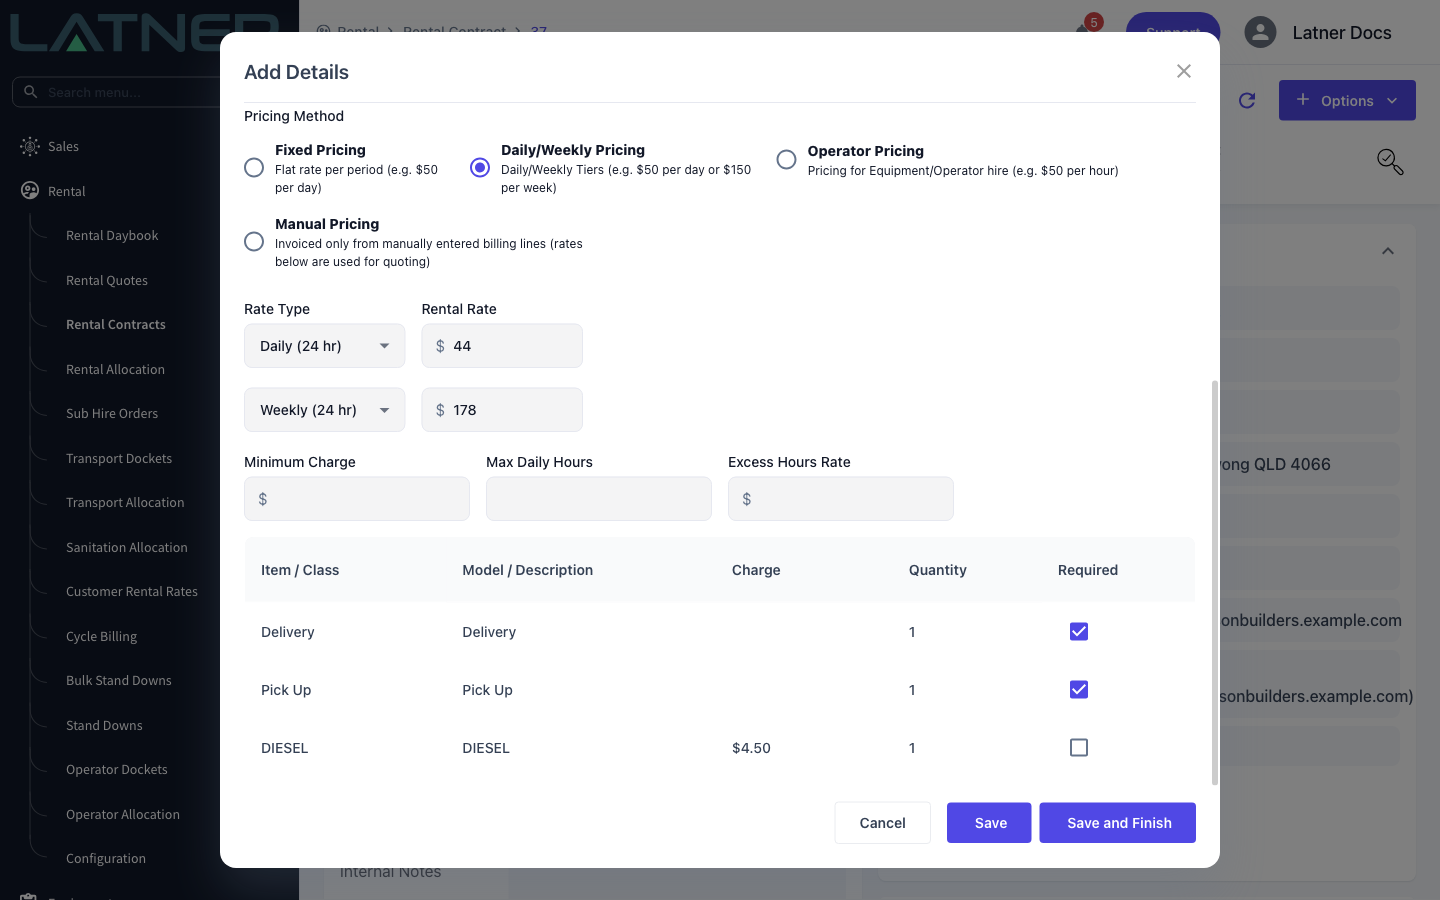
Configuring an Additional Item decides which lines appear and whether they are pre-ticked. For transport, admin and sanitation lines it does not decide the price - the charge stored on the line is replaced by the matching rental rate when the extras are loaded. If your delivery fee comes out wrong, fix it in Rental › Configuration › Rental Rates, not here.
For how the extras behave on a quote or contract, how packages differ and where each line type takes its price from, see How to Set Up Additional Items and Default Charges.