
Requesting approval and confirming a purchase order is how an order moves from a draft your buyers are still editing into a commitment you can send to the supplier and receipt against.
Overview
Not every purchase order should go out the door the moment somebody types it up. Latner gives you two steps between a draft and a live order: you can hand the order to a nominated approver, and you can confirm it. On a small team the same person often does both. On a bigger one, the buyer raises the order and a manager confirms it.
-
A purchase order starts life Open. While it is Open you can still add, edit and remove detail lines.
-
Request Approval hands the order to one nominated approver and moves it to Pending Approval. That person gets an in-app notification and an email.
-
Confirm Purchase Order approves the order, stamps who approved it and when, and moves it to Confirmed.
-
Requesting approval is optional. Anyone with the Confirm Purchase Order permission can confirm an Open order without a request ever being raised.
-
Confirming is what unlocks receipting, and what tells the rest of Latner the stock is on order.
-
Nothing is locked in permanently. A confirmed order can be reopened back to Open for as long as it has not been invoiced.
Before You Begin
You will need the following before you can request approval or confirm an order.
|
Requirement |
Where to Find It |
|---|---|
|
Purchase Orders permission |
Security › Configuration › Permission Groups, Financials module, Screen section |
|
Add Purchase Order Details permission (this is what gates Request Approval, not a separate approval permission) |
Security › Configuration › Permission Groups, Financials module, Option section |
|
Confirm Purchase Order permission, which also covers reopening and cancelling |
Security › Configuration › Permission Groups, Financials module, Option section |
|
Purchase Order Approval Groups permission, only if you are setting up spend limits |
Security › Configuration › Permission Groups, Financials module, Configuration section |
|
Enforce Purchase Order Approval Limits setting, optional |
Security › Settings › Financials |
|
At least one detail line on the purchase order |
Options › Add Purchase Order Details on the purchase order |
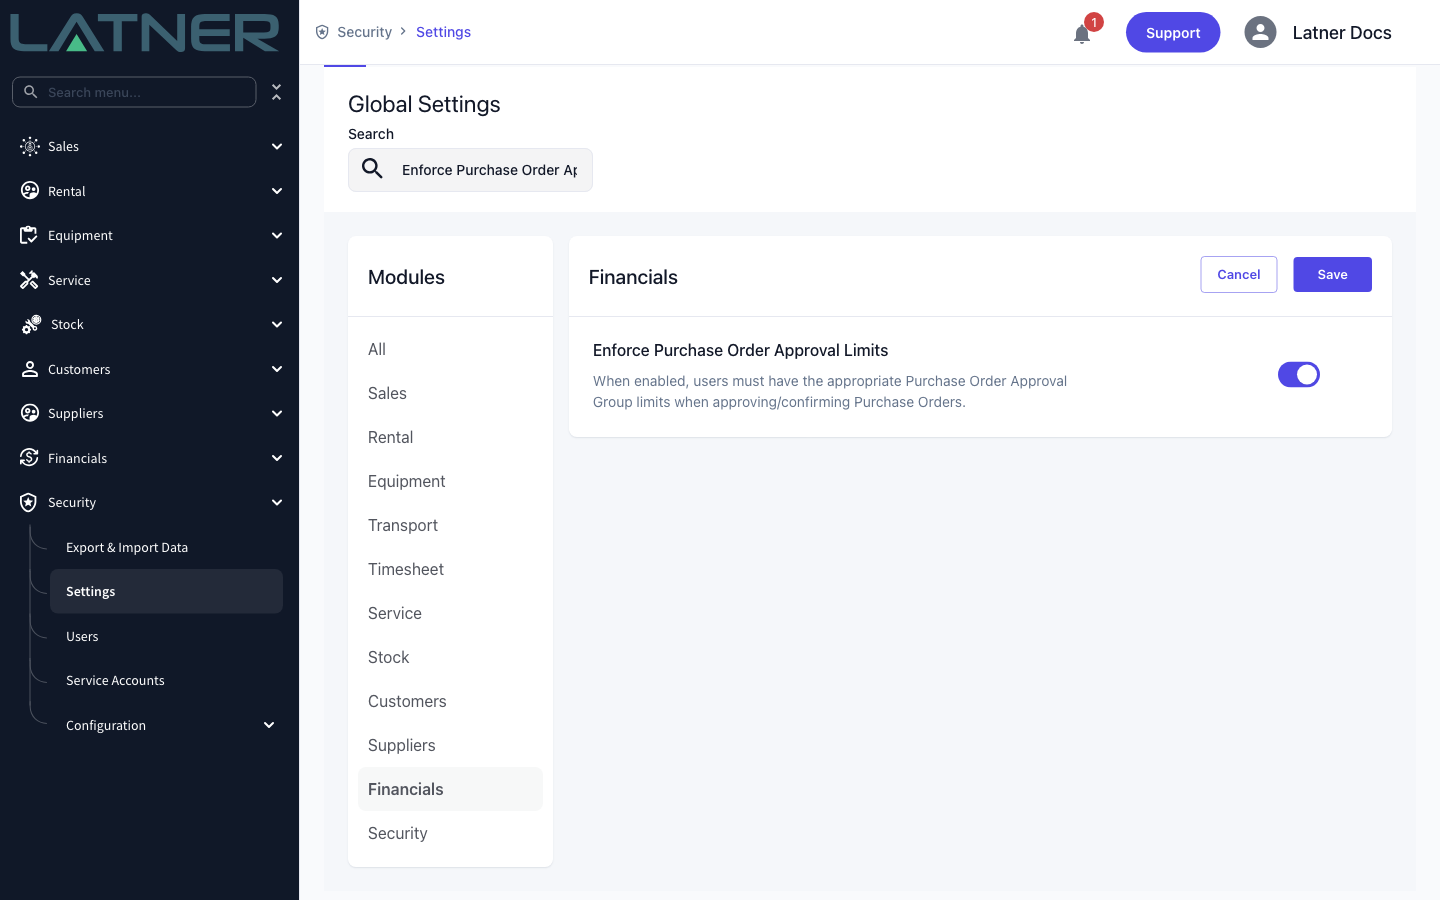
The Enforce Purchase Order Approval Limits setting is optional and off by default. While it is off, the Approver list shows every active user and any user with the Confirm Purchase Order permission can confirm an order of any value. Turn it on and Latner checks the confirming user's spend limits before it will let the order through.
Setting Up Approval Limits
Skip this section if you are not enforcing limits. Limits live on an approval group, and users are assigned to that group, so you build the group first and add people to it afterwards.
Step 1 - Create the approval group
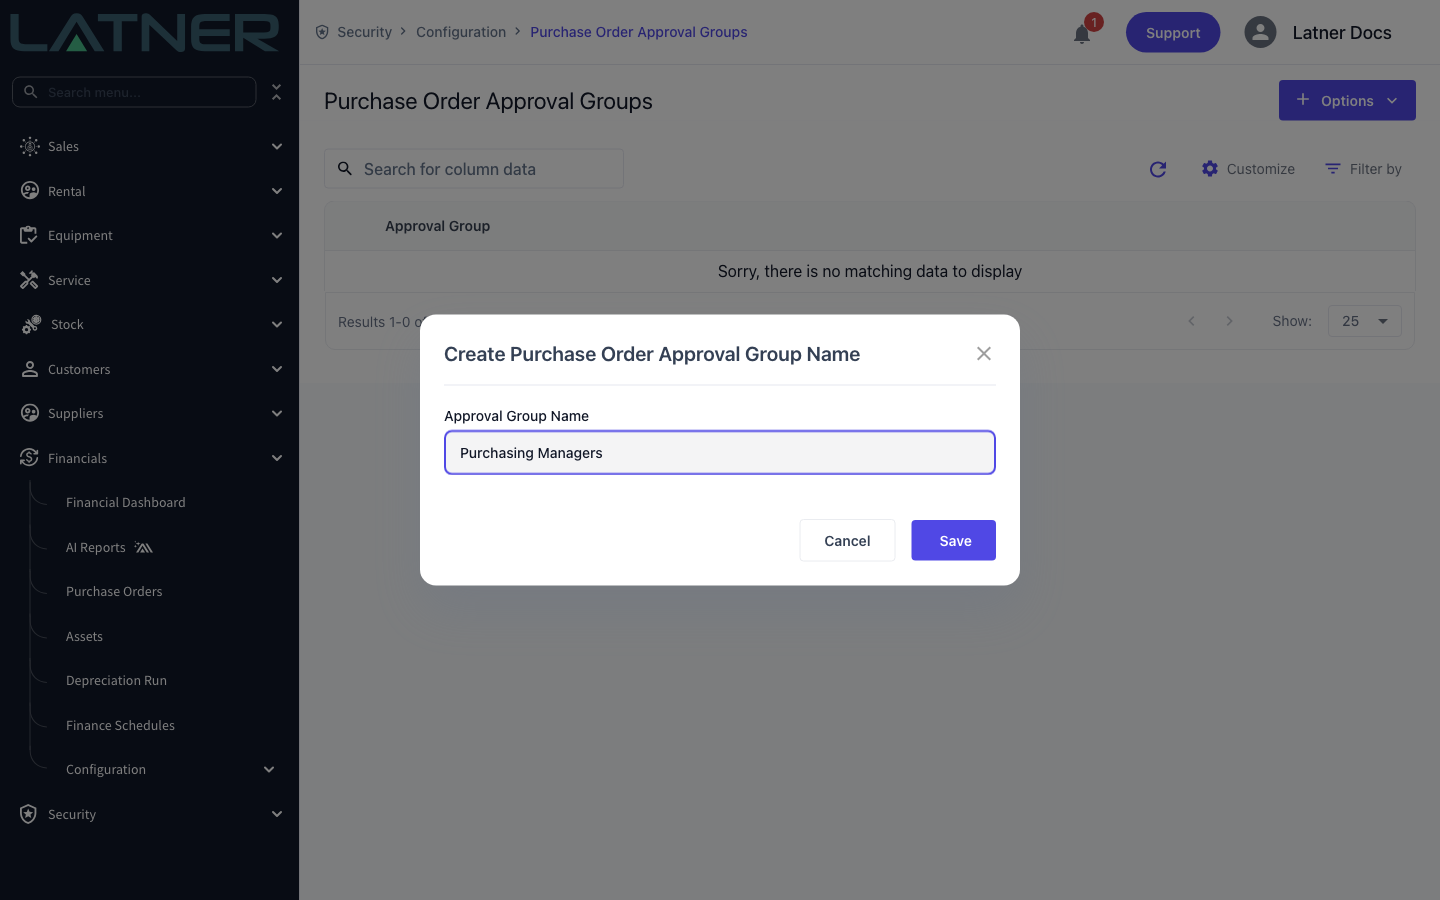
Go to Financials › Configuration › Purchase Order Approval Groups and choose Options › Create Purchase Order Approval Group. A group only needs a name, so name it after the level of authority rather than the person, for example Purchasing Managers or Branch Managers.
Step 2 - Add the limits
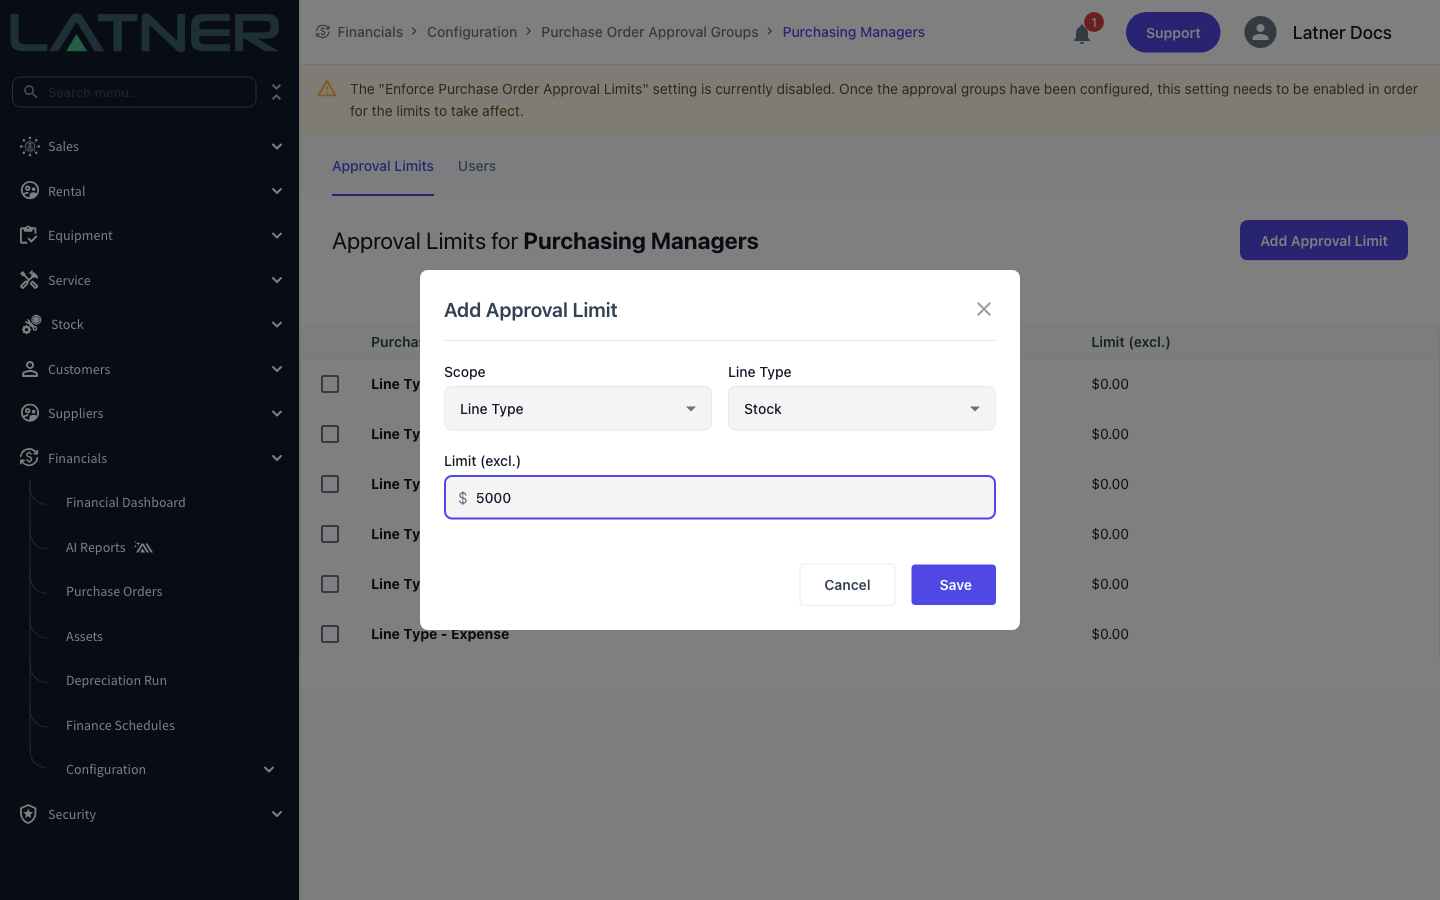
Open the group and use Add Approval Limit on the Approval Limits tab. Each limit has three fields:
-
Scope - Line Type sets a limit for a whole kind of purchase (Stock, Serialized Stock, Asset, Equipment, Transport or Expense). Expense Type sets a tighter limit for one specific expense type.
-
Line Type or Expense Type - which one you see depends on the scope you picked.
-
Limit (excl.) - the maximum the user may approve, excluding tax.
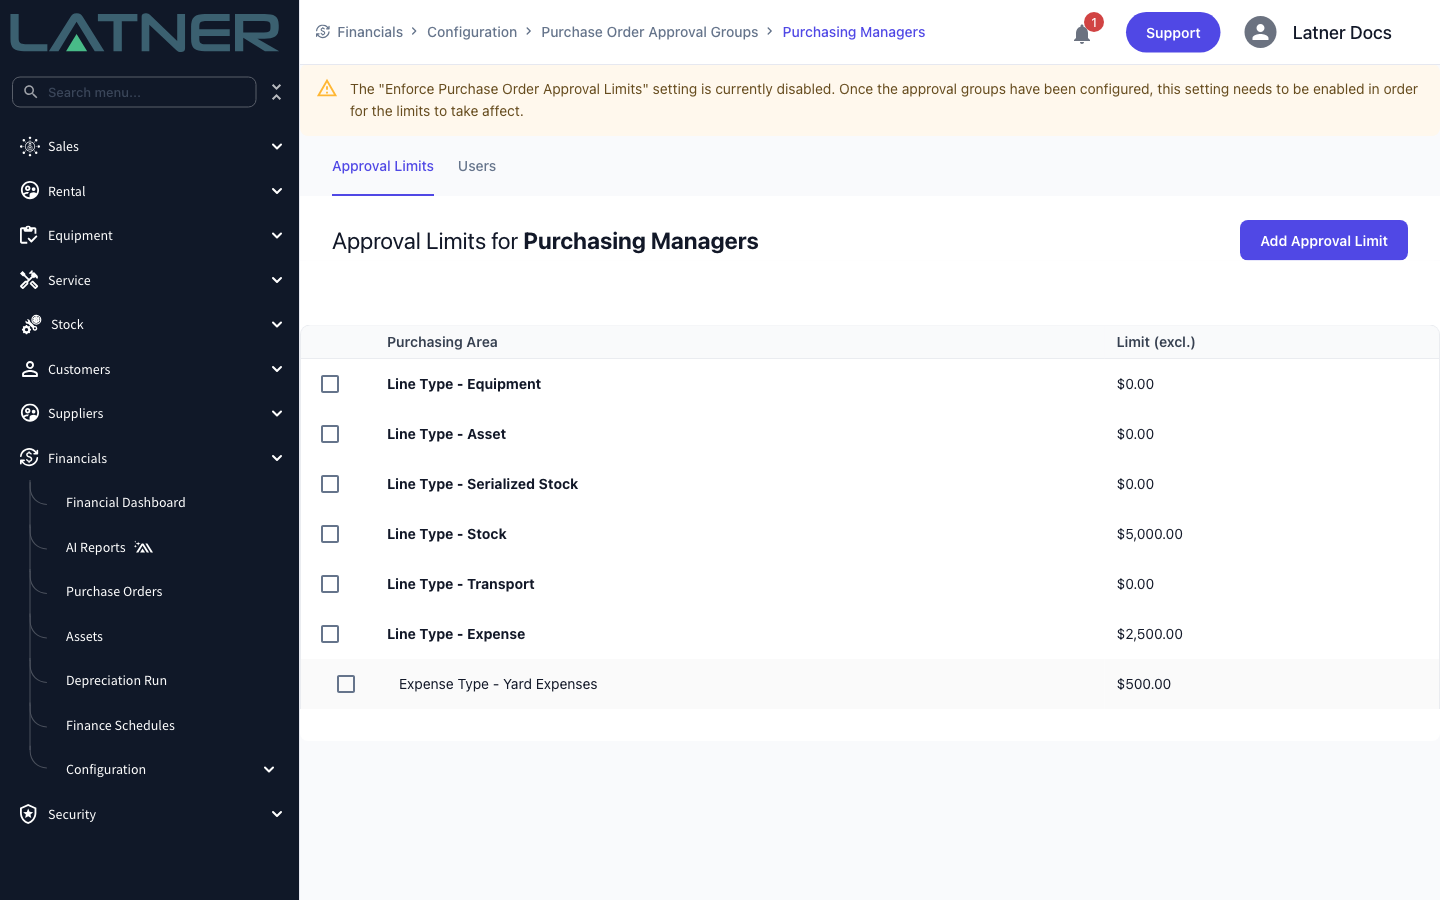
The Approval Limits tab lists every line type whether or not you have set a limit for it, so a line type showing $0.00 is one nobody in this group can approve. Expense type limits are shown indented beneath the Expense line type they refine.
Step 3 - Assign your approvers
Go to Security › Users, open the user and choose Options › Assign Purchase Order Approval Group. Pick the Approval Group and a Level:
-
All - the limits apply to purchase orders from every branch.
-
Branch - the limits only apply to purchase orders raised at the branch you nominate.
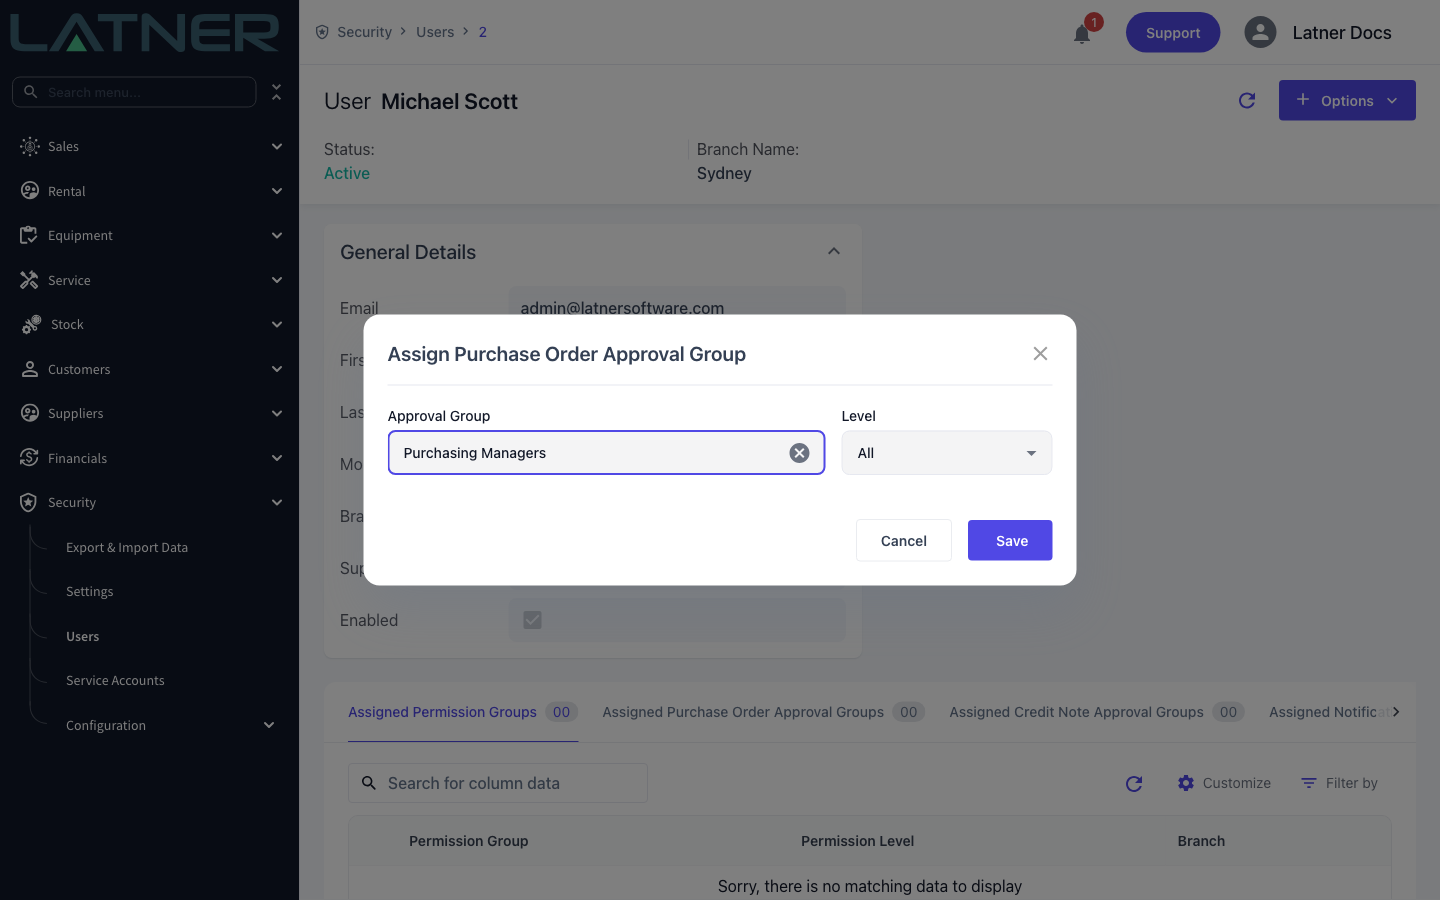
You can see everyone in a group at any time from the Users tab of the group itself. A user can belong to more than one group, in which case Latner uses their highest applicable limit.
Requesting Approval
Step 1 - Open the purchase order and check the lines
Go to Financials › Purchase Orders and open the order. It must be Open and it must have at least one detail line: Request Approval is hidden on any other status, and greyed out with the tooltip "No Purchase Order Details" while the order is empty. This is the last comfortable moment to fix a quantity or a cost, because lines can no longer be added once the order leaves Open.
Step 2 - Choose Request Approval
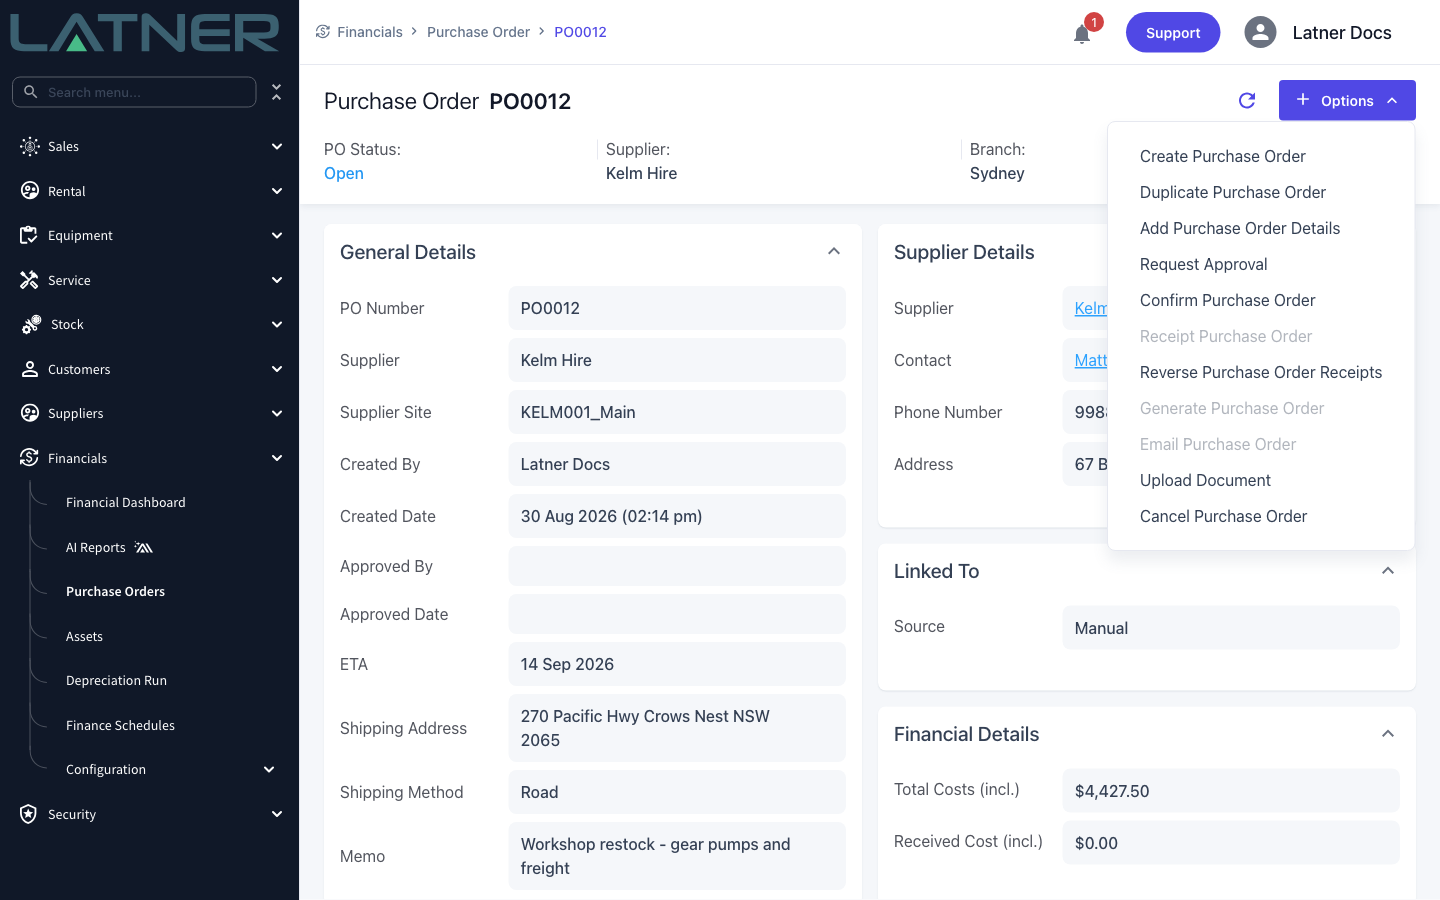
Open the Options menu on the purchase order and choose Request Approval.
Step 3 - Nominate the approver
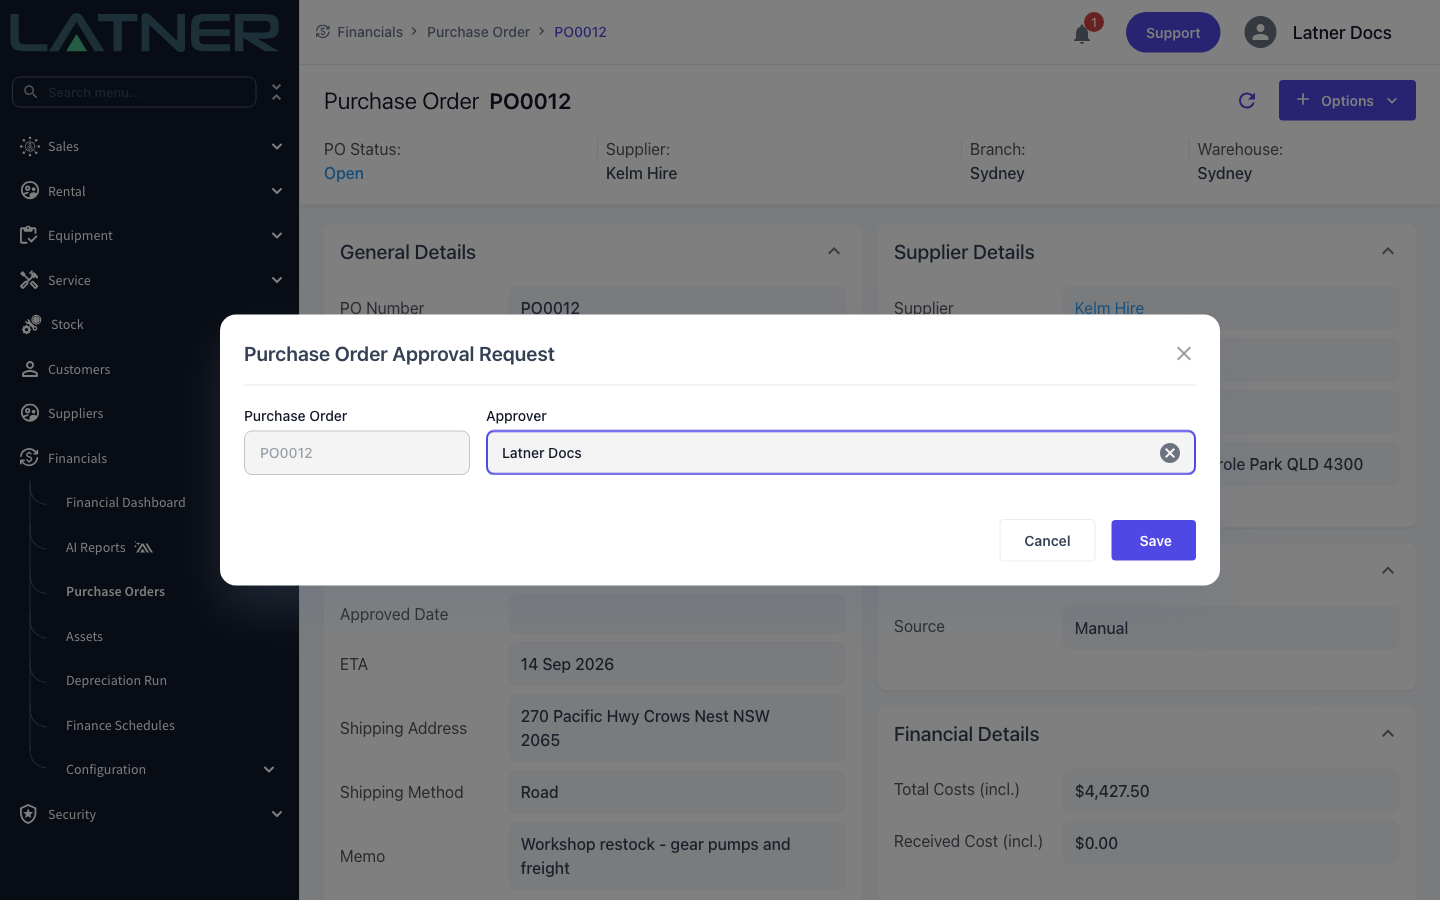
The Purchase Order Approval Request dialog shows the order you are on, which you cannot change, and asks for one thing:
-
Approver - required. The person who will be asked to confirm the order.
When Enforce Purchase Order Approval Limits is on, this list is filtered to users whose approval limits actually cover this order, so you cannot send a request to somebody who could never approve it. With the setting off, every active user is listed.
Step 4 - Save
Latner confirms with "Purchase Order Approval Requested" and the order moves to Pending Approval.
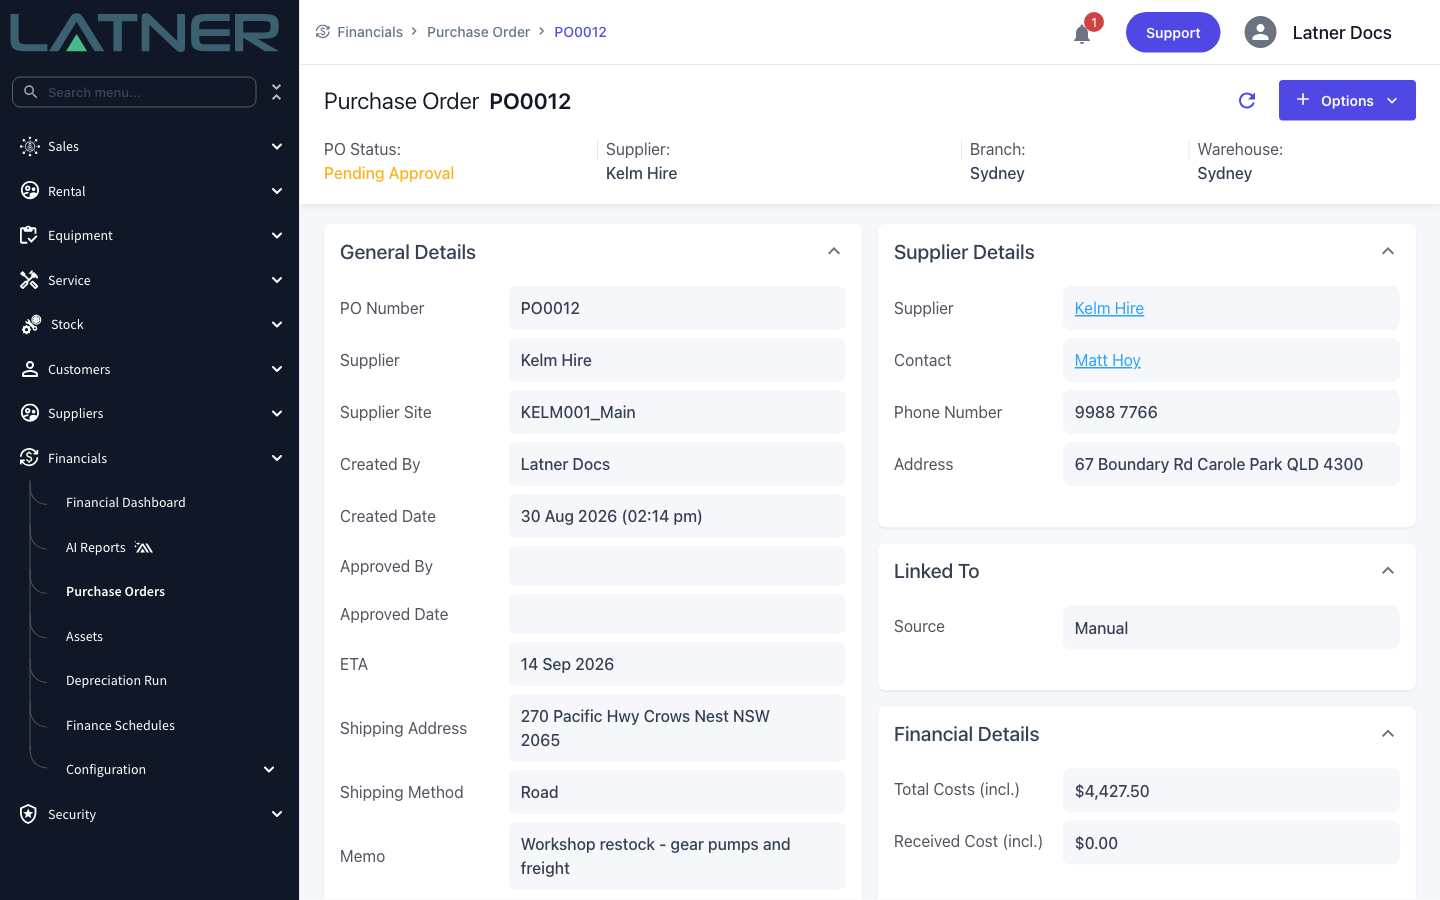
The approver you nominated gets the request in their notifications straight away, and the same alert by email with a link back to the order. Only that person is notified, so the request does not go to a notification group or to everyone with the permission.
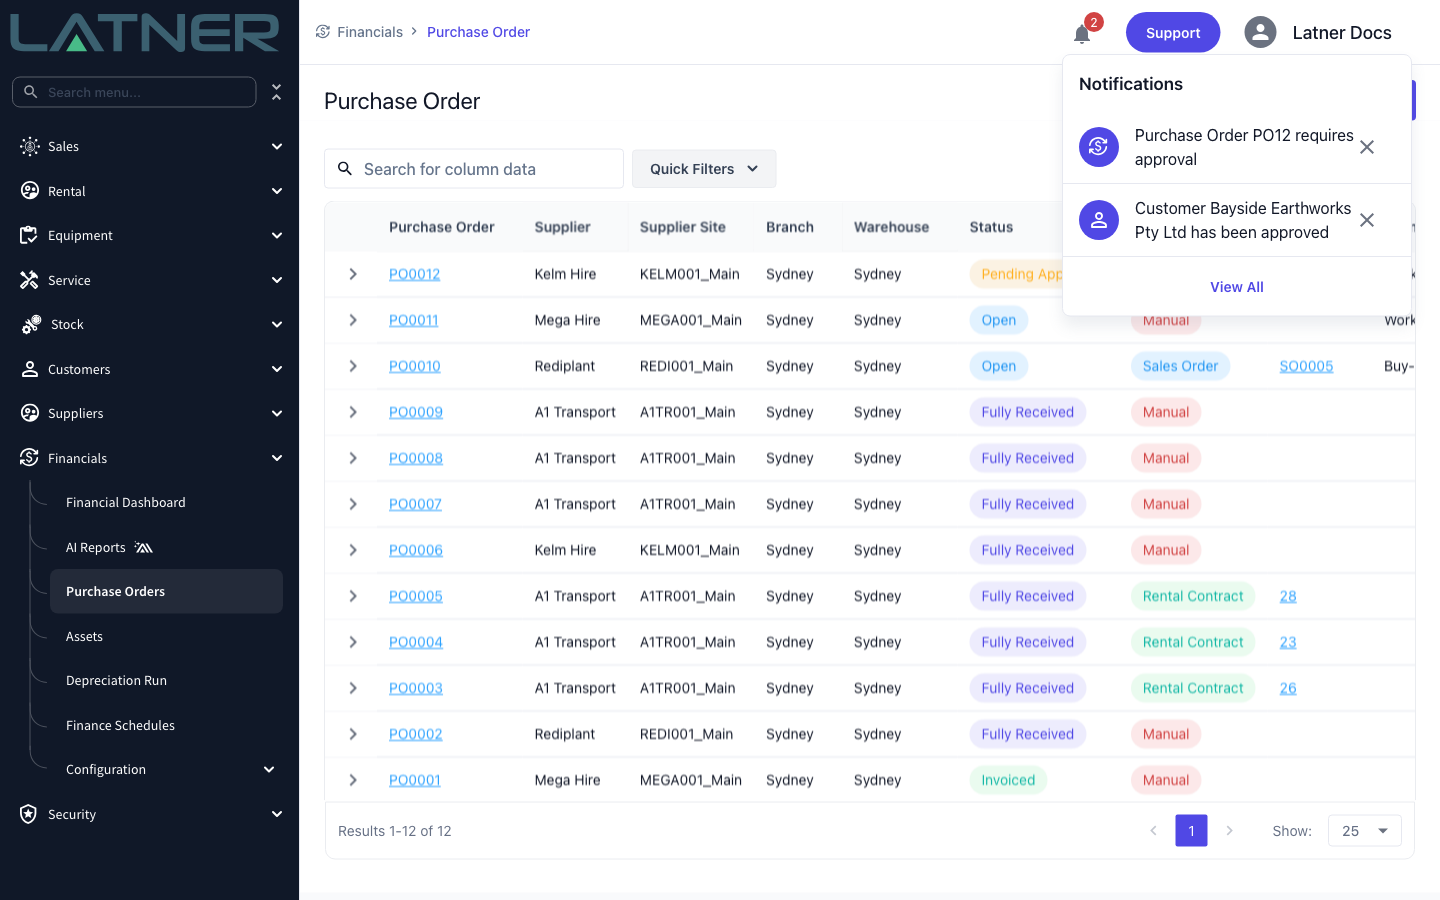
Confirming the Purchase Order
Step 1 - Choose Confirm Purchase Order
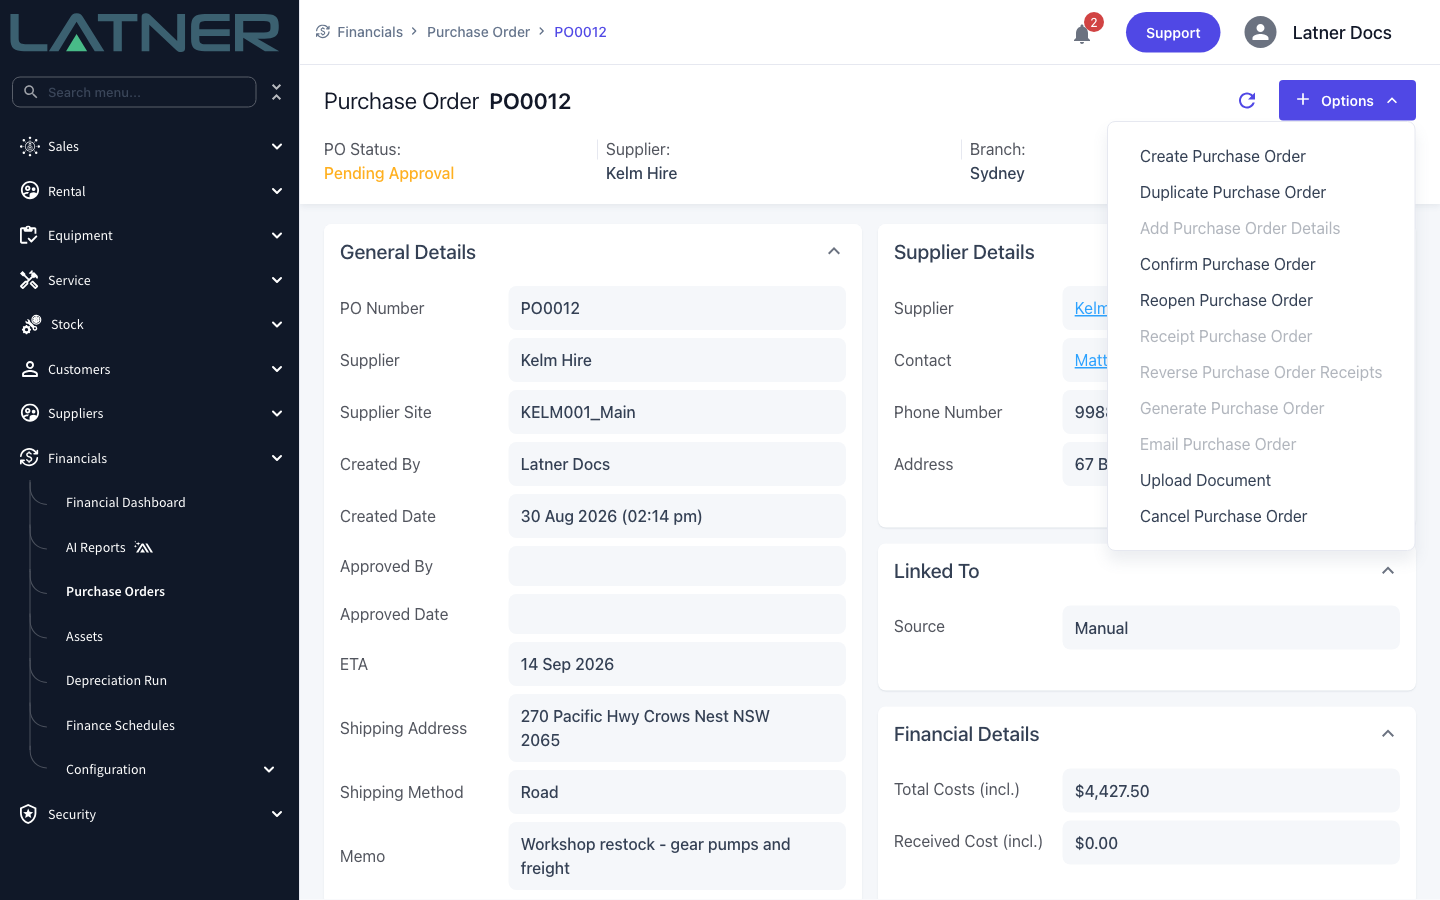
Open the order and choose Options › Confirm Purchase Order. The action is available on both Open and Pending Approval orders, so an approver can act on a request, and a buyer with the right permission can confirm their own order without raising one. There is no extra dialog: the order is confirmed as soon as you click.
Step 2 - Clear any limit errors
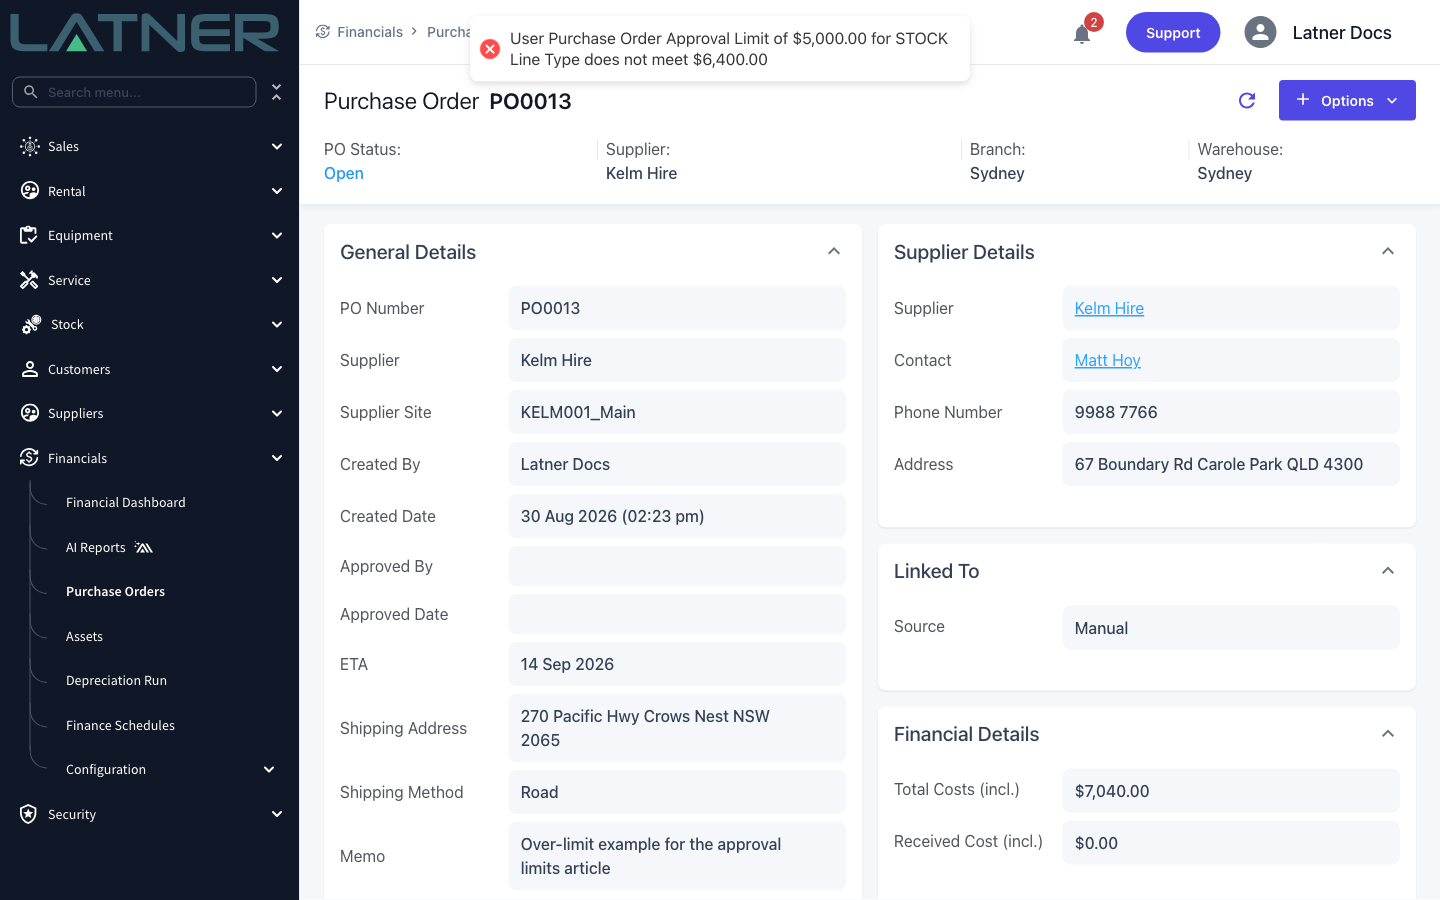
If Enforce Purchase Order Approval Limits is on, Latner totals the order's lines by line type (and by expense type where one is set) and compares each total against your limits before it confirms anything. If a total is over, nothing is confirmed and you are told exactly which limit was short.
Step 3 - Check the confirmed order
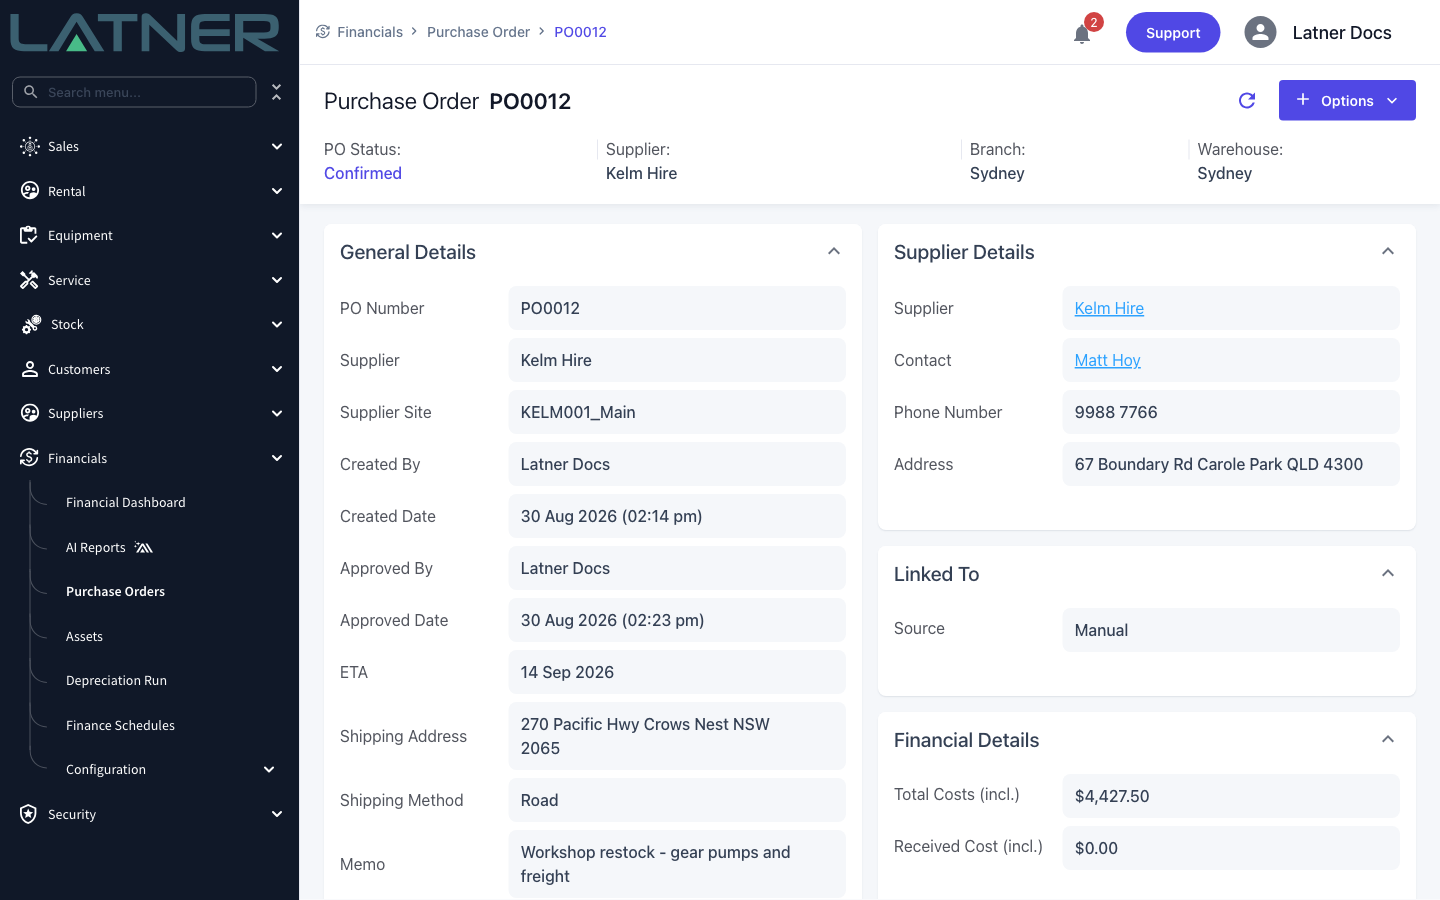
The status becomes Confirmed, and Approved By and Approved Date are stamped with whoever clicked Confirm. Note that this is the confirming user, not the person who raised the request.
After Confirming
-
Receipt Purchase Order becomes available, and stays available until the order is fully received.
-
Generate Purchase Order and Email Purchase Order become available, so this is the point at which you send the order to the supplier.
-
Add Purchase Order Details is greyed out. A confirmed order's lines are fixed unless you reopen it.
-
Any Stock lines are put on backorder against the order's warehouse, for the quantity not yet received, so the stock record shows the shortfall is covered.
-
Any Serialized Stock lines create serialized stock items with the status Ordered, using the serial number entered on the line or a temporary number if you left it blank.
-
Reopen Purchase Order appears, and Cancel Purchase Order is still available.
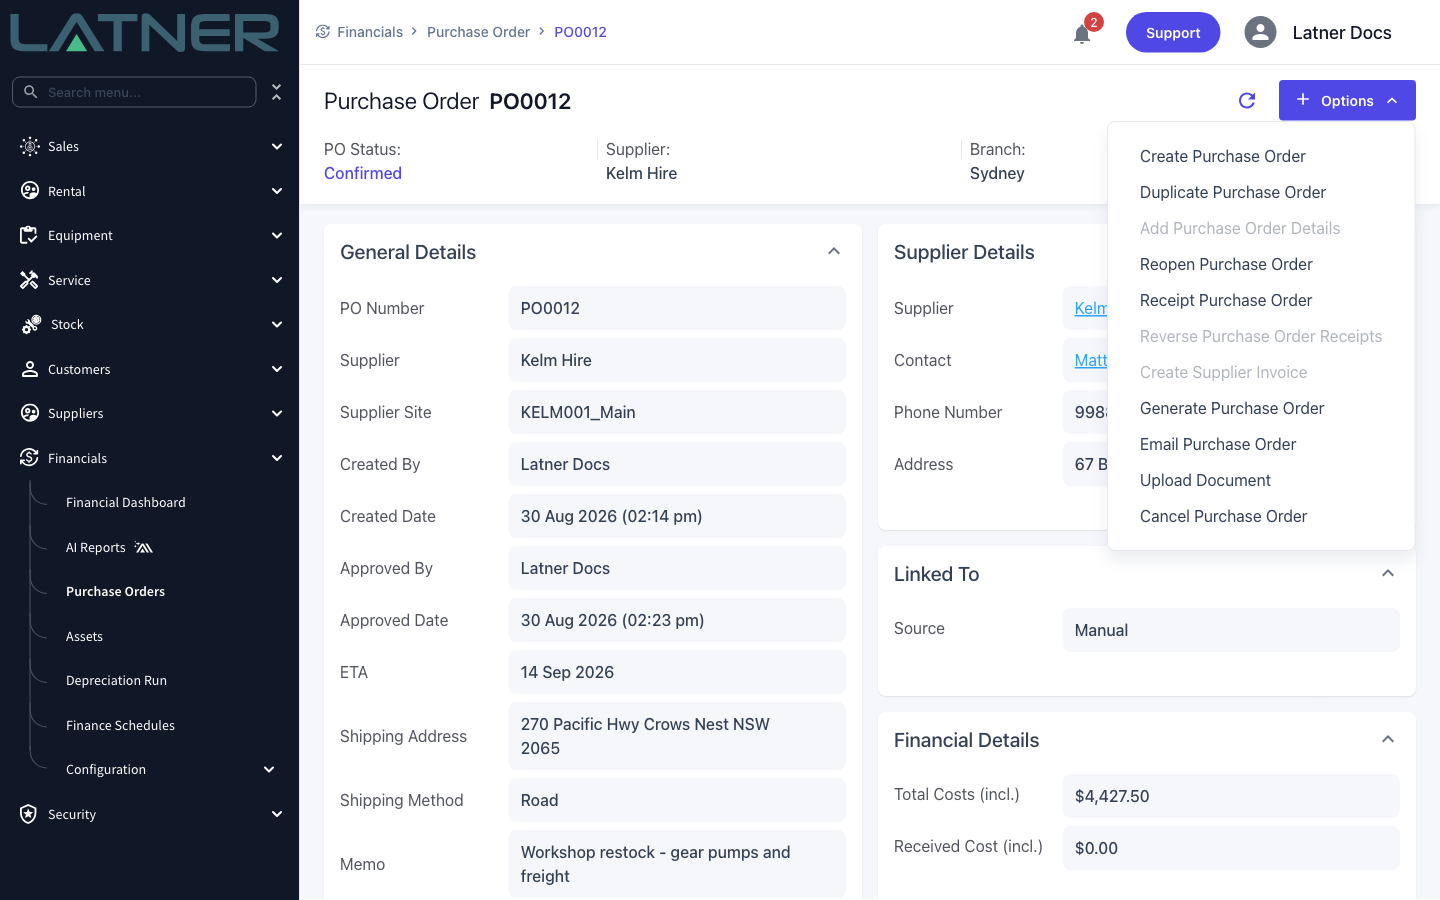
Reopening a confirmed order clears Approved By and Approved Date and reverses the backorders and Ordered serialized stock items that confirming created. That means the approval is genuinely undone, not just recorded twice, and the order has to be confirmed again before it can be receipted. Reopening stays available right up until the order is invoiced, and on a partly or fully received order Latner only warns you that a quantity has been received rather than stopping you. If the order is wrong after a receipt, reverse the receipt first.
FAQs
Watch the Demo
Prefer to watch it? Step through the same flow here.