
Allocating a credit note applies money a supplier already owes you against one of their outstanding invoices, so the invoice is settled with credit instead of cash.
Overview
A supplier credit note is only half the story. Until you tell Latner which invoice the credit belongs to, the credit note sits on the supplier's account as unused money and the invoice still looks like it needs paying. A Credit Allocation joins the two together.
-
Credit is allocated from the credit note, not from the invoice.
-
One credit note can be spread across several invoices, and one invoice can absorb credit from several credit notes.
-
You can allocate part of a credit note now and the rest later. Latner tracks what is left as Remaining Credit.
-
Both the credit note and the invoice must be Completed, and both must belong to the same supplier.
-
Allocating never changes the value of either document. It only records how much of the credit has been used.
-
Once the whole credit note is used, it moves to Paid. Once an invoice's balance reaches zero, it moves to Paid too.
Before You Begin
Credit allocation needs two permissions and two records already in the right state.
|
Requirement |
Where to Find It |
|---|---|
|
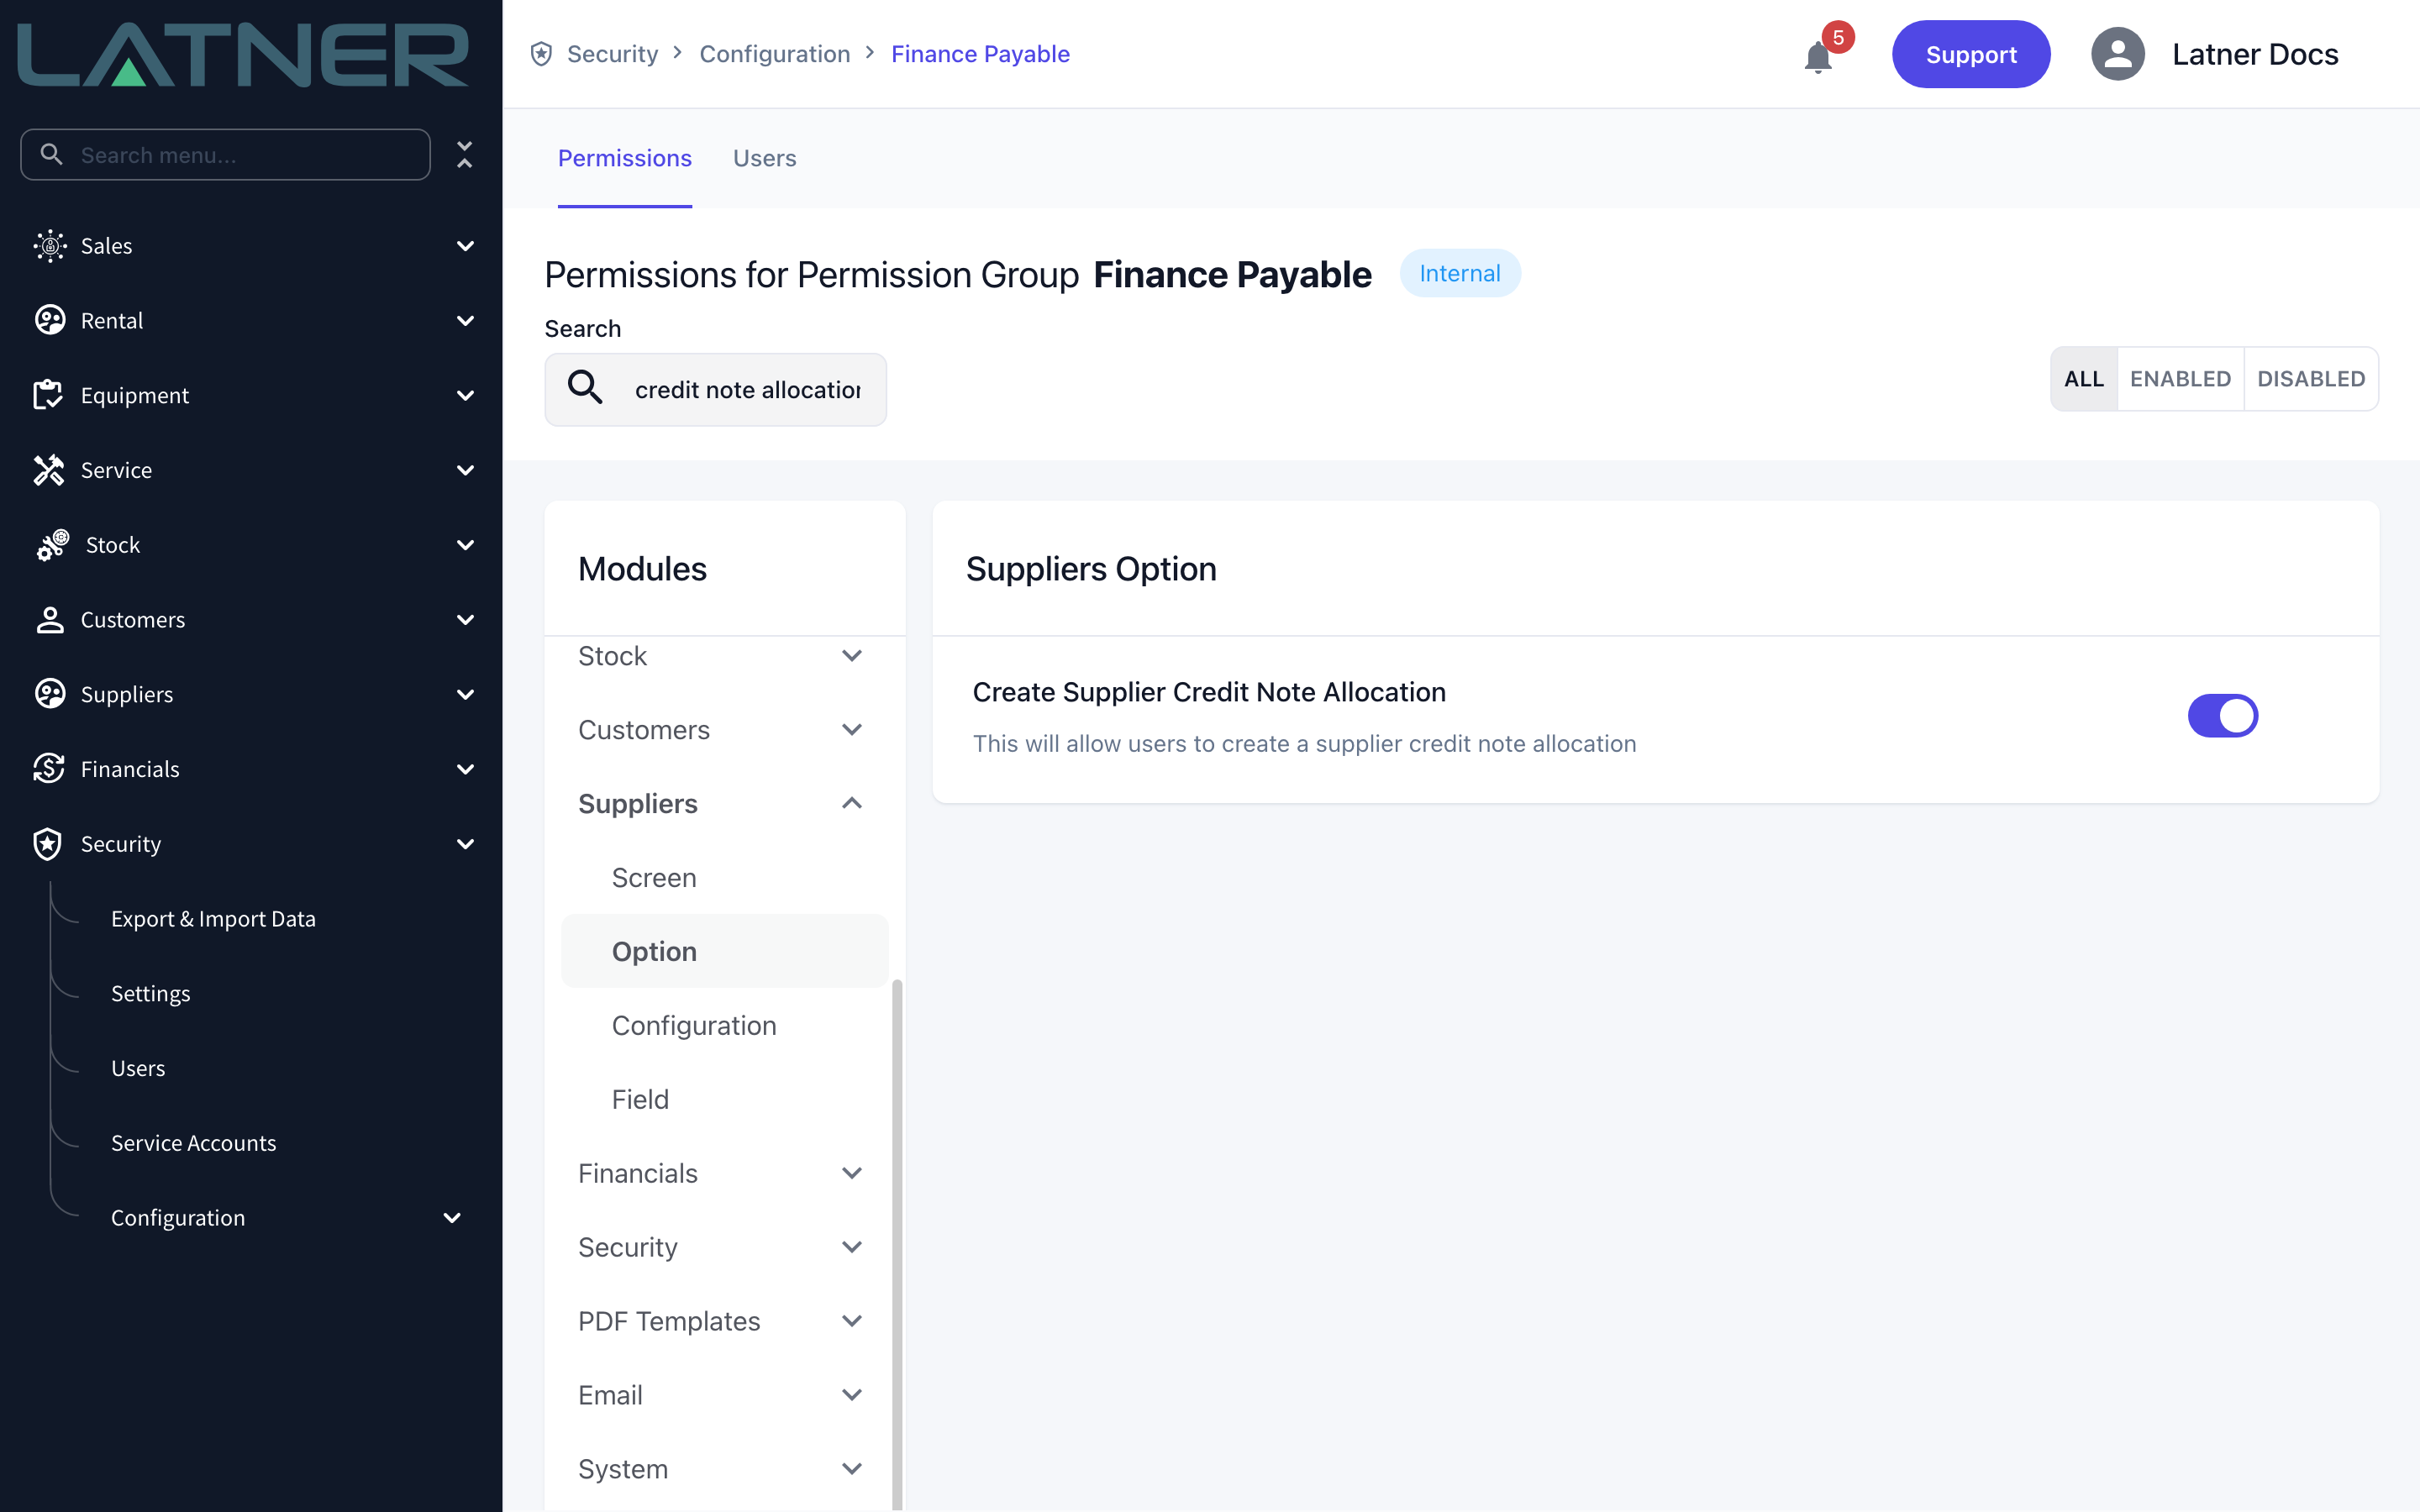
Supplier Invoice permission - lets you open supplier invoices and credit notes, and see the allocation tabs |
Security › Configuration › Permission Groups › Suppliers › Screen |
|
Create Supplier Credit Note Allocation permission - lets you create and delete allocations |
Security › Configuration › Permission Groups › Suppliers › Option |
|
A supplier credit note in Completed status with credit remaining |
Suppliers › Supplier Invoices (the Type column shows Credit Note) |
|
A supplier invoice in Completed status, for the same supplier, with a balance still outstanding |
Suppliers › Supplier Invoices |
No system setting has to be switched on. If you can see the credit note and you hold the allocation permission, you can allocate.
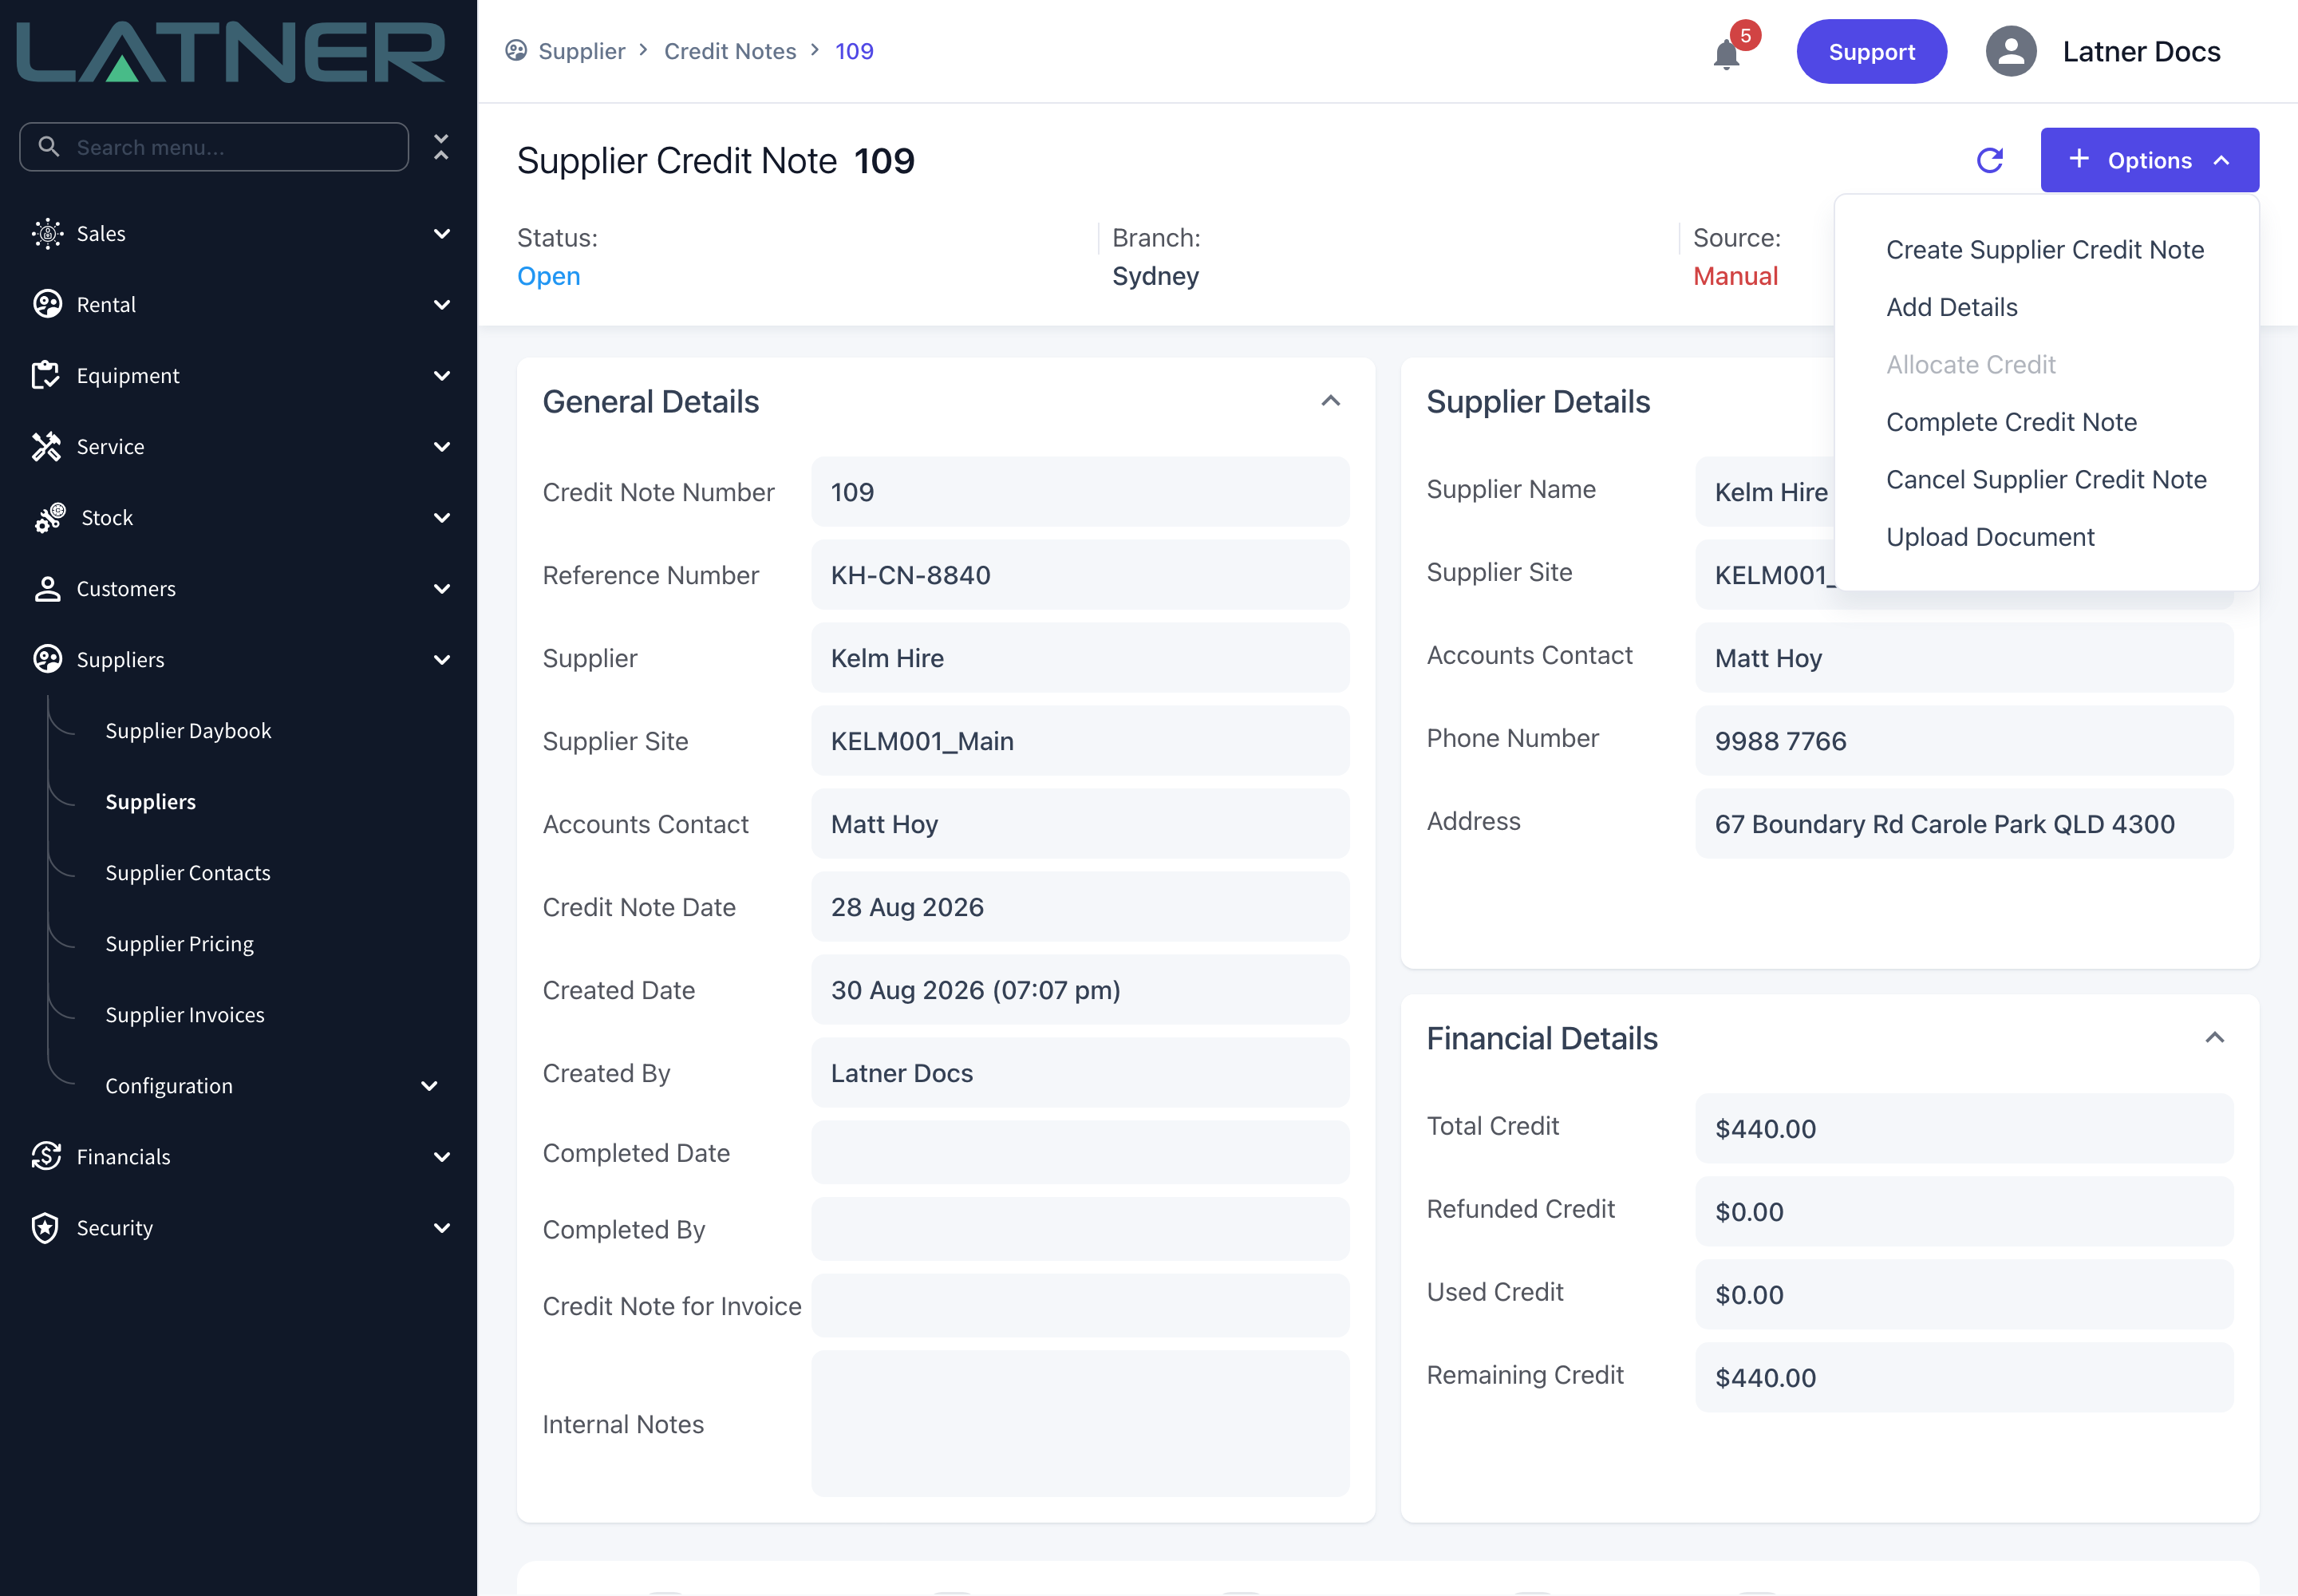
Allocate Credit stays greyed out while the credit note is Open. A credit note has to be completed before any of its value can be used, so finish adding its lines and choose Options › Complete Credit Note first. The same rule applies on the other side: an invoice that is still Open, Disputed, Approved, Cancelled or already Paid will not appear in the invoice list on the allocation form.
Allocating the Credit
Step 1 - Open the credit note
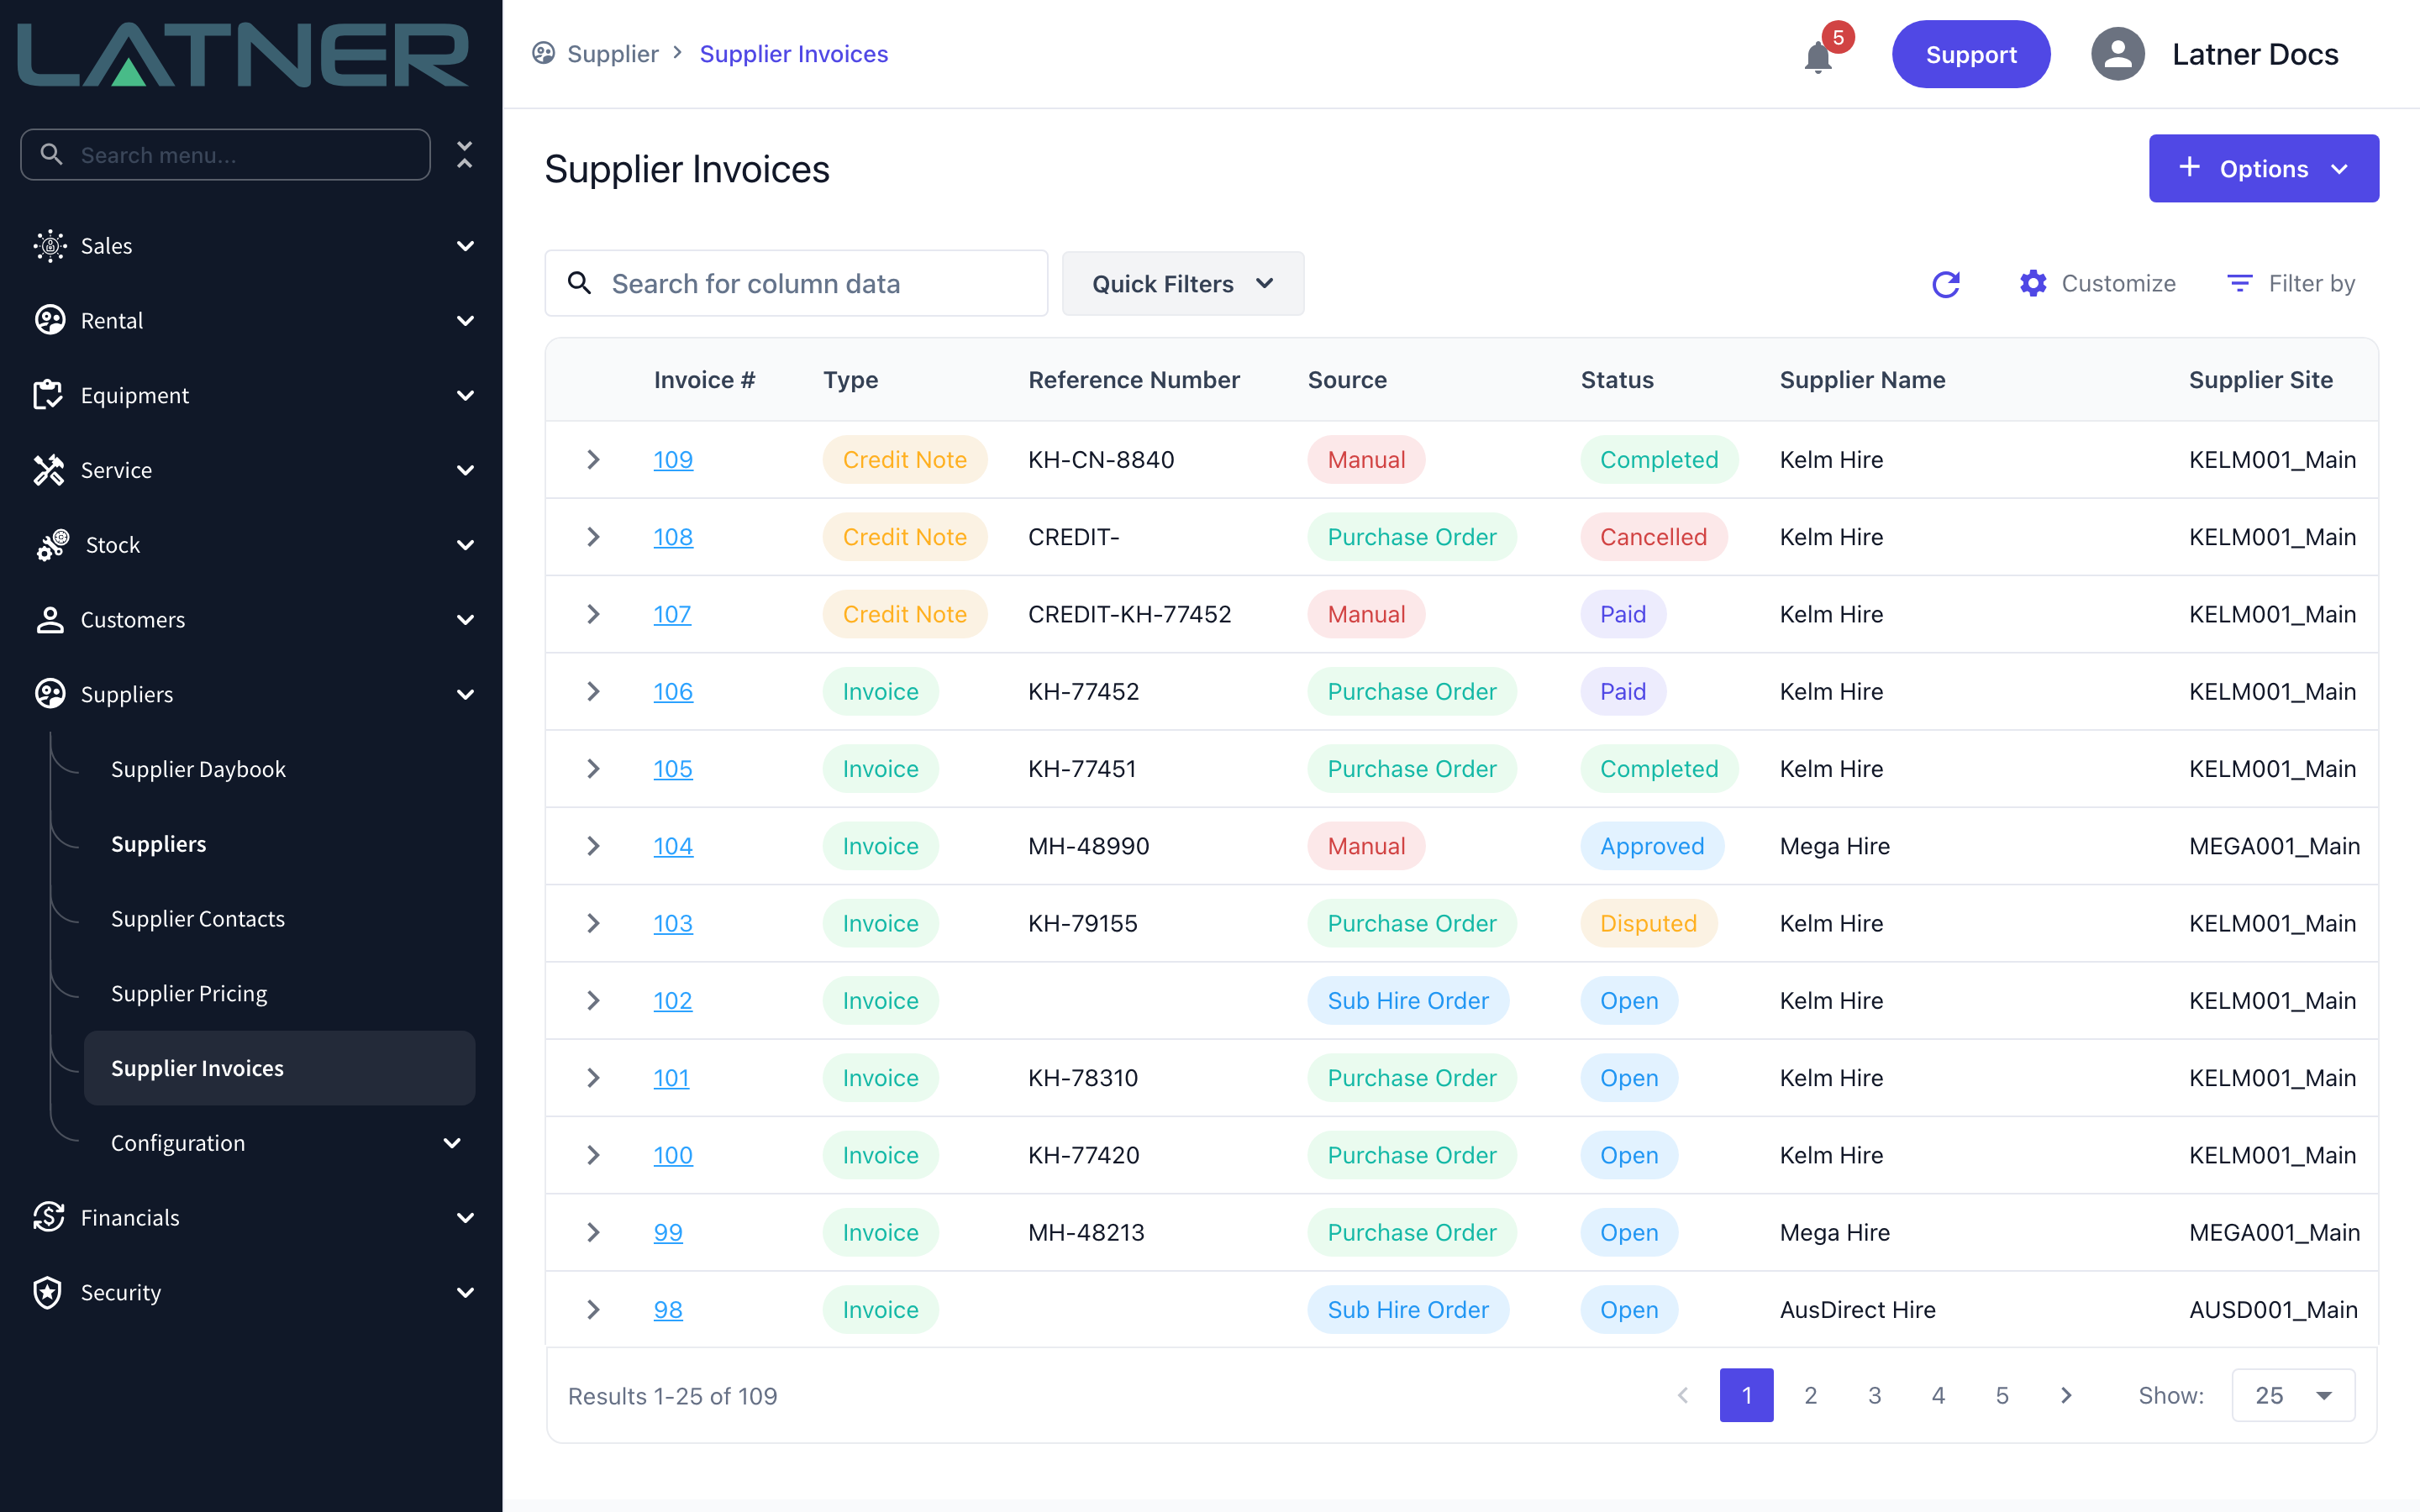
Go to Suppliers › Supplier Invoices. Credit notes are listed alongside invoices and are marked Credit Note in the Type column. Click the number of the credit note you want to use.
Step 2 - Choose Allocate Credit
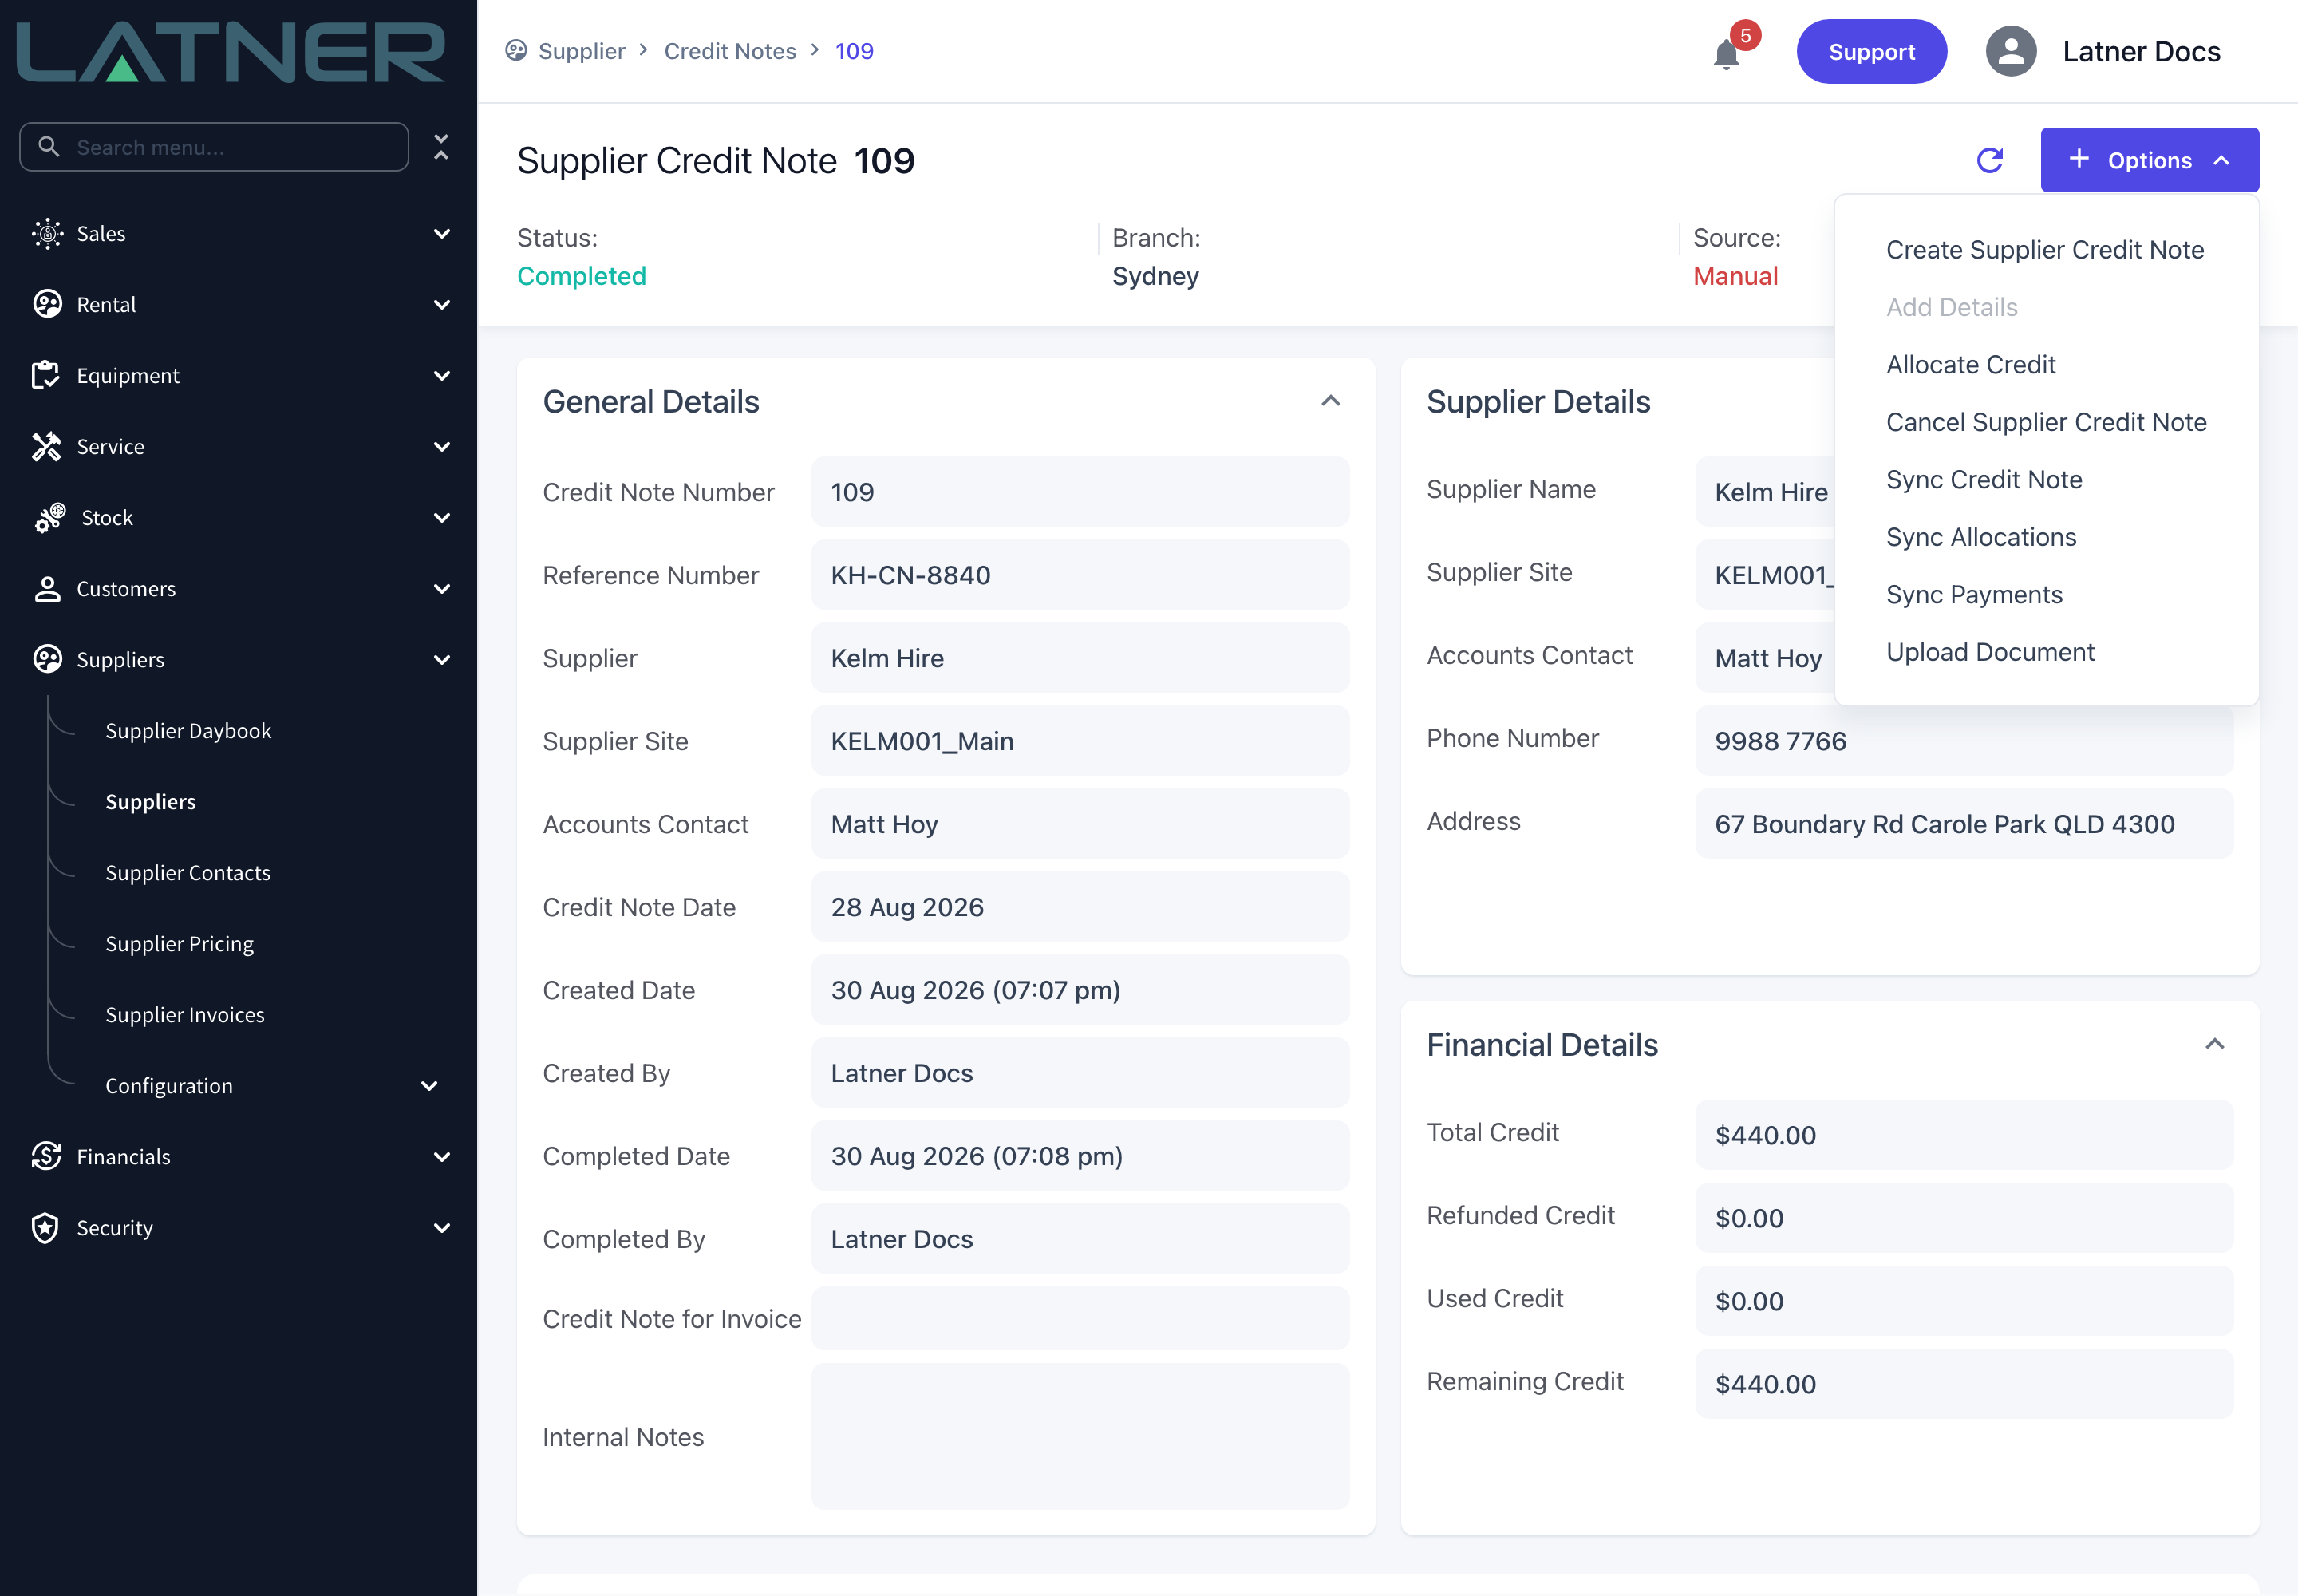
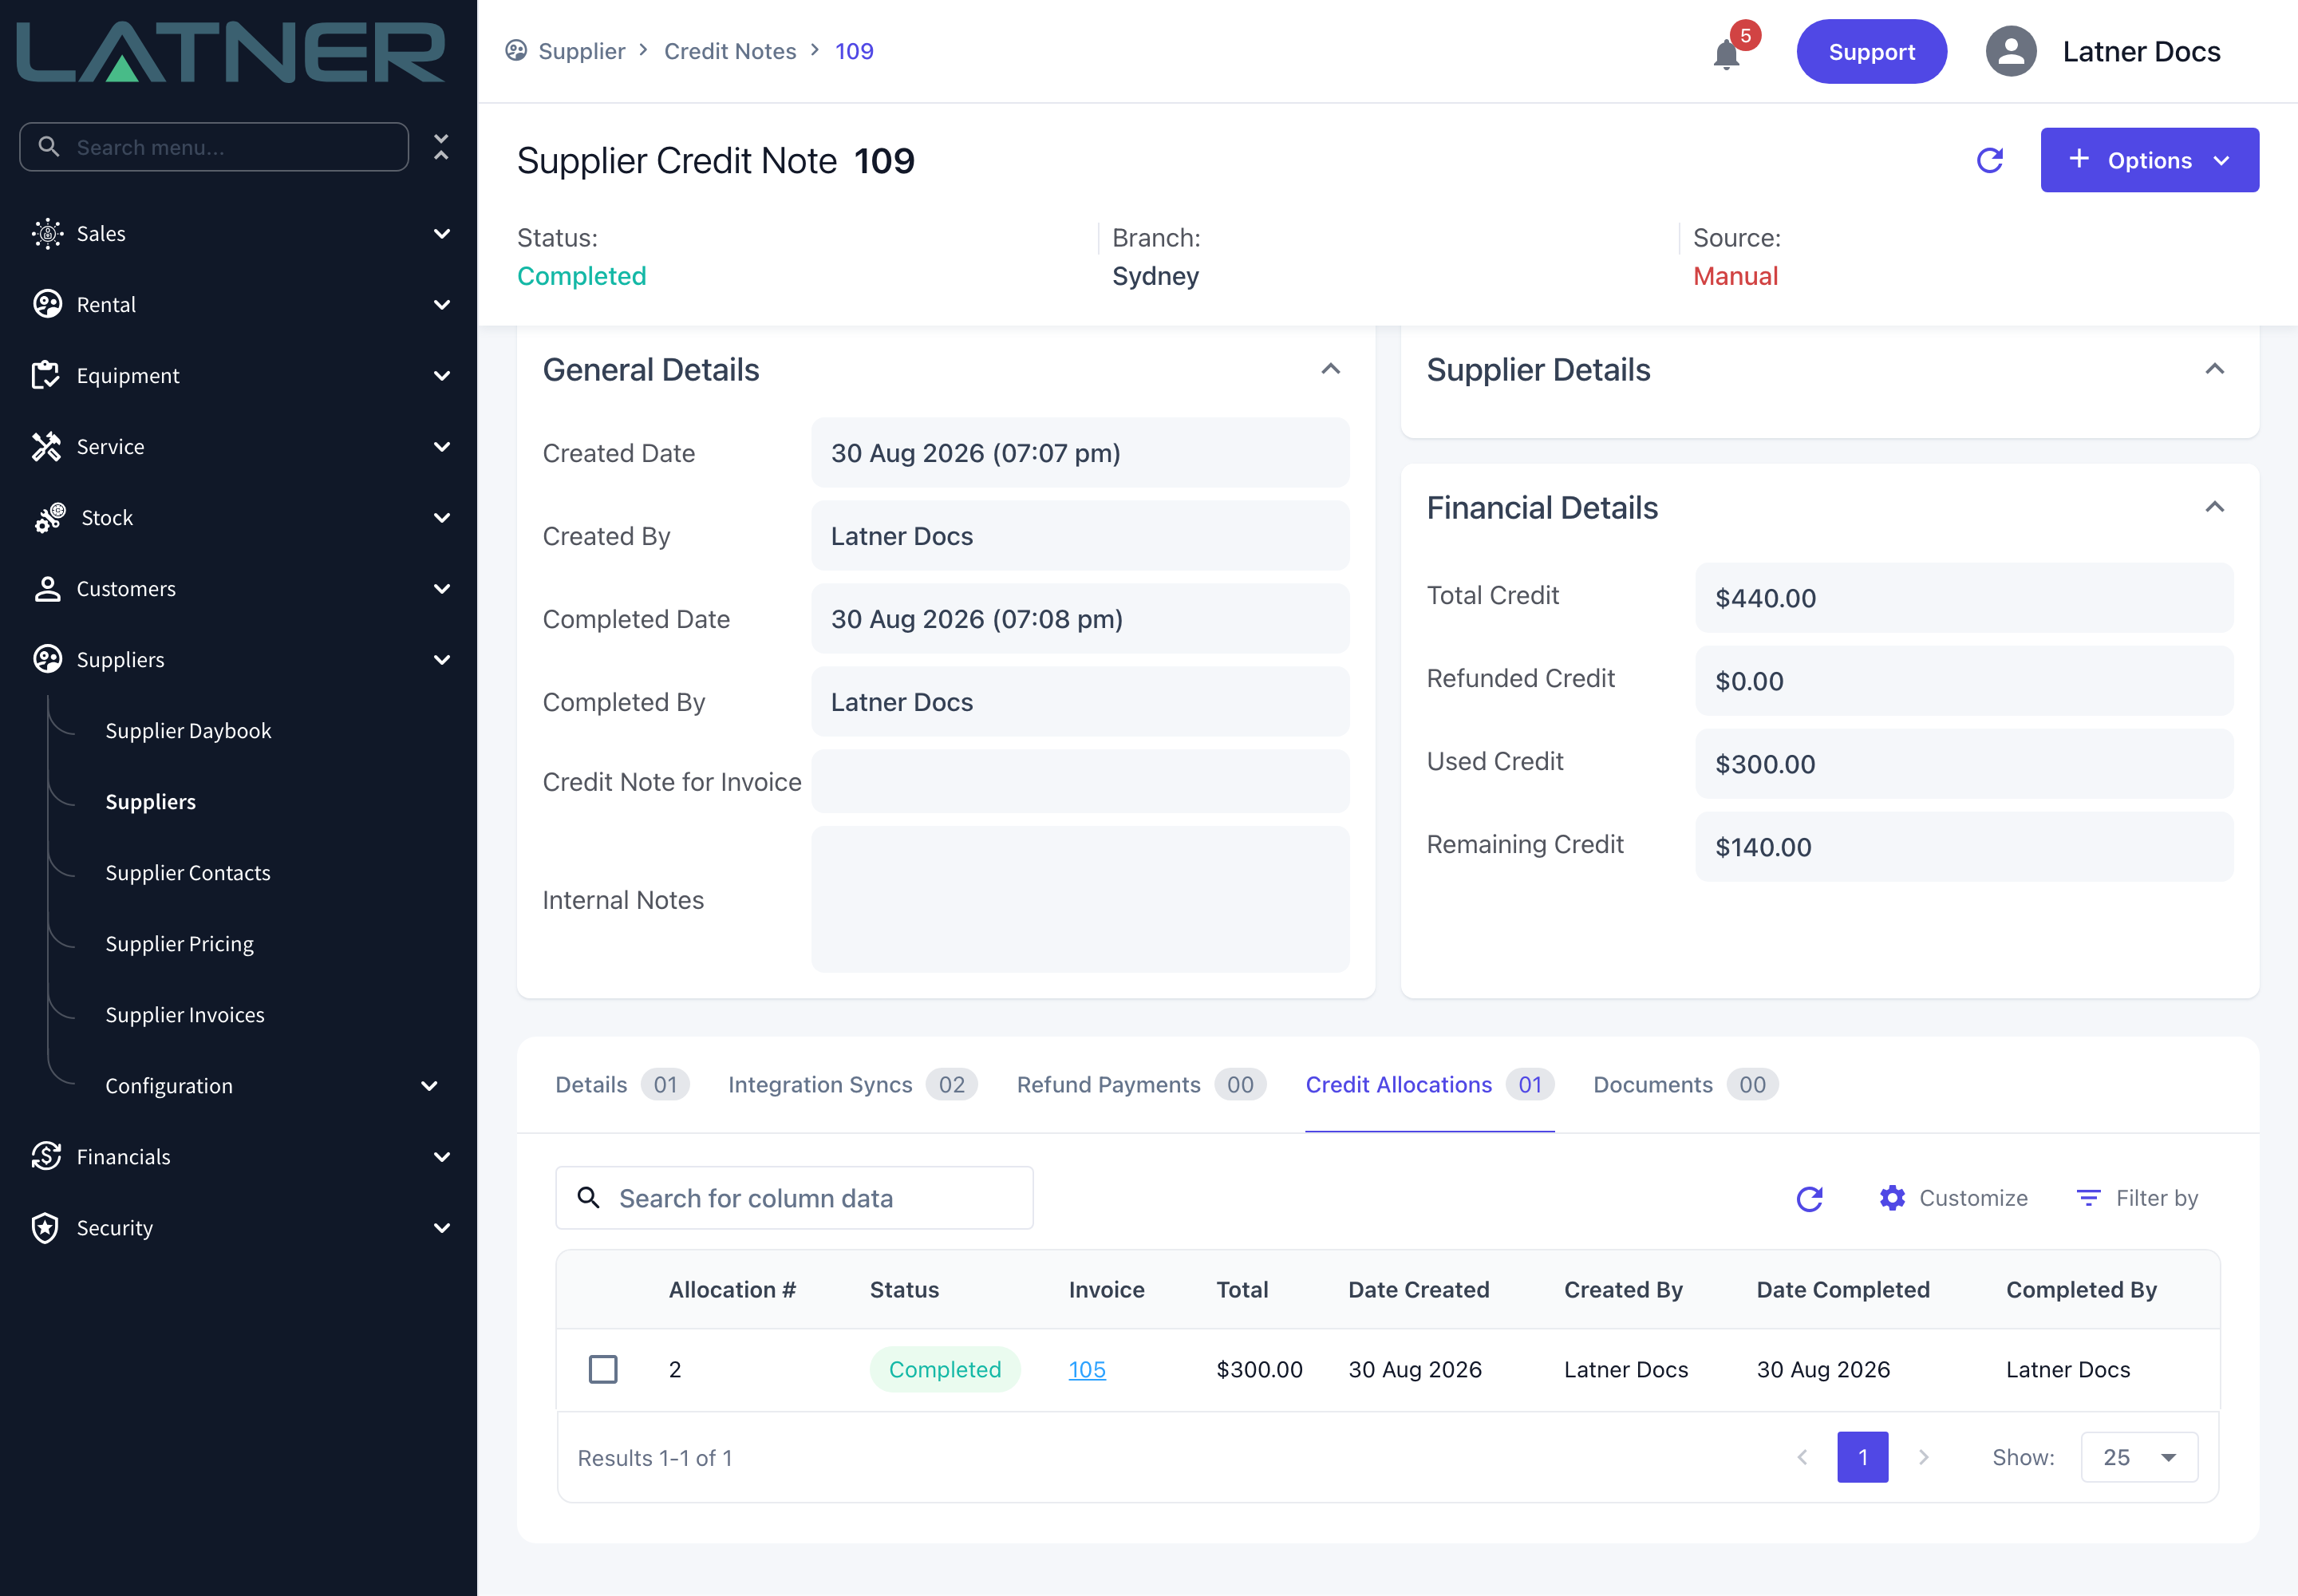
Check Financial Details first. Total Credit is the face value of the credit note, Used Credit is what has already been allocated to invoices, Refunded Credit is what has been refunded in cash, and Remaining Credit is what you have left to work with. Then choose Options › Allocate Credit.
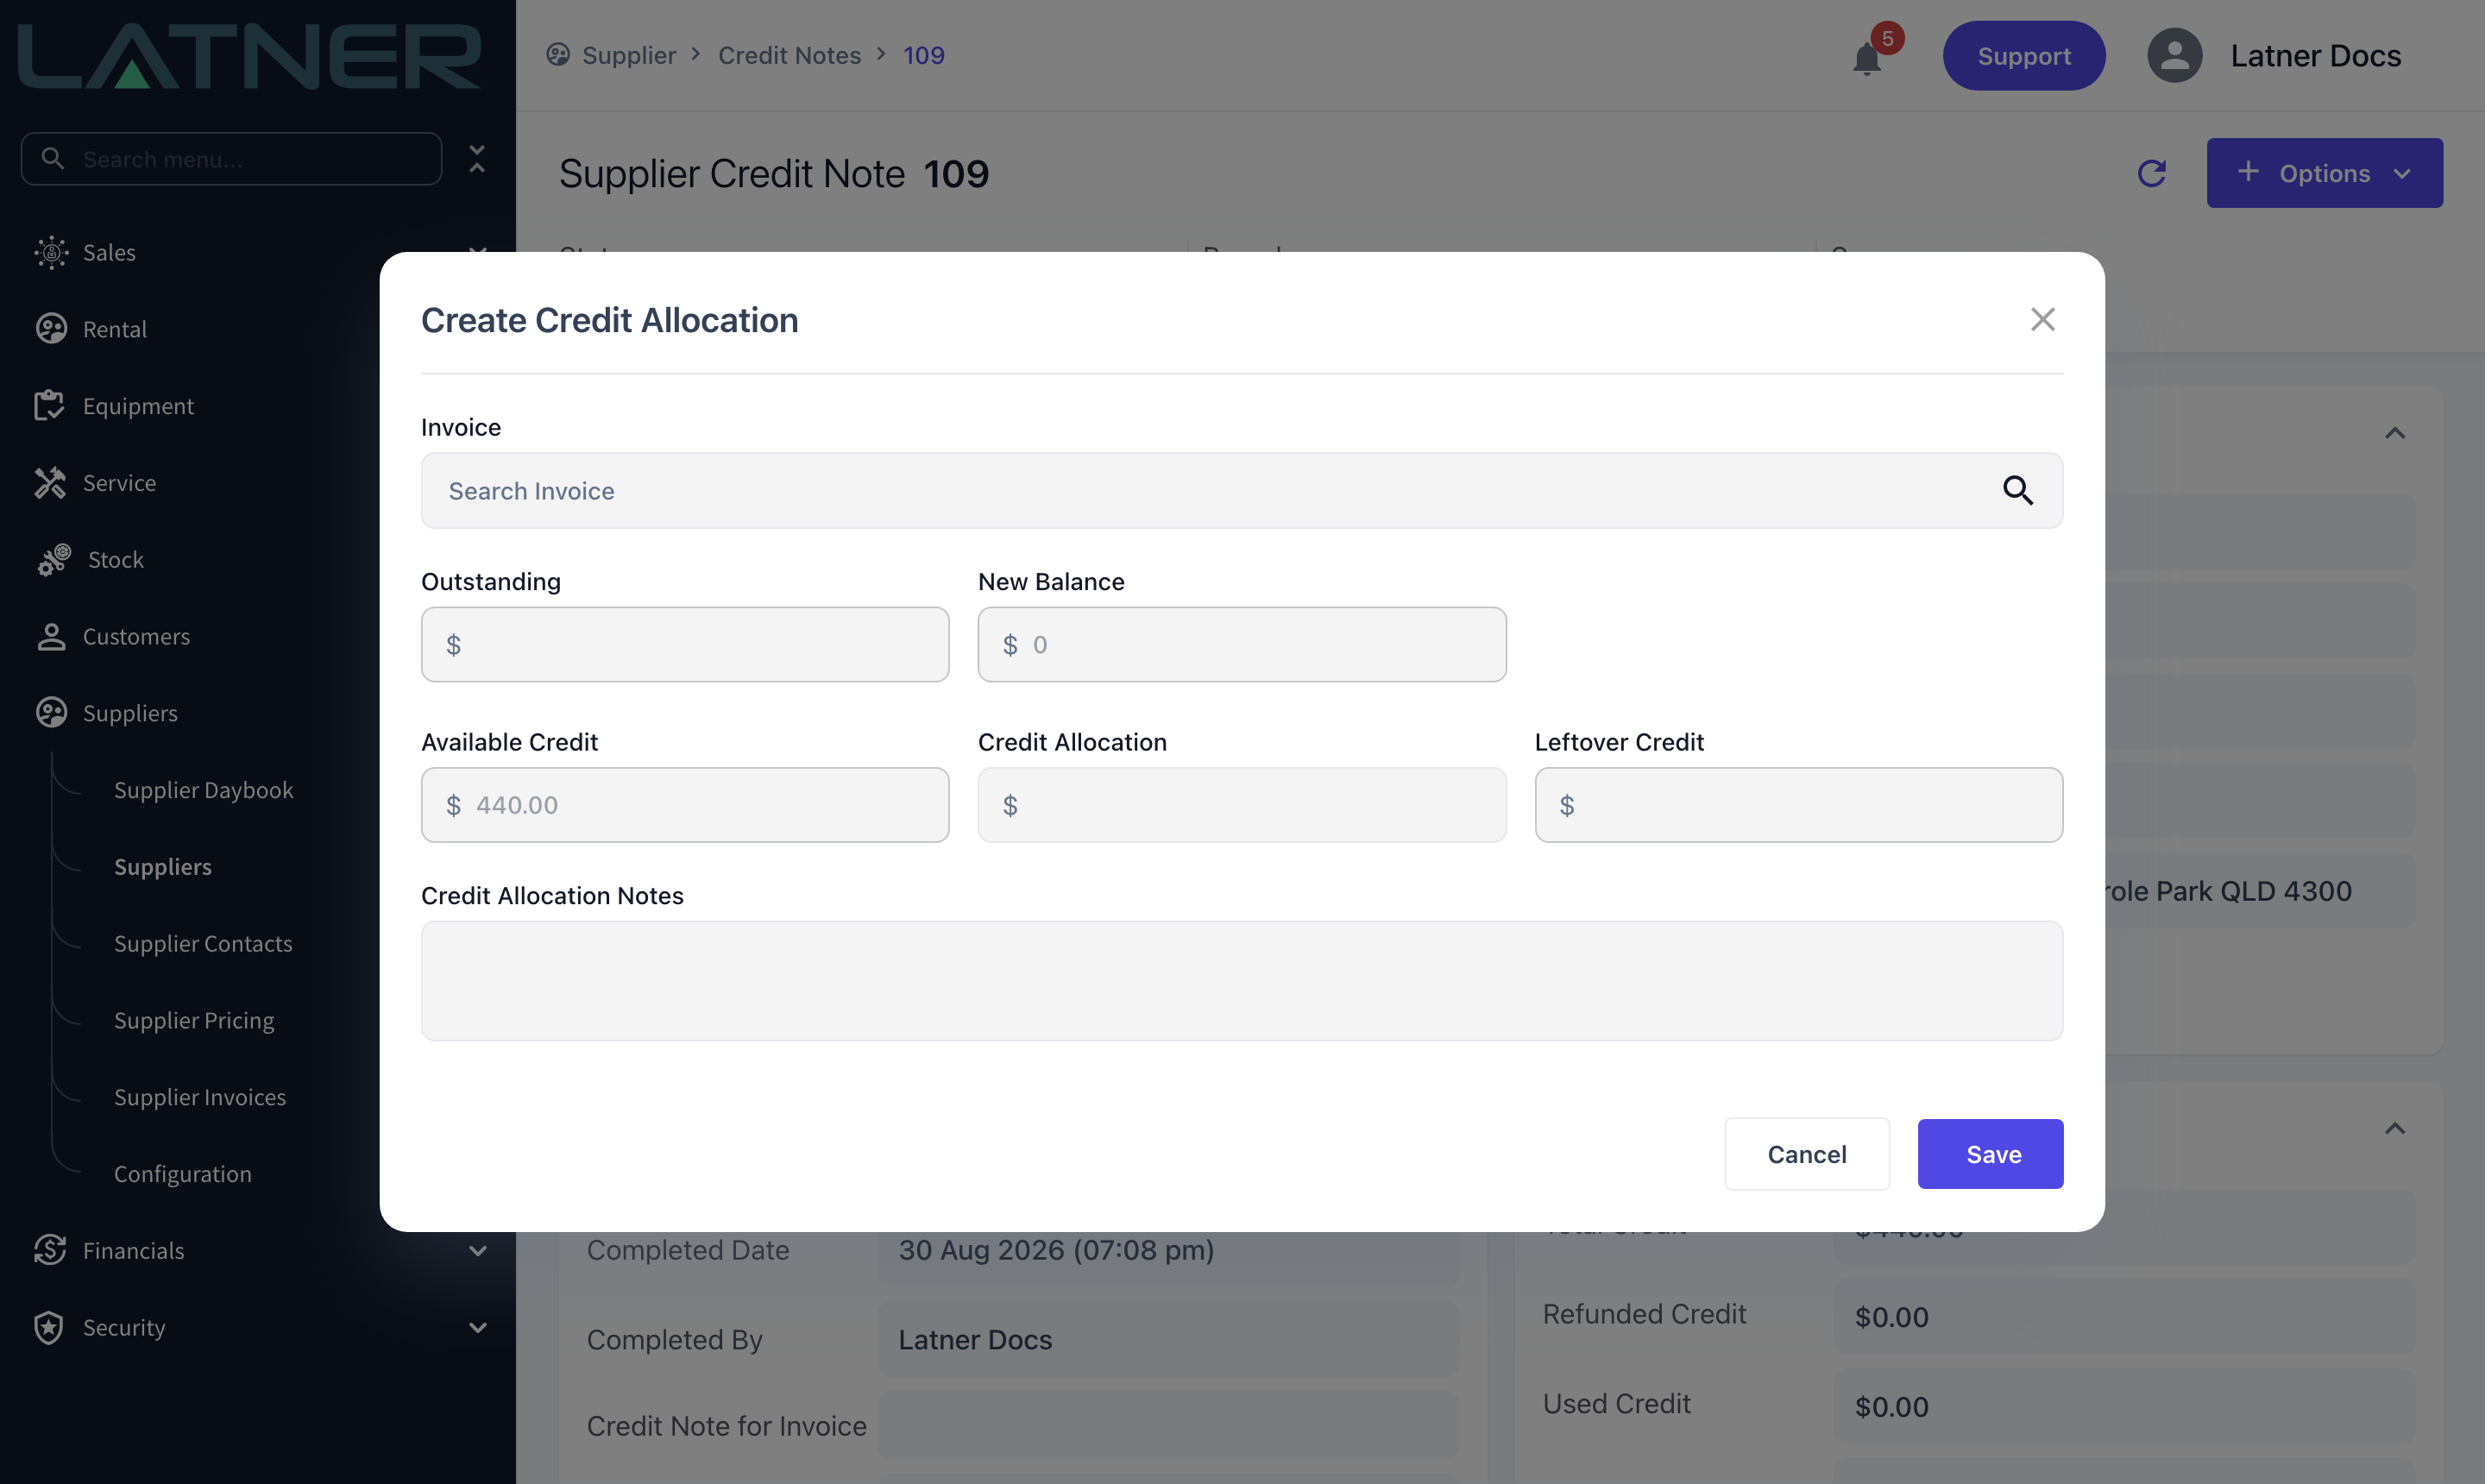
Step 3 - Review the Create Credit Allocation form
The form opens with Available Credit already filled from the credit note's remaining balance. Everything except the invoice, the amount and the notes is read-only and recalculates as you type.
-
Invoice - the supplier invoice the credit is being applied to. Required.
-
Outstanding - what that invoice still owes before this allocation.
-
New Balance - what the invoice will owe once you save.
-
Available Credit - the credit note's remaining credit.
-
Credit Allocation - how much of that credit to apply. Required.
-
Leftover Credit - what will still be sitting on the credit note afterwards.
-
Credit Allocation Notes - free text explaining the allocation. Optional, but worth filling in for whoever reconciles the account later.
Step 4 - Pick the invoice
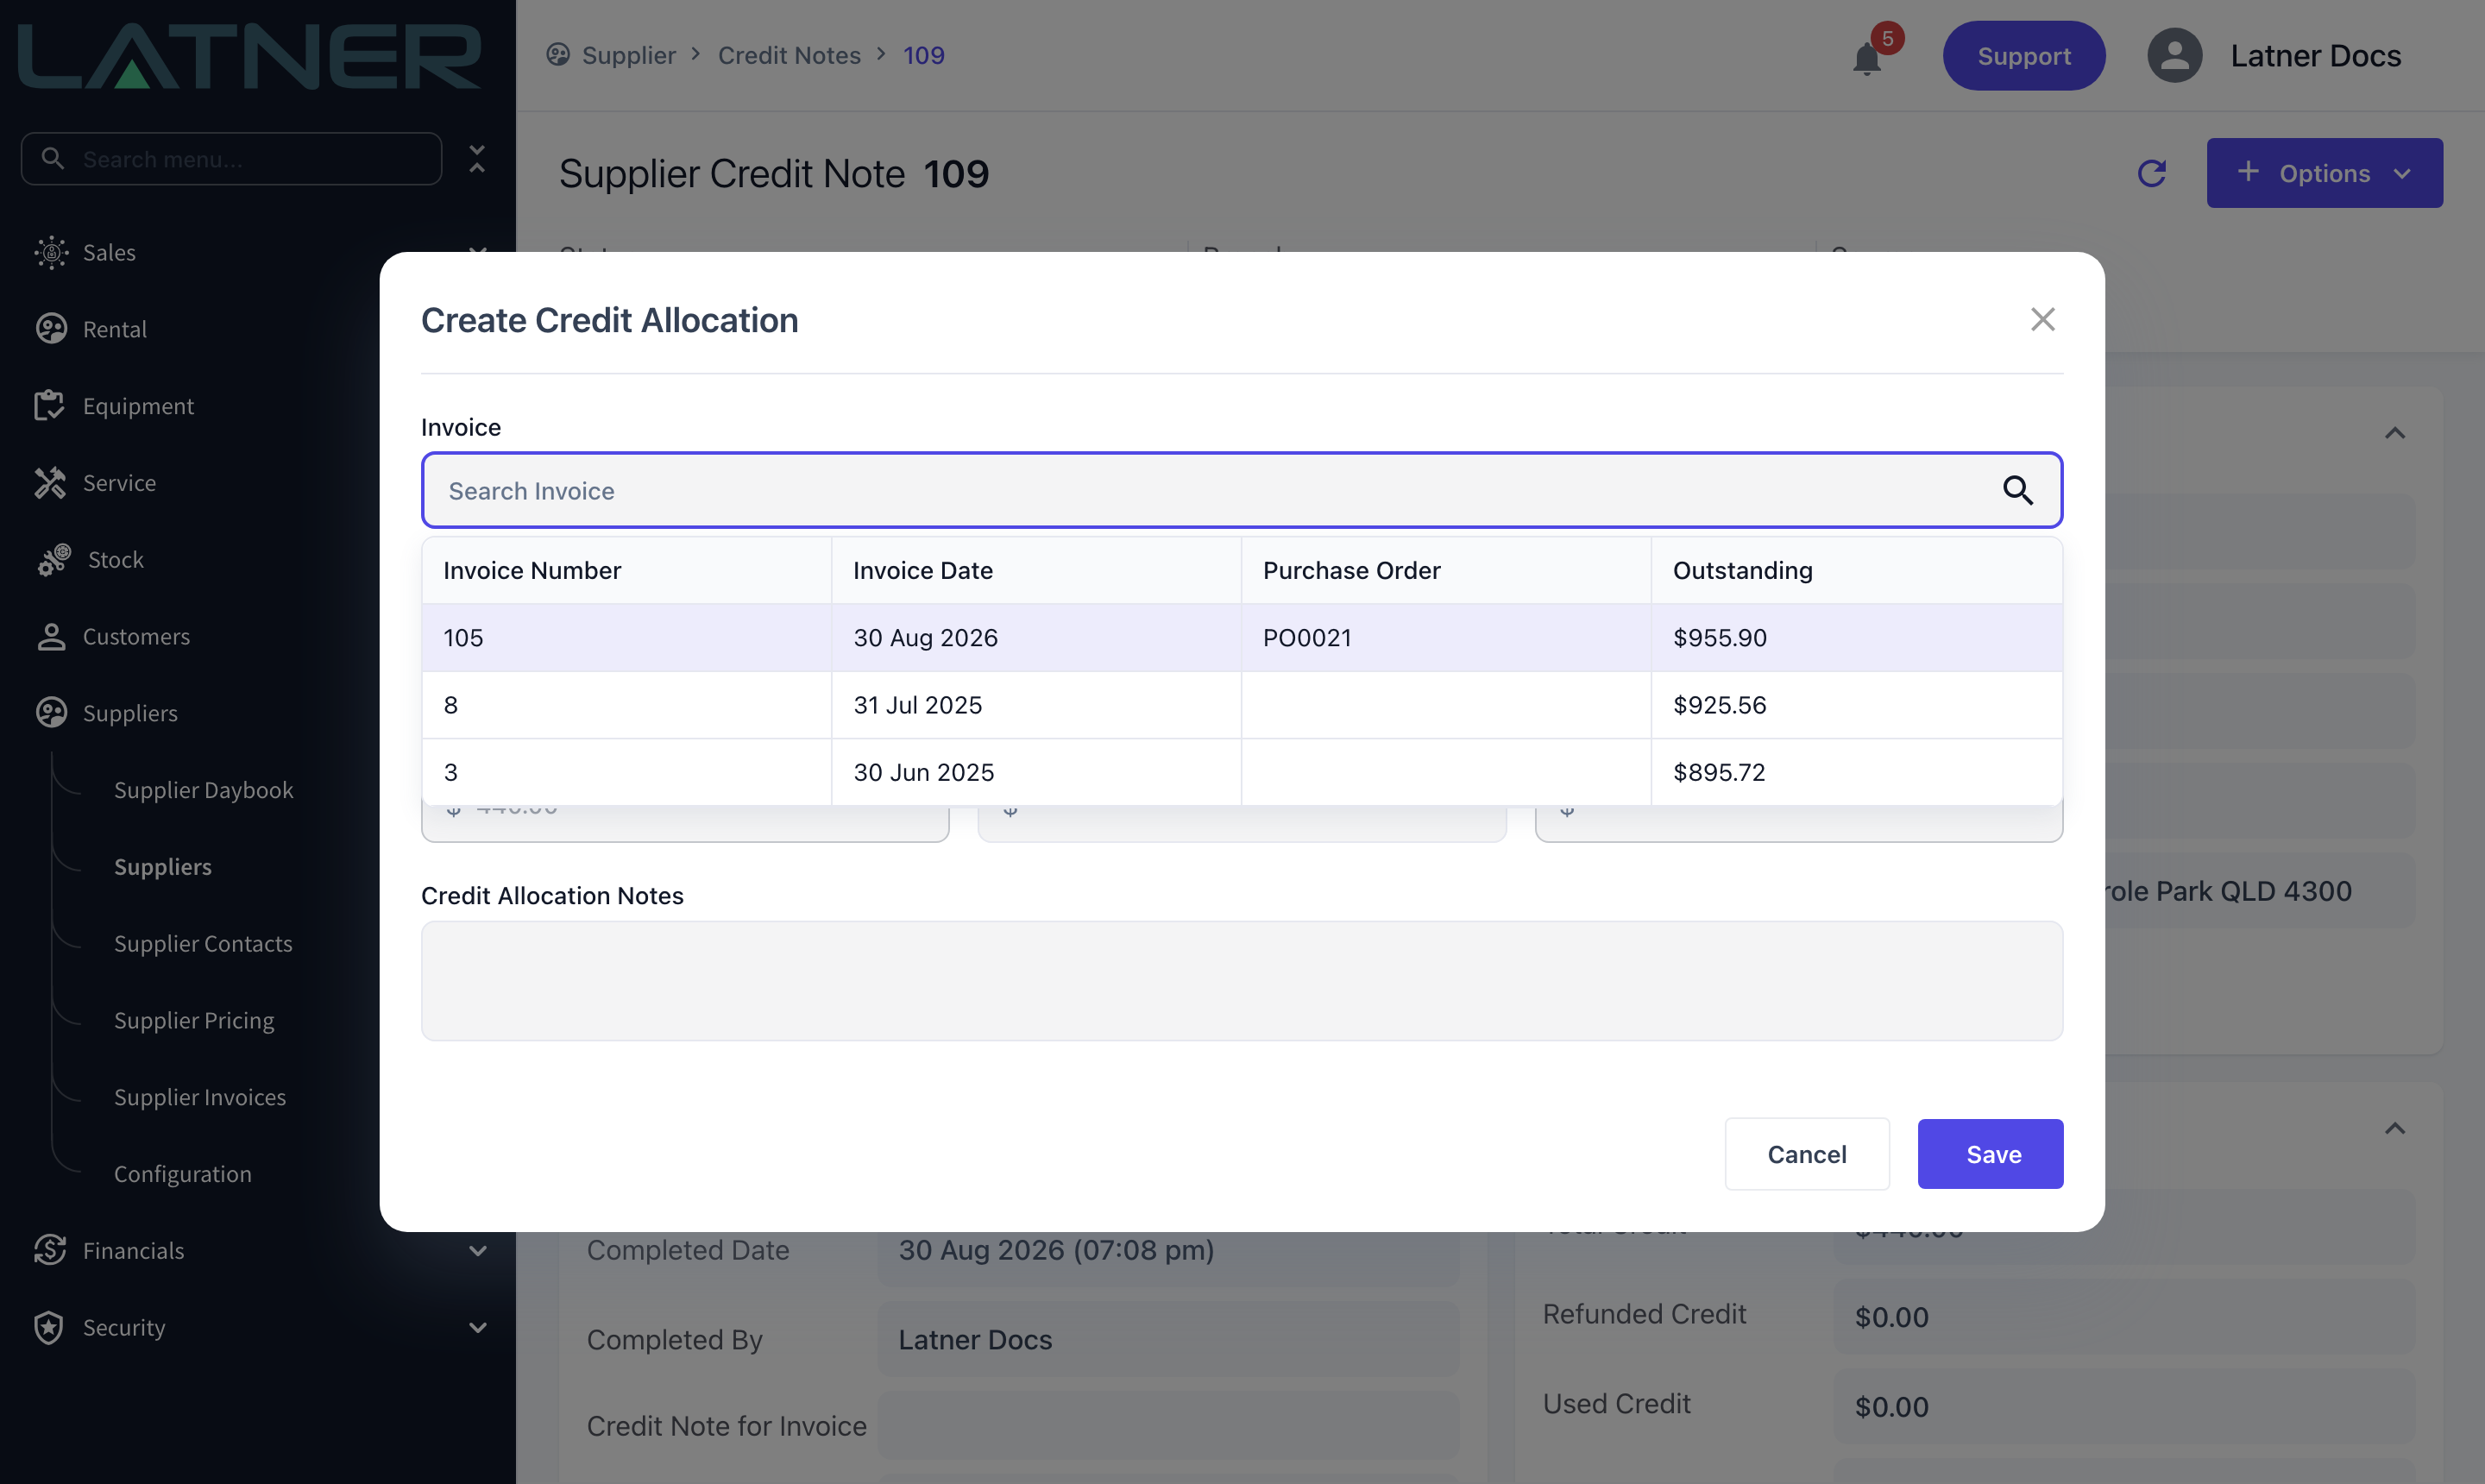
Click Invoice and choose from the list. Latner only offers invoices that can actually take the credit: same supplier, type Invoice, and status Completed. Each row shows the invoice number, invoice date, the purchase order it came from if there is one, and the amount still outstanding, so you can pick the right one without leaving the form. Outstanding and New Balance fill in as soon as you select a row.
Step 5 - Enter the credit allocation
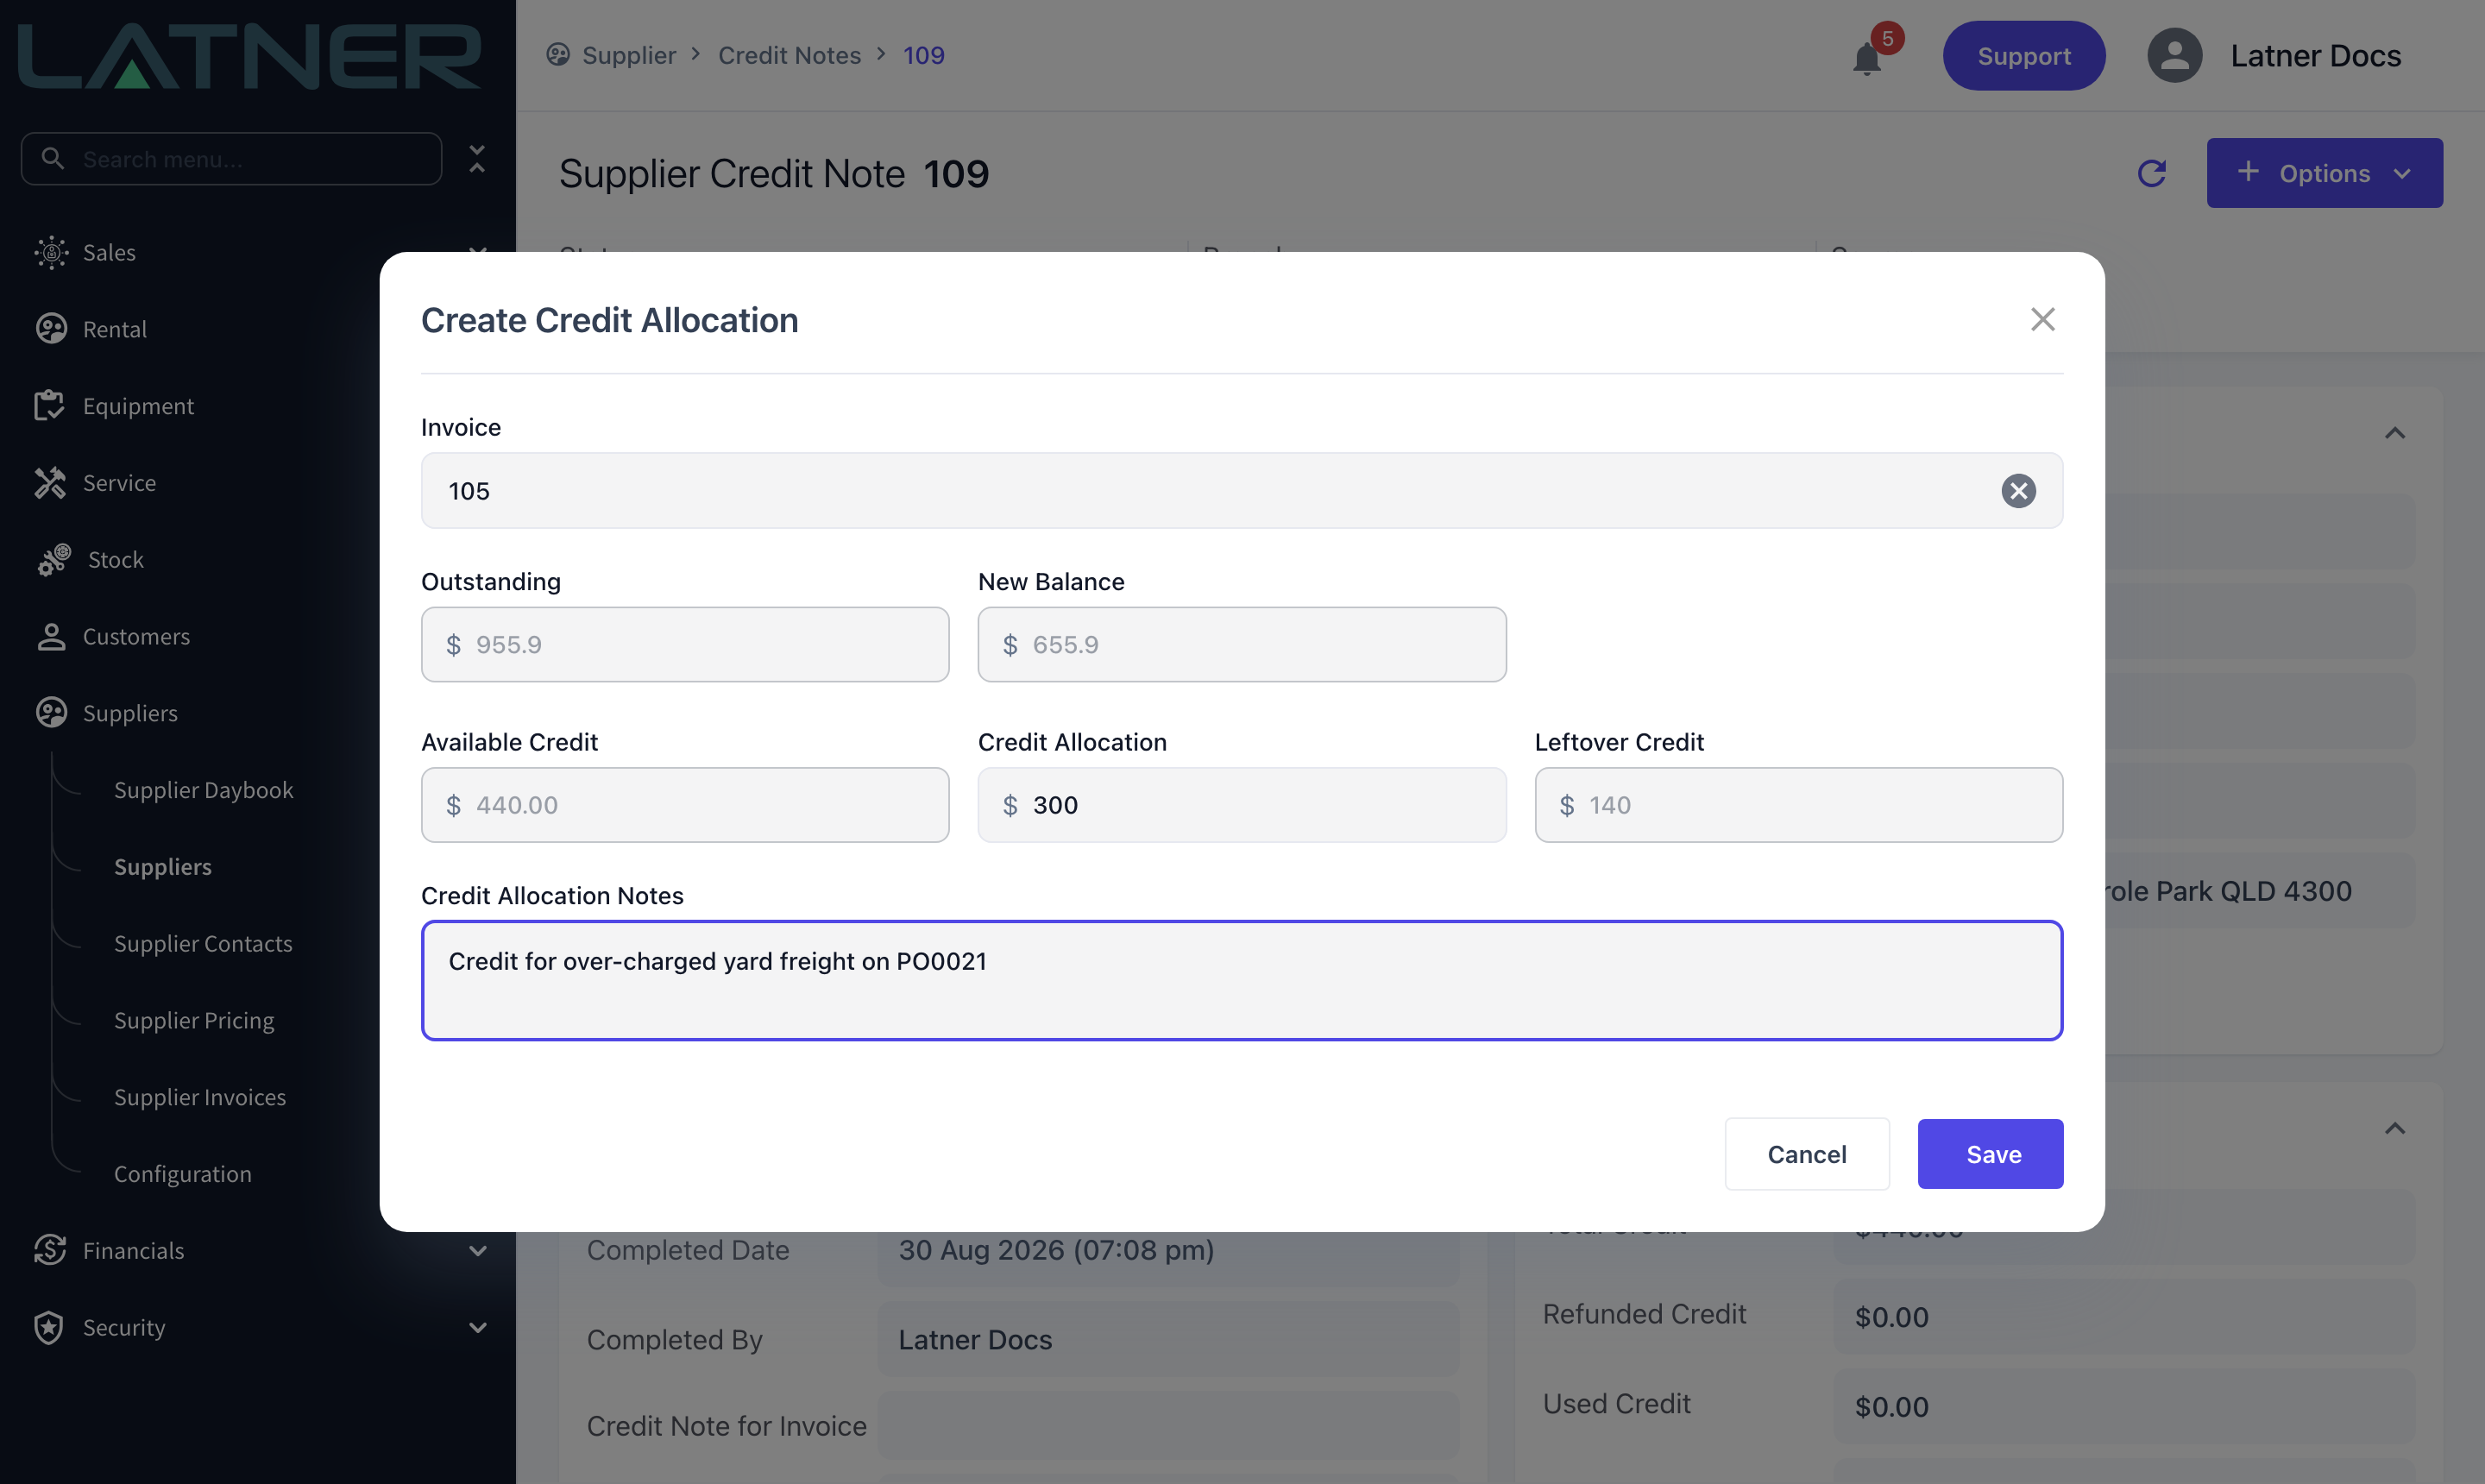
Type the amount into Credit Allocation. It has to be more than zero, no more than the credit note's Available Credit, and no more than the invoice's Outstanding balance - Latner blocks the save and tells you which of the two limits you crossed. New Balance and Leftover Credit update as you type, so you can see the result before committing to it. Add a note if it helps.
Step 6 - Save
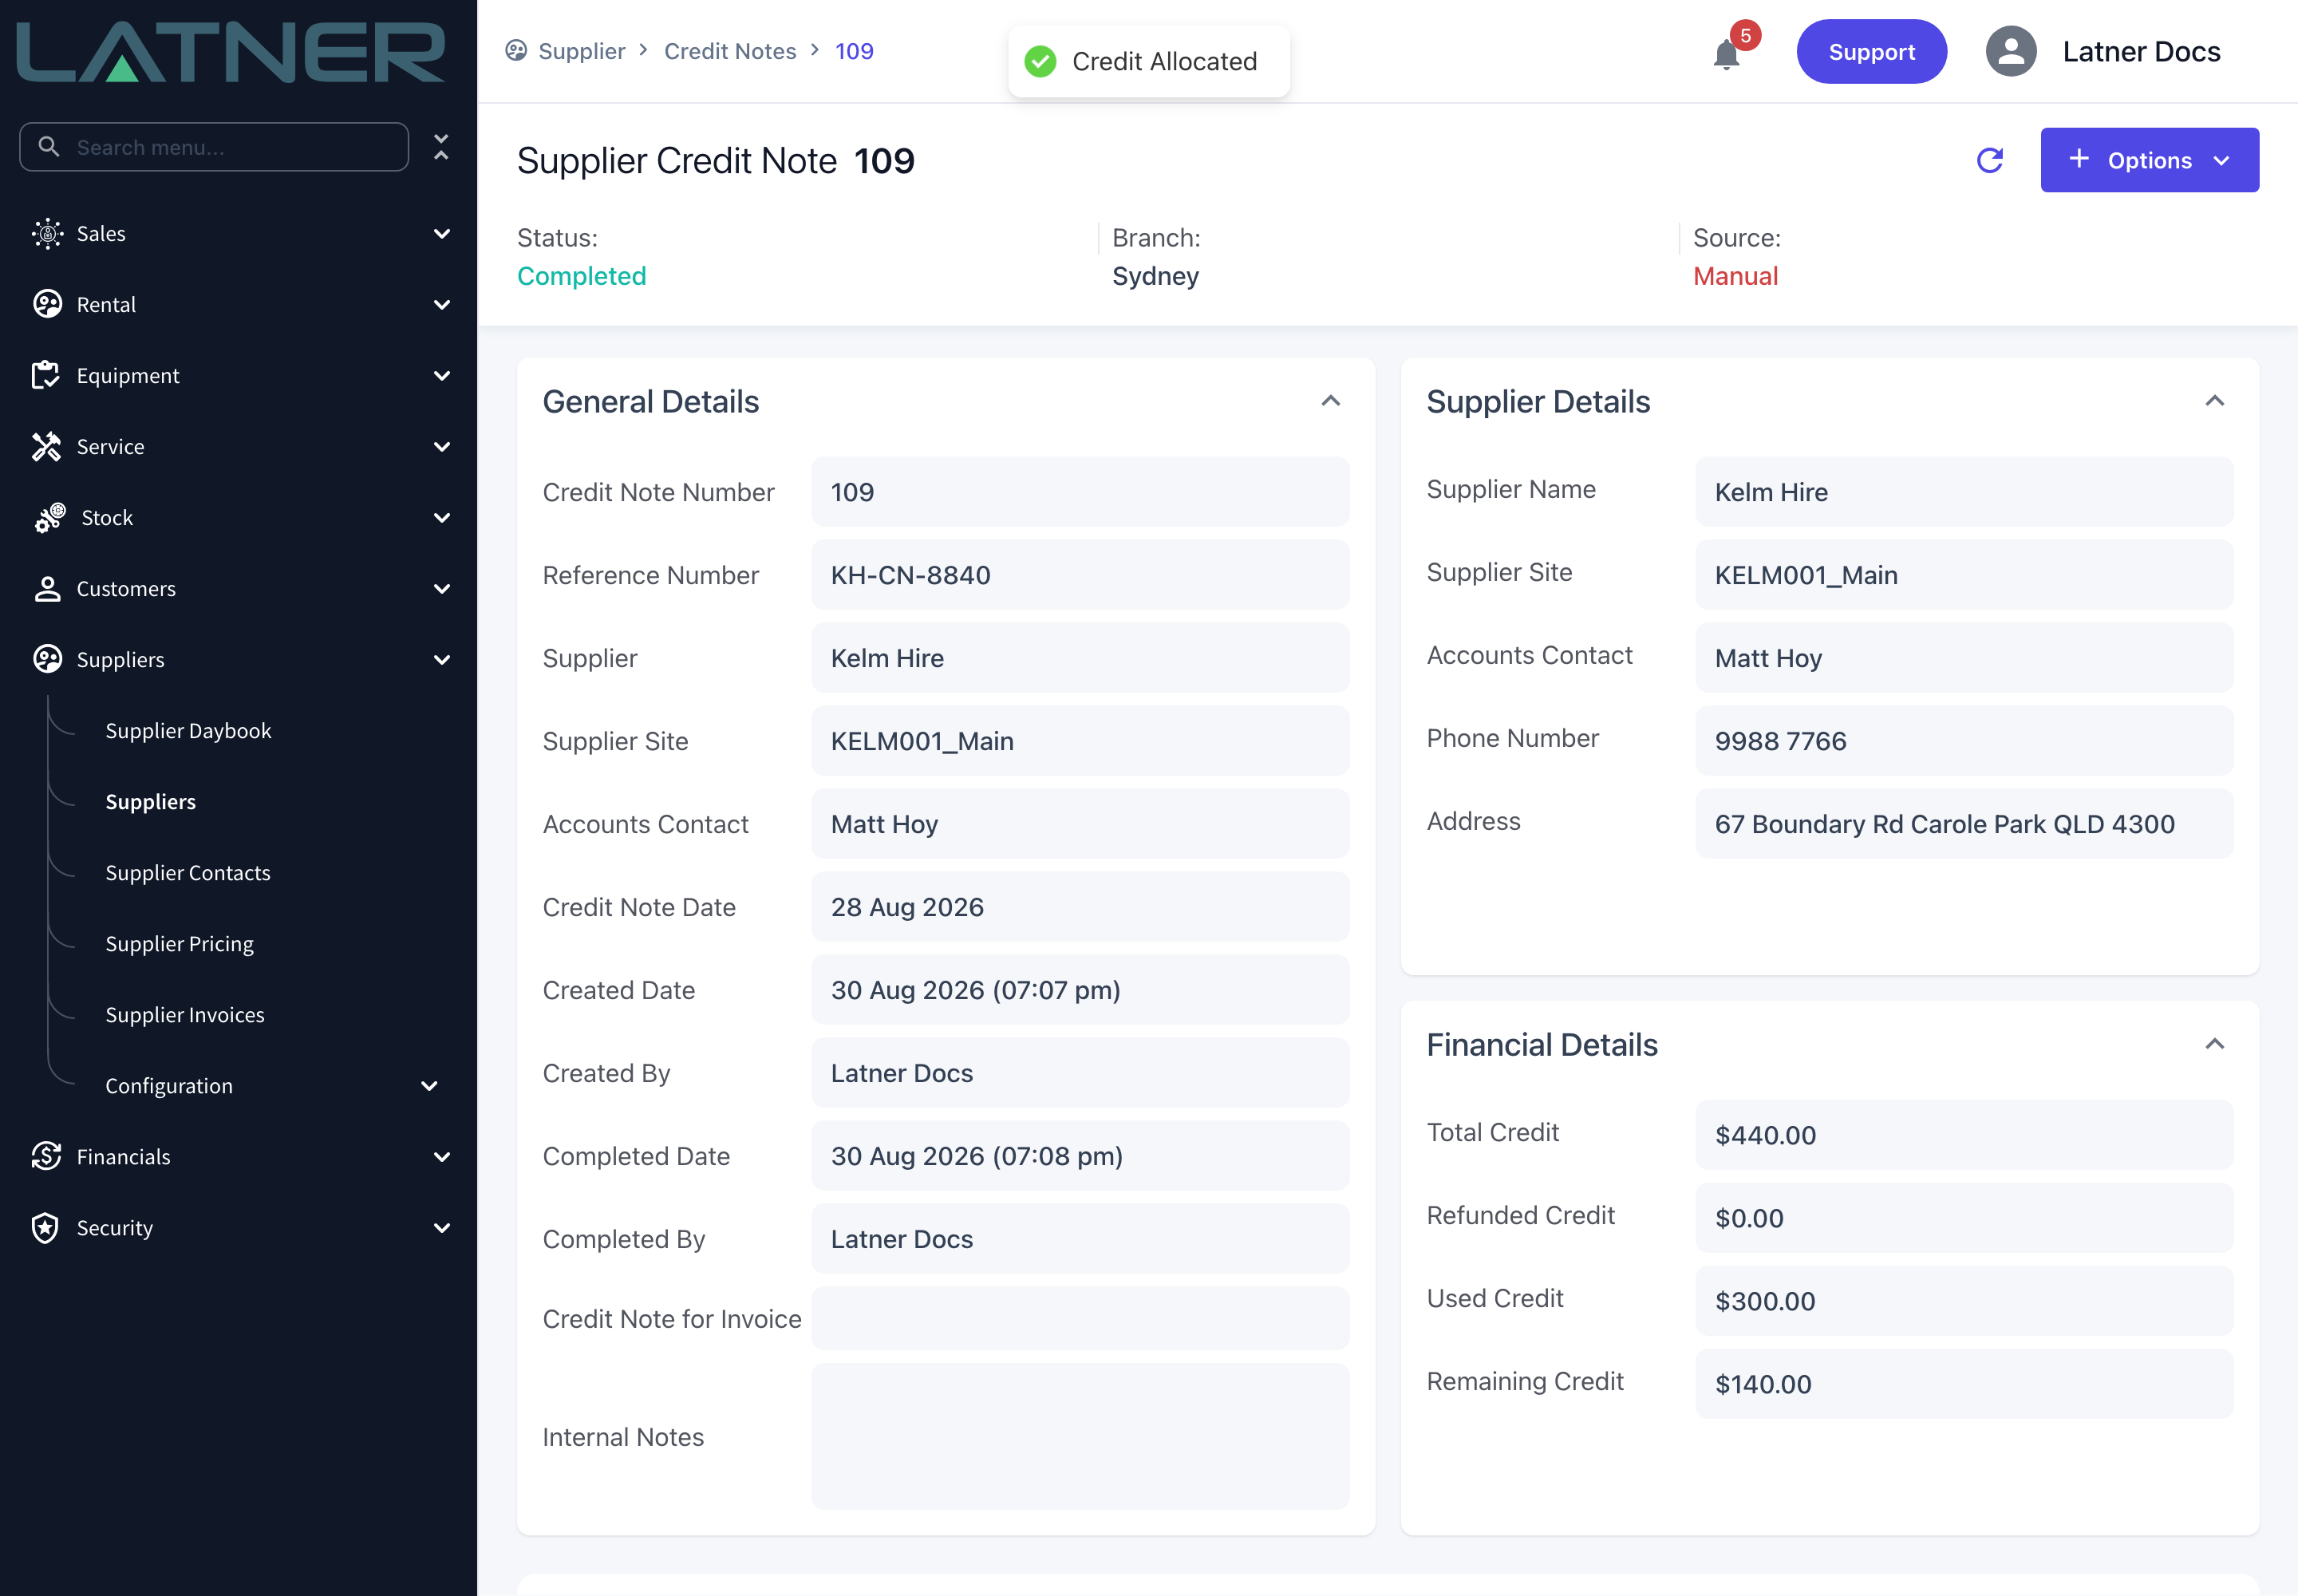
Click Save. Latner confirms with Credit Allocated and the credit note's Financial Details update immediately. There is no draft or approval stage - the allocation is created as Completed and takes effect straight away.
After Allocating
-
The allocation appears on the credit note's Credit Allocations tab, with its allocation number, status, the invoice it was applied to, the amount, and who created and completed it.
-
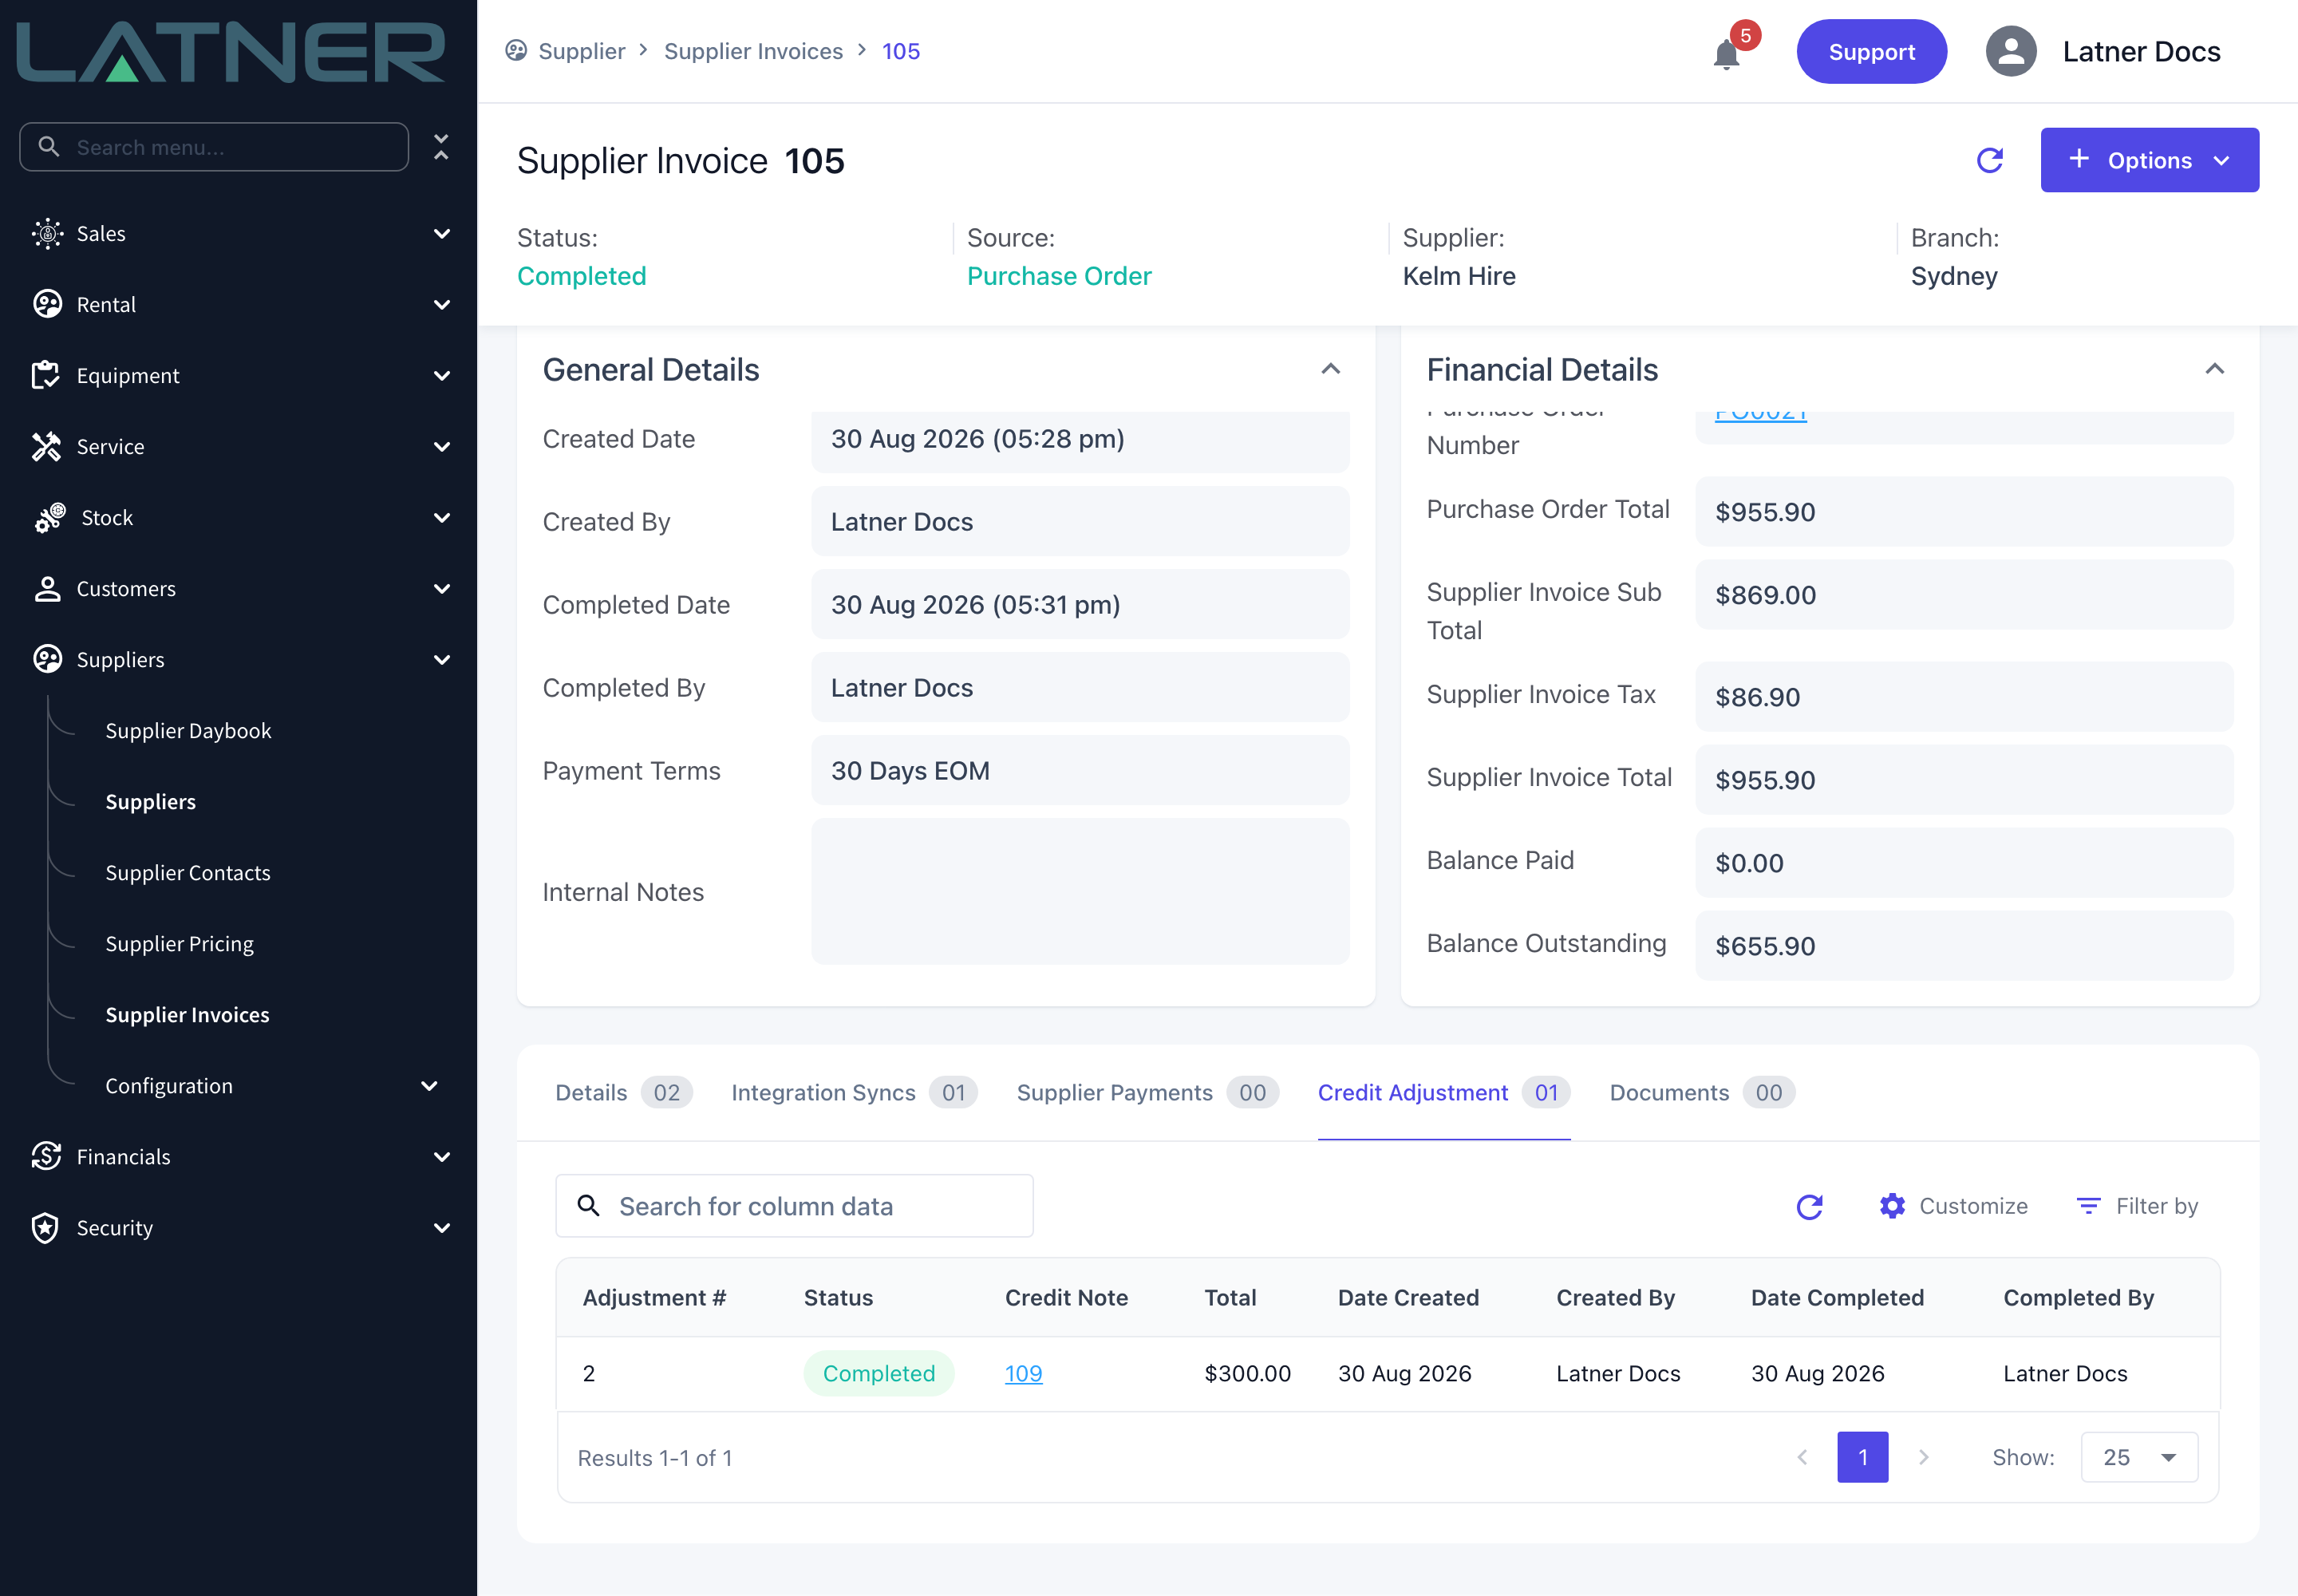
The same record appears on the invoice's Credit Adjustment tab, linked back to the credit note.
-
The invoice's Balance Outstanding drops by the allocated amount. The credit note's Used Credit rises and its Remaining Credit falls by the same amount.
-
If the allocation uses up the last of the credit, the credit note moves from Completed to Paid. If it clears the invoice's balance, the invoice moves to Paid as well.
-
The allocation is pushed to any active accounting integration as soon as it is saved. The result is recorded on the credit note's Integration Syncs tab, and Options › Sync Allocations re-sends every completed allocation on the credit note if a sync needs another go.
A credit allocation cannot be edited once it is saved - the amount and the invoice are fixed. If you allocated the wrong amount, or picked the wrong invoice, delete the allocation from the credit note's Credit Allocations tab and create a new one. Deleting puts the credit back on the credit note, restores the invoice's outstanding balance, and moves either document back from Paid to Completed if it is no longer fully settled.
FAQs
Watch the Demo
Prefer to watch it? Step through the same flow here.