
A supplier credit note records money a supplier owes back to you on goods or charges you have already been invoiced for, so a damaged pump, a double-charged freight line or a wrong price on a purchase order does not sit in your payables as a cost you never agreed to.
Overview
Suppliers get it wrong sometimes. In Latner the credit for a purchase order is always raised against the supplier invoice that billed it, so you start on the order, follow it to its invoice, and credit from there. A credit note adjusts the cost - it does not reduce the order's Qty Invoiced or free the line. Cancelling the supplier invoice does.
-
Create Credit Note from Invoice copies every line off the invoice, keeping the quantity, unit cost and tax type, so a full credit needs no typing.
-
You can change or delete those lines while the credit note is still Open, which is how you raise a partial credit.
-
Completing the credit note makes the credit available and pushes it to your active accounting integrations.
-
Allocate Credit then applies it to any completed invoice for the same supplier, which is what actually reduces what you owe.
-
The purchase order itself is not touched. Its status stays Invoiced and its Qty Invoiced figures are not reduced.
Before You Begin
You need the right permissions and an invoice that is ready to be credited.
|
Requirement |
Where to Find It |
|---|---|
|
Create Supplier Credit Note permission |
Security › Configuration › Permission Groups › [group] › Suppliers › Option |
|
Create Supplier Credit Note Detail and Edit Supplier Credit Note Detail permissions, if you need to add or change lines |
Security › Configuration › Permission Groups › [group] › Suppliers › Option |
|
Create Supplier Credit Note Allocation permission, to apply the credit to an invoice |
Security › Configuration › Permission Groups › [group] › Suppliers › Option |
|
A supplier invoice raised from the purchase order, in status Completed or Paid |
The purchase order's Supplier Invoices tab, or Suppliers › Supplier Invoices |
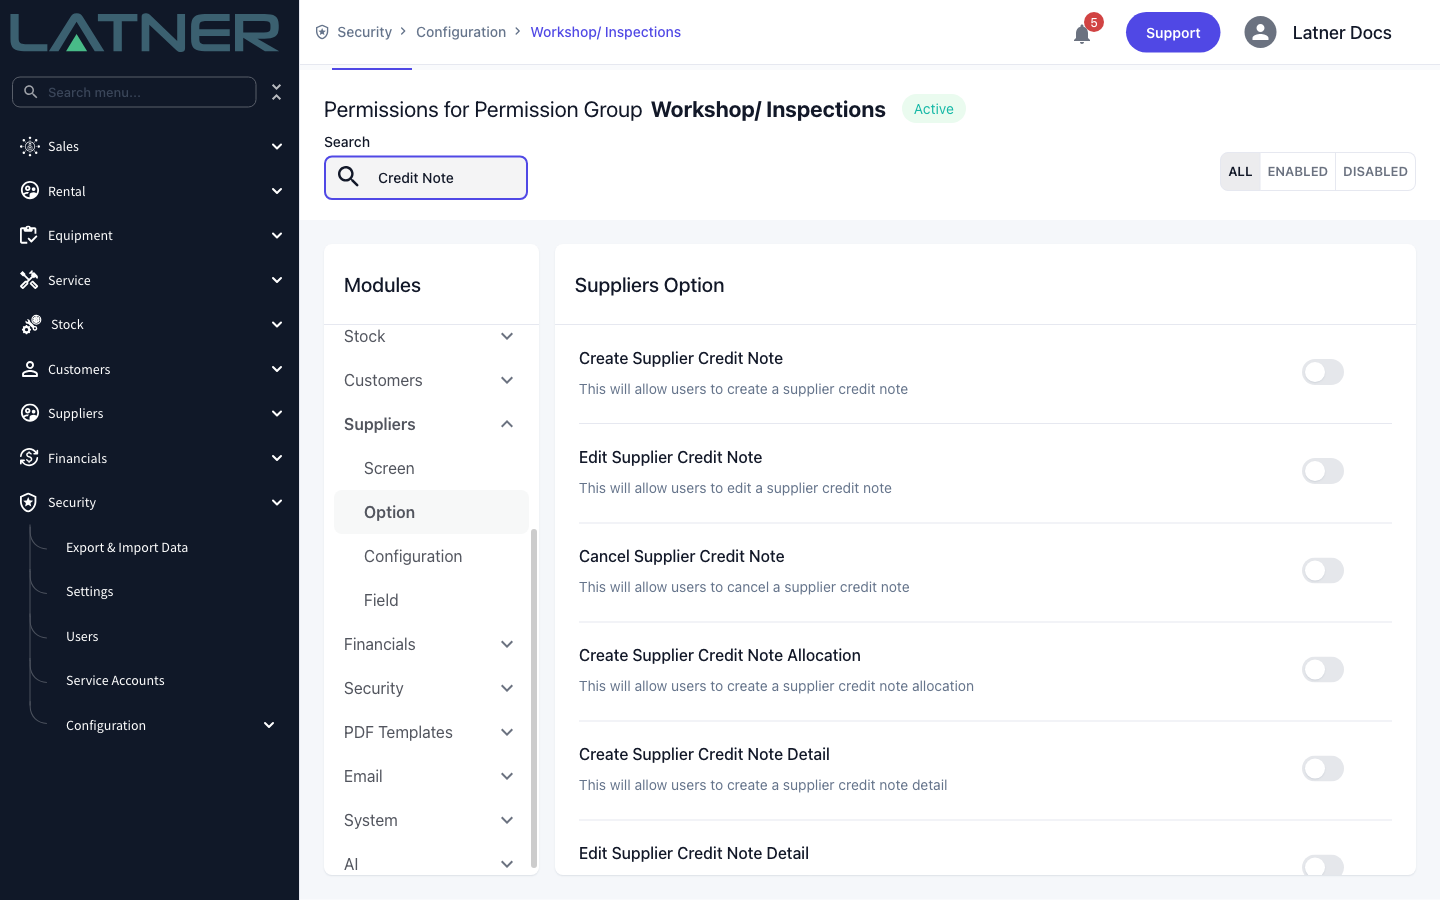
These permissions are checked against the branch on the credit note, so someone who can credit invoices in one branch will not necessarily be able to in another.
Creating the Credit Note
Step 1 - Open the purchase order and find its invoice
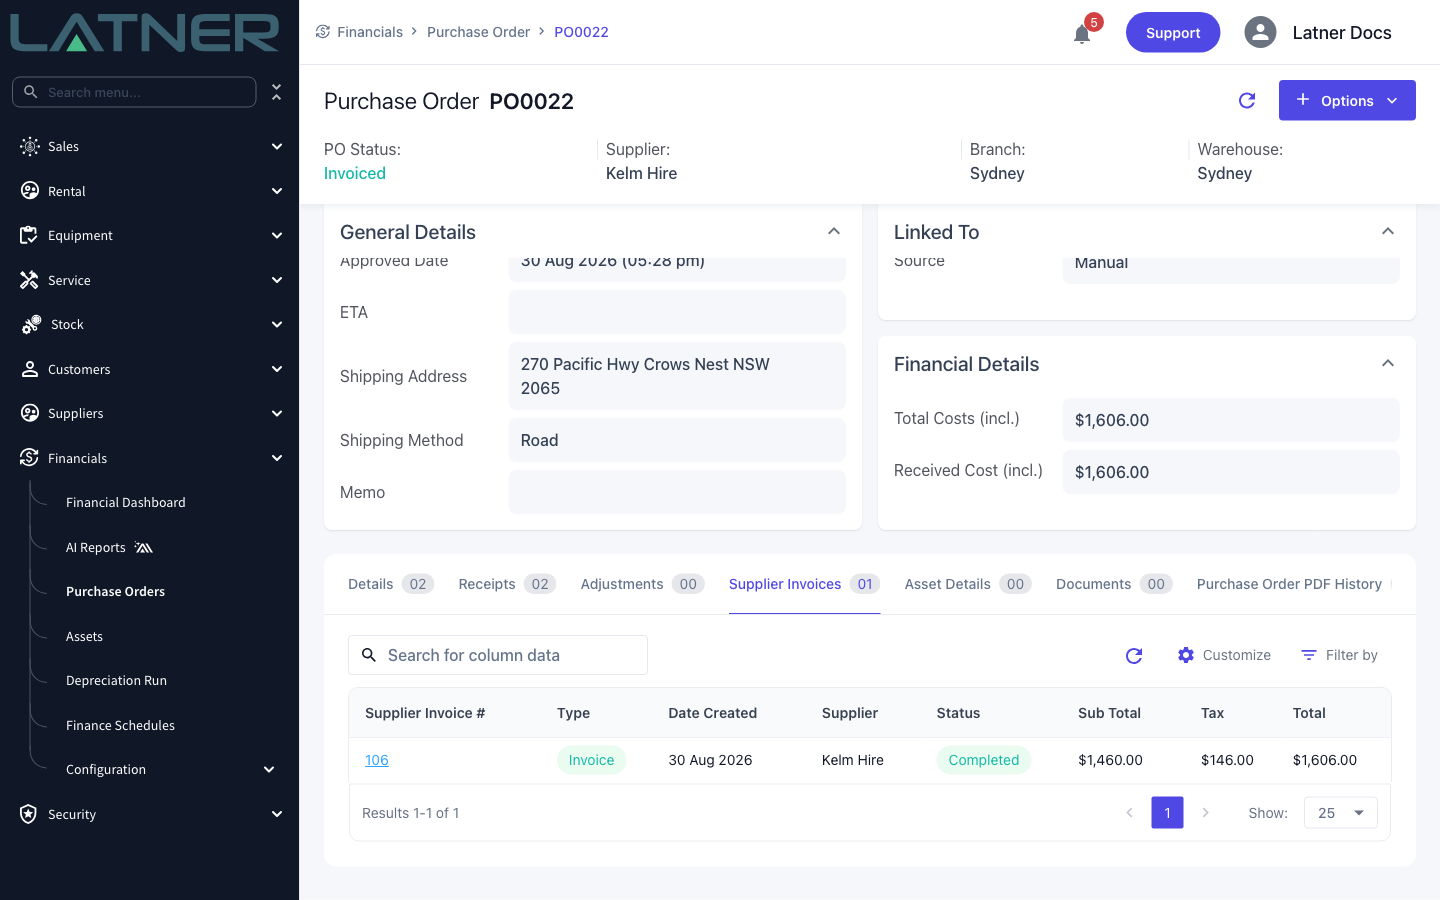
Go to Financials › Purchase Orders and open the order you need to credit, then open the Supplier Invoices tab. Every invoice raised against the order is listed there with its status and total. Note the invoice number you want to credit.
Step 2 - Open the invoice and choose Create Credit Note from Invoice
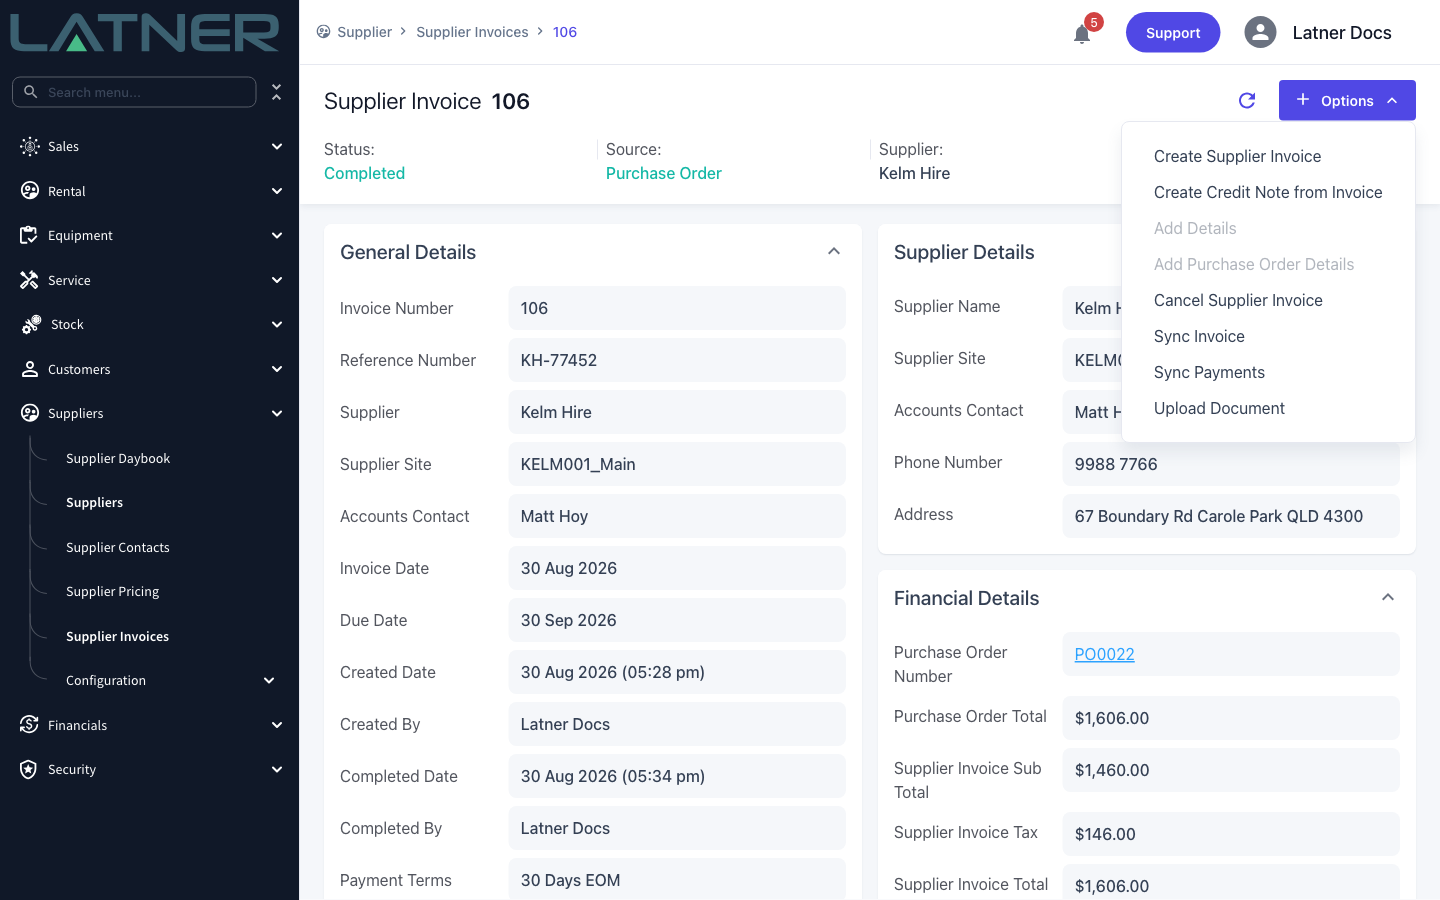
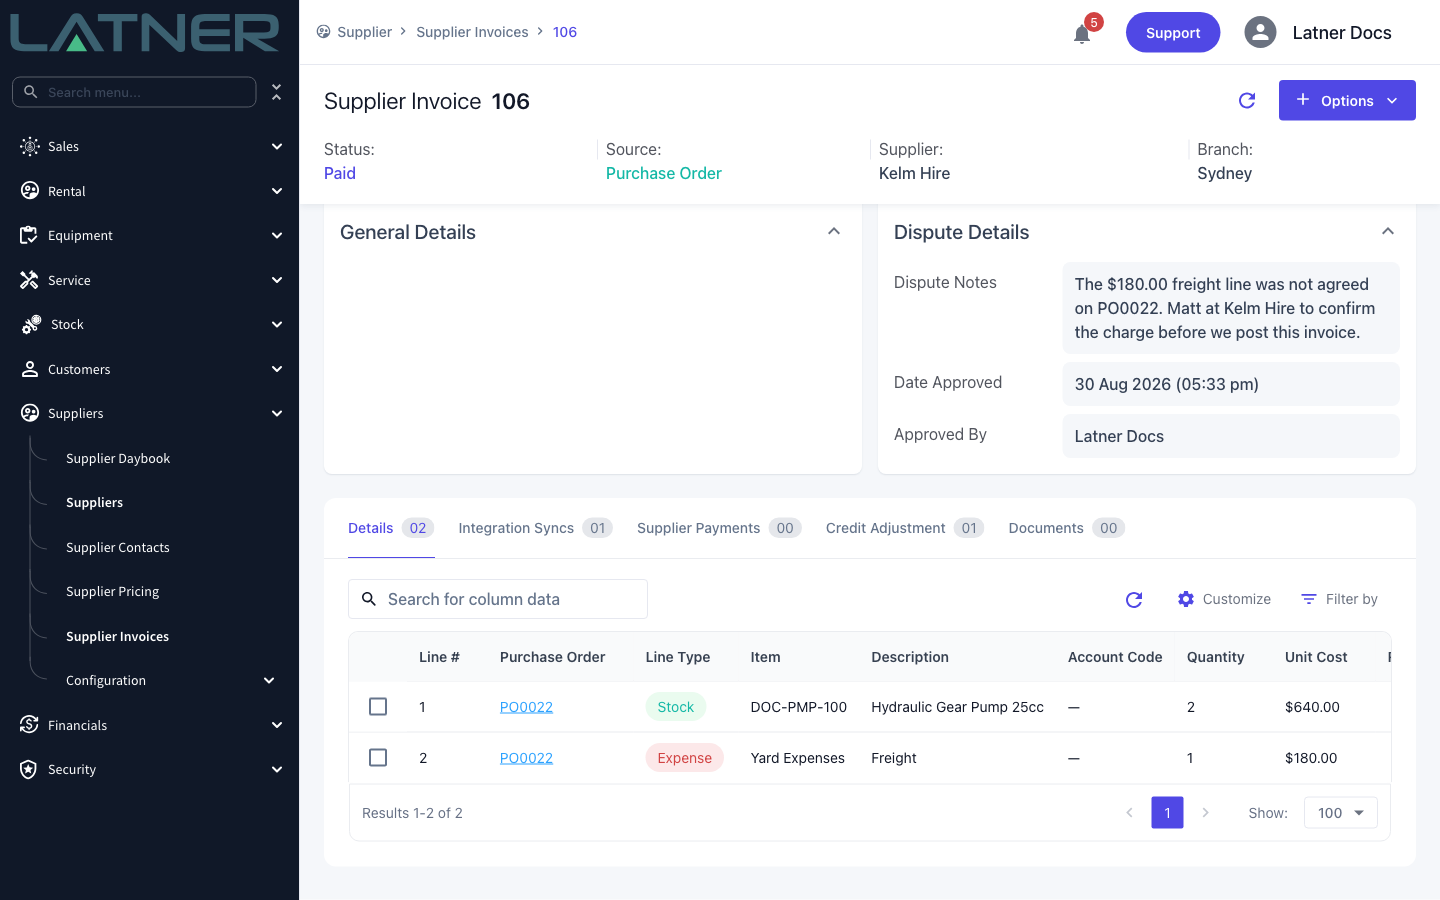
Click through to the invoice, then choose Options › Create Credit Note from Invoice. The option stays greyed out until the invoice is Completed or Paid, so an invoice that is still Open, Approved or Disputed has to be dealt with first.
Step 3 - Check the credit note details
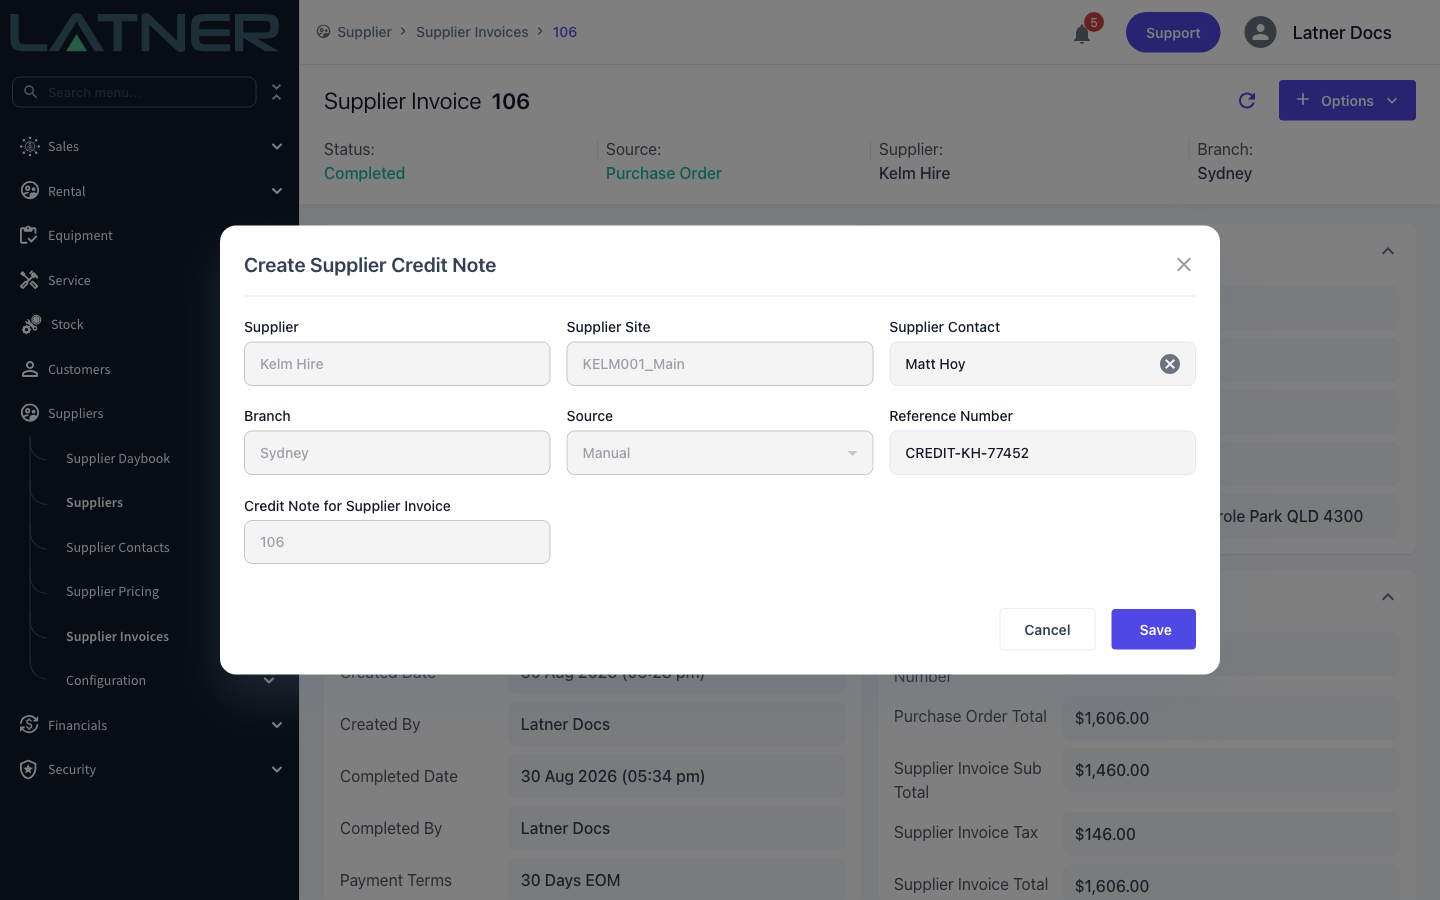
Latner fills the dialog in from the invoice. Check the two fields you can change, then click Save.
-
Supplier, Supplier Site, Branch and Source - carried across from the invoice and locked.
-
Supplier Contact - defaults to the accounts contact on the invoice. Change it if someone else at the supplier issued the credit.
-
Reference Number - prefilled as CREDIT- followed by the invoice's reference. Replace it with the supplier's own credit note number if you have it.
-
Credit Note for Supplier Invoice - the invoice being credited, locked.
Step 4 - Review the credited lines
Saving opens the new credit note on the Details tab with a copy of every line from the invoice, at the same quantity, unit cost and tax type. The credit note starts in status Open, and Total Credit matches the invoice total.
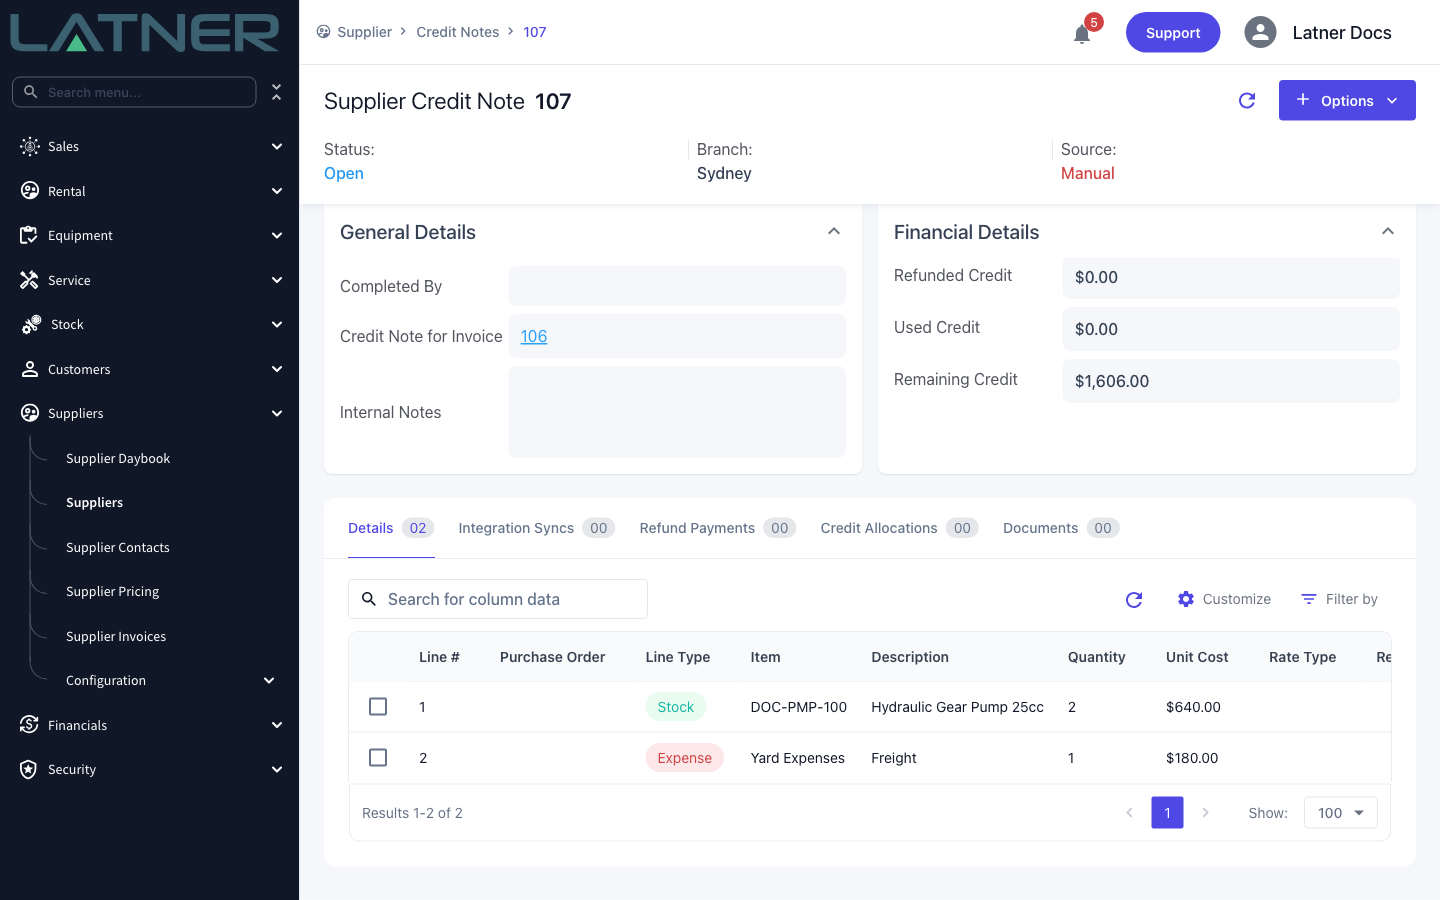
Step 5 - Adjust the lines for a partial credit
If the supplier is only crediting part of the invoice, change the lines before you complete the credit note. Double-click a line to open it and edit the Quantity or Unit Cost, or delete the lines you are not crediting. You can also use Options › Add Details to add a line the invoice never carried. Lines can only be changed while the credit note is Open.
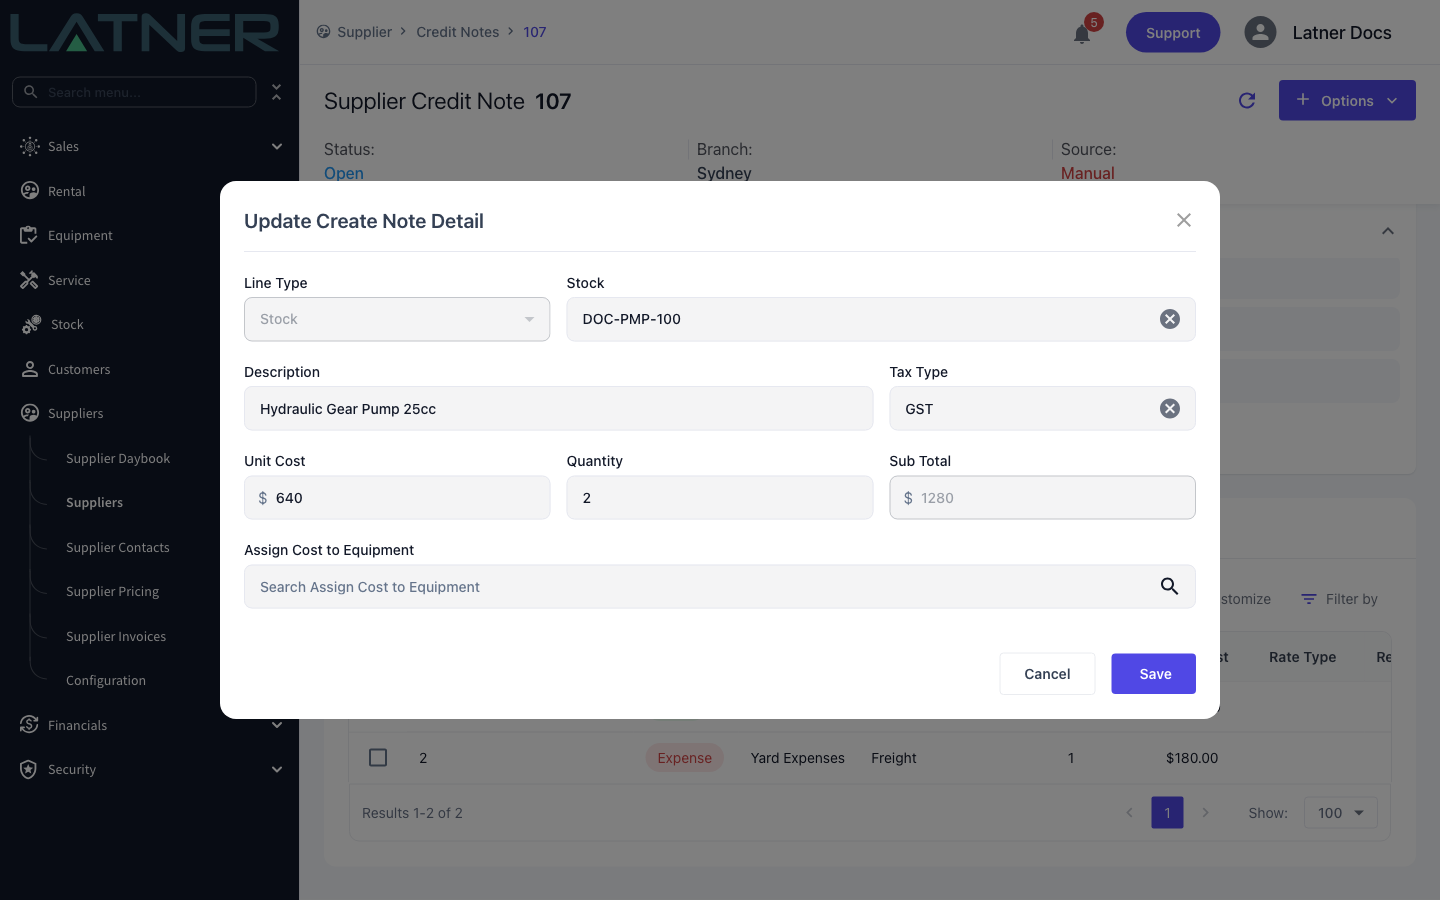
Step 6 - Complete the credit note
Choose Options › Complete Credit Note. The status moves to Completed, the completed date and user are stamped on it, and the credit note is pushed to any active accounting integration. A credit note with no lines cannot be completed.
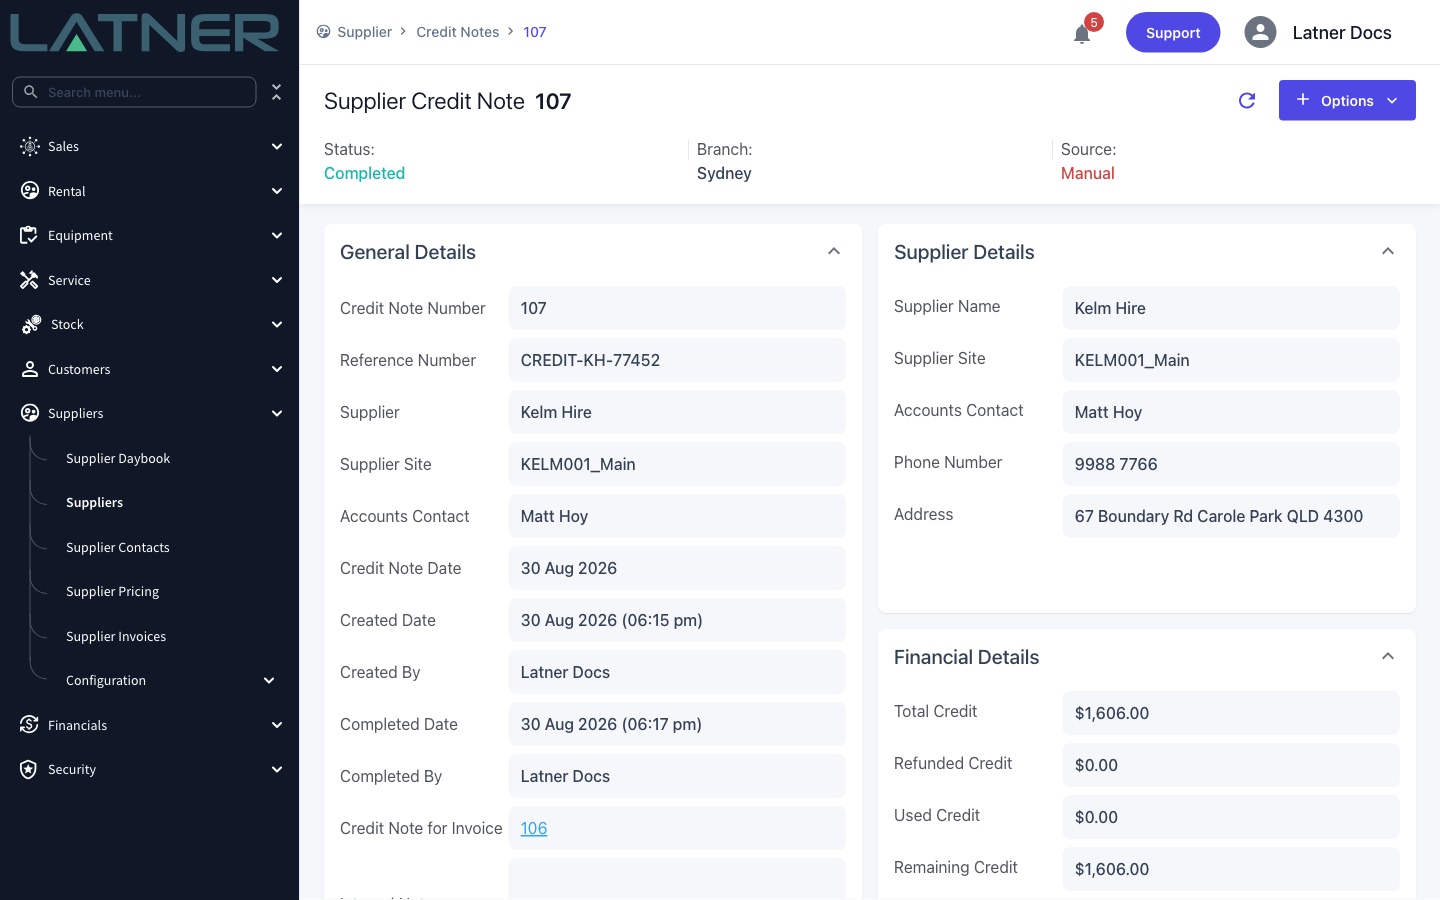
Step 7 - Allocate the credit to an invoice
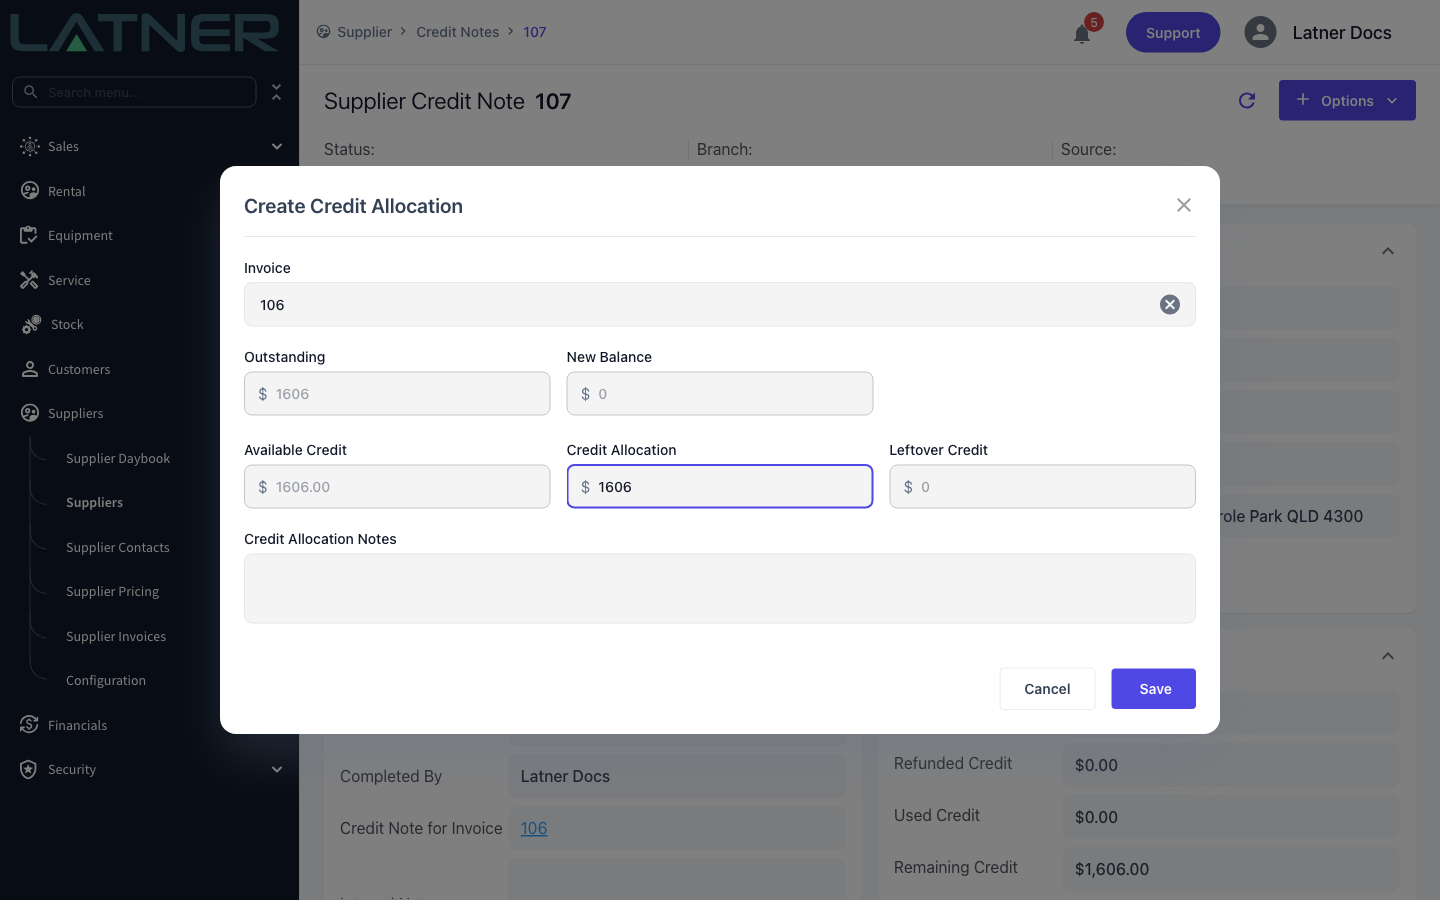
A completed credit note does not reduce anything on its own. Choose Options › Allocate Credit, pick the invoice to apply it to, and enter the amount.
-
Invoice - only Completed invoices for the same supplier are offered. The picker shows each invoice's date, purchase order and outstanding balance.
-
Outstanding and Available Credit - the invoice balance and the credit still unused, both read only.
-
Credit Allocation - the amount to apply. It cannot be more than either balance.
-
New Balance and Leftover Credit - what the invoice and the credit note will be left with, updating as you type.
-
Credit Allocation Notes - optional.
After Creation
-
The credit note gets its own number and appears in Suppliers › Supplier Invoices with a Type of Credit Note.
-
Each allocation is listed on the credit note's Credit Allocations tab and on the invoice's Credit Adjustment tab.
-
When the whole credit has been allocated, the credit note moves to Paid and Remaining Credit falls to $0.00. If the allocation clears the invoice as well, the invoice moves to Paid.
-
Sync results are on the Integration Syncs tab, and Options › Sync Credit Note and Sync Allocations will push them again if an integration was down.
A credit note never changes the purchase order. The order stays Invoiced, its Qty Invoiced is not reduced, and cancelling the credit note later will not put those quantities back either. If a line has to be freed to change it, delete it or invoice it again, cancel the supplier invoice instead of crediting it - a Paid invoice cannot be cancelled. See Which Correction to Use in How to Reopen a Purchase Order.
FAQs
Watch the Demo
Prefer to watch it? Step through the same flow here.