
A Checklist Template is the reusable list of checks Latner copies onto a record whenever a machine needs to be inspected, serviced, started for the day or signed off as safe.
Overview
Nobody wants to retype the same twenty checks every time a machine comes back off hire. You build the list once as a template, and Latner takes a copy of it each time it needs one.
-
A template is a Checklist Type, a Checklist Name and an ordered list of tasks.
-
The Checklist Type decides where the template can be used - a Run Up template only appears in Run Up Checklist fields, a Take 5 template only in the Take 5 settings.
-
Every task belongs to a group, so long checklists stay readable on a phone, and any task can be made to require a photo.
-
The Default Response sets the answers a person can give on each task. Left blank, the template uses the built-in Pass / Fail / N/A answers.
-
Templates are versioned. Changing the tasks starts a new version, and checklists that already exist keep the tasks they were created with.
-
A Checklist Name only has to be unique within its Checklist Type, so you can have a Run Up and a Rental Return checklist that share a name.
Before You Begin
Checklist Templates live in the Equipment configuration area, so you need the configuration permission for it.
|
Requirement |
Where to Find It |
|---|---|
|
Checklist Templates permission |
Security › Configuration › Permission Groups, then the group, then Equipment › Configuration |
|
A Checklist Response (optional) |
Equipment › Configuration › Checklist Responses - only needed if Pass / Fail / N/A does not suit |
|
Somewhere to use the template |
An equipment class, equipment model, serialised stock item, service schedule or Take 5 setting that will point at it |
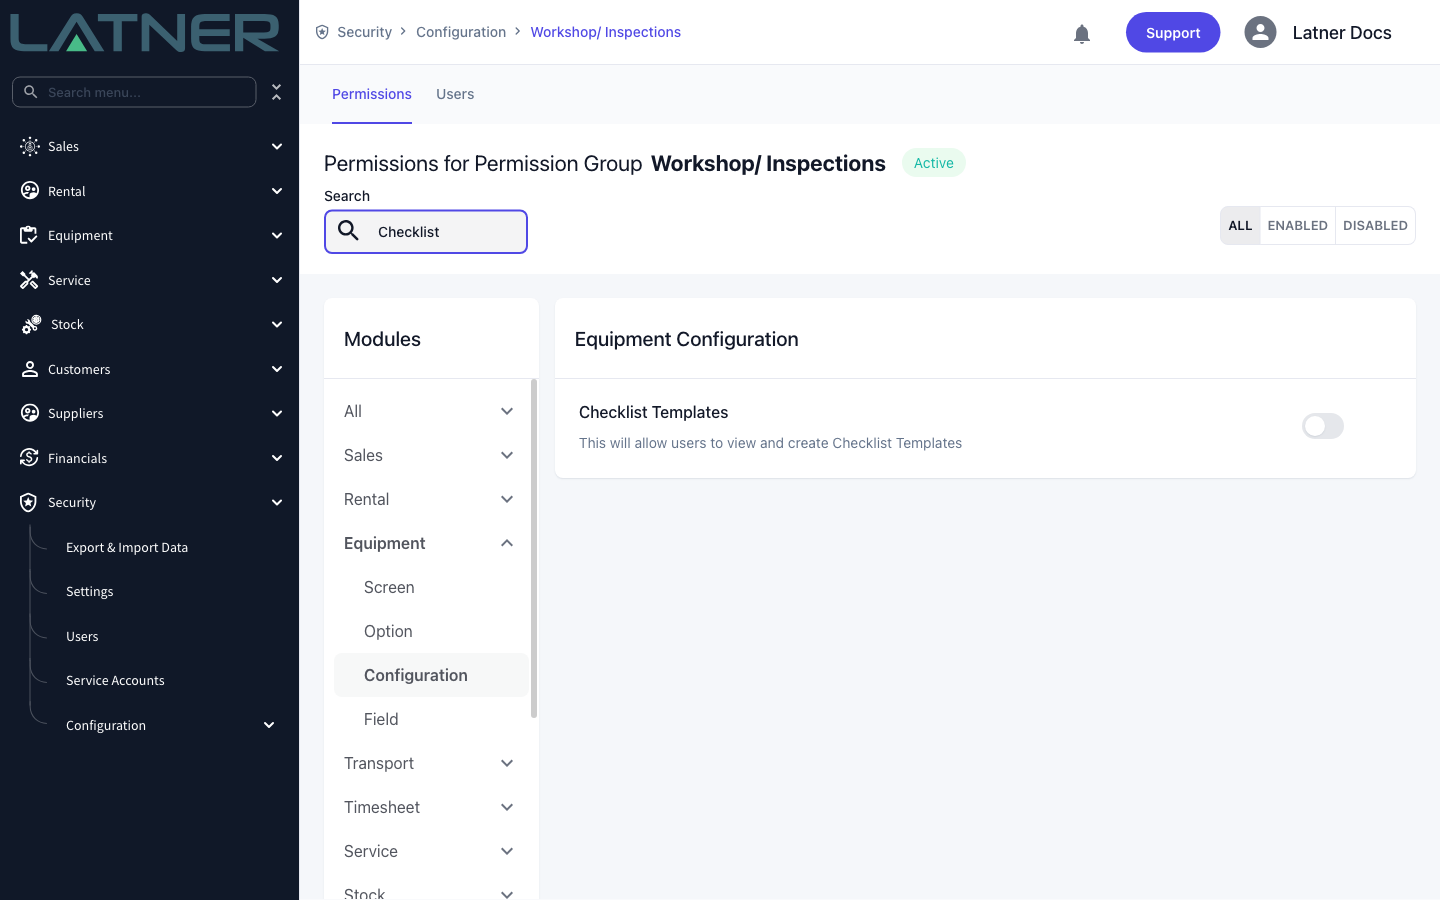
Without this permission, Checklist Templates is not listed under Equipment › Configuration at all, so the screen simply is not there rather than showing an error.
Creating the Checklist Template
Step 1 - Open the Checklist Templates screen
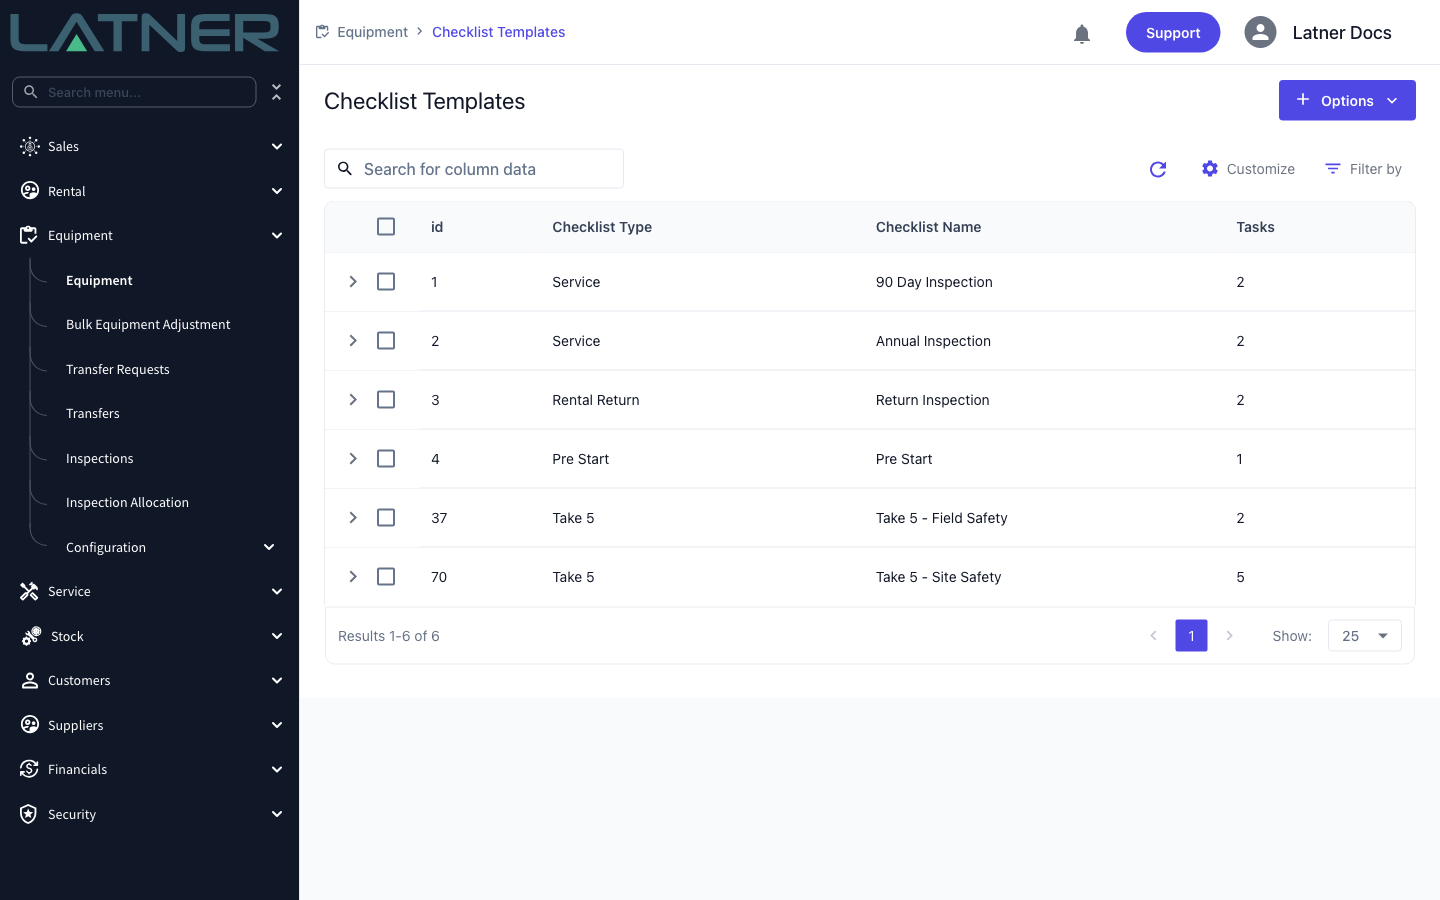
Go to Equipment › Configuration › Checklist Templates. Every template on your system is listed here, whatever it is used for.
Step 2 - Start a new checklist
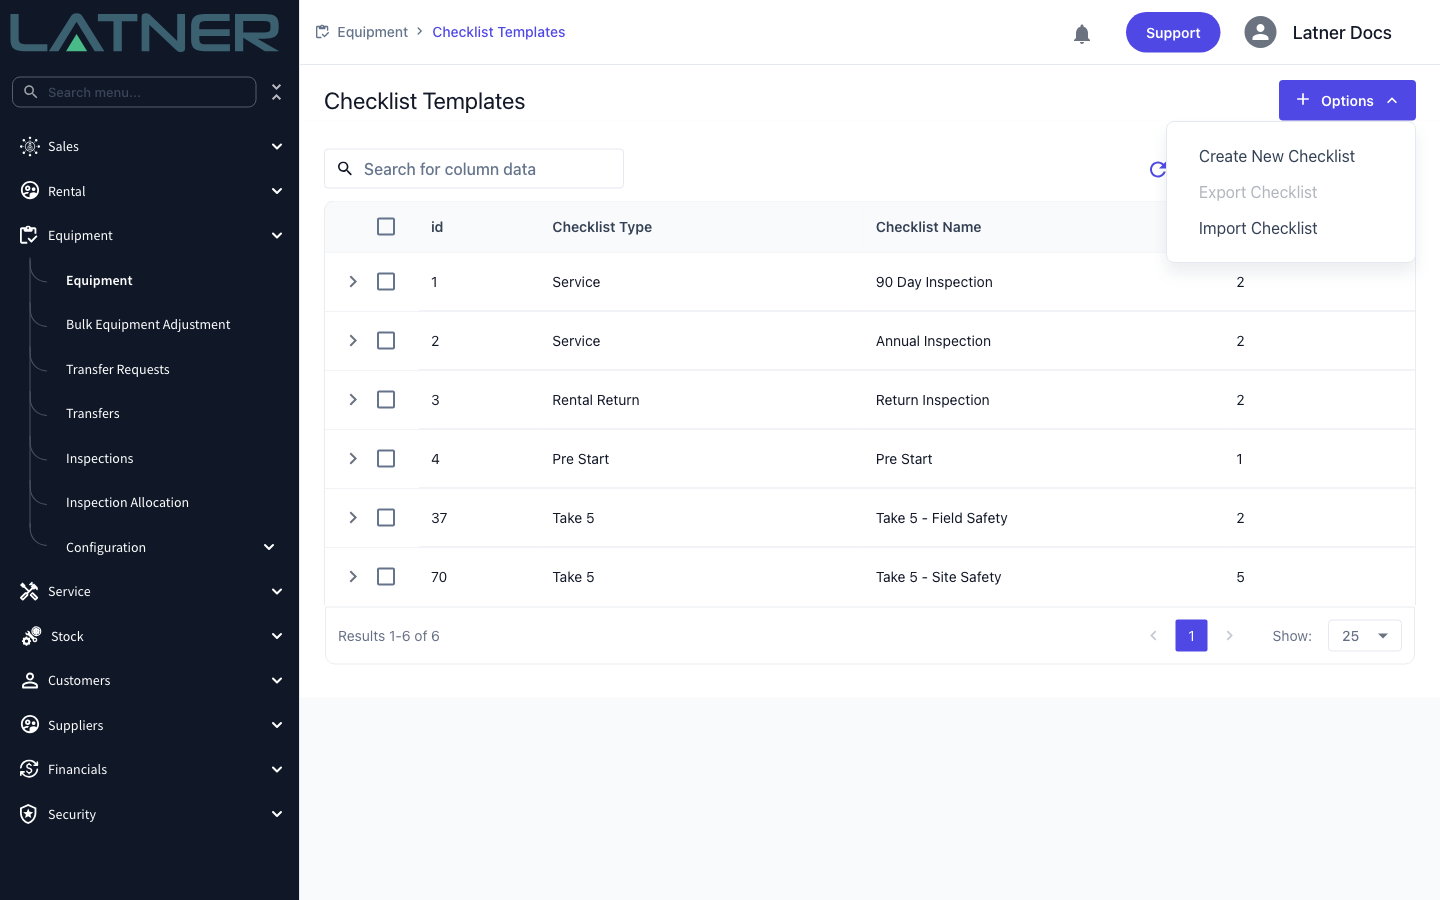
Select Options › Create New Checklist. The Add Checklist Details dialog opens with one empty task row ready to fill in.
Step 3 - Choose the Checklist Type
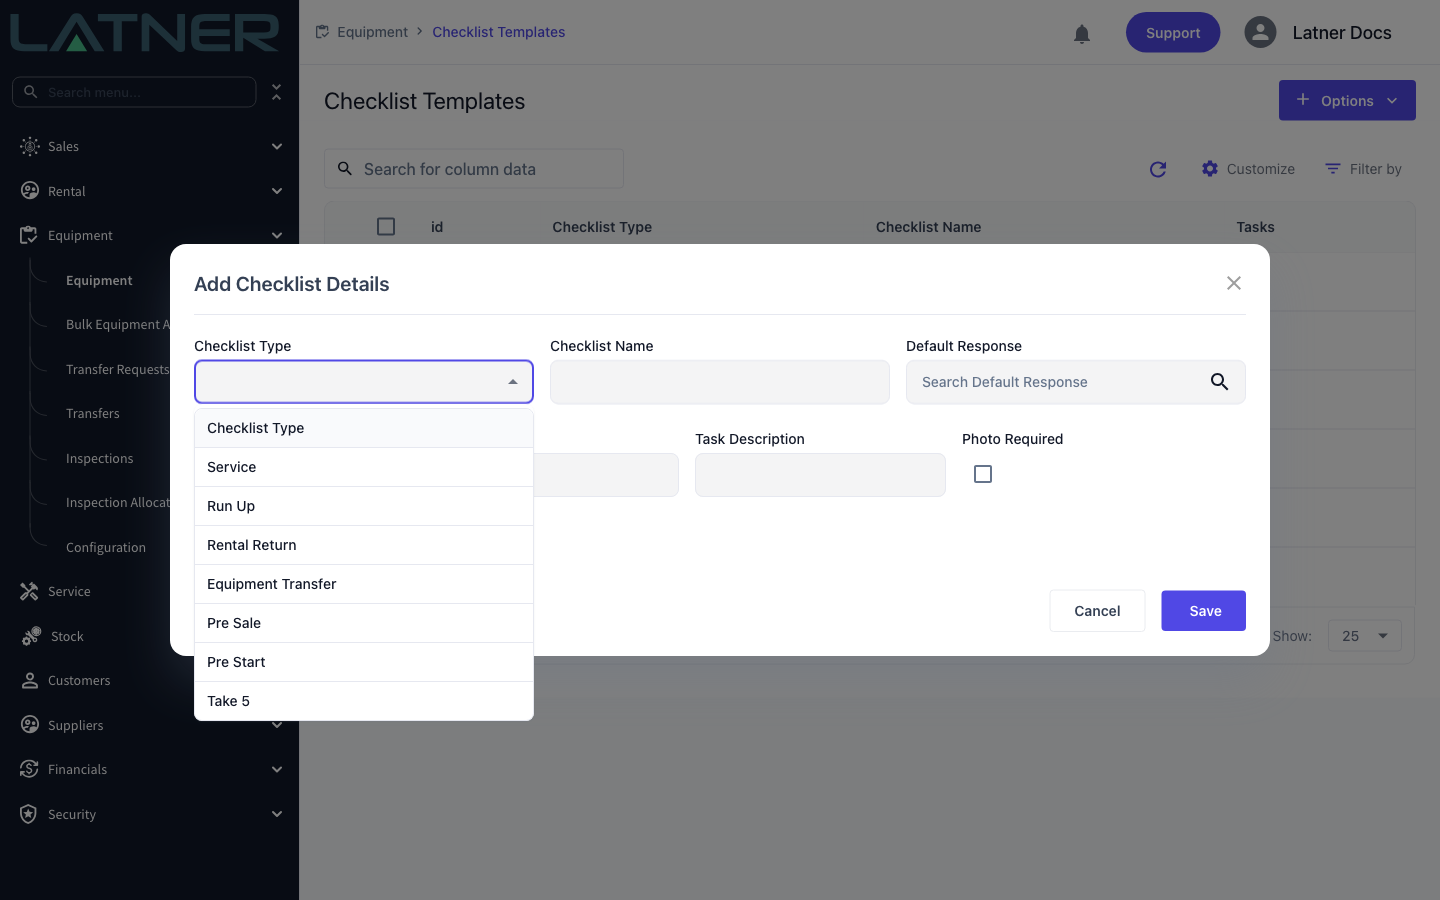
Checklist Type is required and it decides where the finished template can be used:
-
Service - the checklist attached to a service schedule on an equipment class, model or single machine, which then flows onto the work order.
-
Run Up - run up inspections, set as the Run Up Checklist on an equipment class or model.
-
Rental Return - return inspections, set as the Return Checklist on an equipment class or model.
-
Equipment Transfer - transfer inspections, set as the Equipment Transfer Checklist on an equipment class or model.
-
Pre Sale - pre sale inspections, set as the Pre Sale Checklist on a serialised stock item.
-
Pre Start - the operator's start-of-day check, set as the Pre Start Checklist on an equipment class or model.
-
Take 5 - the on-site safety check for work orders and internal transport dockets, chosen in Security › Settings.
Step 4 - Name the checklist and pick a Default Response
Fill in the two remaining header fields.
-
Checklist Name - required. It has to be unique within the Checklist Type, otherwise saving fails with "Checklist Name must be unique for each Checklist Type combination". Name it for what it checks rather than for one machine, since the same template can serve a whole class.
-
Default Response - optional. This is the set of answers offered on every task in the checklist. Leave it blank and the template uses the built-in Pass / Fail / N/A answers.
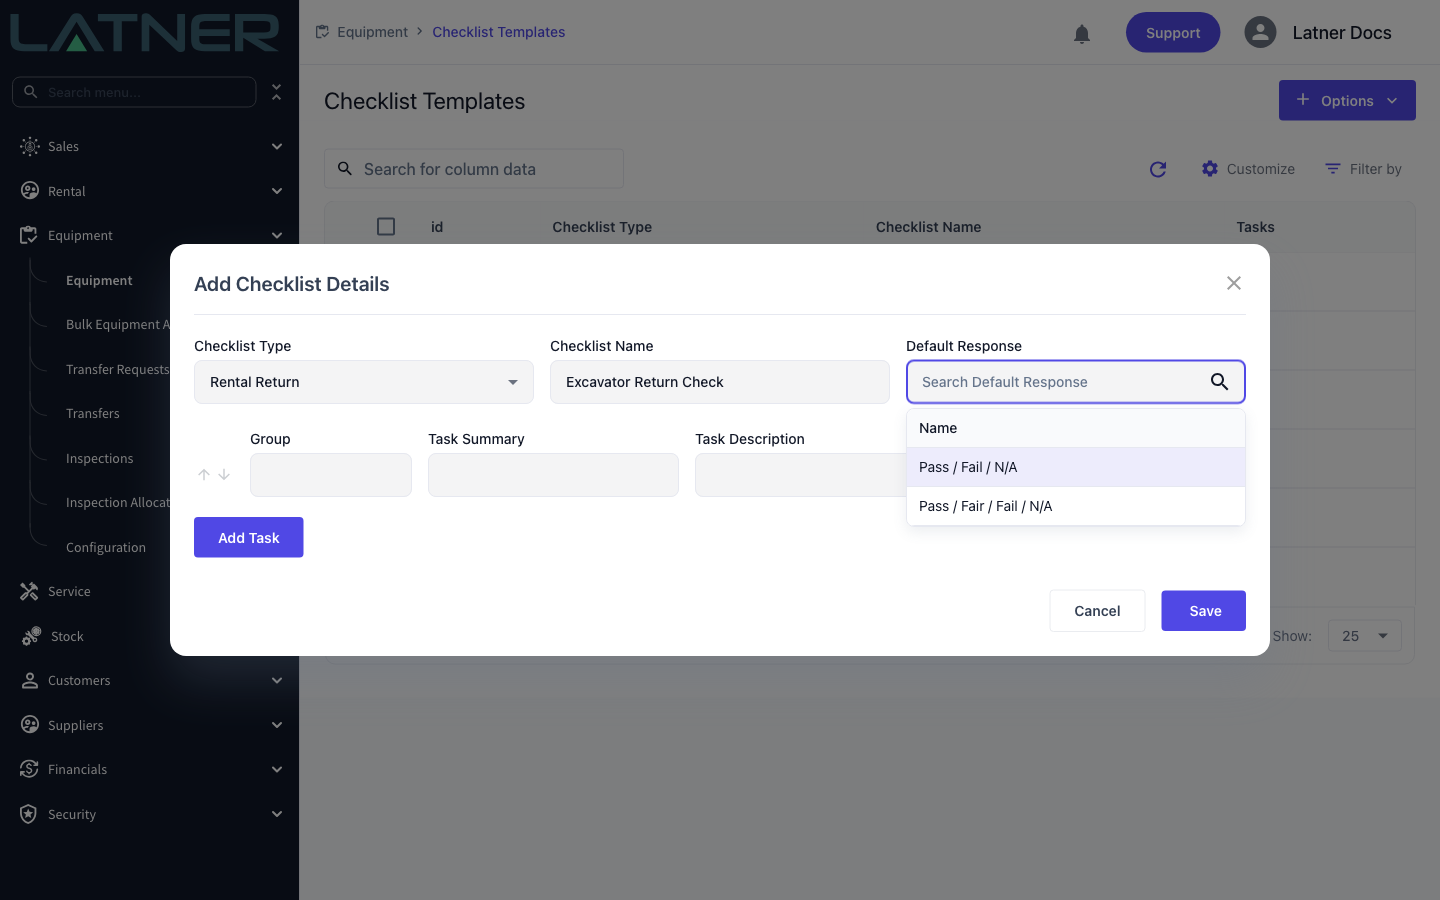
Step 5 - Add the tasks
Each row in the lower half of the dialog is one task. Use Add Task for another row, the up and down arrows to reorder a row, and the bin to remove one.
-
Group - required. Tasks are shown grouped under this heading, so use a small set of repeated values such as Exterior, Fluids and Cabin.
-
Task Summary - required. The short line the person doing the check reads first.
-
Task Description - required. The detail that tells them what a pass actually looks like.
-
Photo Required - optional. Tick it and the task cannot be answered until a photo has been attached to it.
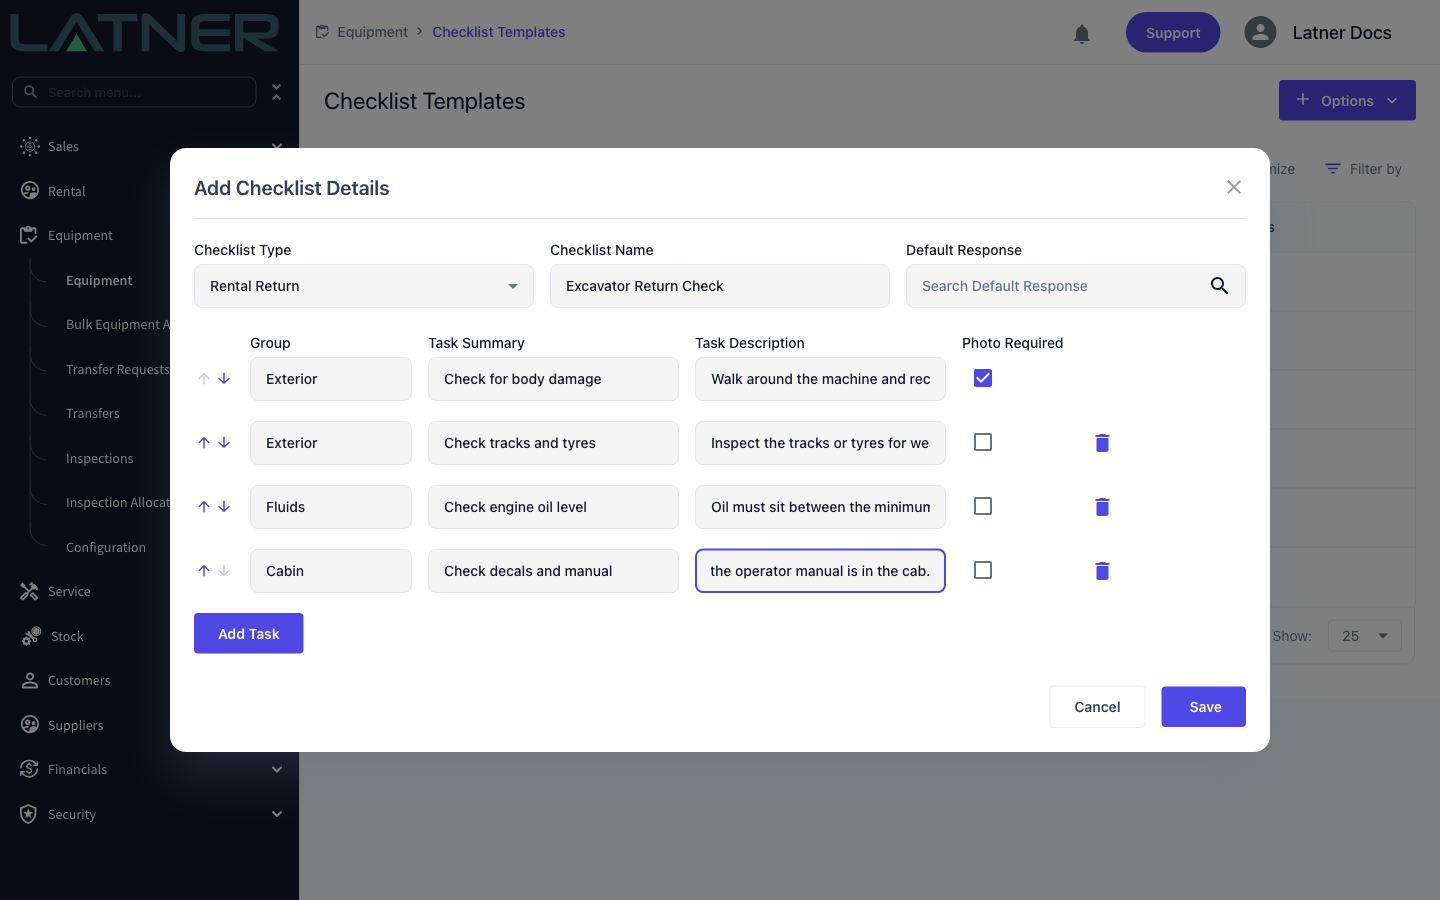
The order you leave the rows in is the order the tasks appear in every checklist created from this template, so it is worth putting them in the order someone would actually walk around the machine.
Step 6 - Save
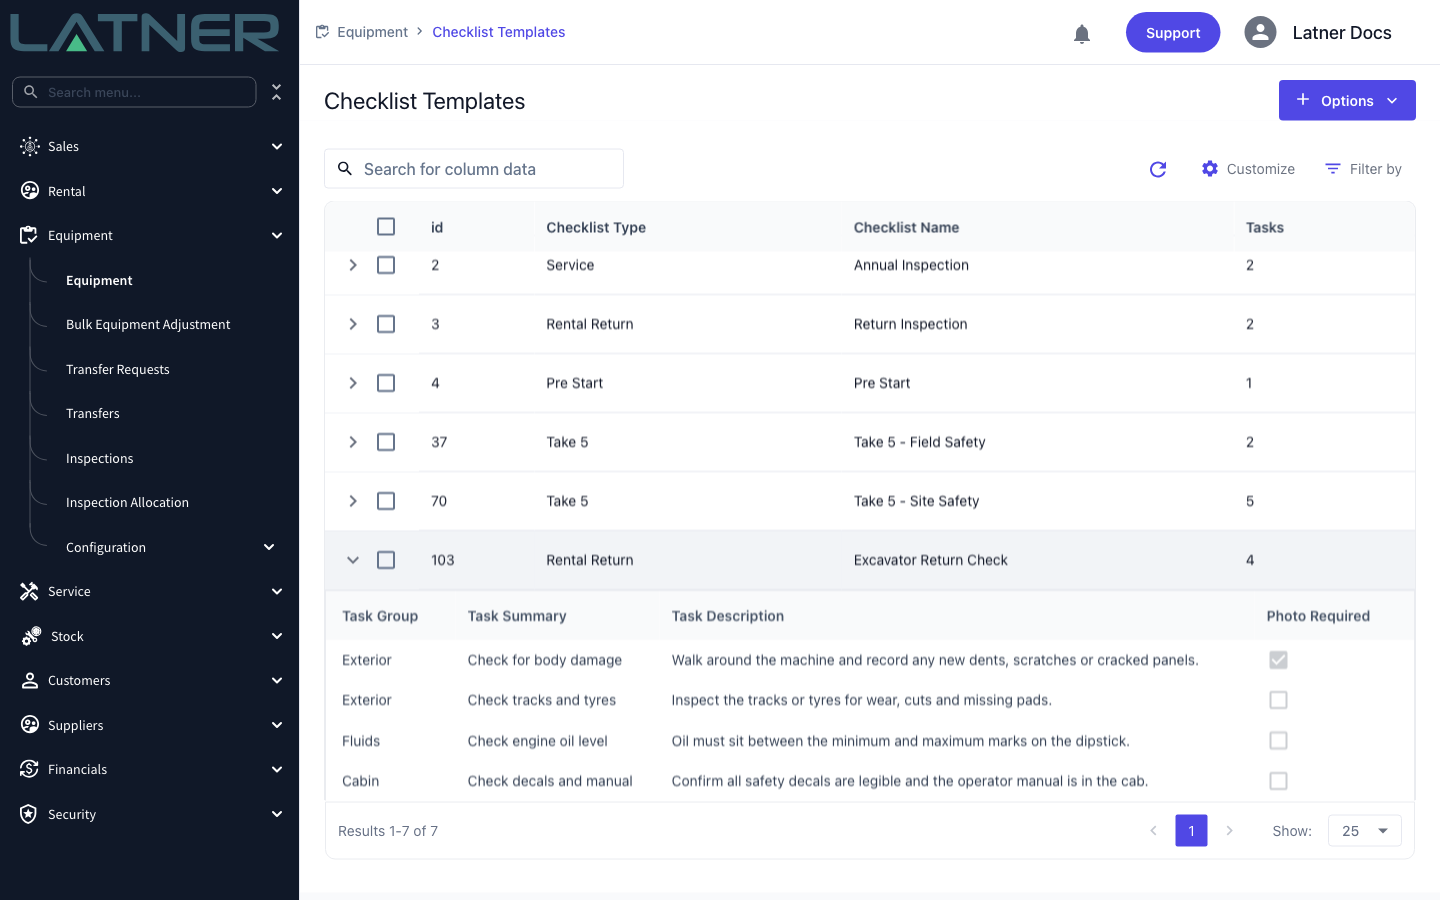
Select Save. The template appears in the list, and the chevron at the start of its row expands to show the tasks you entered.
After Creation
-
The template is now available to be pointed at from wherever its type is used - the Run Up, Return, Equipment Transfer and Pre Start Checklist fields on an equipment class or model, the Pre Sale Checklist on a serialised stock item, a service schedule, or the Work Order Take 5 Checklist and Transport Docket Take 5 Checklist settings.
-
Nothing happens until it is assigned. Creating a template on its own does not add a checklist to any record.
-
Where both an equipment model and its class name a checklist for the same type, the model's checklist is the one used.
-
To change a template, double-click its row, or tick the row and use the edit pencil. Both open the same dialog in edit mode.
-
Changing the tasks creates a new version of the template. Checklists that already exist keep the tasks they were created with, so a checklist completed last month still reads the way it was answered; only checklists created from then on get the new list.
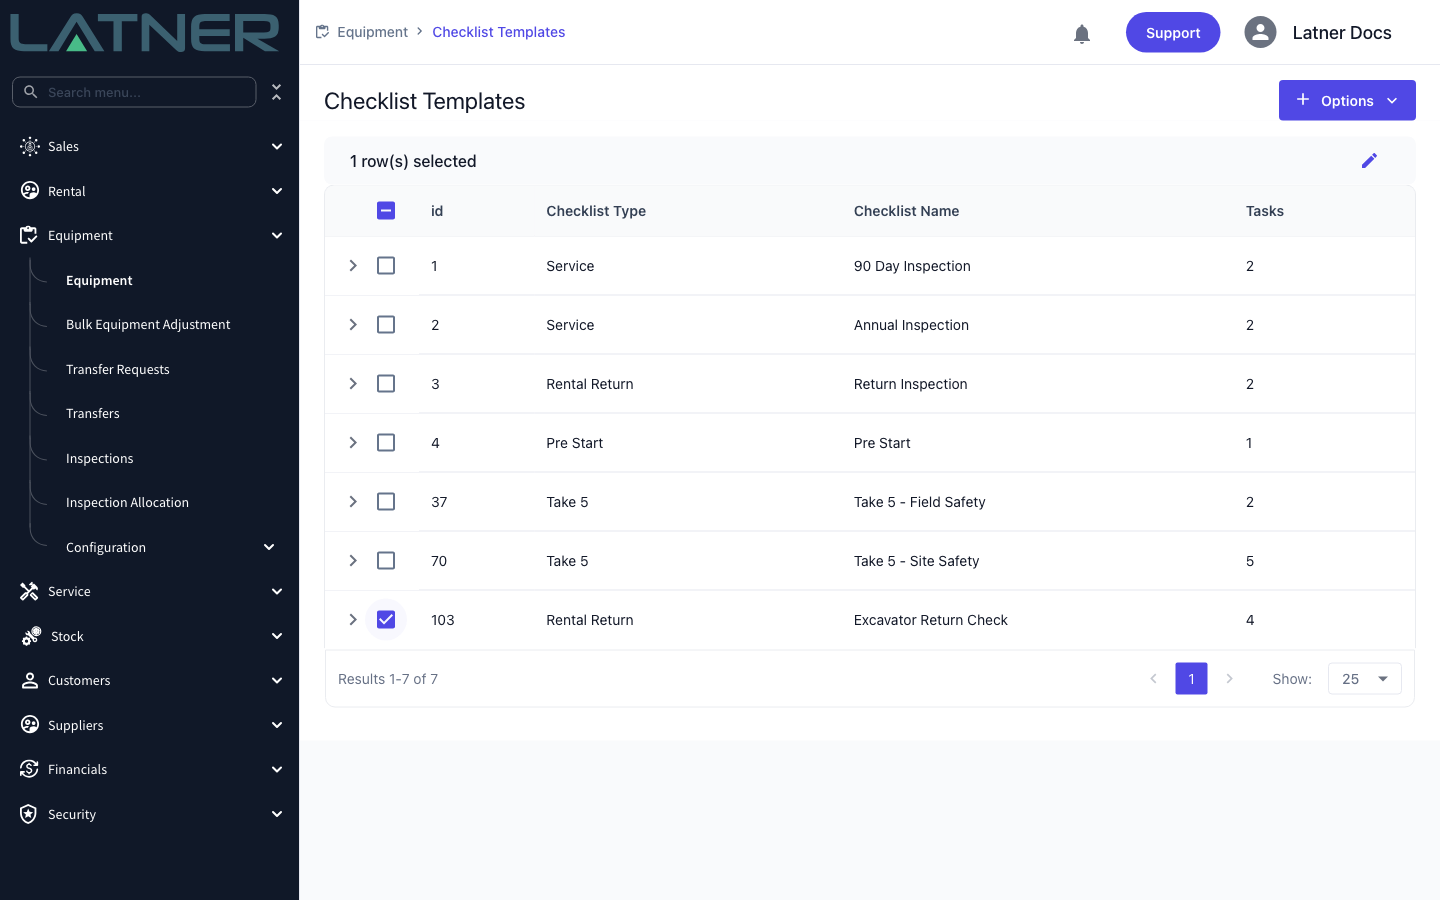
There is no delete on this screen. Templates stay on the system because completed checklists still refer back to them. If a template is no longer wanted, clear it from the class, model, stock item or setting that points at it rather than emptying out its tasks - stripping the tasks changes what future checklists ask, but does not remove the template.
Importing and Exporting in Bulk
Building twenty checklists a row at a time is slow, so the list screen also moves them as a CSV.
-
Export - tick one or more rows, then Options › Export Checklist. You get a checklists_export.csv containing one line per task.
-
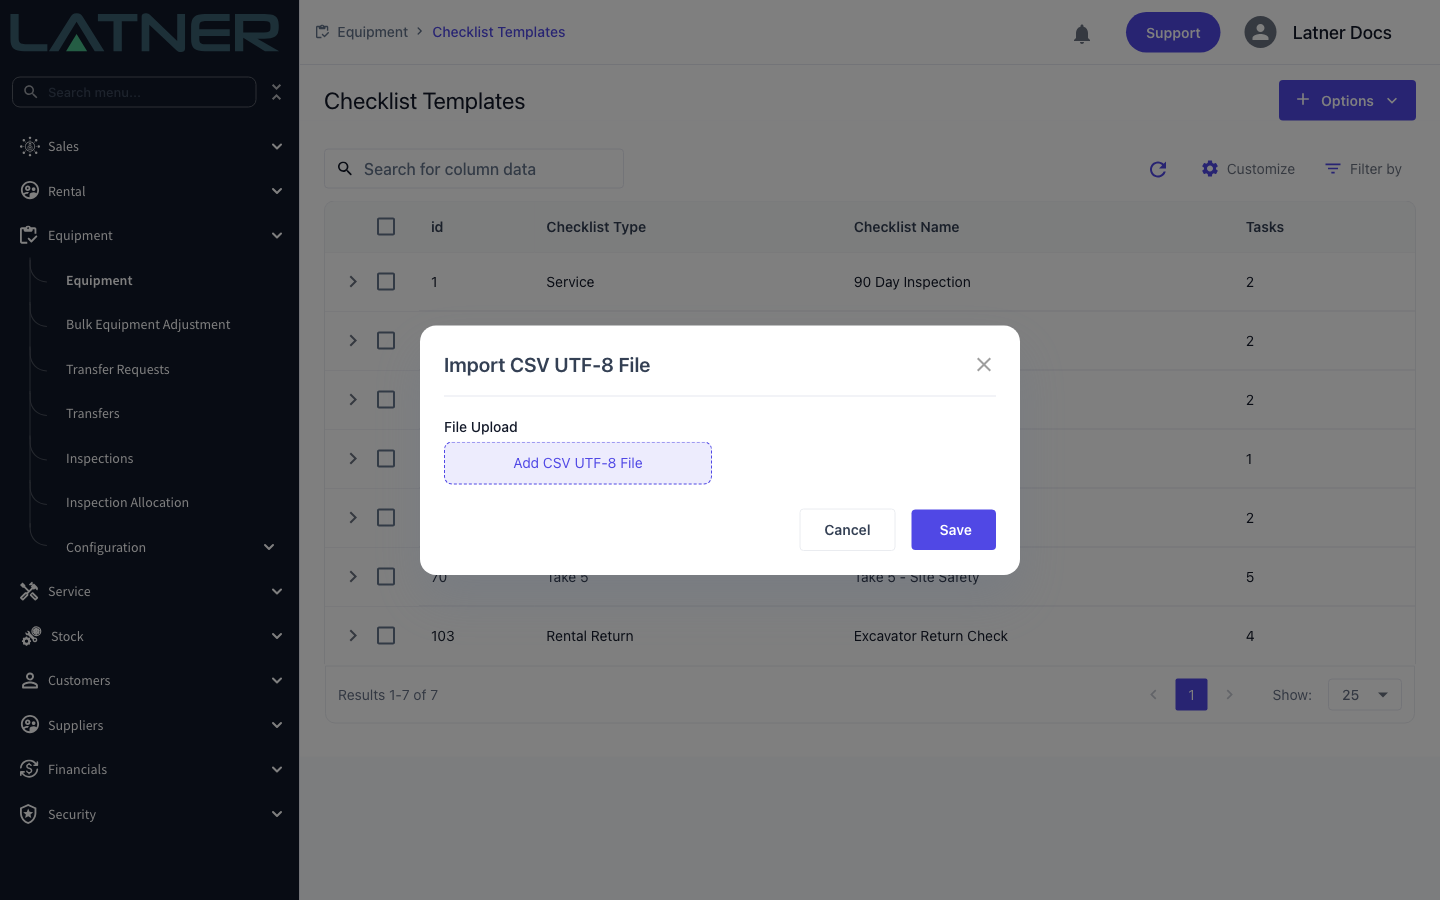
Import - Options › Import Checklist, then upload a file saved as CSV UTF-8. The file must have the columns Checklist ID, Checklist Name, Checklist Type, Task ID, Order, Group, Summary, Description and Photo Required, or the import stops and tells you which headers are missing.
-
A row with a Checklist ID updates that existing template; leave the Checklist ID blank and a new template is created. The safest way to build an import file is to export an existing checklist first and edit that, which also gives you the exact Checklist Type values the import expects.
FAQs
Watch the Demo
Prefer to watch it? Step through the same flow here.