
Assigning a QR code links a printed label on a machine to its equipment record in Latner, so anyone who scans the label lands on the right machine.
Overview
A QR label is only useful once Latner knows which machine it belongs to. That's what this job does: you scan the sticker once, in the office or standing next to the machine, and from then on the code is that machine's.
-
Codes are assigned one at a time from the equipment record, under Options › Assign QR Code.
-
Each code has a Type - Portal opens the customer equipment portal, Pre Start opens a public pre-start check for the operator.
-
A machine can carry more than one code, so a Portal label and a Pre Start label can live on the same machine.
-
Codes are unique across your whole system - one code can only ever point at one machine.
-
The code is captured by scanning the label with your device camera. There's no keyboard entry for it.
-
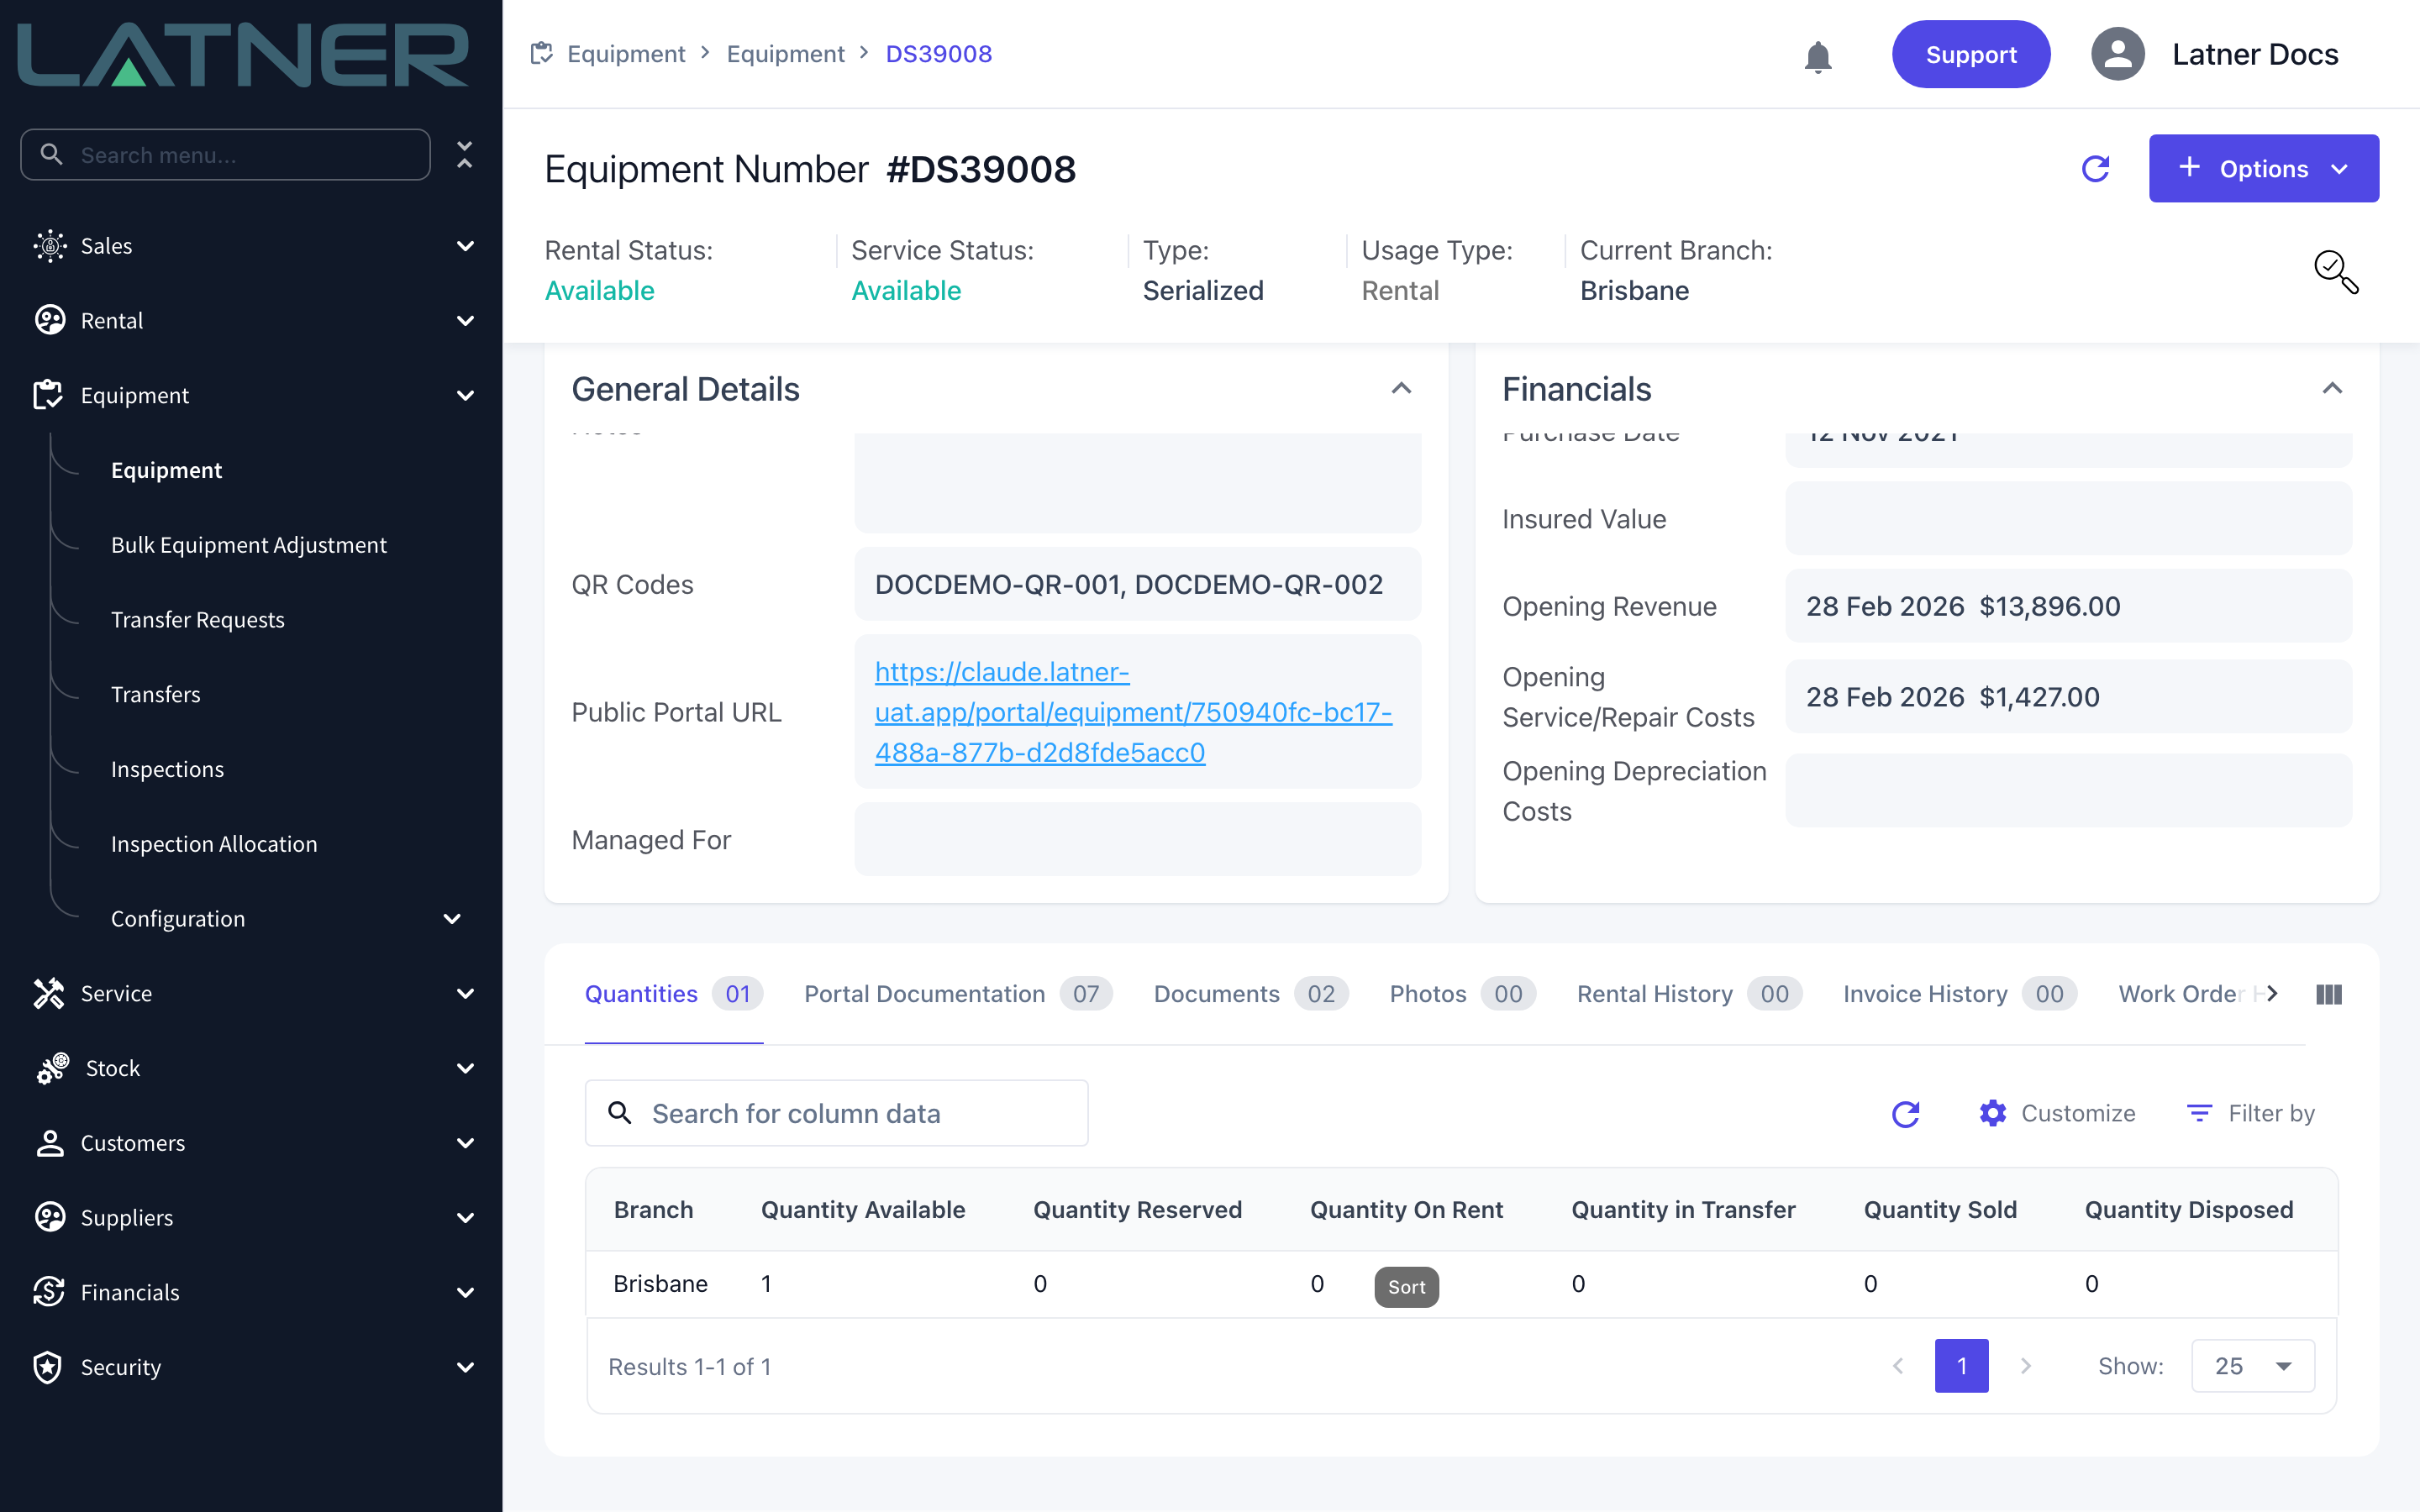
Once assigned, you can find the machine in Latner by searching for its code, and the code shows on the equipment record under QR Codes.
Before You Begin
You'll need these in place before you start.
|
Requirement |
Where to Find It |
|---|---|
|
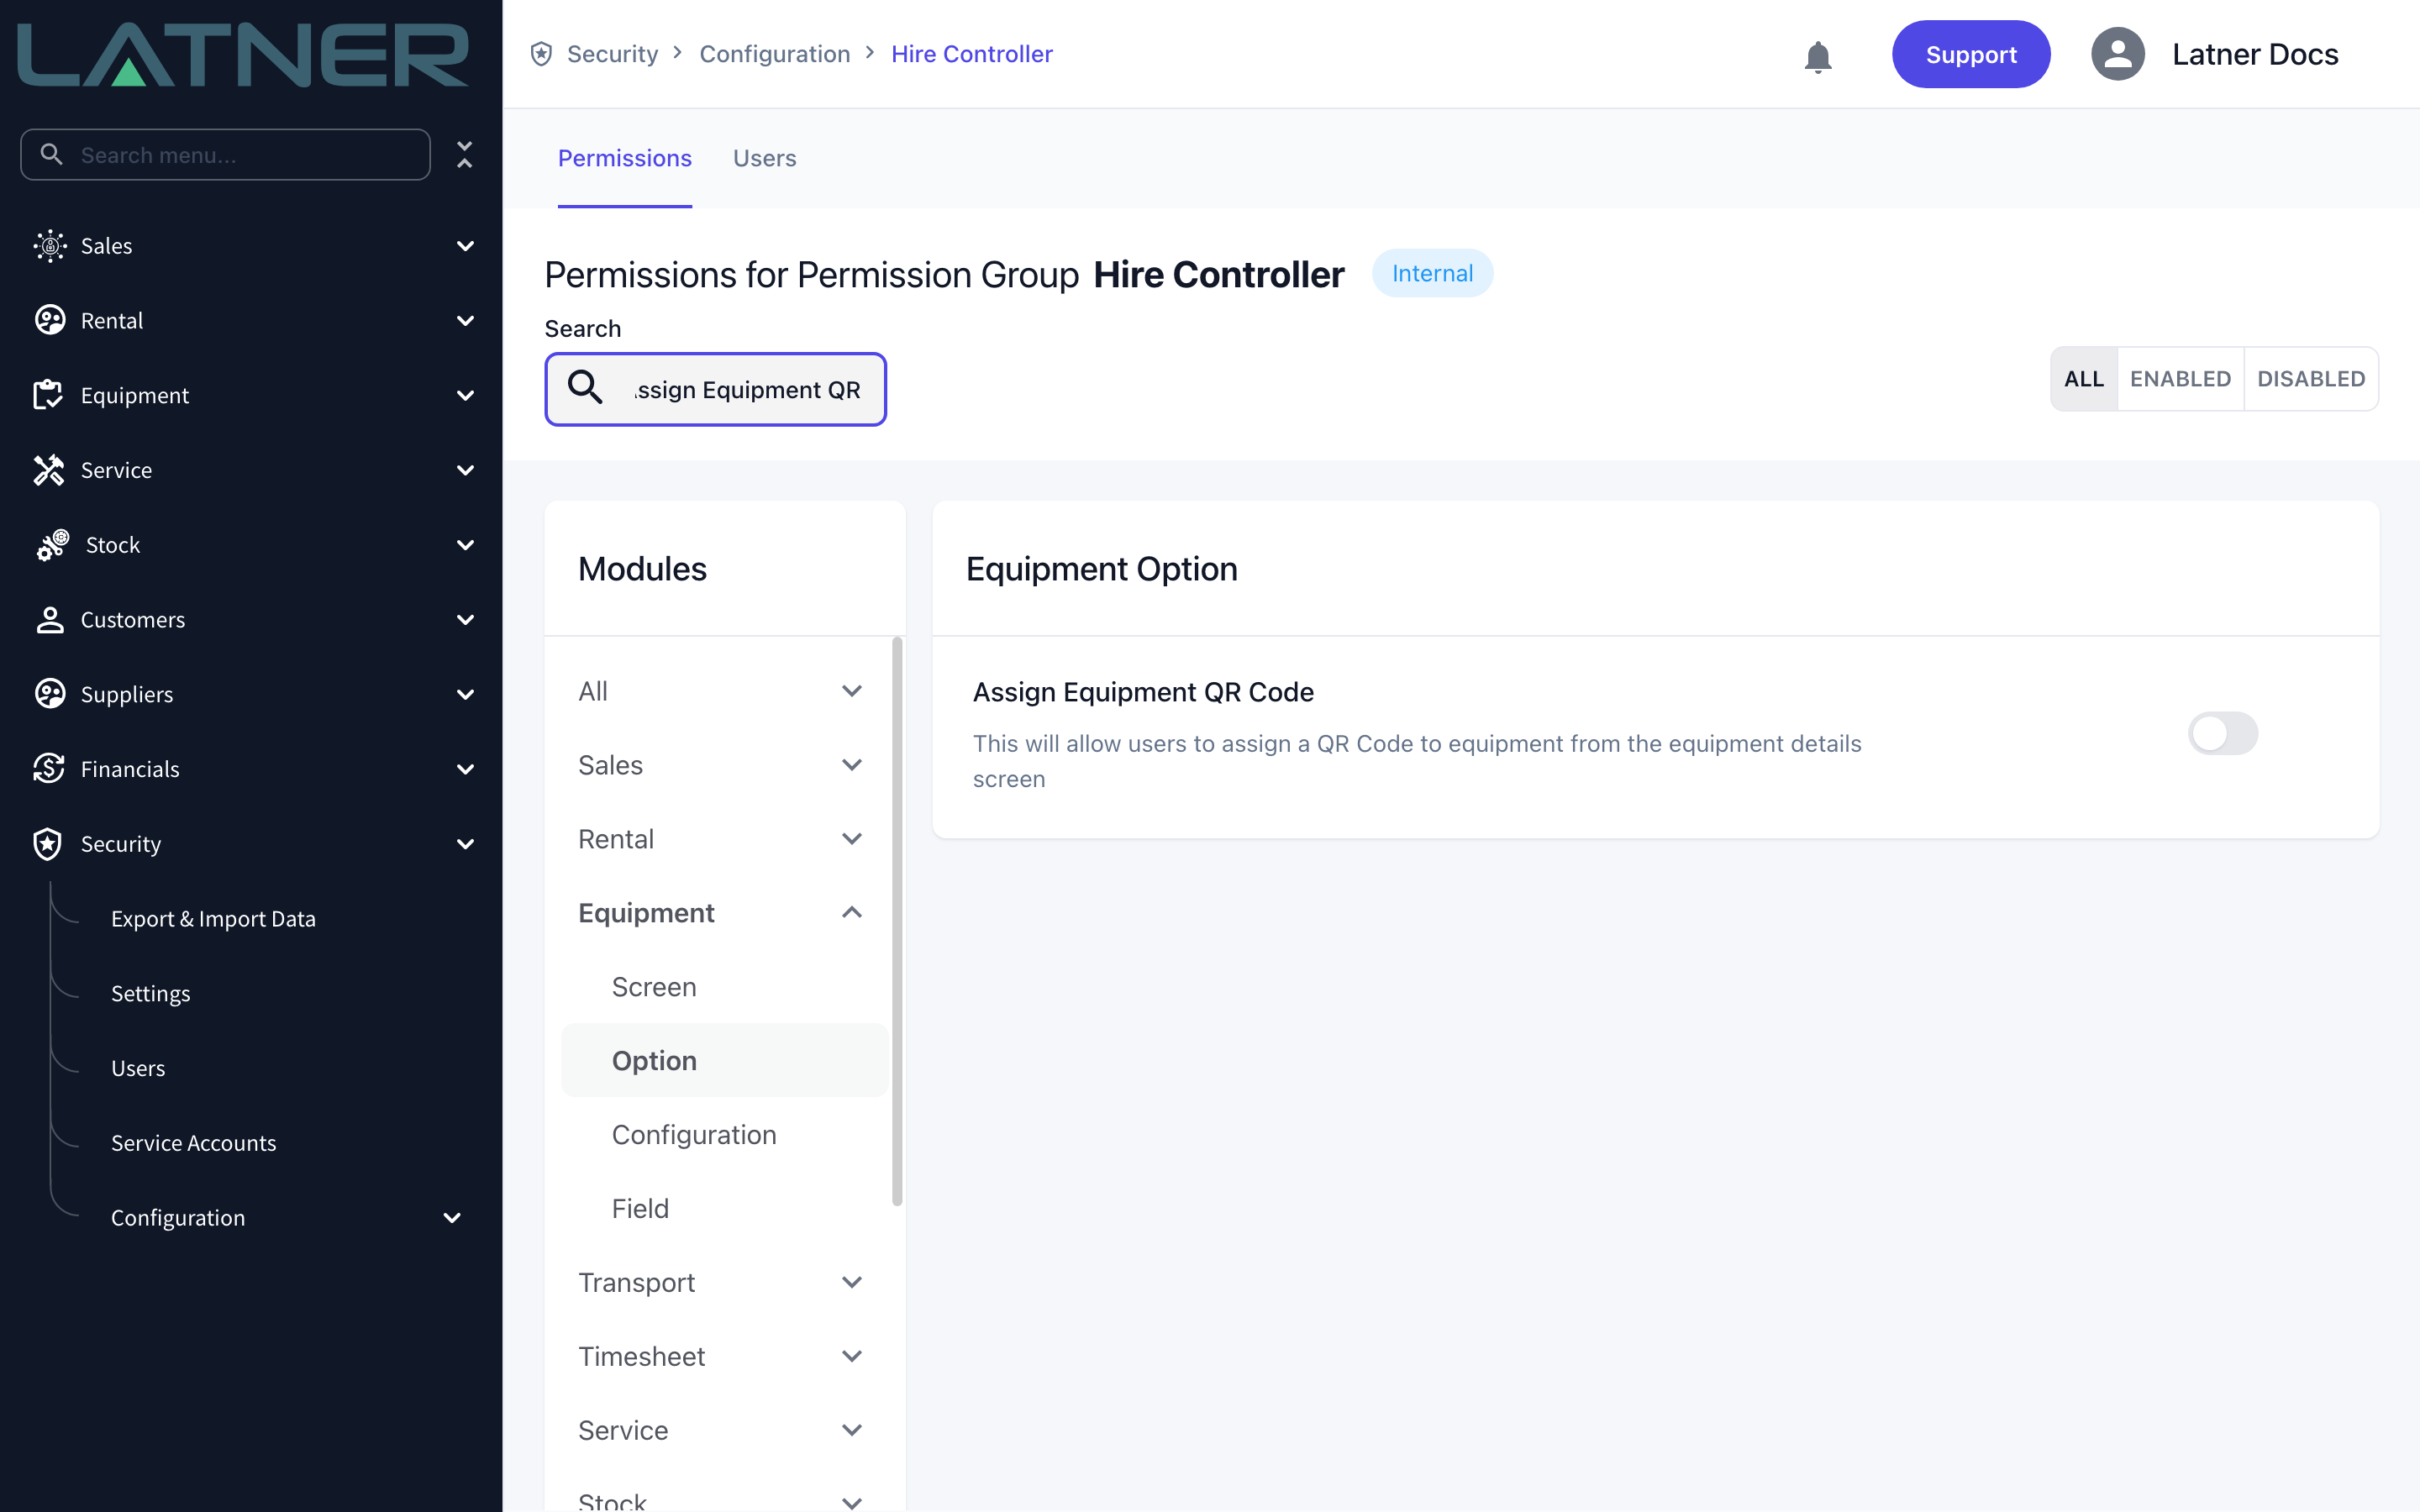
Assign Equipment QR Code permission |
Security › Configuration › Permission Groups - Equipment module, under Option. The same permission also controls Unassign QR Code. |
|
Printed QR labels |
Any durable-label supplier. Latner doesn't supply labels - you choose what each one encodes, so settle on a scheme before you order. |
|
A device with a working camera |
A phone, tablet or a laptop with a camera, and permission for the browser to use it. The code can't be typed in. |
|
Pre-Start checks enabled (only for Pre Start codes) |
Pre-start operator checks are switched on for your account by Latner. Portal codes need nothing extra. |
What each label encodes matters. For a sticker to work when someone points a plain phone camera at it, it has to carry a link in the form https://<your Latner web address>/qr-codes/<your code> - Latner then stores just the <your code> part. Labels that encode anything else can still be assigned, but they'll only be recognised when scanned from inside Latner.
Assigning a QR Code
Step 1 - Open the equipment record
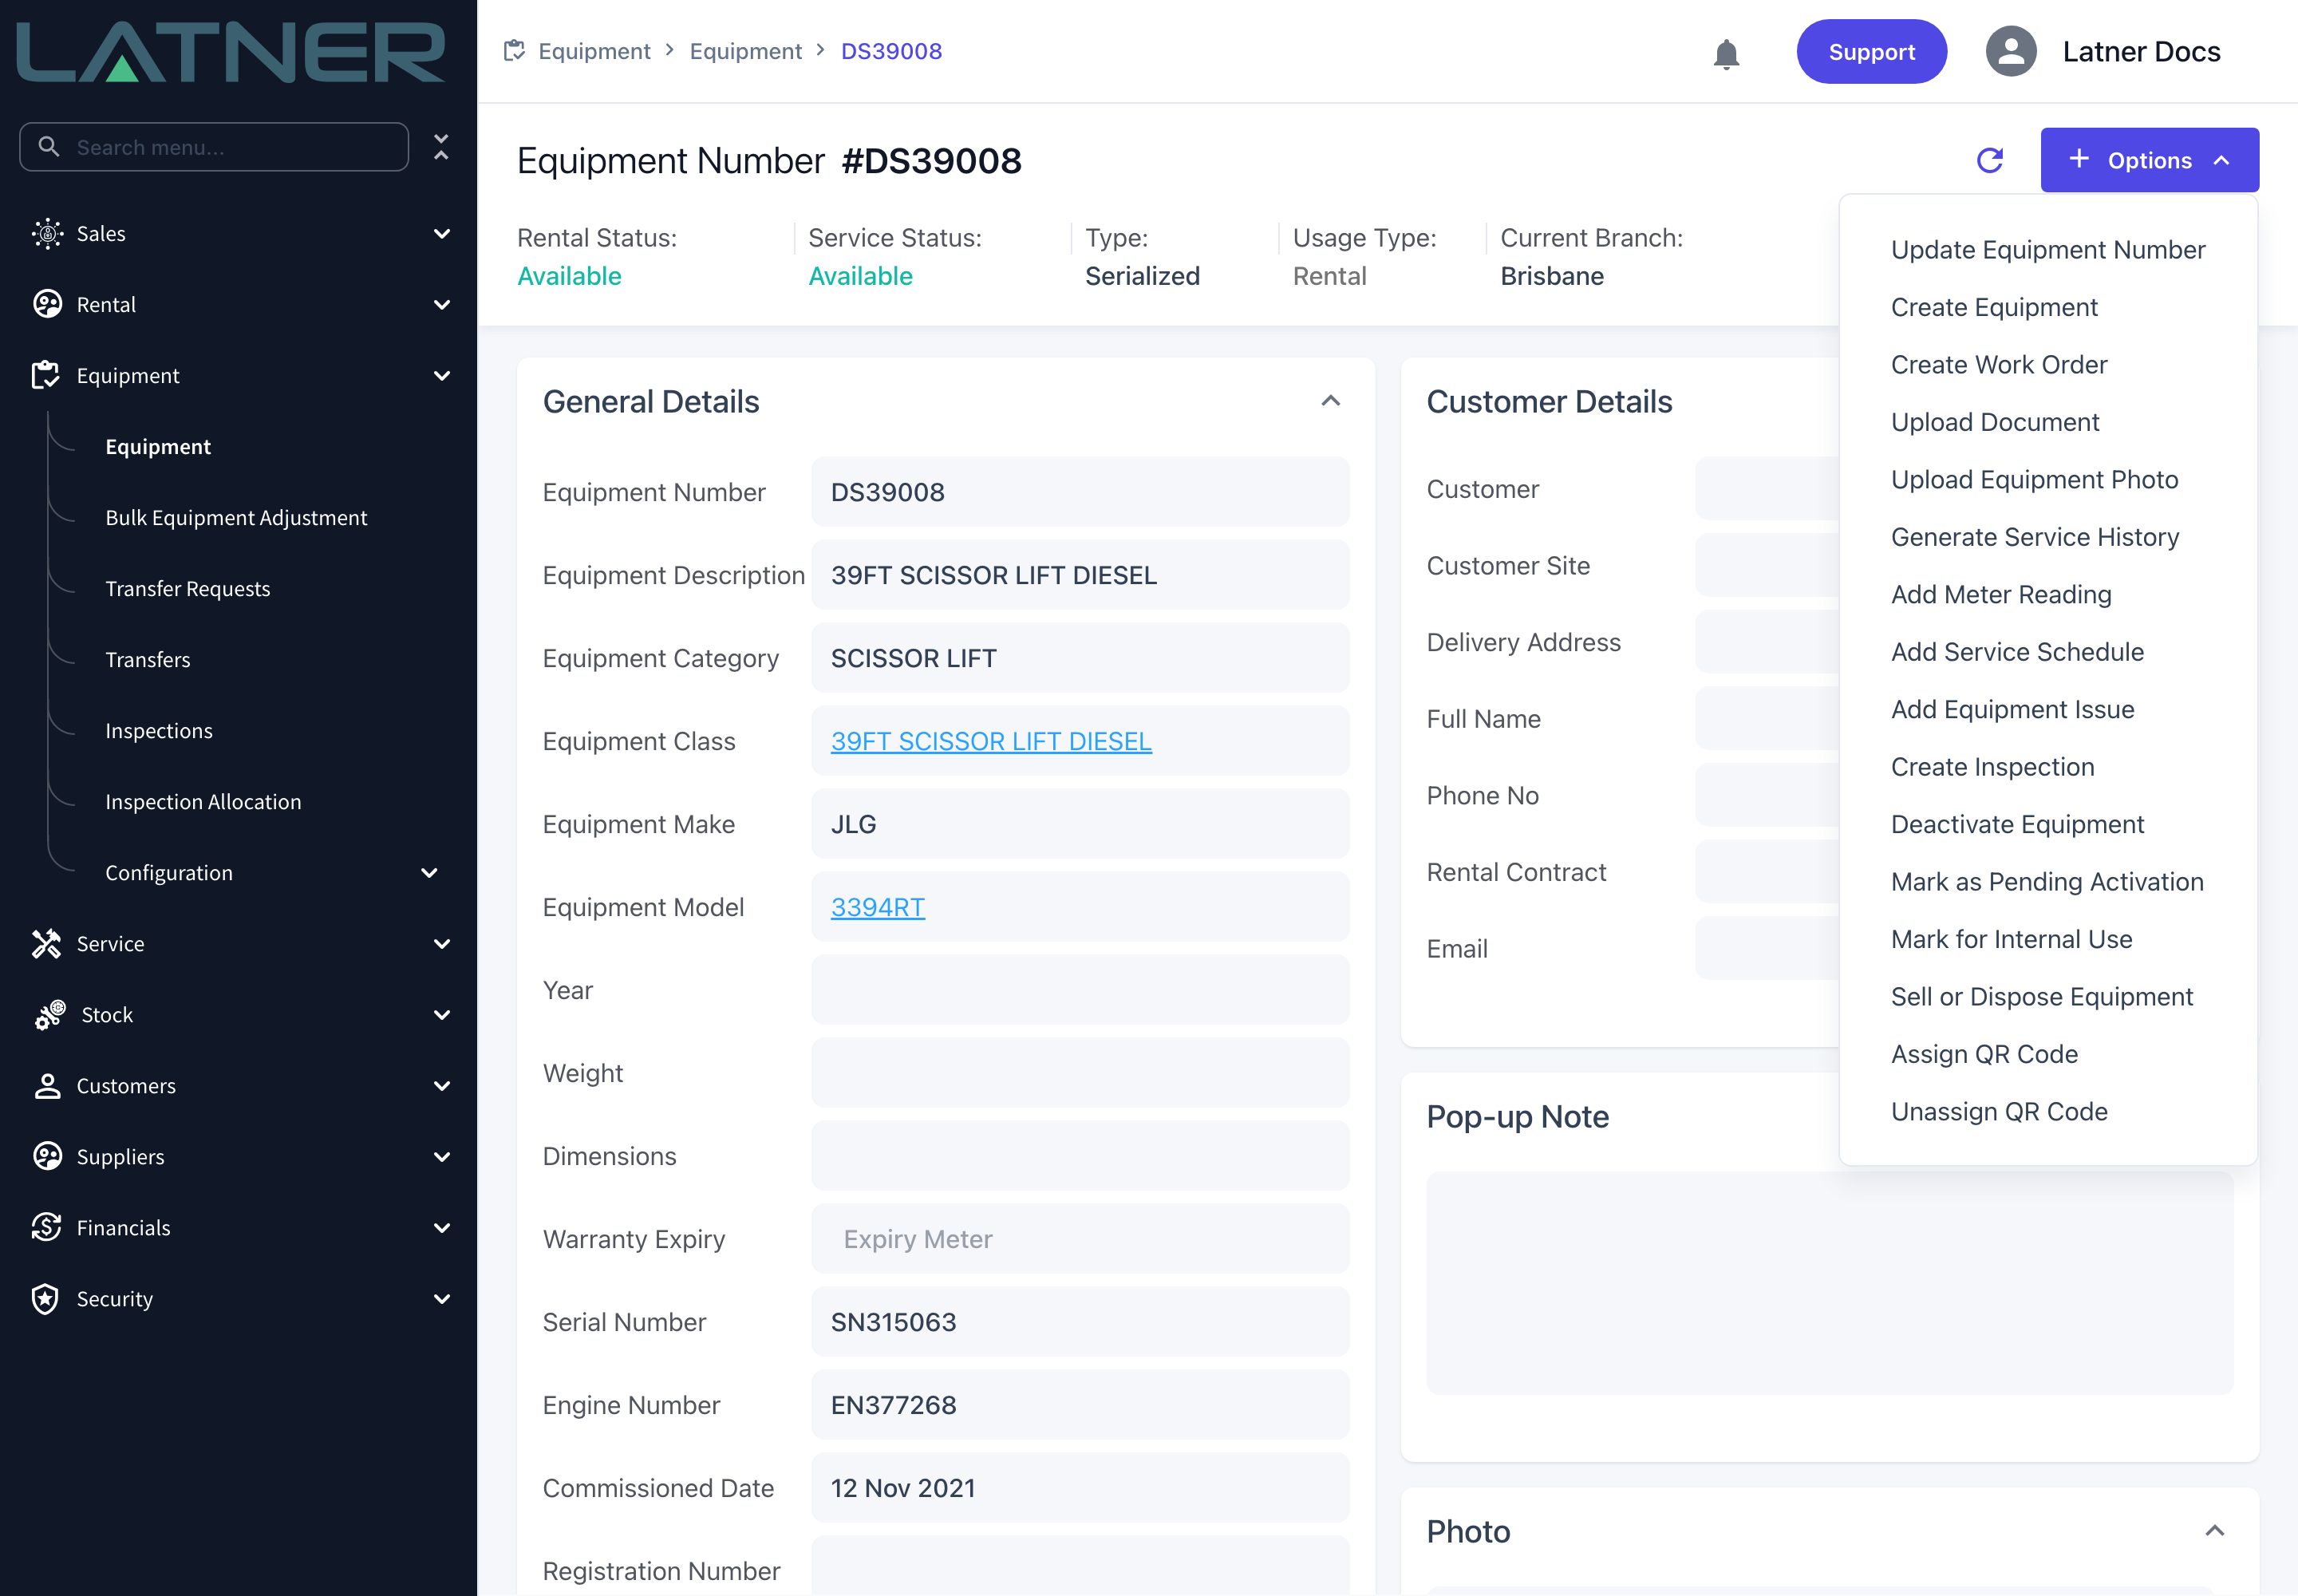
Go to Equipment › Equipment and open the machine you're labelling, then click Options at the top right.
Step 2 - Choose Assign QR Code
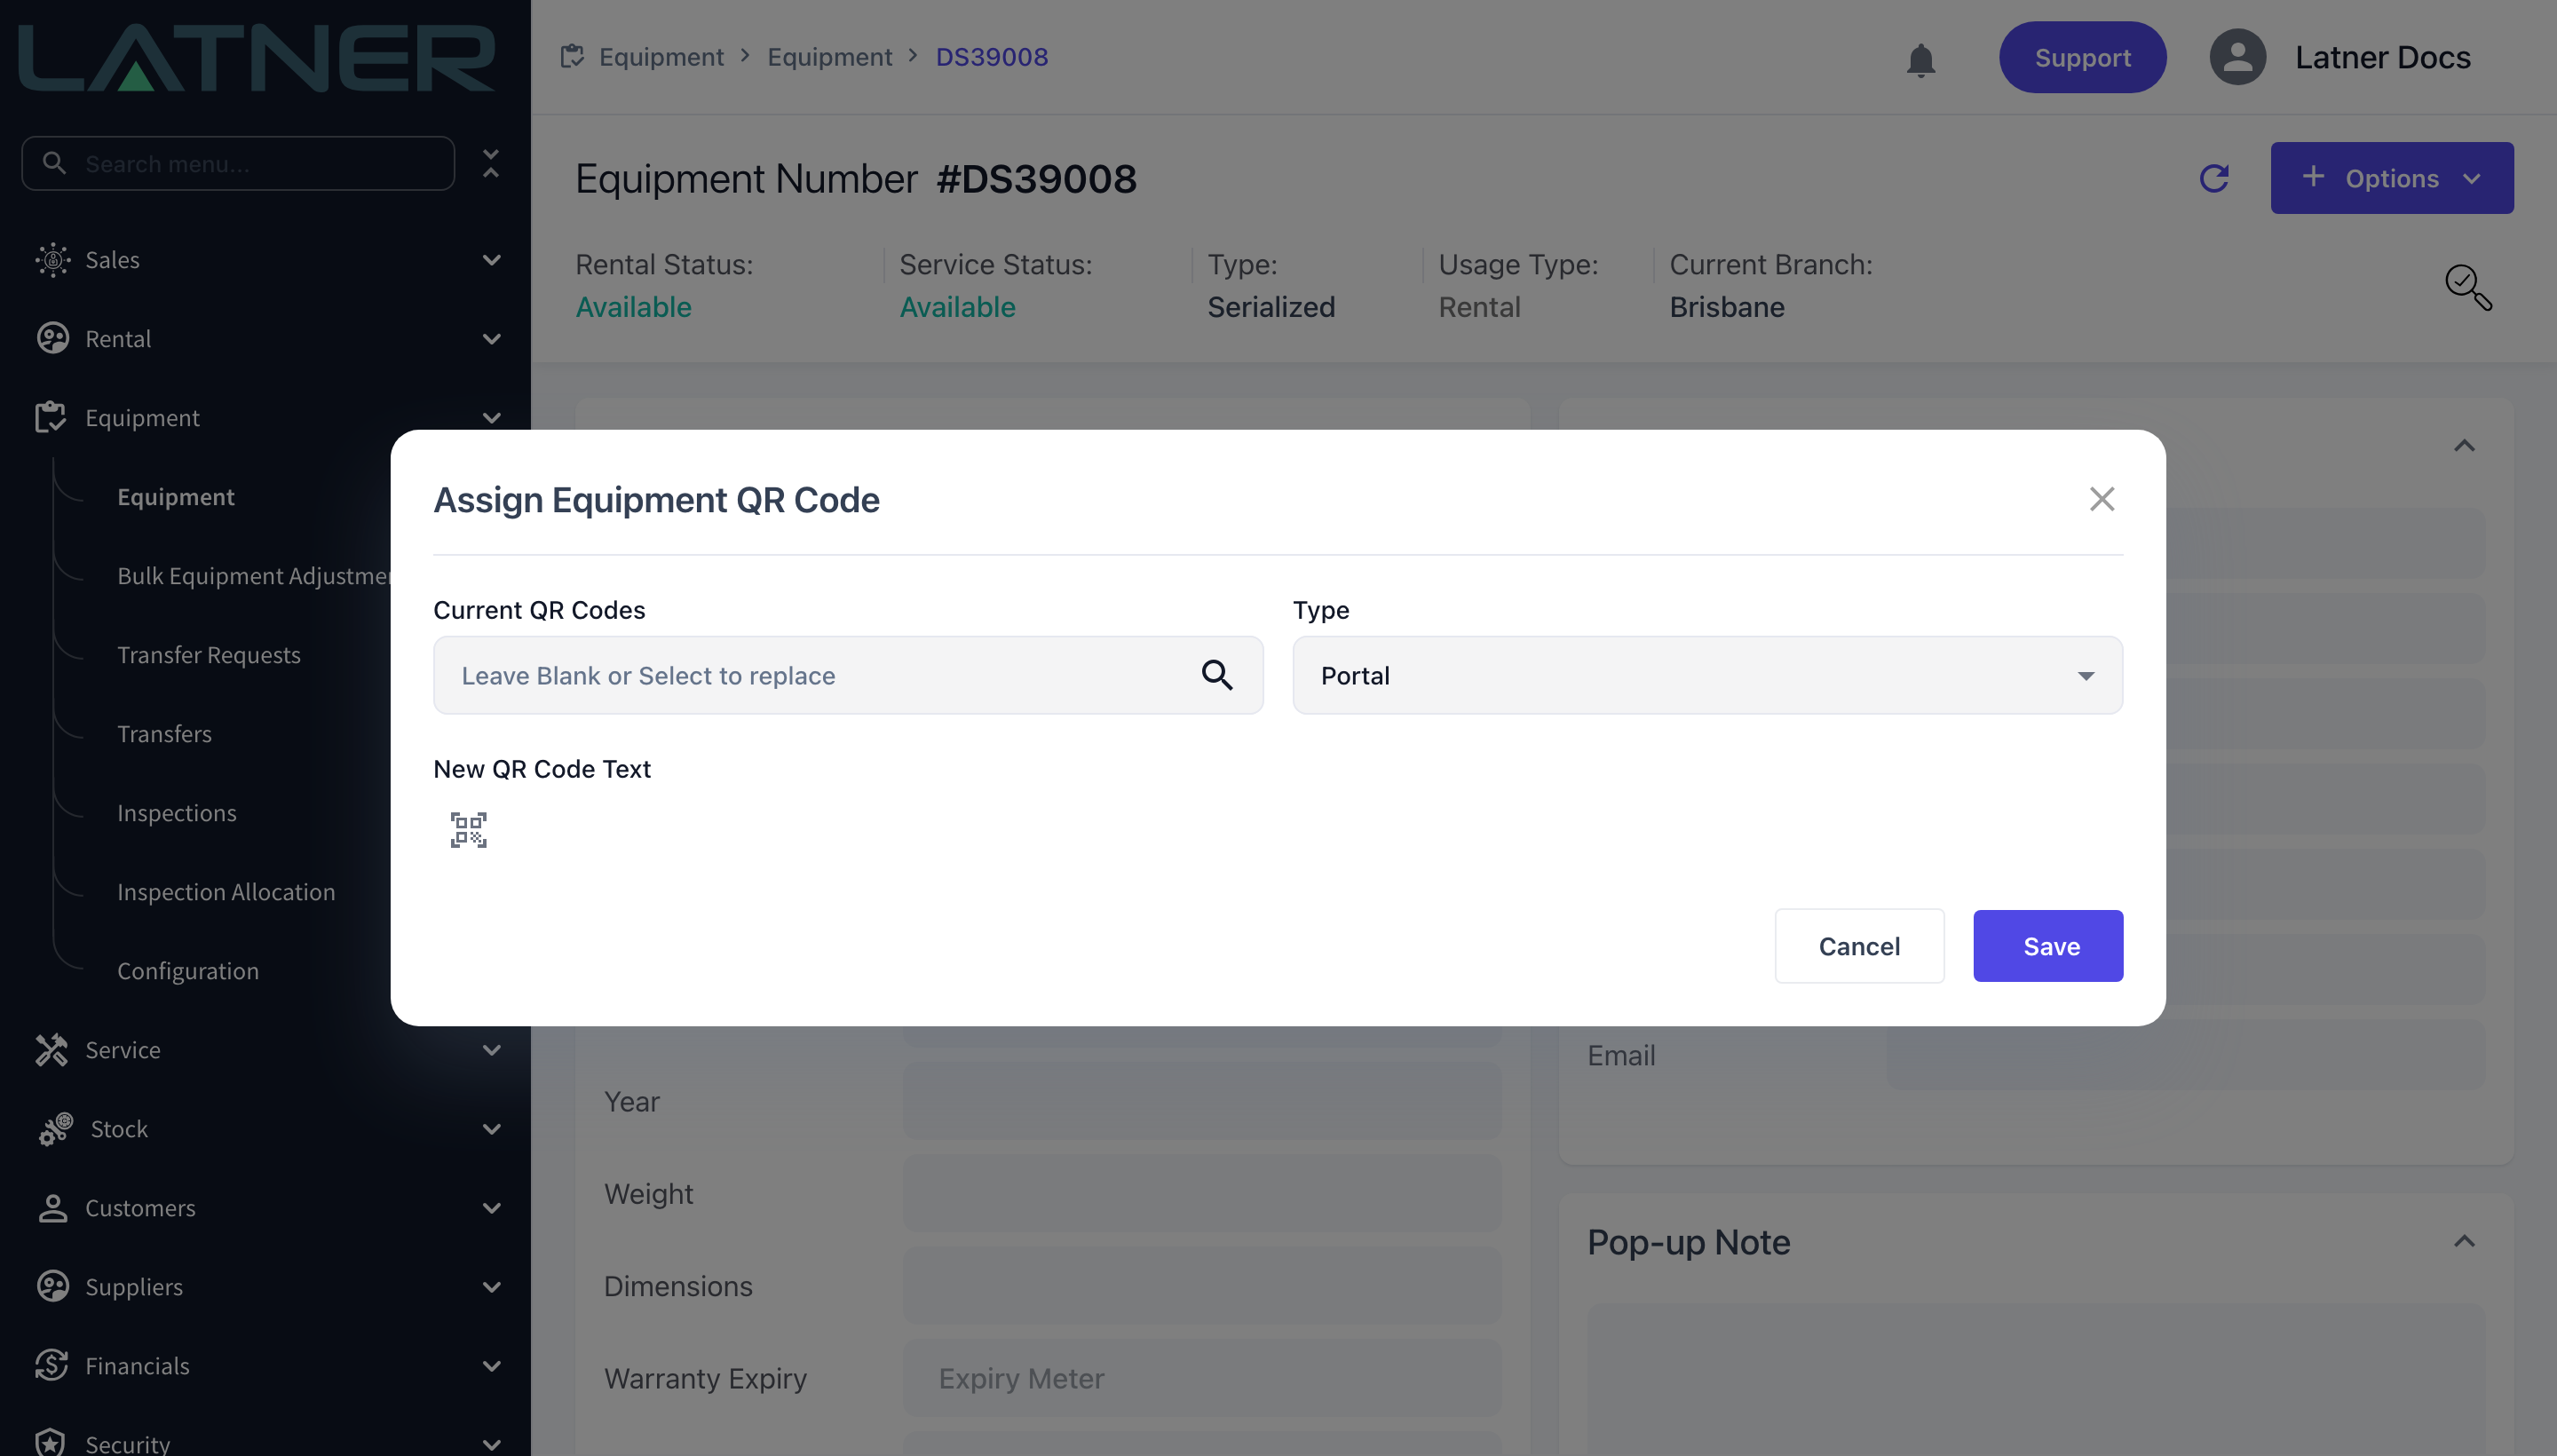
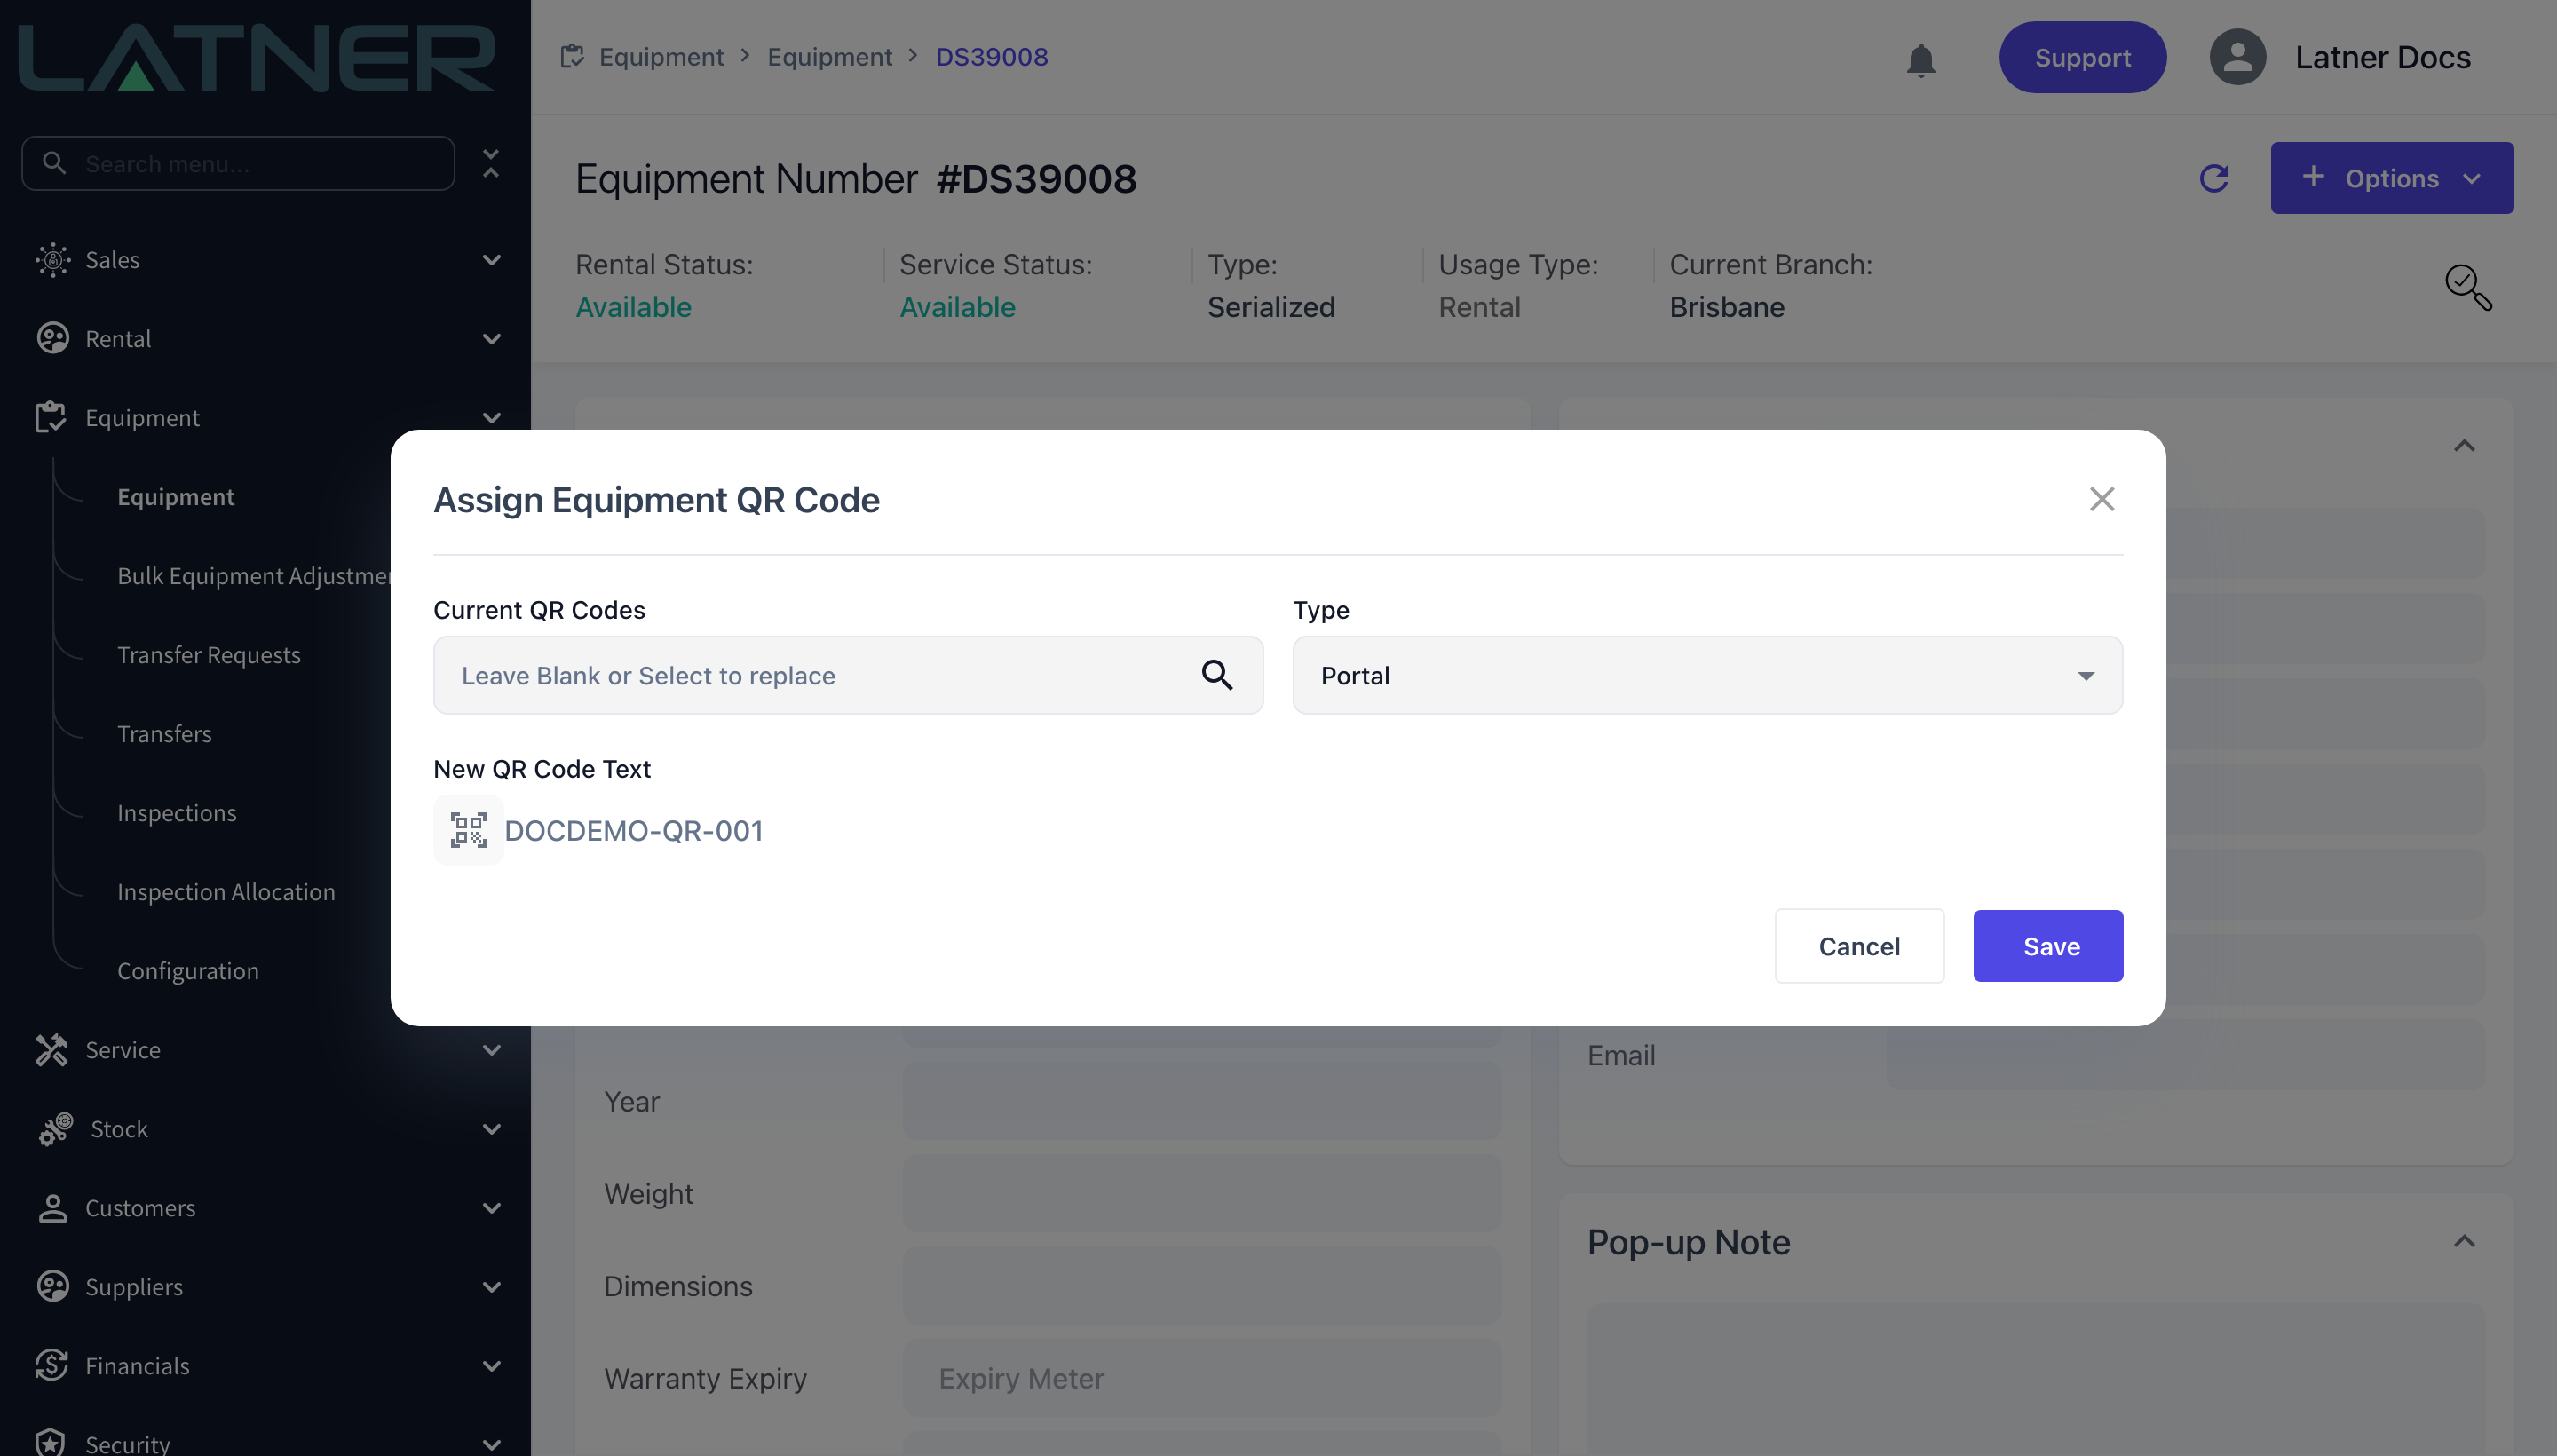
Select Options › Assign QR Code. The Assign Equipment QR Code window has three fields:
-
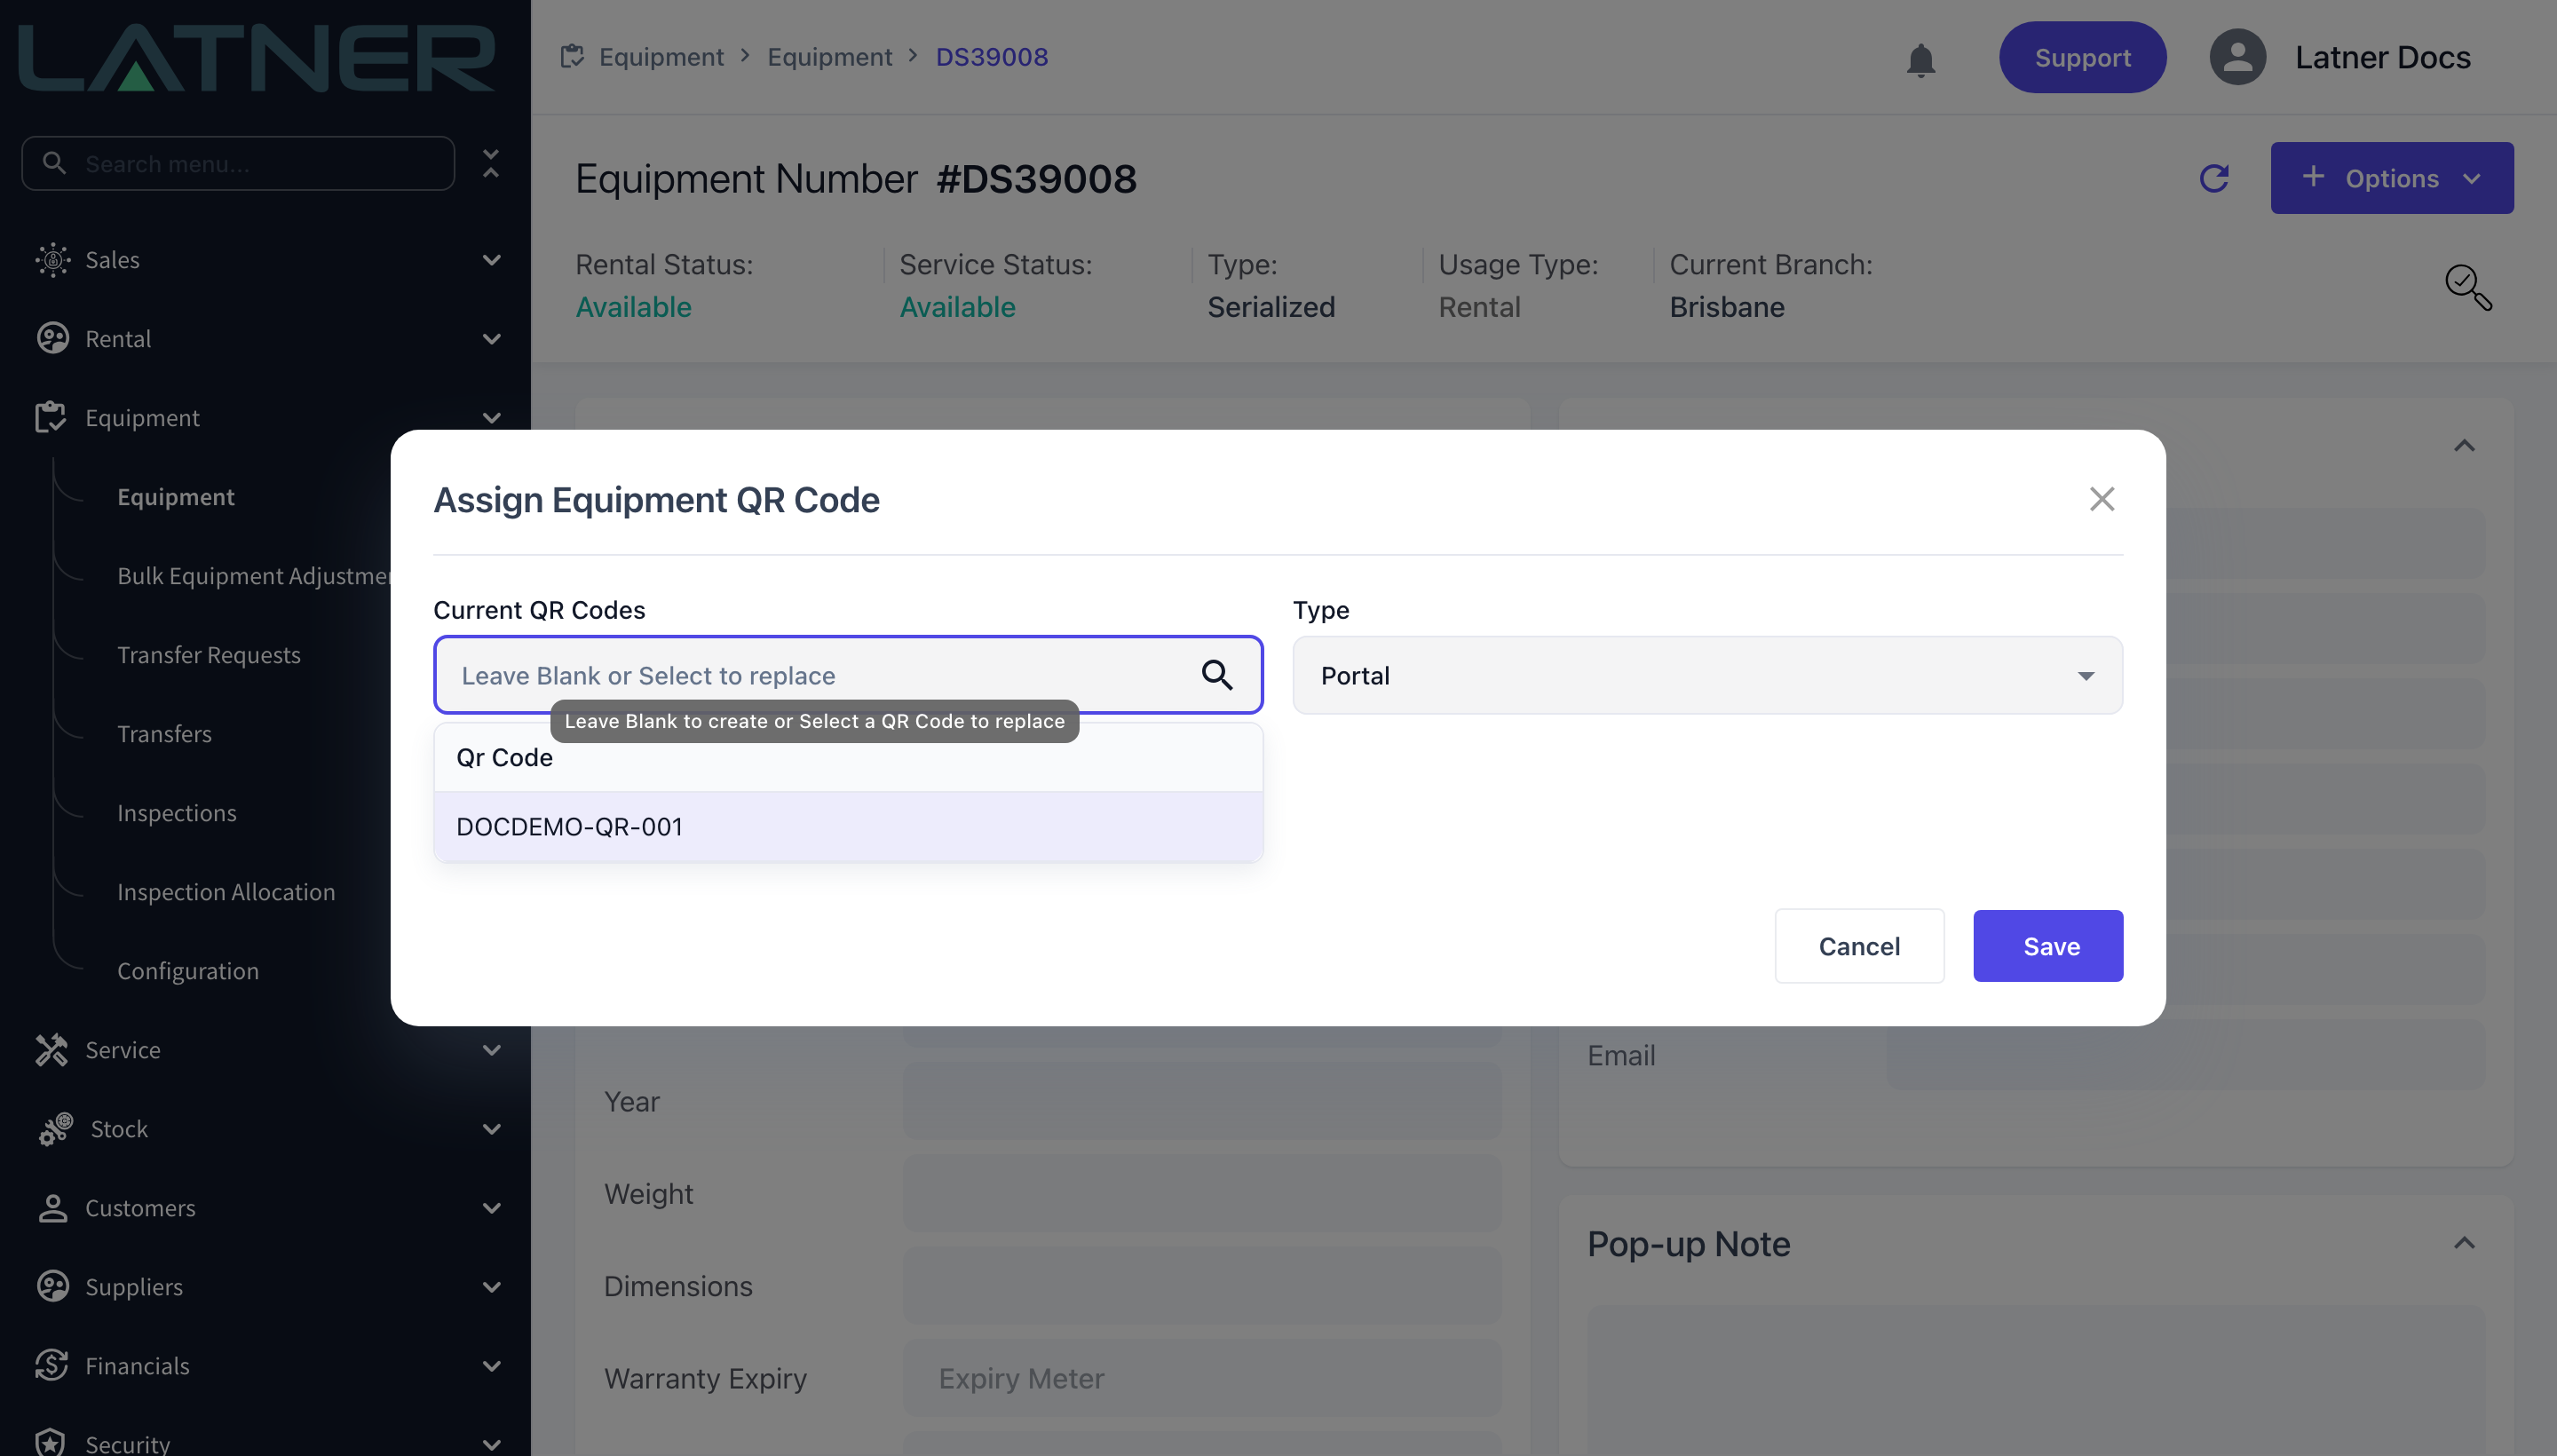
Current QR Codes - leave this blank to add a new code. Select a code here only when you're replacing one that's already on this machine. The list only offers codes belonging to the machine you're on.
-
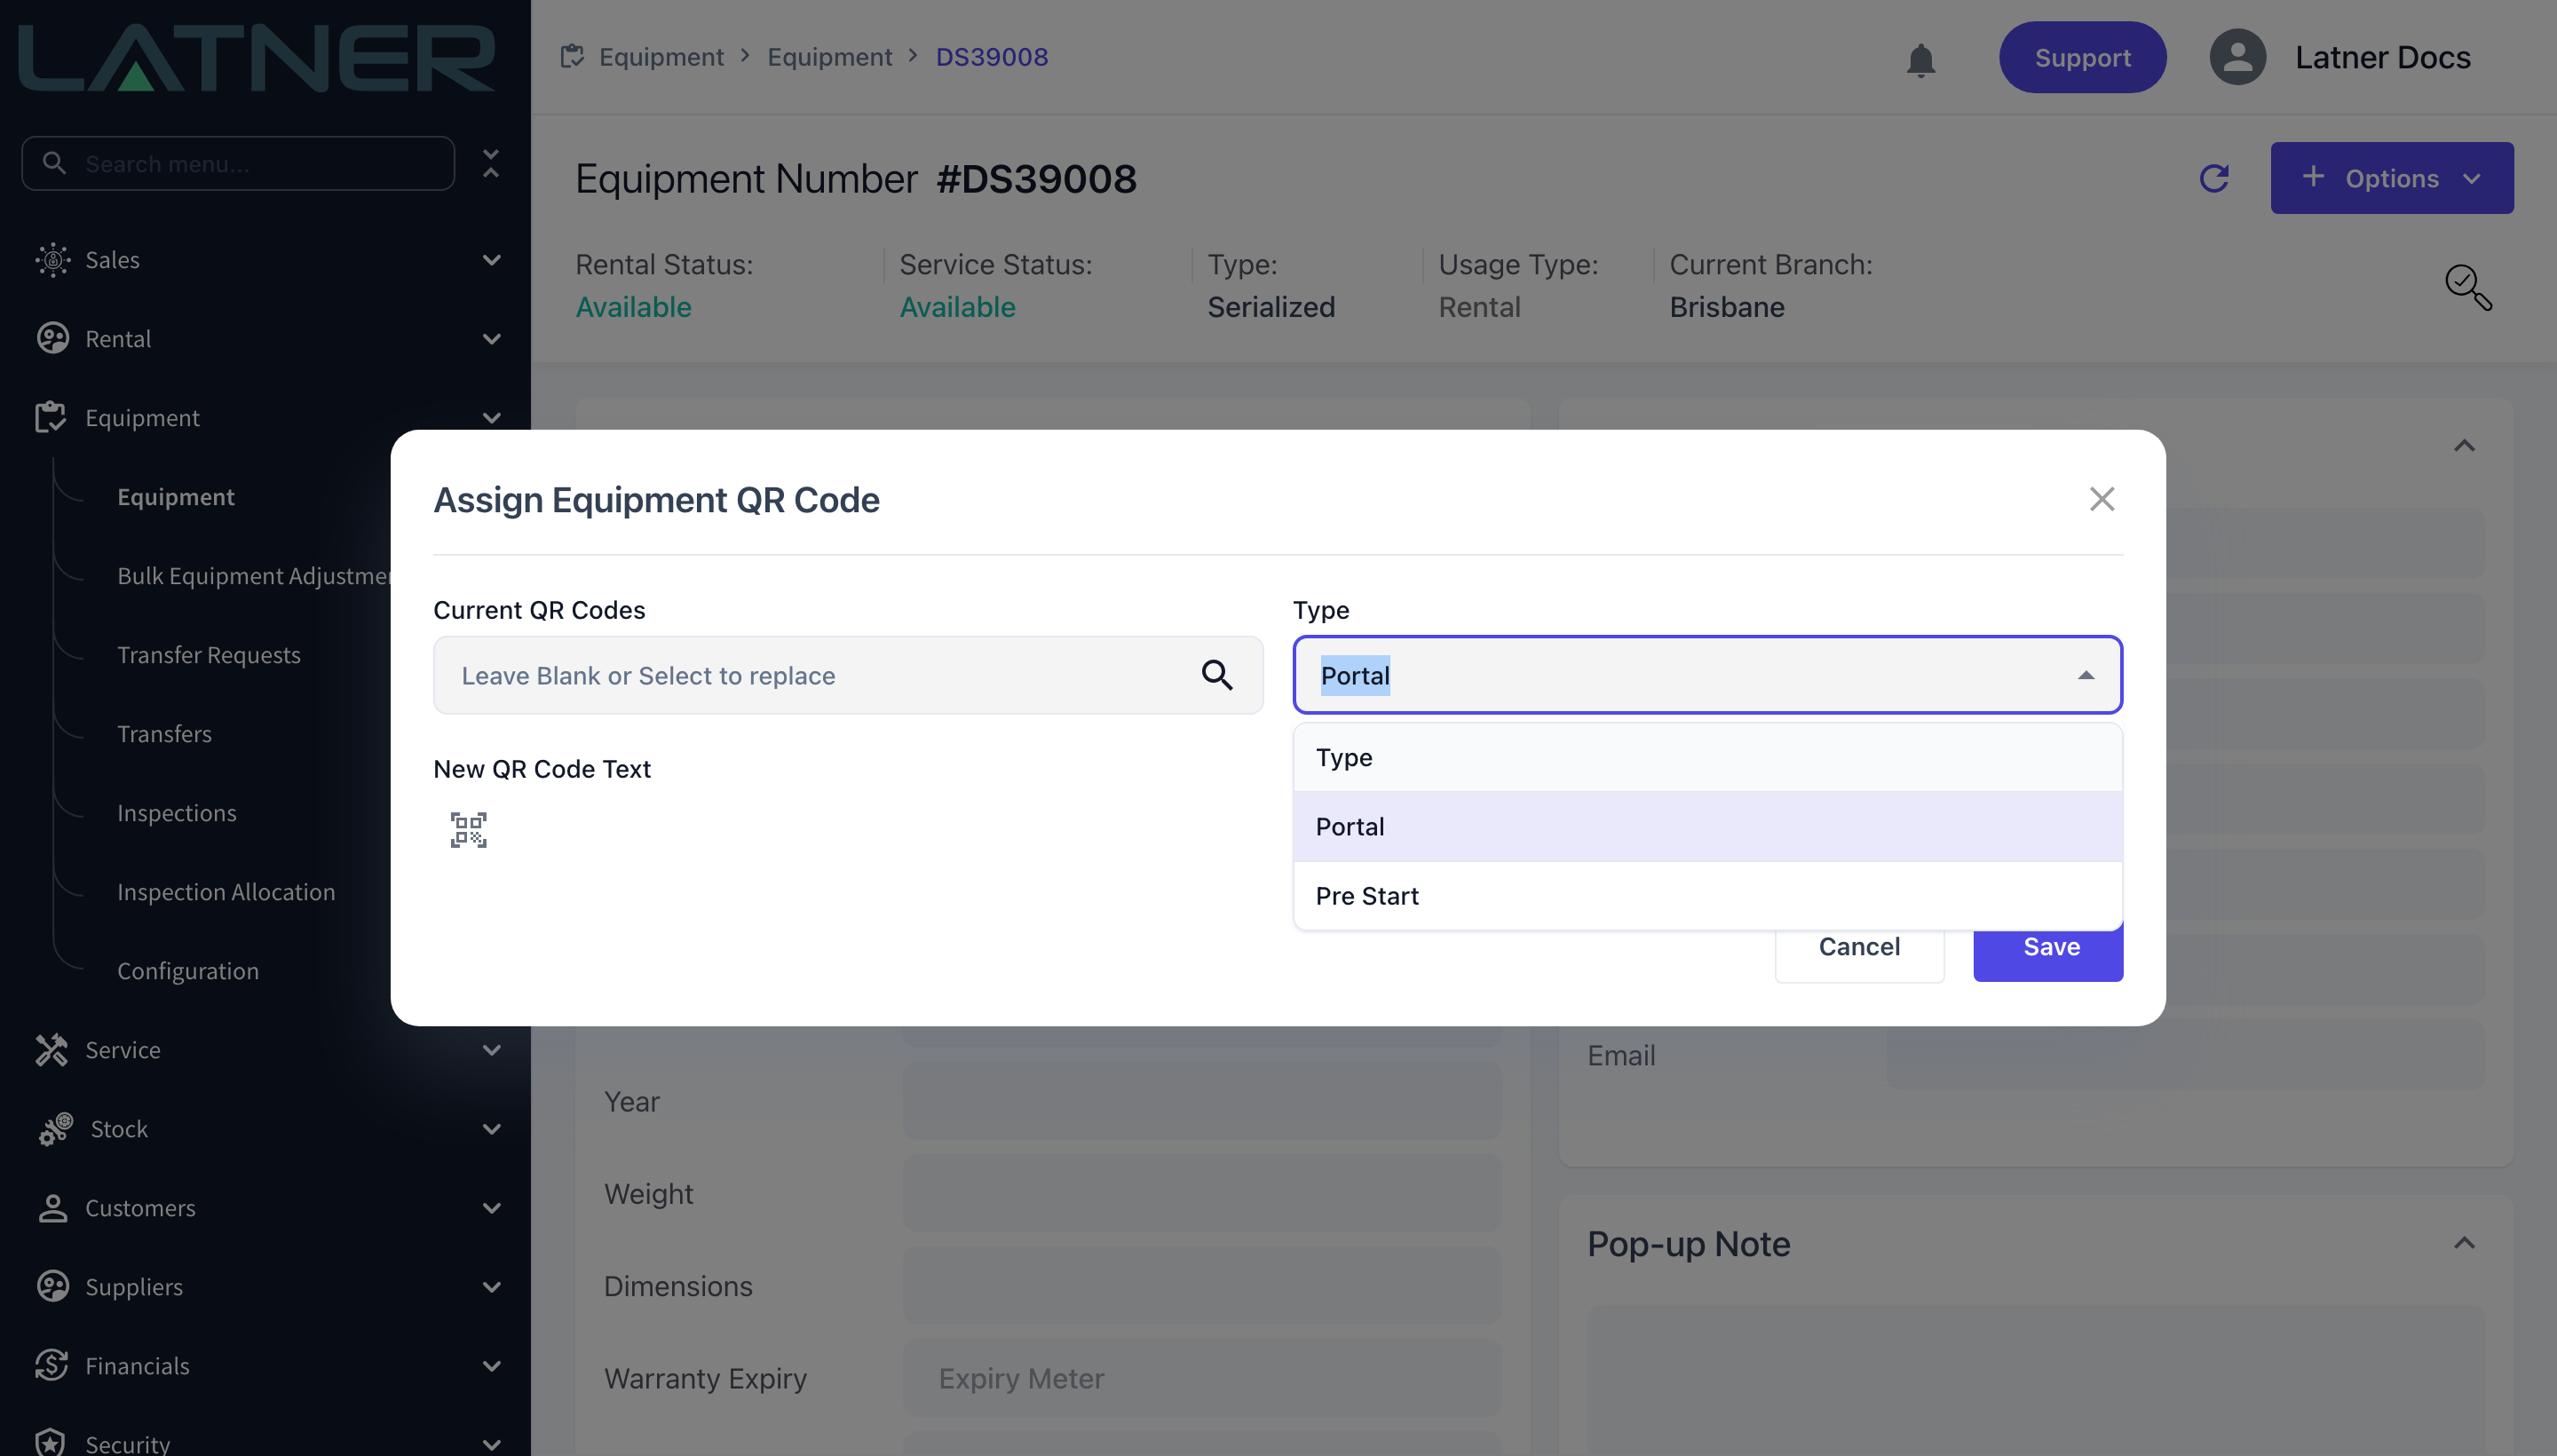
Type - Portal or Pre Start. Defaults to Portal. If you pick a code in Current QR Codes, this switches to that code's type automatically.
-
New QR Code Text - required. Captured by scanning, using the QR button beneath the label.
Step 3 - Set the Type
Choose what the label should do when it's scanned. Portal takes a customer to that machine's documentation, inspection history and service history. Pre Start opens a public pre-start check for an operator to complete before using the machine. The type belongs to the code, not to the machine, so a machine with two labels can have one of each.
Step 4 - Scan the label
Click the QR button under New QR Code Text. The Scan QR Code window opens with a live camera view - allow camera access if your browser asks. Hold the label in frame; as soon as it's read, the window closes on its own and the code appears next to the button. Cancel backs out without capturing anything.
The scanner reads QR codes and common barcodes (Code 128, EAN-13, EAN-8, UPC-A, UPC-E, Code 39, Code 93, ITF and Codabar), so an existing asset barcode can be used as the code just as well as a QR sticker.
Step 5 - Save
Click Save. Latner confirms with QR Code Updated, and the code appears on the equipment record under QR Codes in General Details. That field is read-only - codes are only ever changed through the Options menu.
Assigning a Code from a Phone
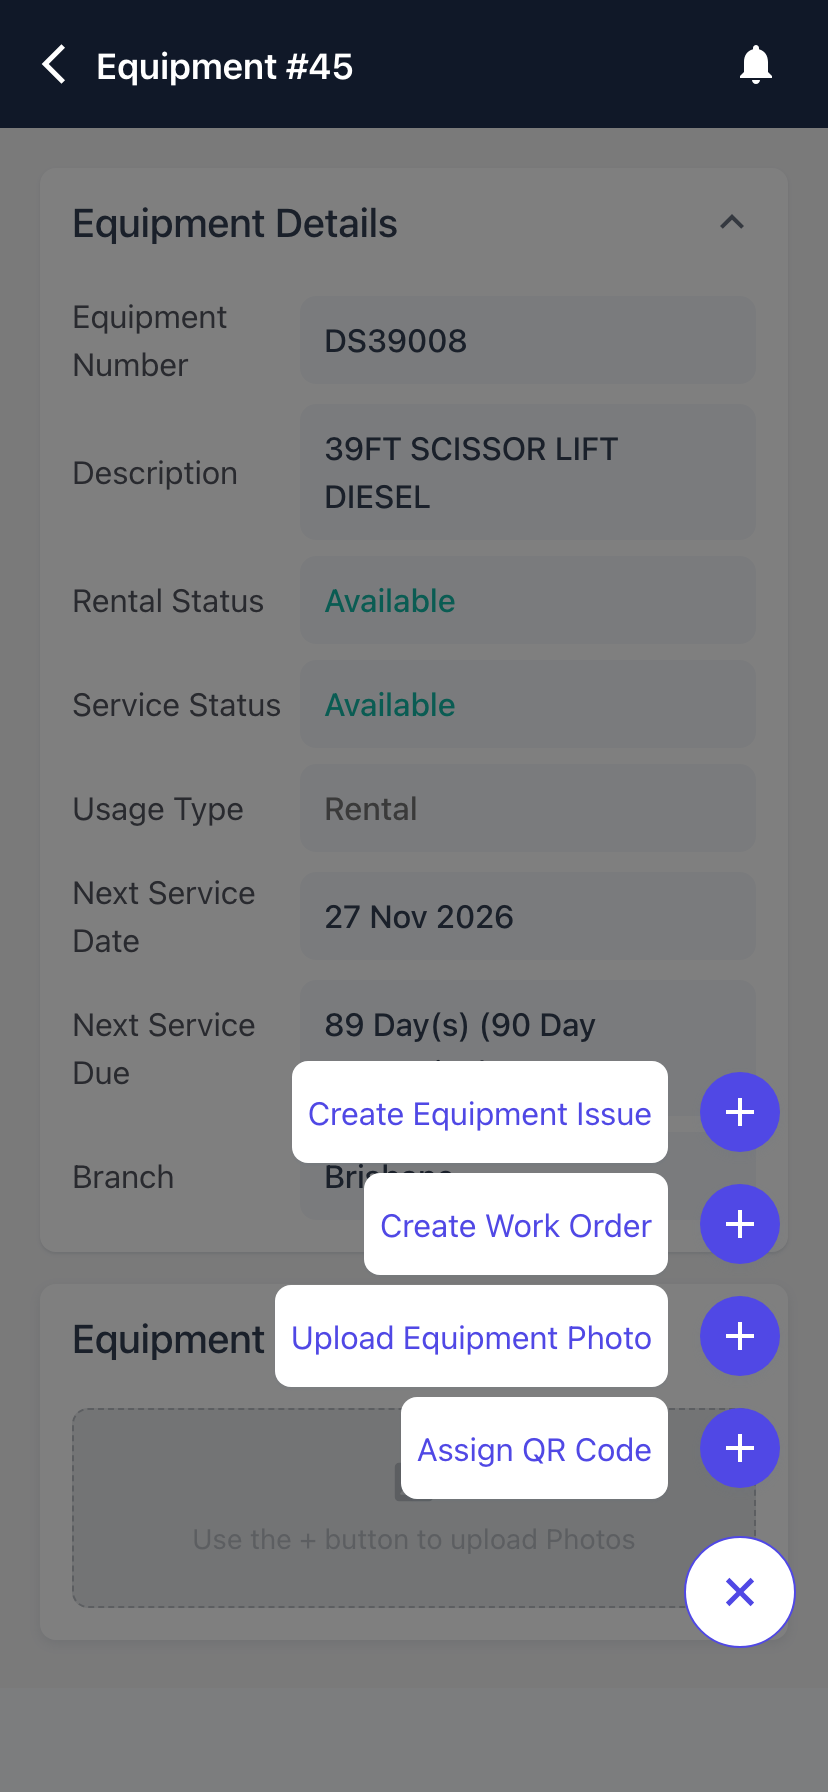
Labelling usually happens in the yard rather than at a desk, so the same action is on the mobile equipment record. Open the machine from Search Equipment, tap the + button and choose Assign QR Code. The fields and the scan step are identical to the desktop window.
Replacing or Removing a Code
When a sticker is damaged or peels off, replace the code rather than adding a second one. Open Options › Assign QR Code, select the old code in Current QR Codes, then scan the new label and Save. The existing code record is updated in place, so the machine doesn't accumulate dead codes.
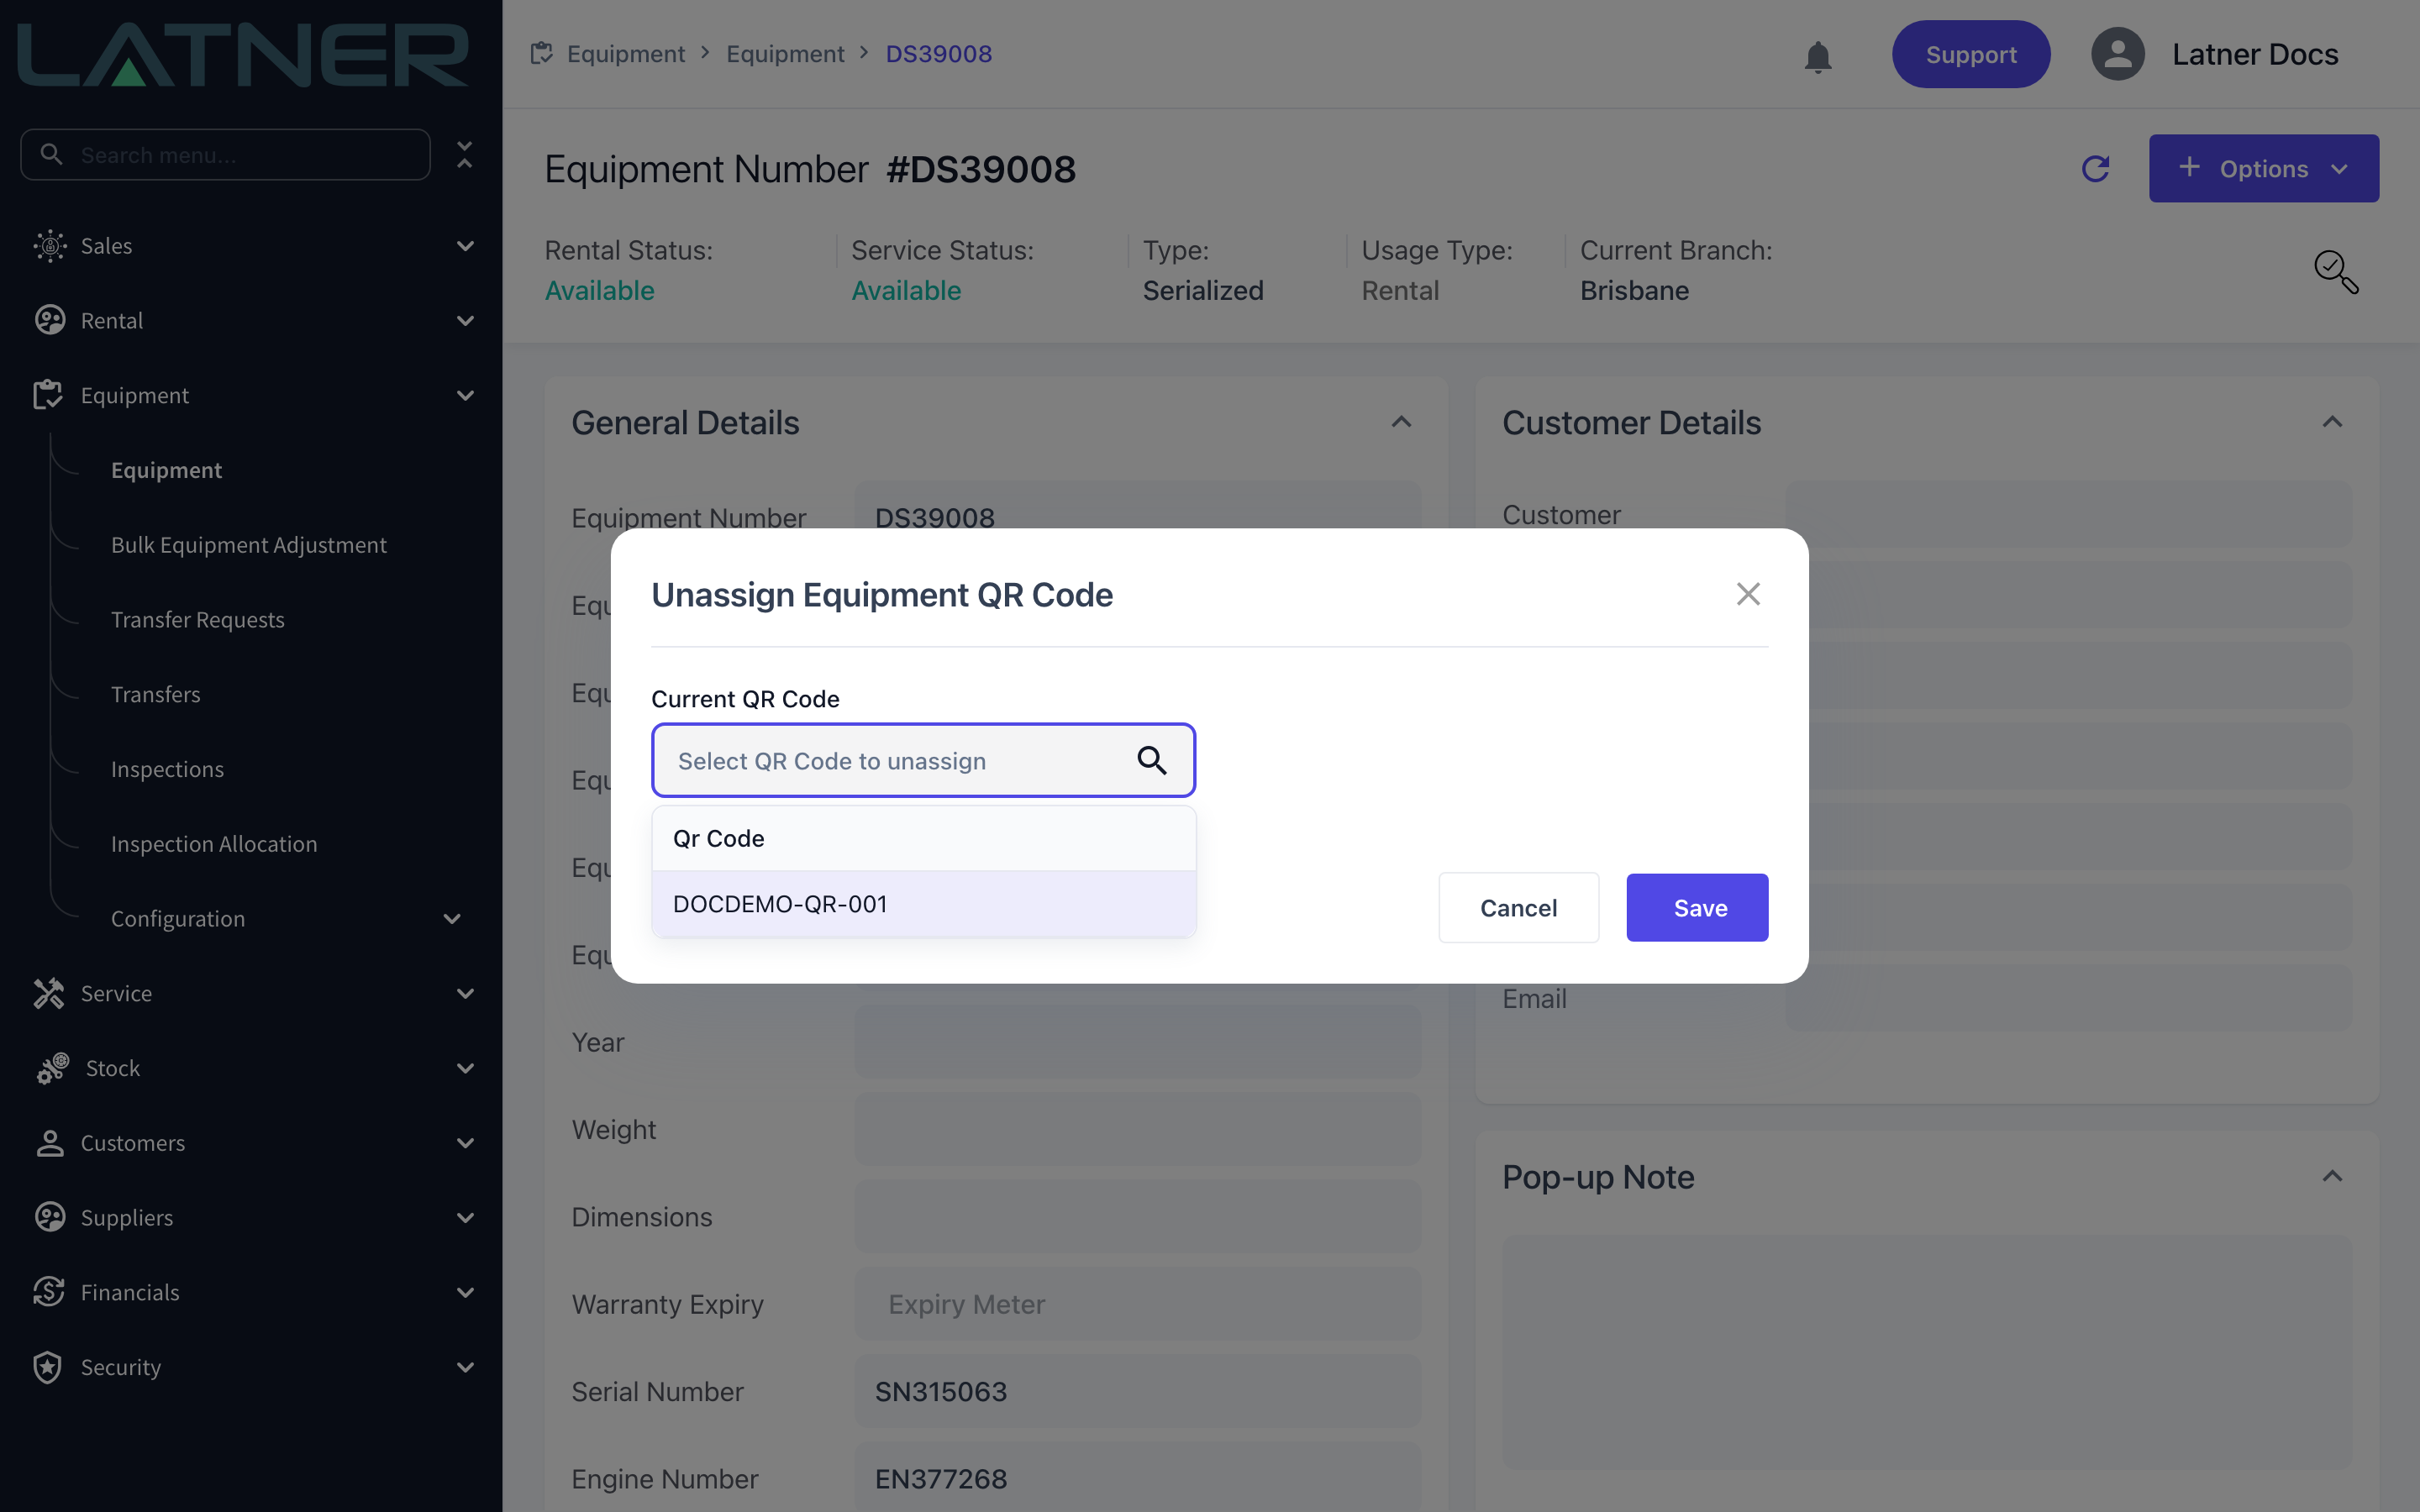
To take a code off a machine entirely, use Options › Unassign QR Code, select the code and Save. Latner confirms with QR Code Unassigned. The picker only lists codes belonging to the machine you're on.
After Assigning
-
The code is listed under QR Codes on the equipment record, comma separated when there's more than one.
-
You can find the machine by typing its code into the search box on the Equipment list. On a phone, the Search Equipment screen has a scan button that fills the search box from a label.
-
Scanning a Portal label while signed in to Latner opens the internal equipment record; scanning it signed out opens the customer portal instead.
-
Scanning a Pre Start label opens the public pre-start check for that machine, signed in or not.
-
The change is recorded in the machine's audit history as QR Code Assigned (or QR Code Unassigned), with who did it and when.
Unassigning a code deletes it rather than parking it, so its history goes with it and the machine no longer answers to that label. If a machine is simply getting a new sticker, replace the code through Assign QR Code instead of unassigning and starting again.
FAQs
Watch the Demo
Prefer to watch it? Step through the same flow here.