
Portal Documentation lets you attach manuals, risk assessments and certificates to an equipment model or to a single unit, so customers can open them straight from the equipment's public portal.
Overview
Most of what an operator needs to know about a machine is true of every machine like it, and only some of it is true of the one sitting on their site. Portal Documentation handles both: attach the operators manual once to the model, and attach the certificate that belongs to a single serial number to that unit.
-
Every document is filed against a document type - Operators Manual, Risk Assessment, Certification and so on - configured under Equipment › Configuration › Portal Documentation.
-
Attach at the equipment model level for anything that applies to every unit of that model, and at the equipment level for anything specific to one machine.
-
You can attach one file per document type on each record. Uploading again replaces what is there.
-
PDF, JPG and PNG files are accepted.
-
Customers see the documents on the Documentation tab of the equipment's Public Portal URL - they do not need a login.
-
Where a unit and its model both have a document of the same type, the customer is served the unit's file.
Before You Begin
Check the following before you start uploading.
|
Requirement |
Where to Find It |
|---|---|
|
Equipment Portal - Visible Tabs includes Documentation (or is left empty) |
Security › Settings › Equipment |
|
Equipment Portal Documentation Type permission - to open the document type list and add types |
Security › Configuration › Permission Groups › Equipment › Configuration |
|
Equipment Model permission - to open an equipment model |
Security › Configuration › Permission Groups › Equipment › Configuration |
|
Equipment permission - to open an equipment record |
Security › Configuration › Permission Groups › Equipment › Screen |
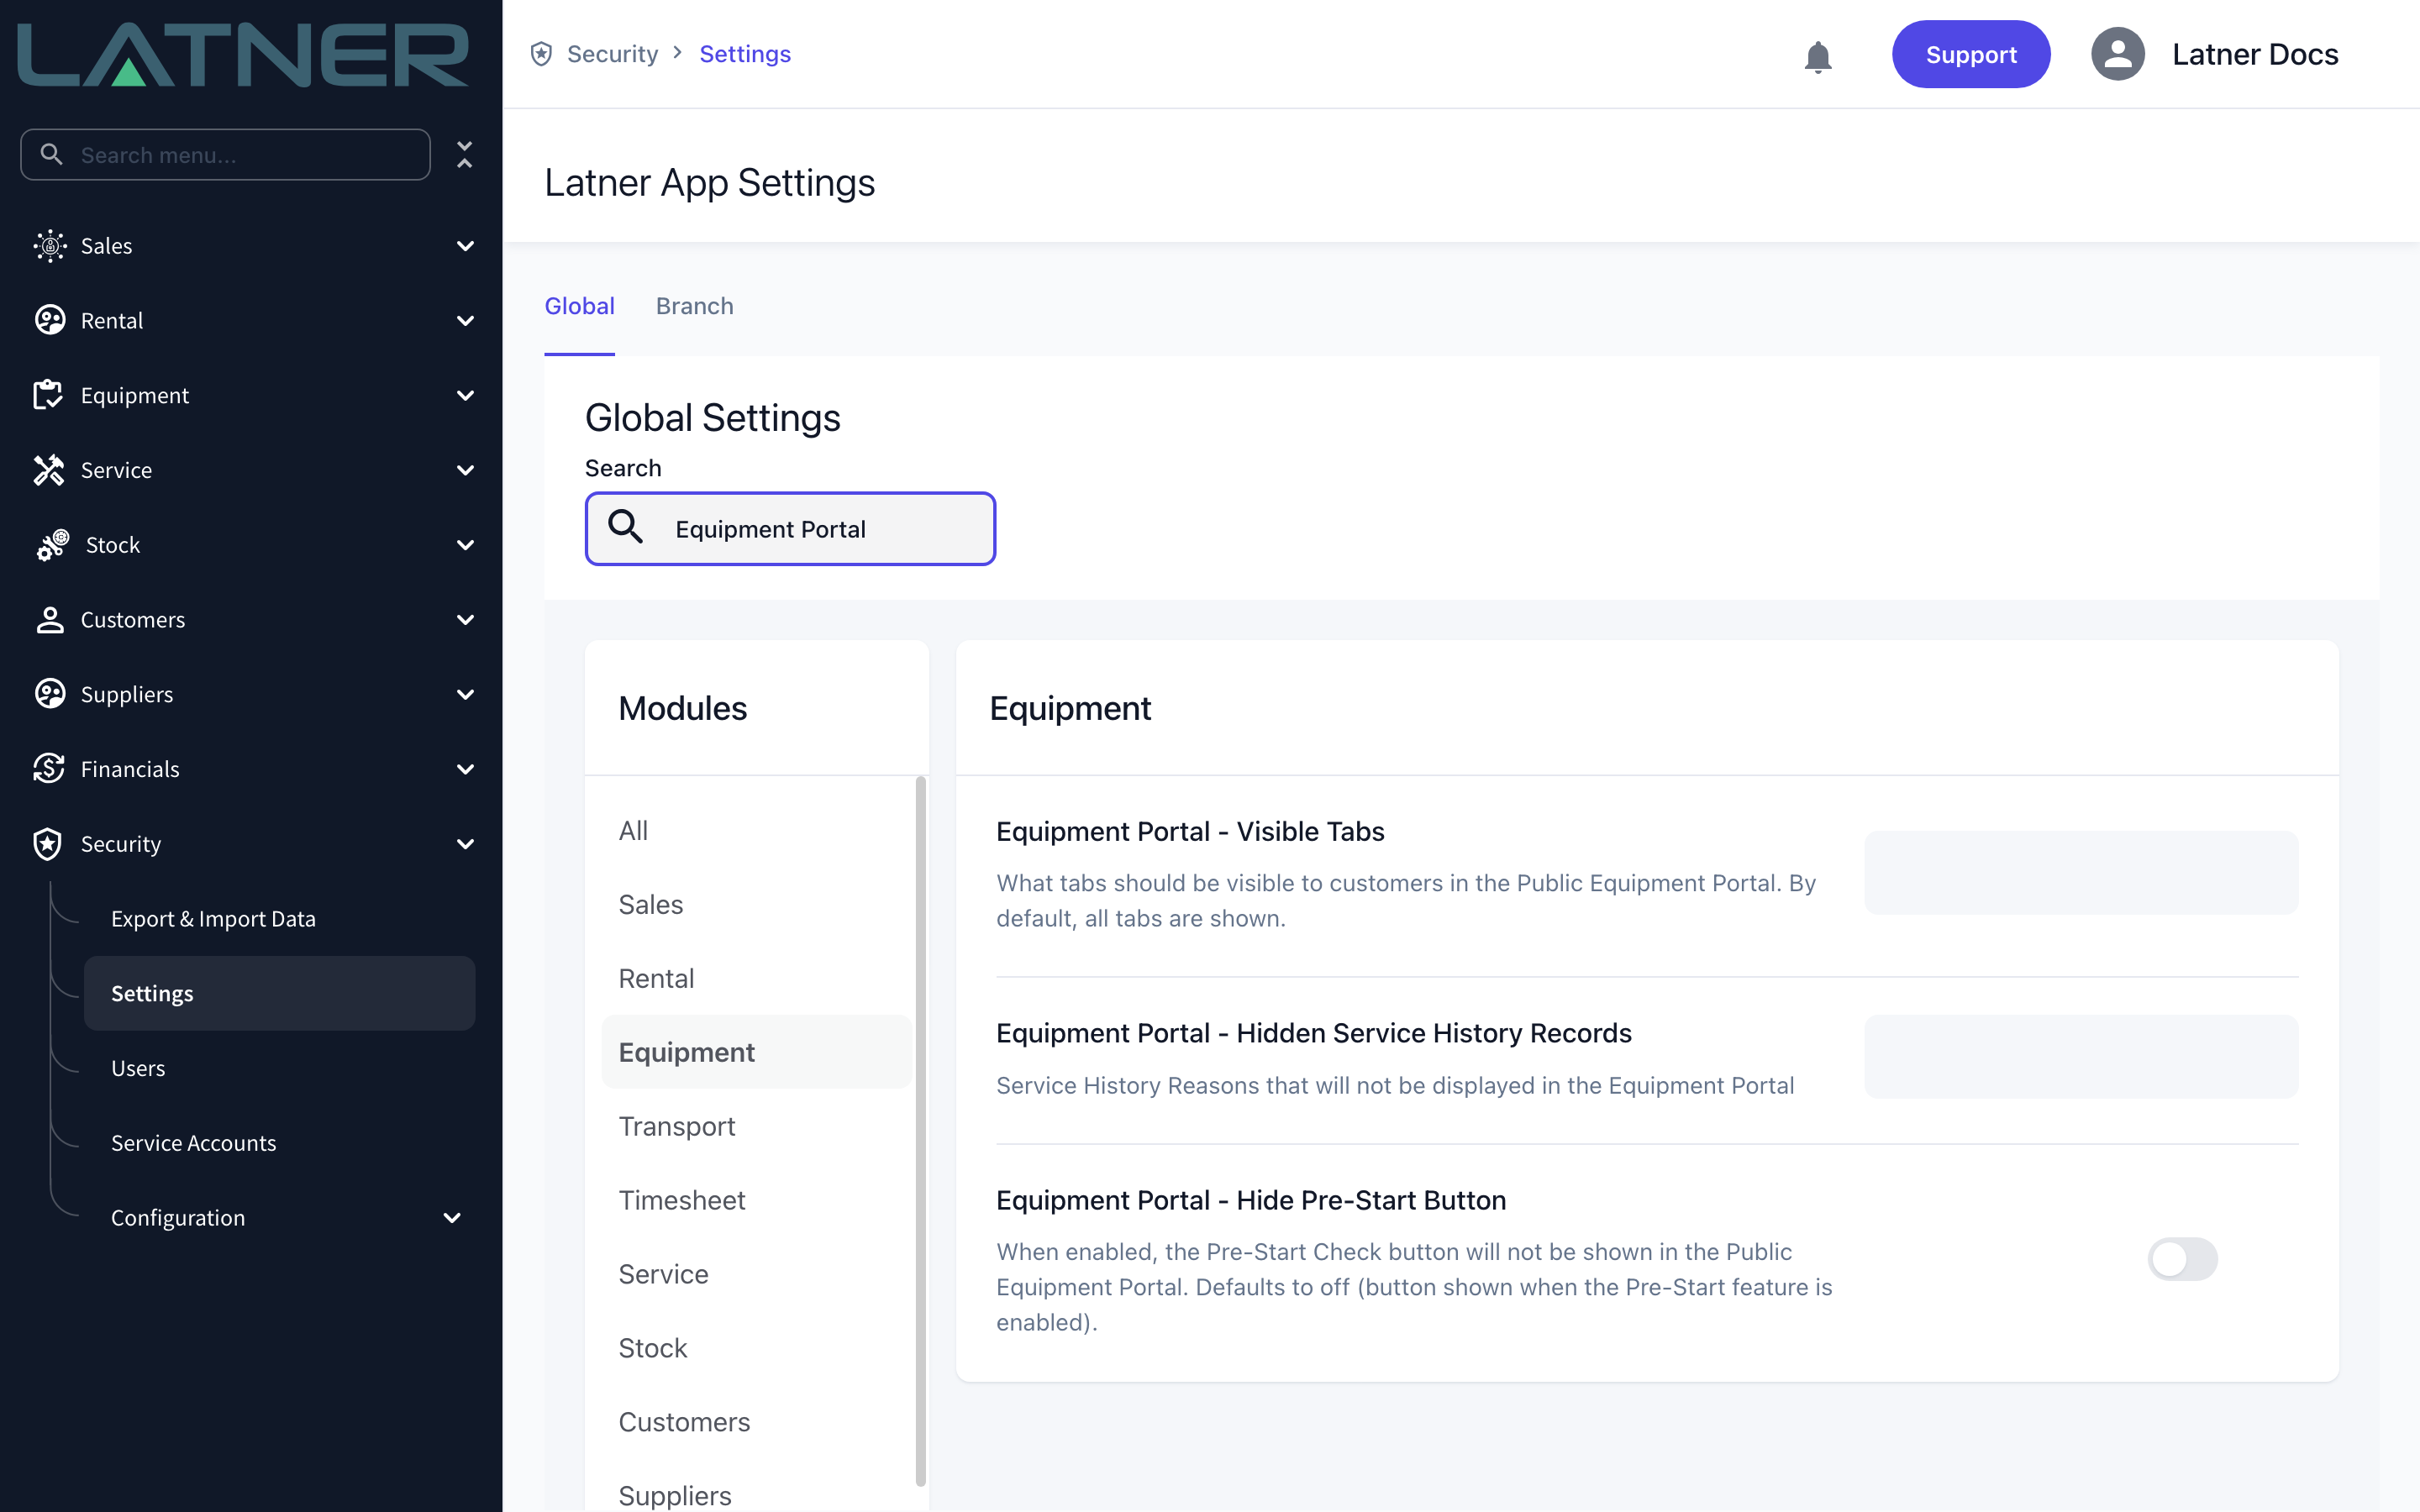
If Equipment Portal - Visible Tabs has been set and Documentation is not one of the selected tabs, the documents you attach are stored correctly but customers never see them. Clear the setting or add Documentation back to it.
Setting Up Document Types
Step 1 - Review the document types
Go to Equipment › Configuration › Portal Documentation Types. Latner ships with seven types, all Active. These types are shared across the whole system - every equipment model and every equipment record offers the same list.
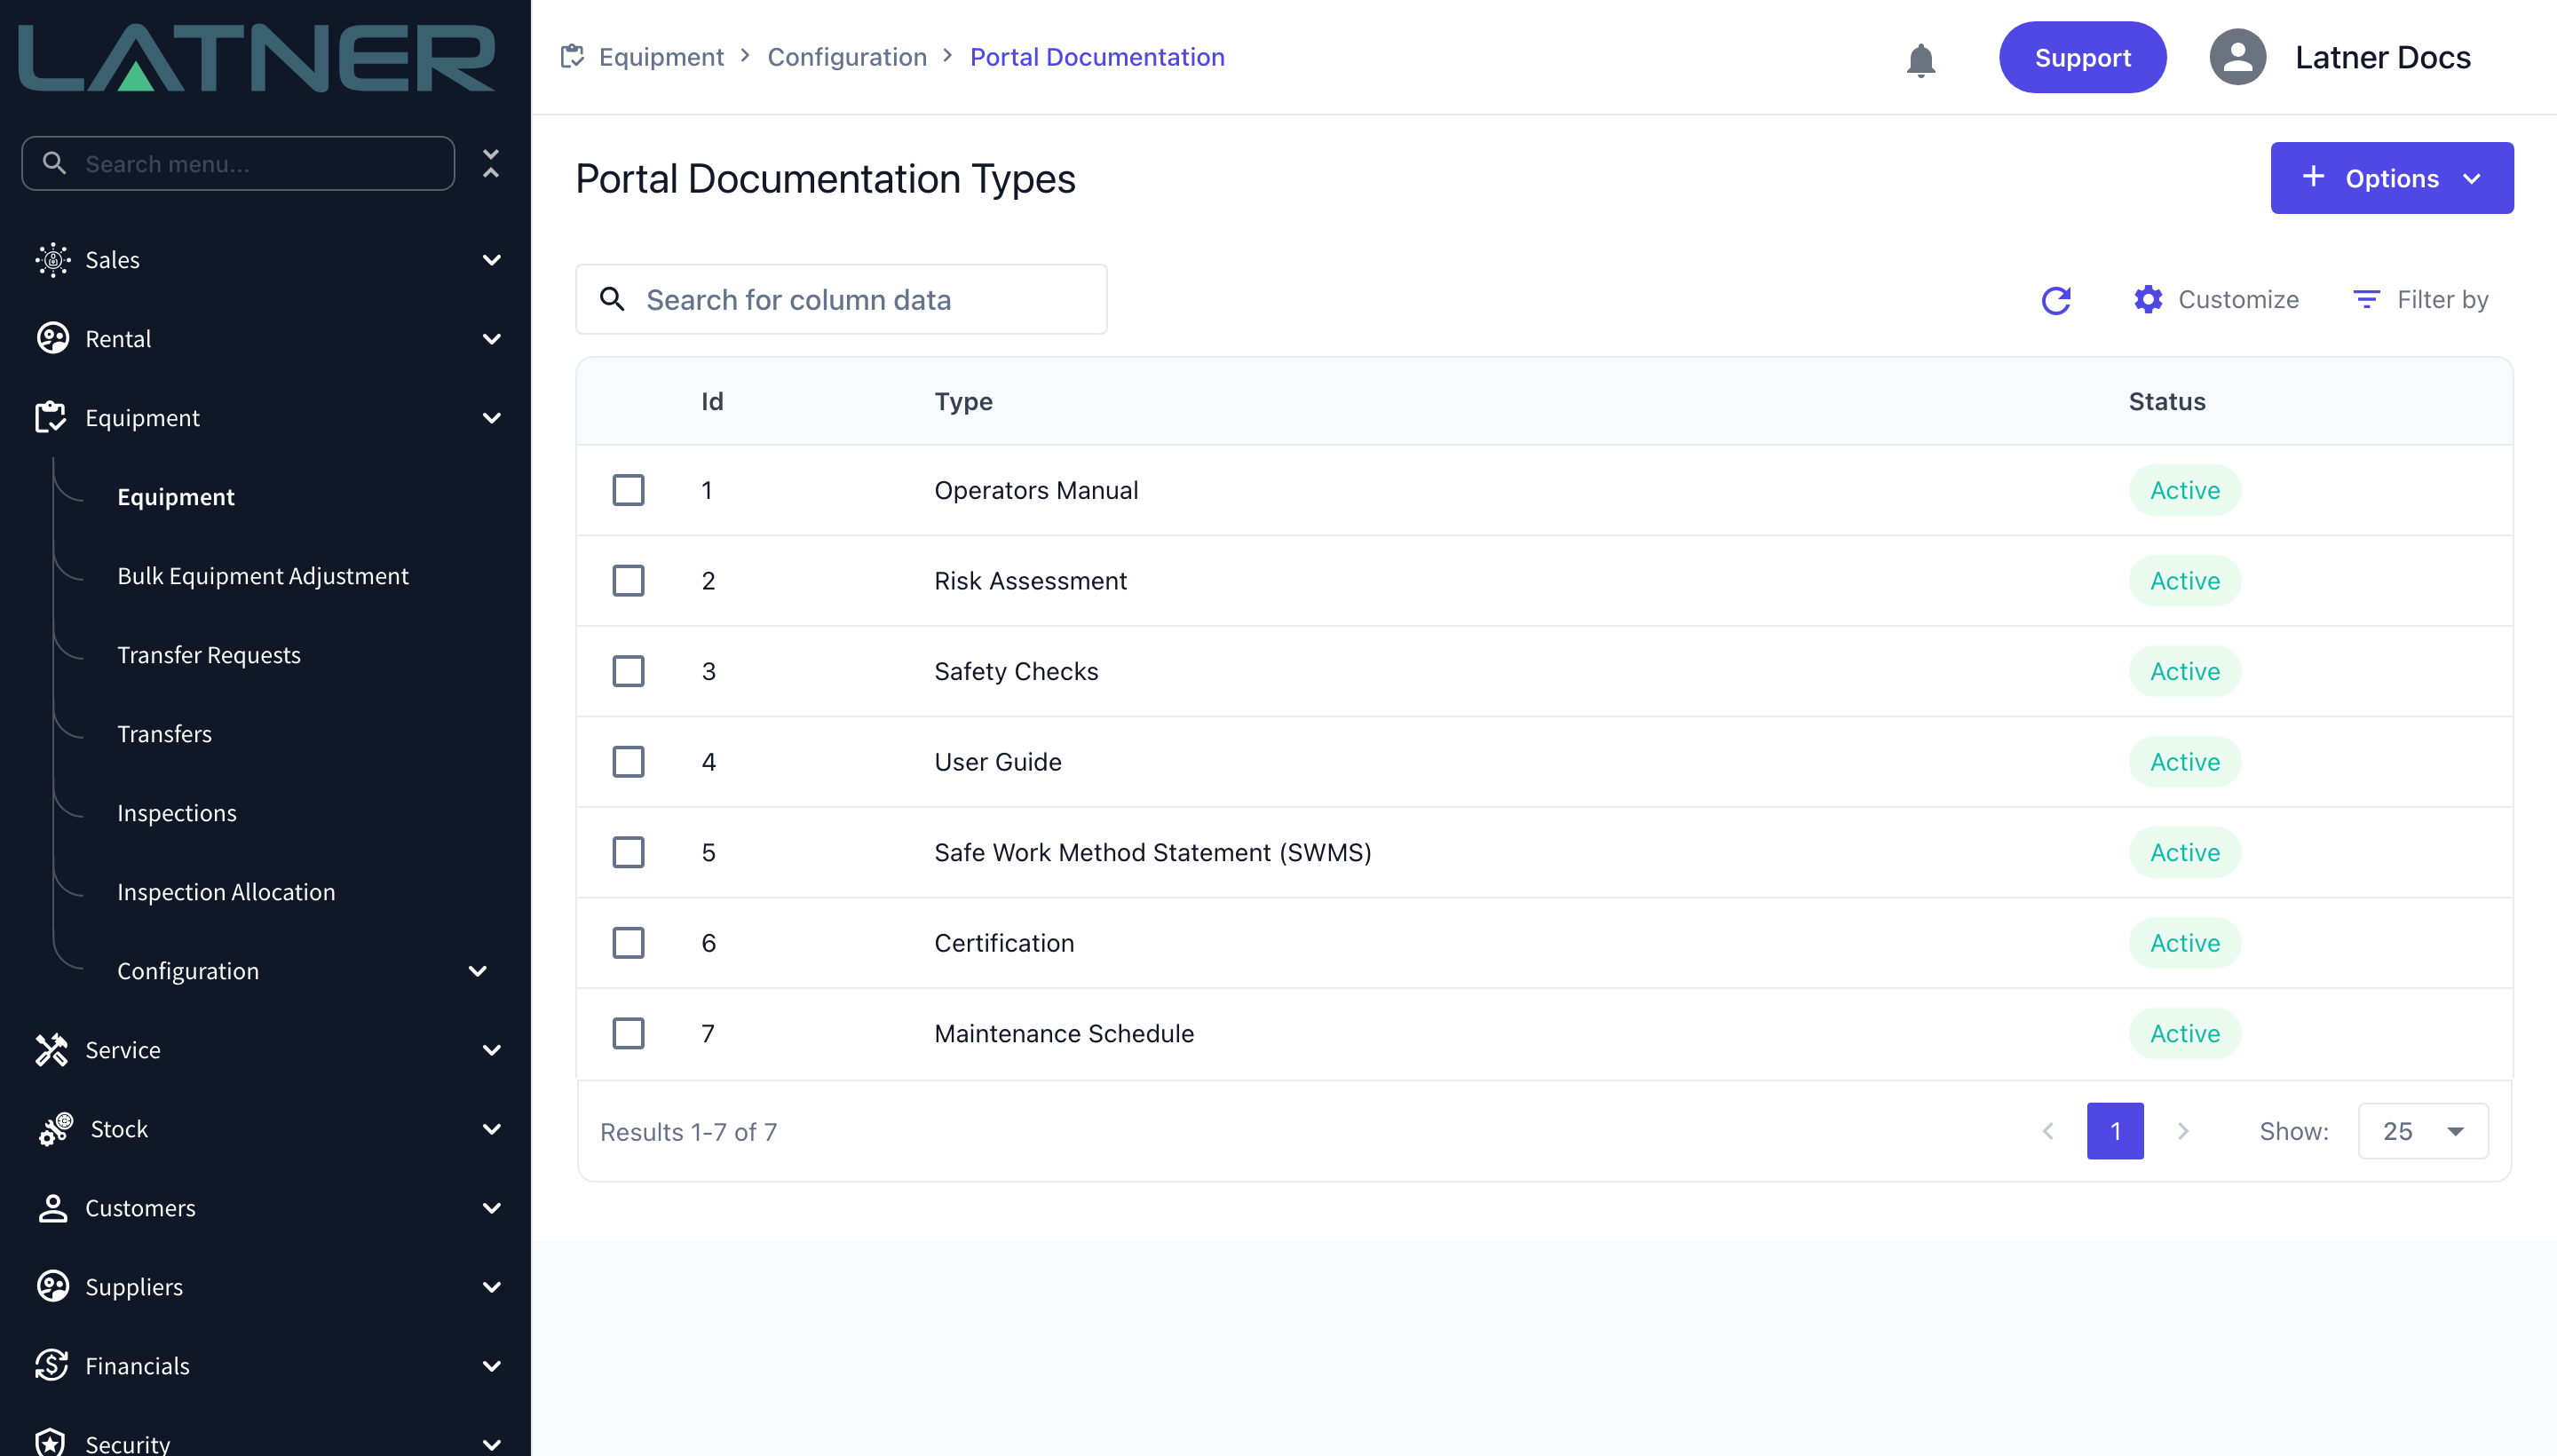
Step 2 - Add a type if you need one
If the document you want to publish does not fit an existing type, choose Options › Create Portal Documentation Type.
-
Type Name - required, and must be unique. This is the heading customers see in the portal, so name it the way they would ask for it.
-
Status - required. Active types appear everywhere; Inactive types are hidden from the equipment and model screens and from the portal.
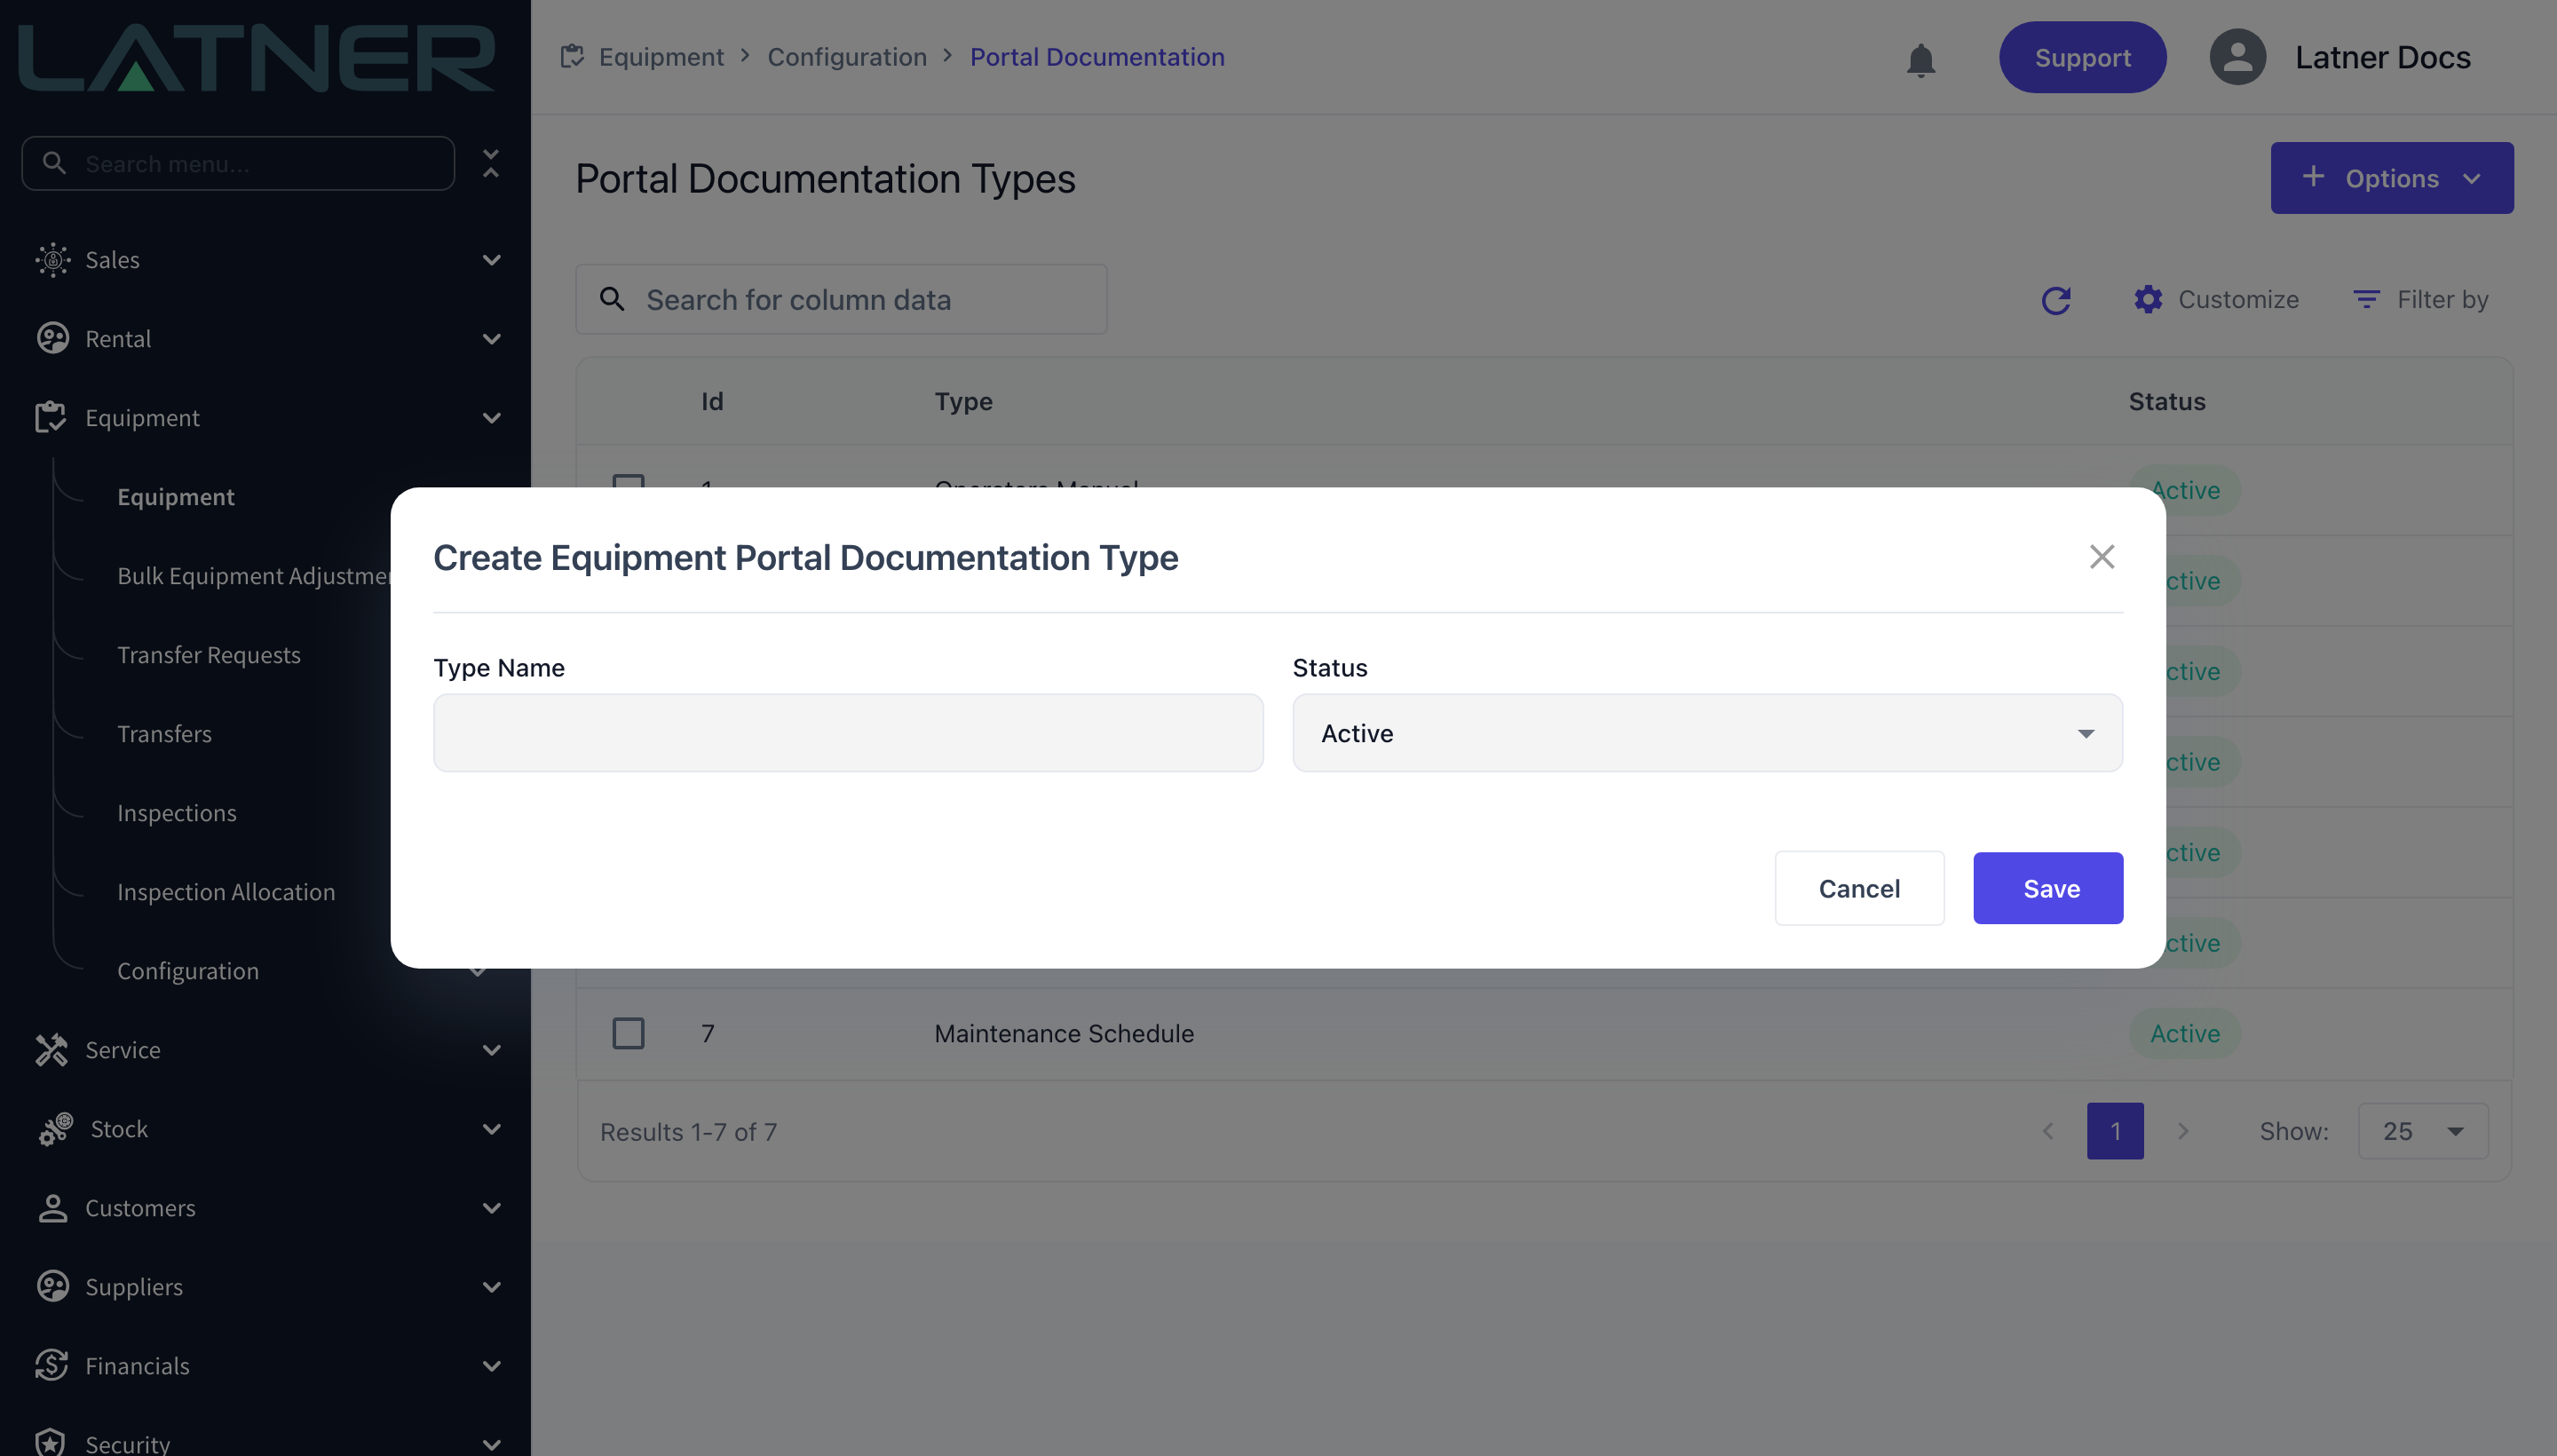
To rename a type or change its status later, tick its row on the list and use the edit pencil.
Attaching a Document to an Equipment Model
Start at the model, because a document attached here covers every unit of that model without any further work.
Step 3 - Open the model's Portal Documentation tab
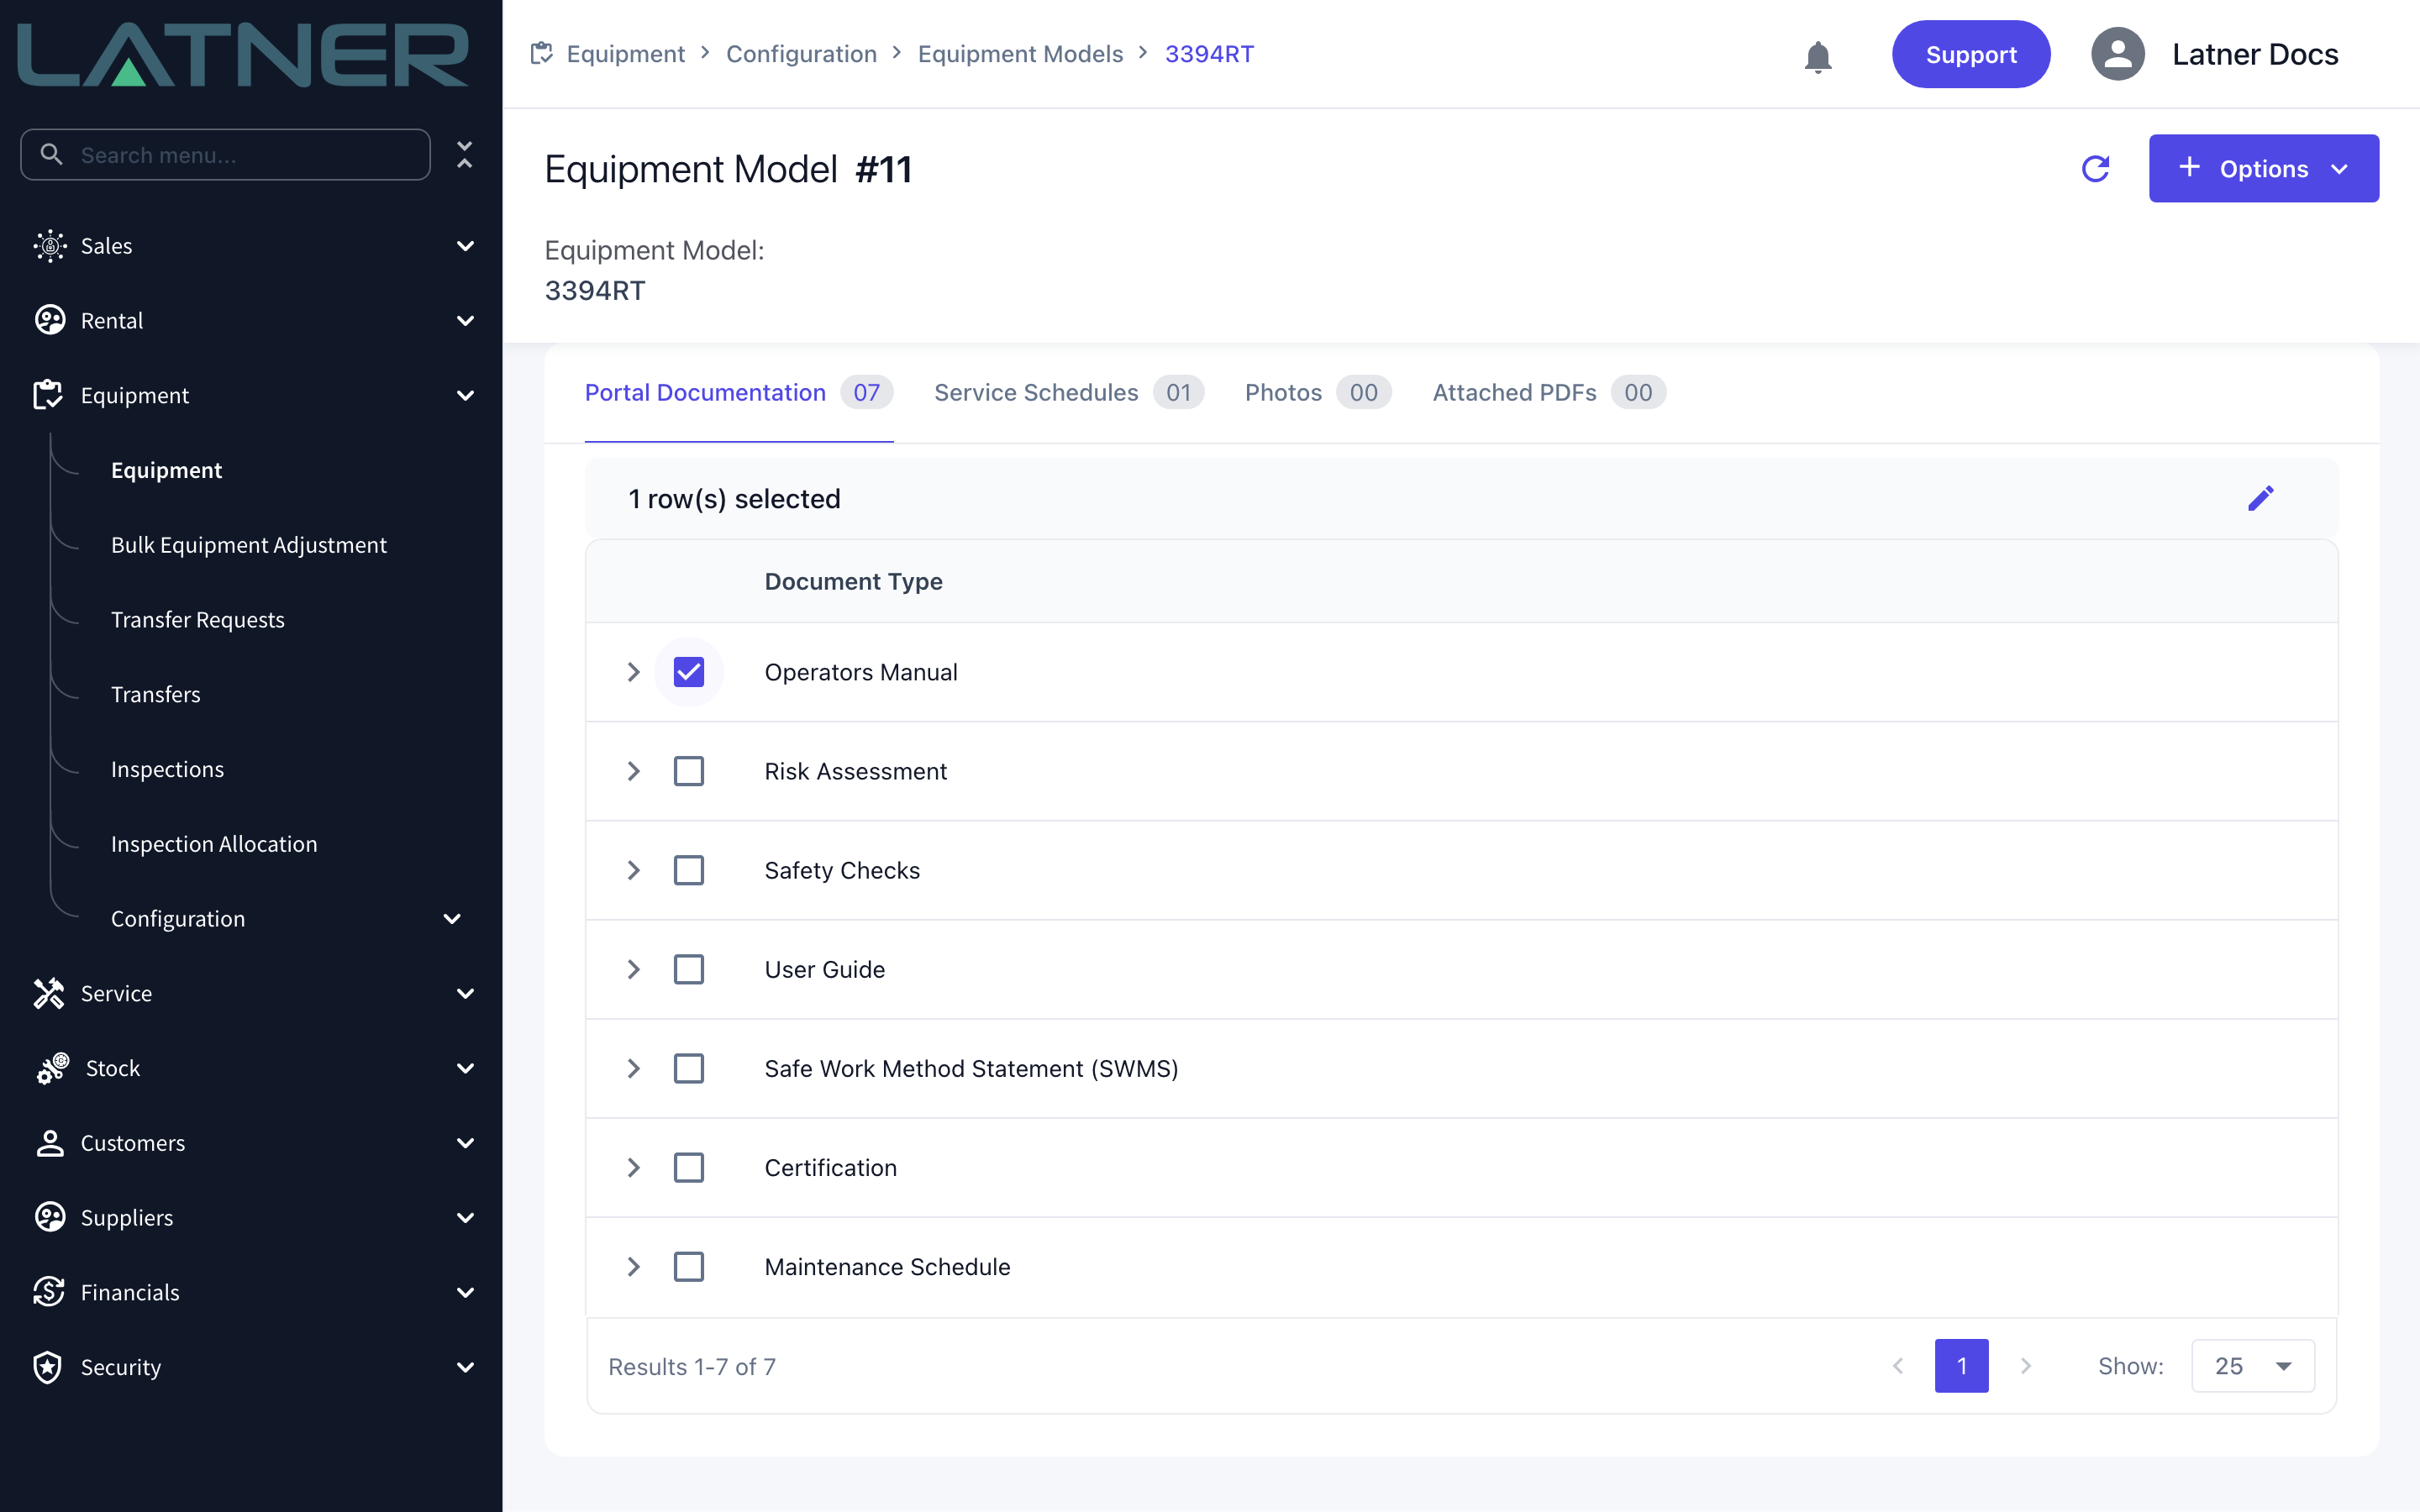
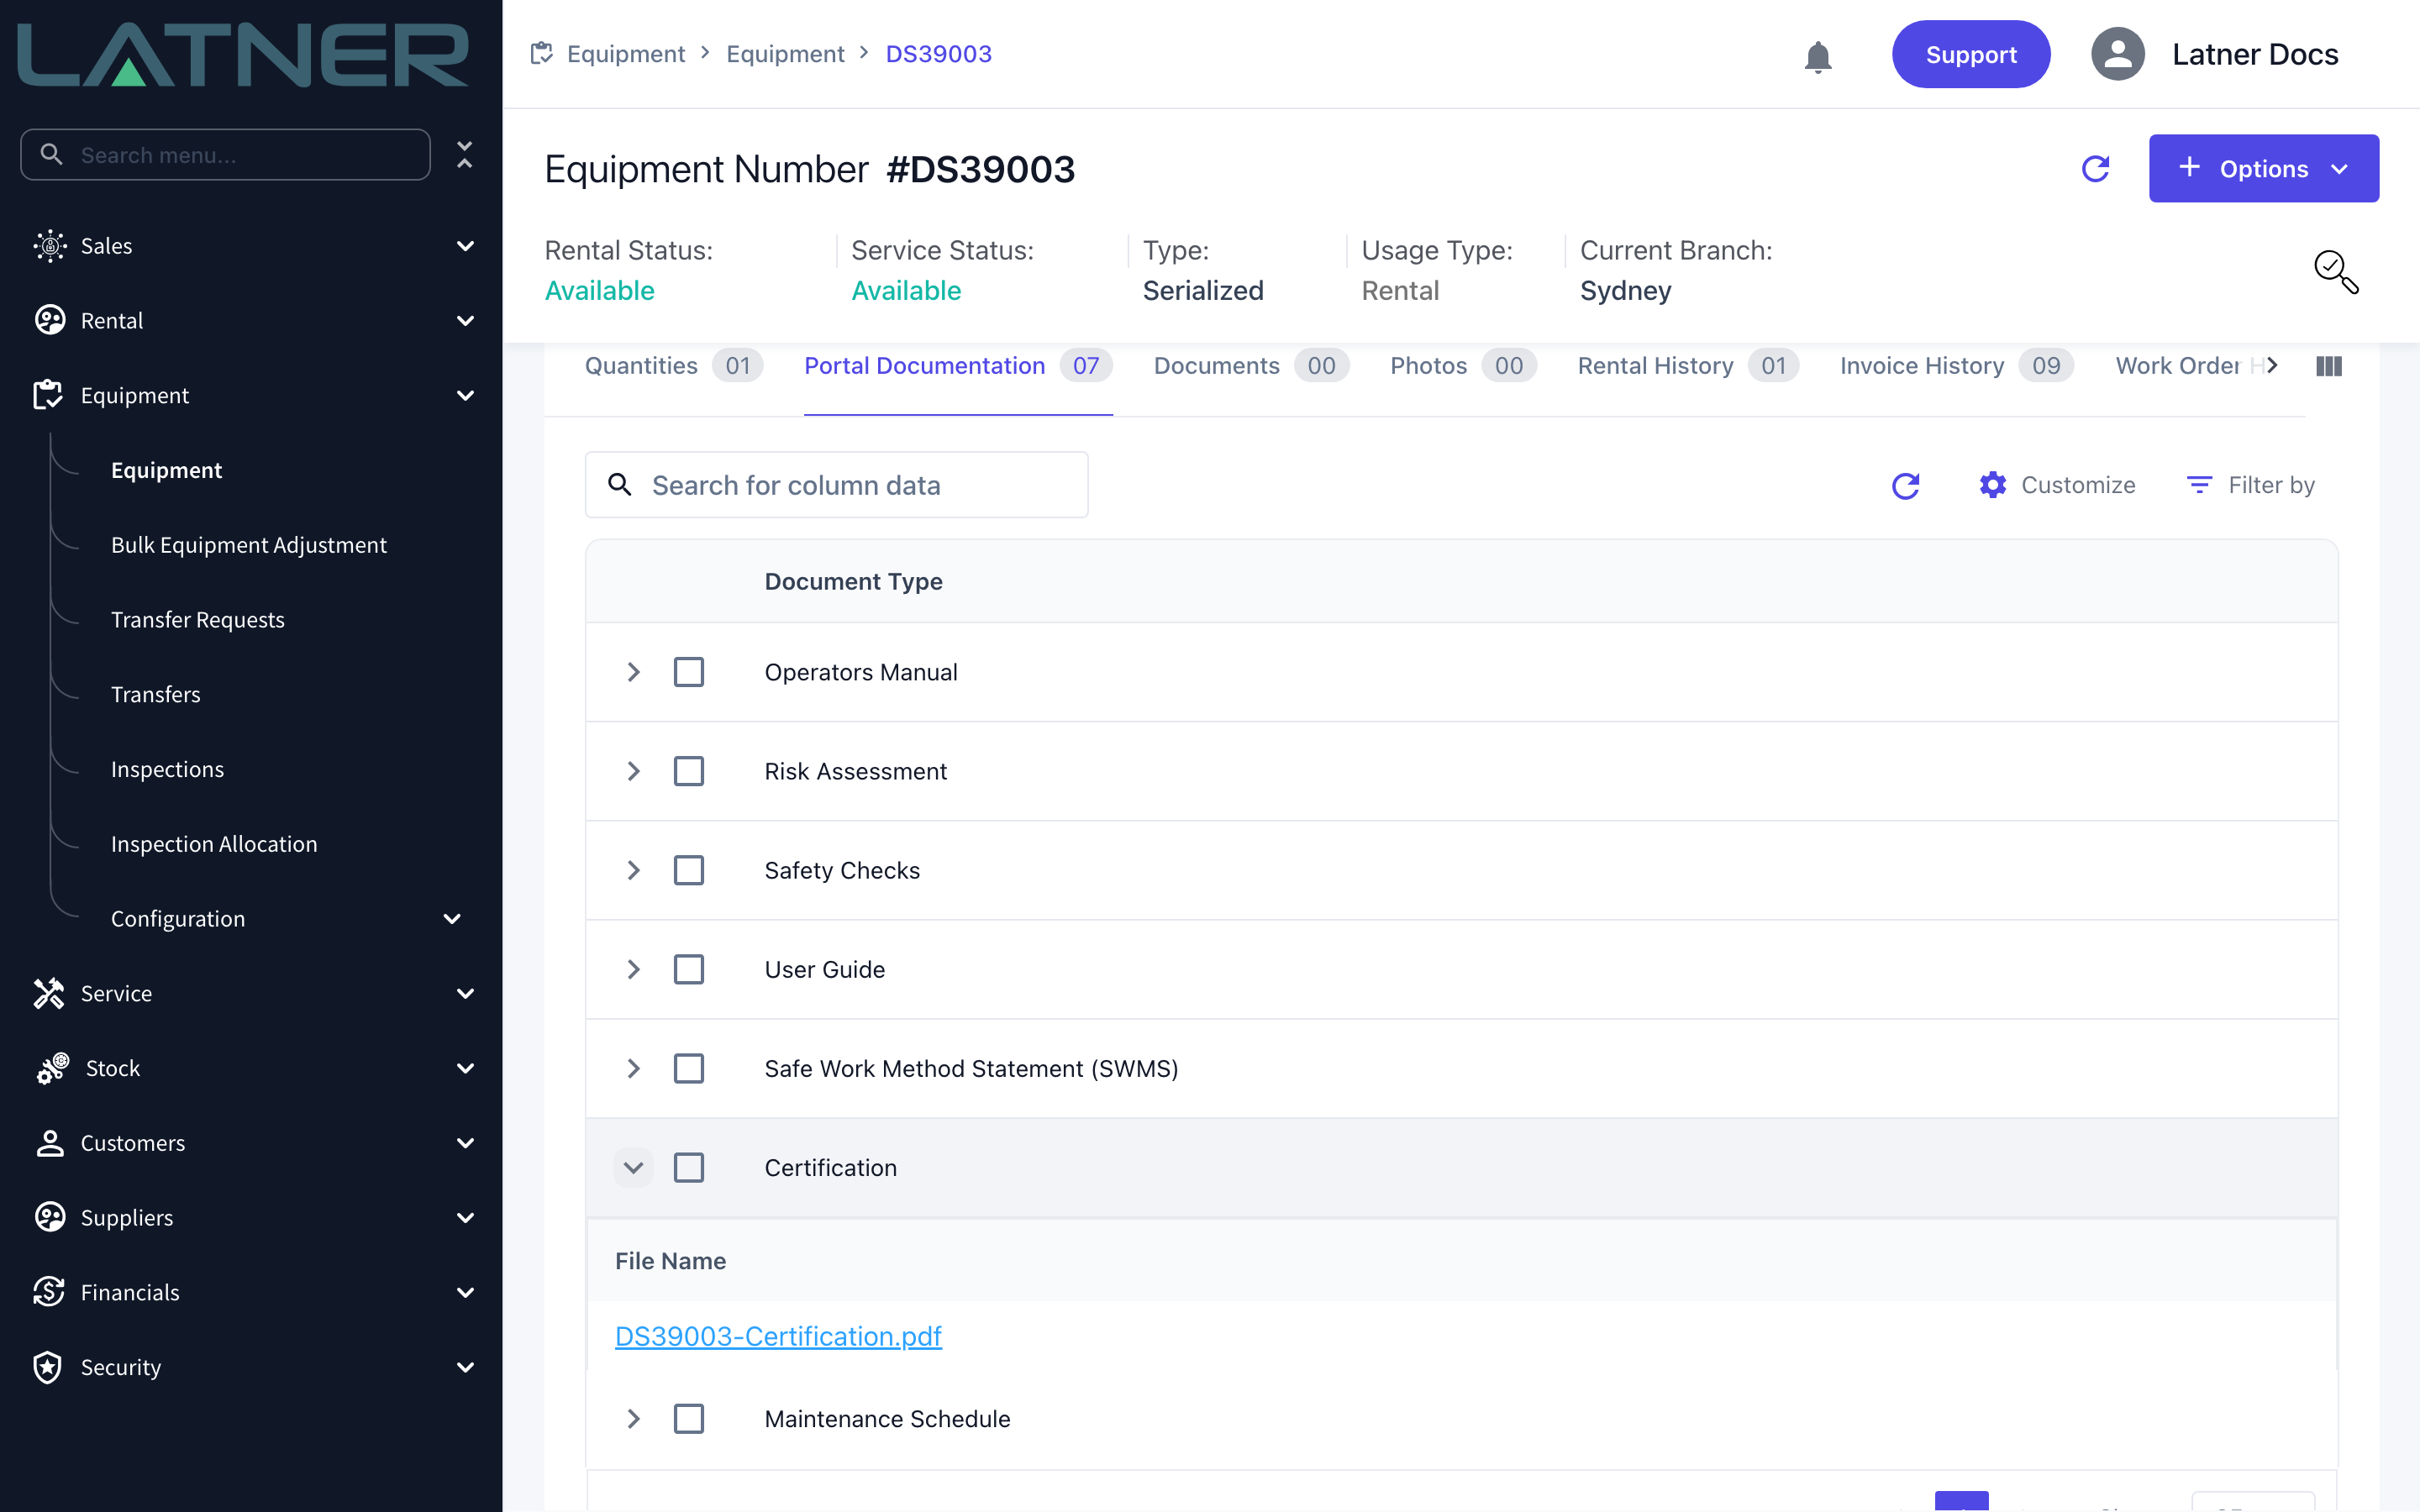
Go to Equipment › Configuration › Models and open the model. The Portal Documentation tab lists every active document type, whether or not a file has been attached to it, so the tab count is the number of types rather than the number of documents.
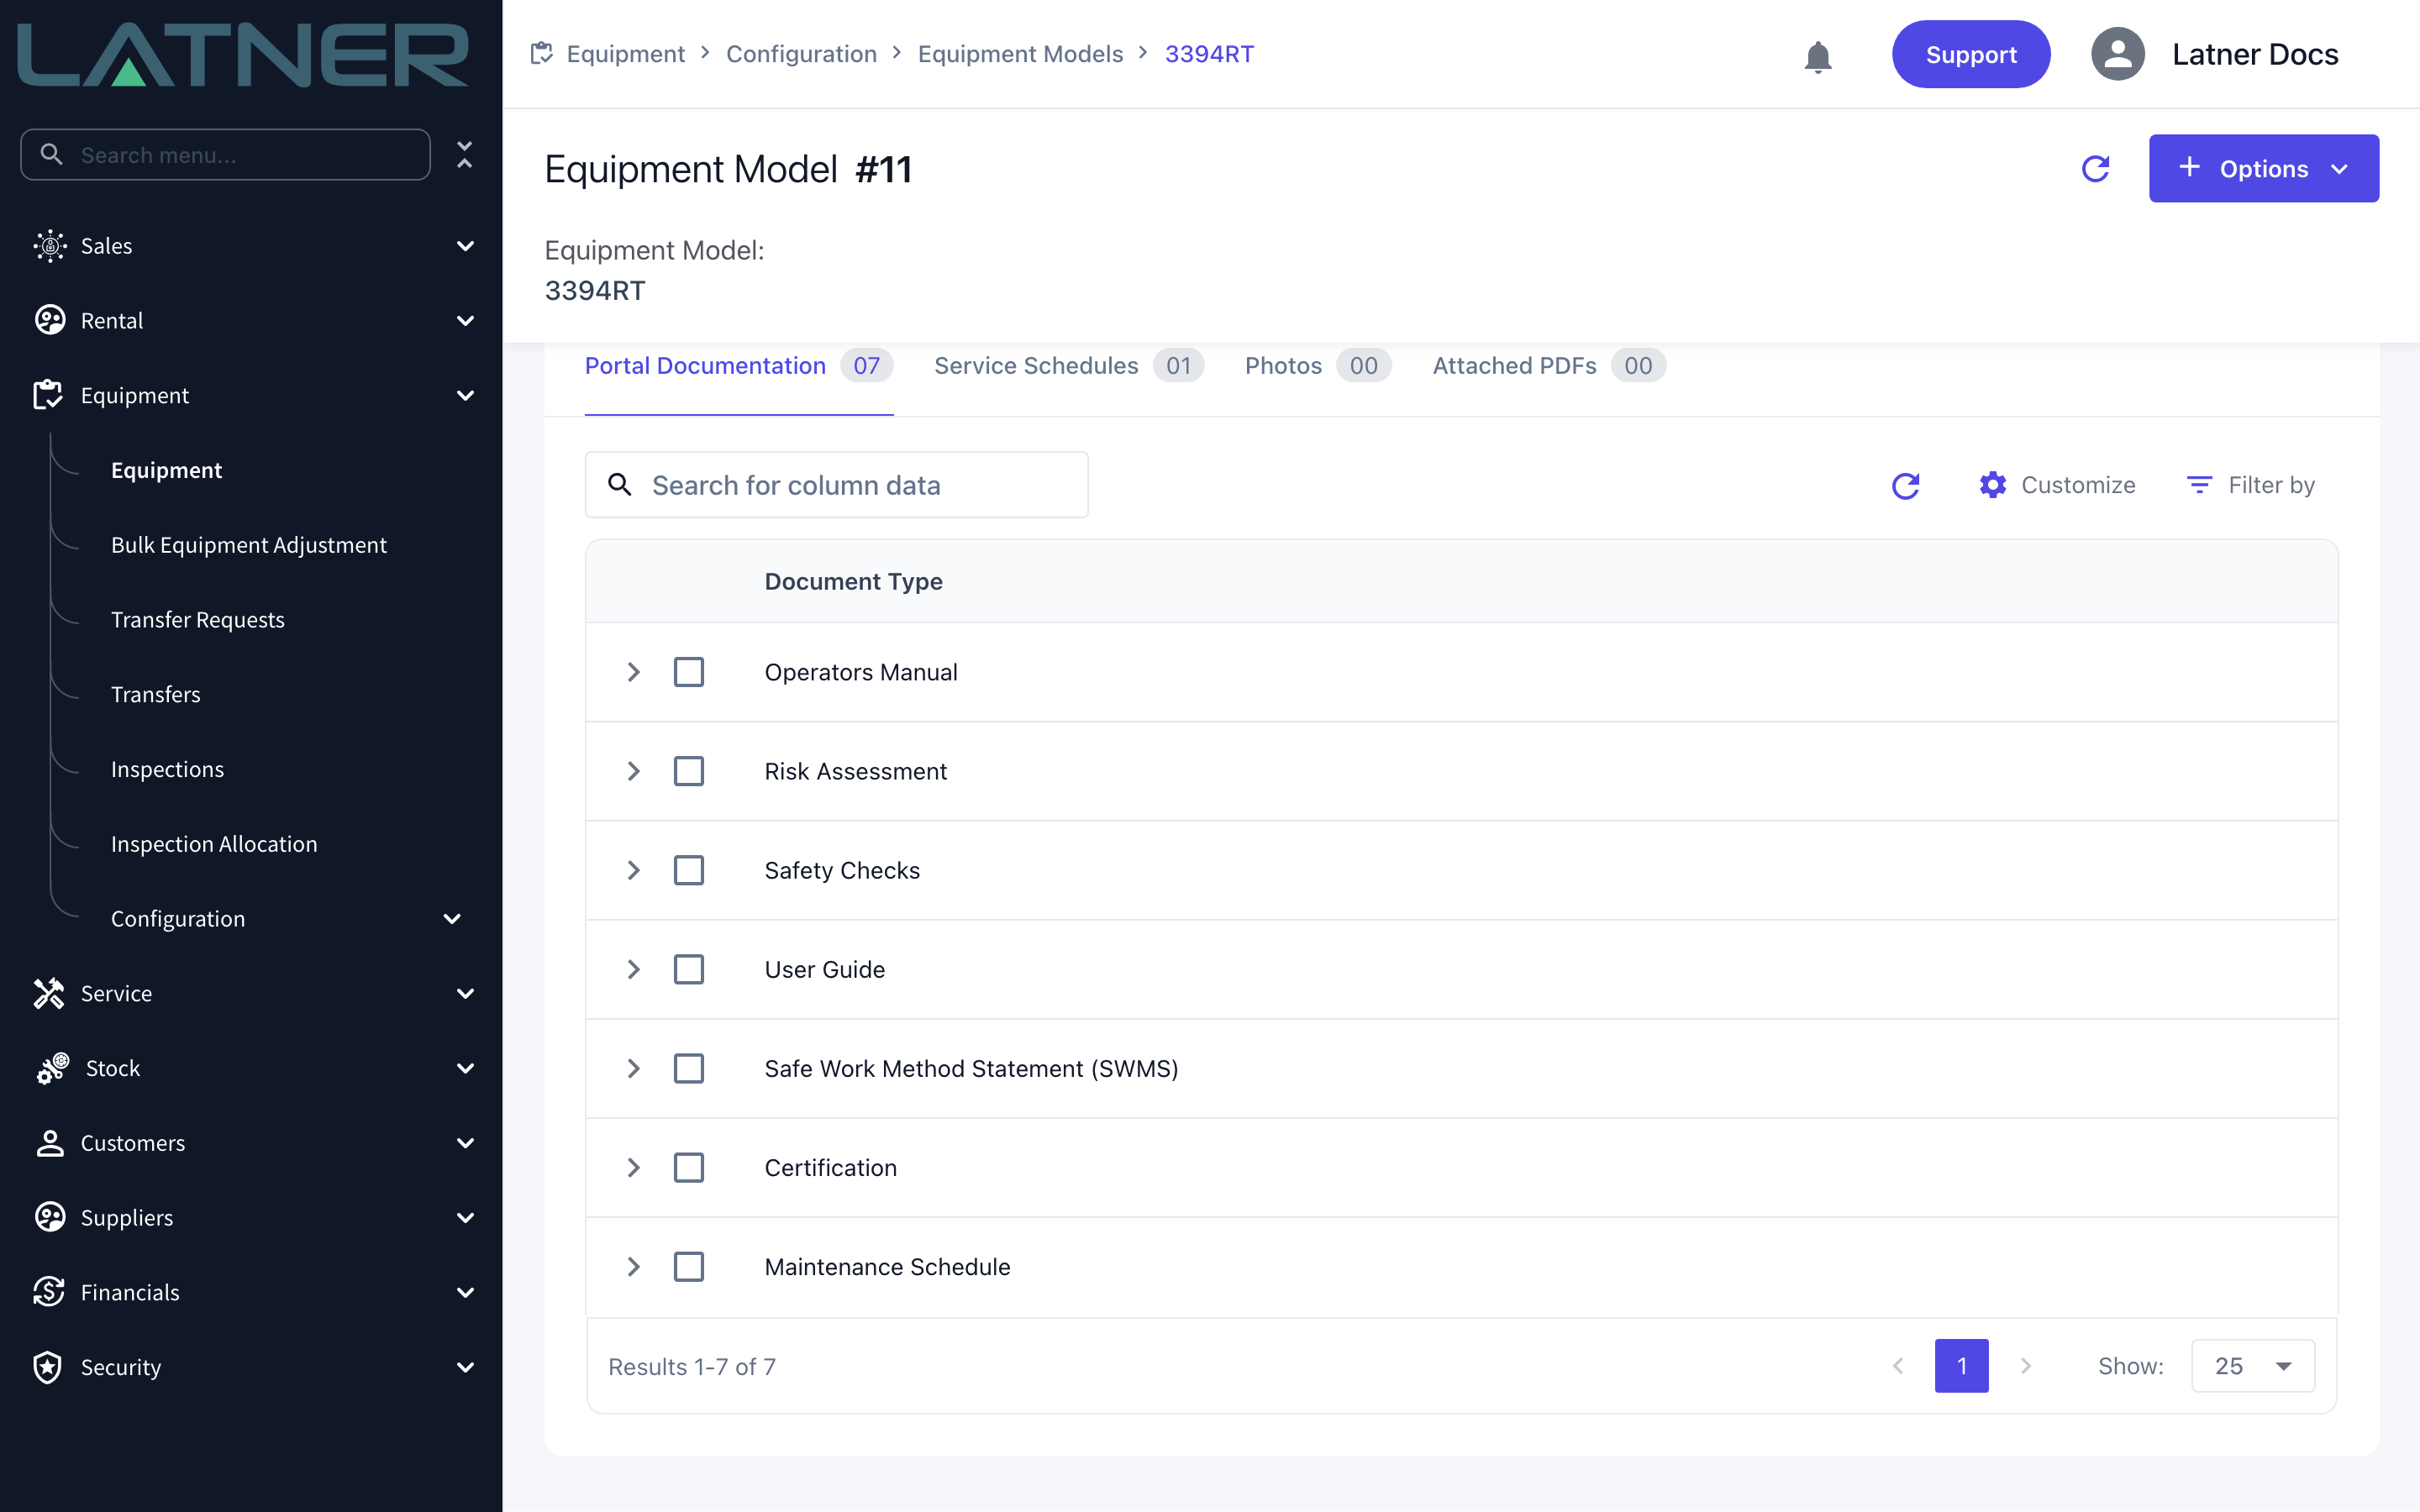
Step 4 - Select the document type
Tick the checkbox on the row for the type you are uploading. An edit pencil appears at the top right of the table. Click it.
Step 5 - Attach the file
The Update Document dialog opens. Document Type is fixed to the row you selected and cannot be changed here - if you picked the wrong one, cancel and start again.
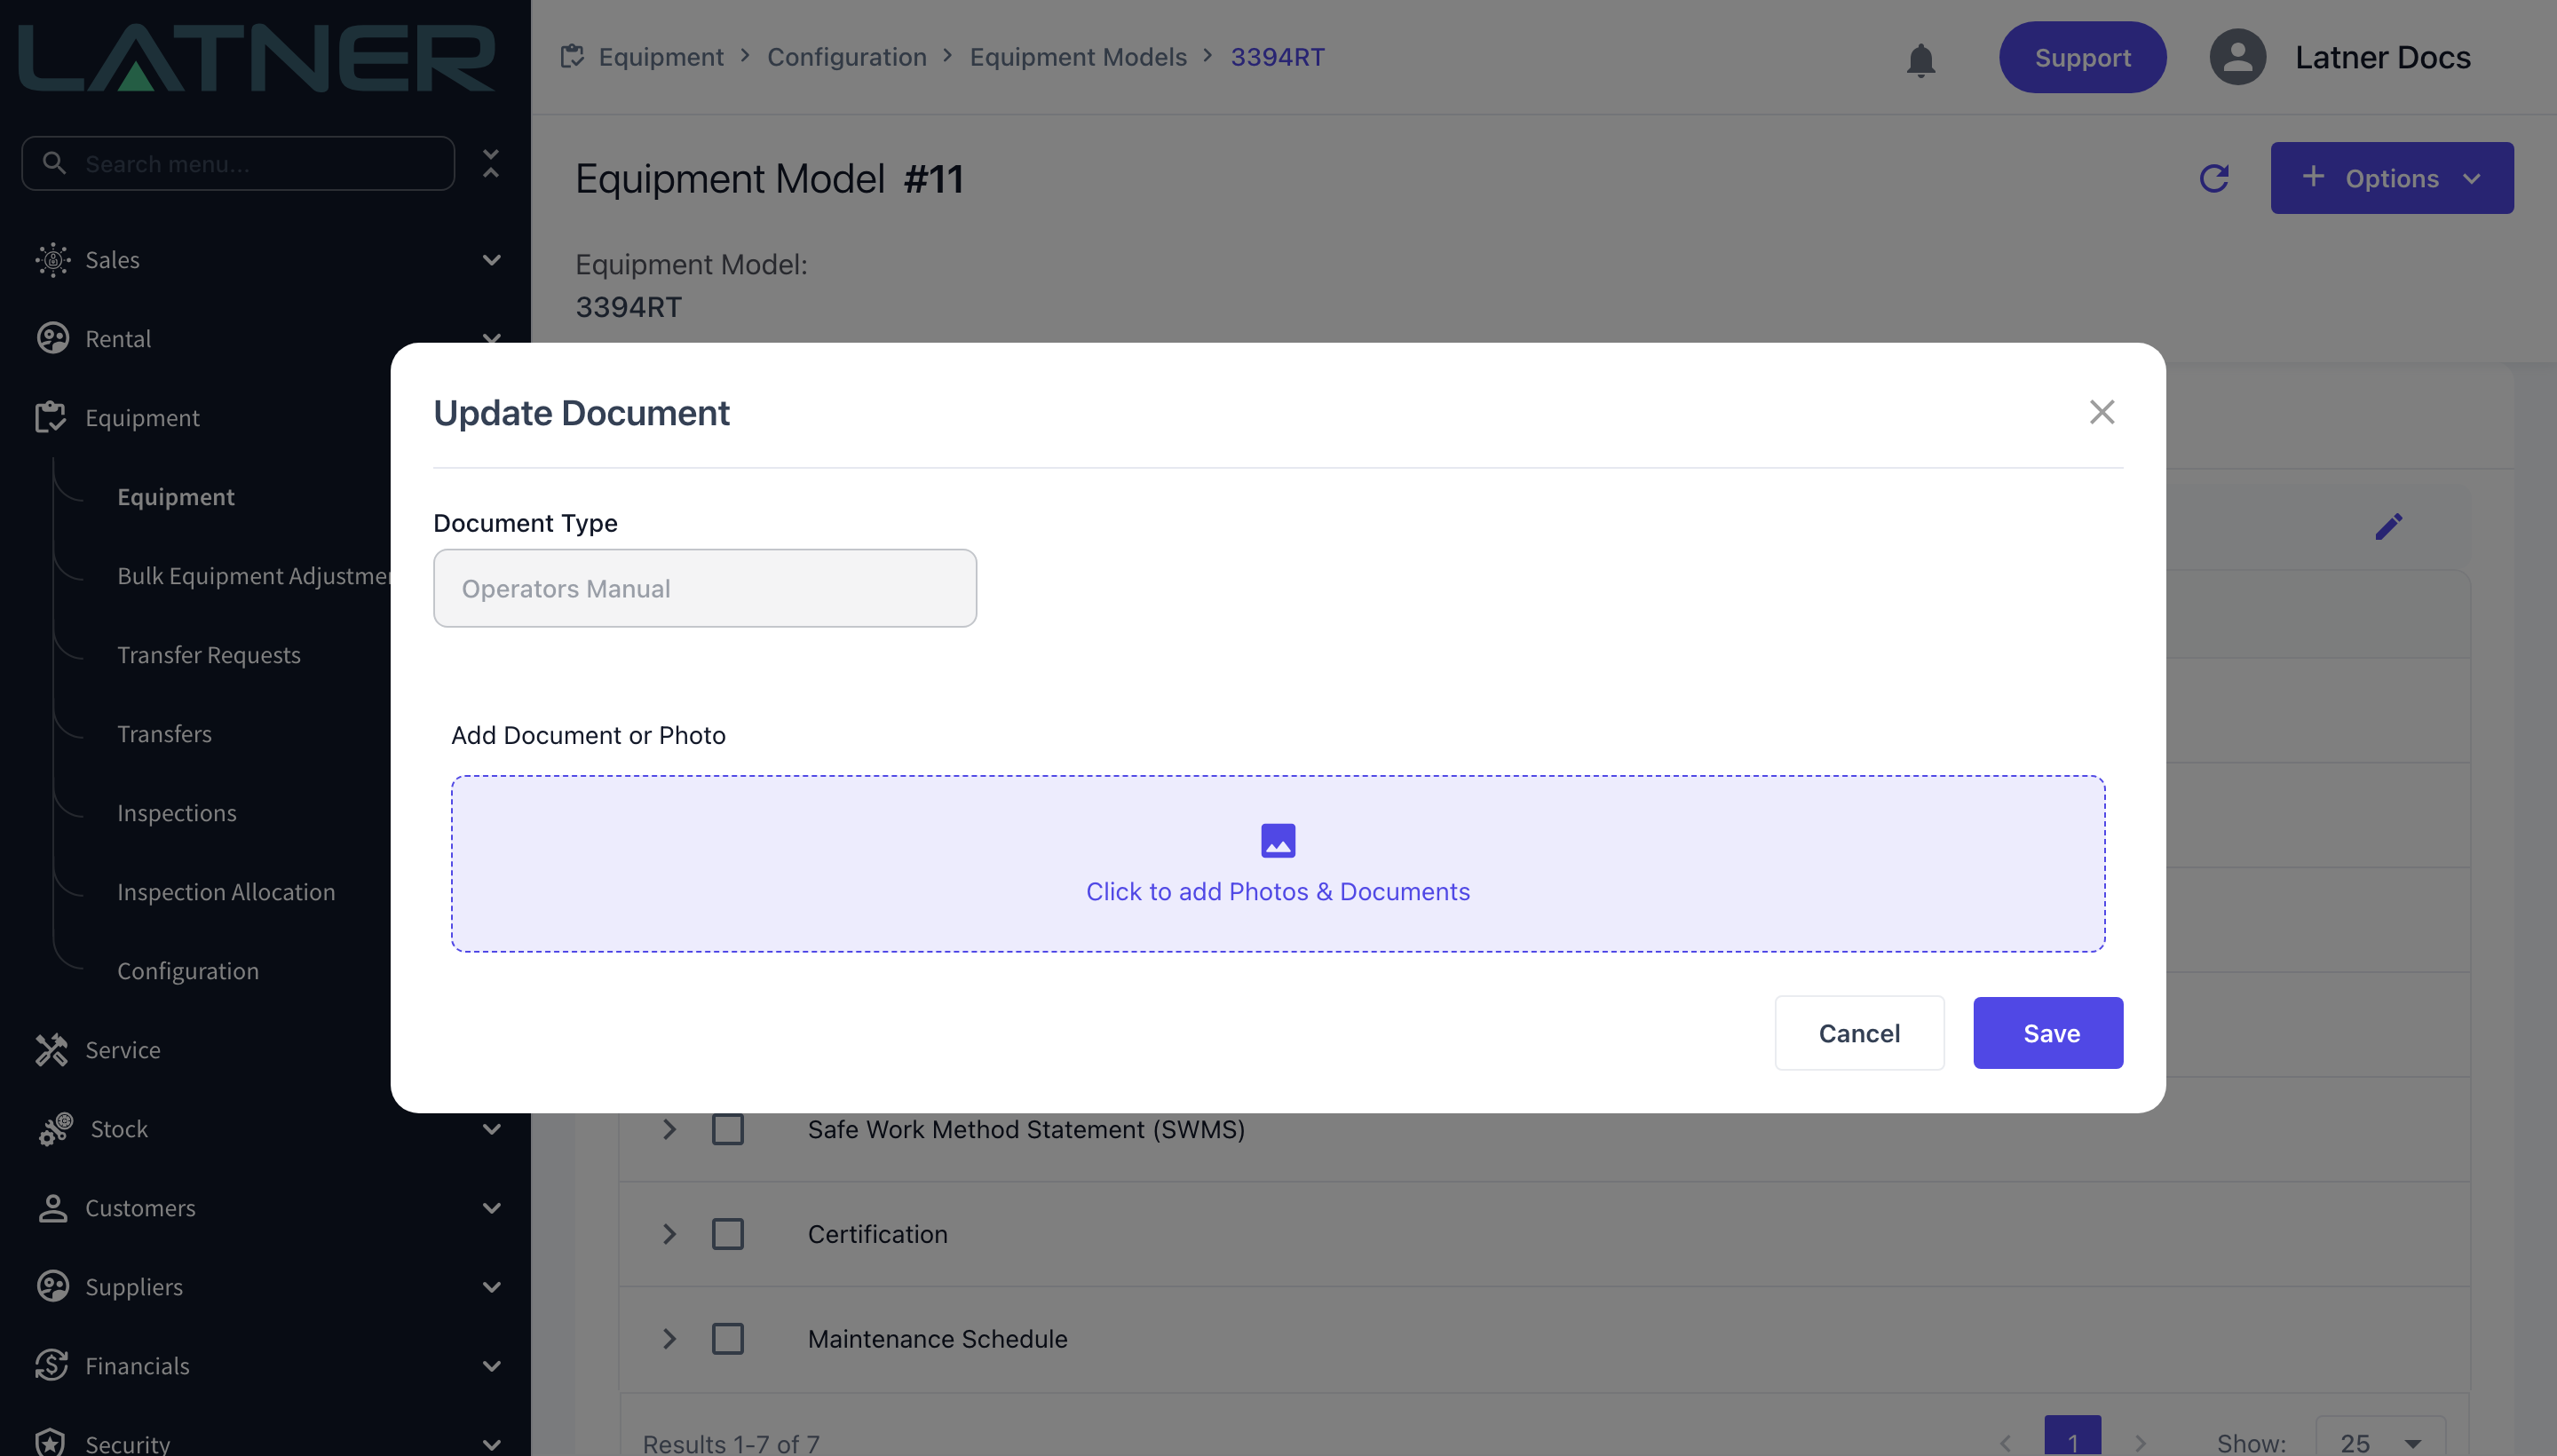
Click Click to add Photos & Documents and choose the file, or drag it onto the drop zone. A thumbnail of the file appears once it is attached.
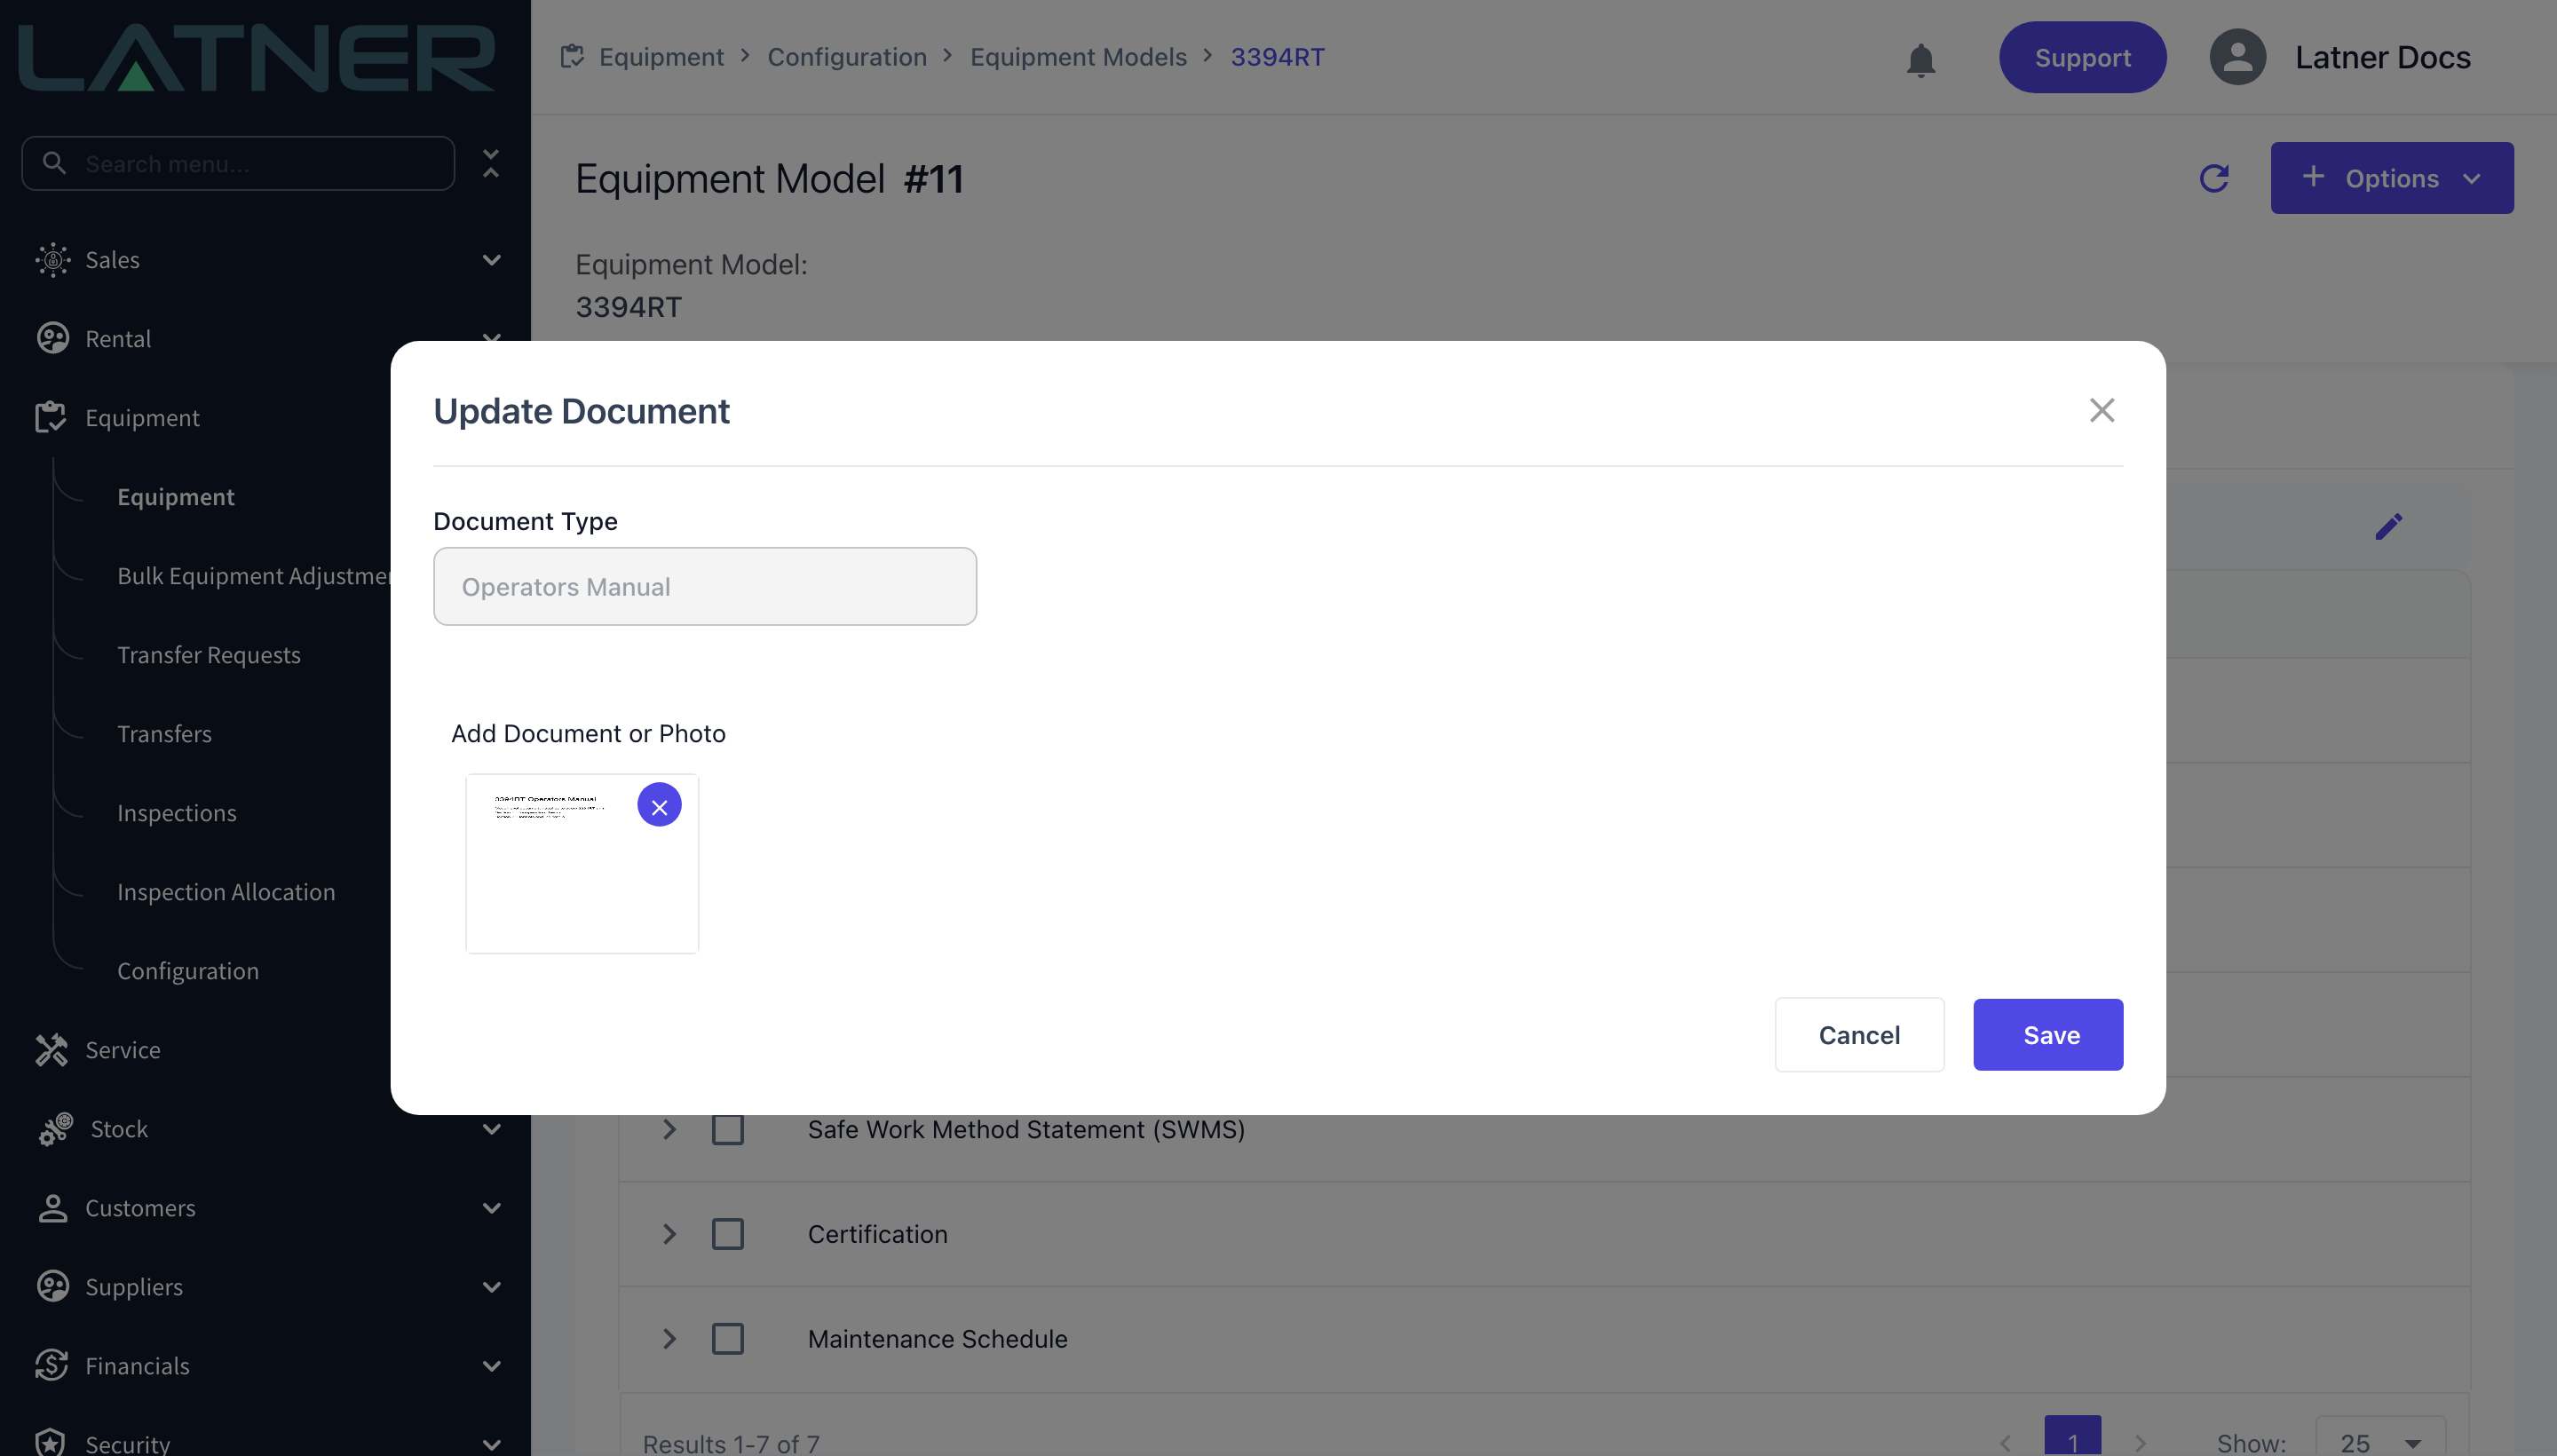
Step 6 - Save and check the result
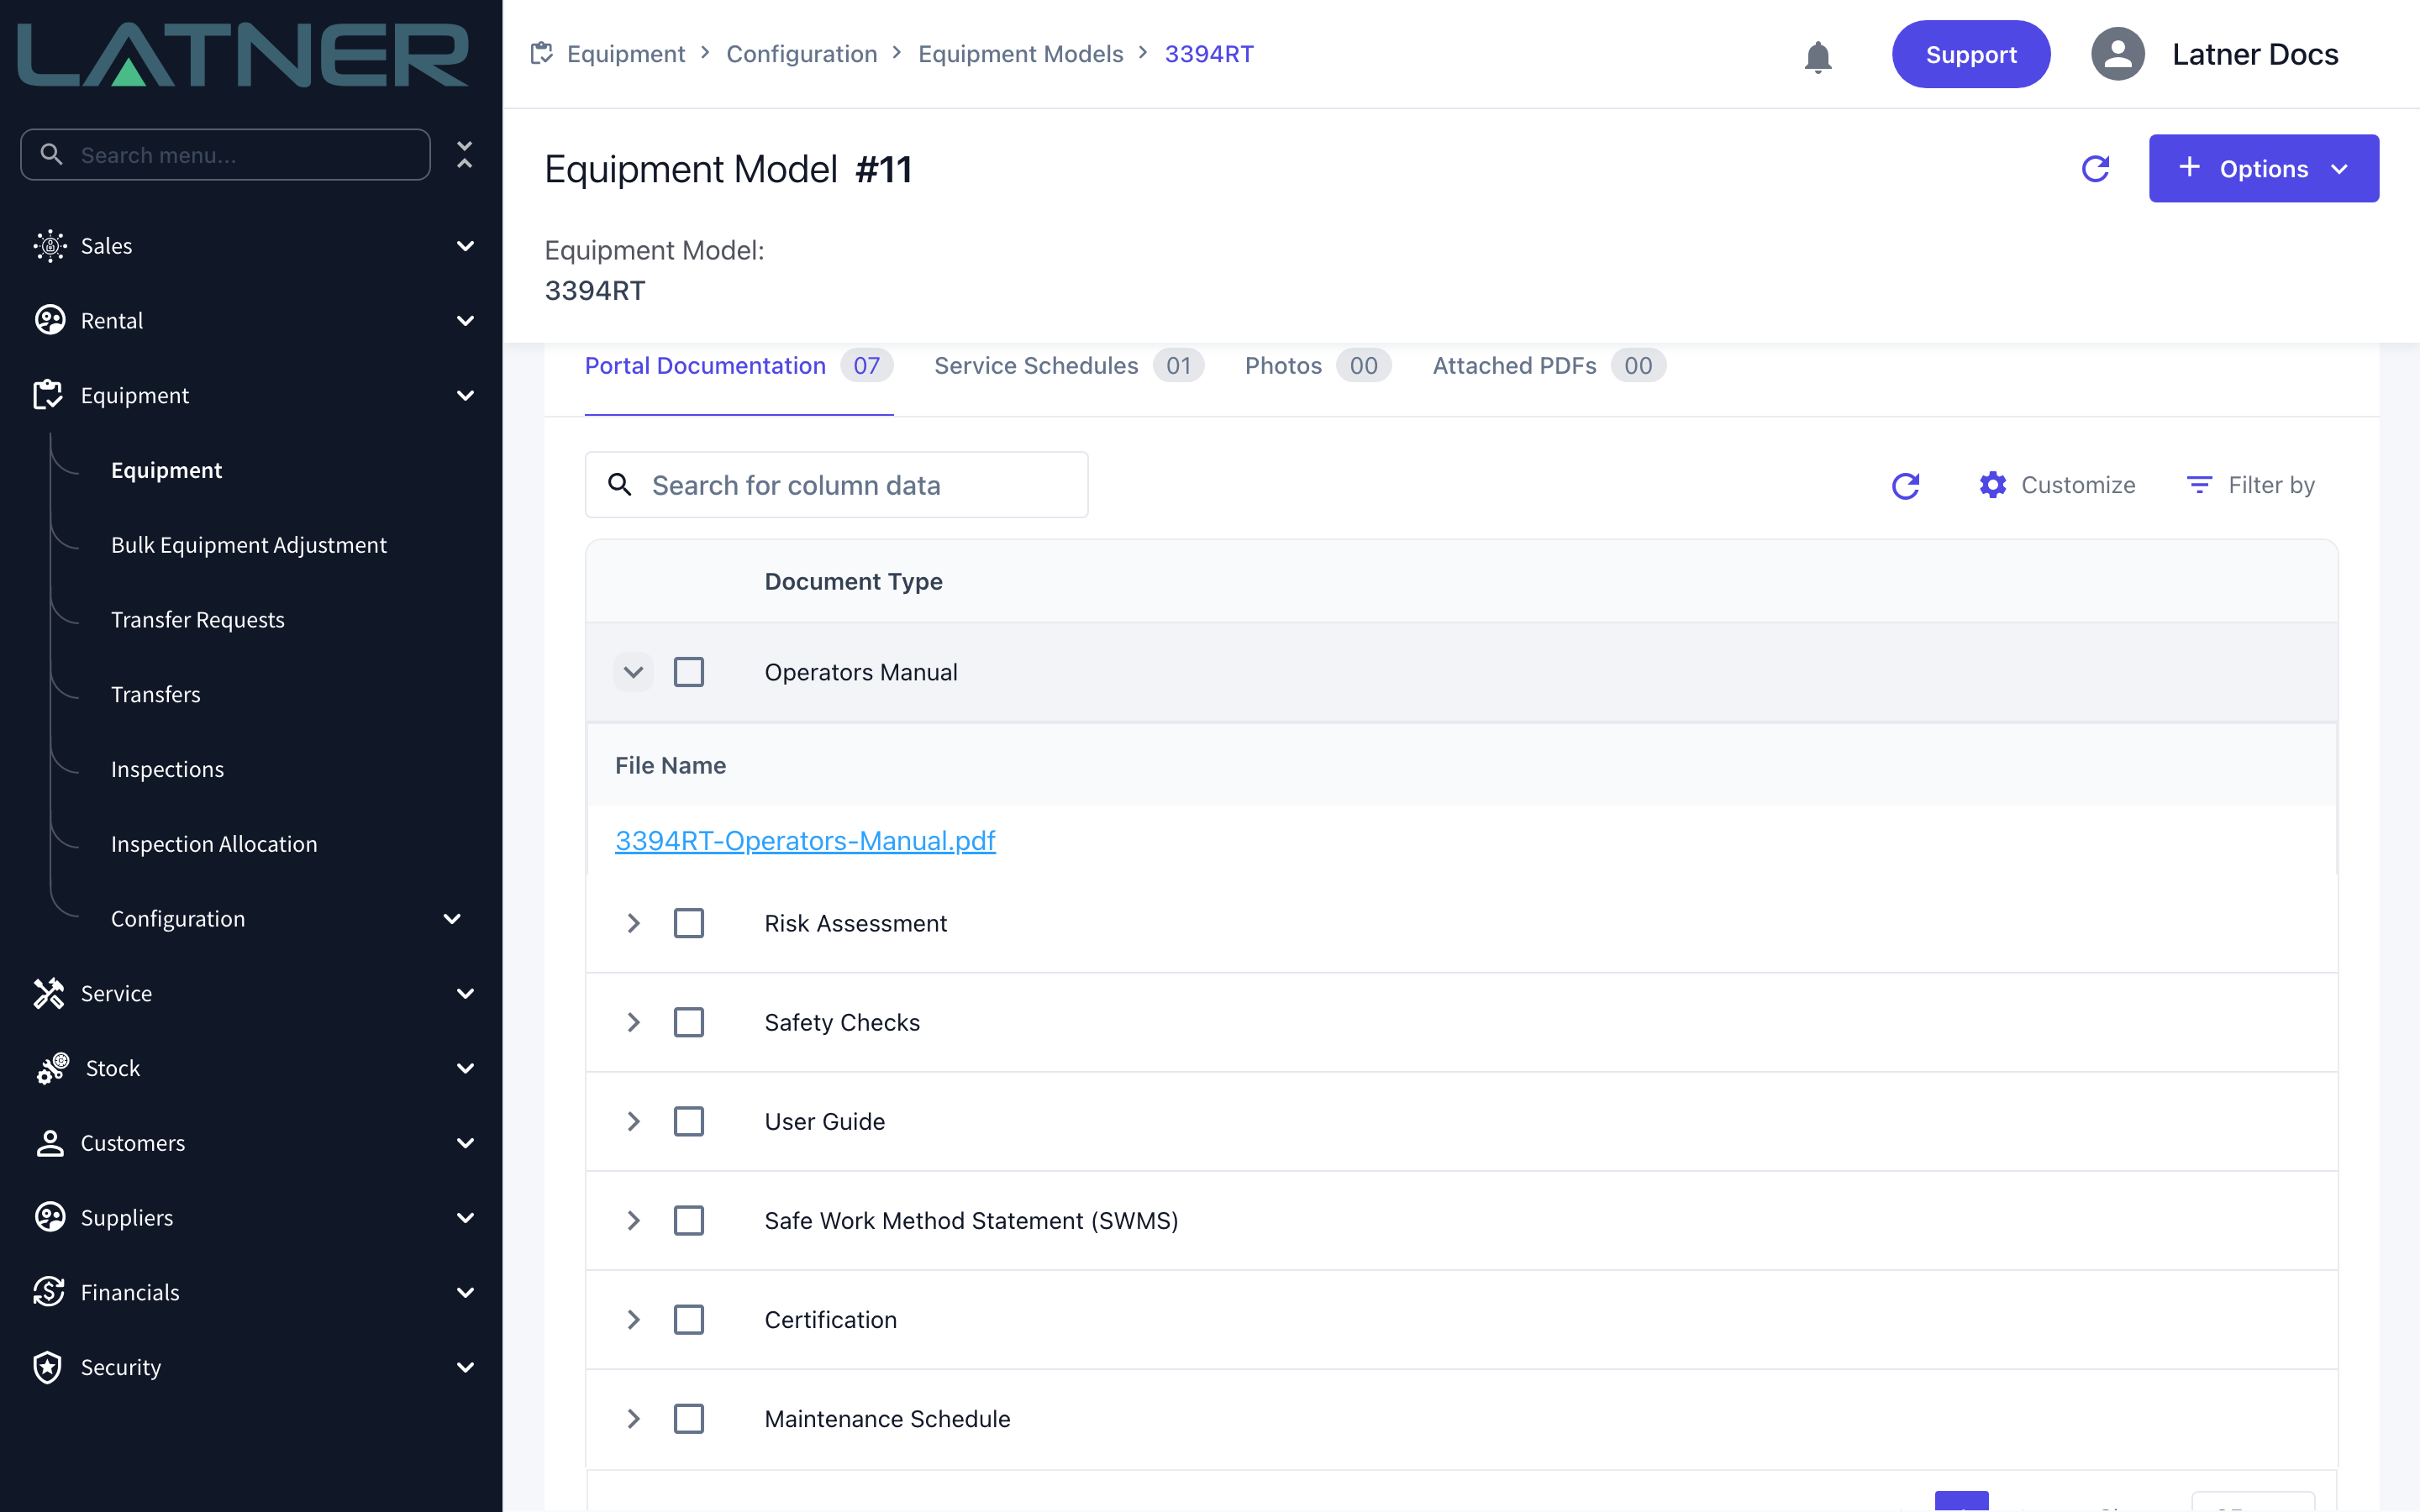
Click Save. The document uploads and the tab refreshes. Click the arrow at the left of the row to expand it and see the file name, which is a link - click it to open the document exactly as a customer would.
Attaching a Document to a Single Equipment
Step 7 - Repeat on the equipment record
Open the unit from Equipment › Equipment and use the same Portal Documentation tab. The tab, the pencil and the Update Document dialog all behave exactly as they do on the model - the only difference is who the document belongs to.
Use this level for anything tied to the individual machine: its compliance certificate, its log book, a photo of its plant risk assessment.
Replacing or Removing a Document
Open the same row and dialog you used to attach the file.
-
To replace it - drop the new file on and click Save. The old file is replaced.
-
To remove it - click the x on the thumbnail, confirm Delete on the Delete File prompt, then click Save.
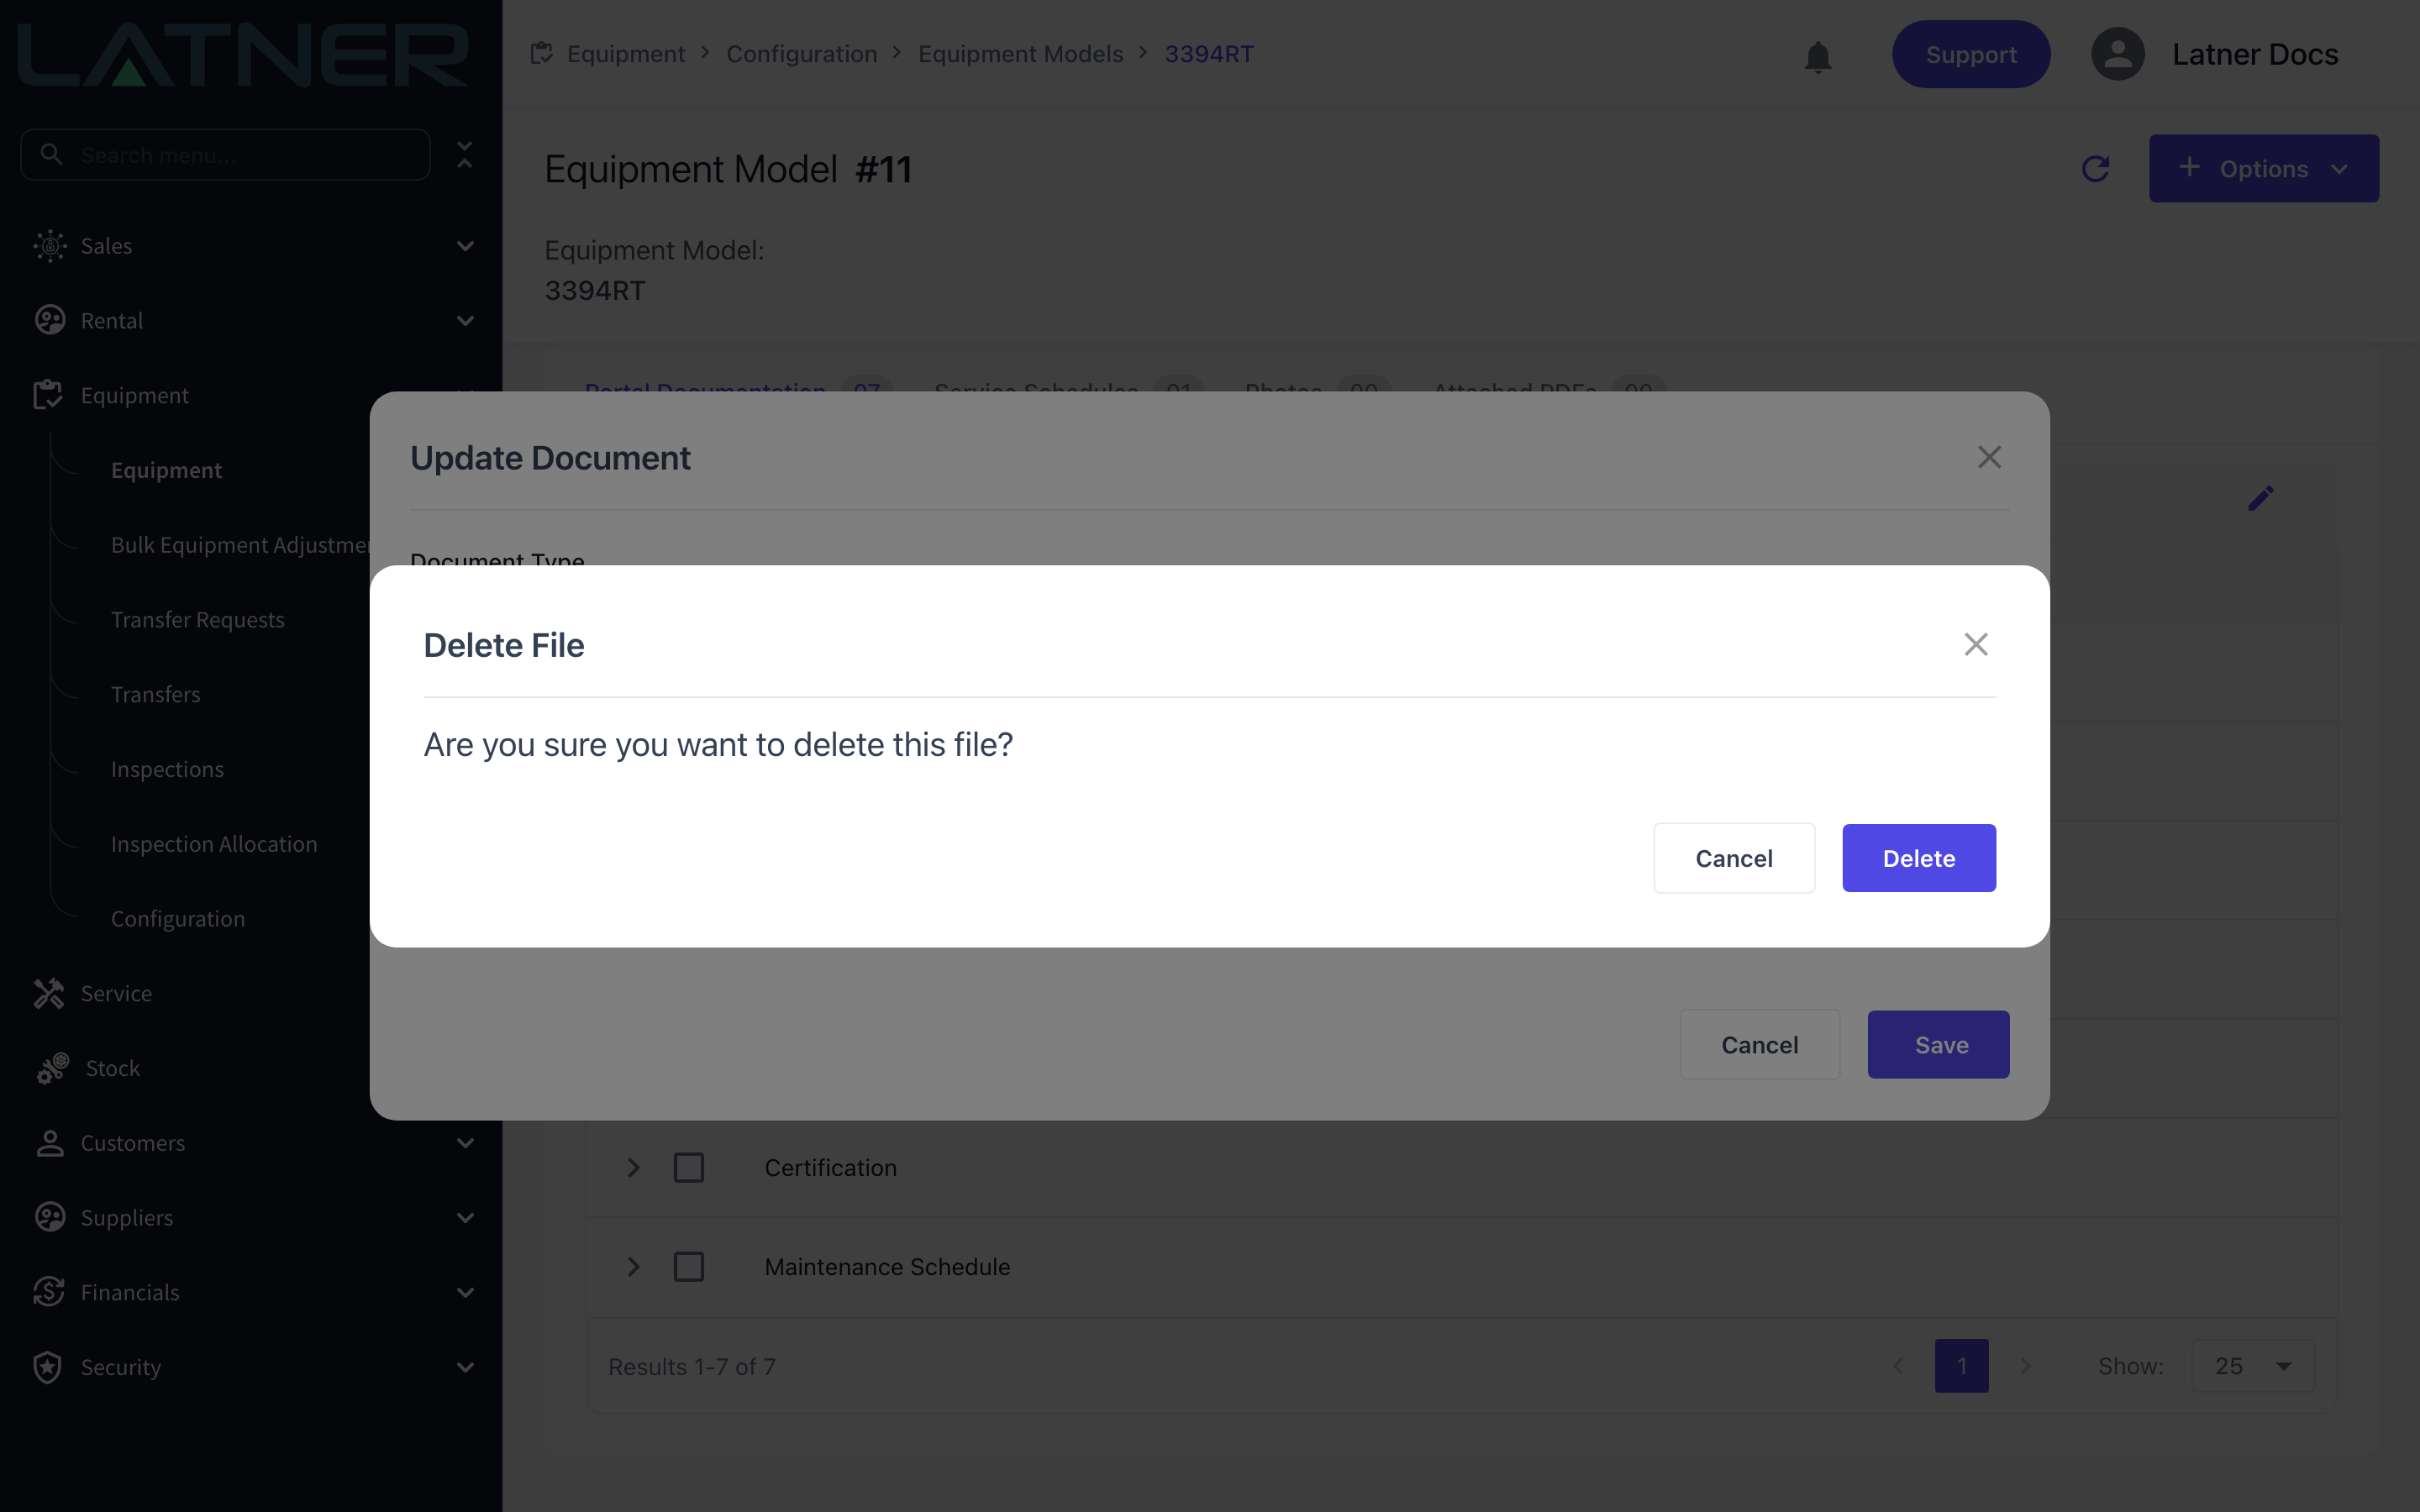
Closing the dialog with Cancel after removing the thumbnail leaves the document in place, which is the behaviour you want when you change your mind. The reverse is also true: once you click Save the file is gone and has to be uploaded again.
What the Customer Sees
Customers reach the documents through the equipment's Public Portal URL, shown on the equipment's General Details and encoded in its QR code. On that page, the Documentation tab lists only the types that actually have a document for this machine, so a customer is never shown an empty heading.
-
Documents attached to the model and documents attached to the unit are merged into one list.
-
Where both levels hold the same type, the unit's file is the one served.
-
Types set to Inactive disappear from the portal, along with anything filed under them.
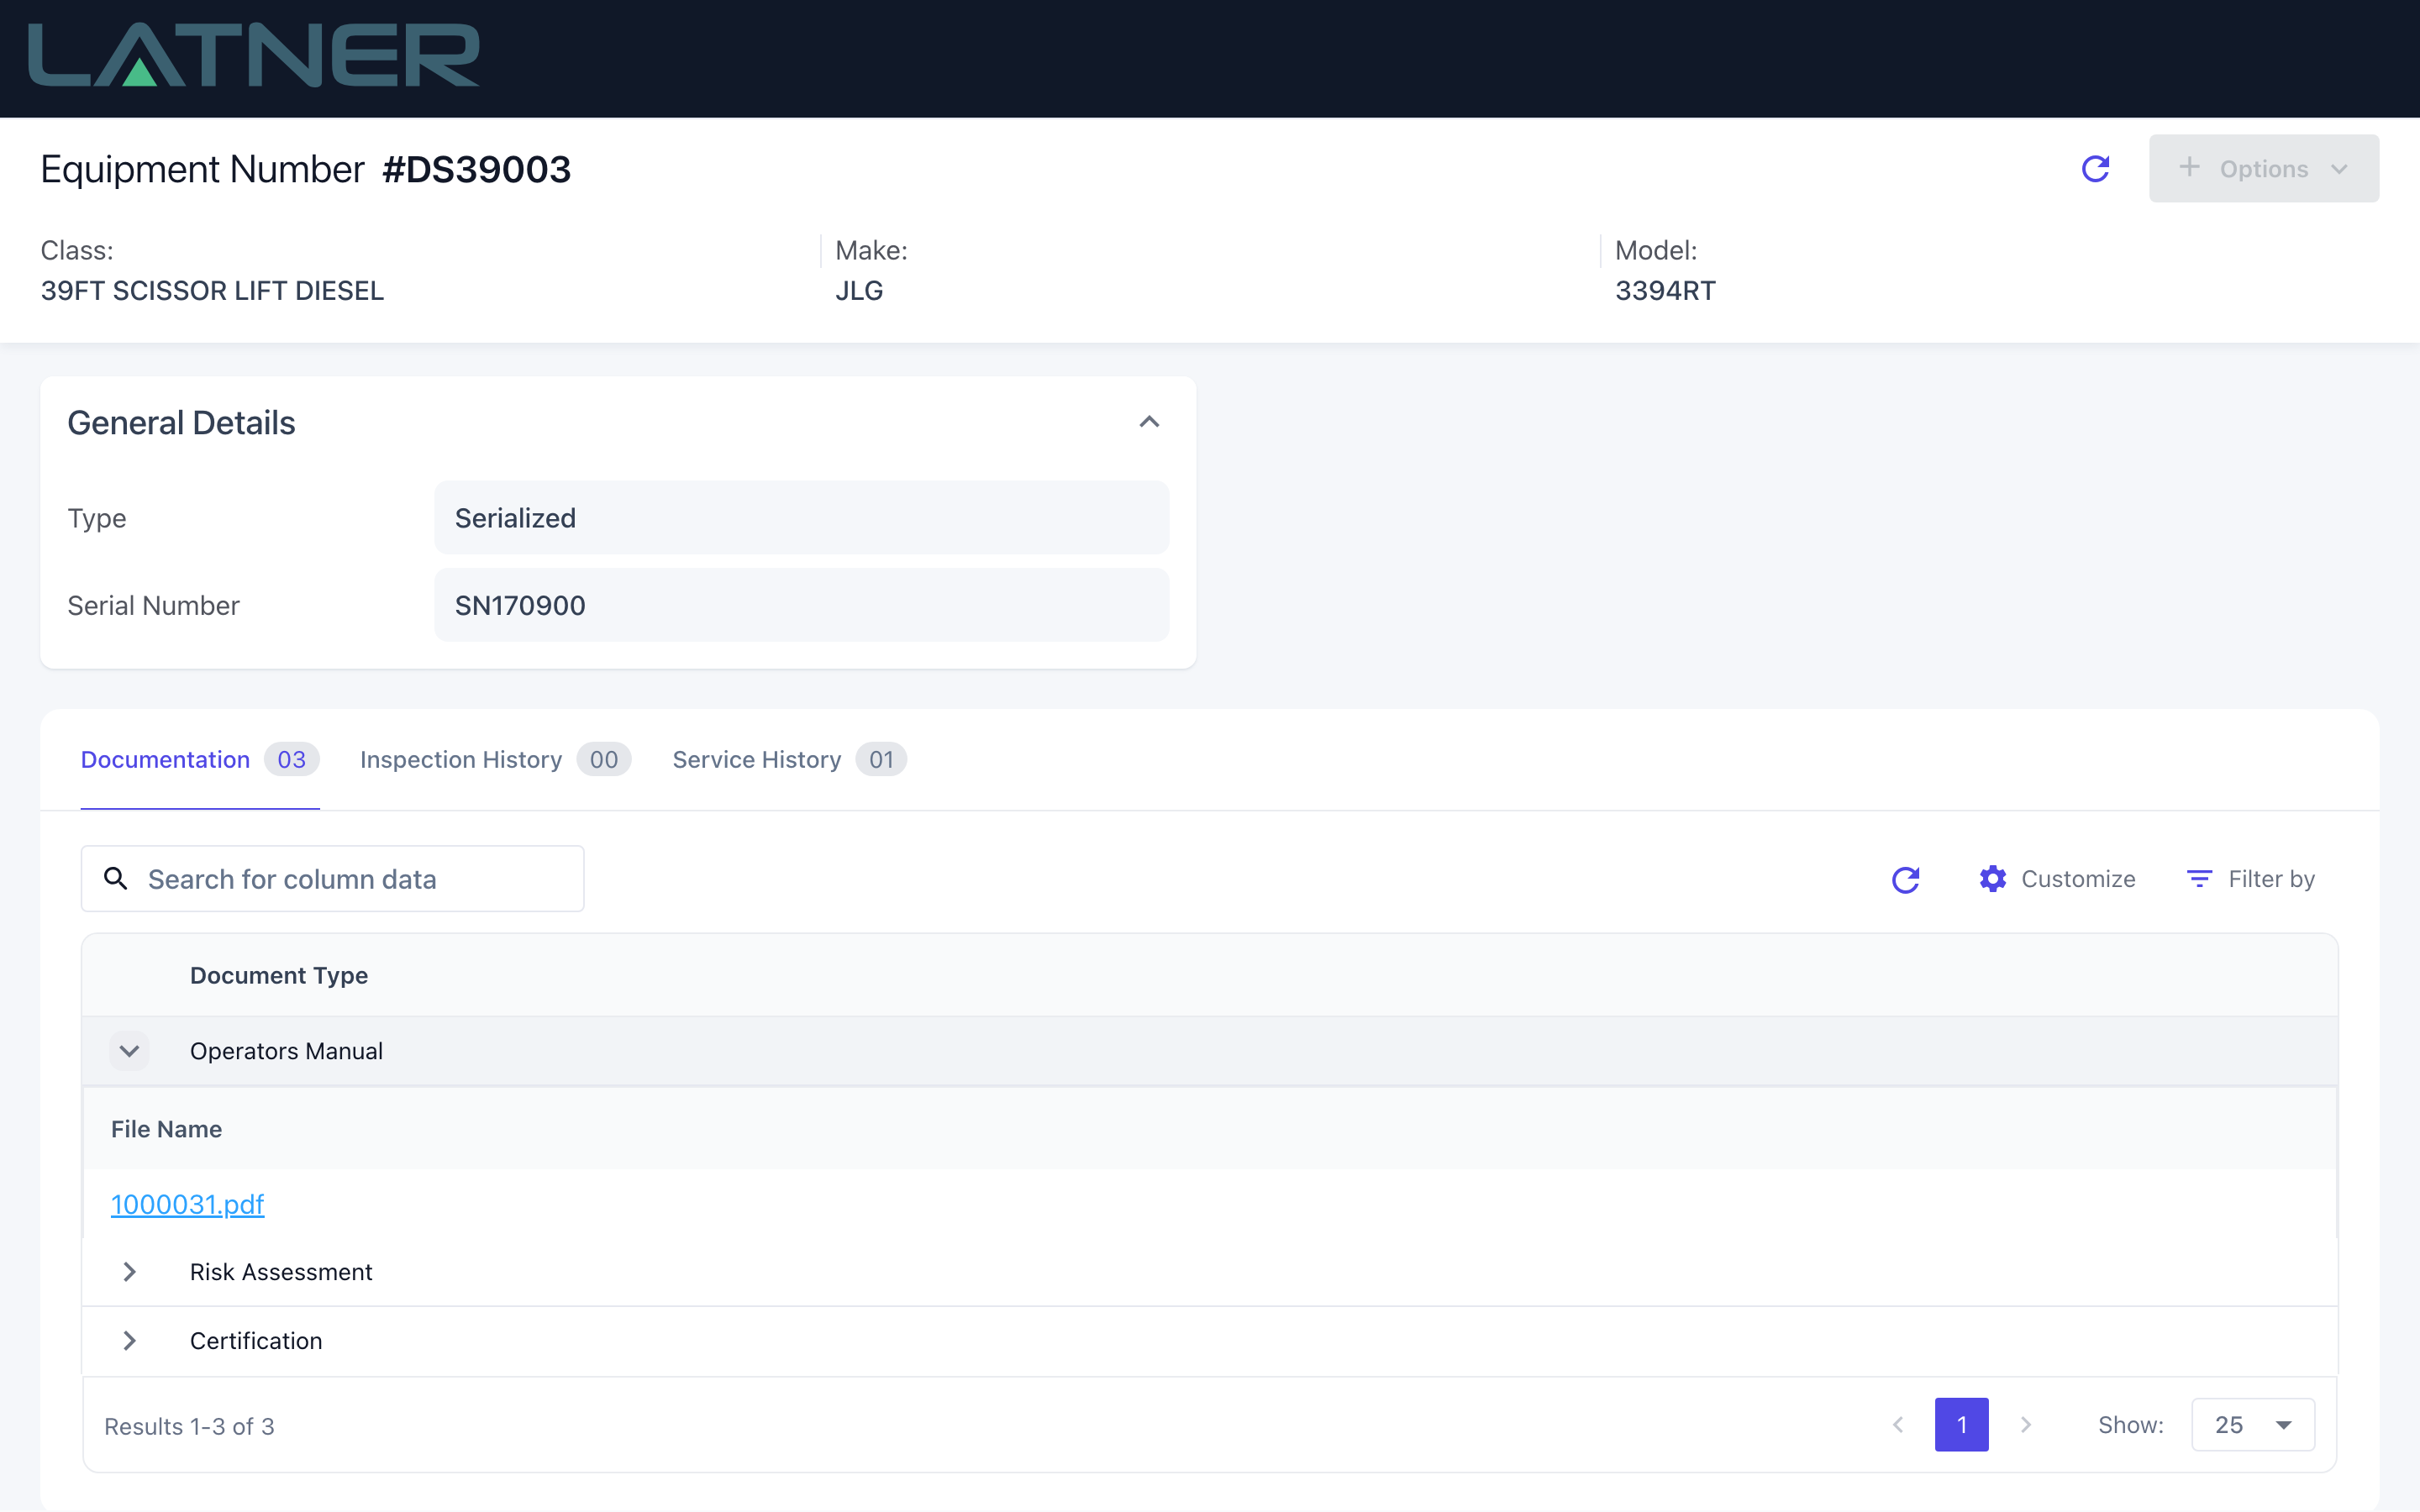
The portal is public to anyone holding the link or scanning the QR code. Only publish documents you are happy for a customer, an operator or a site supervisor to read - certificates and manuals rather than internal costing or service notes.
FAQs
Watch the Demo
Prefer to watch it? Step through the same flow here.