
Assigning an inspection checklist to an equipment class or model tells Latner which list of checks to attach whenever a Run Up, Return or Equipment Transfer inspection is raised for that gear, so every machine of that type gets looked over the same way.
Overview
Inspectors shouldn't have to remember what to check on a 3.5 tonne excavator. Set the checklist once on the class, refine it on the models that need something different, and Latner attaches the right list to each inspection as it is created.
-
Inspection checklists are assigned on the General Details card of an Equipment Class or an Equipment Model, not on individual equipment numbers.
-
There are three of them: Run Up Checklist, Return Checklist and Equipment Transfer Checklist. Each field only offers checklist templates whose Checklist Type matches.
-
The model wins over the class. If the inspection has an equipment model, Latner uses the model's checklist, and falls back to the class only when the model's field is blank.
-
The tick box beside each field decides whether Latner raises that inspection automatically. The checklist beside it decides what is on the inspection once it exists.
-
The checklist is copied onto the inspection at the moment the inspection is created, so it is a snapshot, not a live link.
-
Pre Sale inspection checklists are the exception. They are set on the Serialized Stock record, not on a class or model.
Before You Begin
Have these ready before you start.
|
Requirement |
Where to Find It |
|---|---|
|
A checklist template of the right type |
Equipment › Configuration › Checklist Templates. See How to Create a Checklist Template. |
|
Equipment Class and Equipment Model screen access |
Security › Configuration › Permission Groups, under Equipment › Configuration. |
|
Create Equipment Class / Create Equipment Model permissions |
Security › Configuration › Permission Groups, under Equipment › Option. The same permission that creates a class or model is the one that saves changes to it. |
|
The settings that raise inspections |
Security › Settings › Equipment: Create Run Up Inspection for Rental Contract Reservations, Create Return Inspection after Rental Return and Create Inspection after receiving Equipment Transfer. |
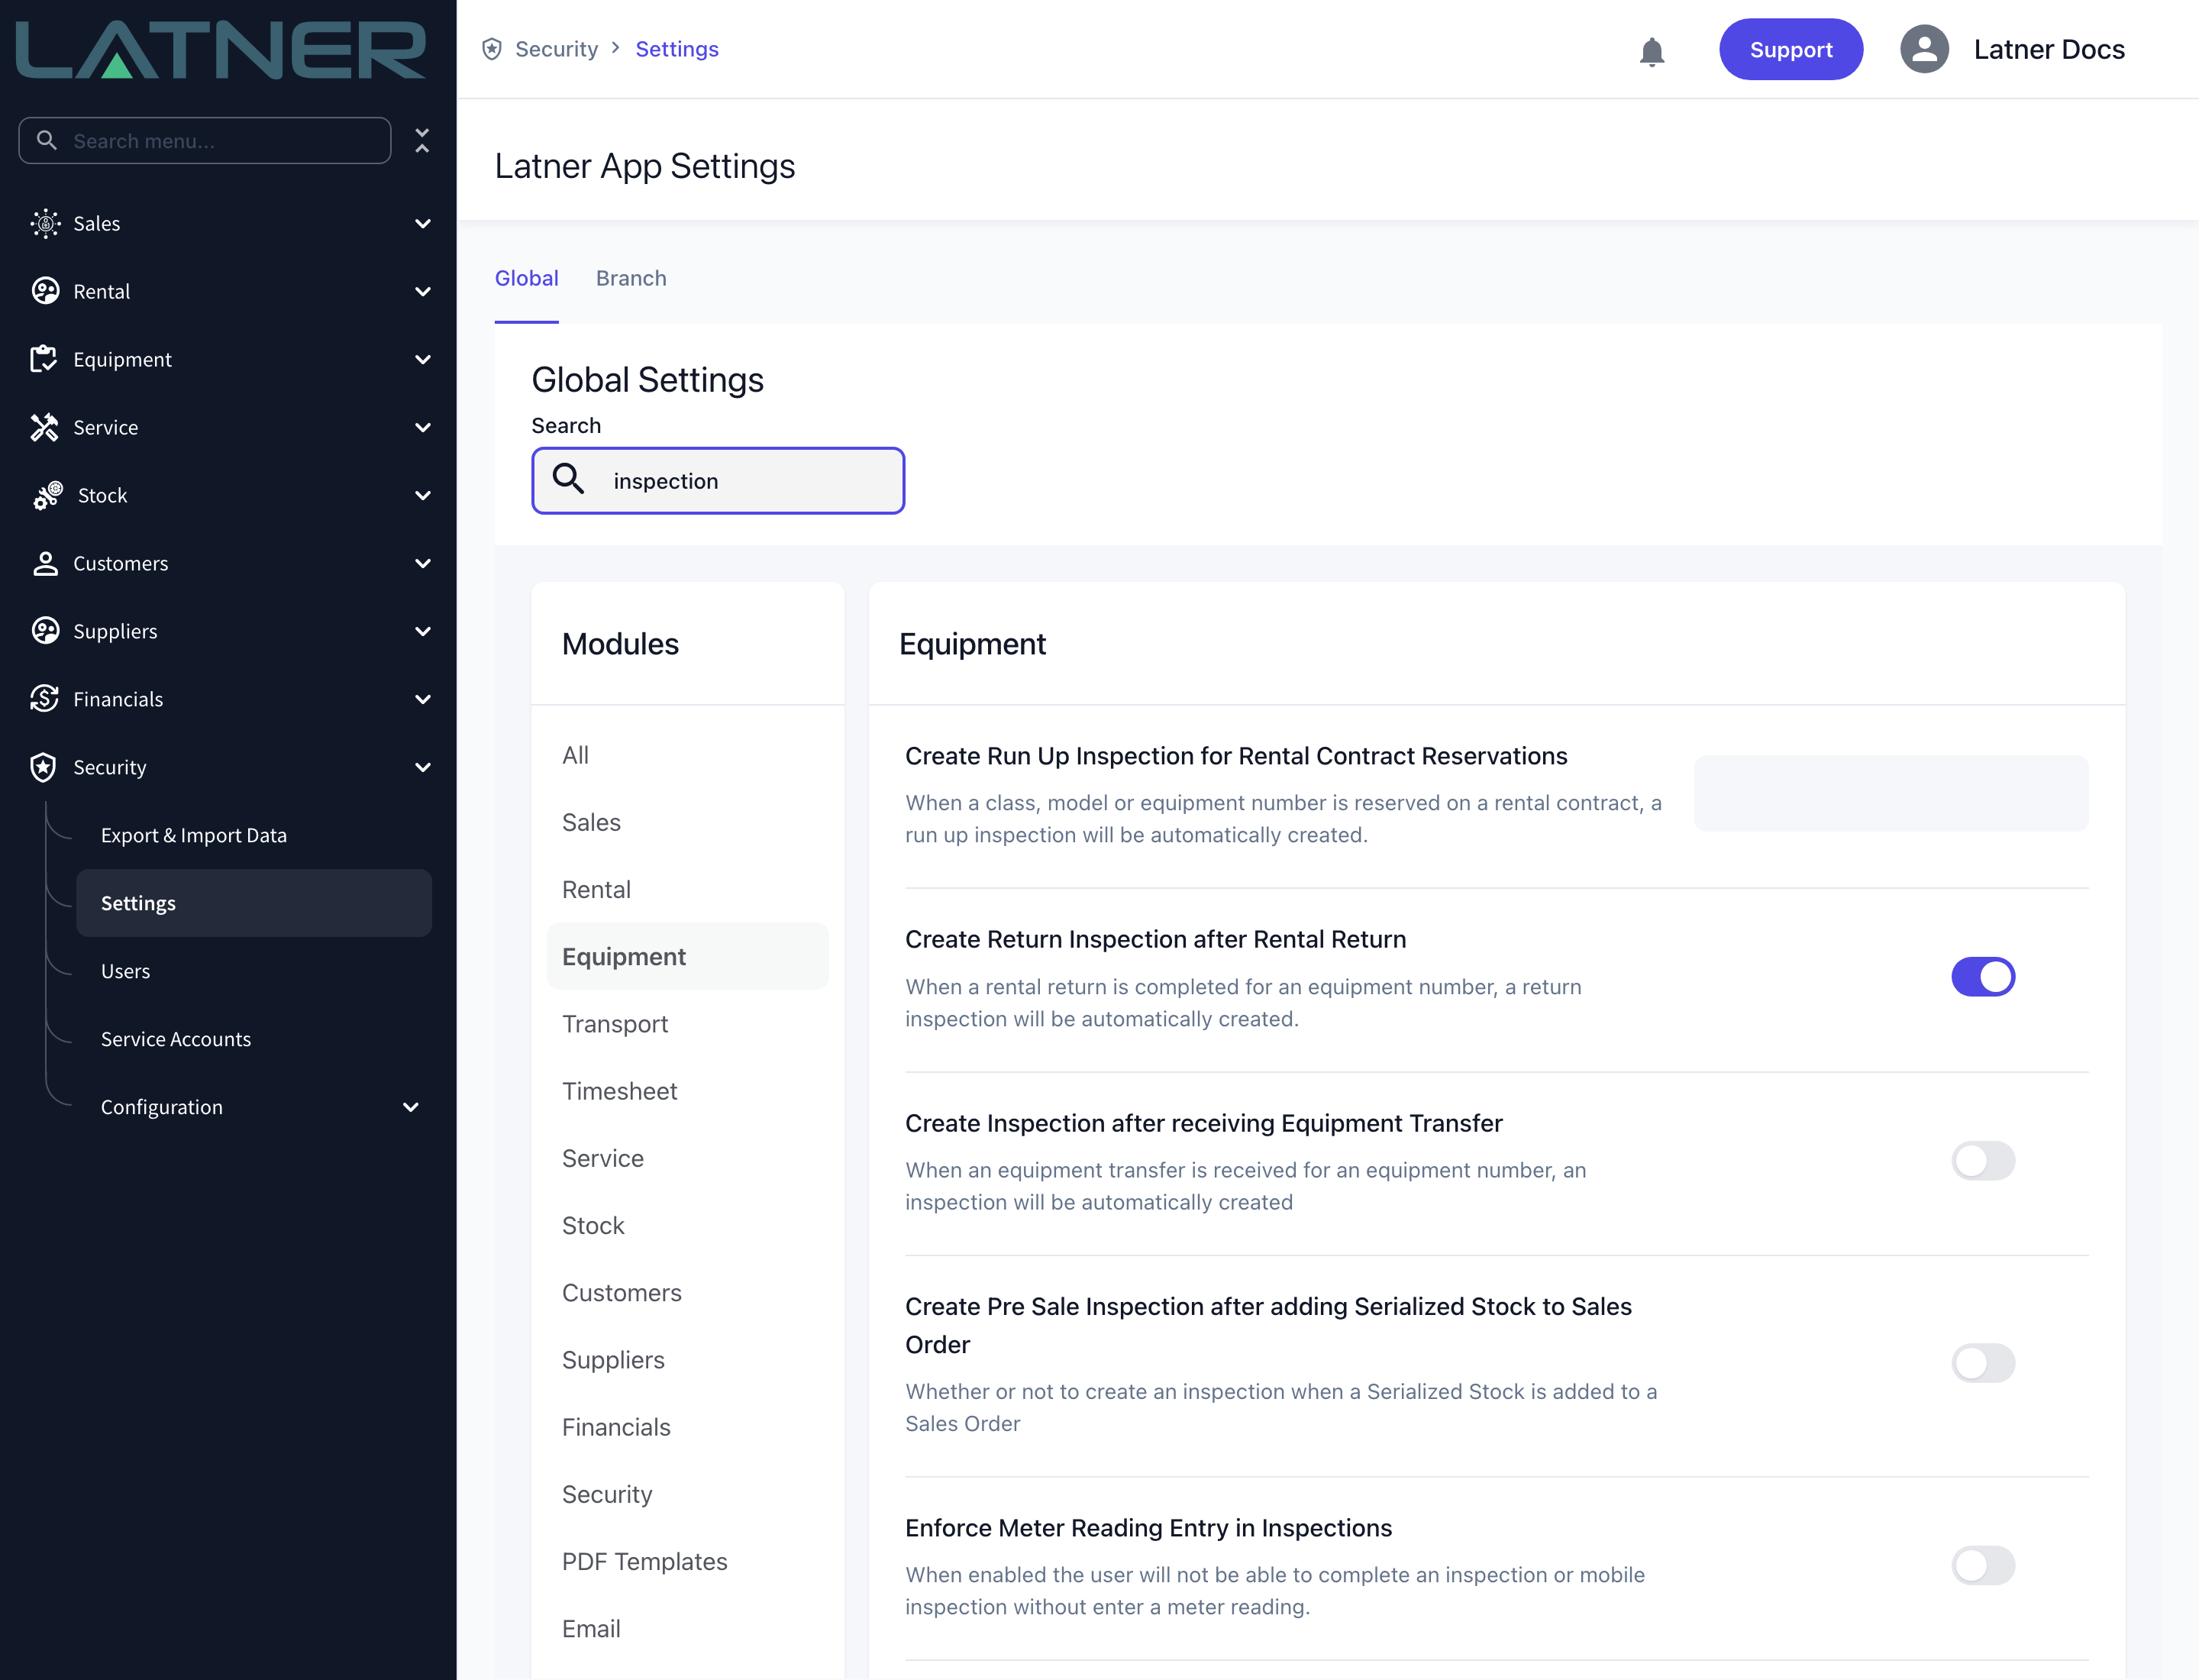
Assigning a checklist does not create inspections by itself. The settings above, together with the tick boxes on the class or model, decide whether an inspection is raised. If nothing raises an inspection of that type, the checklist simply never appears.
Assigning the Checklist
Step 1 - Check you have a template of the right type
Go to Equipment › Configuration › Checklist Templates and look for a template whose Checklist Type matches the inspection you're configuring: Run Up, Rental Return or Equipment Transfer. A template of any other type will not be offered on the class or model.
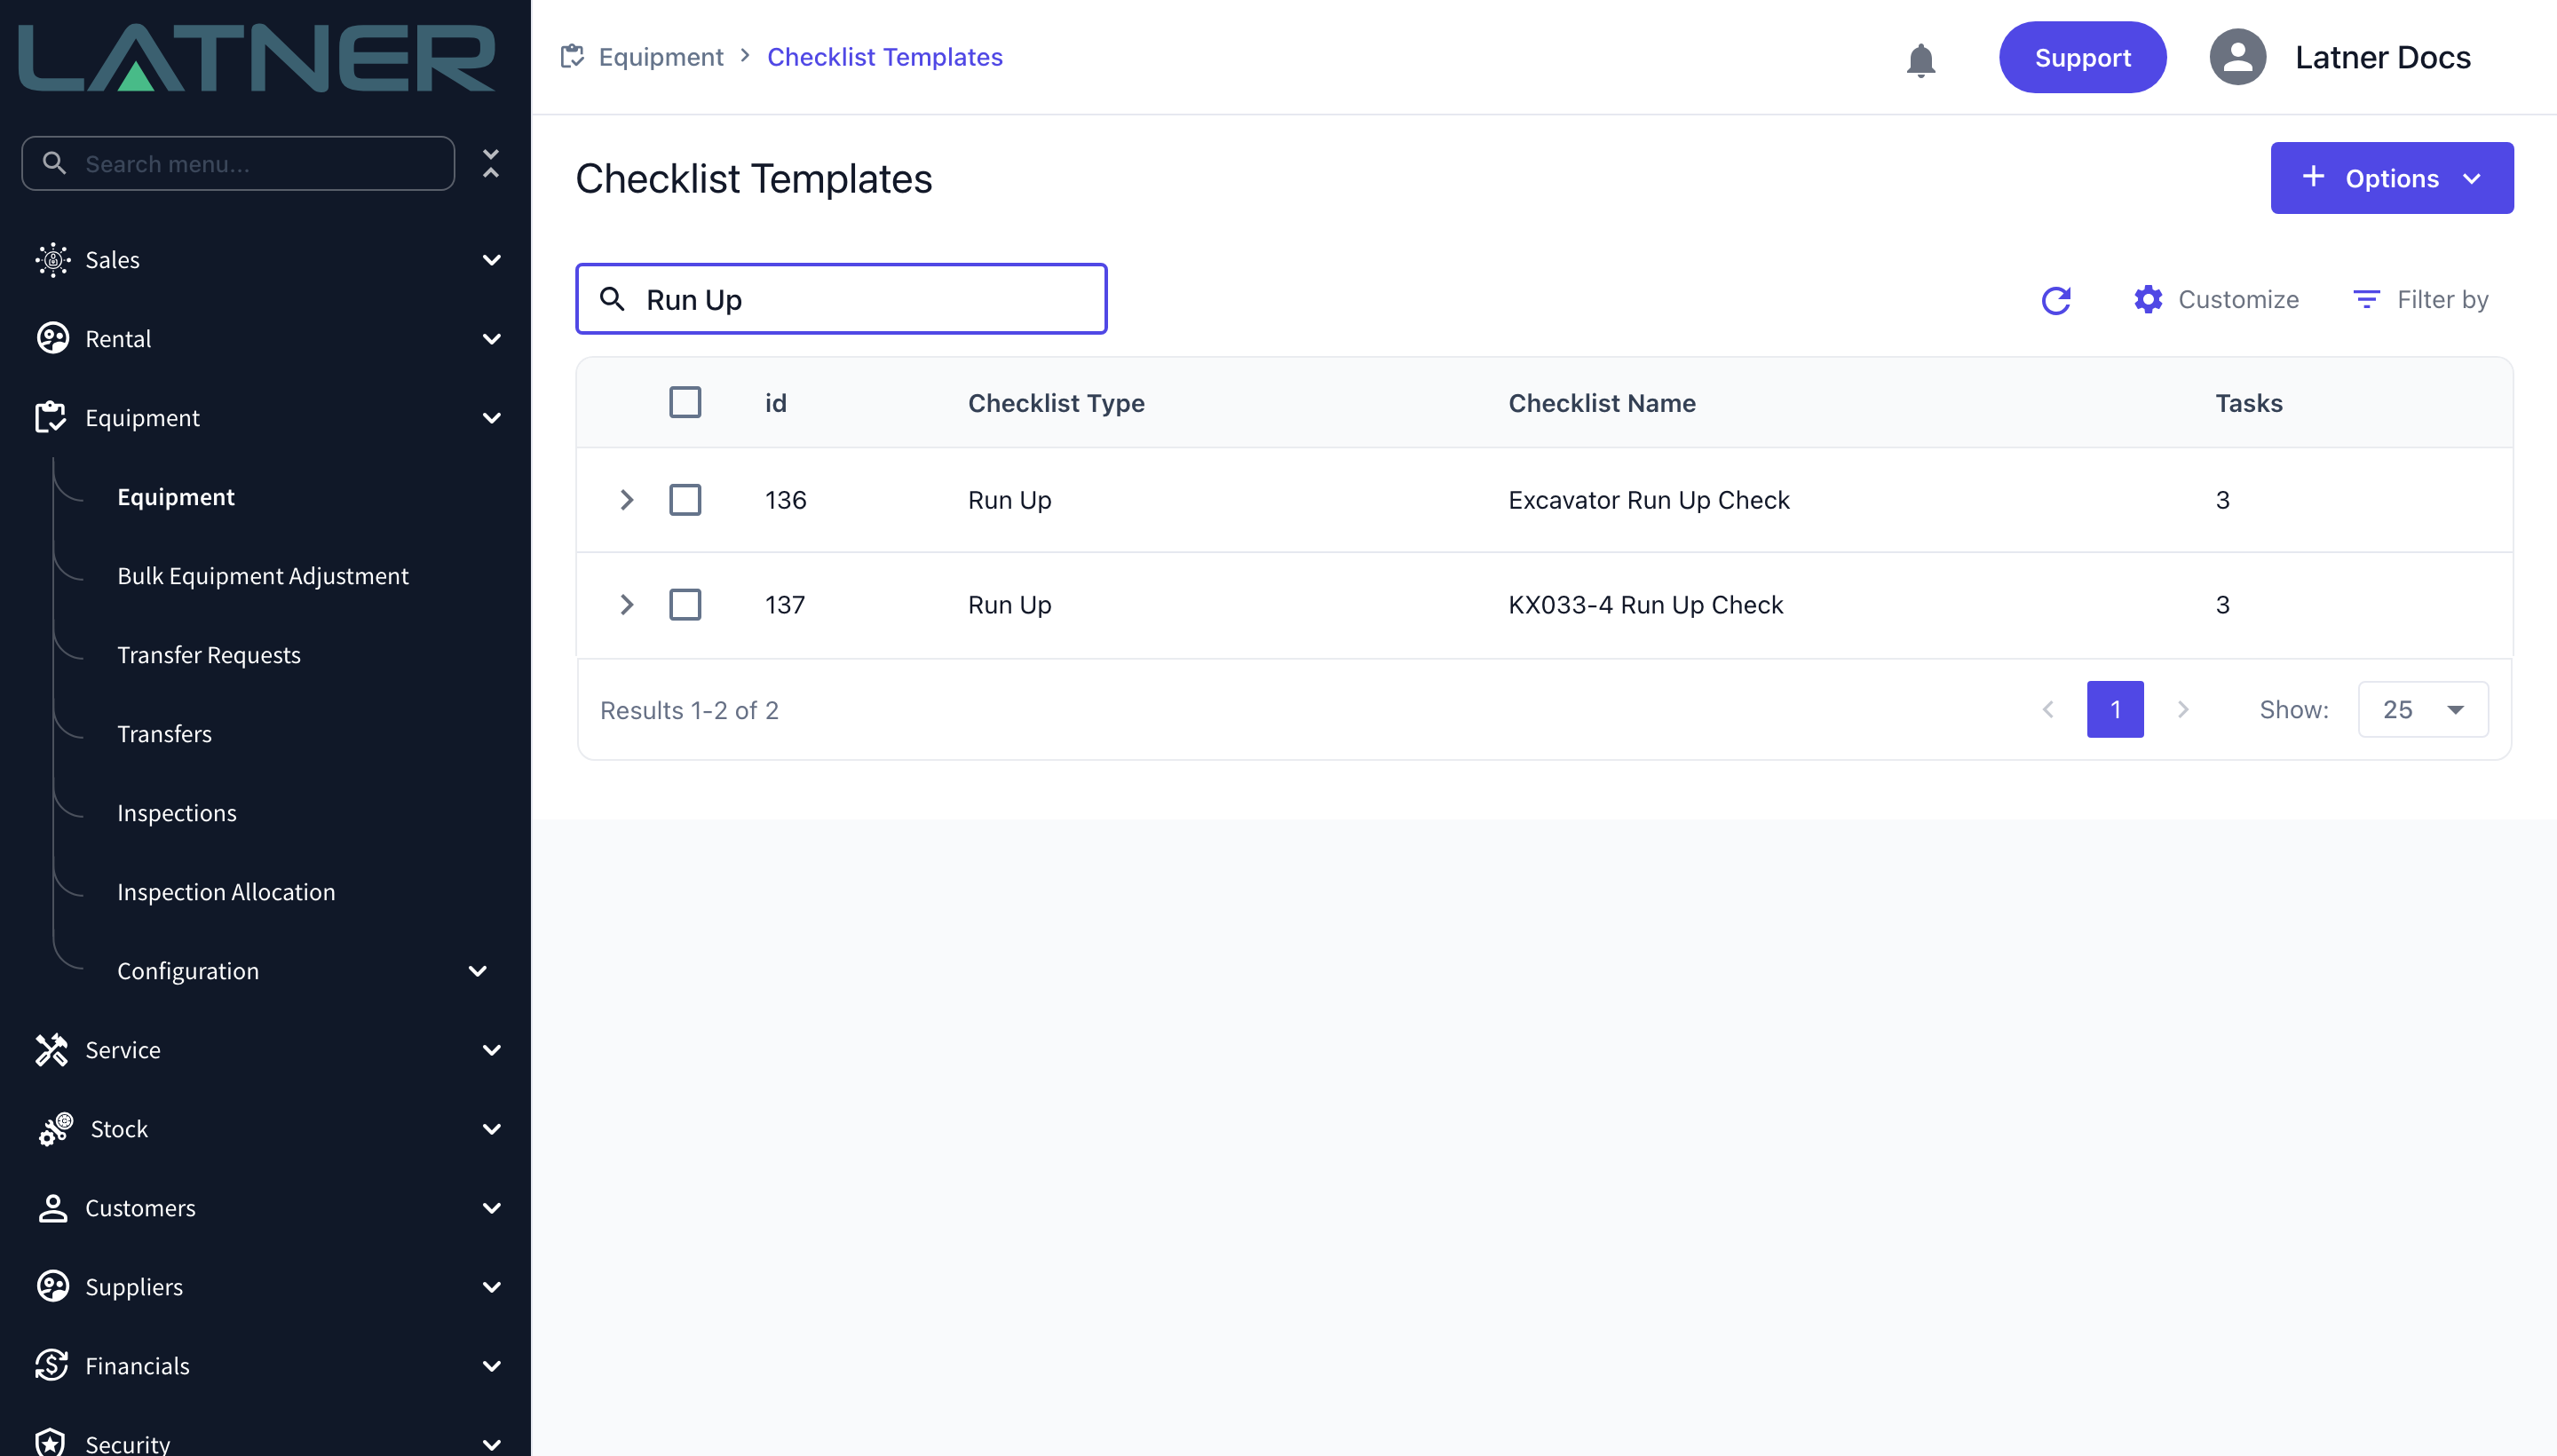
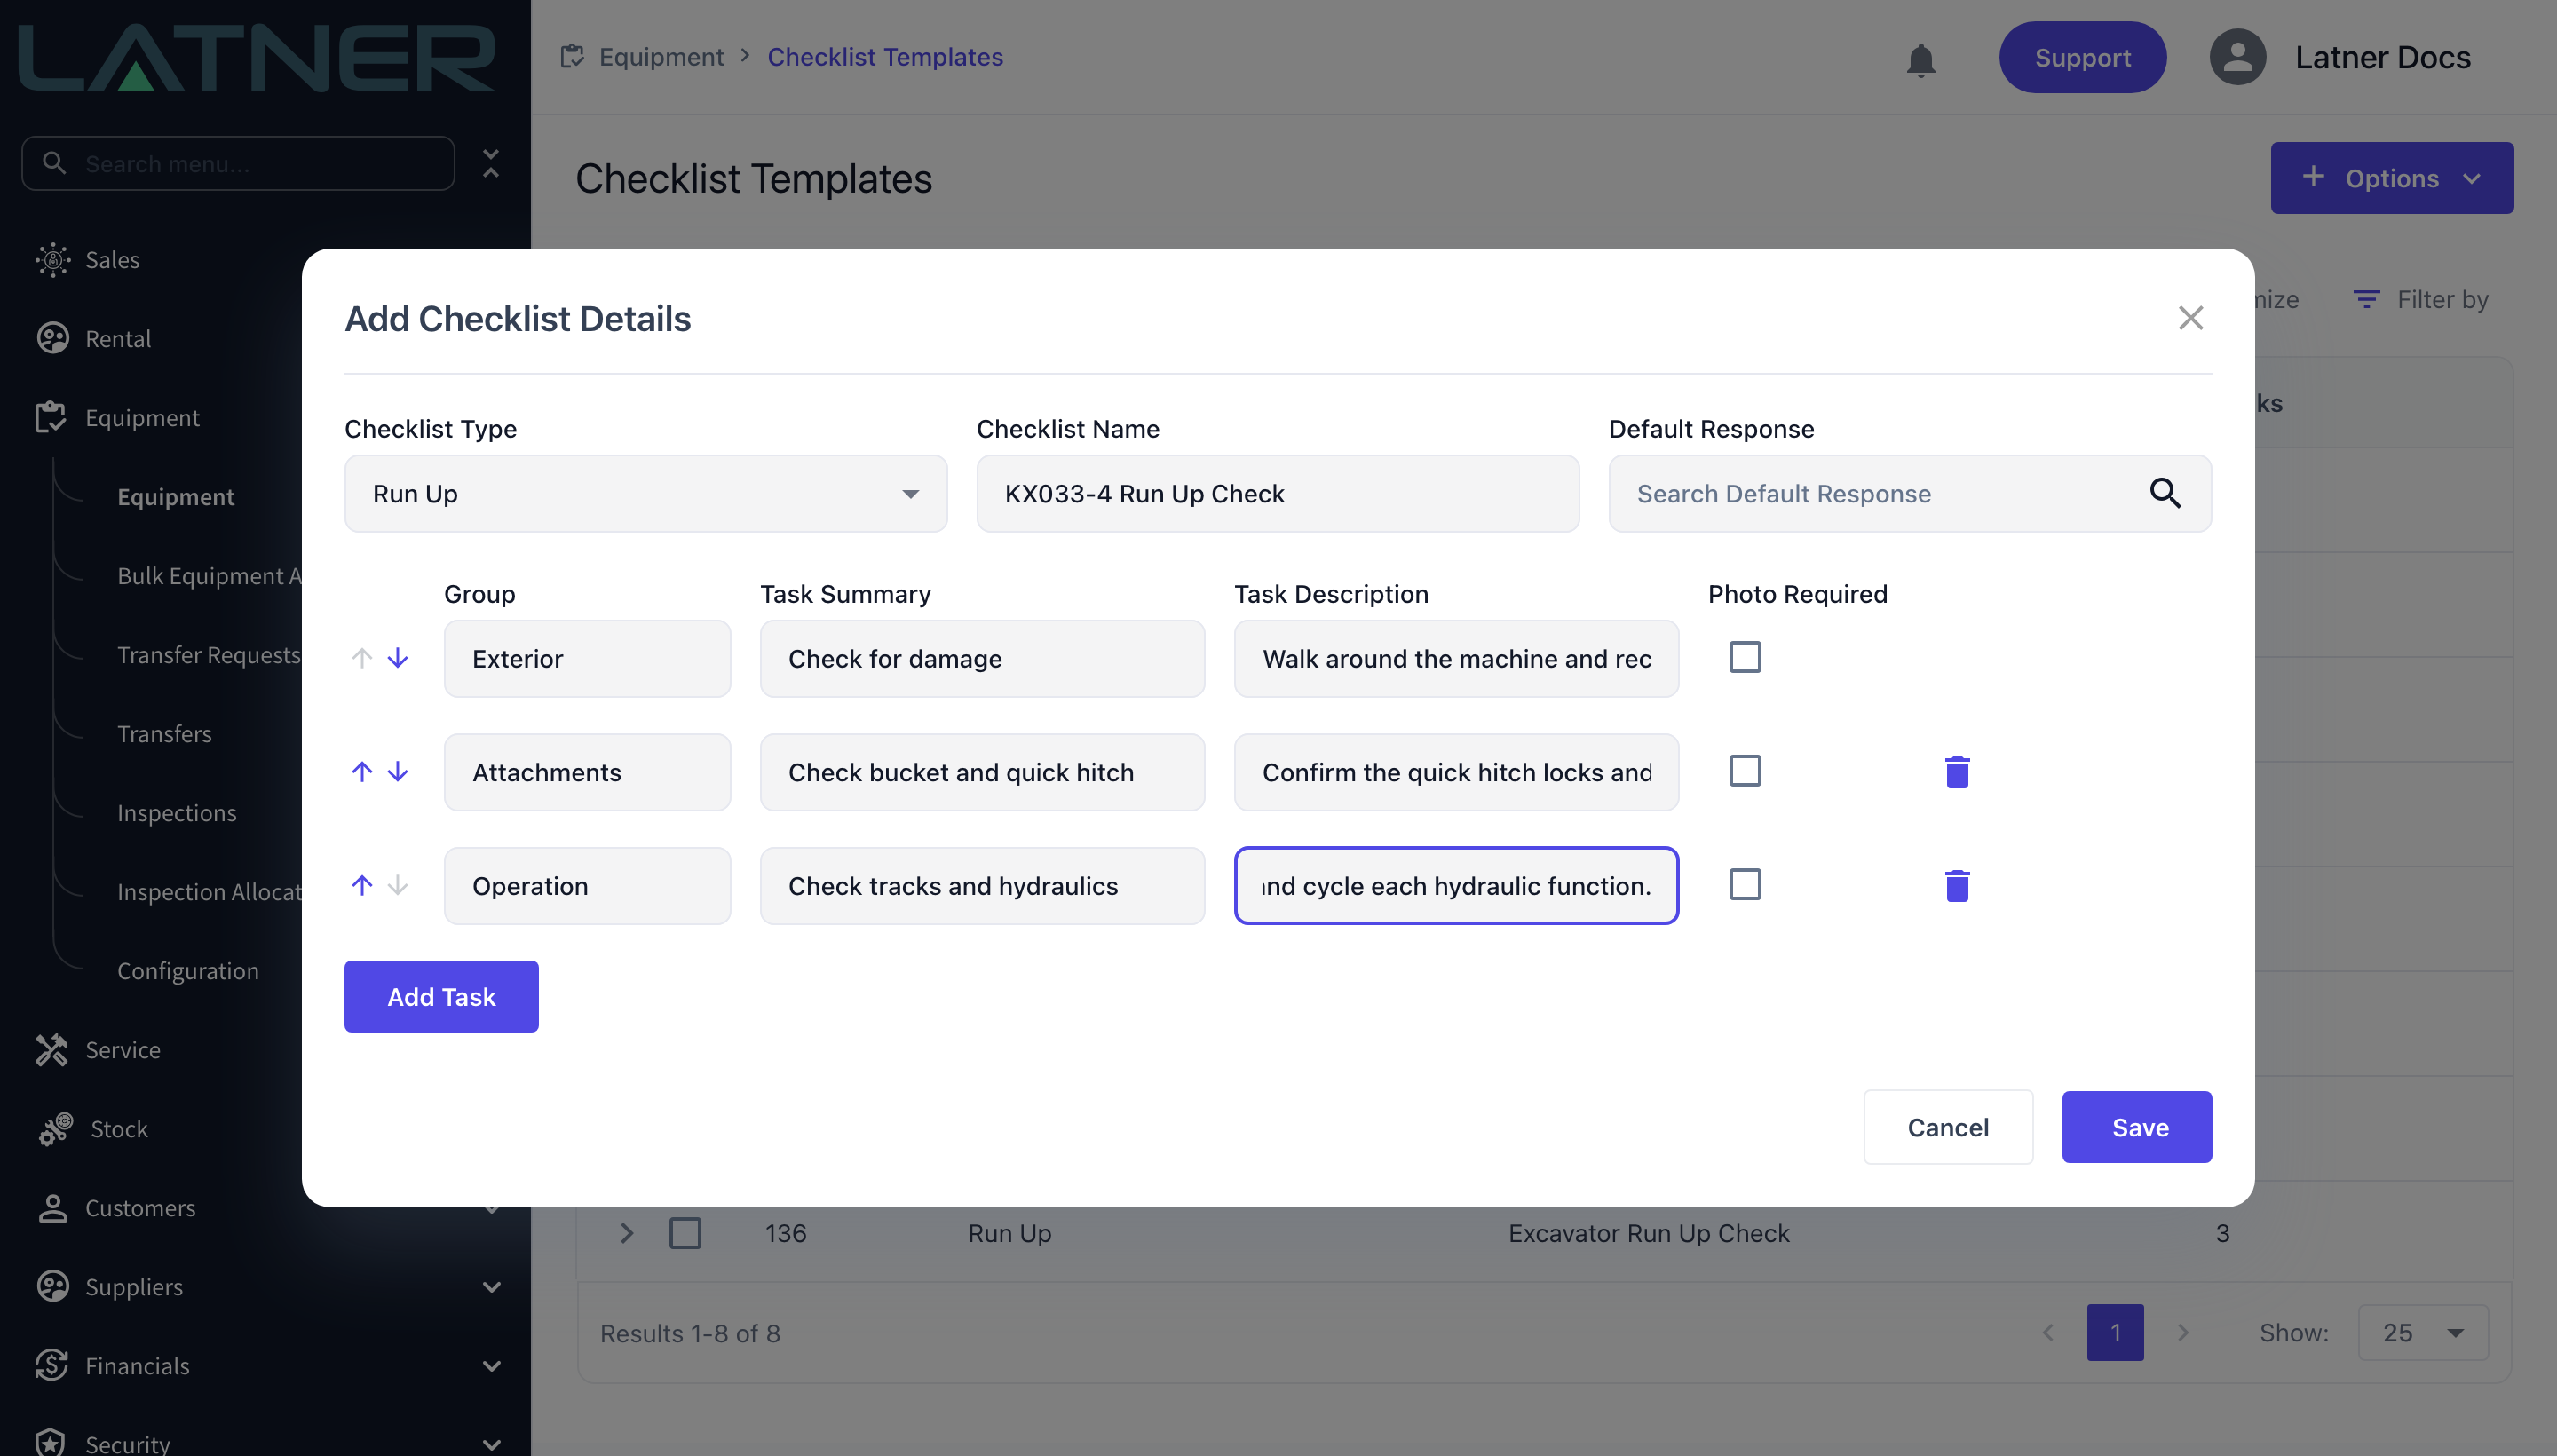
If there isn't one, create it from Options › Create New Checklist. Set the Checklist Type first, give the checklist a name, then add a row per task with its Group, Task Summary and Task Description. Tick Photo Required on any task the inspector must photograph.
-
Checklist Type - required, and it is what makes the template selectable on a class or model.
-
Checklist Name - required, and must be unique within the type.
-
Default Response - optional. Leave it blank and Latner uses the standard Pass / Fail / N/A responses.
Step 2 - Open the equipment class
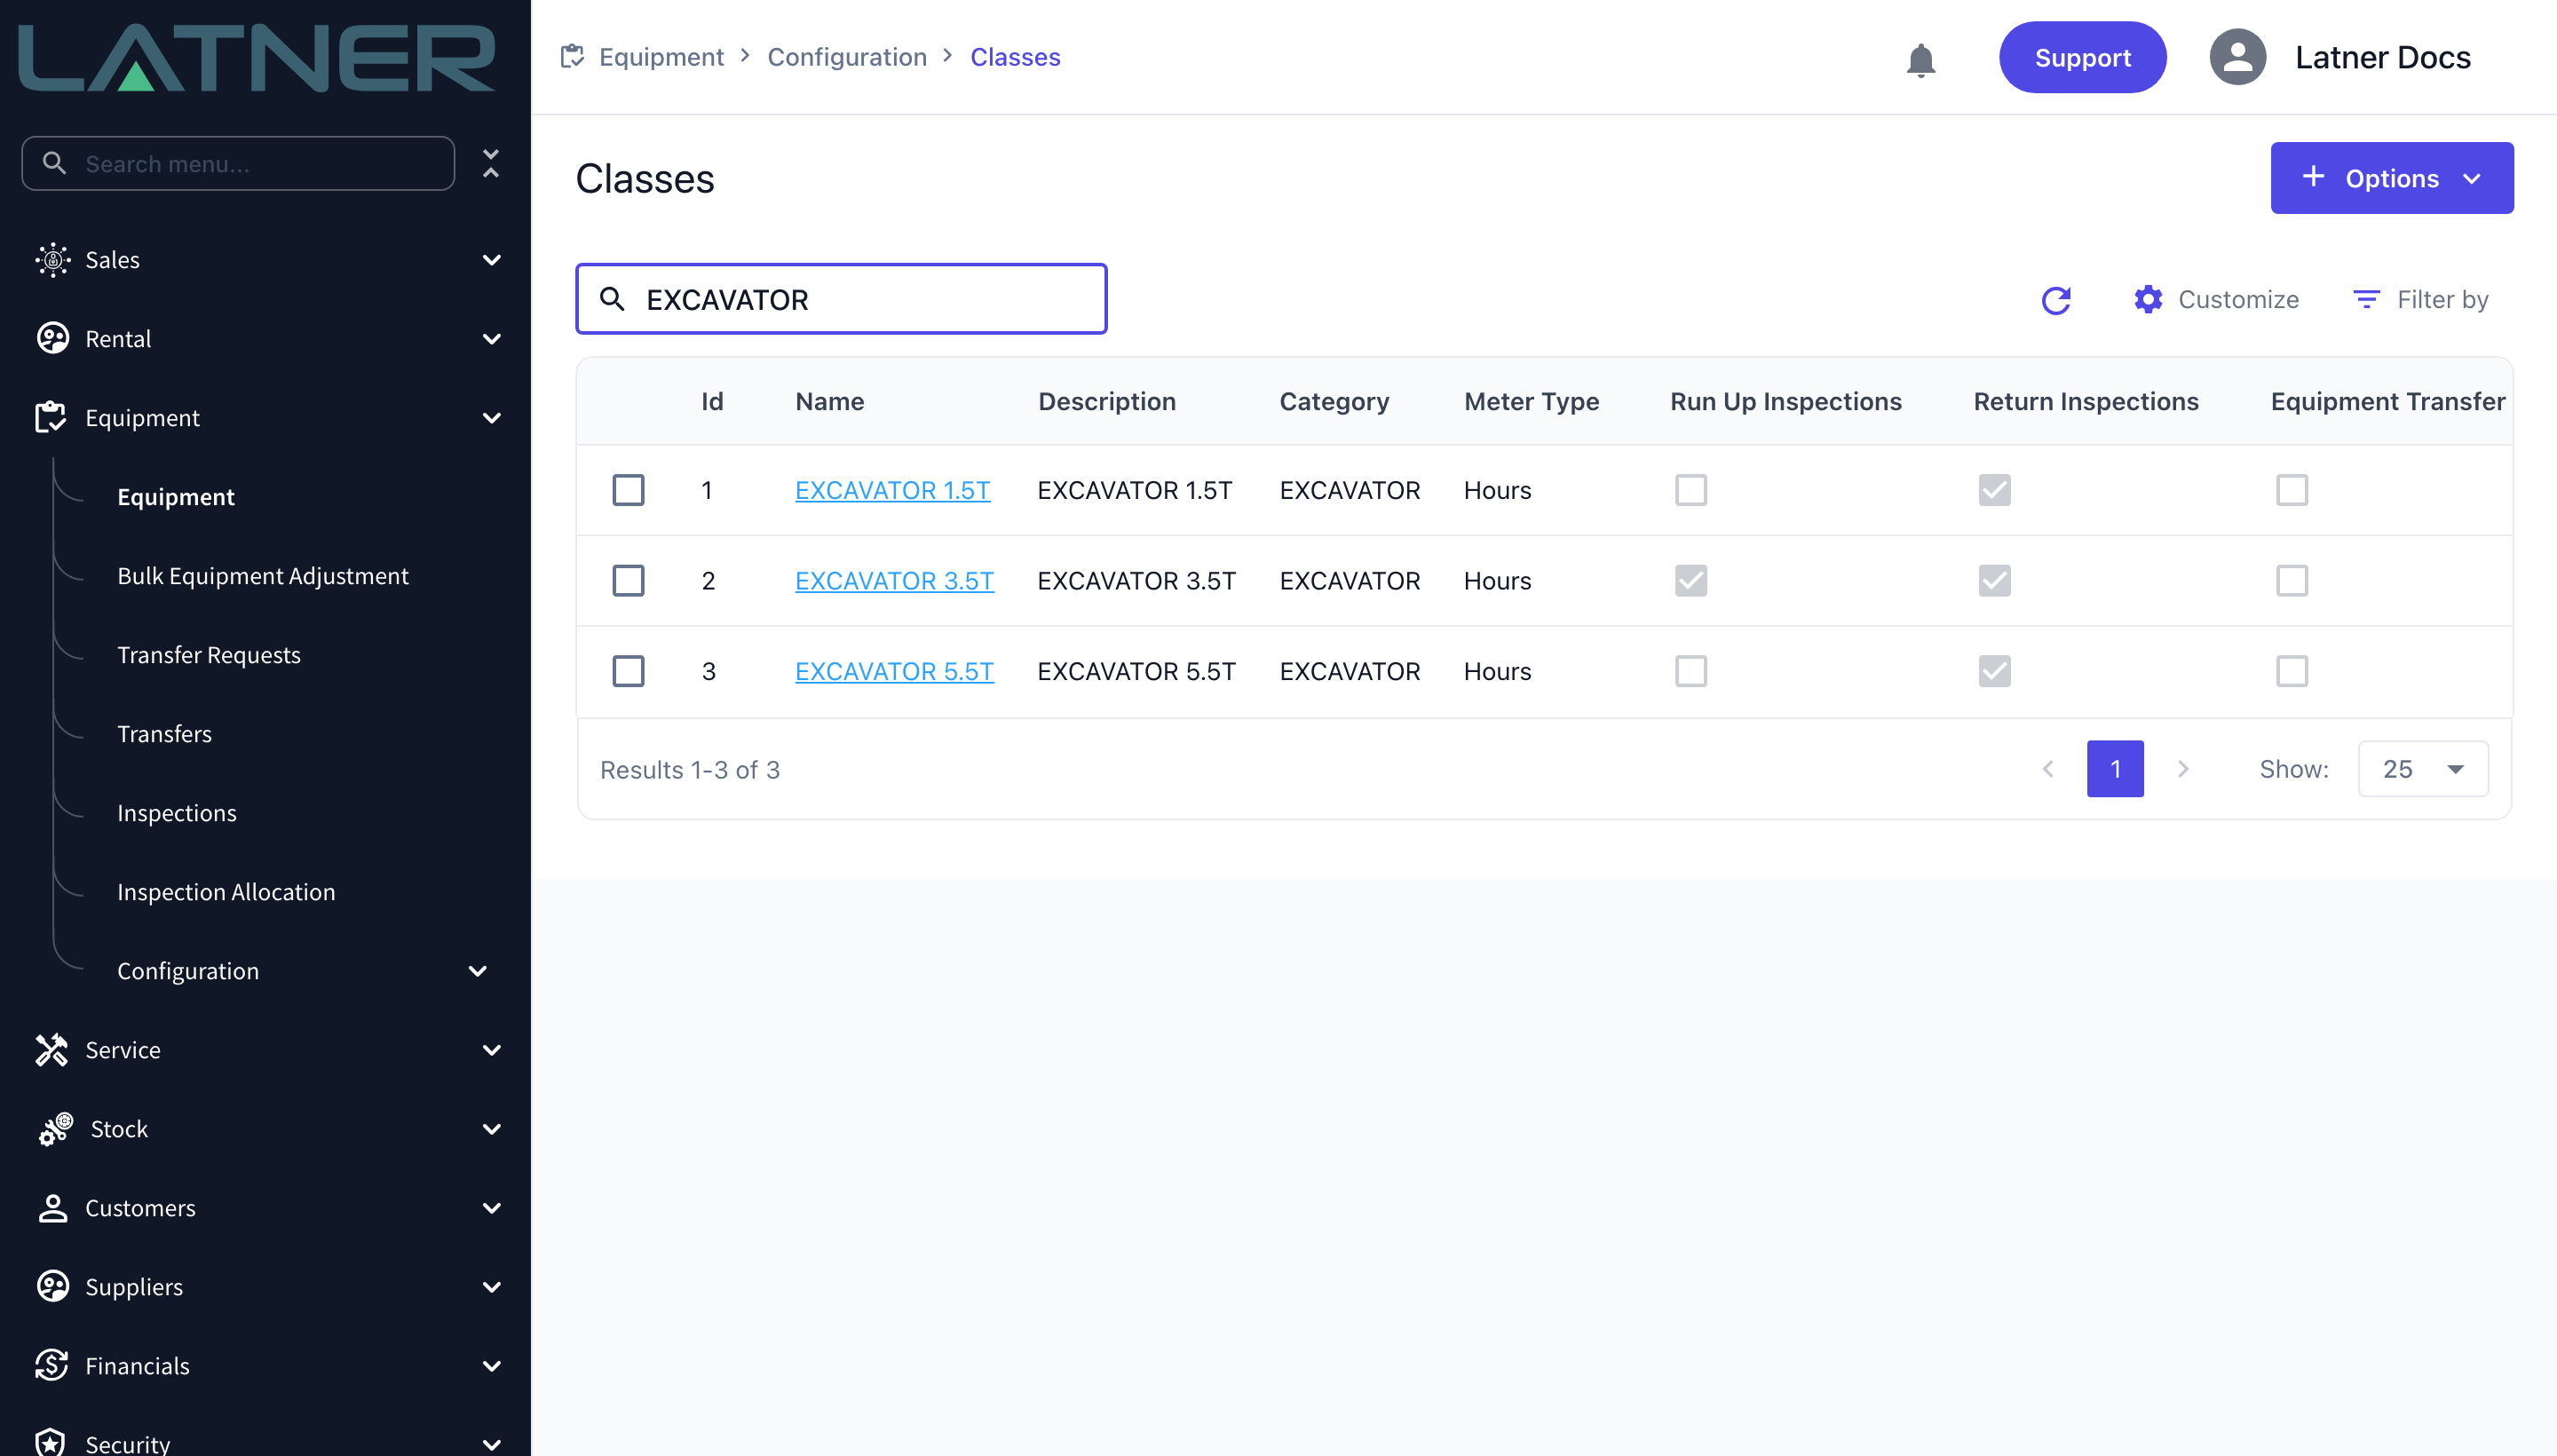
Go to Equipment › Configuration › Classes and click the class you want to configure. The list carries Run Up Inspections, Return Inspections and Equipment Transfer columns, so you can see which classes are already set up before you open anything.
Step 3 - Edit the General Details card
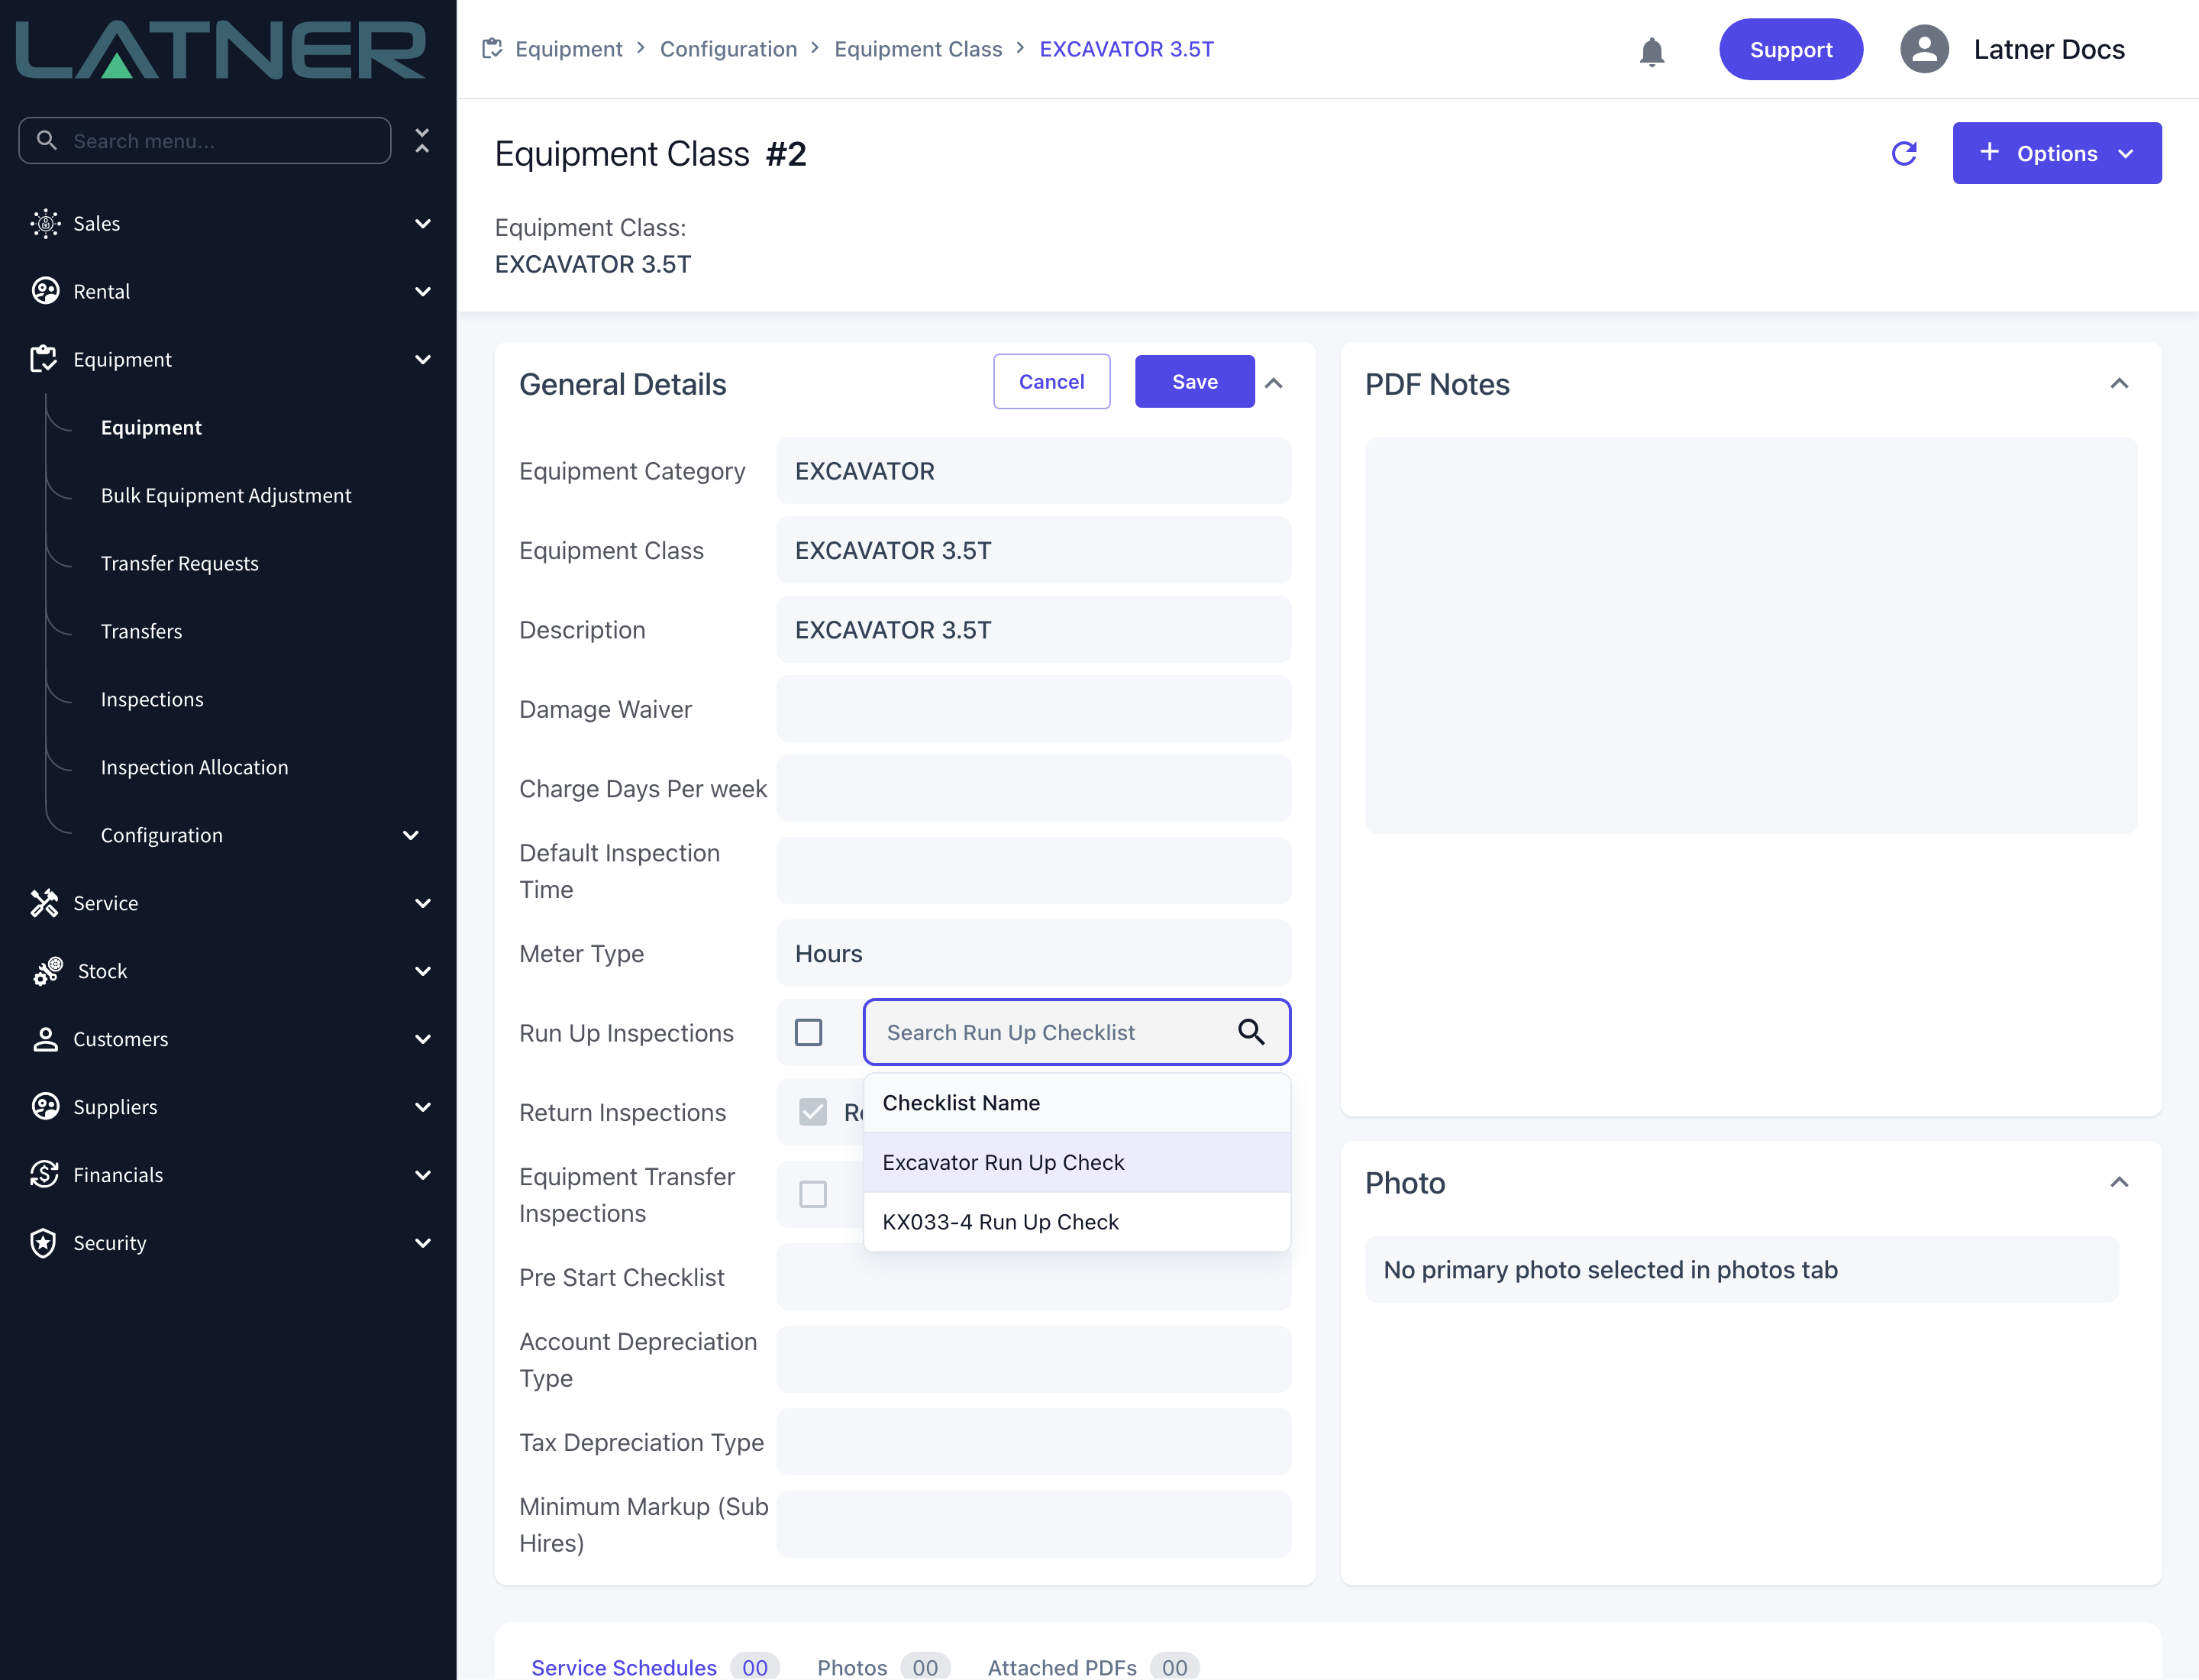
Click any value in the General Details card to put it into edit mode. Cancel and Save appear in the card header. Click the search box beside Run Up Inspections and pick your template. The same pattern applies to Return Inspections and Equipment Transfer Inspections.
Step 4 - Tick the inspection type and save
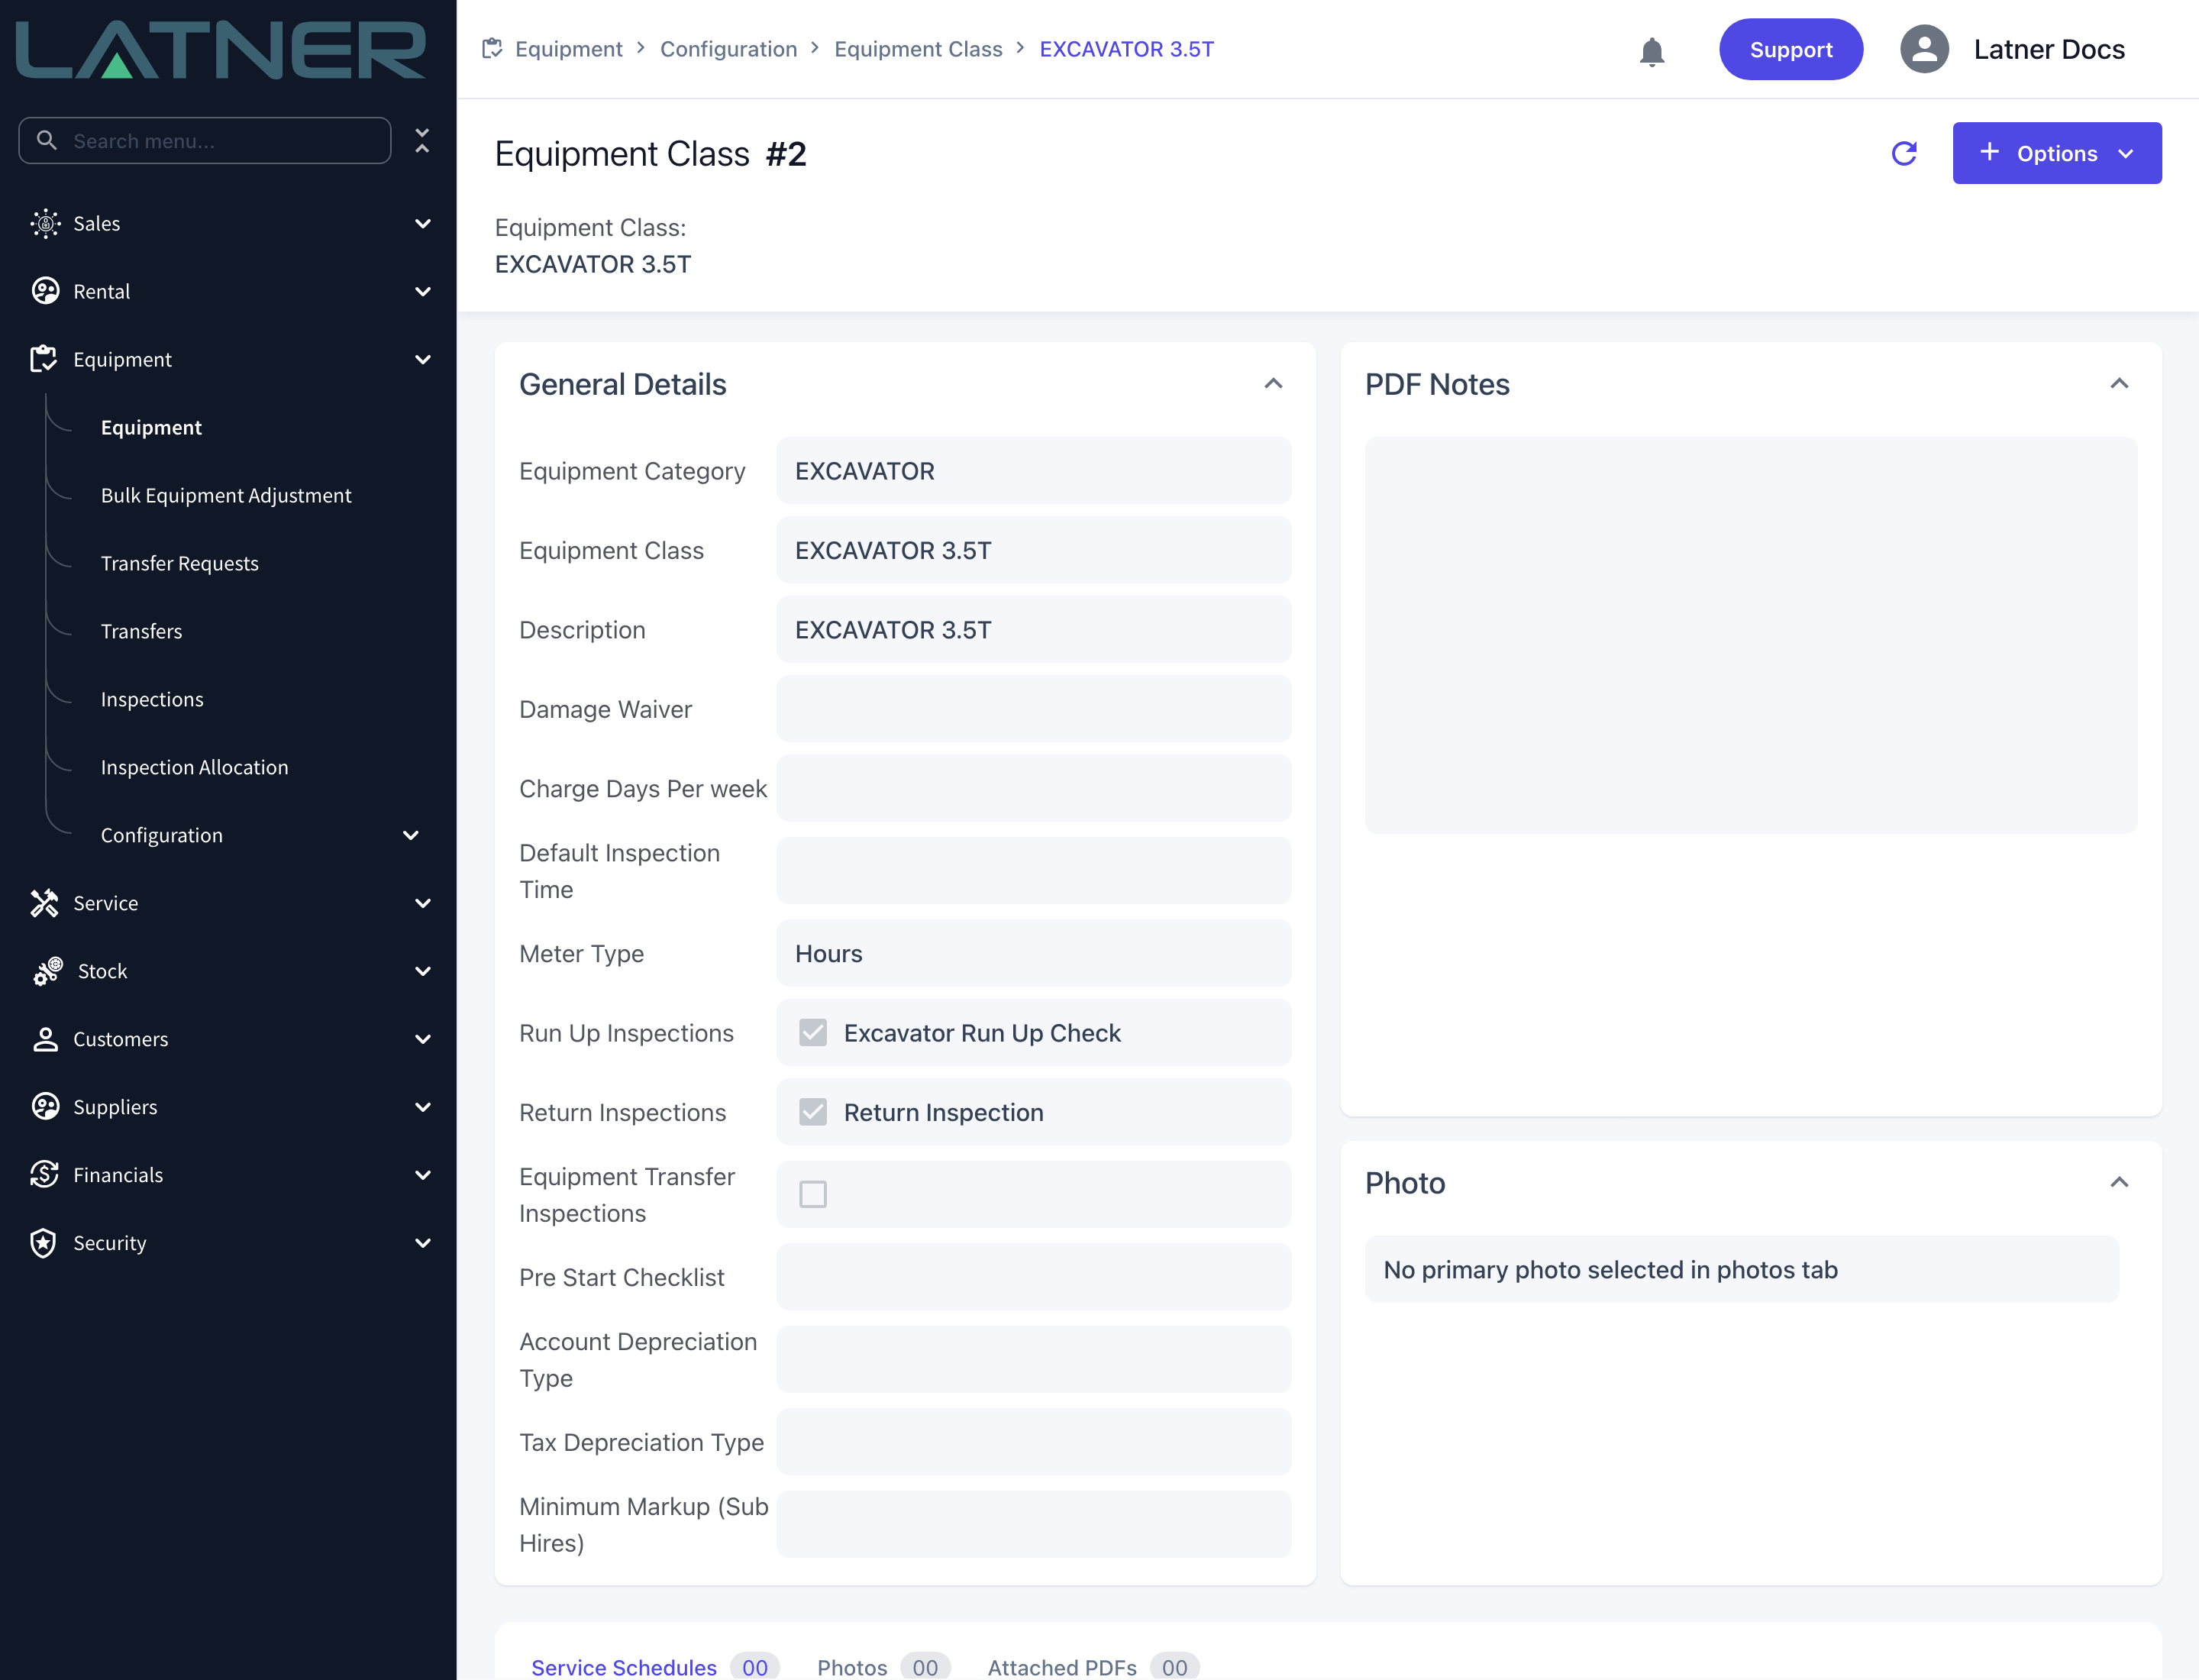
Tick the box to the left of the checklist if you want Latner to raise that inspection automatically for this class, then click Save. The card shows the tick box and the checklist name side by side once it is saved.
-
Run Up Inspections - raises a Run Up inspection when equipment of this class is reserved on a rental contract.
-
Return Inspections - raises a Return inspection when a rental return is completed for an equipment number.
-
Equipment Transfer Inspections - raises an inspection when an equipment transfer is received at the destination branch.
Step 5 - Override on a model where you need to
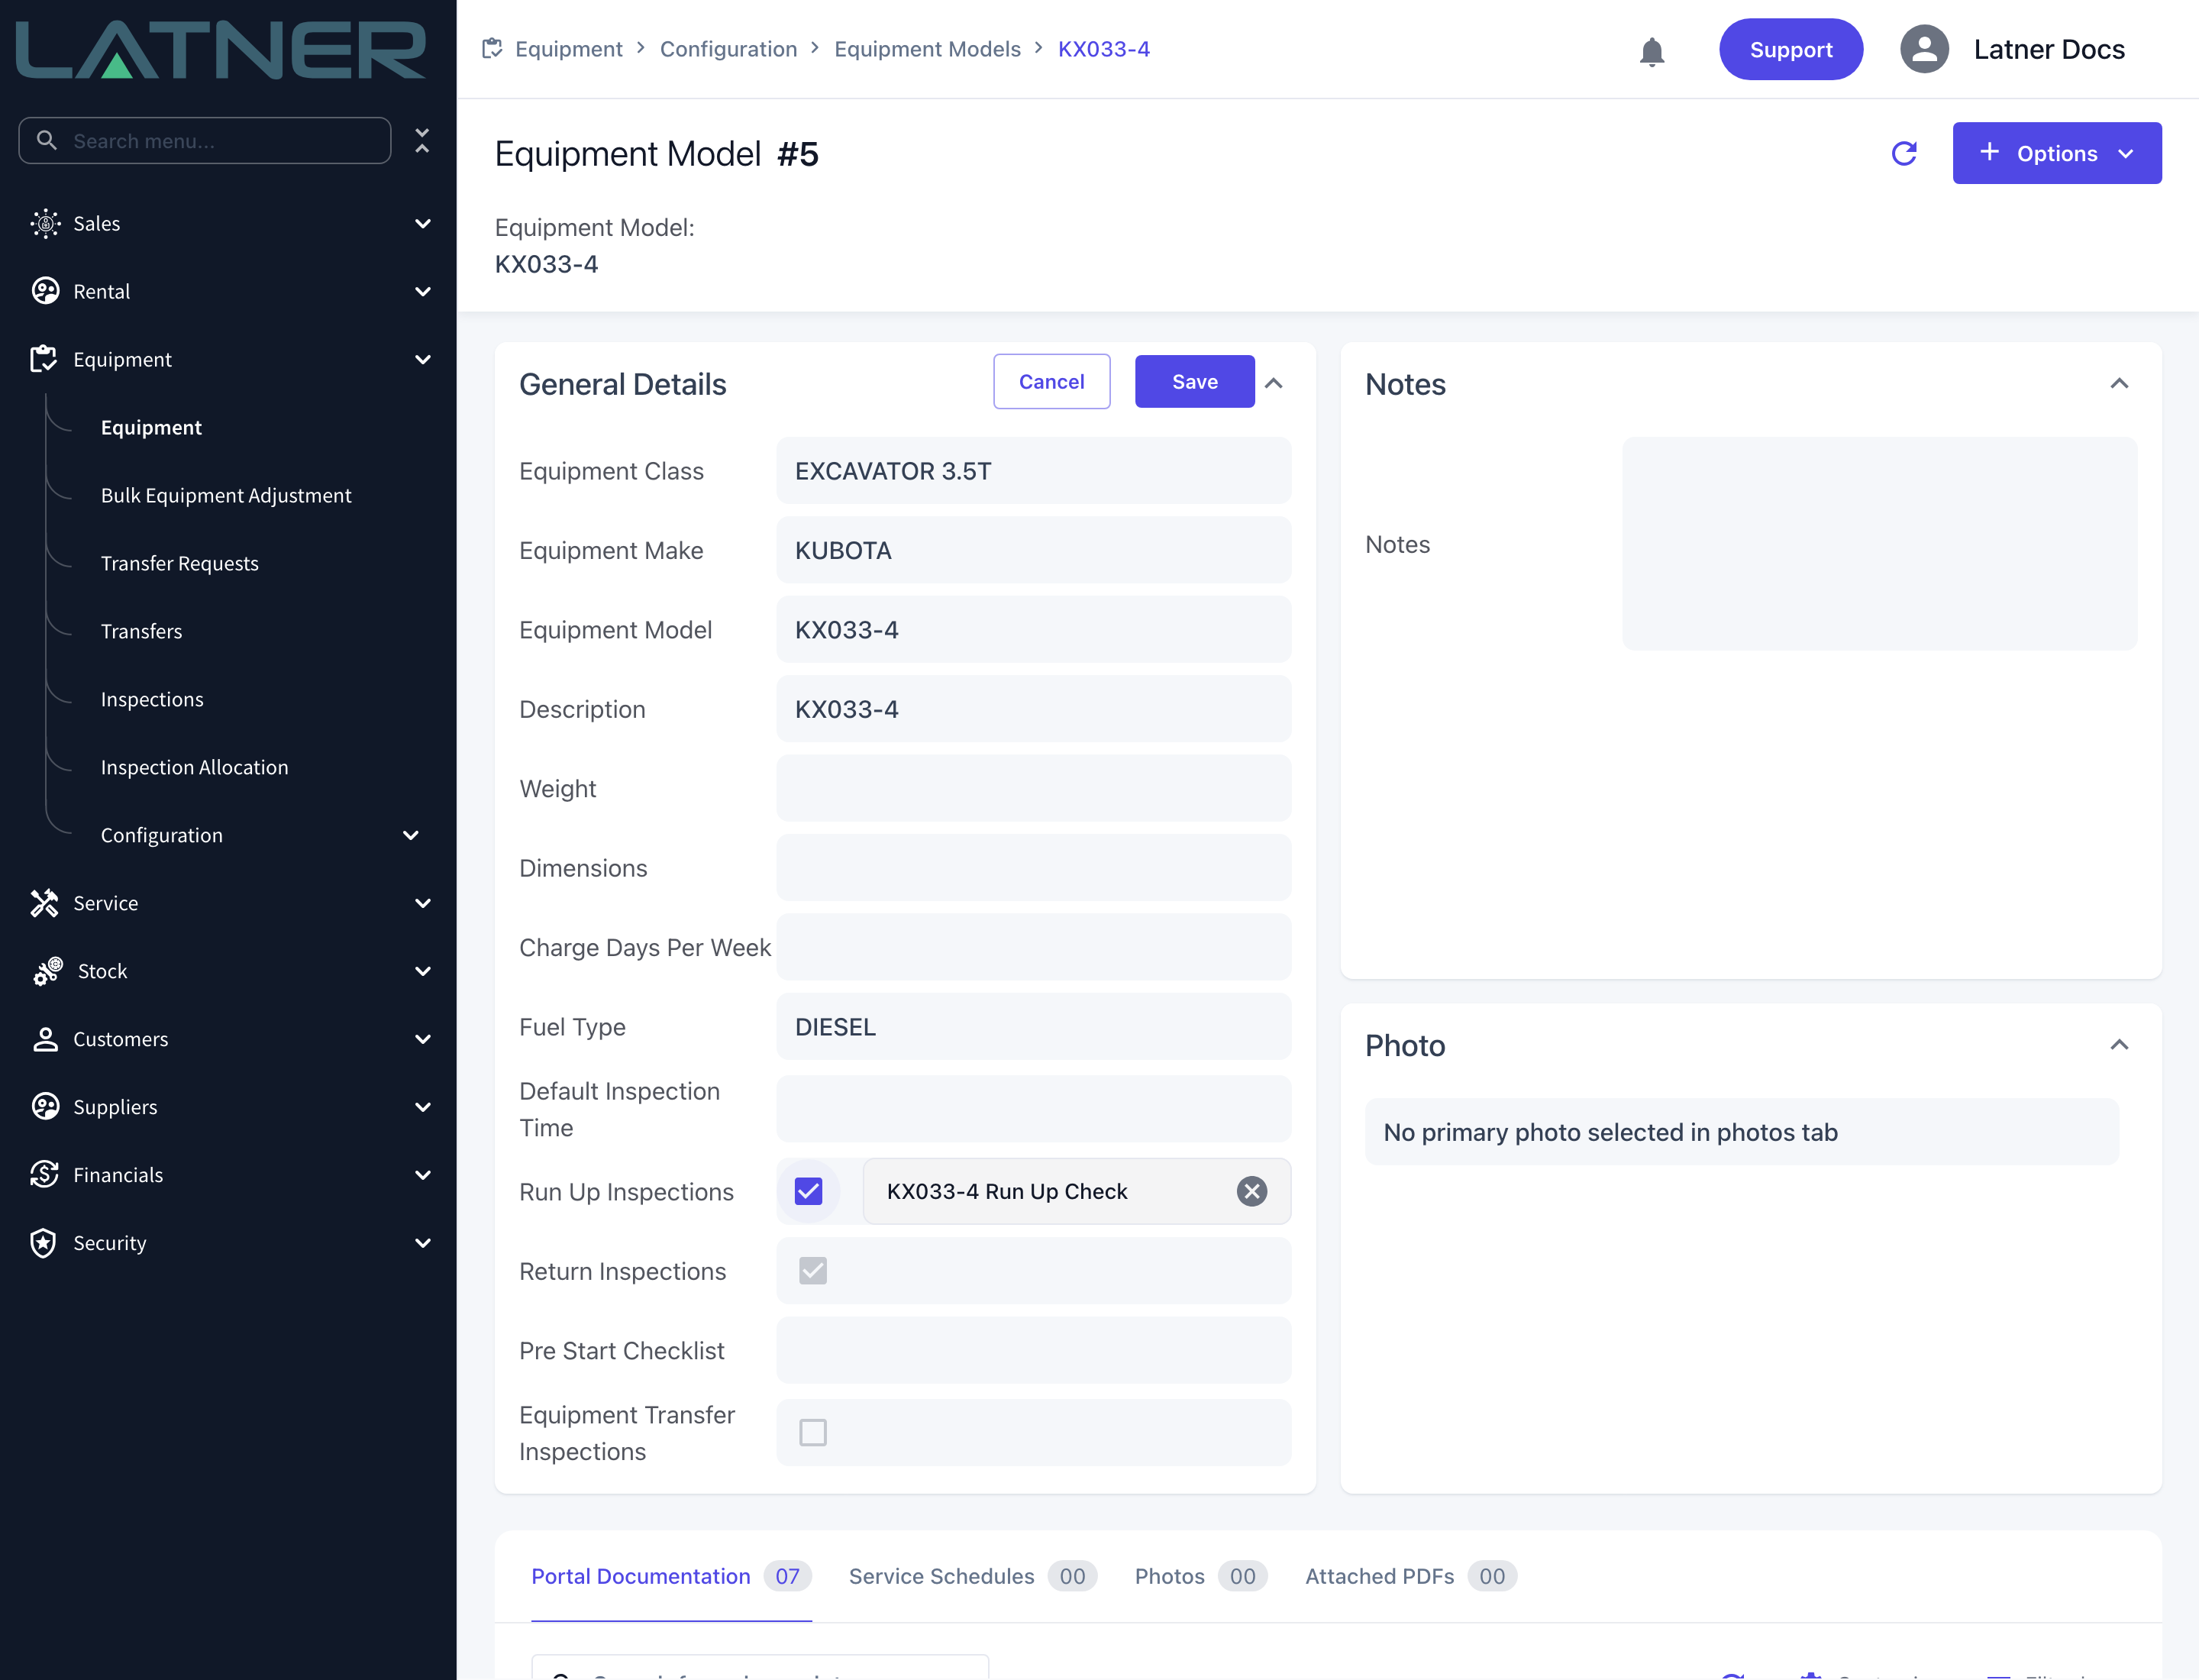
Where one model needs different checks from the rest of its class, go to Equipment › Configuration › Models, open the model and set its checklist the same way. Leave the model's field blank and it keeps using the class's checklist, so you only need to fill in the models that genuinely differ.
Step 6 - Confirm it on a new inspection
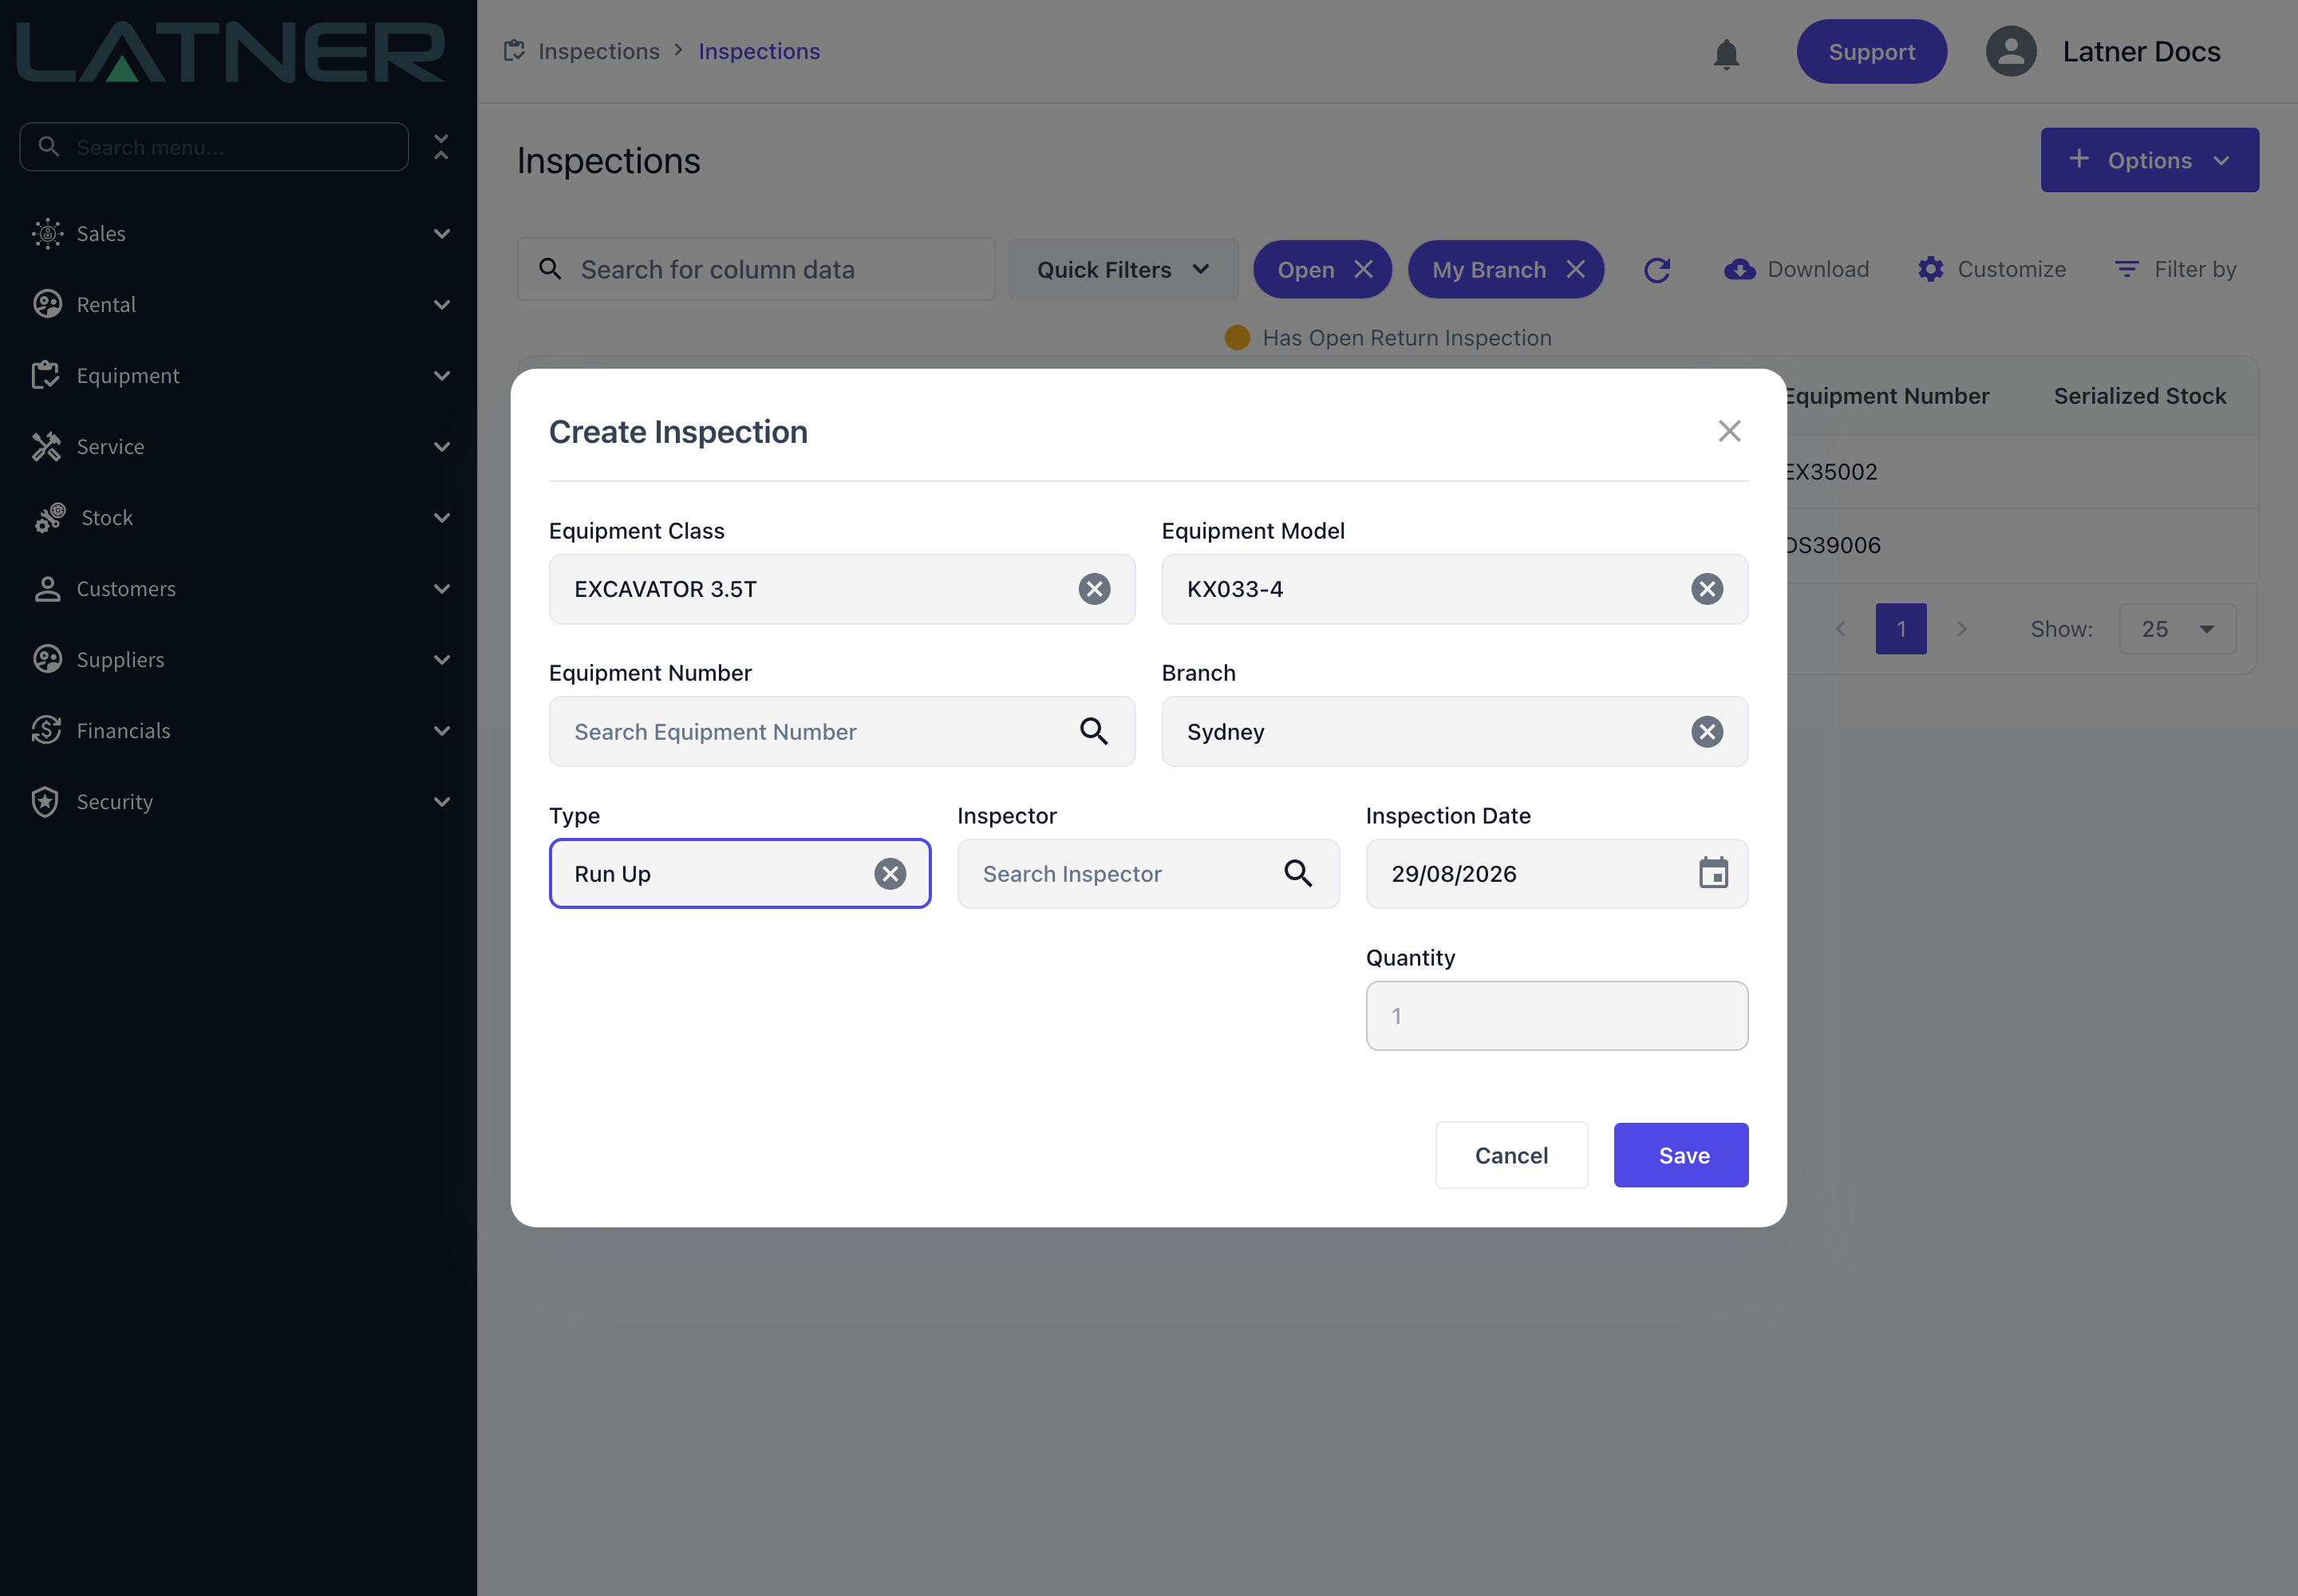
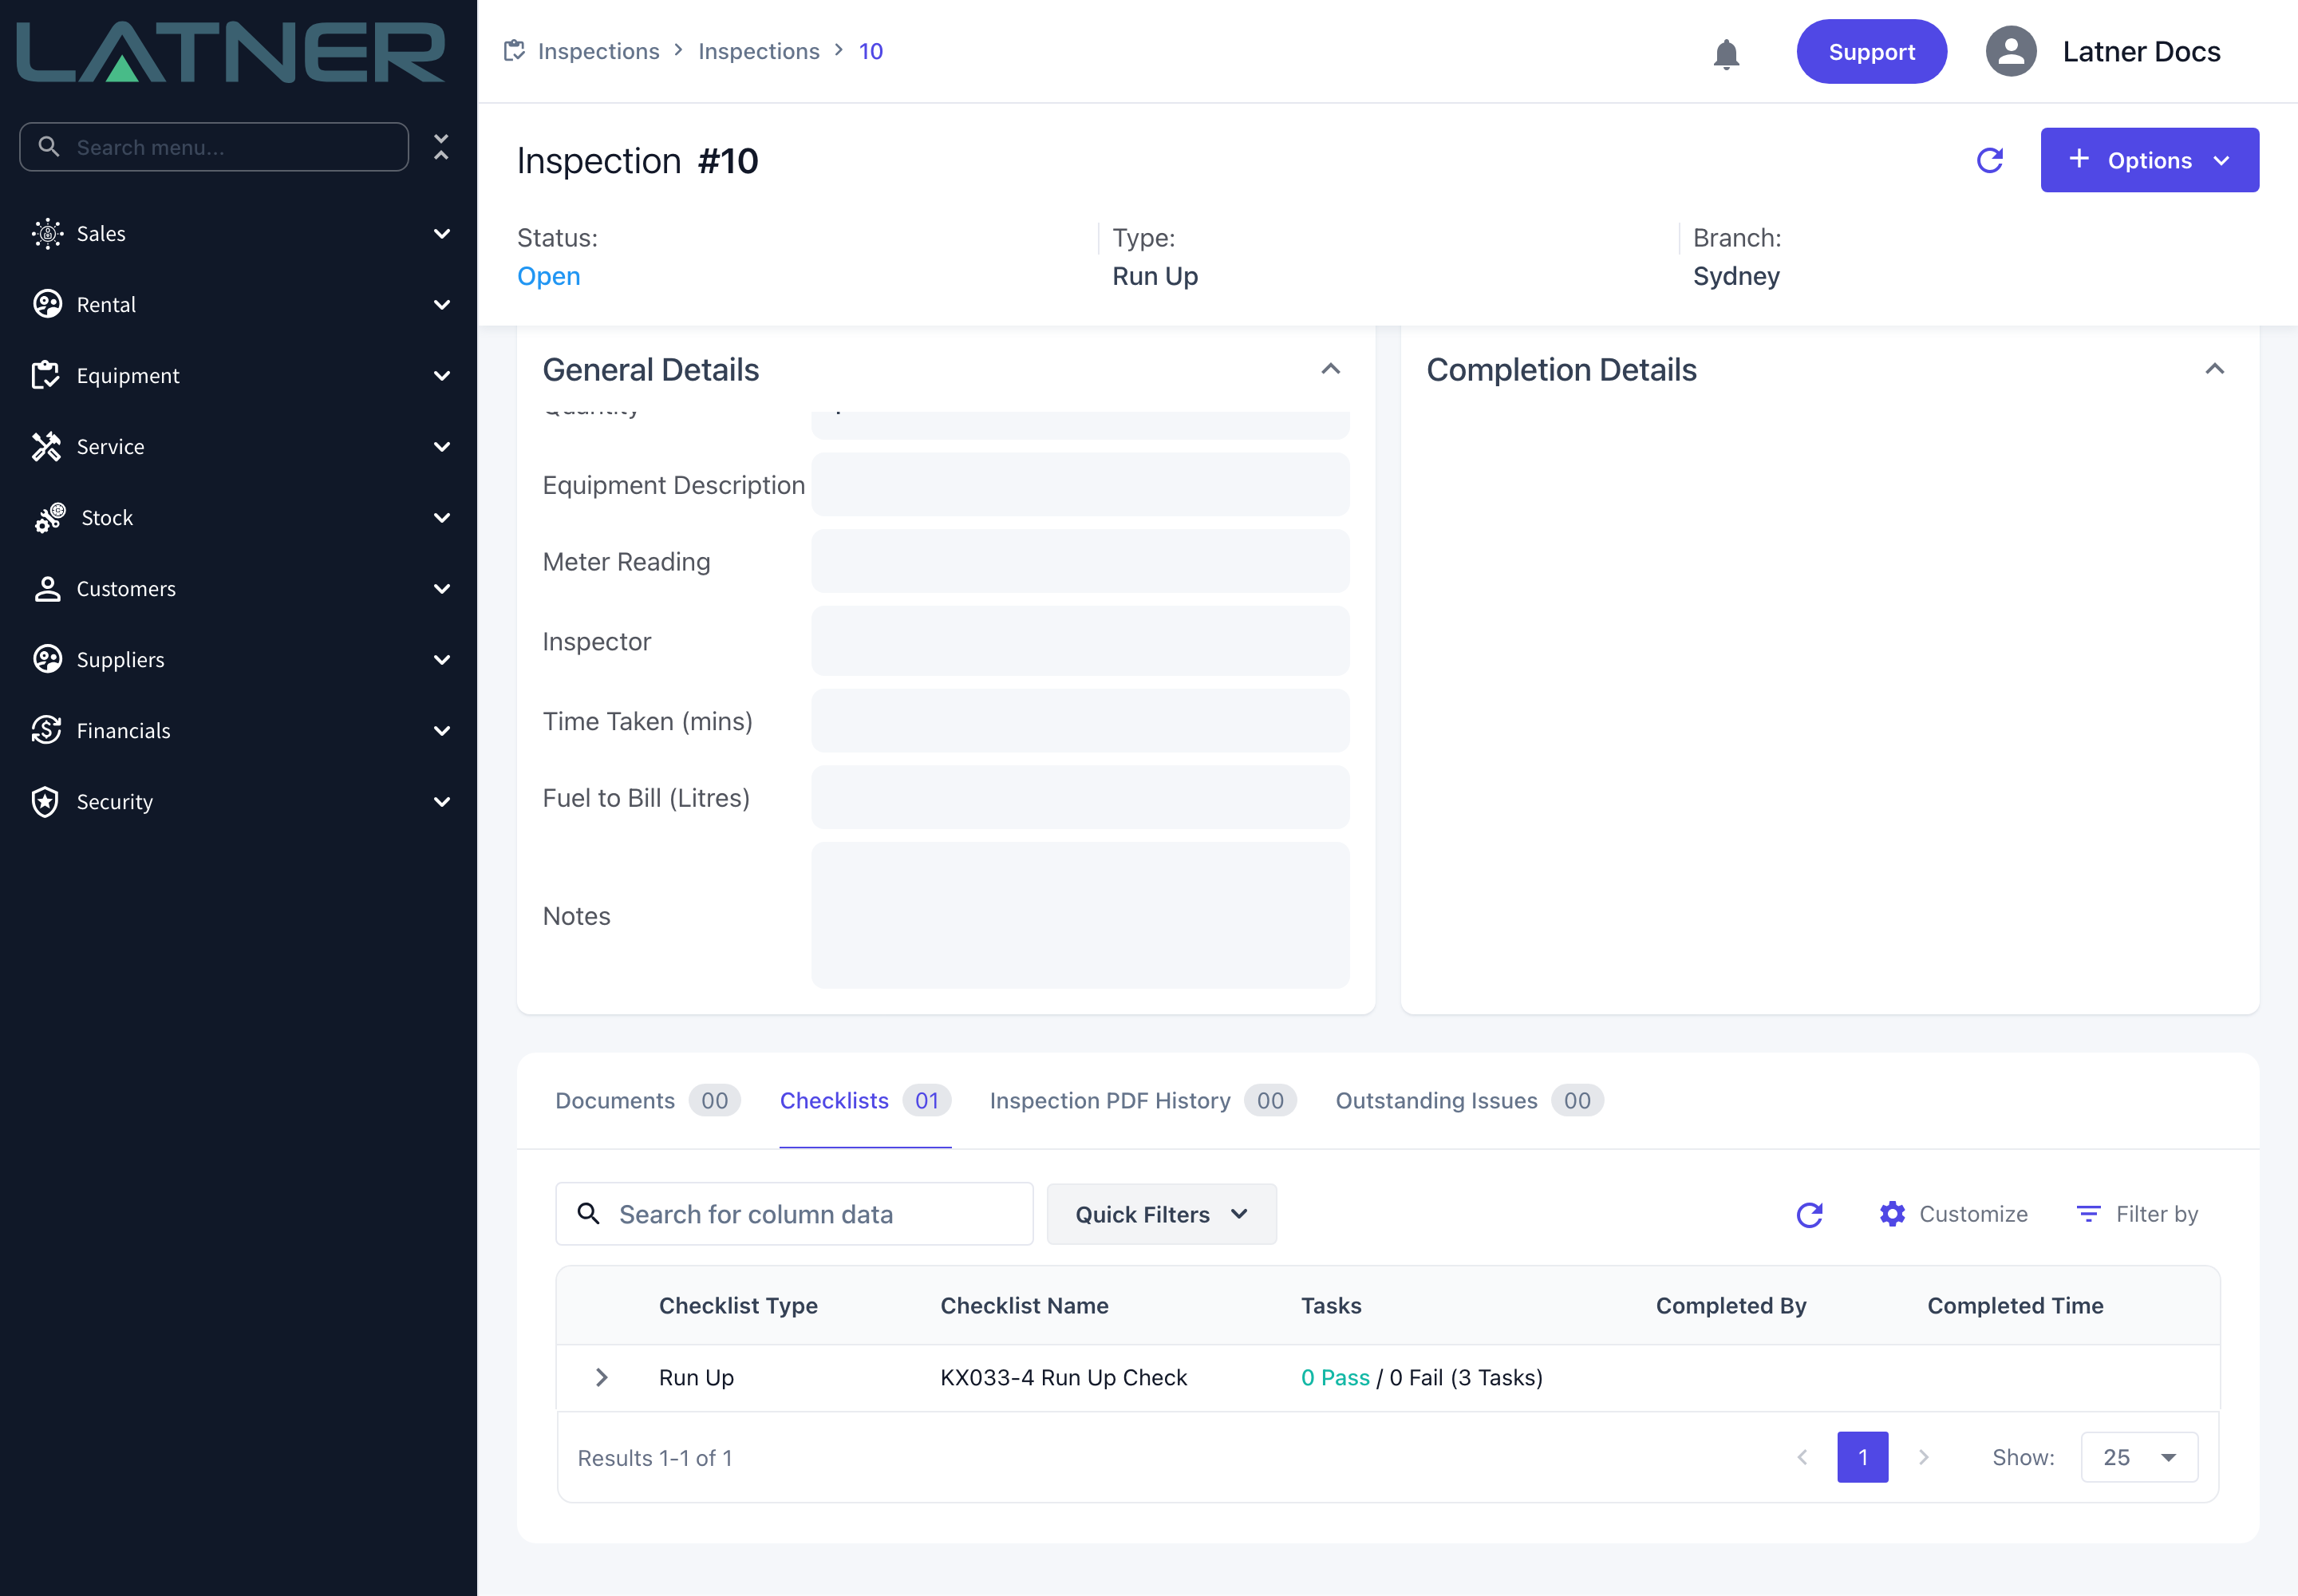
The quickest way to prove the setup is to raise one. Go to Inspections › Options › Create Inspection, choose the class and model you configured, set Type to Run Up and save. Equipment Number is optional on a Run Up inspection, so you can test without tying up a machine.
Open the new inspection and check the Checklists tab. The checklist is there with its tasks waiting to be actioned, and the name tells you whether the class's or the model's checklist was used.
After You Save
-
Every new Run Up, Return or Equipment Transfer inspection for that class or model gets a copy of the checklist, listed on the inspection's Checklists tab.
-
Inspections raised before you made the change are untouched. The assignment applies from now on.
-
Inspectors action the tasks from the inspection or from the mobile inspection screen, and each task's response is recorded against that inspection.
-
If Completed Checklists Required For Inspections is enabled, an inspection cannot be completed while any of its checklist tasks are still outstanding.
-
If Failed Inspection Checklist Points Require Approval is enabled, completing an inspection that has a failed task moves it to Pending Approval instead of Completed.
Changing the equipment class, model or equipment number on an Open inspection makes Latner work the checklist out again and replace it, and any responses already recorded on the old checklist go with it. Finish and complete the inspection before reassigning equipment, or record the responses again afterwards. On an inspection that is no longer Open the change is blocked outright with Cannot change Equipment on a Completed Inspection.
FAQs
Watch the Demo
Prefer to watch it? Step through the same flow here.