
A credit note reverses part or all of a customer invoice, so you can put right an overcharge without cancelling the invoice and raising it again.
Overview
Not every billing mistake is worth unpicking. When an invoice is right in most respects and wrong in one - a delivery charged twice, a machine billed for a day it never worked - a credit note is the tidy fix.
-
Latner builds the credit note out of the invoice's own lines, so descriptions, item codes, tax rates and the rental contract link all carry across.
-
You pick which lines to credit and, for each one, how many units and how much per unit - so a partial credit is no more work than a full one.
-
The credit note is a separate document with its own number, status, PDF and email. The original invoice is left exactly as it was.
-
Creating a credit note does not reduce what the customer owes. It creates credit, which you then allocate to an invoice or refund.
-
The option only appears once the invoice is finished - an invoice in Completed or Paid status.
Before You Begin
You need one permission and one invoice in the right state. The two settings below are optional and change how the credit note is numbered and approved.
|
Requirement |
Where to Find It |
|---|---|
|
Create Credit Note permission |
Security › Configuration › Permission Groups, under Customers › Option |
|
An invoice in Completed or Paid status |
Customers › Customer Invoices |
|
Customer Credit Note Number Format (optional) |
Security › Settings › Customers |
|
Enforce Credit Note Approval Limits (optional) |
Security › Settings › Customers |
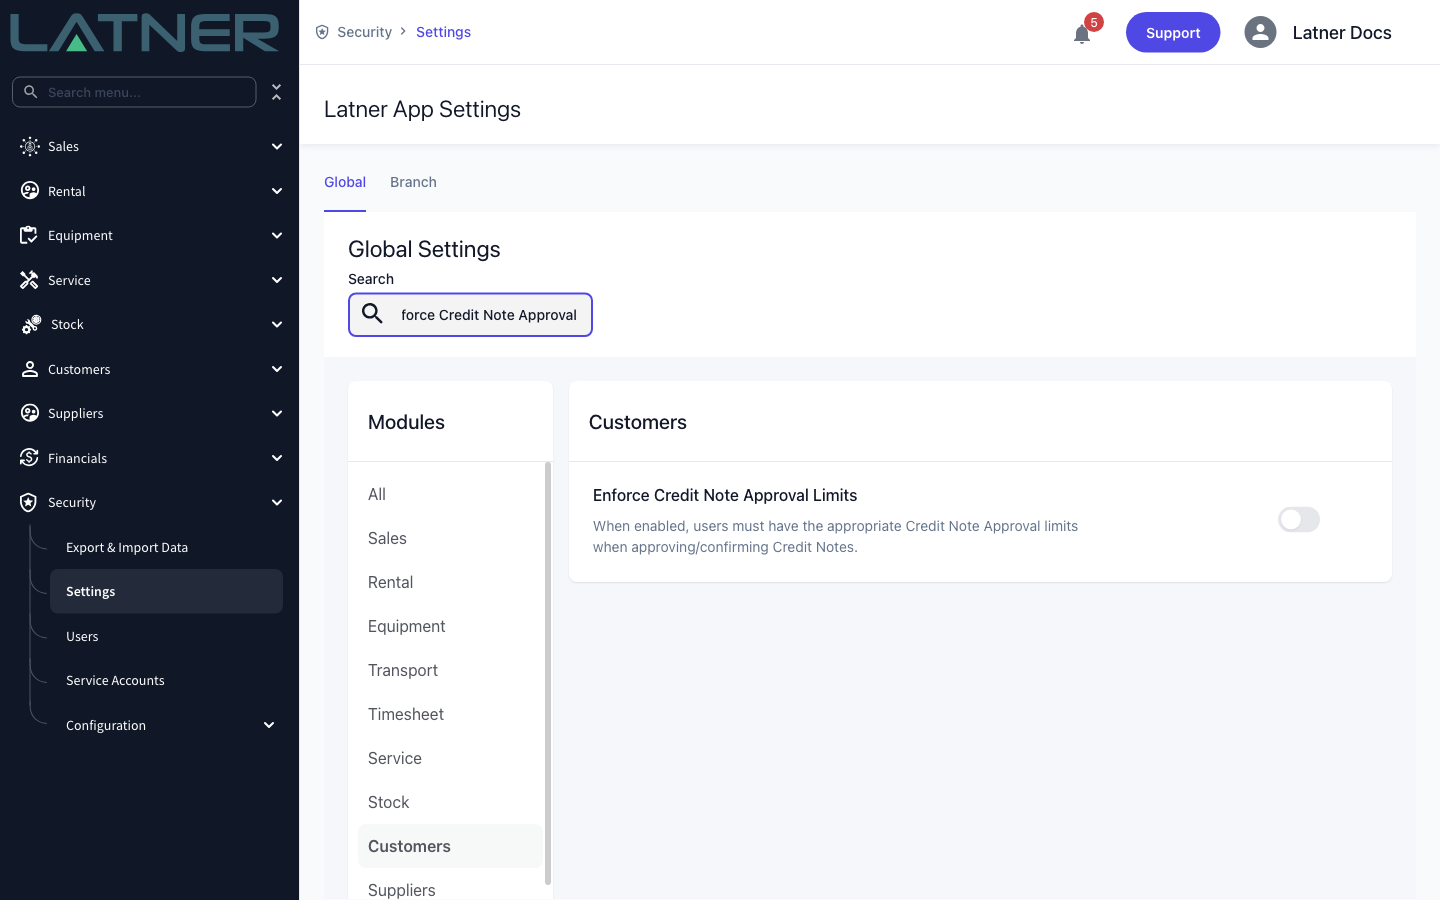
Turn Enforce Credit Note Approval Limits on and whoever completes a credit note must hold an approval limit that covers every line type on it. Those limits are set up under Customers › Configuration › Credit Note Approval Groups. Leave the setting off and anyone with the Create Credit Note permission can complete one.
Creating the Credit Note
Step 1 - Open the invoice you want to credit
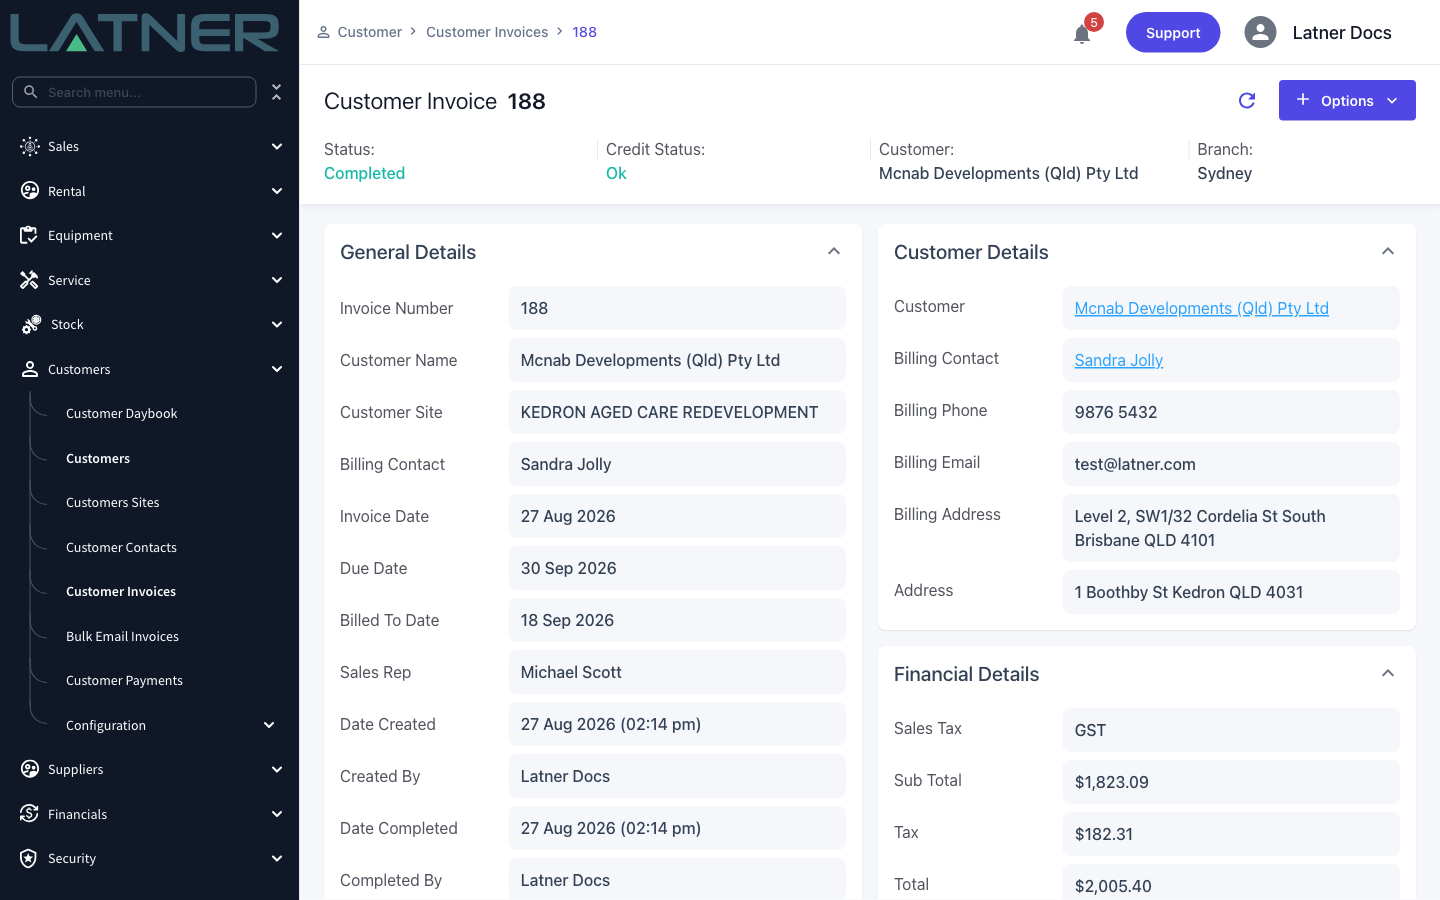
Go to Customers › Customer Invoices and open the invoice. Check the Status at the top of the page: crediting is only offered on an invoice that has been finished, so an Open invoice has to be completed (or simply corrected) first.
Step 2 - Choose Create Credit Note from Invoice
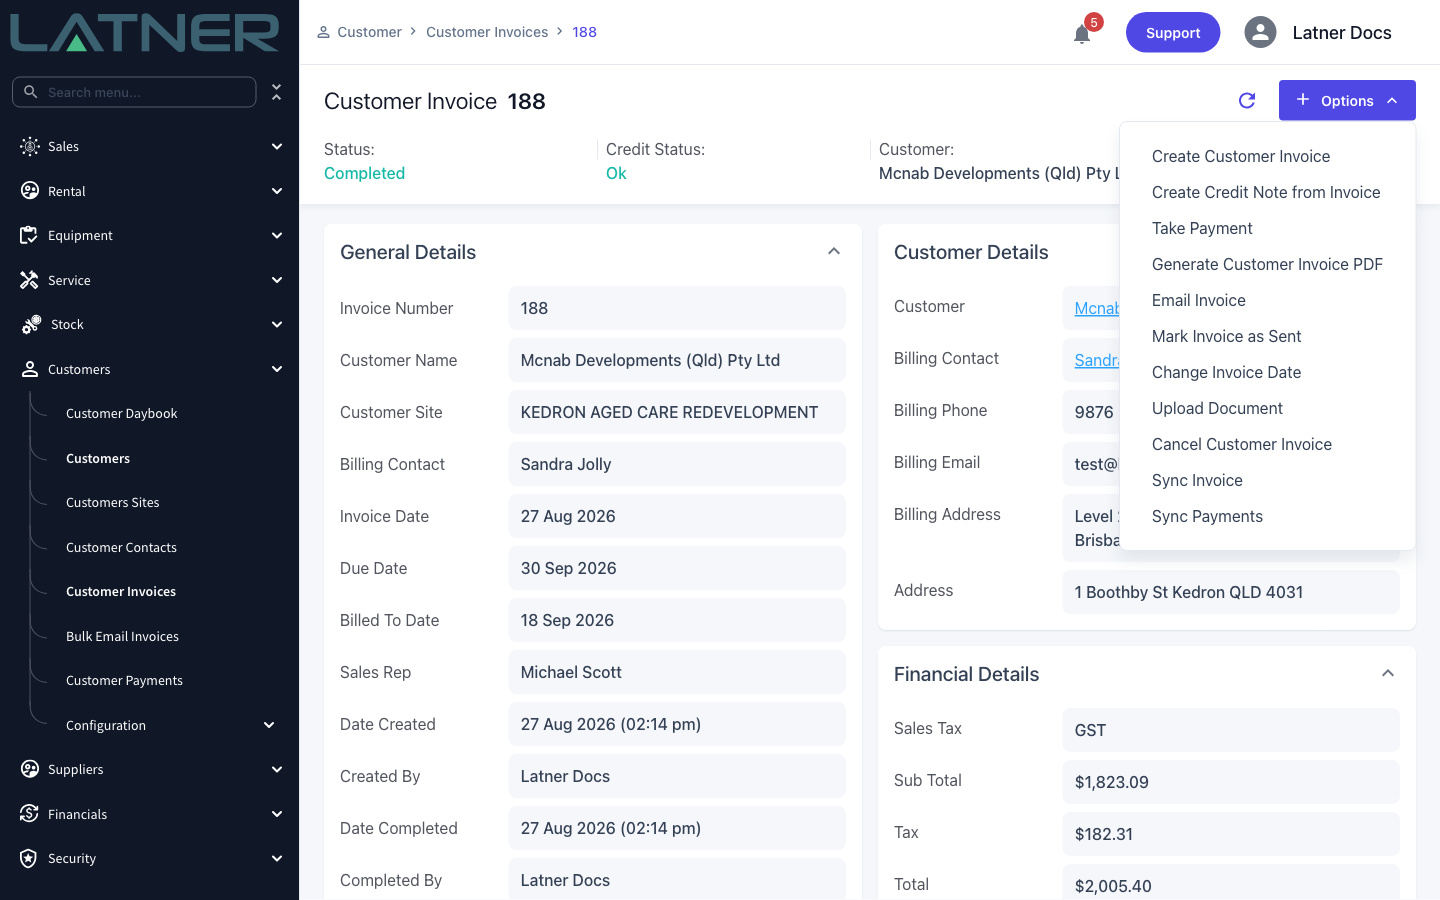
Click Options › Create Credit Note from Invoice. If the entry is greyed out, the invoice is not yet Completed or Paid.
Step 3 - Review the lines Latner has brought across
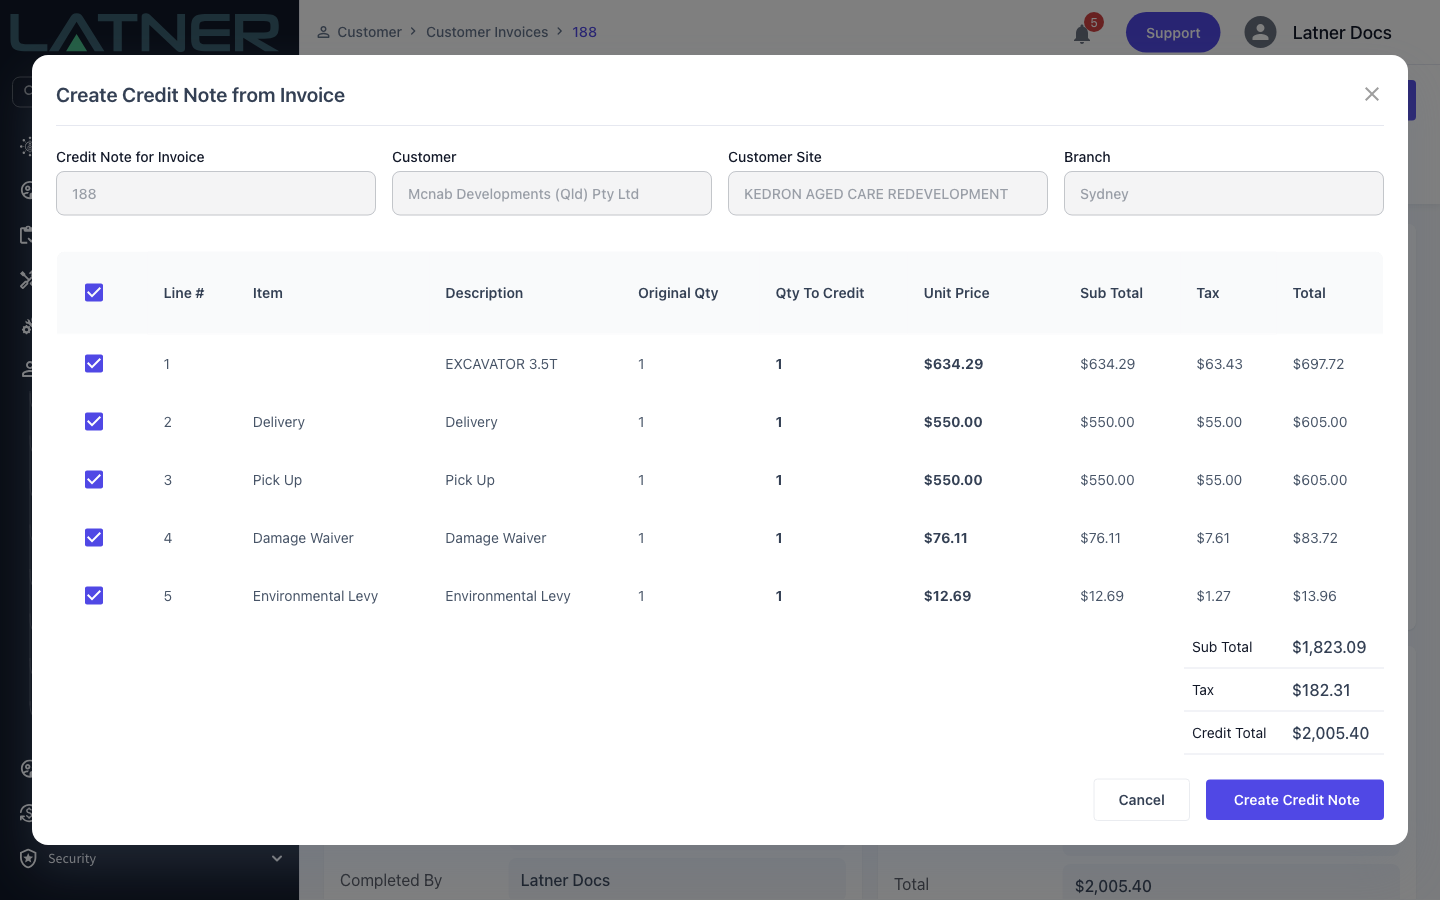
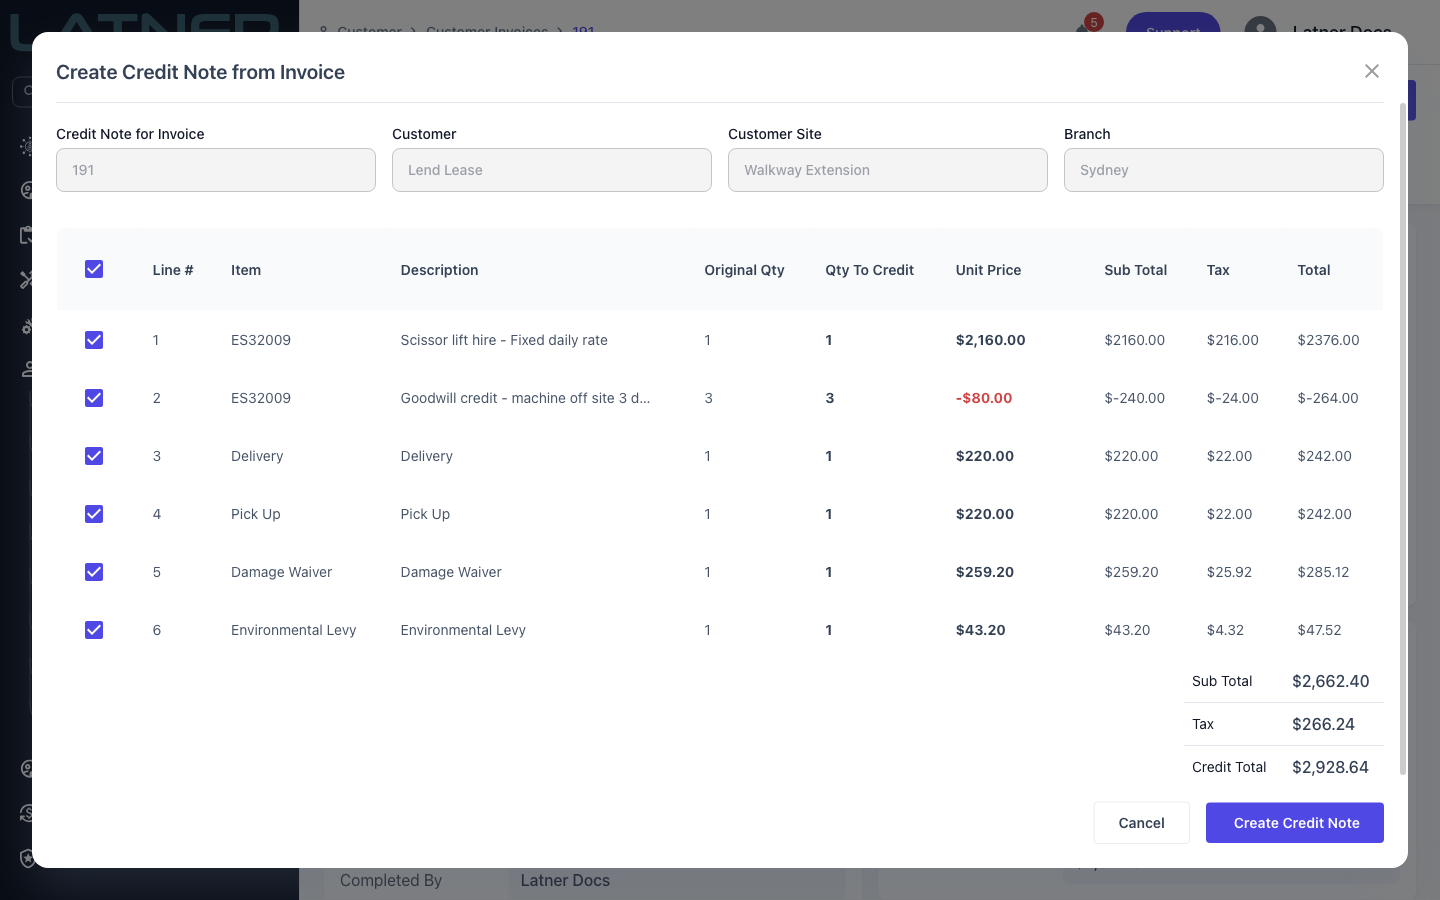
The form opens with every line from the invoice listed and ticked, each at its full quantity, so the default is a complete reversal of the invoice.
The four fields along the top - Credit Note for Invoice, Customer, Customer Site and Branch - are copied from the invoice and cannot be changed. A credit note always belongs to the same customer, site and branch as the invoice it credits.
In the table:
-
Include - whether the line is credited at all. The tick box in the header row selects or clears every line at once.
-
Line #, Item, Description - copied from the invoice and read-only.
-
Original Qty - what was invoiced. This is the ceiling for the credit.
-
Qty To Credit - editable. Starts at the full quantity.
-
Unit Price - editable. Starts at the invoiced unit price.
-
Sub Total, Tax, Total - recalculated as you type, using the line's original tax rate.
Equipment hired on a rental rate has no unit price of its own on the invoice, so Latner divides that line's sub total by its quantity to get one. That is why an equipment line can show an unrounded figure such as $634.29.
A line that was already a negative adjustment on the invoice - a goodwill credit, say - shows its unit price in red, and Latner will refuse to save a credit line with a negative unit price. Clear the tick on those lines. Crediting a credit is a double negative that would add to the customer's bill.
Step 4 - Set what you are actually crediting
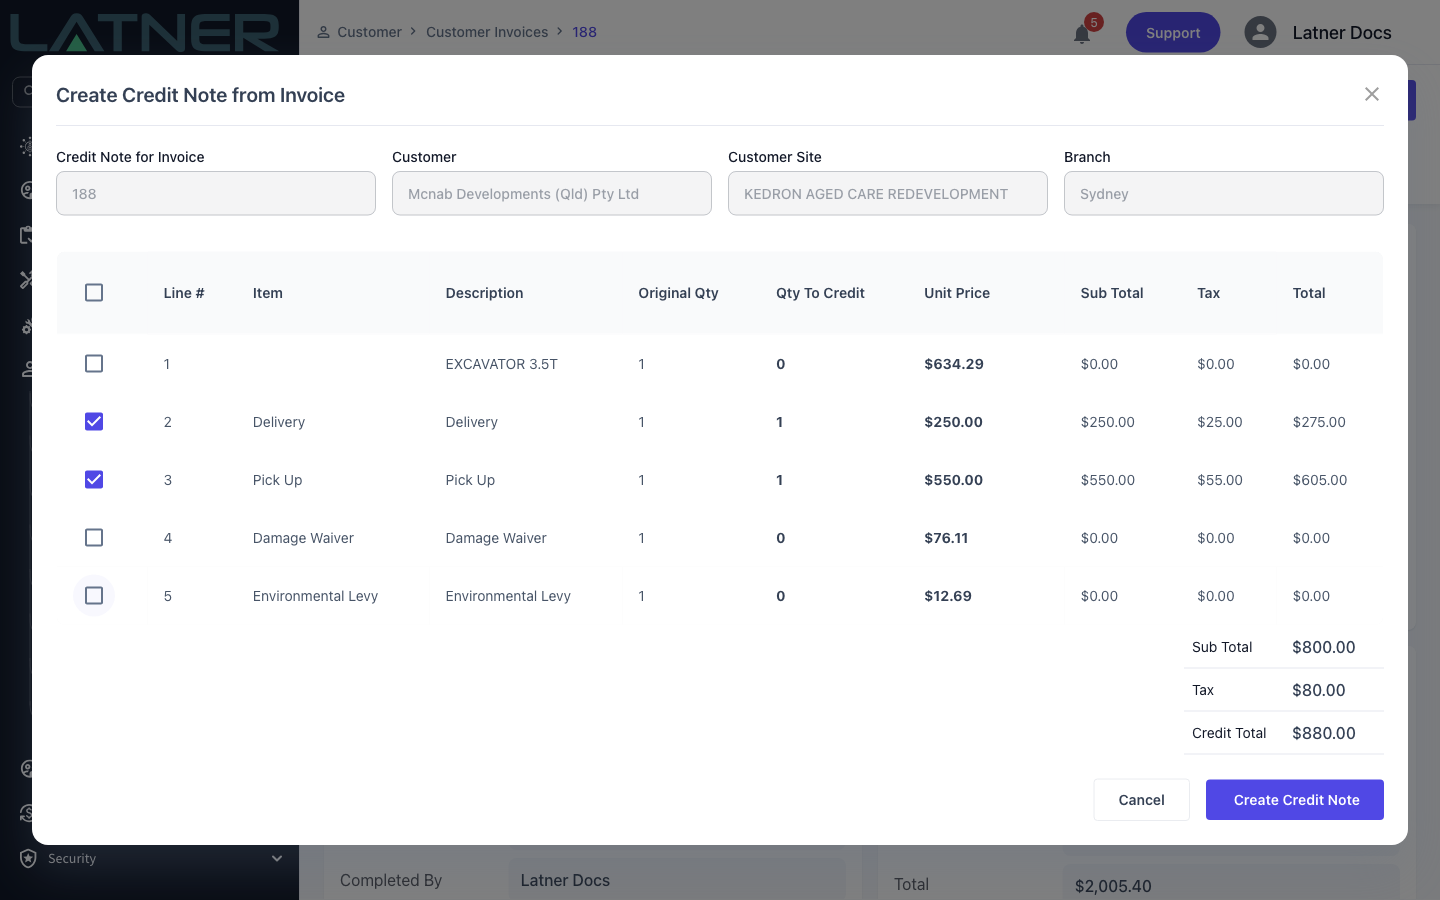
Untick the lines you are not crediting, then adjust the two editable columns on the lines you are:
-
Qty To Credit - must be more than zero and no more than Original Qty. Typing a quantity ticks the line for you; setting it to zero unticks it.
-
Unit Price - the amount credited per unit. Lower it to credit part of a charge, for example $250 of a $550 delivery fee. It cannot be negative.
Watch the Credit Total in the footer as you go - it counts only the ticked lines. At least one line has to be ticked, or Latner answers with "Please select at least one Invoice Line to credit".
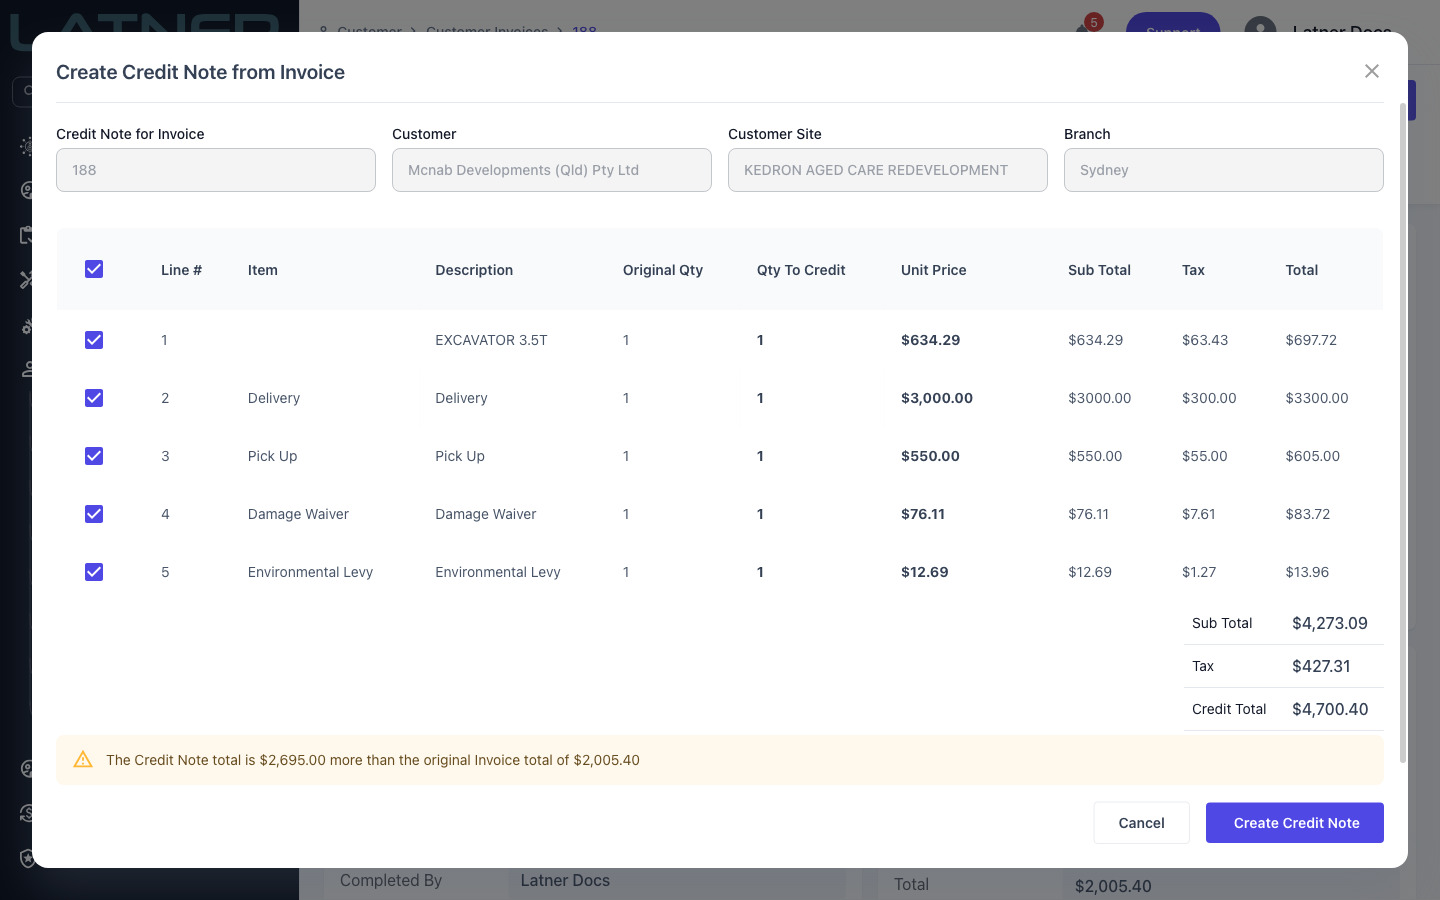
Latner warns when the credit adds up to more than the invoice, but it does not stop you. Because each line is capped at its original quantity, this only happens when a unit price has been typed higher than the one invoiced - which is almost always a typo. Read the warning and check the figure before you continue.
Step 5 - Create the credit note
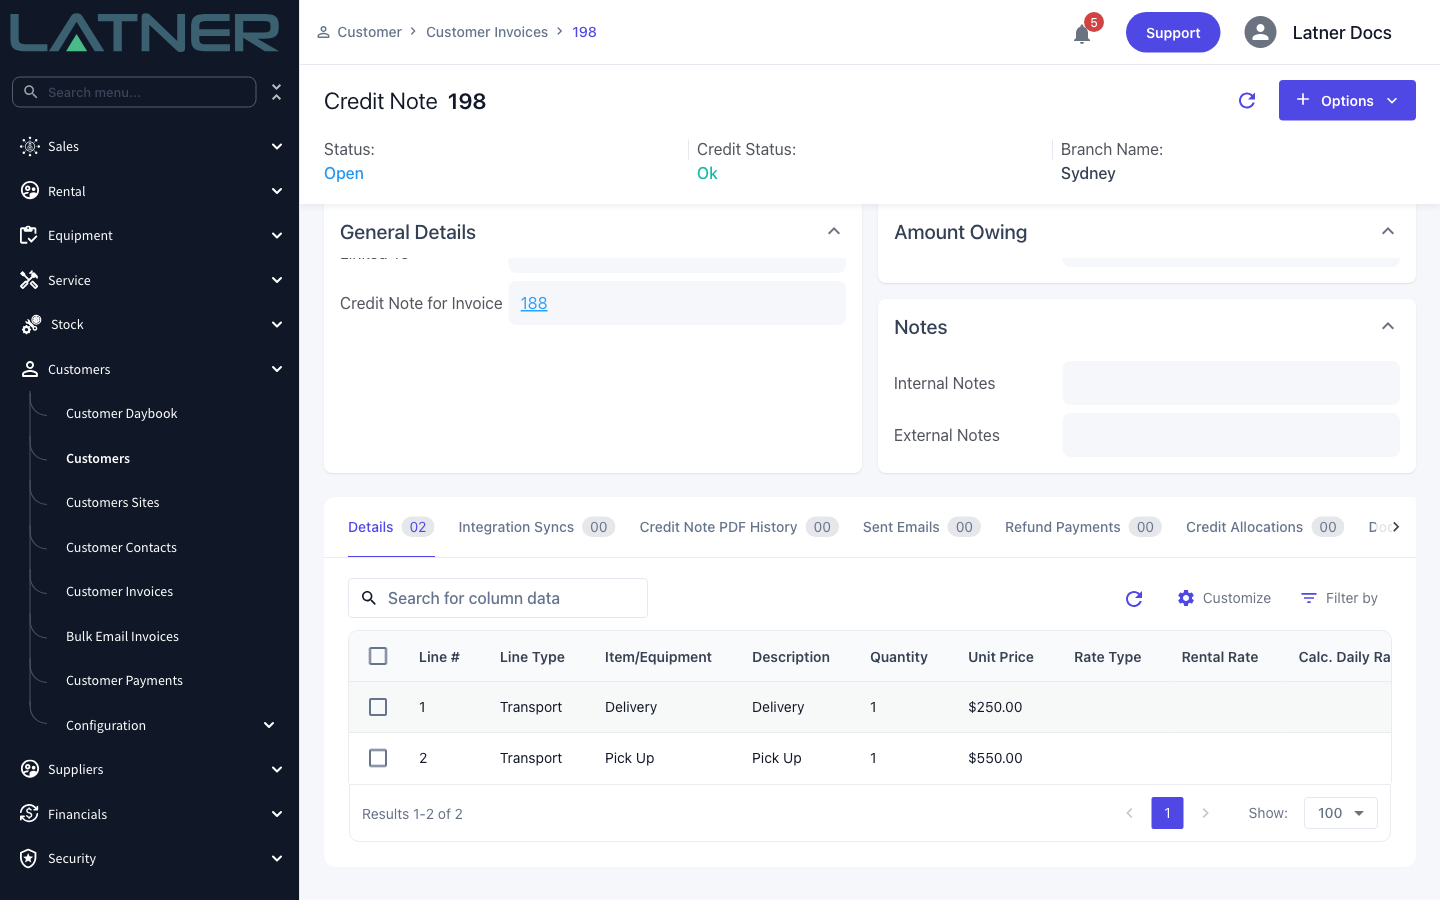
Click Create Credit Note. Latner creates the document and takes you straight to it. It arrives in Open status with Source set to Manual, its own number from the Customer Credit Note Number Format setting, and a Credit Date of today - not the date of the original invoice.
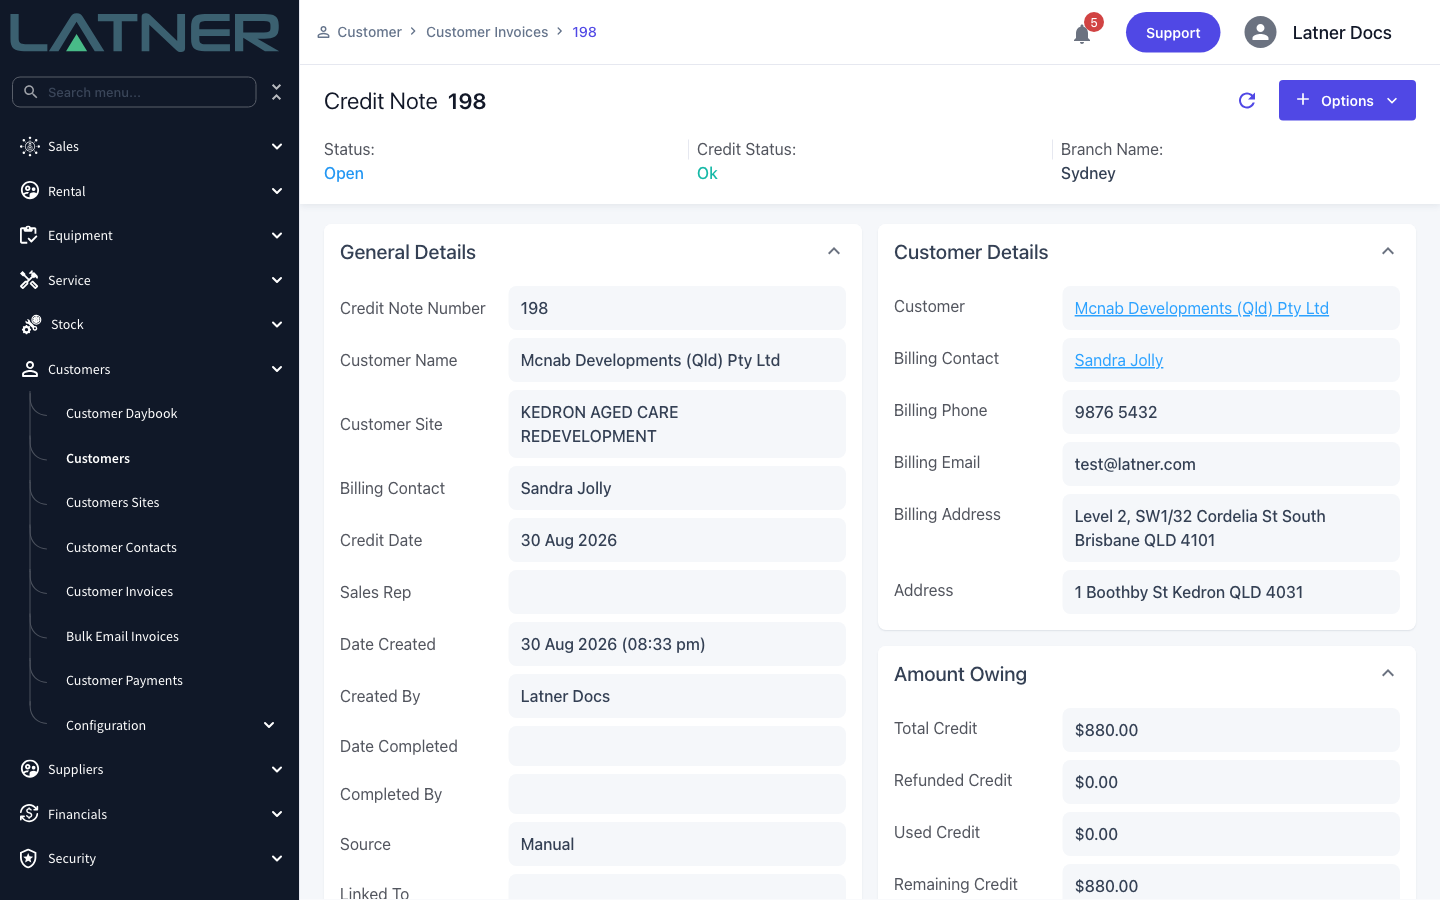
Scroll down and the Details tab holds only the lines you chose, renumbered from 1. Credit Note for Invoice links straight back to the invoice you started from, and behind the scenes the credit note also inherits that invoice's rental contract and delivery address.
Step 6 - Complete the credit note
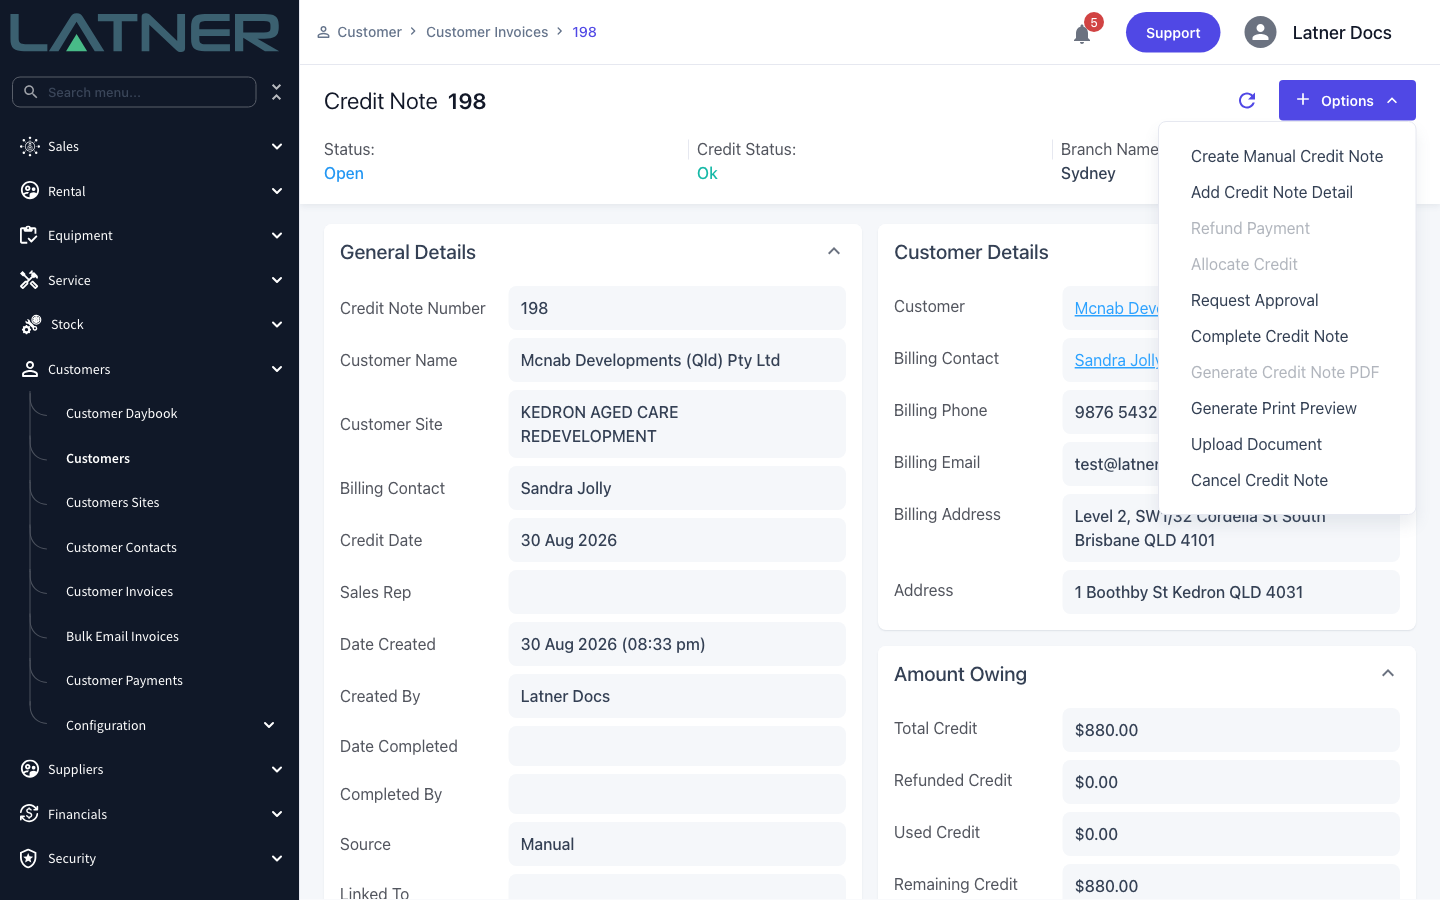
An Open credit note is still a draft. While it is open you can use Options › Add Credit Note Detail to add a line the invoice never had, or delete lines you no longer want.
When it is right, choose one of:
-
Options › Complete Credit Note - finalises it immediately.
-
Options › Request Approval - sends it to a colleague instead. Pick an Approver and add Notes; the credit note moves to Pending Approval and the approver is notified. They complete it with Approve Credit Note, or send it back with Reject Credit Note, which returns it to Open.
Either way the credit note needs at least one detail line, and its total cannot be negative.
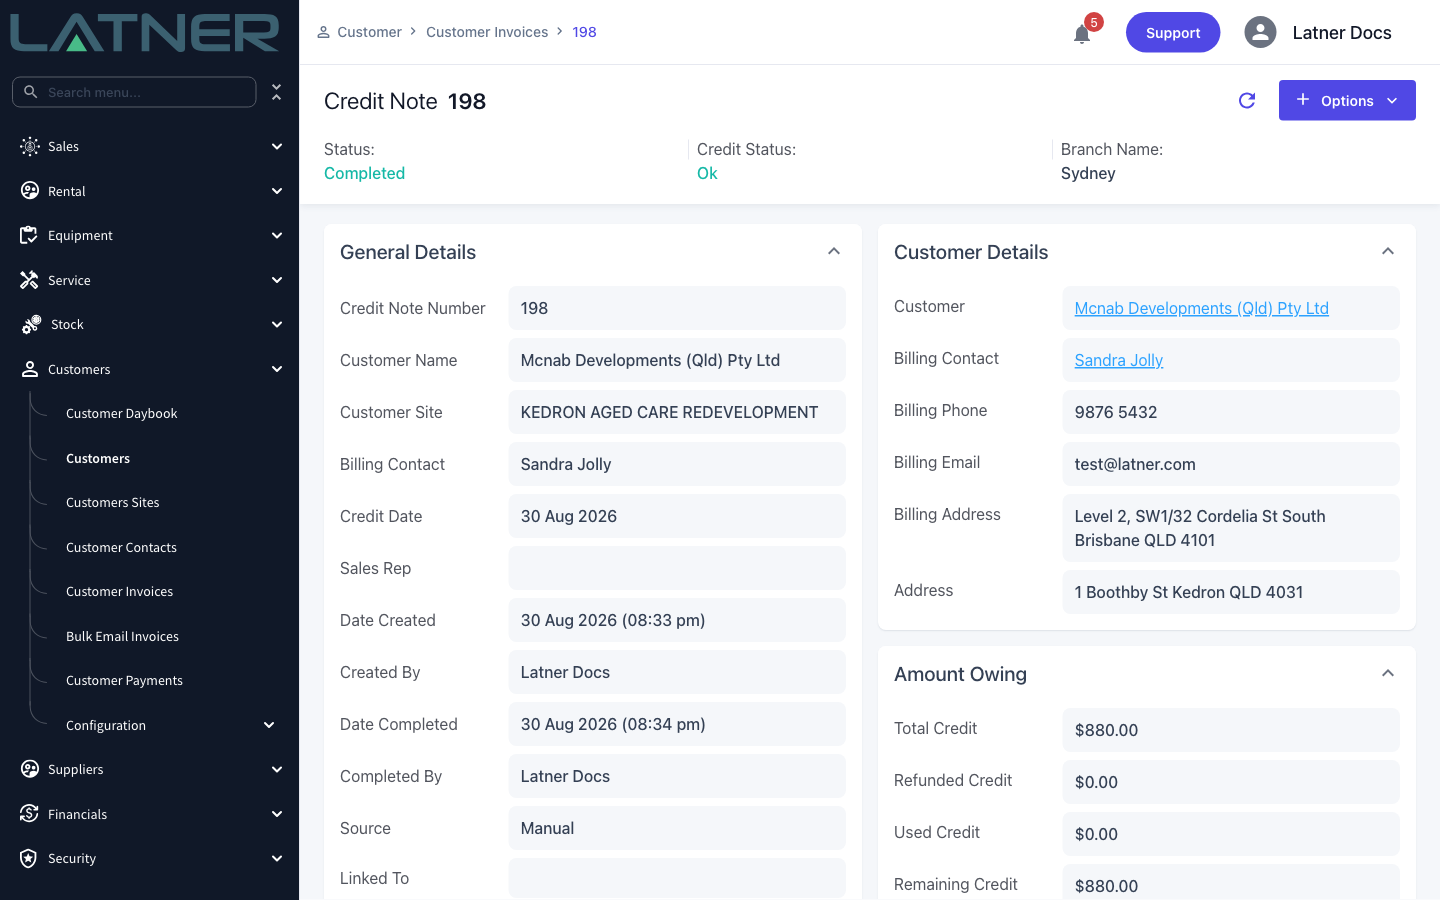
Completing the credit note stamps Date Completed and Completed By, pushes it to any active accounting integration, and unlocks Generate Credit Note PDF, Email Credit Note, Allocate Credit and Refund Payment.
After Creation
-
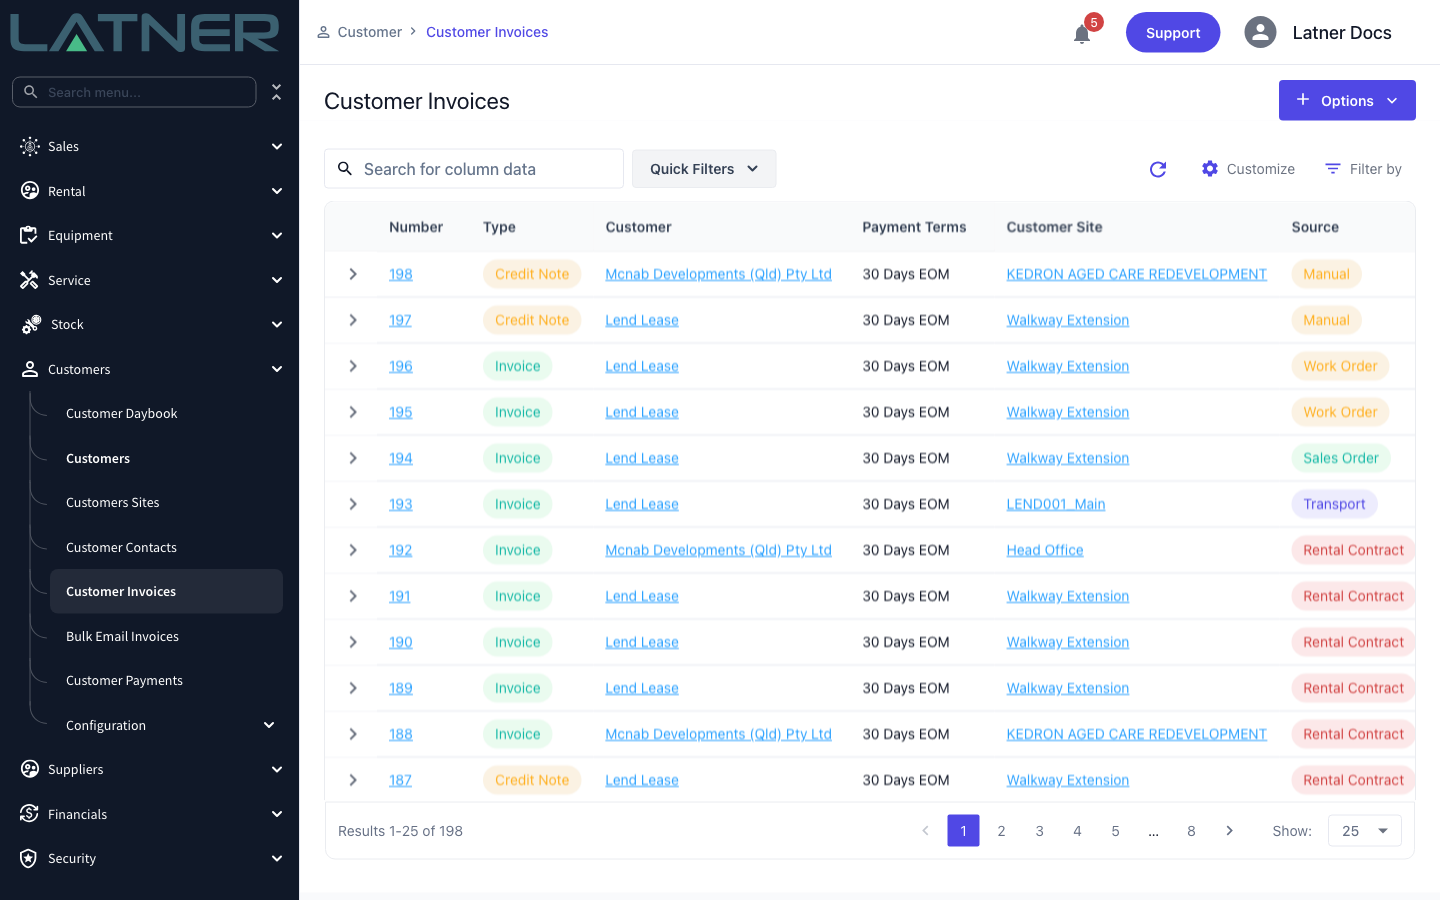
The credit note appears in Customers › Customer Invoices alongside your invoices, with Type of Credit Note and Source of Manual.
-
The original invoice is unchanged - same total, same balance outstanding. Creating credit does not spend it.
-
The credit note's Amount Owing card tracks the credit: Total Credit, Refunded Credit, Used Credit and Remaining Credit.
-
To reduce what the customer owes, use Options › Allocate Credit on the completed credit note. The allocation then shows on the invoice's Credit Adjustment tab.
-
To hand the money back instead, use Options › Refund Payment.
-
Once the credit is fully allocated or refunded, the credit note moves from Completed to Paid.
A credit note in Paid status can no longer be cancelled - all of its credit is committed to an allocation or a refund. If you need to undo it, remove the allocation or the refund first and the credit note drops back to Completed, where Cancel Credit Note is available again.
FAQs
Watch the Demo
Prefer to watch it? Step through the same flow here.