
The mobile Transport screen gives drivers everything they need to run a delivery or pick up from a phone: the run for the day, the site address and contact, the safety checklist, the equipment on the truck, and the customer's signature at the end.
Overview
A transport docket starts life on the desktop - raised from a rental contract, an equipment transfer, a sales order or by hand - and is allocated to a driver. From there it belongs to the driver's phone. Latner shows the driver only the dockets that are actually theirs to do, and walks them through confirming what came off the truck before the docket can be closed.
-
The mobile Transport list only shows Open dockets, and only those that are internally fulfilled or externally fulfilled with a driver assigned.
-
My Transport shows the open dockets you are the assigned driver for. Today and Tomorrow show every open docket scheduled or due on that day, whoever is driving.
-
Each line on the docket has to be confirmed individually - the driver sets the equipment number and the quantity actually delivered or collected.
-
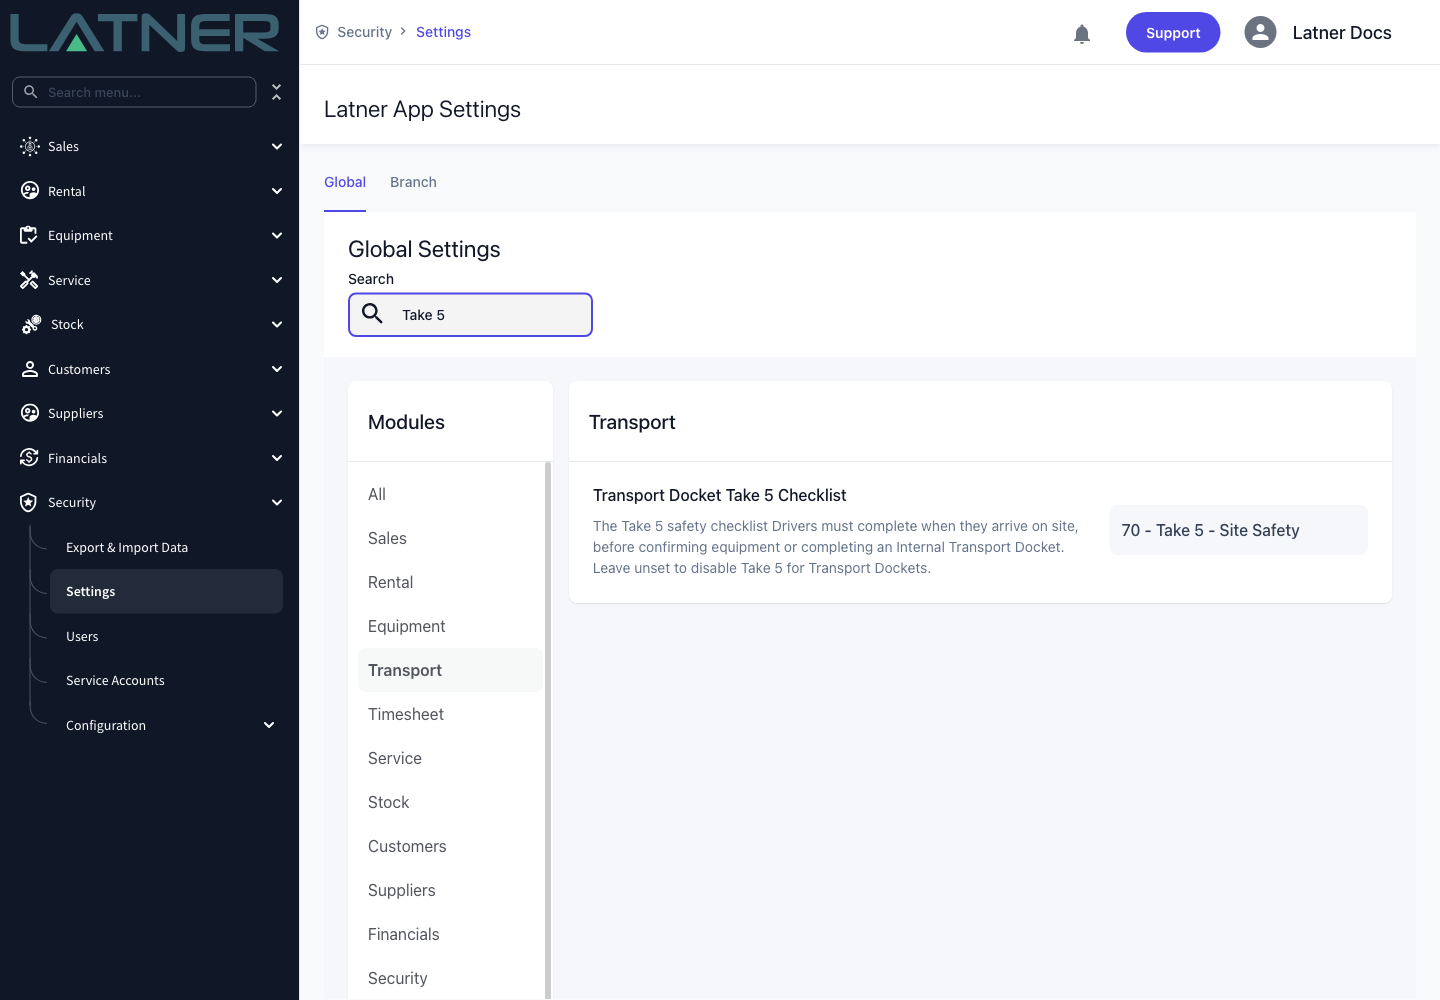
If Take 5 is switched on for transport, an internal docket cannot be confirmed or completed until a Take 5 has been completed on site.
-
Completing the docket writes back to whatever raised it: rental contract lines go on rent, transport charge lines become applicable, and a manual docket with a charge raises an invoice.
-
Anything the driver does not deliver comes back as a new open docket, so the shortfall is never lost.
Before You Begin
The mobile Transport screen is permission-gated, and two settings change what the driver has to do on site.
|
Requirement |
Where to Find It |
|---|---|
|
Mobile Transport screen permission |
Security › Configuration › Permission Groups › Rental › Screen |
|
The driver is set up as a skilled person with the Driver role, and the docket is allocated to them |
Service › Skilled Persons, then Rental › Transport Allocation |
|
Transport Docket Take 5 Checklist (optional - select a checklist template to require a Take 5) |
Security › Settings › Transport |
|
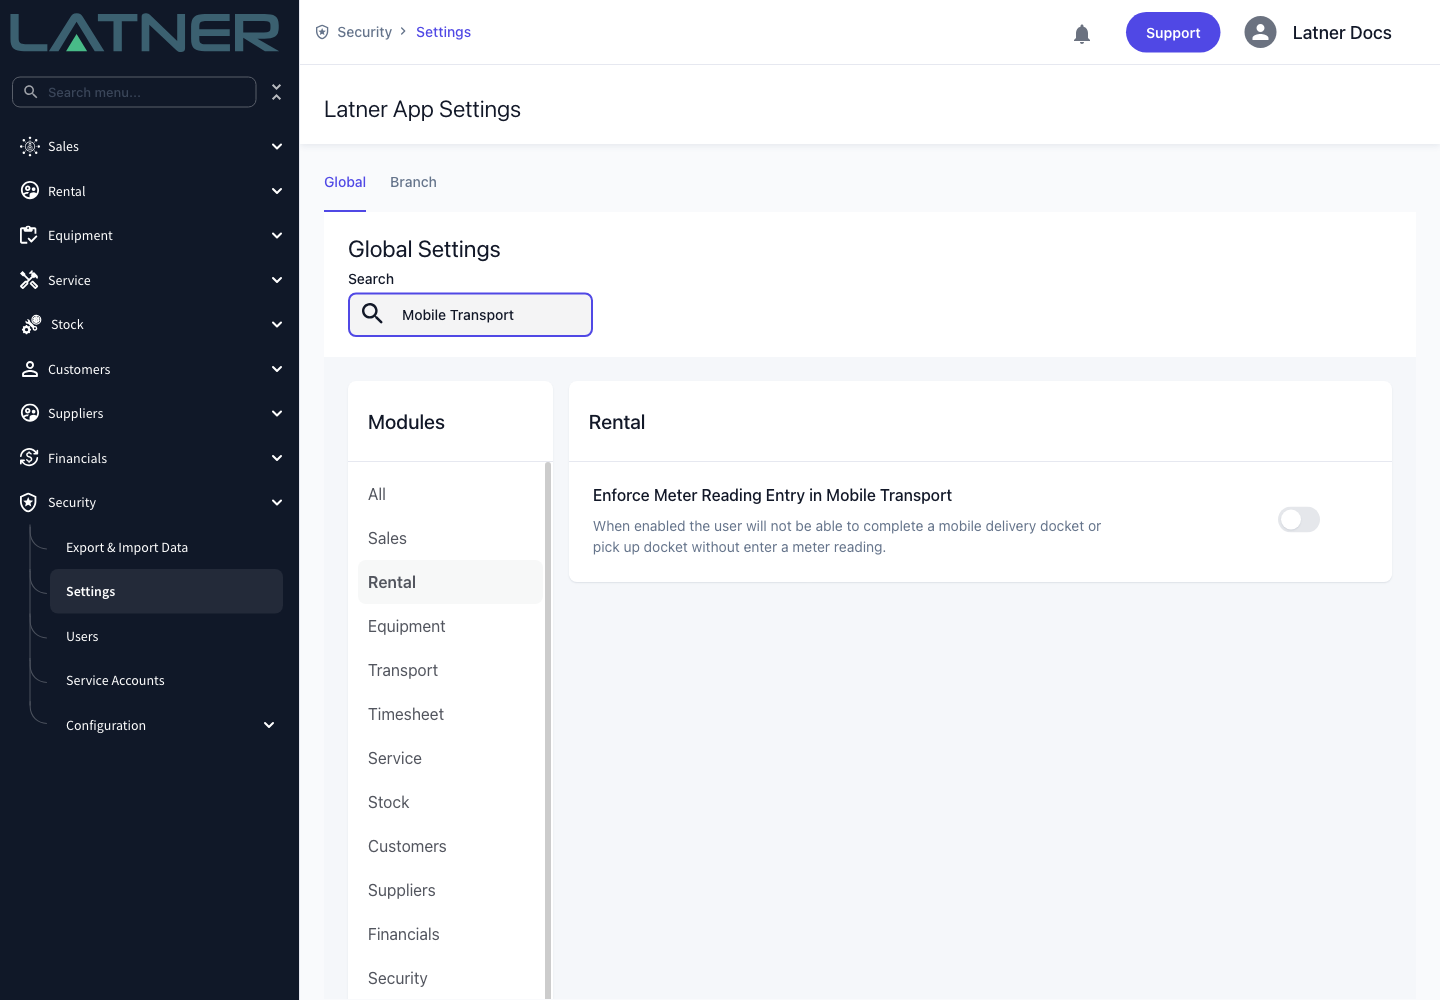
Enforce Meter Reading Entry in Mobile Transport (optional) |
Security › Settings › Rental |
|
Complete Transport without Take 5 (optional - lets a user bypass the Take 5 requirement) |
Security › Configuration › Permission Groups › Transport › Field |
Latner picks the mobile screens from the device, not from a setting - open the app on a phone and you get the driver's menu automatically. On a desktop you'll see the standard screens, and the Transport menu item takes you to the Transport Allocation board instead.
Completing the Transport
Step 1 - Open the Transport screen
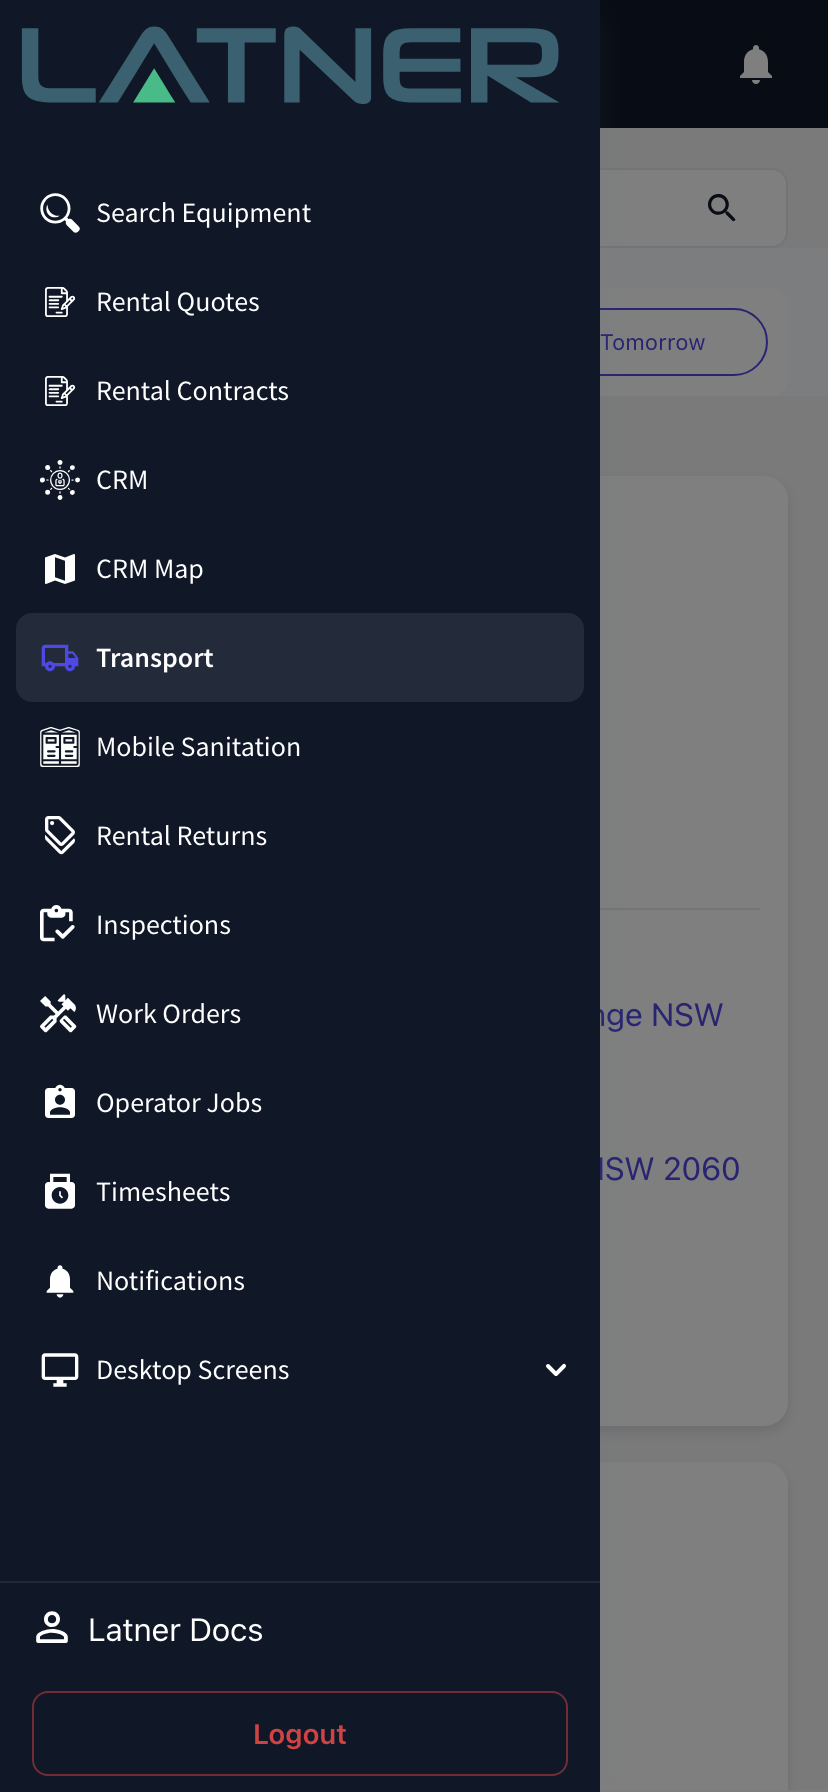
Tap the menu icon at the top left and choose Transport. If the item isn't there, you don't have the Mobile Transport screen permission.
Step 2 - Find your docket
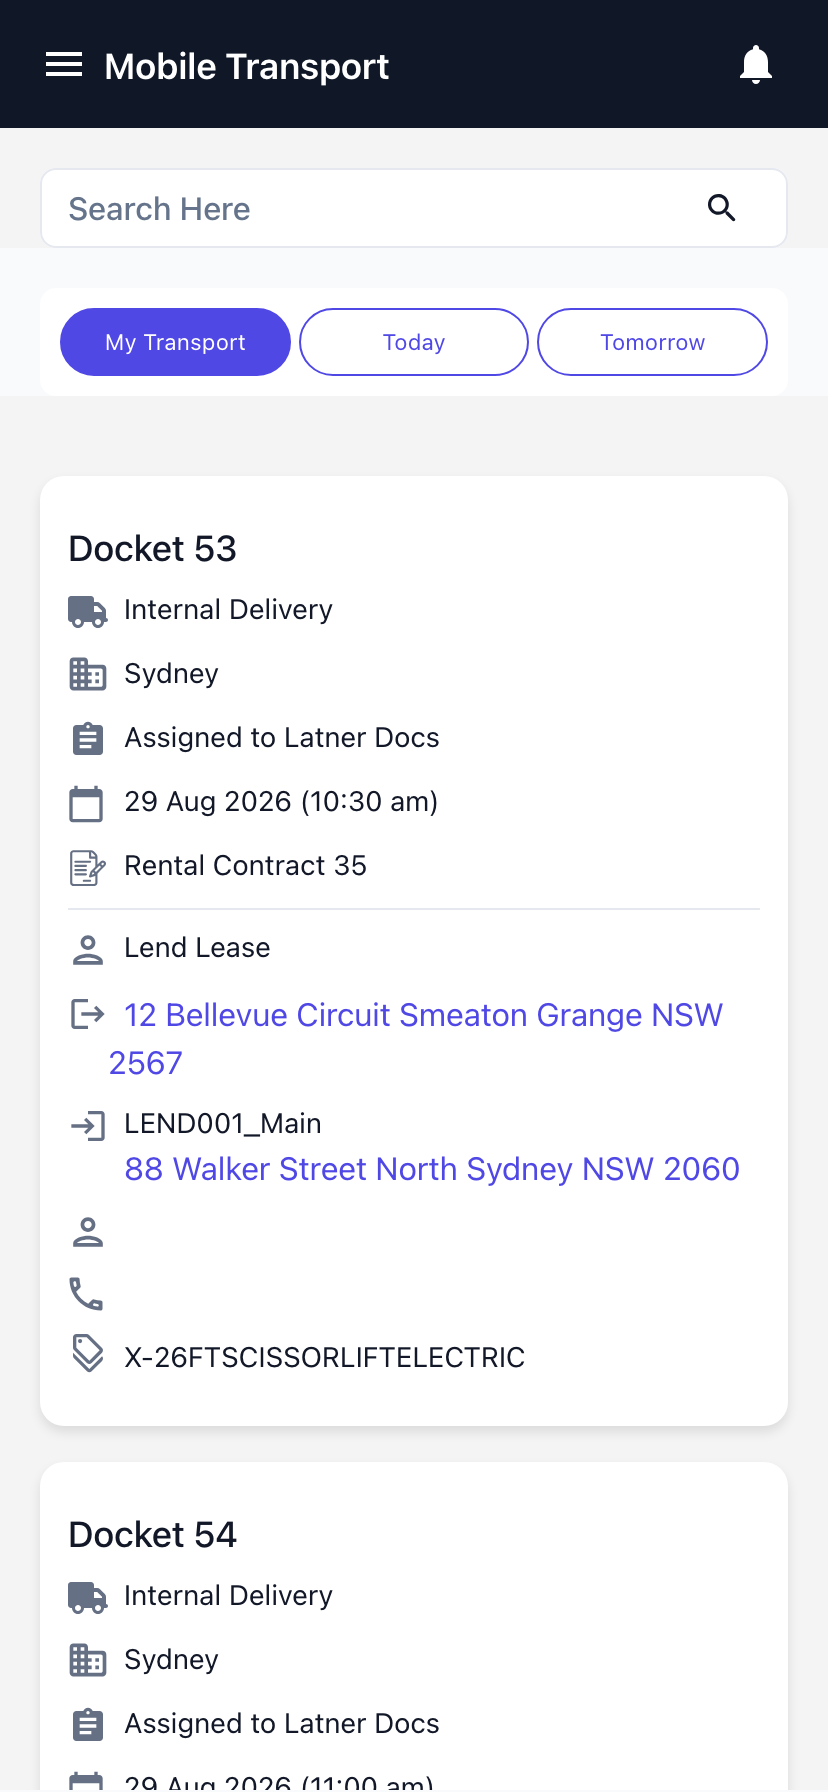
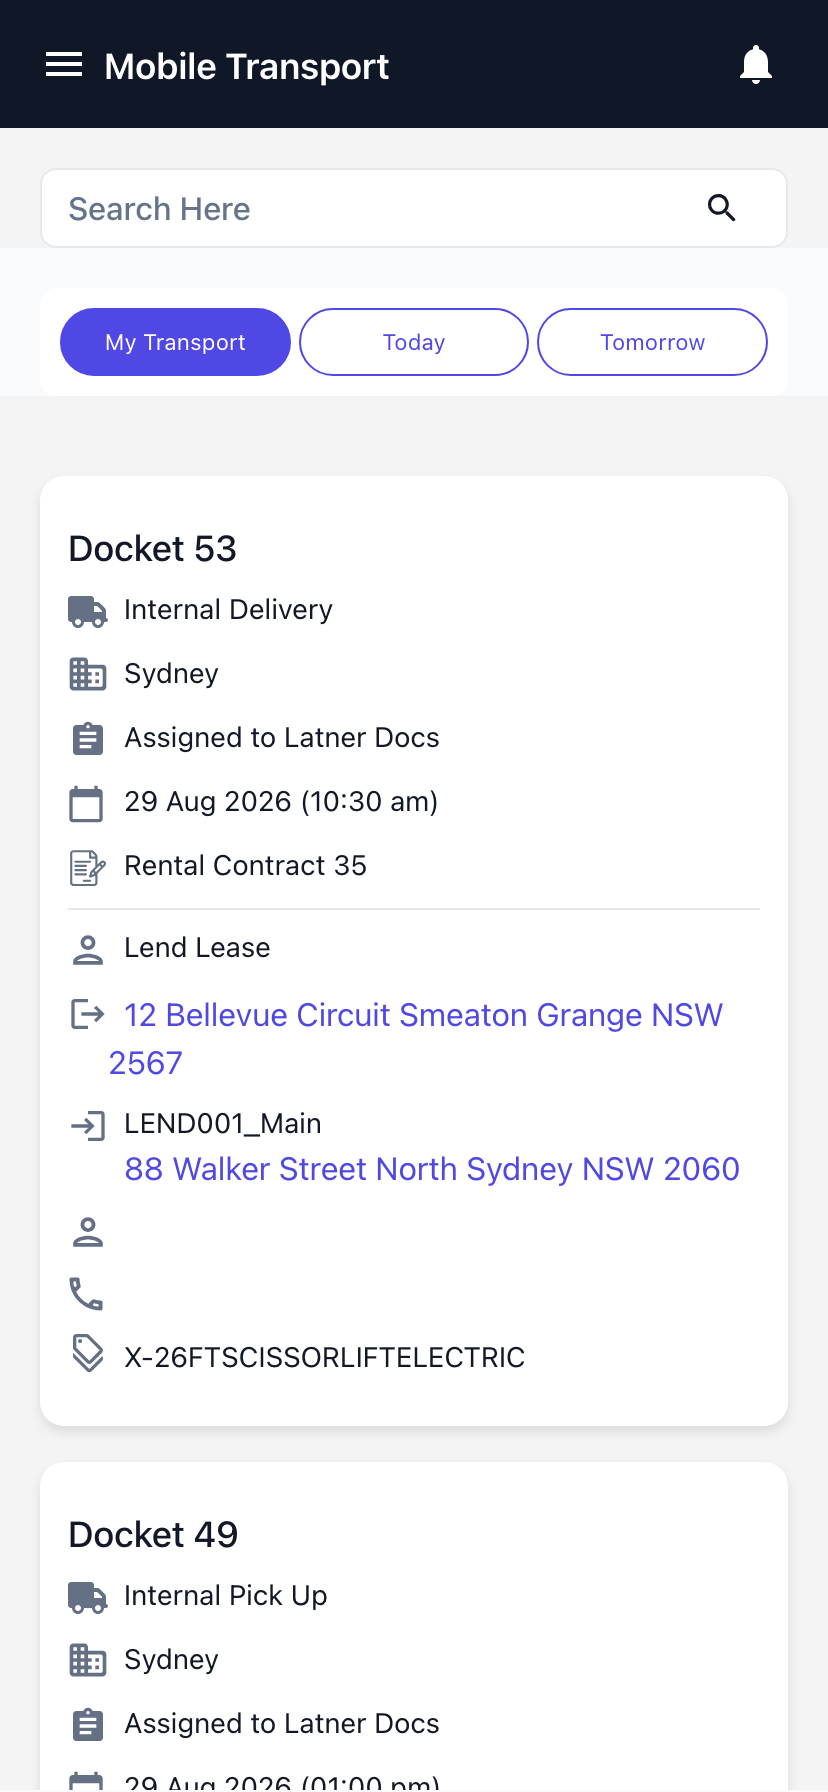
Tap My Transport to filter the list down to the open dockets you are the assigned driver for. Today and Tomorrow widen it to everything open and scheduled for those days, and the search box at the top matches on docket number, customer and site.
Each card summarises the job: type and fulfilment, branch, driver, scheduled time, the contract or sales order behind it, the customer, and the from and to addresses. Both addresses are links - tapping one opens it in Google Maps.
Step 3 - Open the docket and read the job
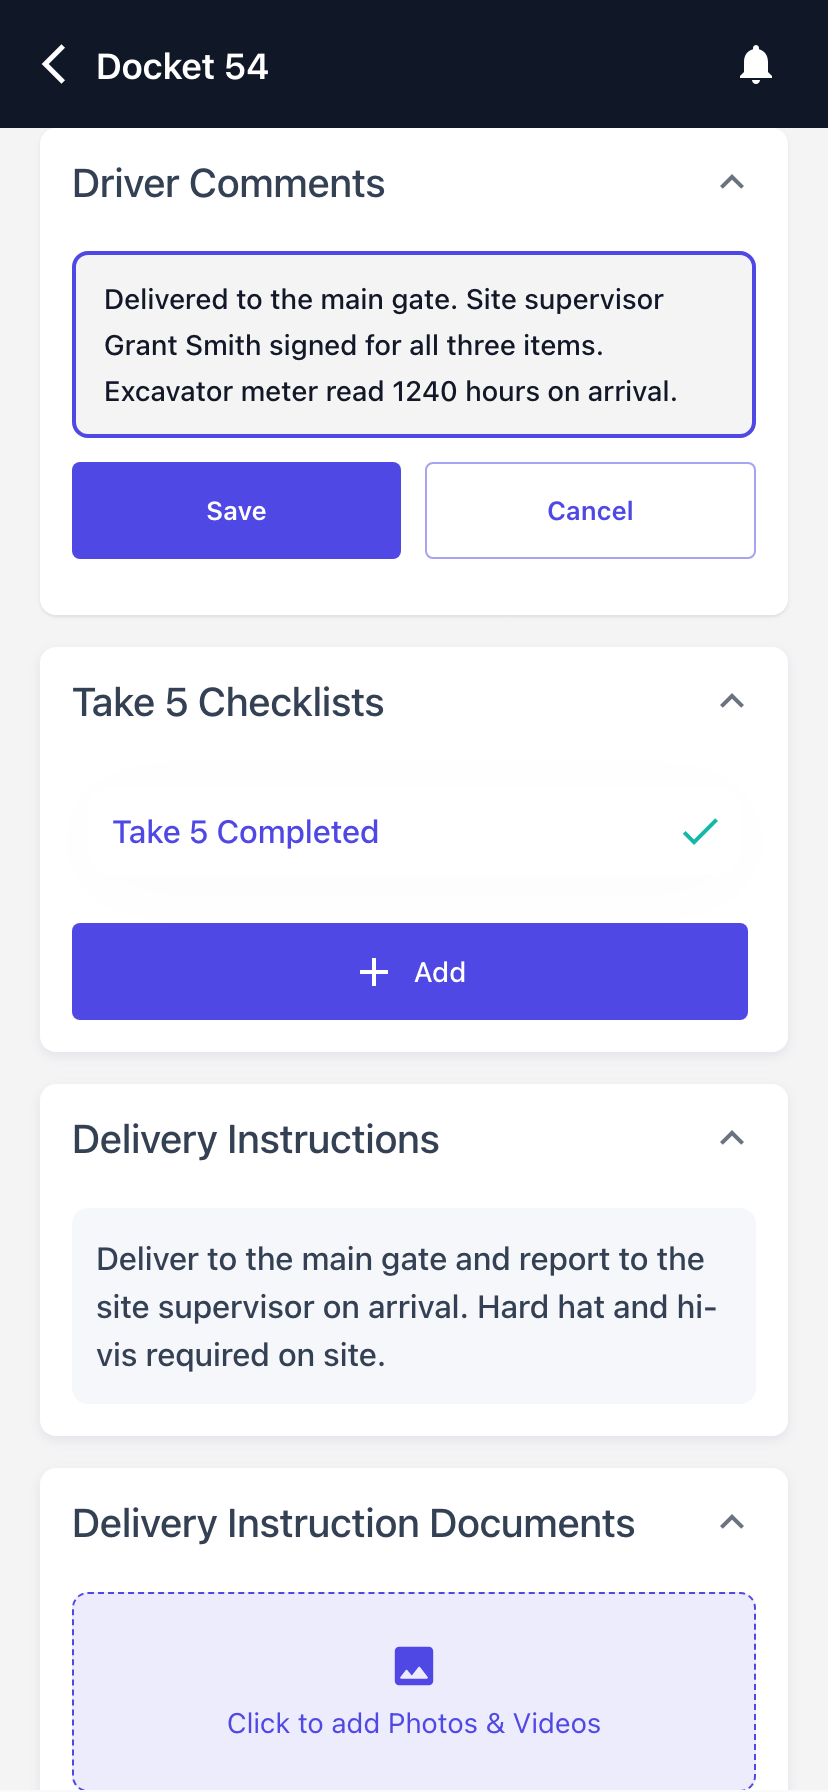
Tap the card to open the docket. Transport Details holds the job at a glance, and below it are the sections you'll work through: Driver Comments, Take 5 (when it applies), Delivery Instructions, Delivery Instruction Documents, Delivery Lines and Add Signature. On a pick up docket those read Pick Up Instructions, Pick Up Instruction Documents and Pick Up Lines.
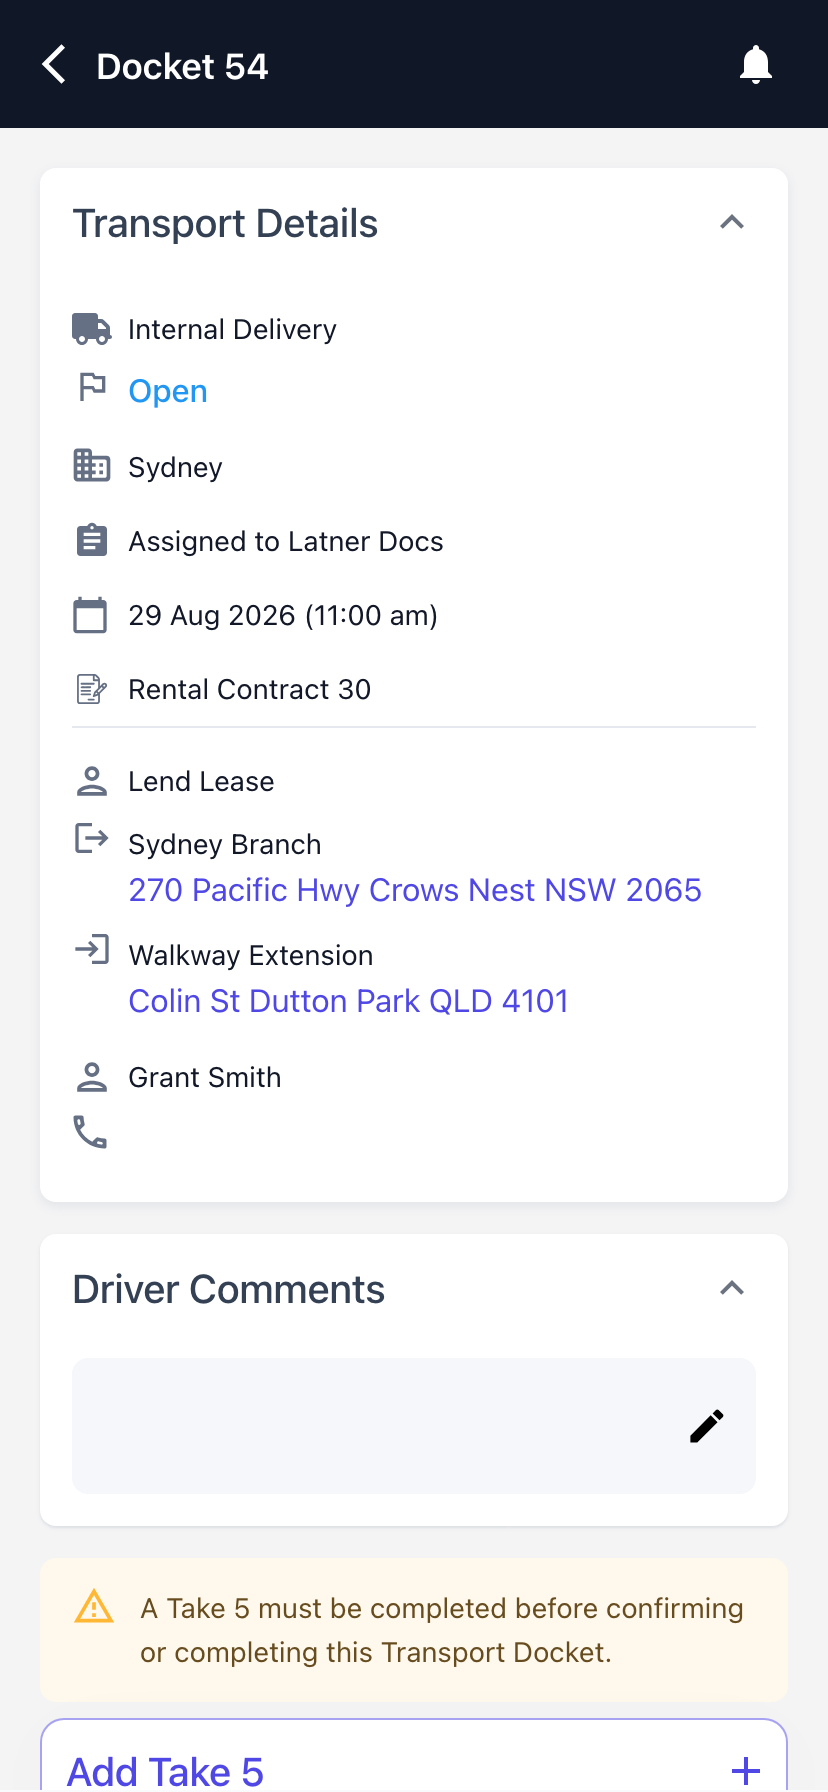
Step 4 - Complete the Take 5
If Take 5 is switched on and the docket is internally fulfilled, a warning sits above the checklist section and the Confirm and Complete buttons stay disabled until a Take 5 has been completed. Tap Add Take 5 to start one, or Complete Take 5 to carry on with one you've already started - the checklist opens at the first task you haven't answered yet.
Answer each task Pass, Fail or N/A, adding notes or photos as you go. Some tasks are set up to require a photo, and won't accept an answer until you've attached one. The checklist counts as complete once every task has an answer, and the warning disappears.
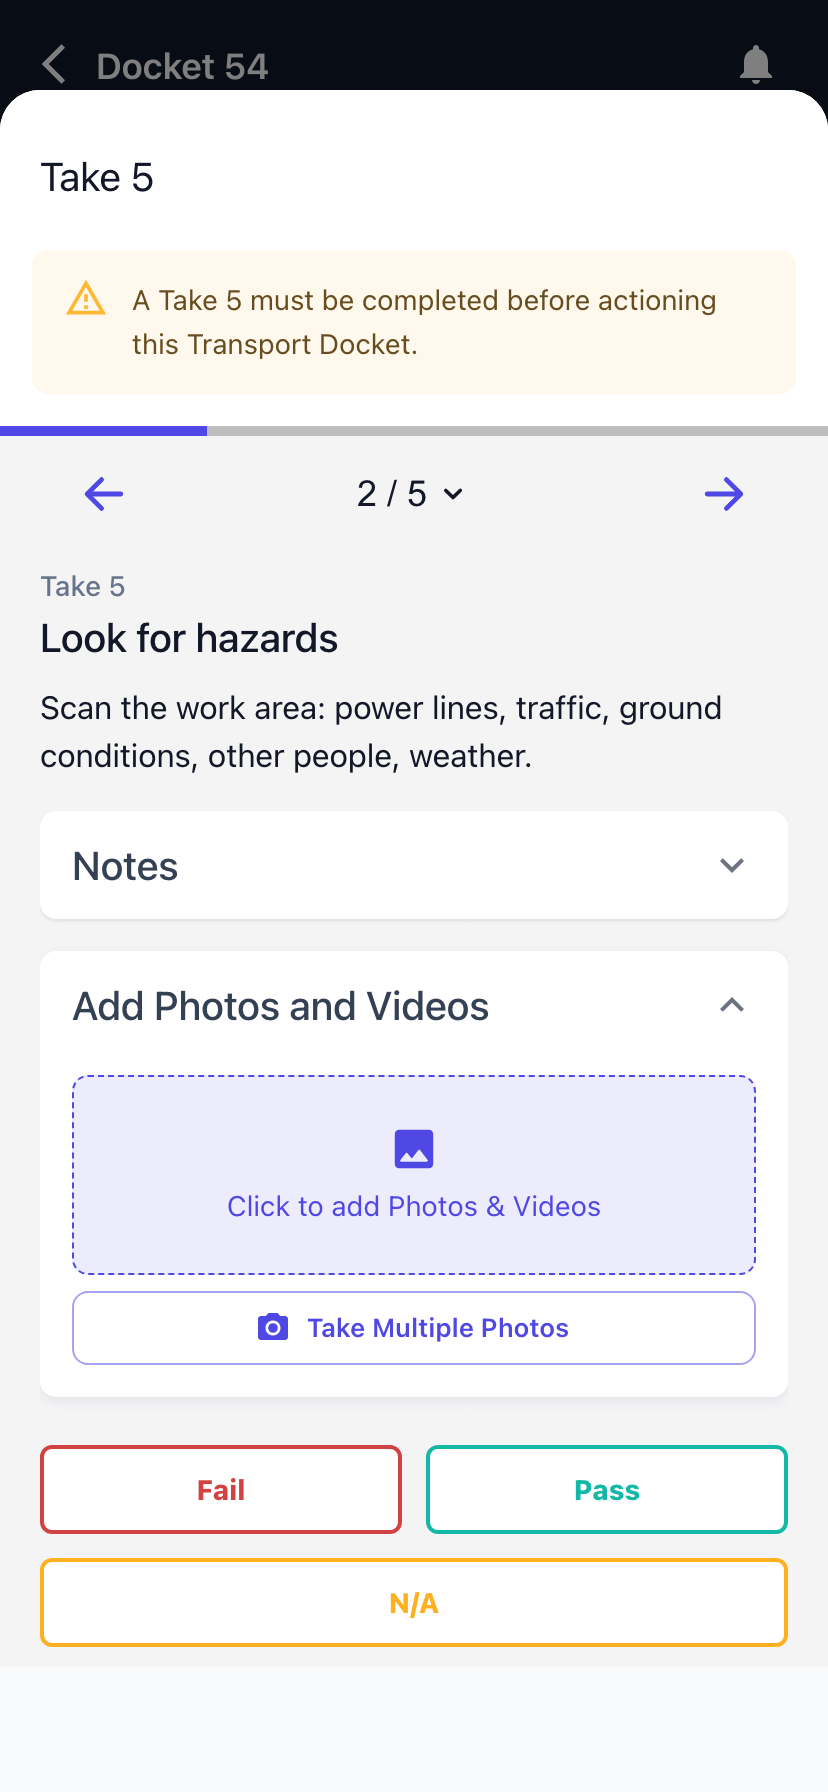
You can add more than one Take 5 to a docket - useful on a long run or when conditions change - but only once the previous one has been completed. External (sub hired) transport dockets never ask for a Take 5.
Step 5 - Confirm each line
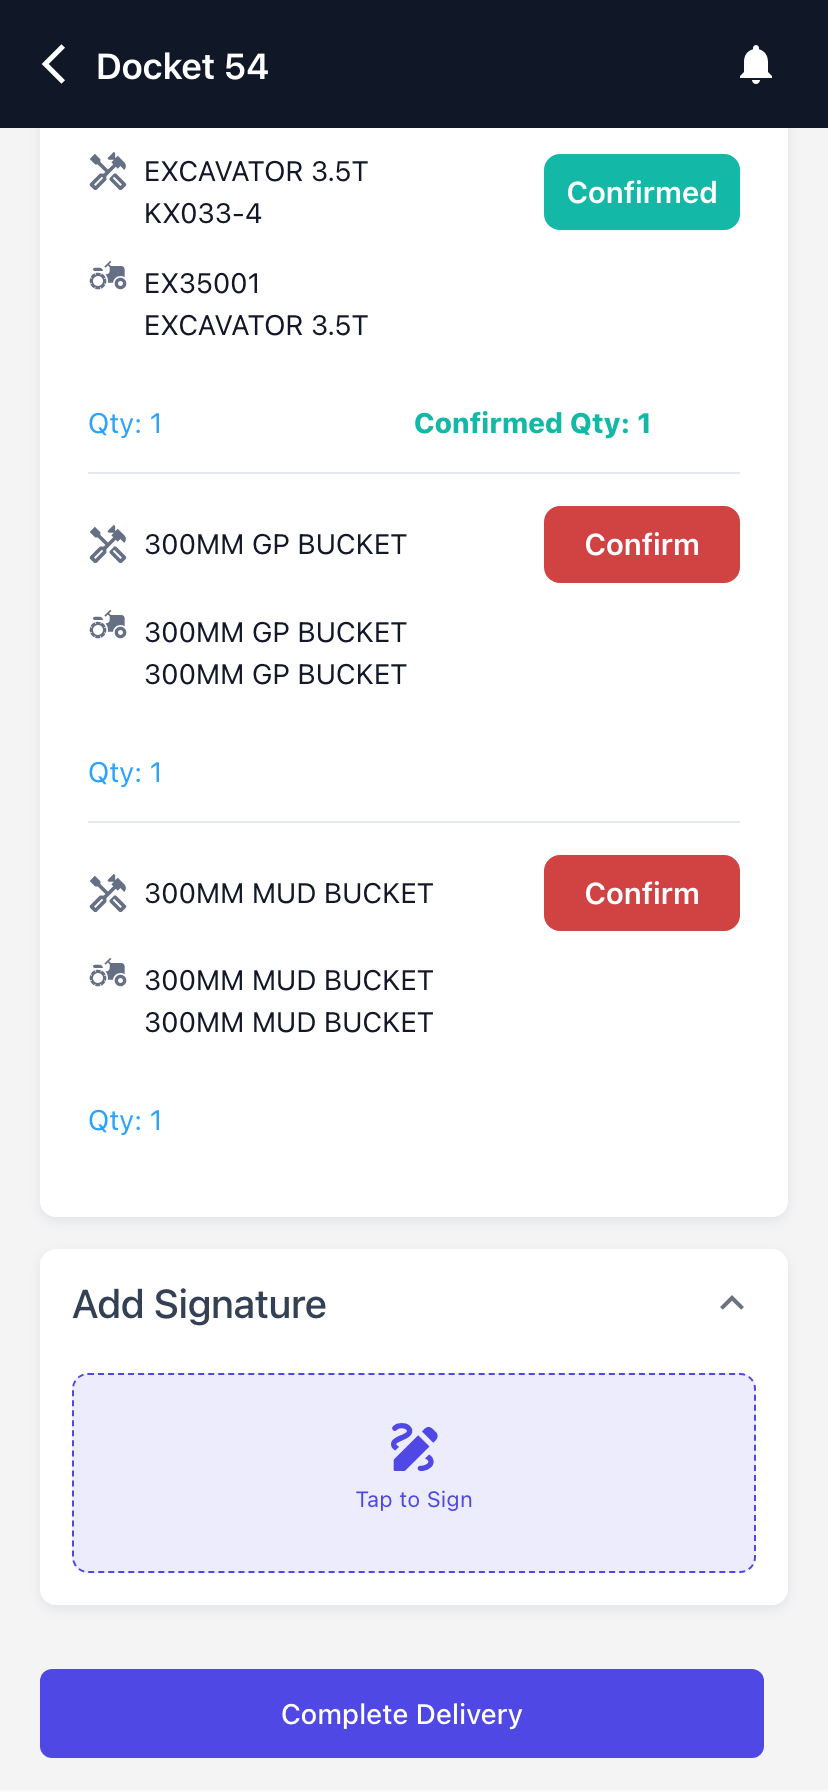
Open Delivery Lines (or Pick Up Lines). Every line carries a red Confirm button; tap it to open that line.
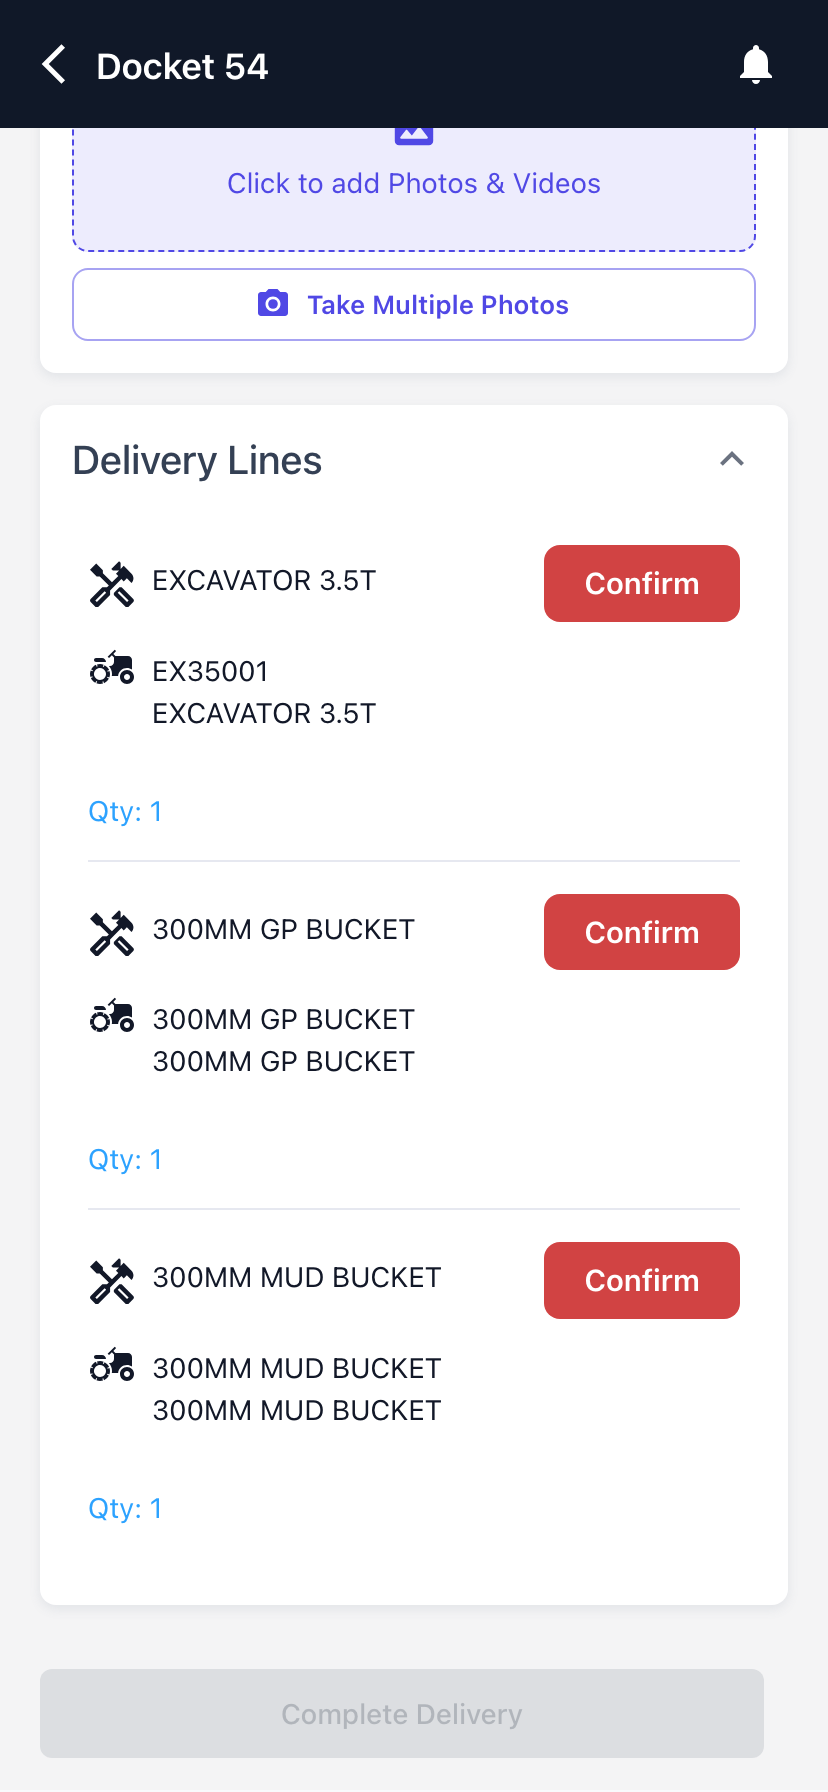
Step 6 - Check the equipment number
The Confirm Equipment form opens with what the office allocated. Line Type, Branch, Class, Model, Description and Quantity are read only; the two fields you can change are the ones that matter on site:
-
Equipment Number - the machine you've actually got on the truck. Search by number or description, or tap Scan QR Code and scan the asset. The list is restricted to rentable equipment of the right class and model at the contract's branch. This is required on equipment lines - you can't confirm without it.
-
Confirmed Quantity - how many you're actually delivering or collecting. It can't be more than Quantity and it can't be negative.
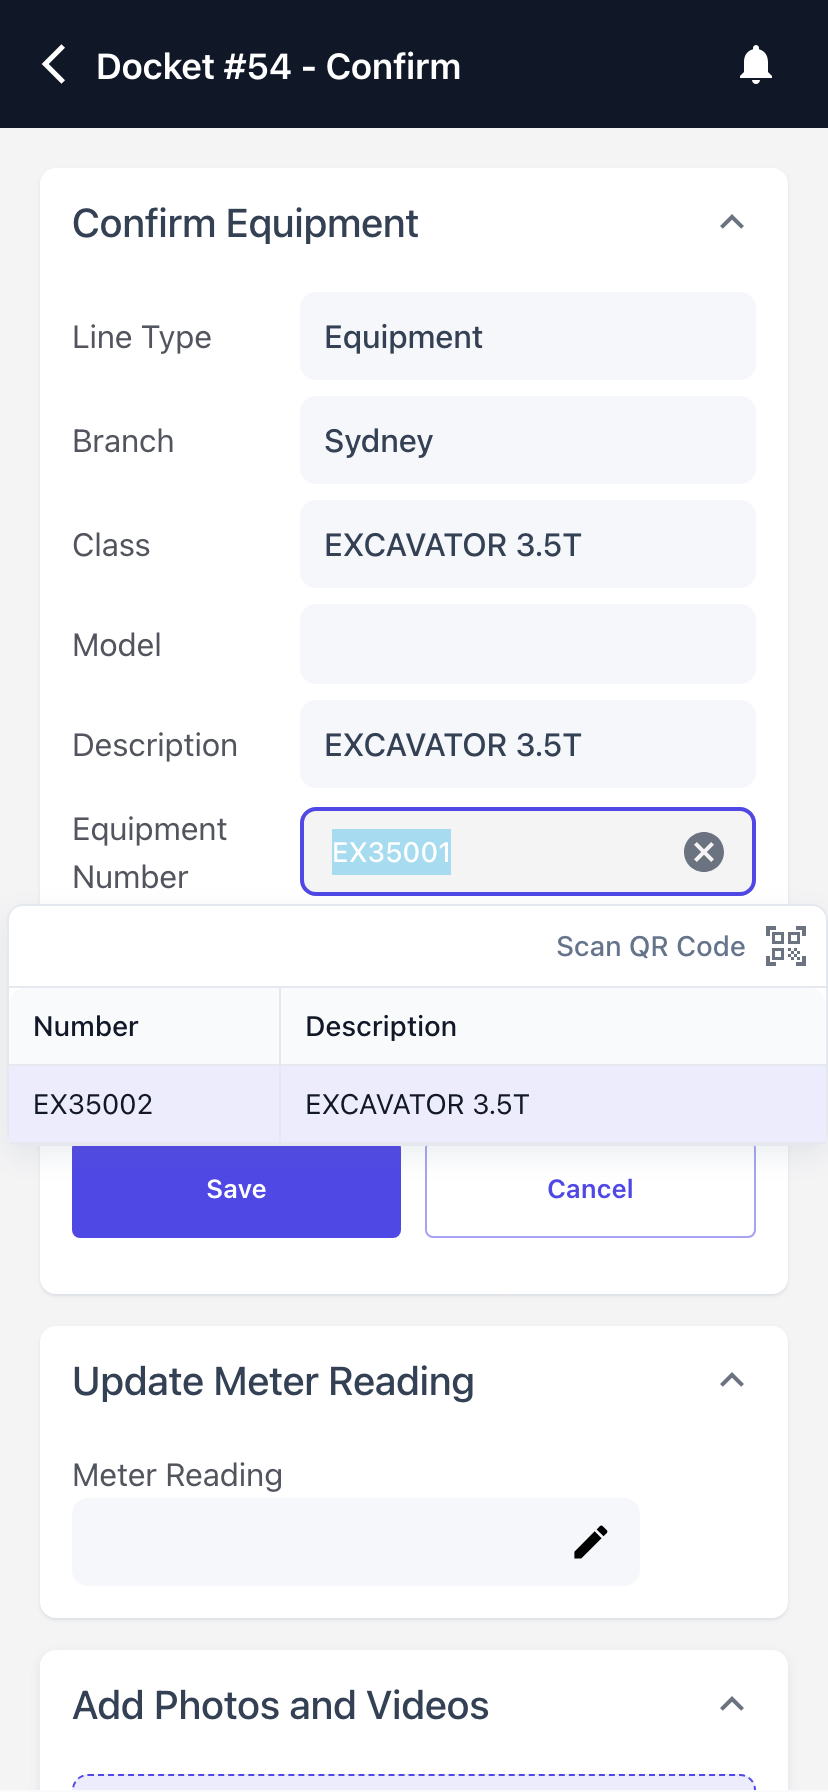
Step 7 - Record the meter reading and any photos
Enter the Confirmed Quantity, then use Update Meter Reading to log the hours or kilometres showing on the machine. The section only appears when the equipment class is set up with a meter type, and the reading can't be lower than the last one recorded. Add Photos and Videos attaches evidence to that line - condition on arrival, where the machine was left, damage found on collection.
Tap Save on each section you've filled in.
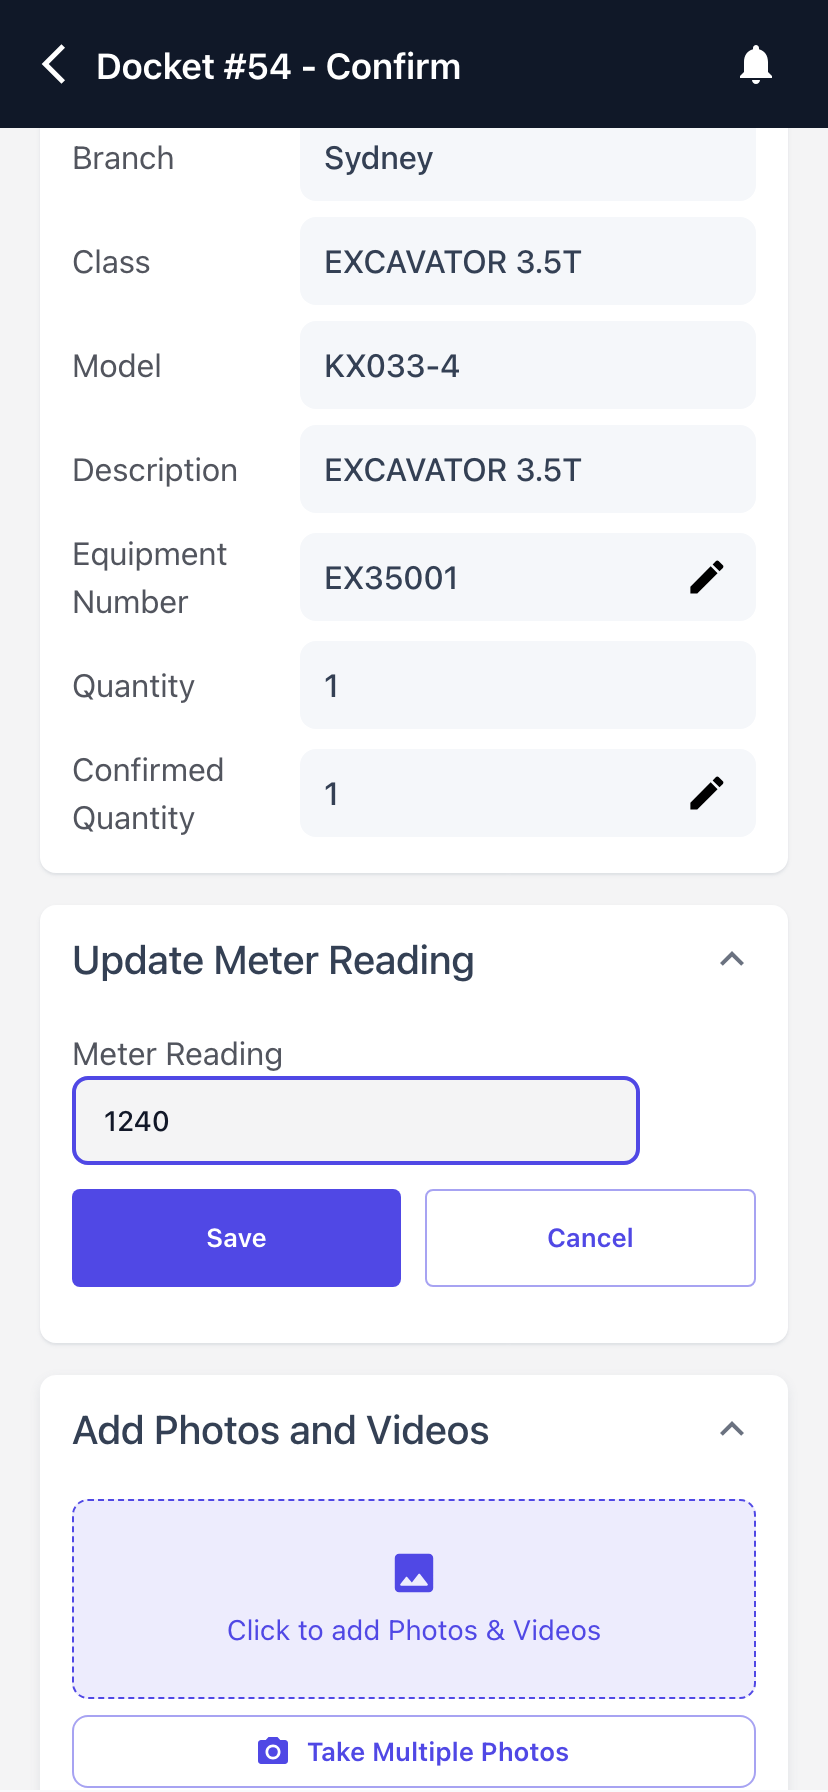
Step 8 - Confirm the line
Tap Confirm Equipment at the bottom. You're taken back to the docket and the line's button turns green and reads Confirmed, with the confirmed quantity shown beside it. Repeat steps 5 to 8 for every line.
If the machine has an inspection still open against this contract line, Latner warns you with an Outstanding Inspection message before you confirm.
Step 9 - Add your comments
Use Driver Comments for anything the office needs to know - who signed, where the machine was left, why a line came back. Tap the pencil, type, then Save. The comments stay on the docket and are visible from the desktop.
Step 10 - Take the customer's signature
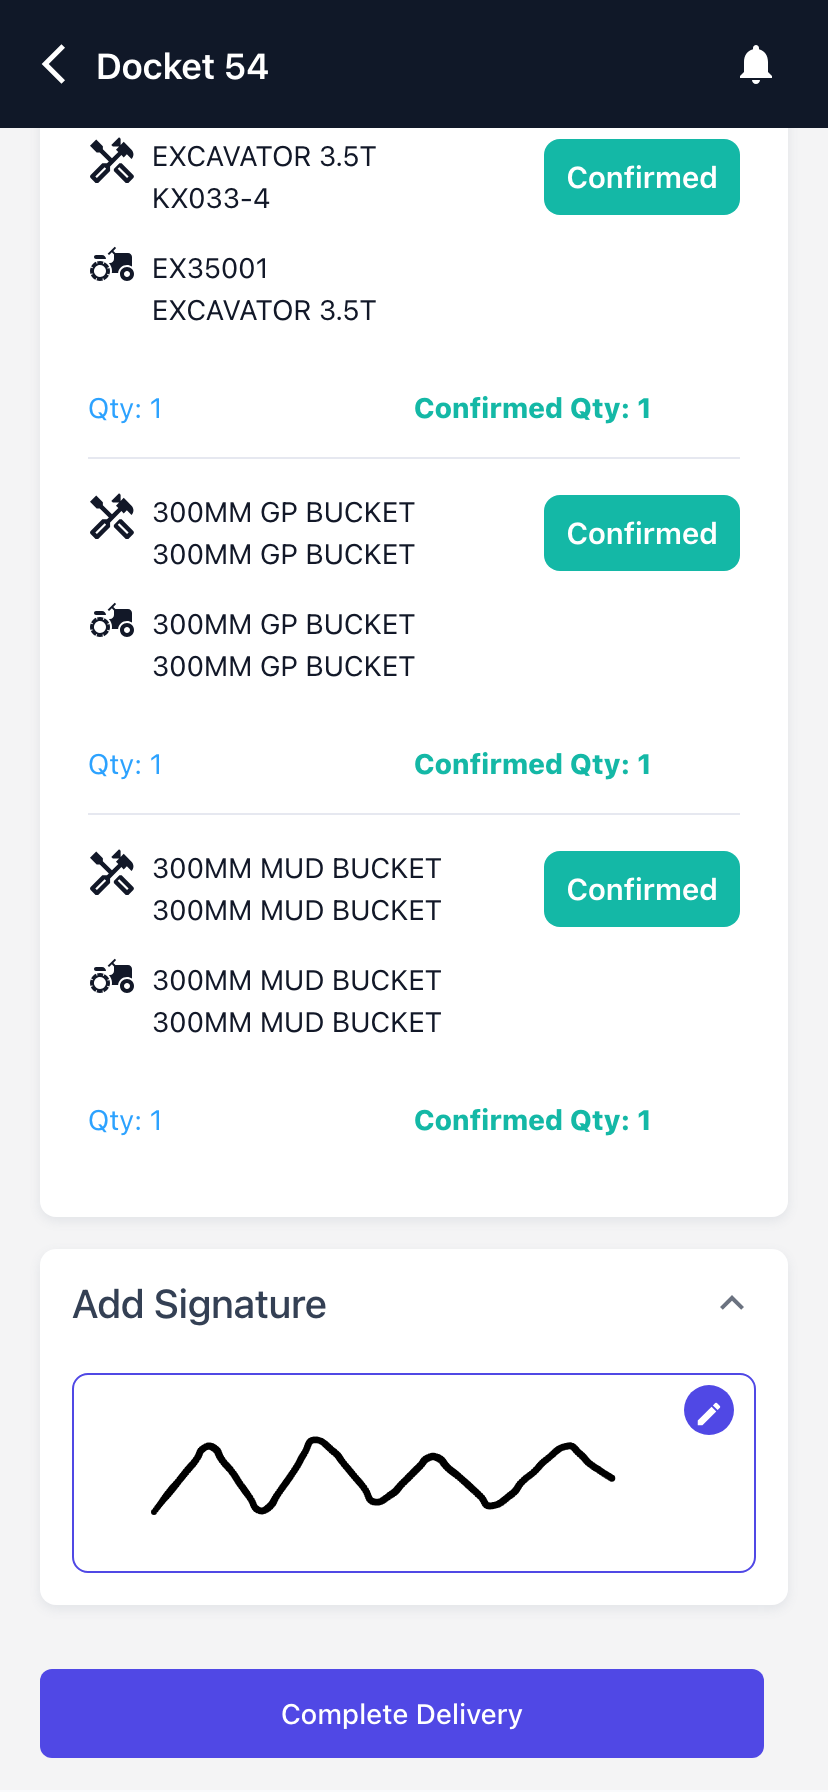
Tap Tap to Sign, hand the phone over, and have the customer sign with a finger. Tap Save to store it against the docket. To redo it, tap the pencil on the signature and sign again.
Step 11 - Complete the docket
Tap Complete Delivery (or Complete Pick Up). If every confirmed quantity matches the scheduled quantity the docket completes straight away, you get a Transport Completed message and you're returned to the list.
If any line is short, Latner asks Are you sure that you want to only partially complete this transport docket? first. Tap Yes to complete what you did deliver and let Latner raise a new docket for the rest, or No to go back and fix the quantities.
After Completion
-
The docket moves to Completed and records the date and time it was received and who received it, along with the signature and driver comments.
-
On a delivery from a rental contract, the contract lines move to On Rent. On a pick up, they move on to the return workflow. On an equipment transfer or sales order, the source lines are updated the same way.
-
Transport charge lines on the rental contract move from Pending to Applied, so they can be invoiced.
-
A manual docket with a transport charge raises a customer Invoice for that charge automatically.
-
On a site move, the rental contract's site and delivery address are updated to the new site.
-
On an externally fulfilled docket, the matching sub hire order transport line is marked completed.
-
Any line you did not deliver, or the undelivered part of a partial delivery, comes back as a new Open docket on internally fulfilled transport.
Completing a docket puts equipment on rent and makes charges invoiceable, so it isn't something the driver can undo from the phone. If a docket was completed by mistake, someone with the Reopen Transport Docket permission can reopen it from the desktop Transport screen.
FAQs
Watch the Demo
Prefer to watch it? Step through the same flow here.