
Activating a finance schedule marks the loan as live, which is the last step of setting one up before you start invoicing the repayments.
Overview
A schedule sits in Open while you're still building it. Activating it is how you say the repayment plan is right and the loan is running.
-
Activation moves the status from Open to Active, and the menu option is replaced by Complete Finance Schedule.
-
A schedule can't be activated until it has repayment lines.
-
Active schedules are the ones you'll see day to day - the Active quick filter on the Finance Schedules list is the shortest way back to them.
-
A completed or cancelled schedule can be brought back with Reactivate Finance Schedule, which is the same option under a different name.
Before You Begin
Make sure the following are in place before you start.
|
Requirement |
Where to Find It |
|---|---|
|
A finance schedule with repayment lines on its Details tab |
|
|
Create Finance Schedule permission |
Security › Configuration › Permission Groups › Financial › Options |
Check the repayment lines against the financier's own schedule before you activate. Lines are easiest to correct now - once a line has been invoiced it can't be deleted, and the loan terms lock as soon as any principal has been invoiced.
Activating the Schedule
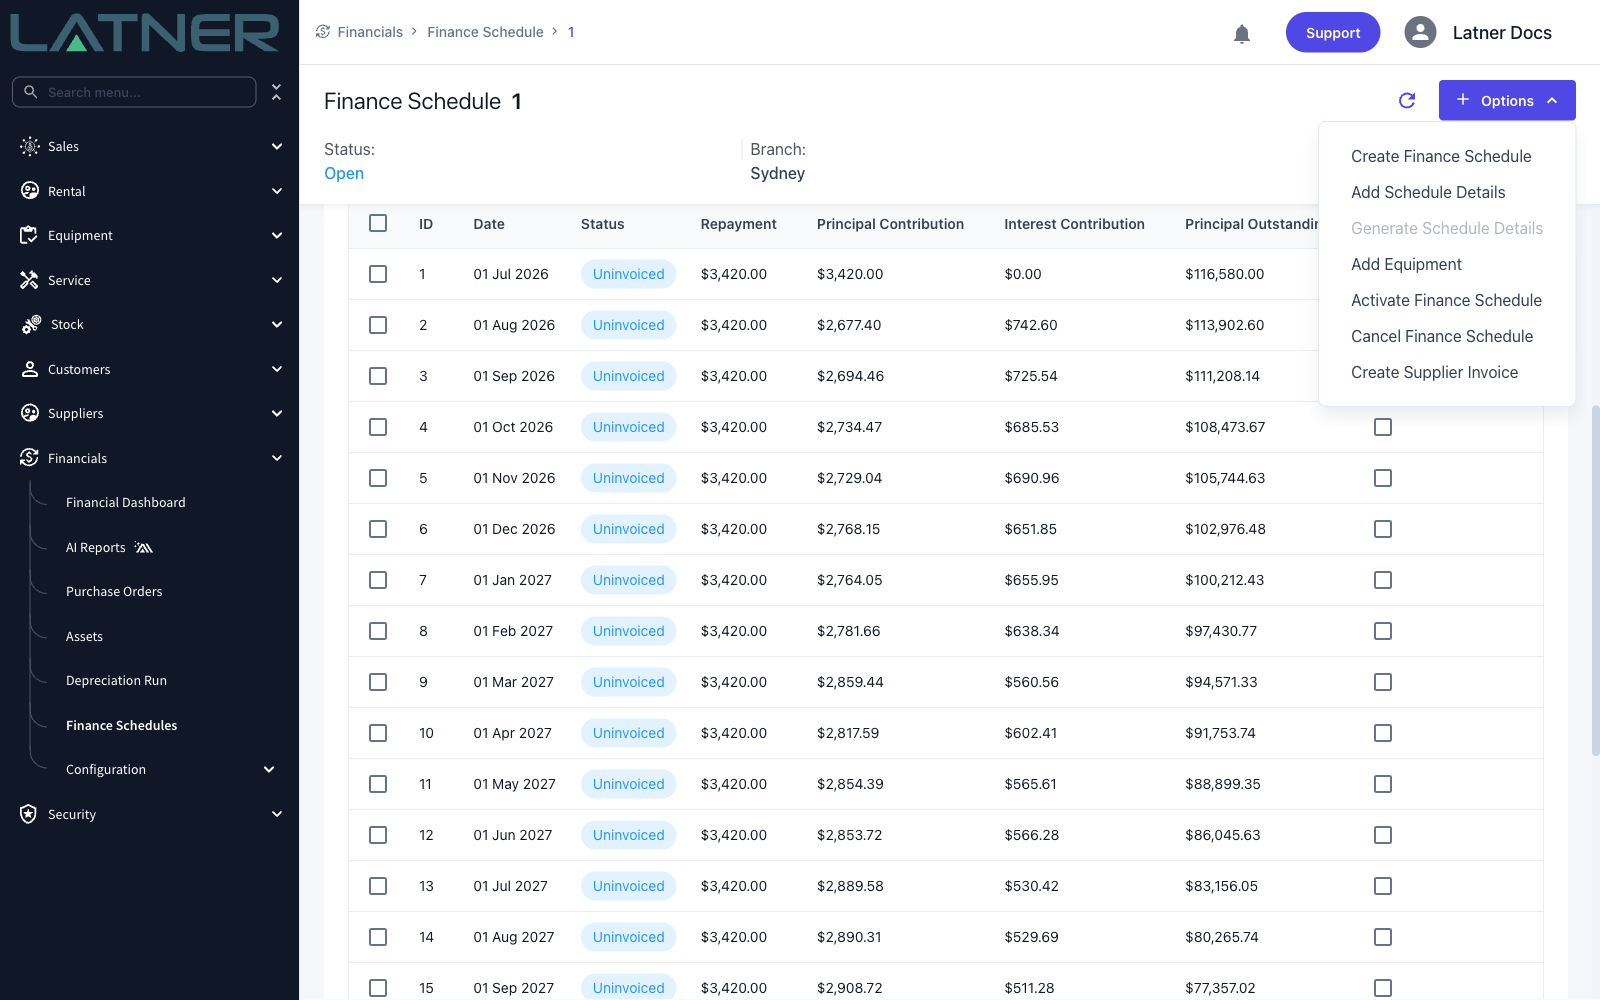
Step 1 - Choose Activate Finance Schedule
Open the finance schedule and choose Options › Activate Finance Schedule. There's no confirmation step - the schedule is activated straight away.
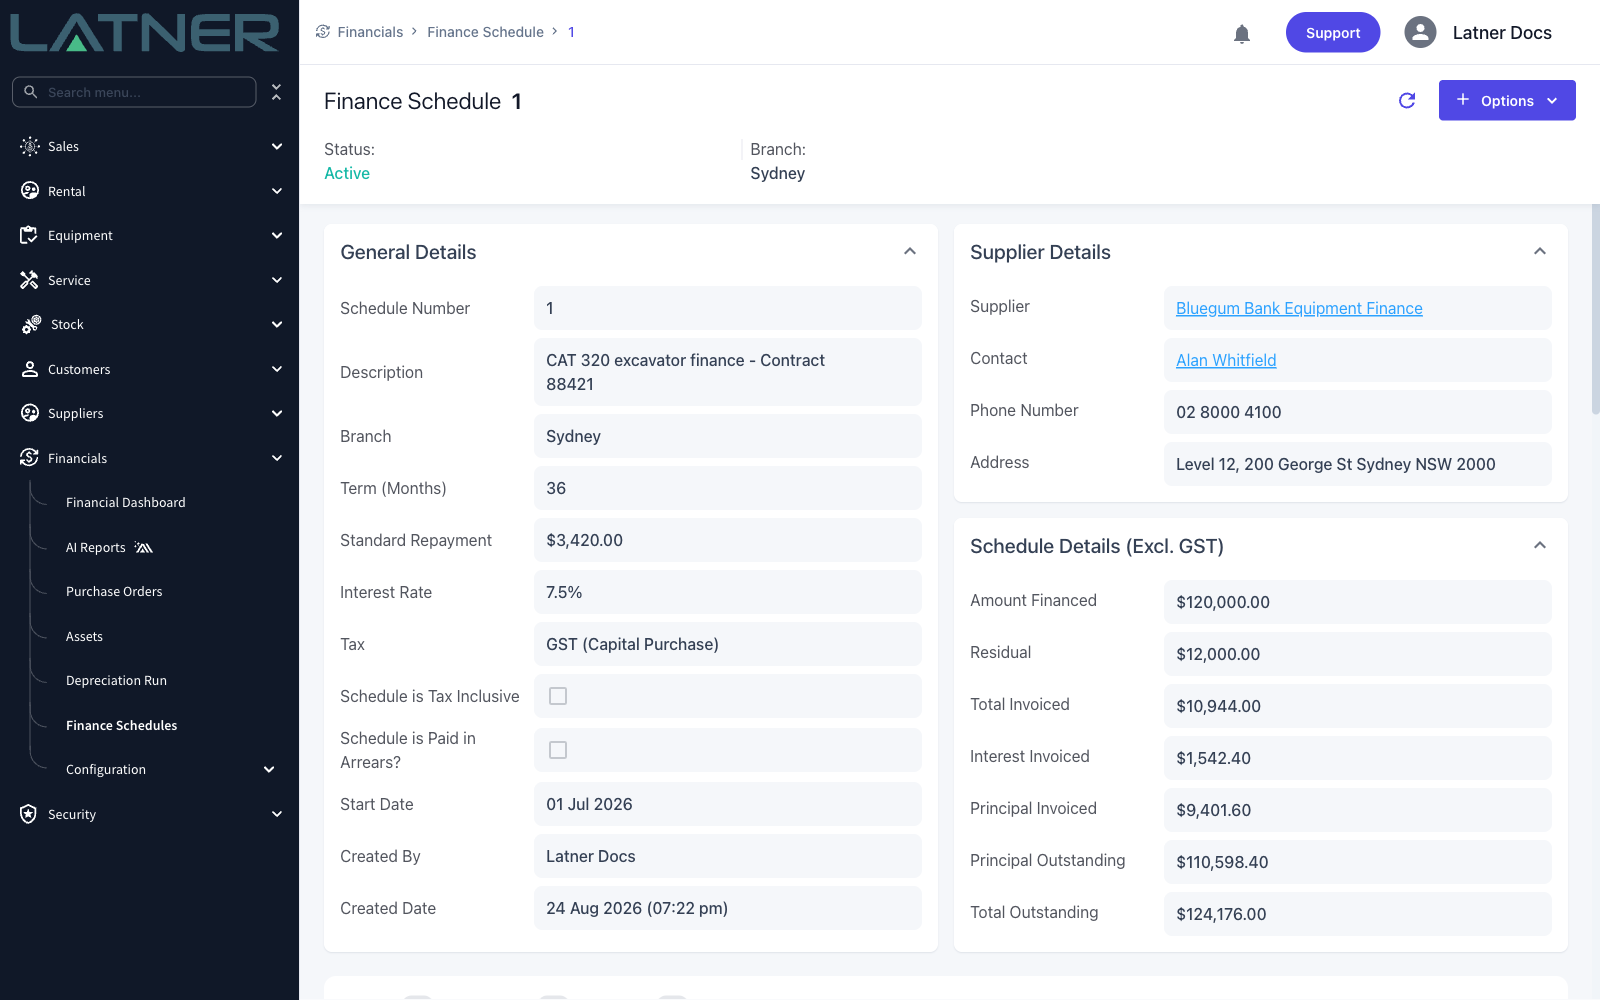
Step 2 - Check the status
The status at the top of the schedule changes to Active. From here the Schedule Details (Excl. GST) panel tracks the loan as you invoice it, with Total Invoiced, Interest Invoiced, Principal Invoiced, Principal Outstanding and Total Outstanding all kept up to date.
After Activation
-
The repayments are ready to invoice - see How to Invoice Finance Schedule.
-
Repayment lines can still be added, edited or deleted while the schedule is Active, as long as they haven't been invoiced.
-
Once every line is invoiced or marked as invoiced, Latner completes the schedule for you and the status changes to Completed. You can also complete it yourself with Options › Complete Finance Schedule once the principal is fully invoiced.
-
Options › Cancel Finance Schedule stops any further invoicing, and needs the Cancel Finance Schedule permission.
Cancelling a schedule doesn't touch invoices that have already been raised against it. If a schedule was set up wrongly and invoiced, cancel those supplier invoices separately before starting again.