
A finance schedule records the loan behind a financed asset - what you borrowed, what you repay each month, and who you repay it to - so Latner can work out every repayment for you and turn those repayments into supplier invoices.
Overview
Financed equipment comes with a second set of numbers to keep track of, and they rarely live anywhere useful. A finance schedule keeps them in one place and does the arithmetic for you.
-
The schedule header holds the loan terms: amount financed, interest rate, term, standard repayment, residual and tax.
-
Creating the schedule is the first of four steps - once it exists you generate the repayment lines, link any equipment, activate it, then invoice the repayments as they fall due.
-
A schedule moves through Open, Active and Completed, and can be cancelled at any point before it completes.
-
One schedule covers one loan. If the same financier funds three machines under three contracts, that's three schedules.
Before You Begin
Make sure the following are in place before you start.
|
Requirement |
Where to Find It |
|---|---|
|
Finance Schedules screen permission |
Security › Configuration › Permission Groups › Financial › Screens |
|
Create Finance Schedule permission |
Security › Configuration › Permission Groups › Financial › Options |
|
Finance Schedule Number Format setting |
Security › Settings › Financials |
|
A supplier for the financier, with a site and a billing contact |
Suppliers › Suppliers |
|
A purchase tax code for the repayments |
Financials › Configuration › Purchase Tax |
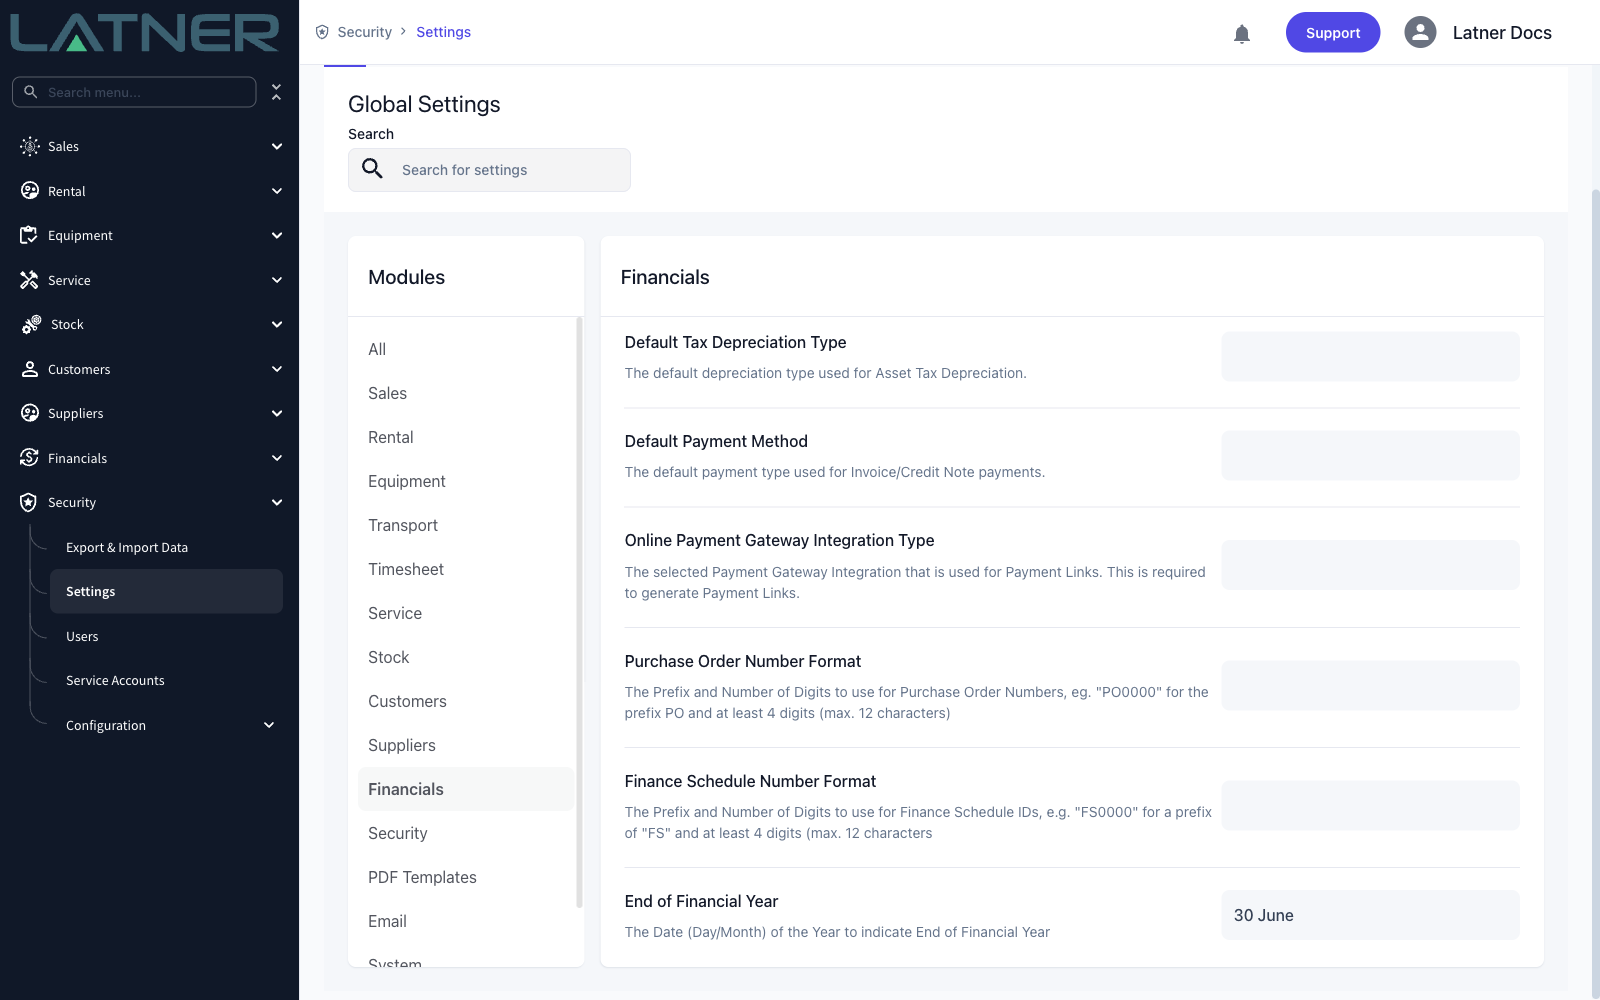
If Finance Schedule Number Format is left blank, schedules are numbered by their plain record number (1, 2, 3 and so on). Setting it to something like FS0000 gives you numbers such as FS0001, which is easier to quote to a financier.
Creating the Finance Schedule
Step 1 - Open the Finance Schedules screen
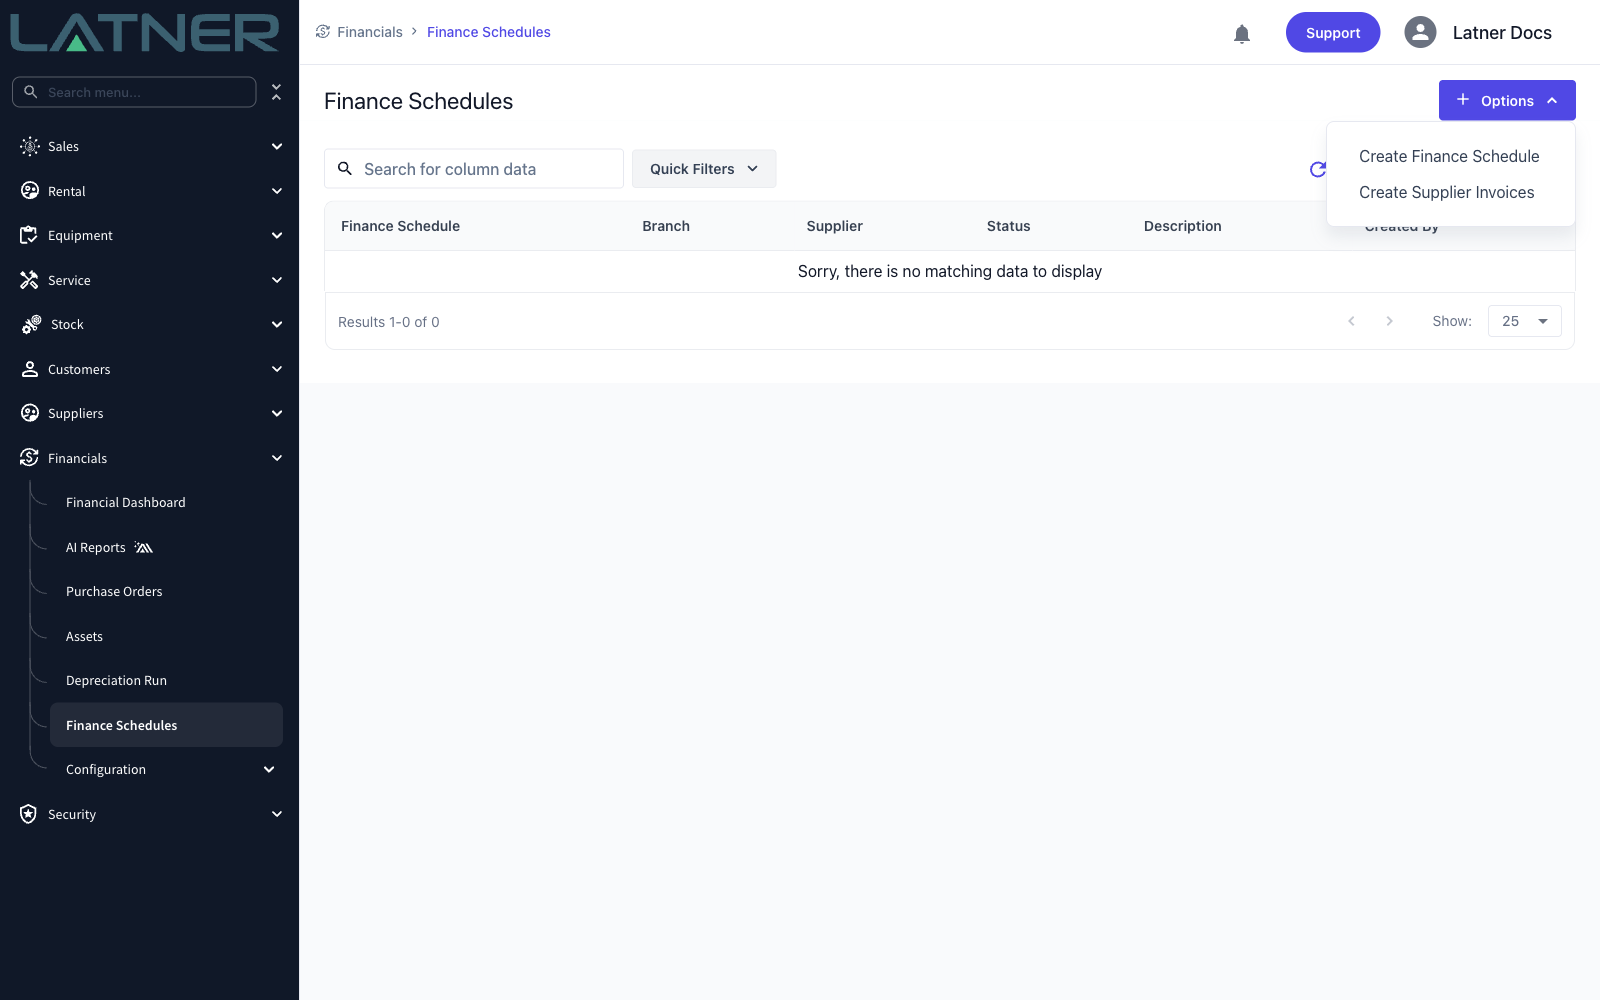
Go to Financials › Finance Schedules, then choose Options › Create Finance Schedule. The same menu holds Create Supplier Invoices, which you'll use later to invoice the repayments.
Step 2 - Enter the loan details
Fill in the terms exactly as they appear on the finance contract. Everything except the repayment, residual and description is required.
-
Schedule Start Date - the date of the first repayment. Every following repayment falls on the same day of each month.
-
Branch - the branch the finance belongs to. Defaults to your own branch.
-
Supplier - the financier you'll be invoiced by.
-
Amount Financed - the amount borrowed.
-
Interest Rate - the annual rate, entered as a percentage.
-
Term (Months) - the number of standard repayments.
-
Standard Repayment - the regular monthly repayment.
-
Residual - the balloon or residual payment at the end of the term. Leave it as 0 if there isn't one.
-
Tax - the purchase tax code applied to the repayments.
-
Schedule is Tax Inclusive? - tick this if the repayment amount already includes tax. Latner then works the tax back out of each repayment instead of adding it on top.
-
Schedule is Paid In Arrears? - tick this if the first repayment includes interest. Left unticked, the first repayment is treated as all principal.
-
Description - free text. A contract number and the asset it paid for is the most useful thing to put here.
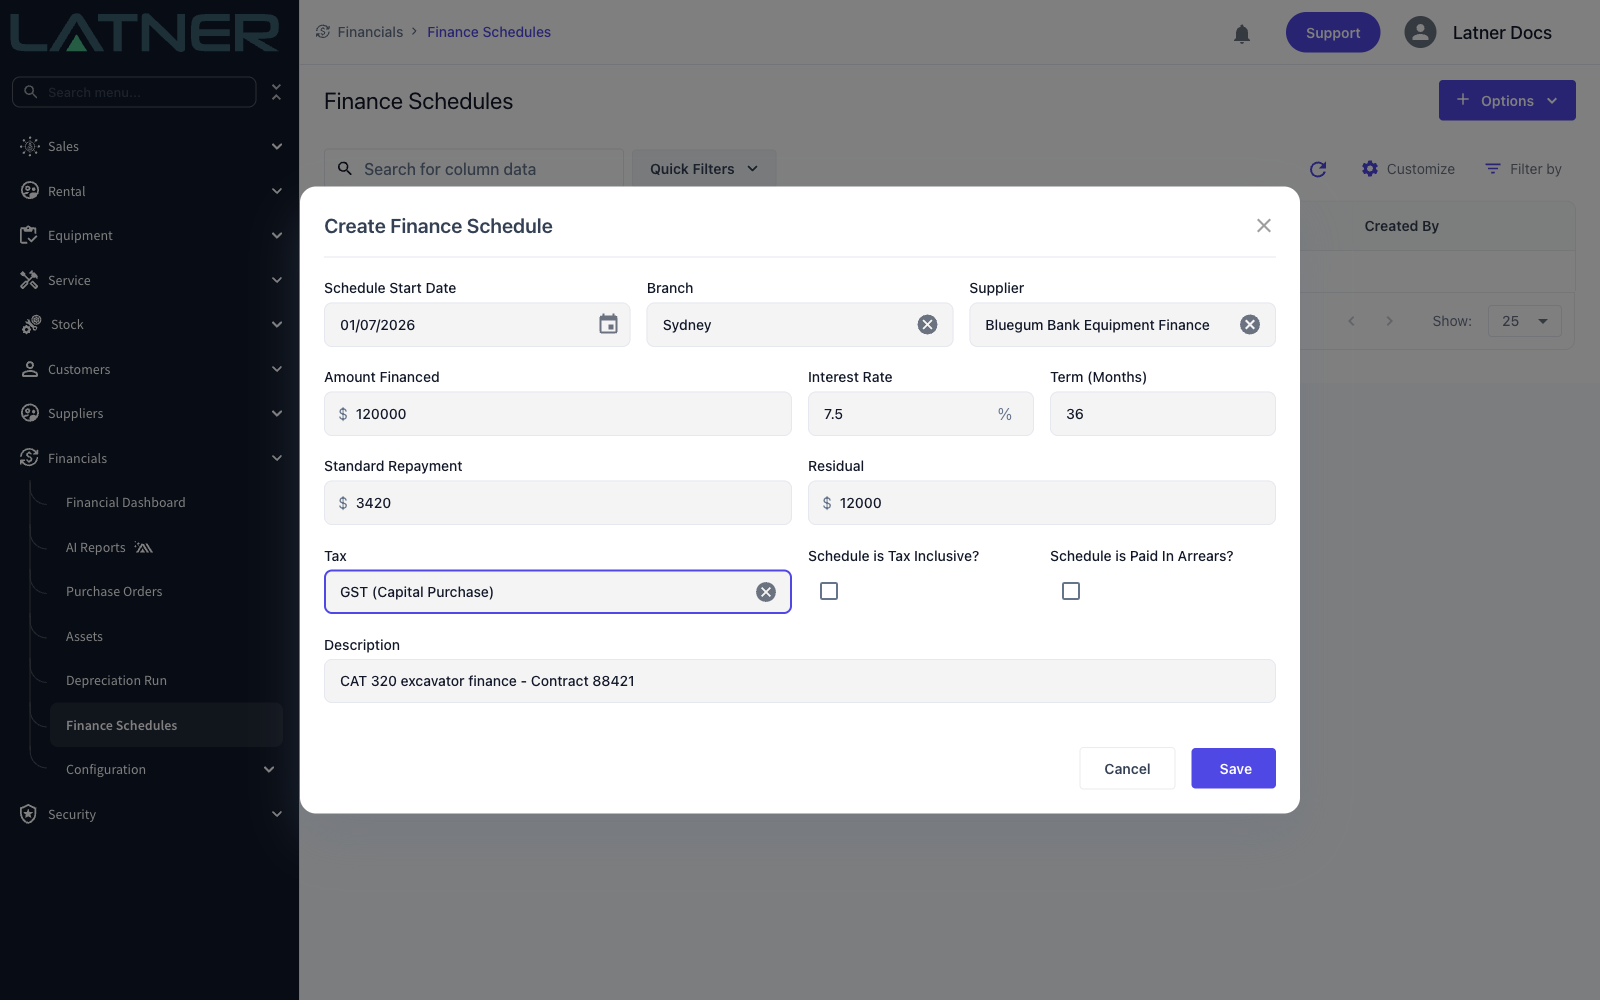
These five numbers have to reconcile with each other, because Latner rebuilds the loan from them when you generate the repayment lines. Take the amount financed, interest rate, term, standard repayment and residual straight off the contract rather than estimating any of them.
Step 3 - Save and check the schedule
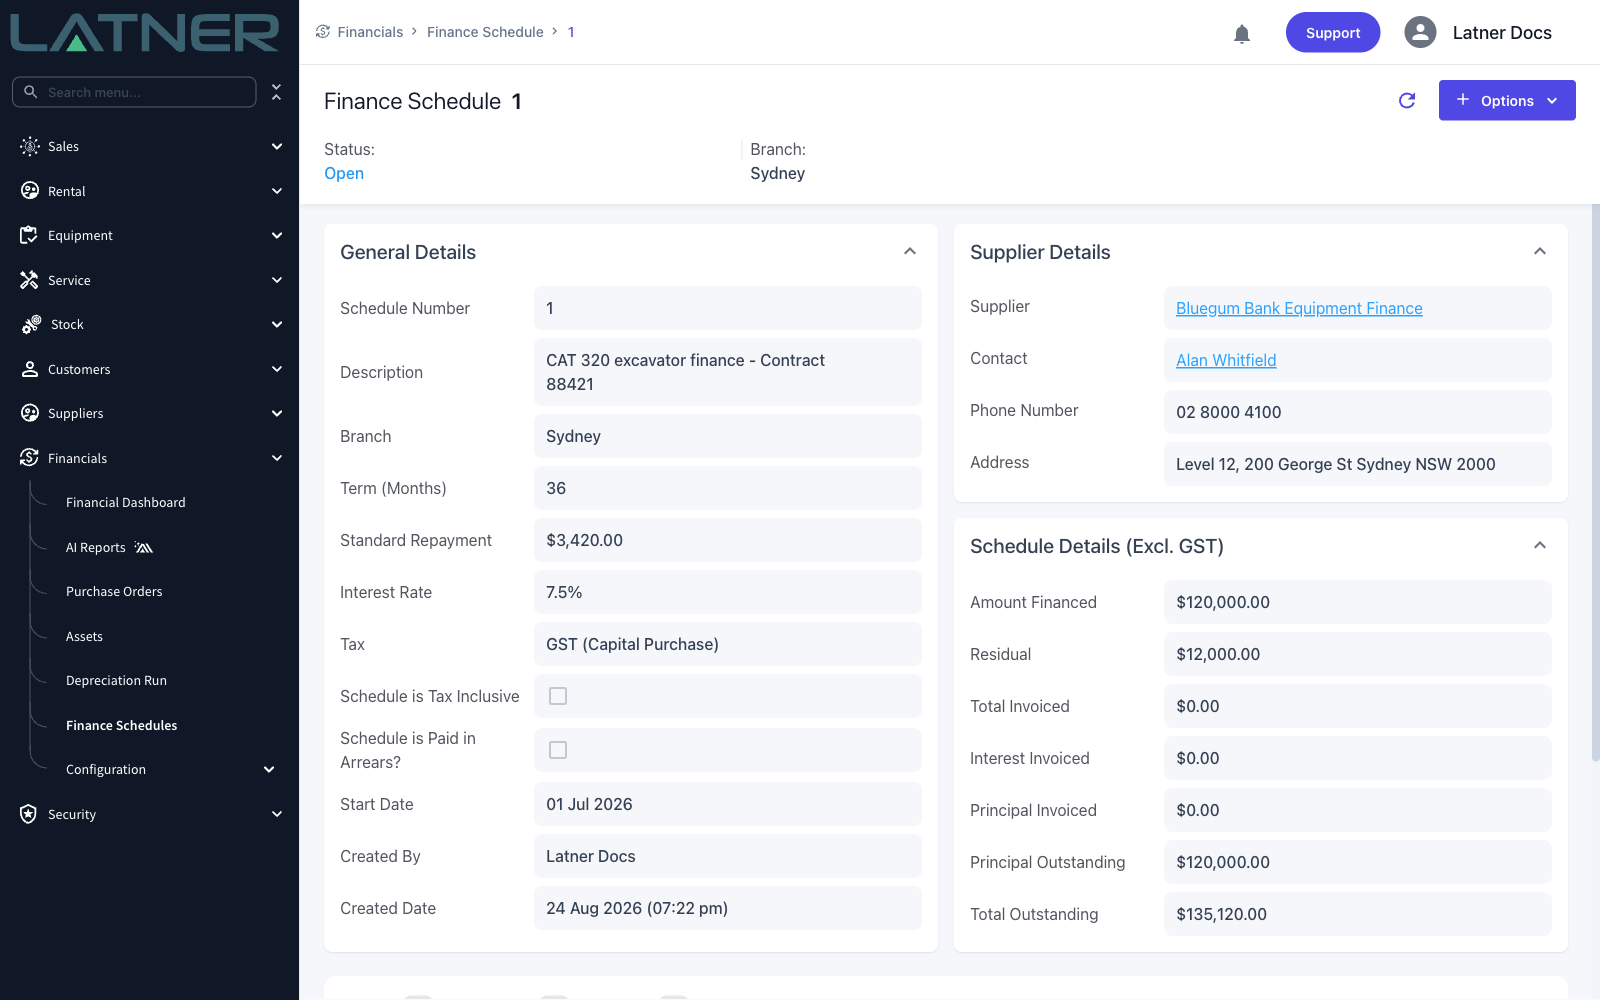
Choose Save. Latner creates the schedule with a status of Open and takes you straight to it. The supplier's billing contact and address come through automatically, and the Schedule Details (Excl. GST) panel starts with nothing invoiced - so Principal Outstanding is the full amount financed and Total Outstanding is every repayment plus the residual.
After Creation
-
The schedule has no repayment lines yet. Create them with Generate Schedule Details, or enter them one at a time with Add Schedule Details.
-
If the finance covers particular machines, link the equipment to the schedule so the finance cost flows through to equipment reporting.
-
Once the lines are right, activate the schedule, then invoice the repayments as they fall due.
-
The schedule appears on the Finance Schedules list under its branch and supplier, and the Open quick filter is the fastest way back to schedules that aren't finished being set up.
The loan terms can be edited while the schedule is Open or Active, but they lock as soon as any principal has been invoiced. If the terms turn out to be wrong after invoicing has started, cancel the schedule and create a new one rather than trying to edit it.