
A sales order records what you are selling to a customer - stock, parts, serialised items or equipment out of your own fleet - and carries that sale through quoting, picking, delivery and invoicing.
Overview
Not everything that leaves the yard comes back. When a customer is buying rather than hiring, the sales order is where the sale lives from the first conversation to the invoice.
-
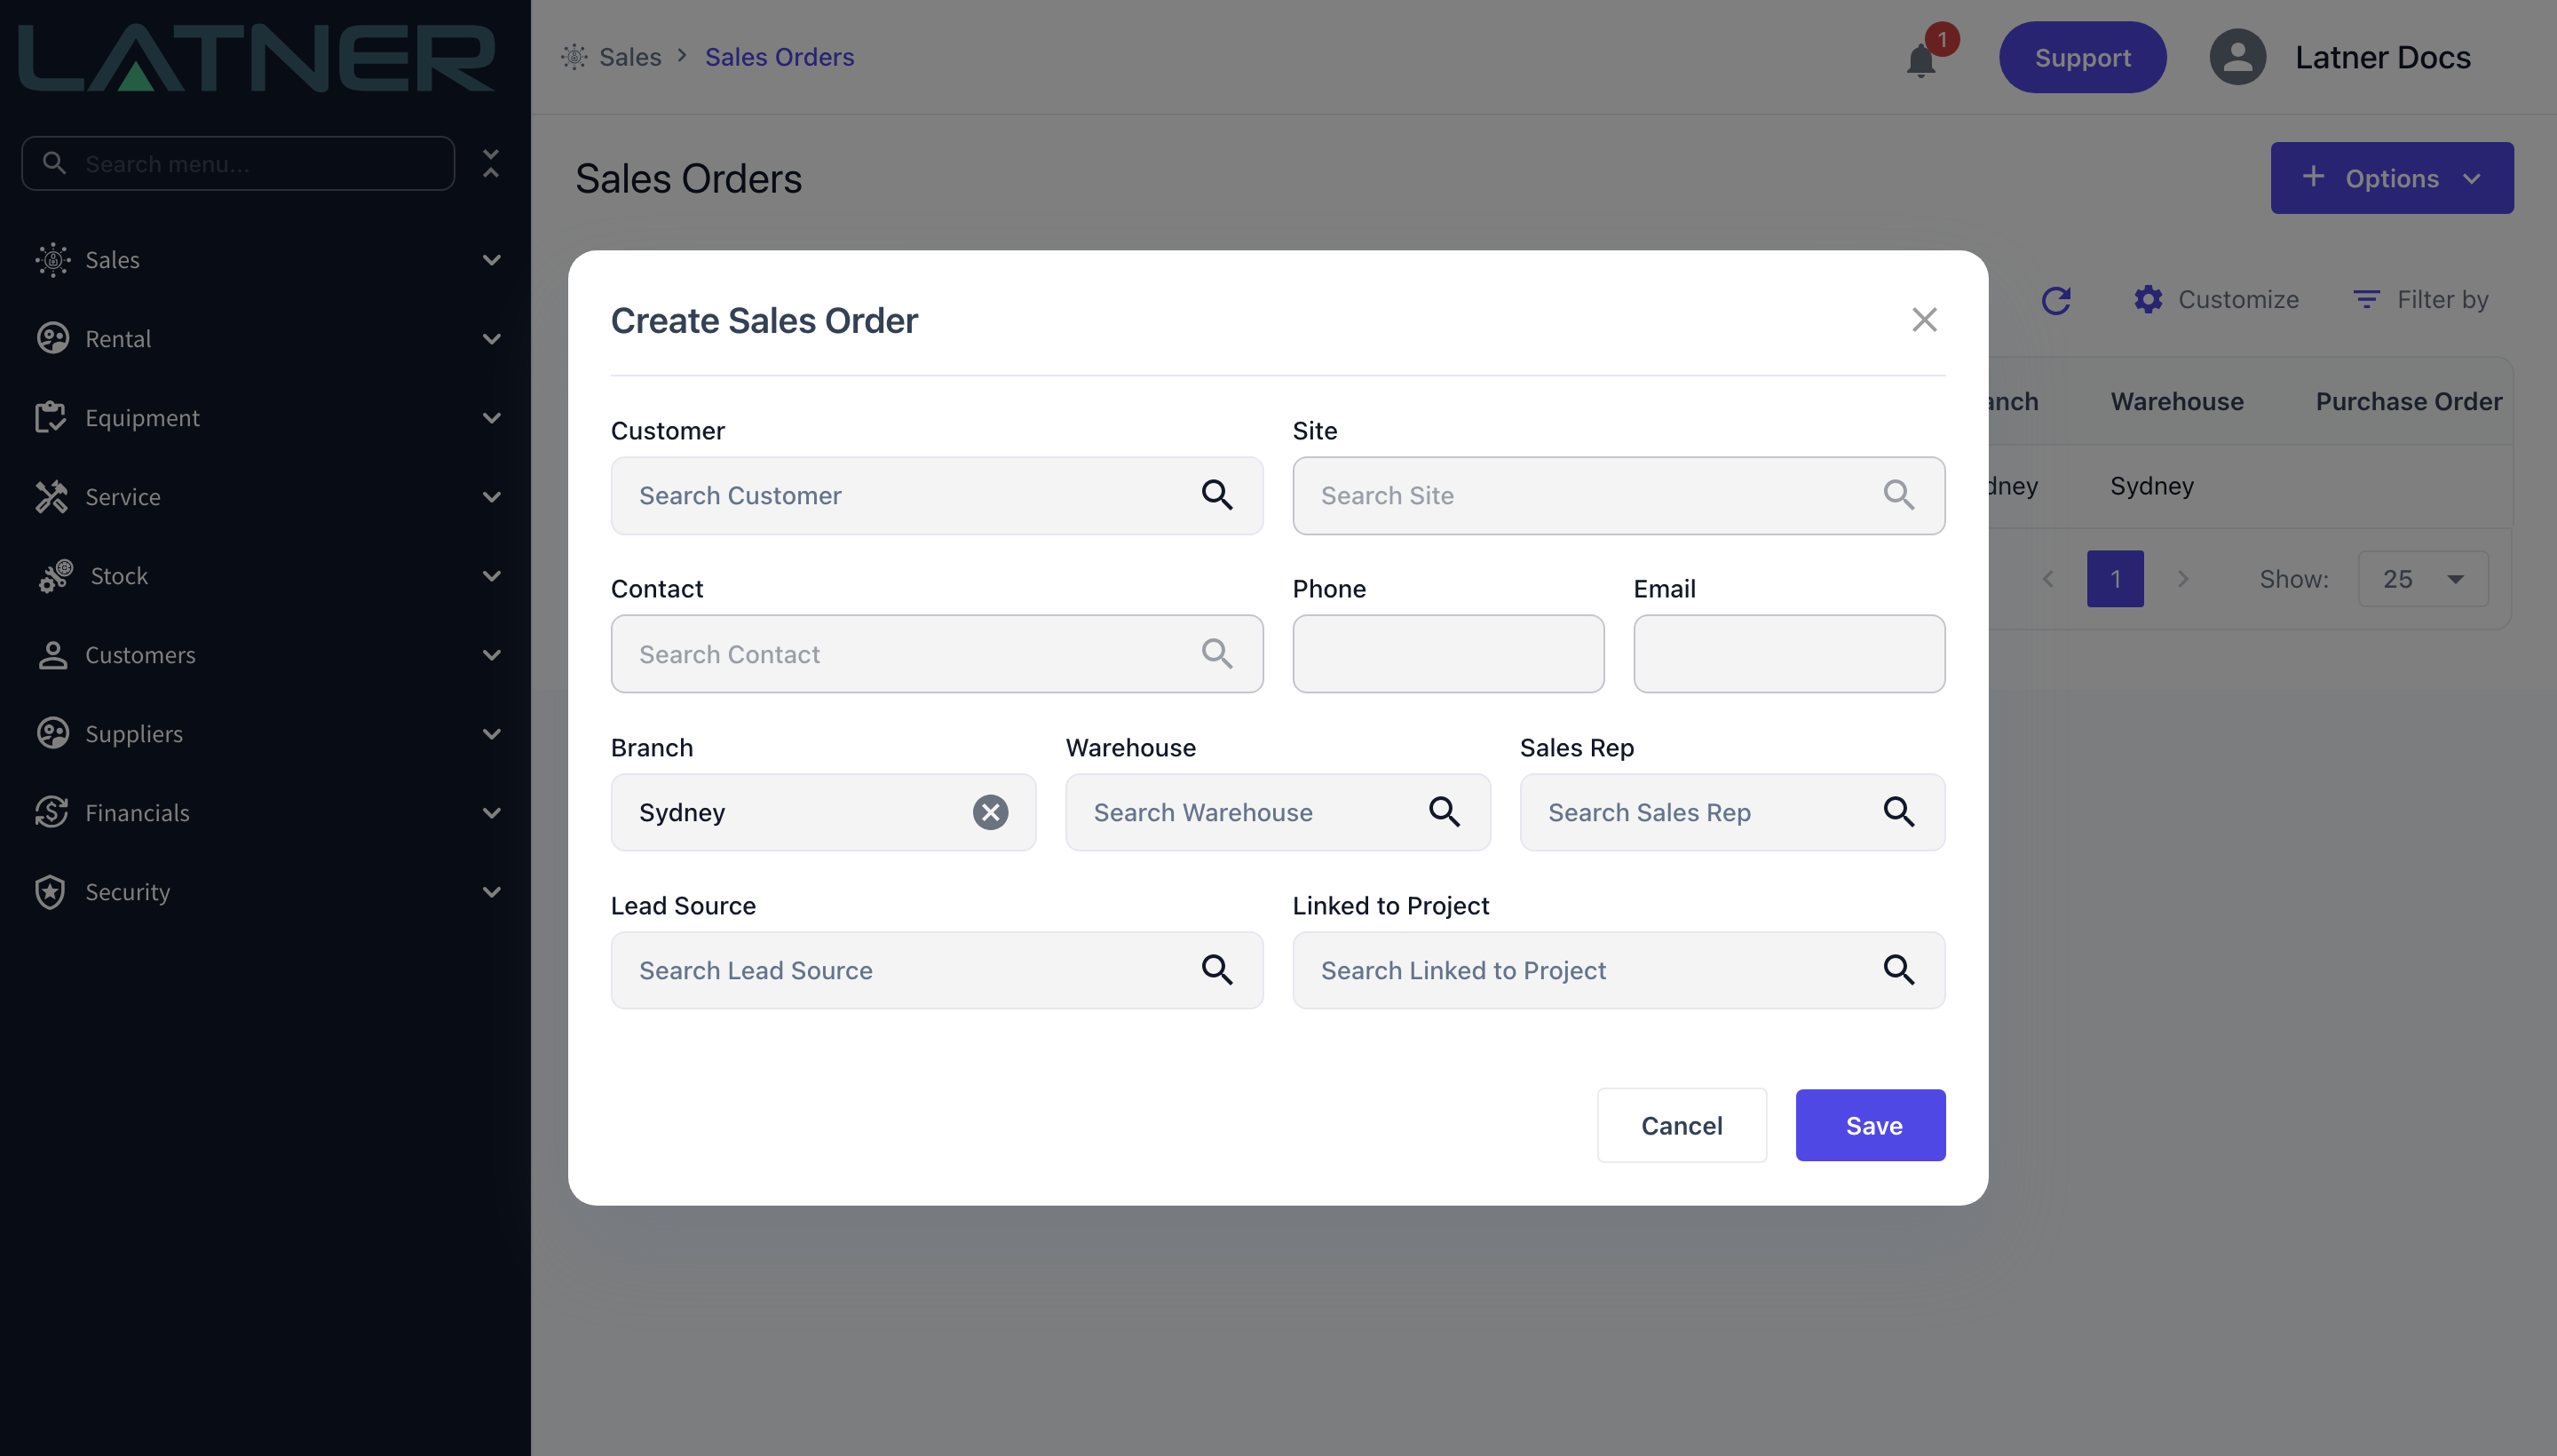
The Create Sales Order form captures the header only: who you are selling to (customer, site and contact), where the goods come from (branch and warehouse), and who owns the sale (sales rep and lead source).
-
A new sales order is created with the status Open, no lines and a total of $0.00. You add what is being sold afterwards, from the sales order itself.
-
The sales order number is allocated in sequence when you save, and formatted using the Sales Order Number Format setting.
-
Latner fills in an expiry date roughly a month ahead if you don't set one, and copies the customer's tax code onto the order.
-
You can start a sales order from the Sales Orders screen, or straight from a CRM deal.
-
Everything that follows - quoting, picking lists, transport, purchase orders, inspections and invoicing - runs from the sales order's Options menu.
Before You Begin
A couple of permissions and settings decide whether you can raise a sales order at all, and what the form looks like when you do.
|
Requirement |
Where to Find It |
|---|---|
|
Sales Order permission - lets you see the Sales Orders screen |
Security › Configuration › Permission Groups › Sales |
|
Create Sales Order permission - lets you raise one |
Security › Configuration › Permission Groups › Sales |
|
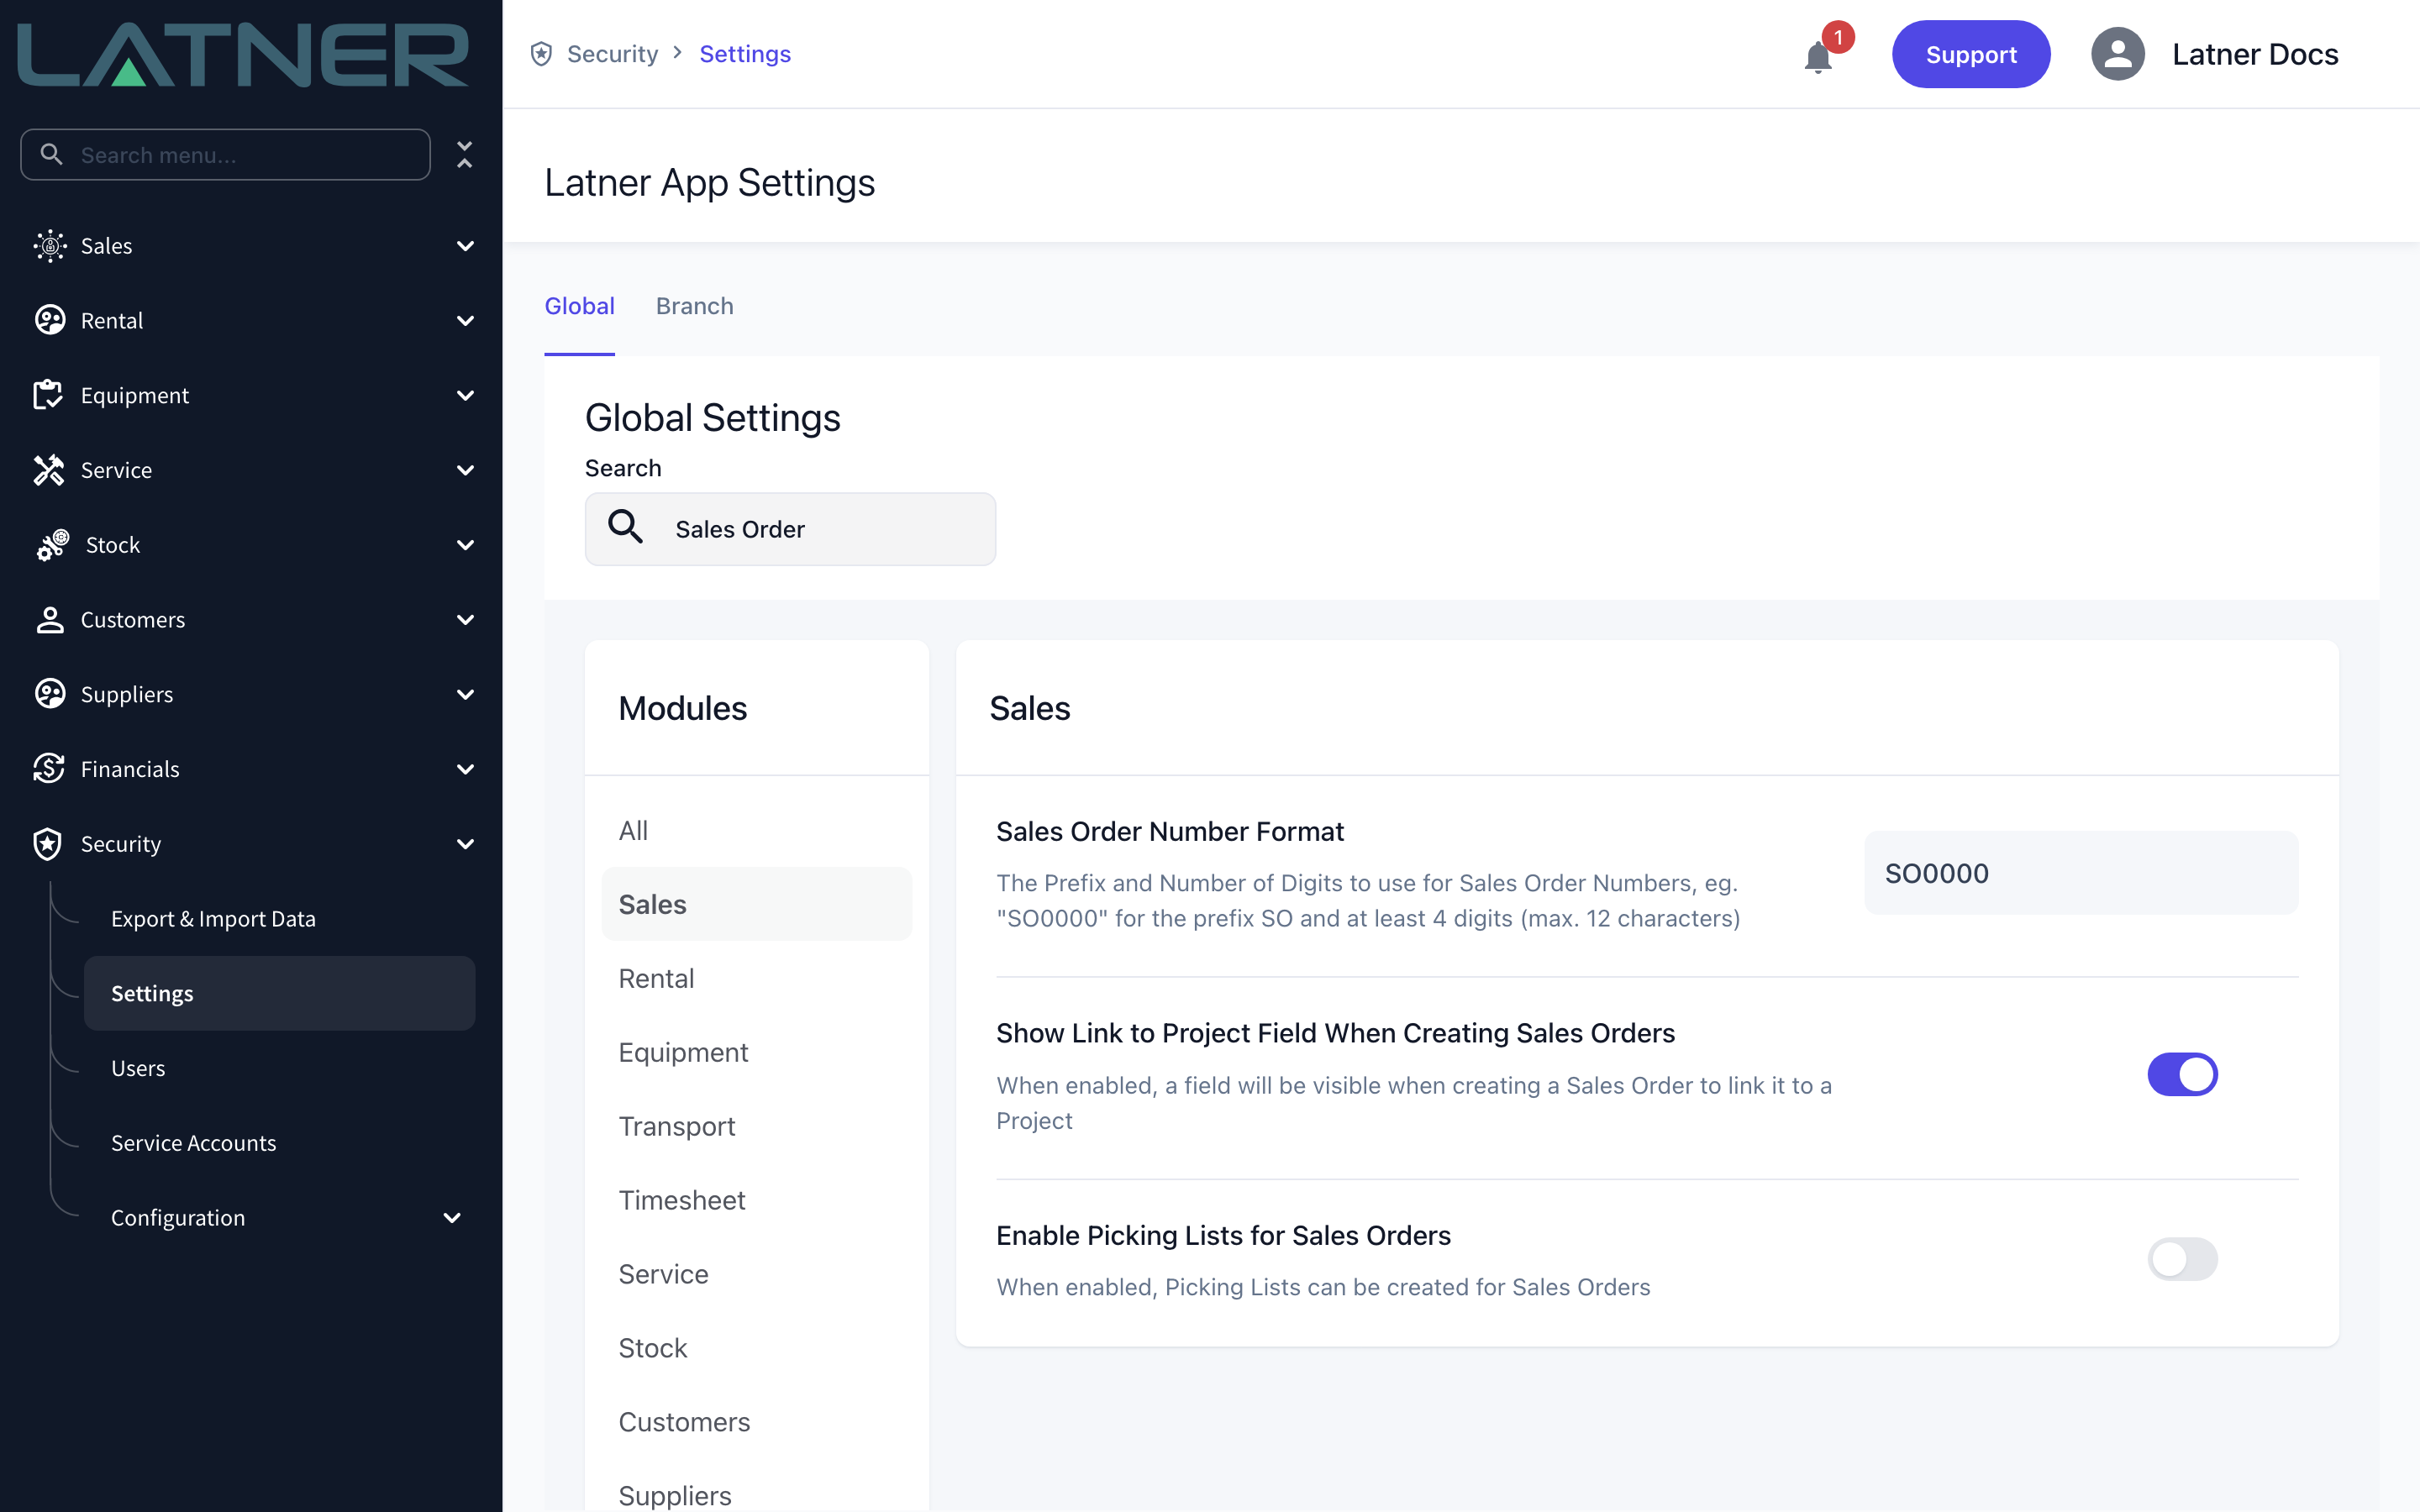
Sales Order Number Format - the prefix and number of digits, for example SO0000 |
Security › Settings › Sales |
|
Show Link to Project Field When Creating Sales Orders - optional, adds the Linked to Project field to the form |
Security › Settings › Sales |
|
An active customer with at least one site and one contact |
Customers › Customers |
|
A warehouse against the branch you are selling from |
Financials › Configuration › Warehouse |
Permissions are granted per branch. You will only see, and can only raise, sales orders for the branches your permission group covers.
Creating the Sales Order
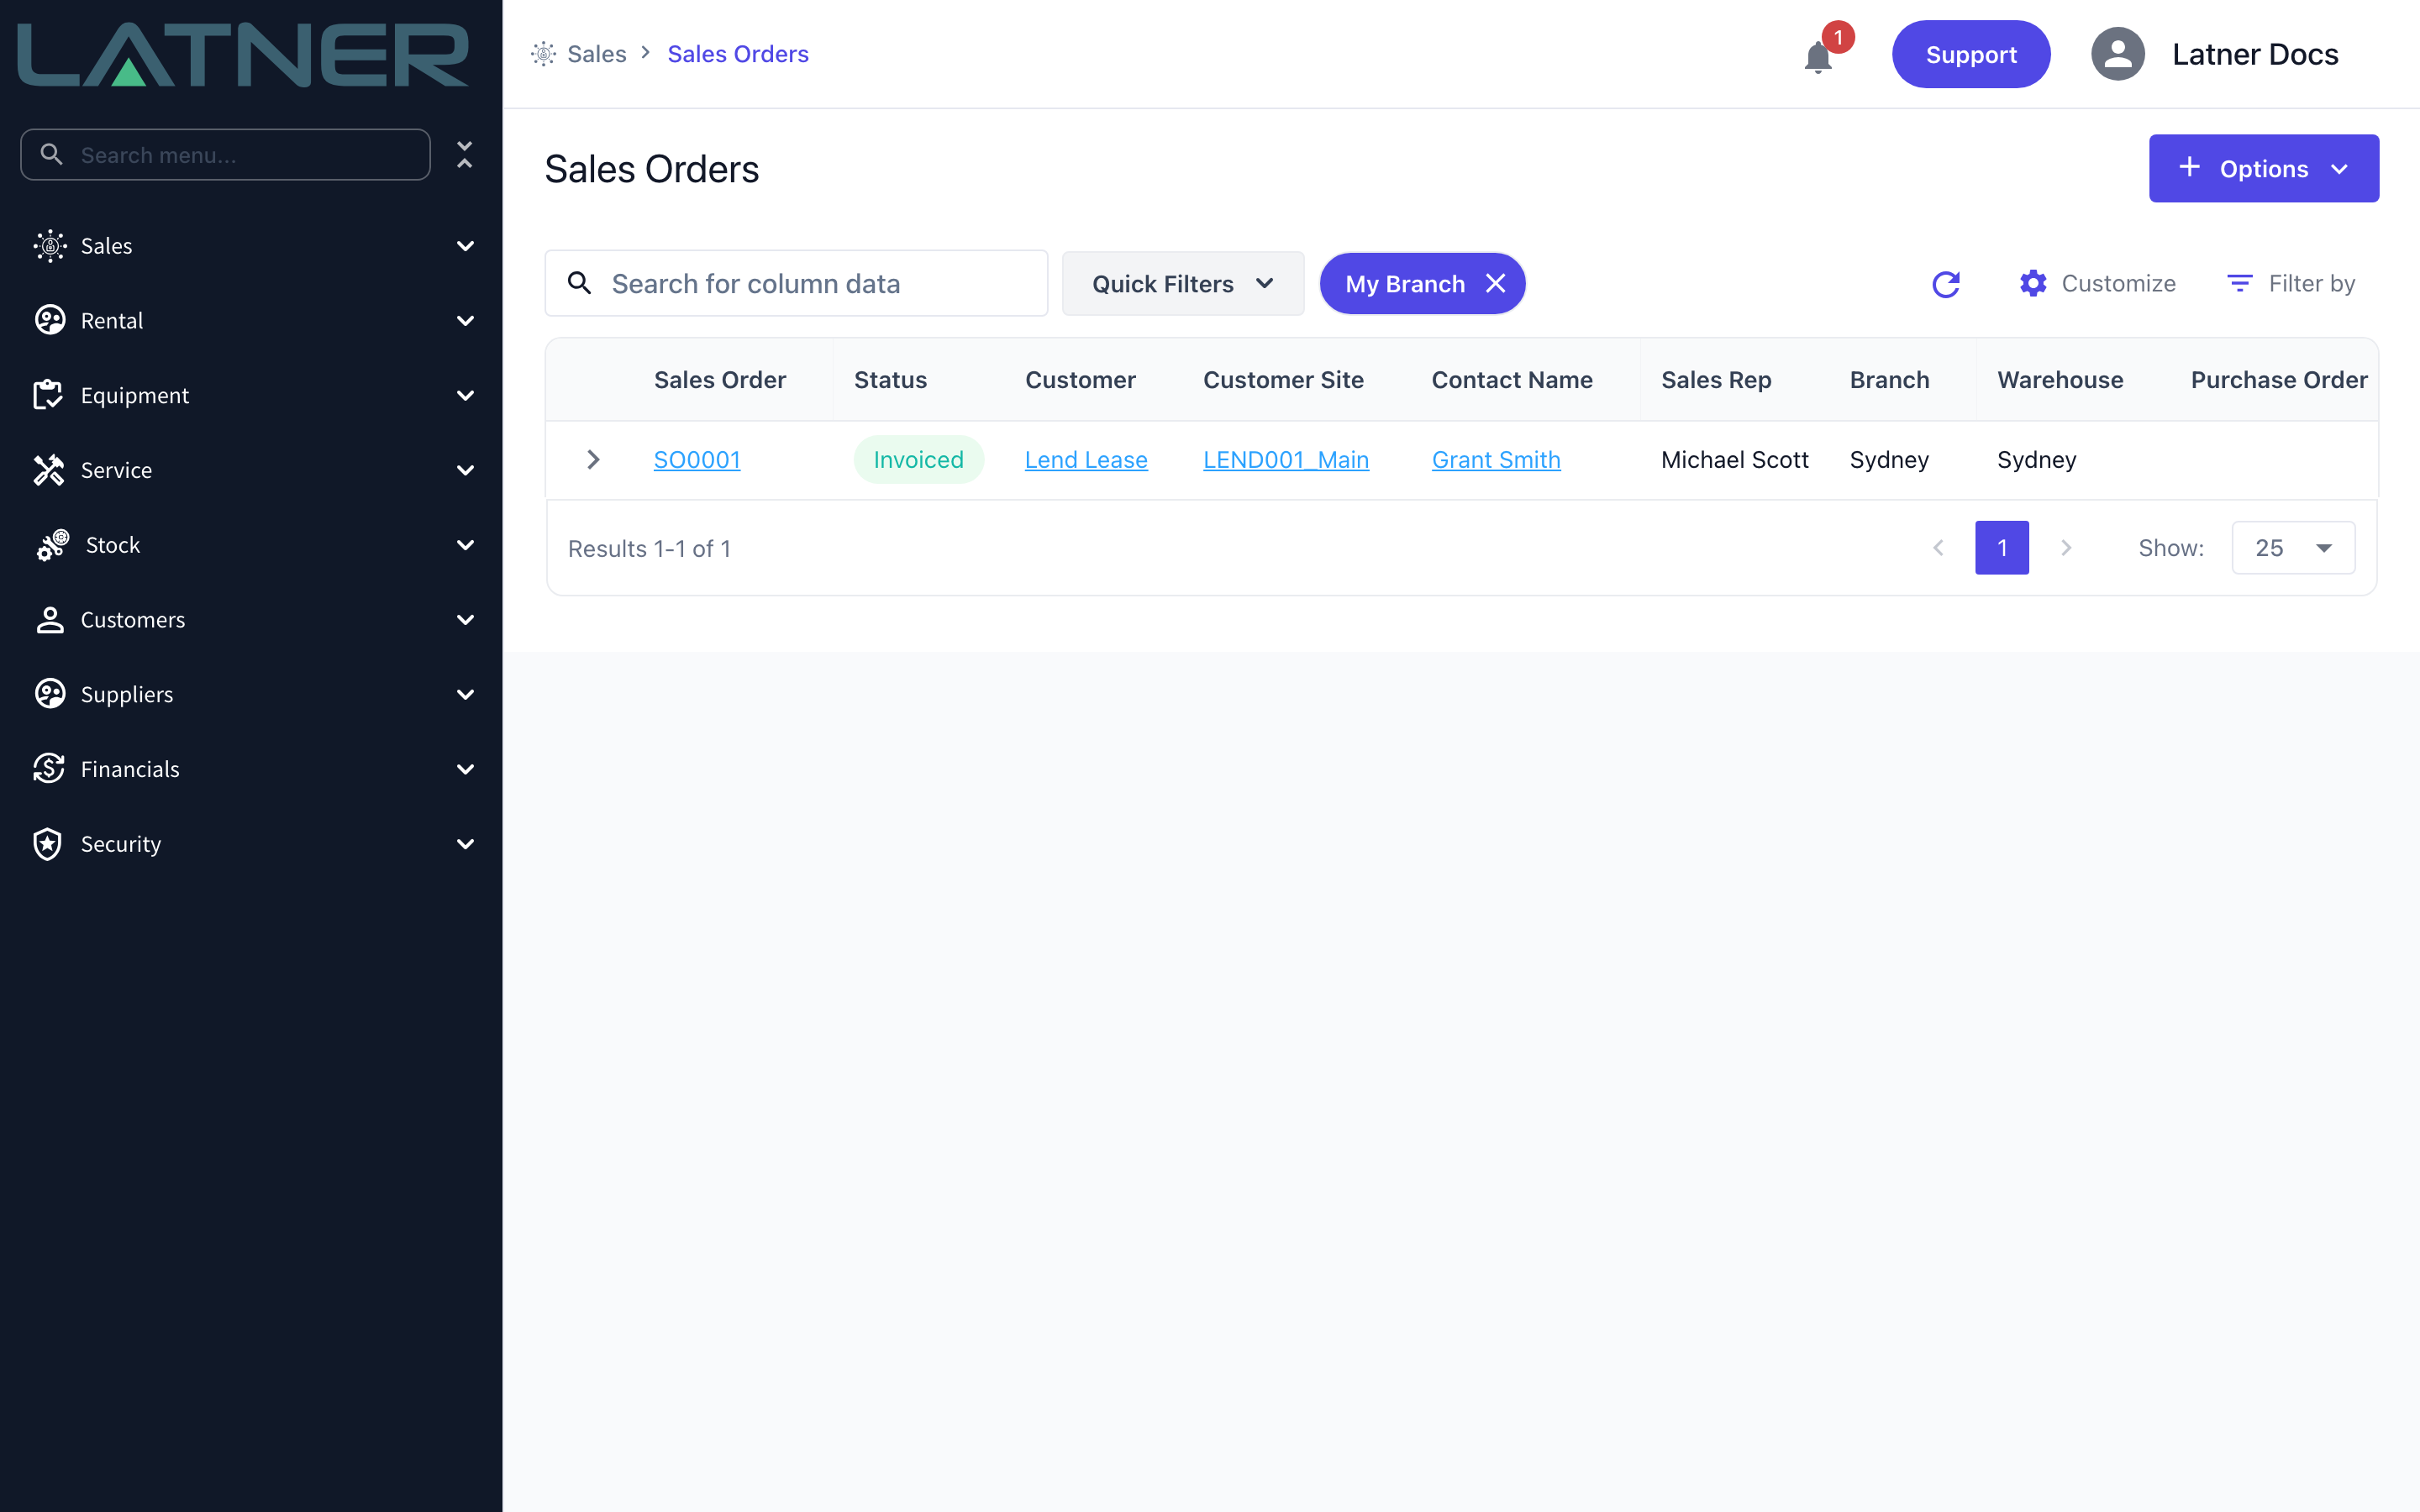
Step 1 - Open the Sales Orders screen
Go to Sales › Sales Orders. The screen lists every sales order you have access to, with its status, customer, site, branch and warehouse.
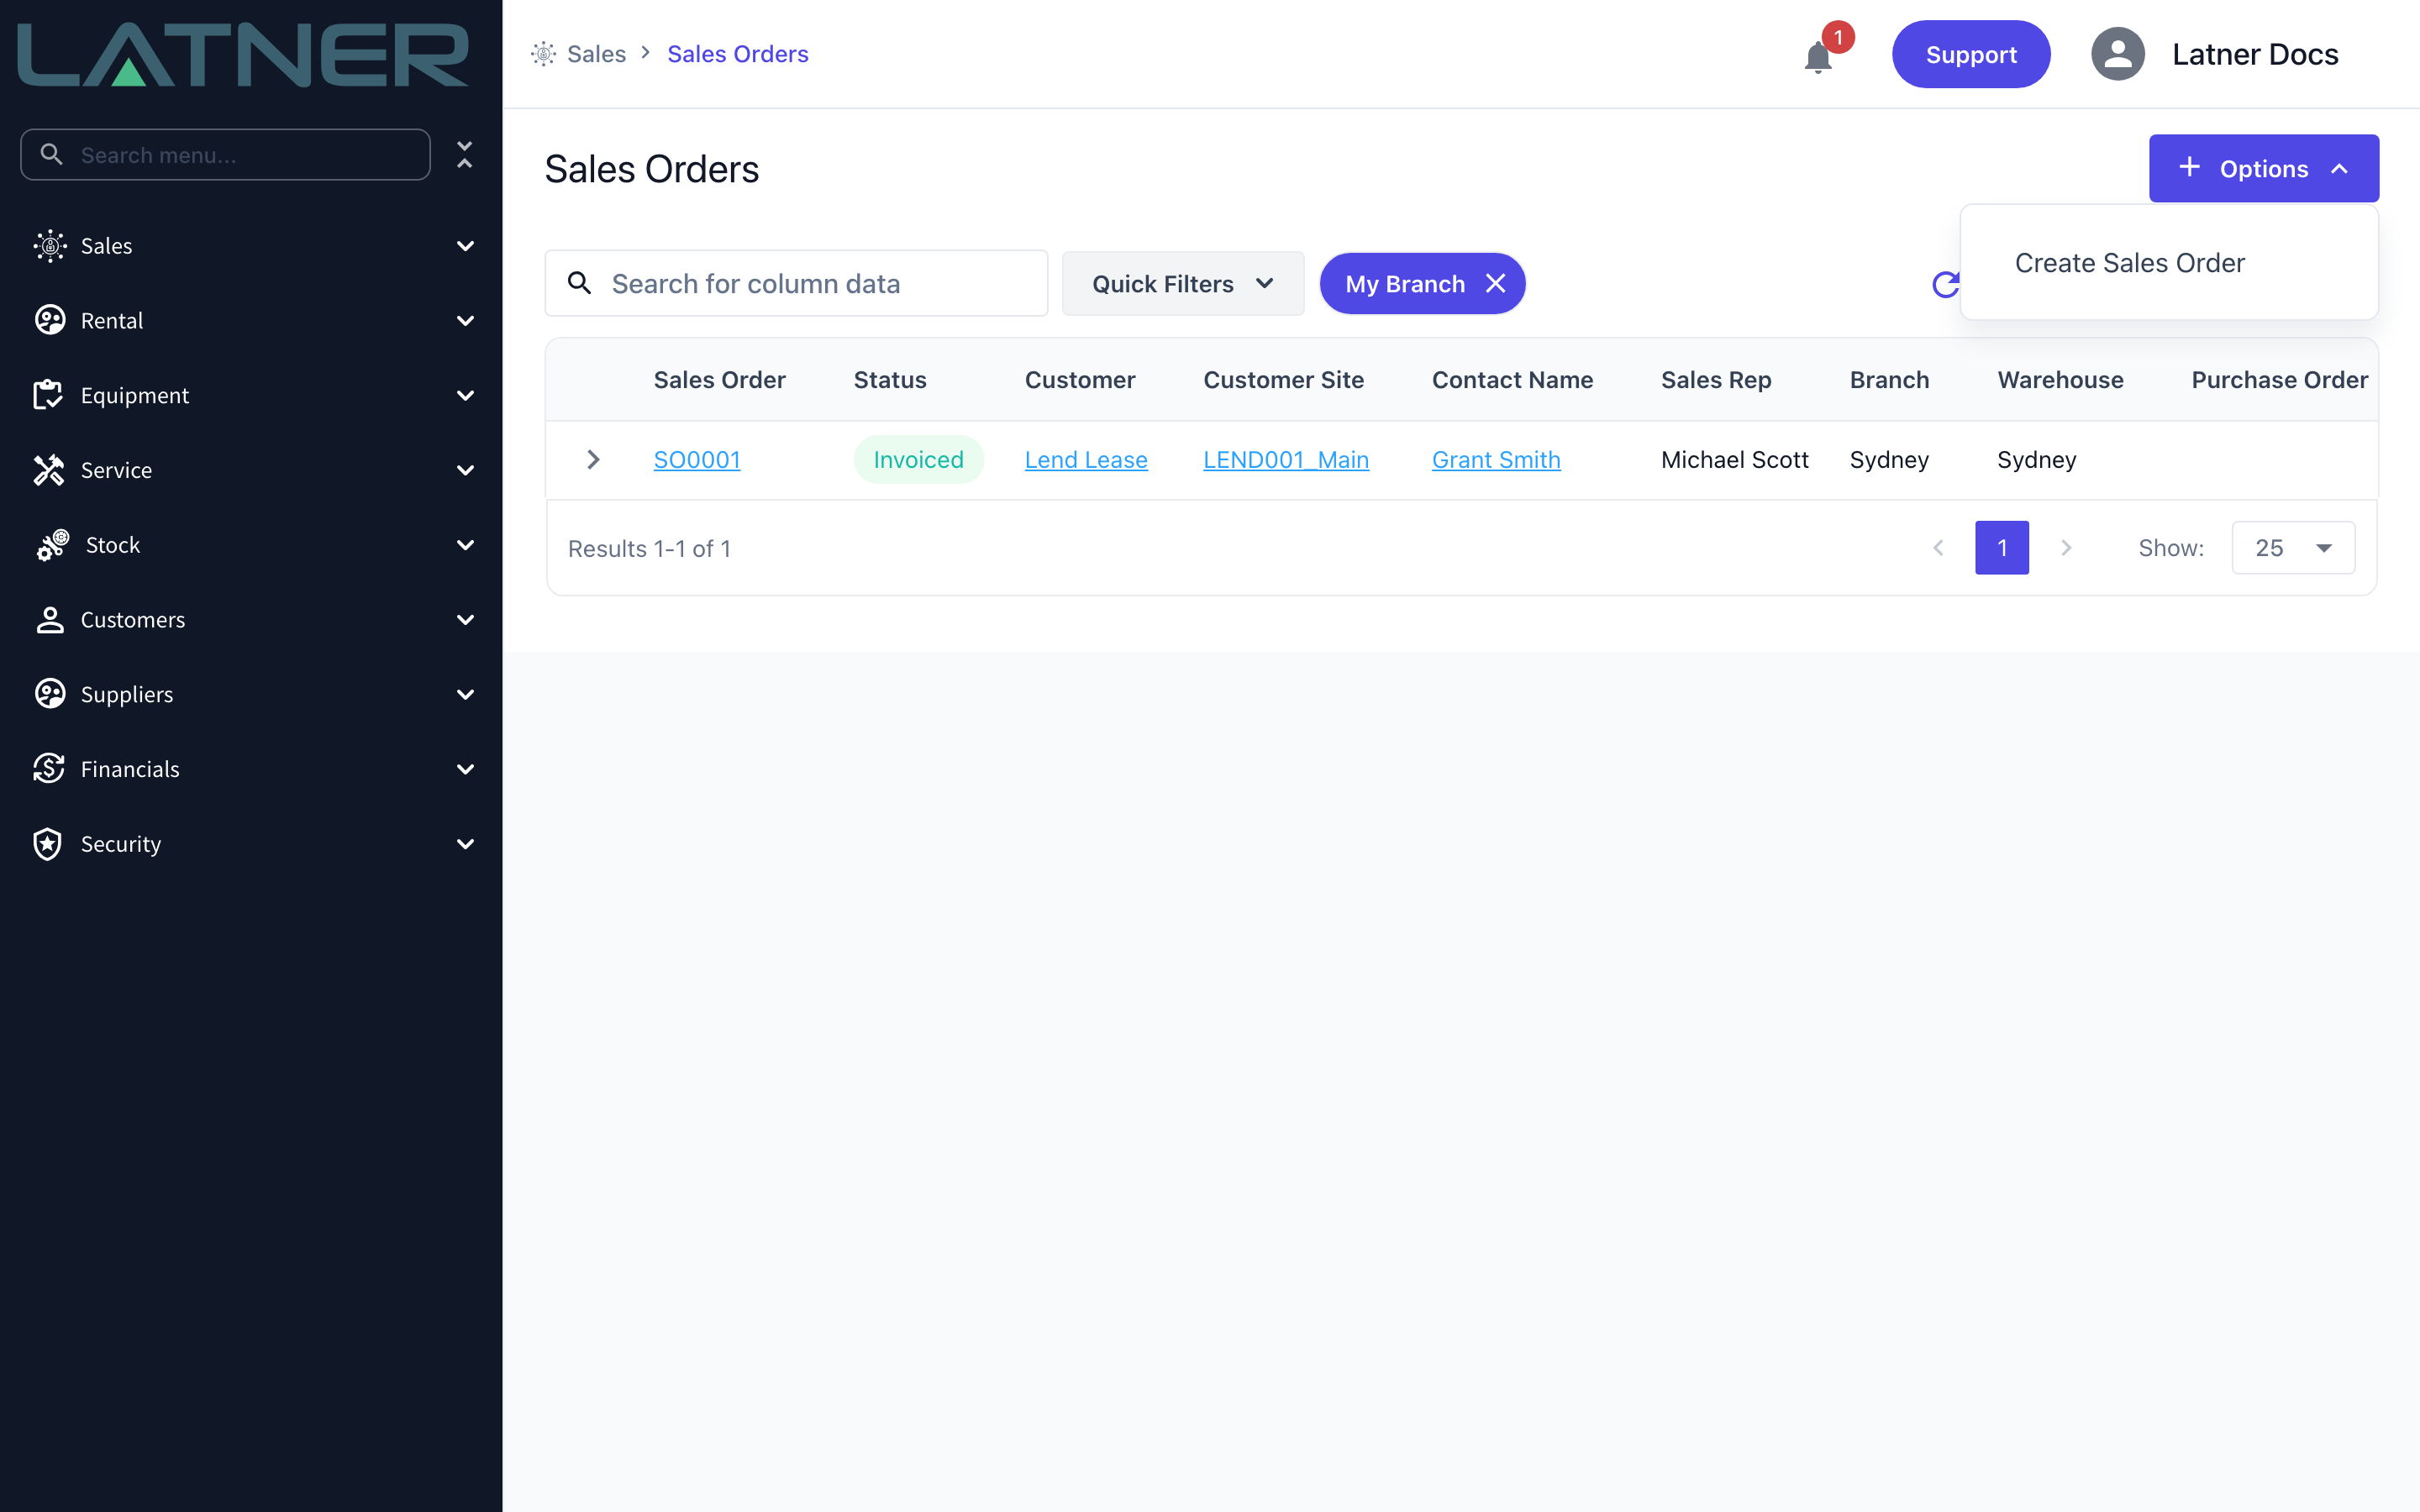
Step 2 - Start a new sales order
Select Options › Create Sales Order.
Step 3 - Choose the customer
The Create Sales Order form opens with Branch already set to your own branch. Site and Contact are greyed out until you pick a customer, because both are filtered by the customer you choose.
Search the Customer field by name. The search shows each customer's payment terms alongside the name, and customers on cash on delivery terms are shown in red. If the customer doesn't exist yet, use Create New at the bottom of the search to add one without leaving the form.
Step 4 - Choose the site and contact
Both fields now list only the records belonging to that customer.
-
Site - the customer site the goods are for, shown as code and name.
-
Contact - the person you are dealing with. Phone and Email fill in from the contact and can't be typed over; to change them, change the contact record itself.
Choosing a customer also brings that customer's sales rep across, so Sales Rep is usually already filled in by this point.
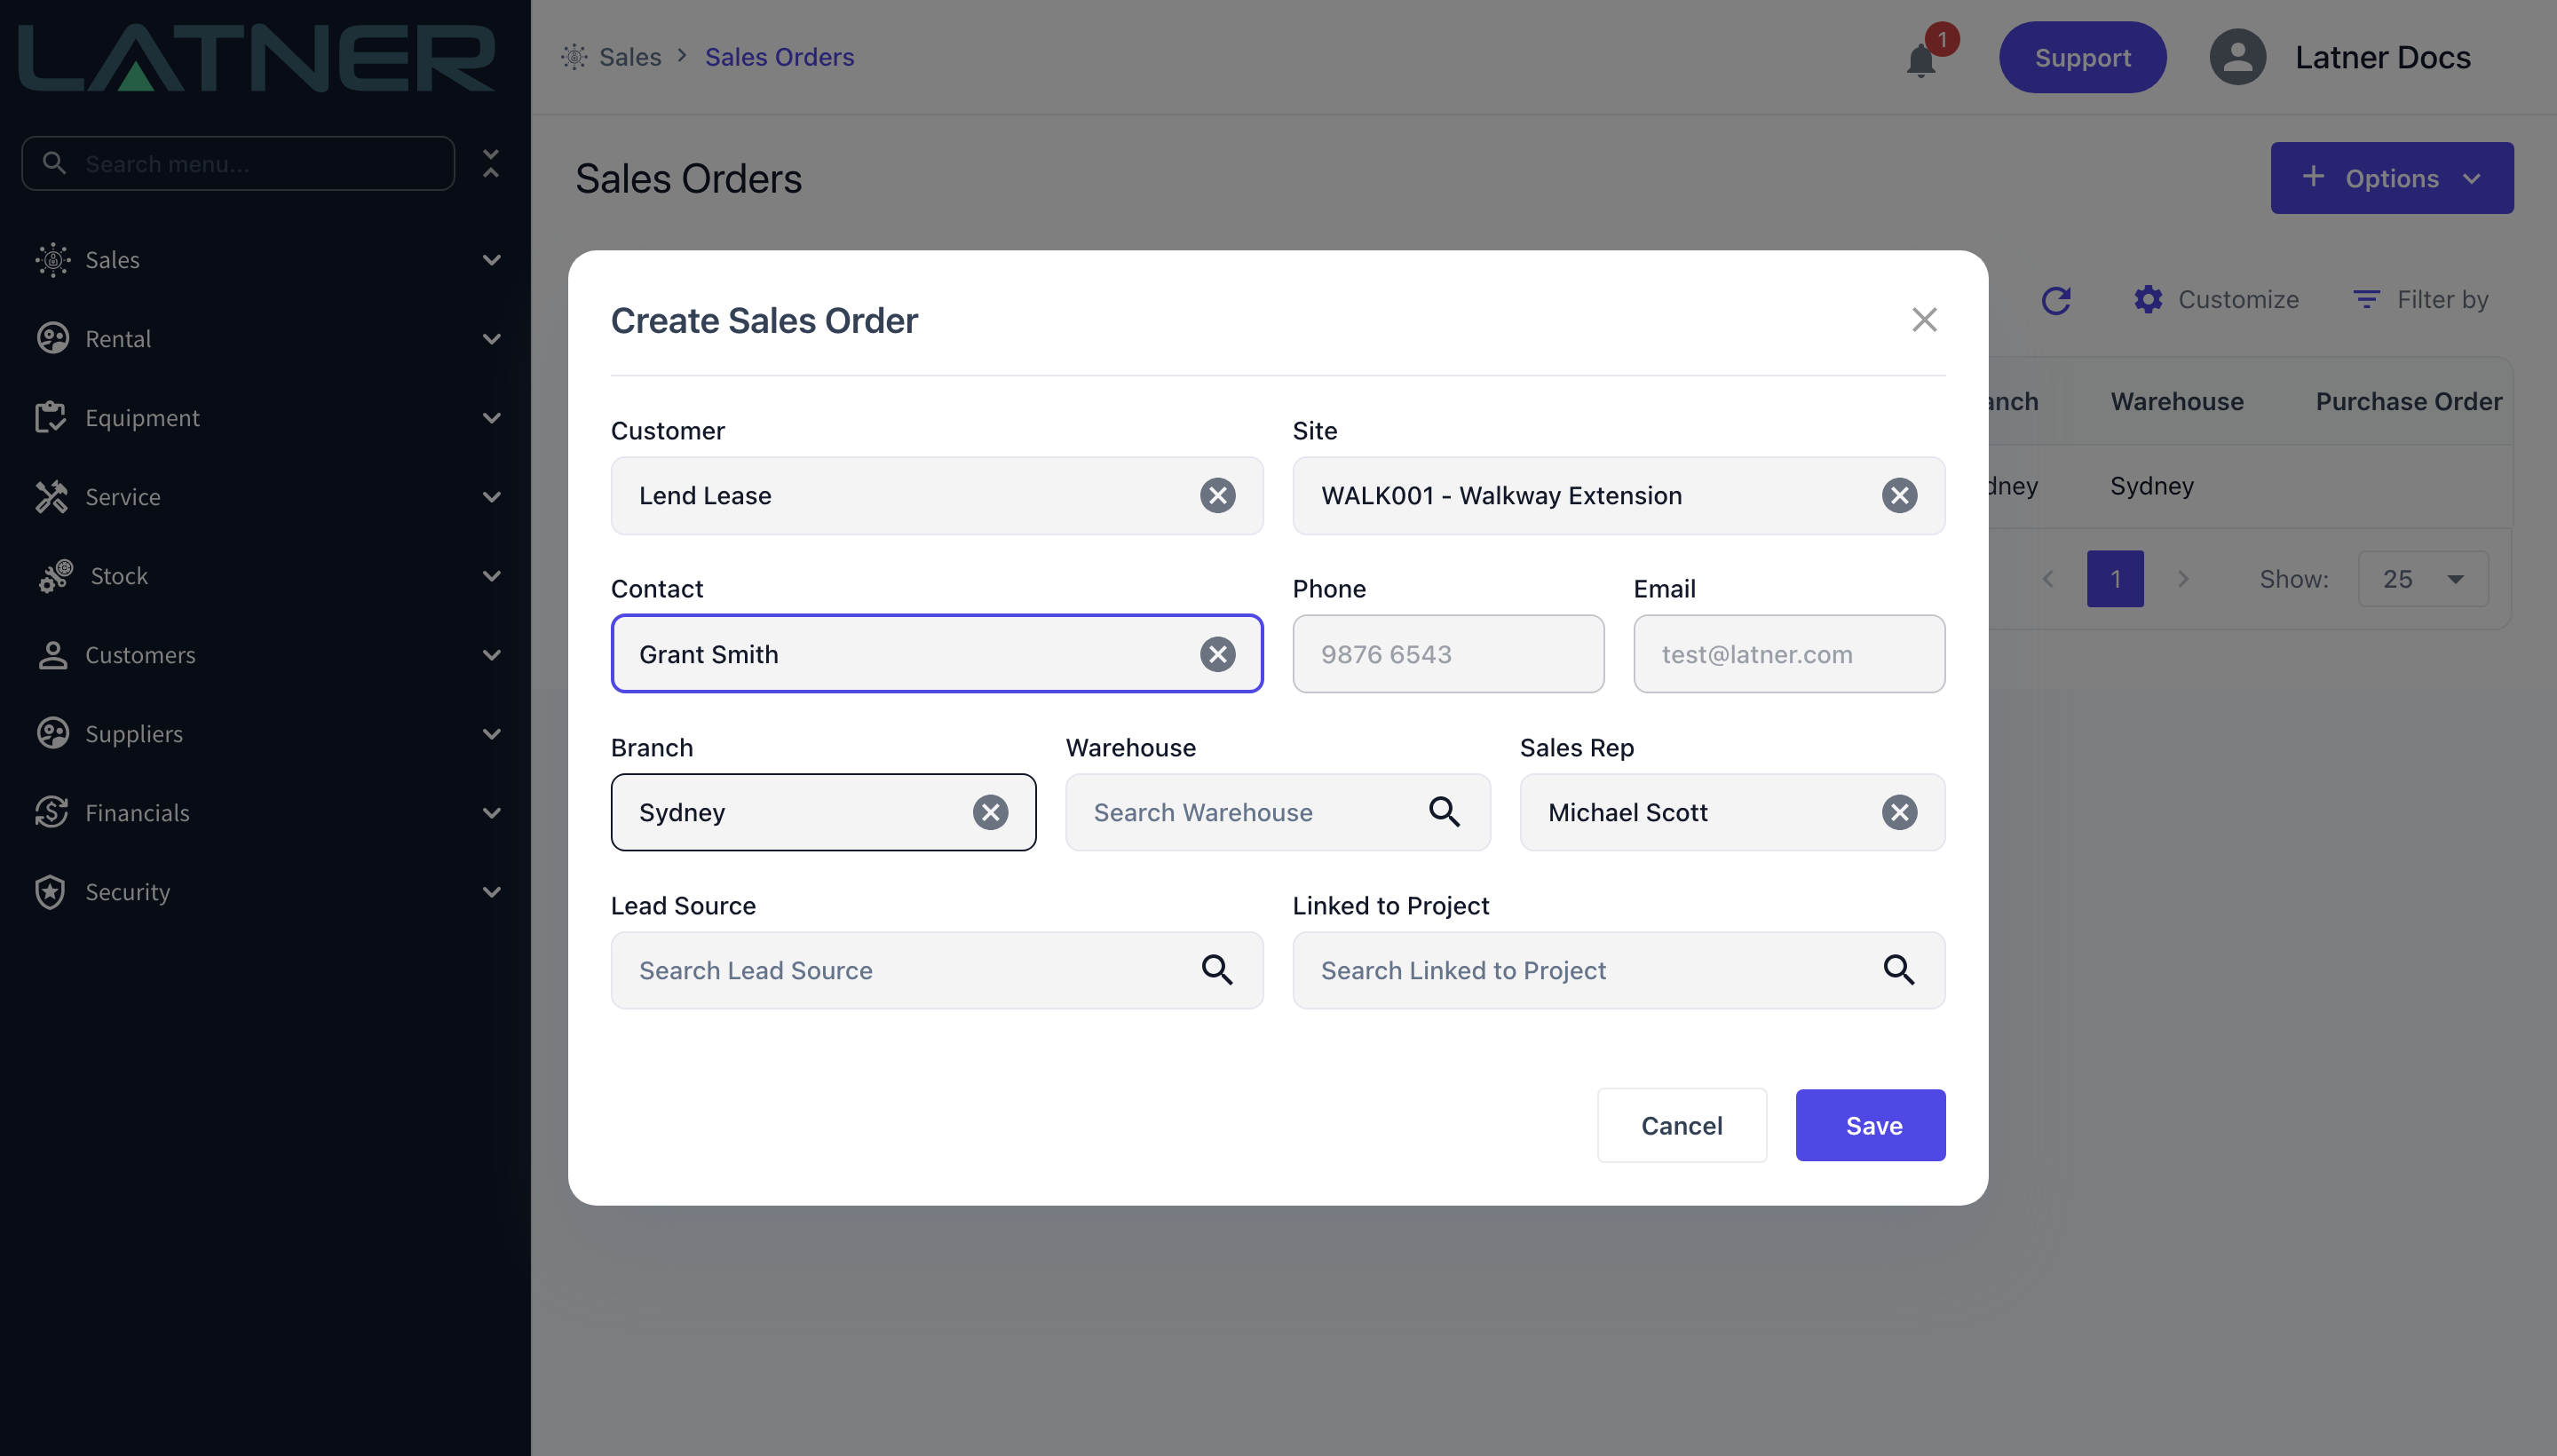
Step 5 - Check the branch, warehouse and sales rep
-
Branch - required. Pre-filled with your branch; changing it clears the warehouse.
-
Warehouse - required. Only warehouses belonging to the selected branch are listed. If you pick a warehouse before a branch, the branch is filled in from it.
-
Sales Rep - optional, and pre-filled from the customer. Use Create New in the search to add a rep who isn't set up yet.
Step 6 - Record where the sale came from
-
Lead Source - required. How the sale came to you, for example Existing Customer or Website Enquiry.
-
Linked to Project - optional, and only shown when Show Link to Project Field When Creating Sales Orders is enabled. Only projects that are in progress are listed.
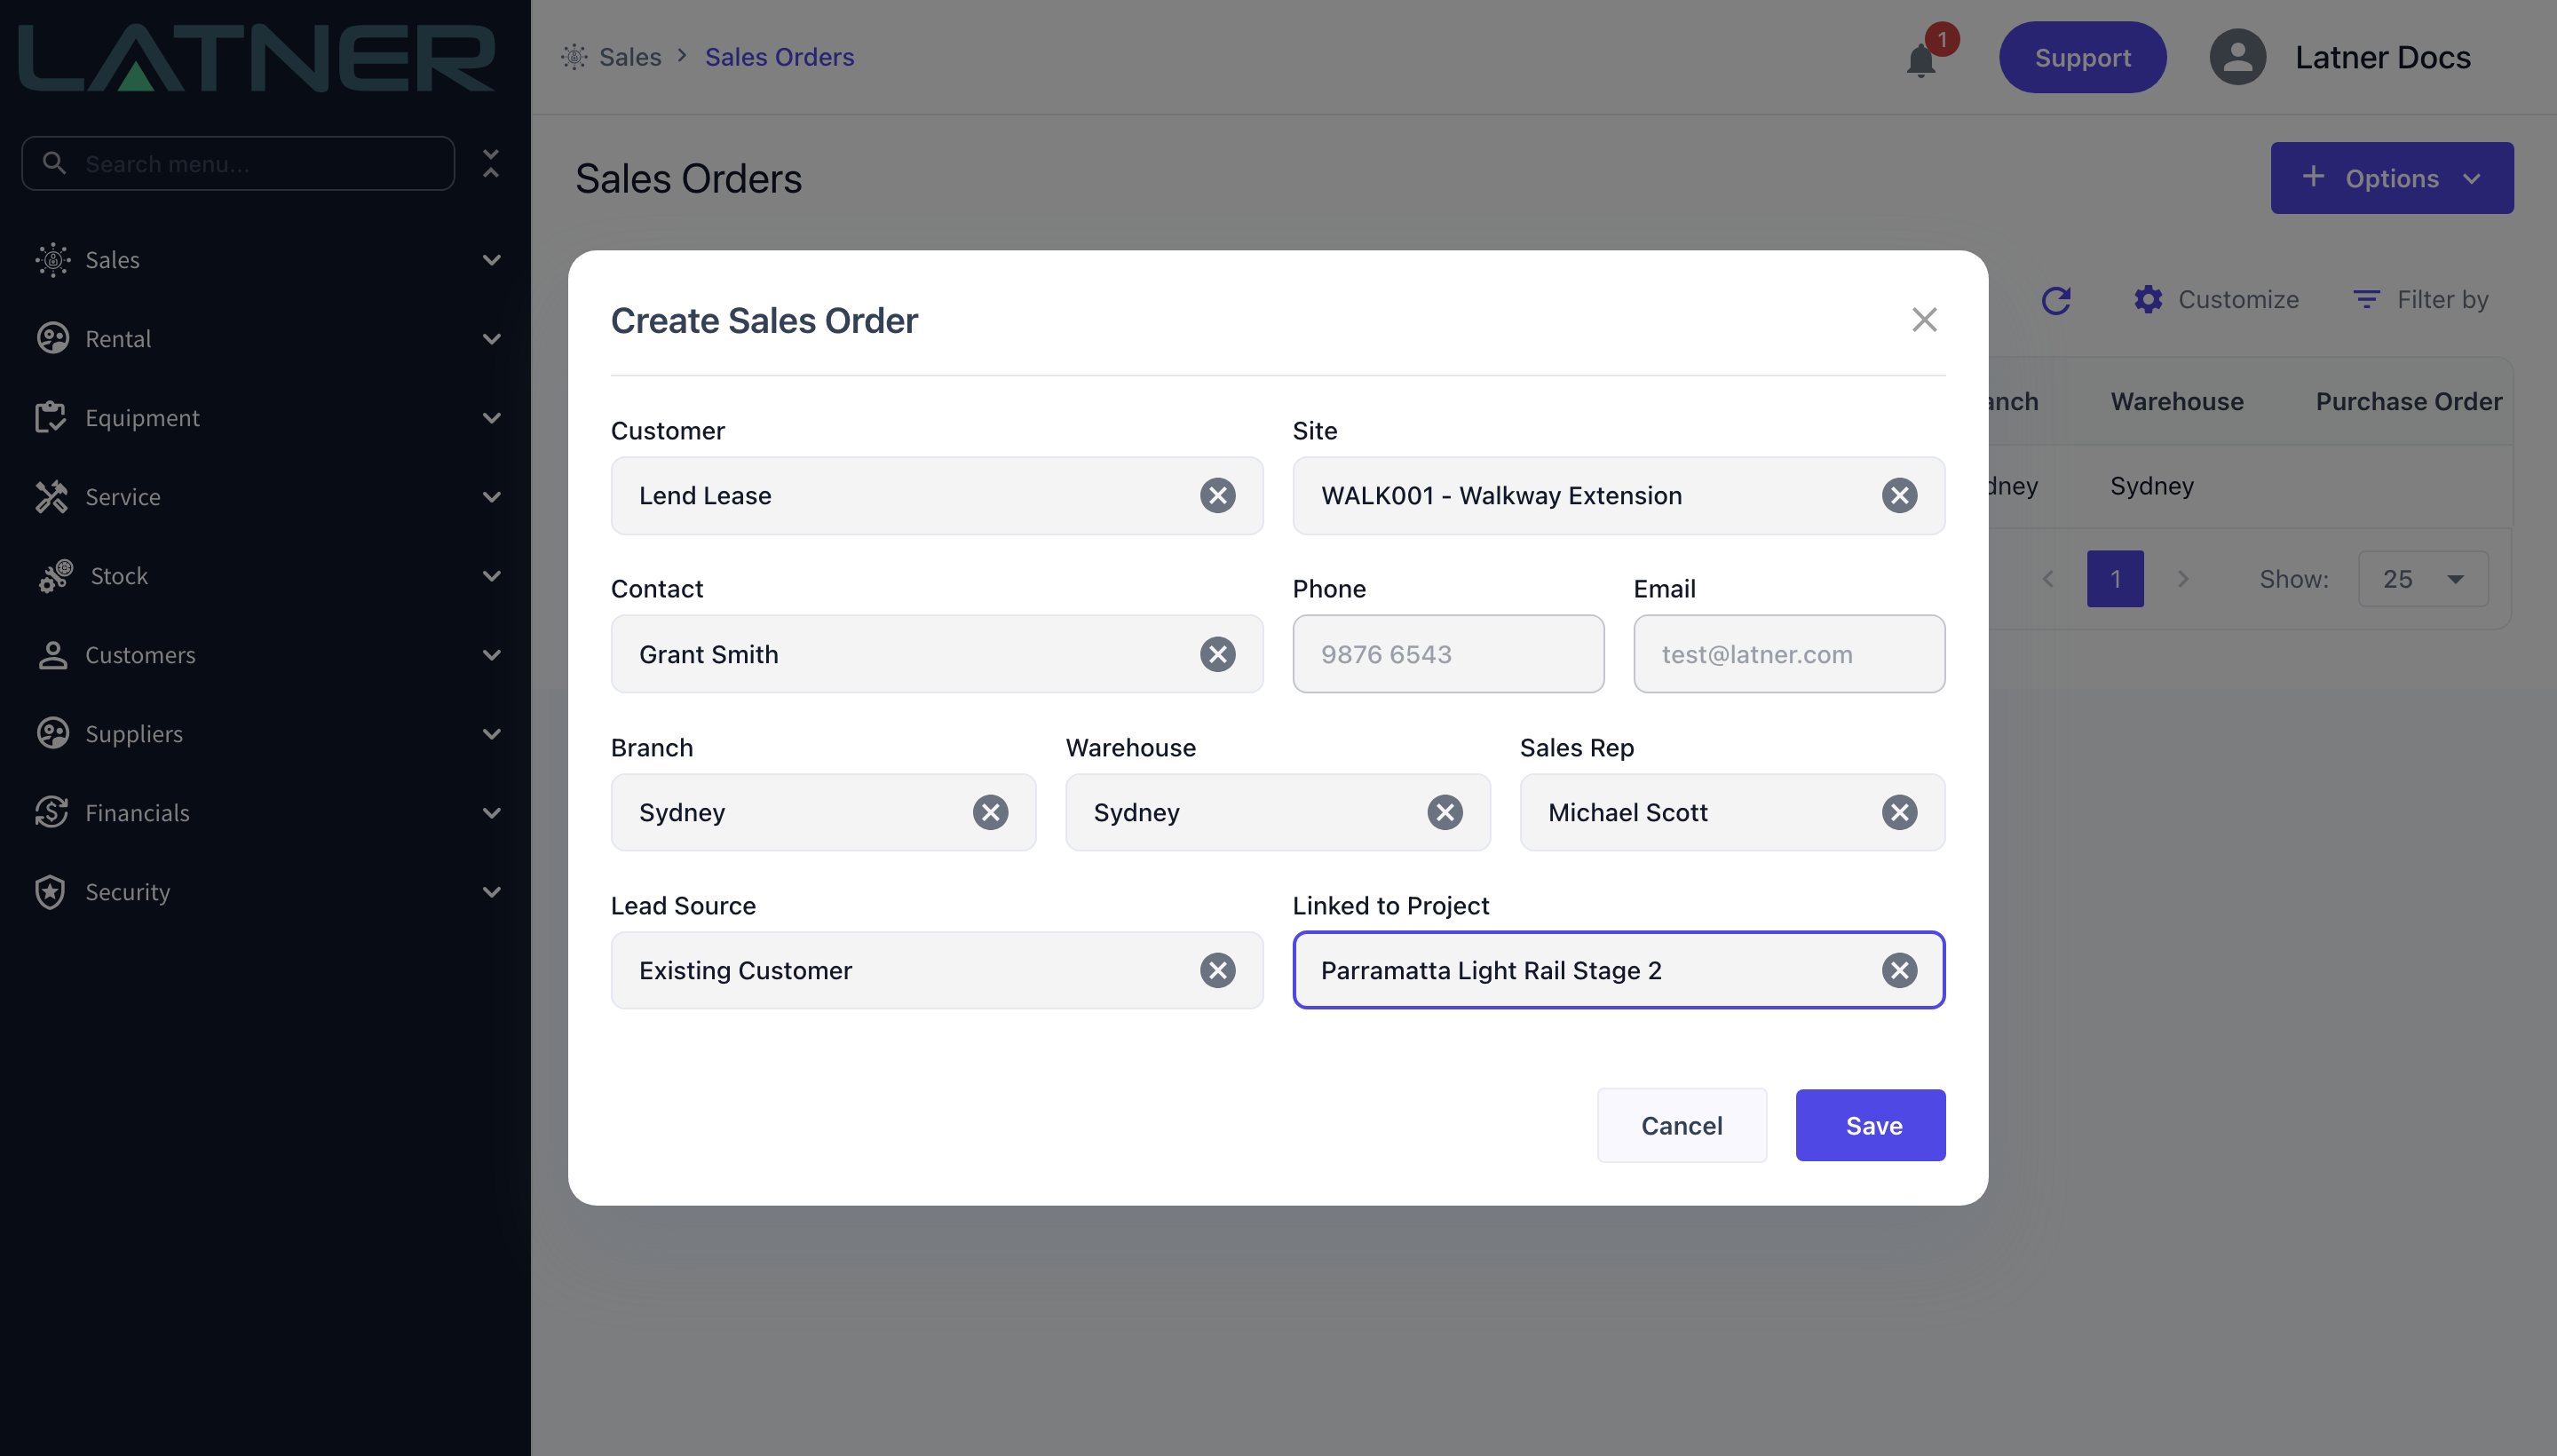
Step 7 - Save
Select Save. Latner allocates the sales order number and opens the new sales order.
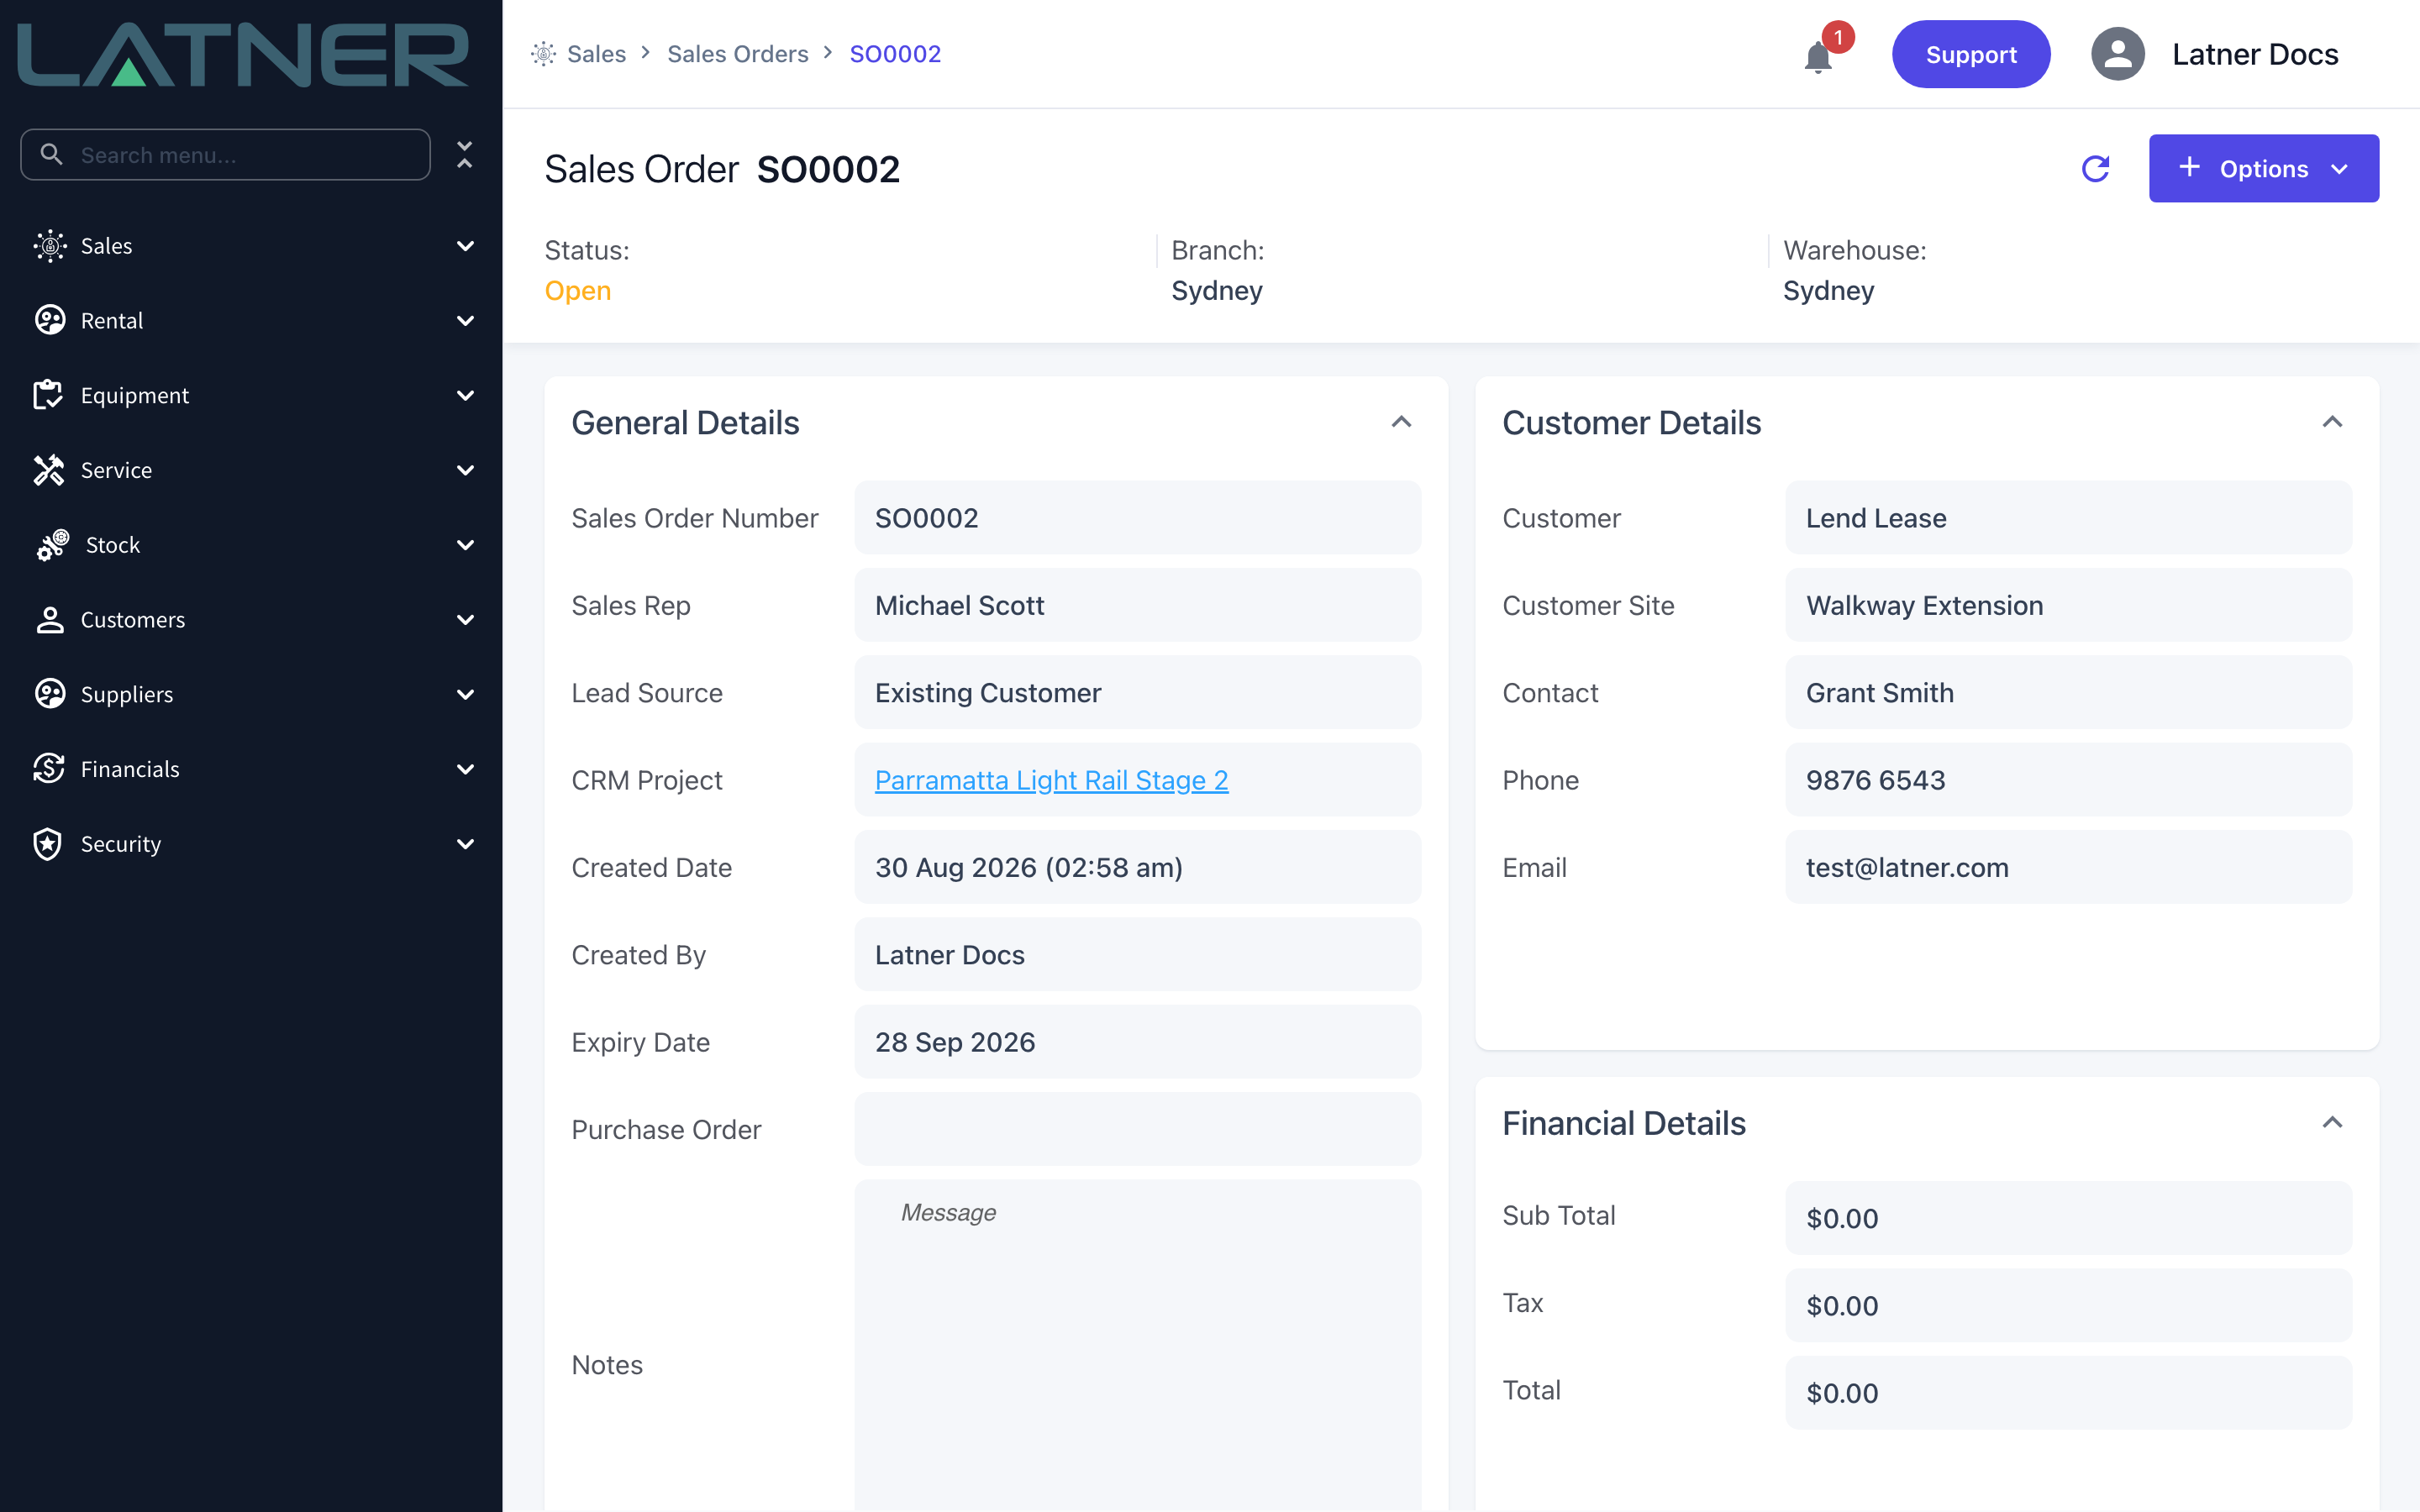
After Creation
-
The sales order opens on its own screen, numbered and with the status Open.
-
Sub Total, Tax and Total sit at $0.00 and are recalculated every time a line is added, changed or removed. The tax code applied is the one on the customer's record.
-
Expiry Date is set for you about 30 days ahead. You can change it, along with Sales Rep, Lead Source, CRM Project, Purchase Order and Notes, directly on the General Details card.
-
Customer Site and Contact can still be changed on the Customer Details card while the order is open.
-
The tabs along the bottom - Details, Inspections, Transport, CRM Activities, Invoices, Purchase Orders, Sales Order PDF History, Sent Emails and Documents - fill in as the sale progresses.
-
Most of the Options menu is greyed out until the order has at least one line. Add one with Options › Add Sales Order Detail, and generating the PDF, emailing, raising a purchase order and invoicing all become available.
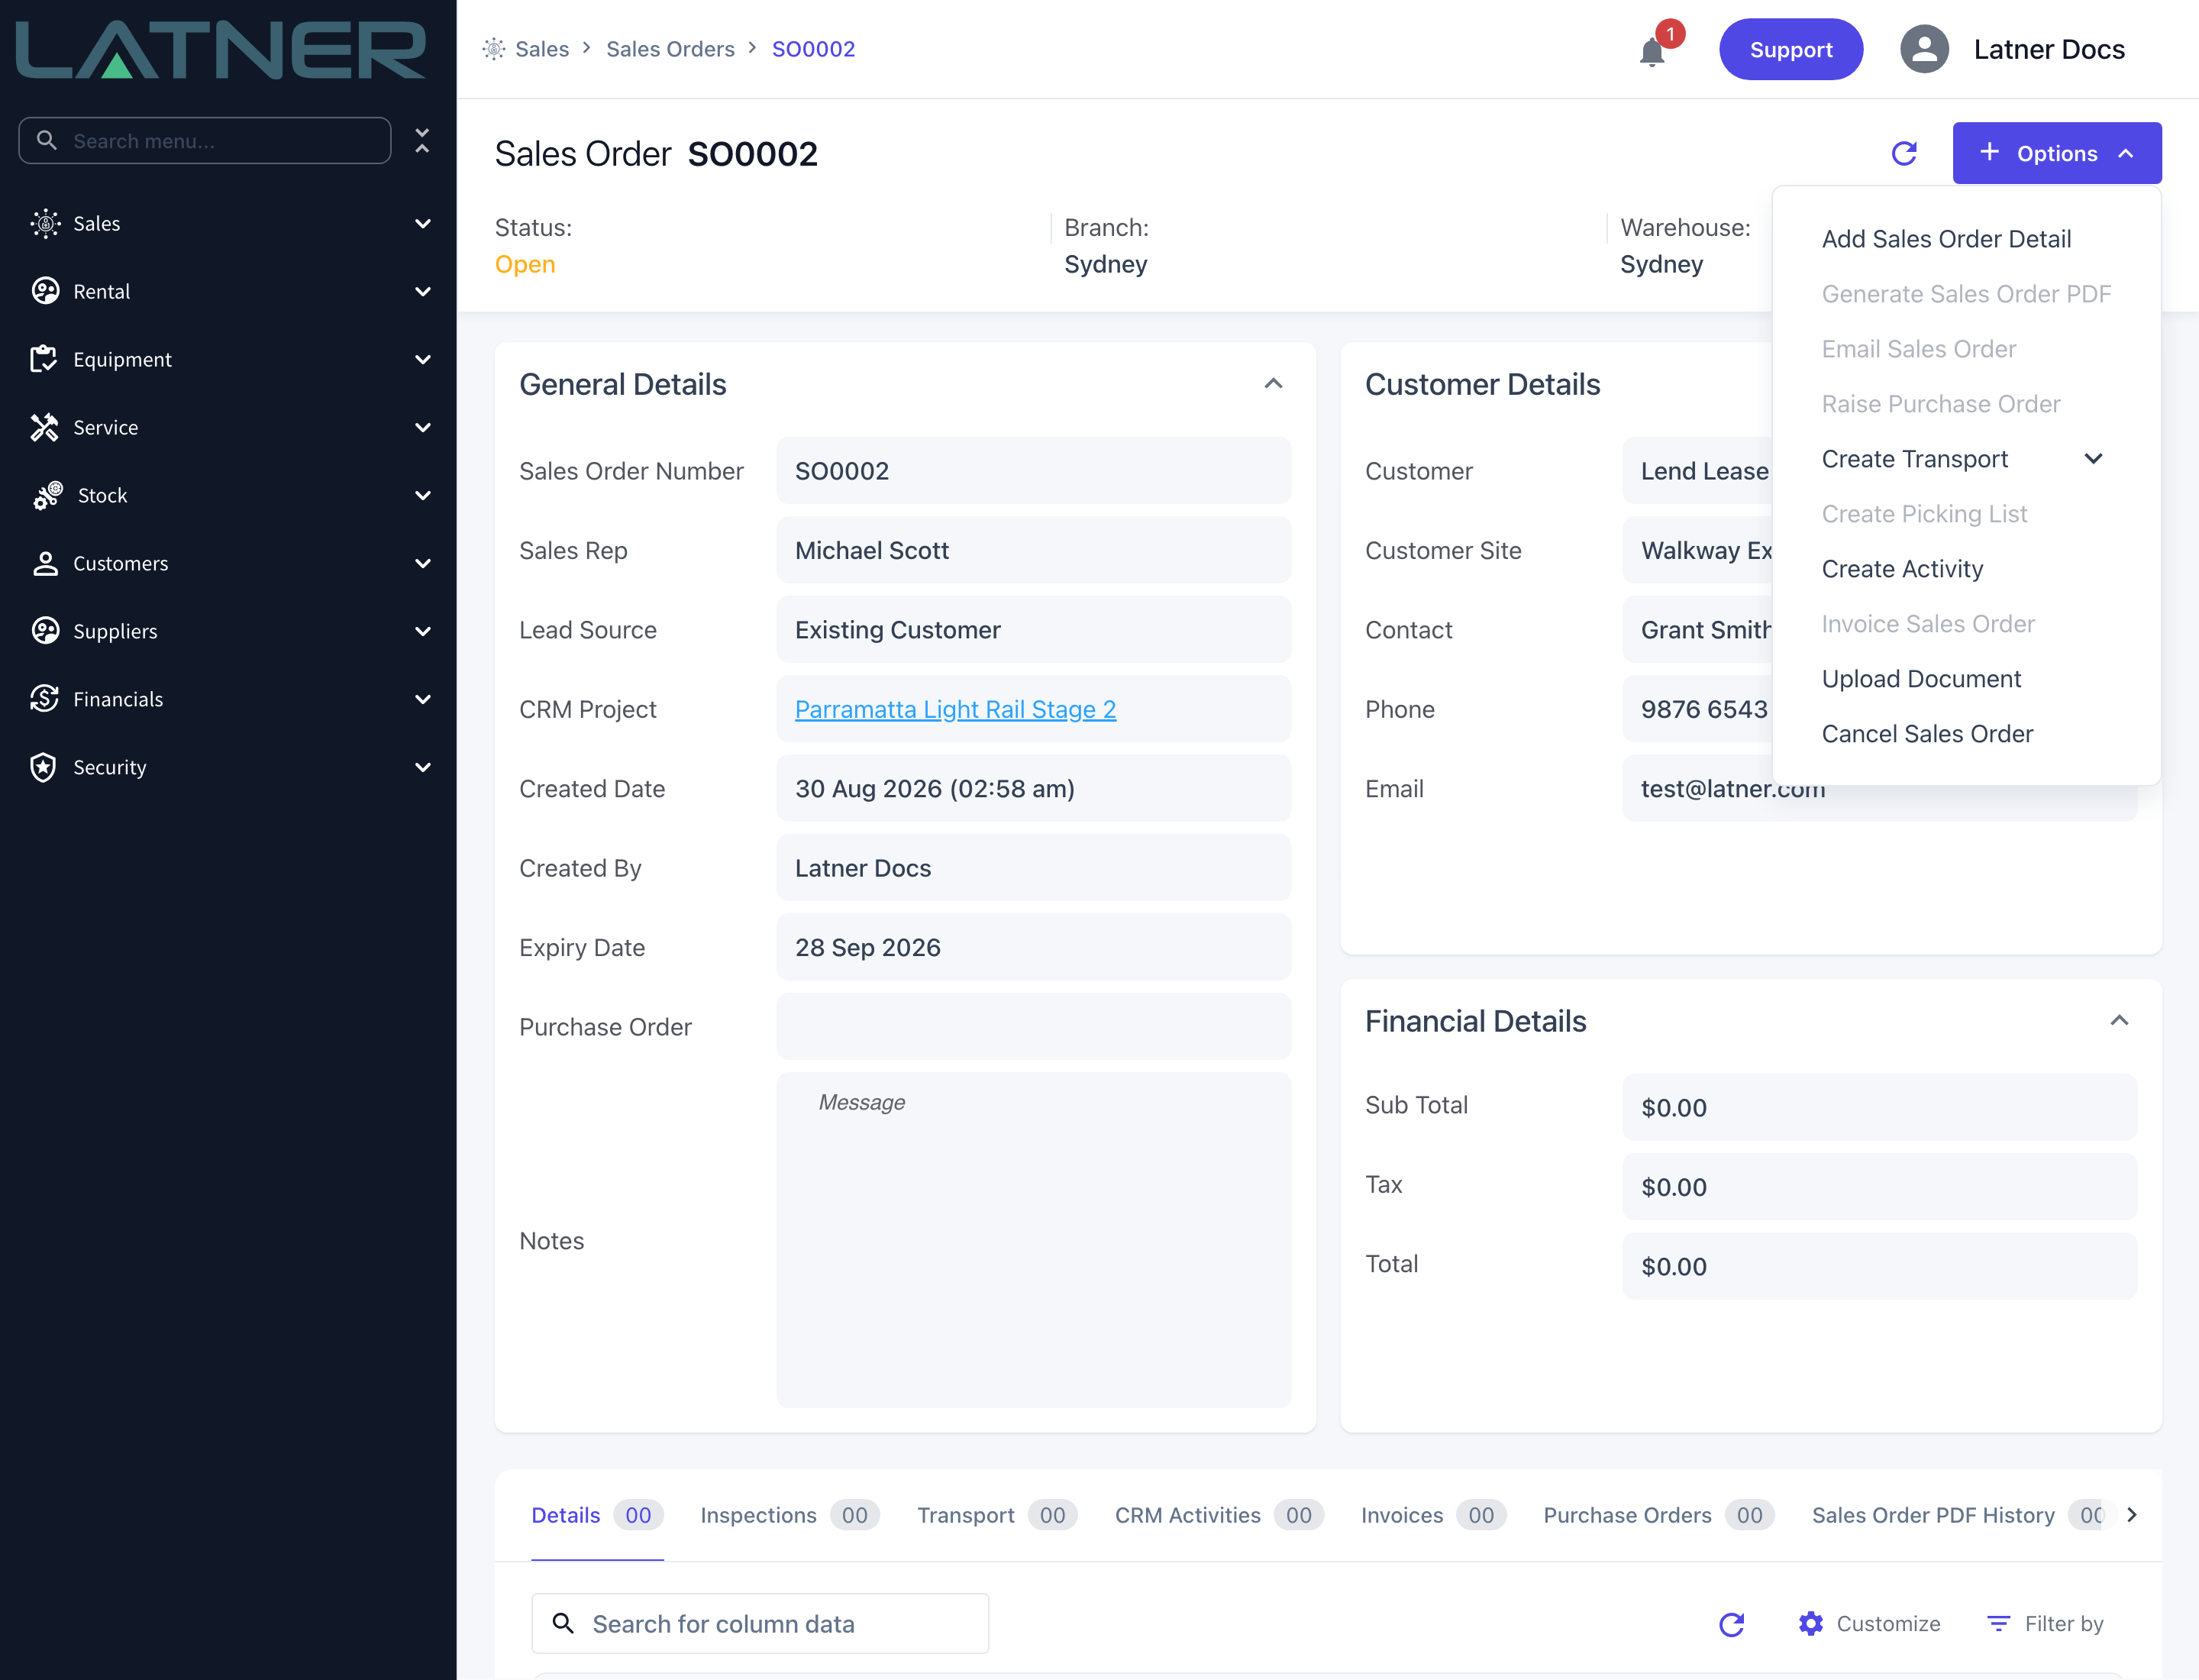
The customer can't be changed once the sales order is saved - it is display-only from then on. If you picked the wrong one, use Options › Cancel Sales Order and raise a new order against the right customer.
FAQs
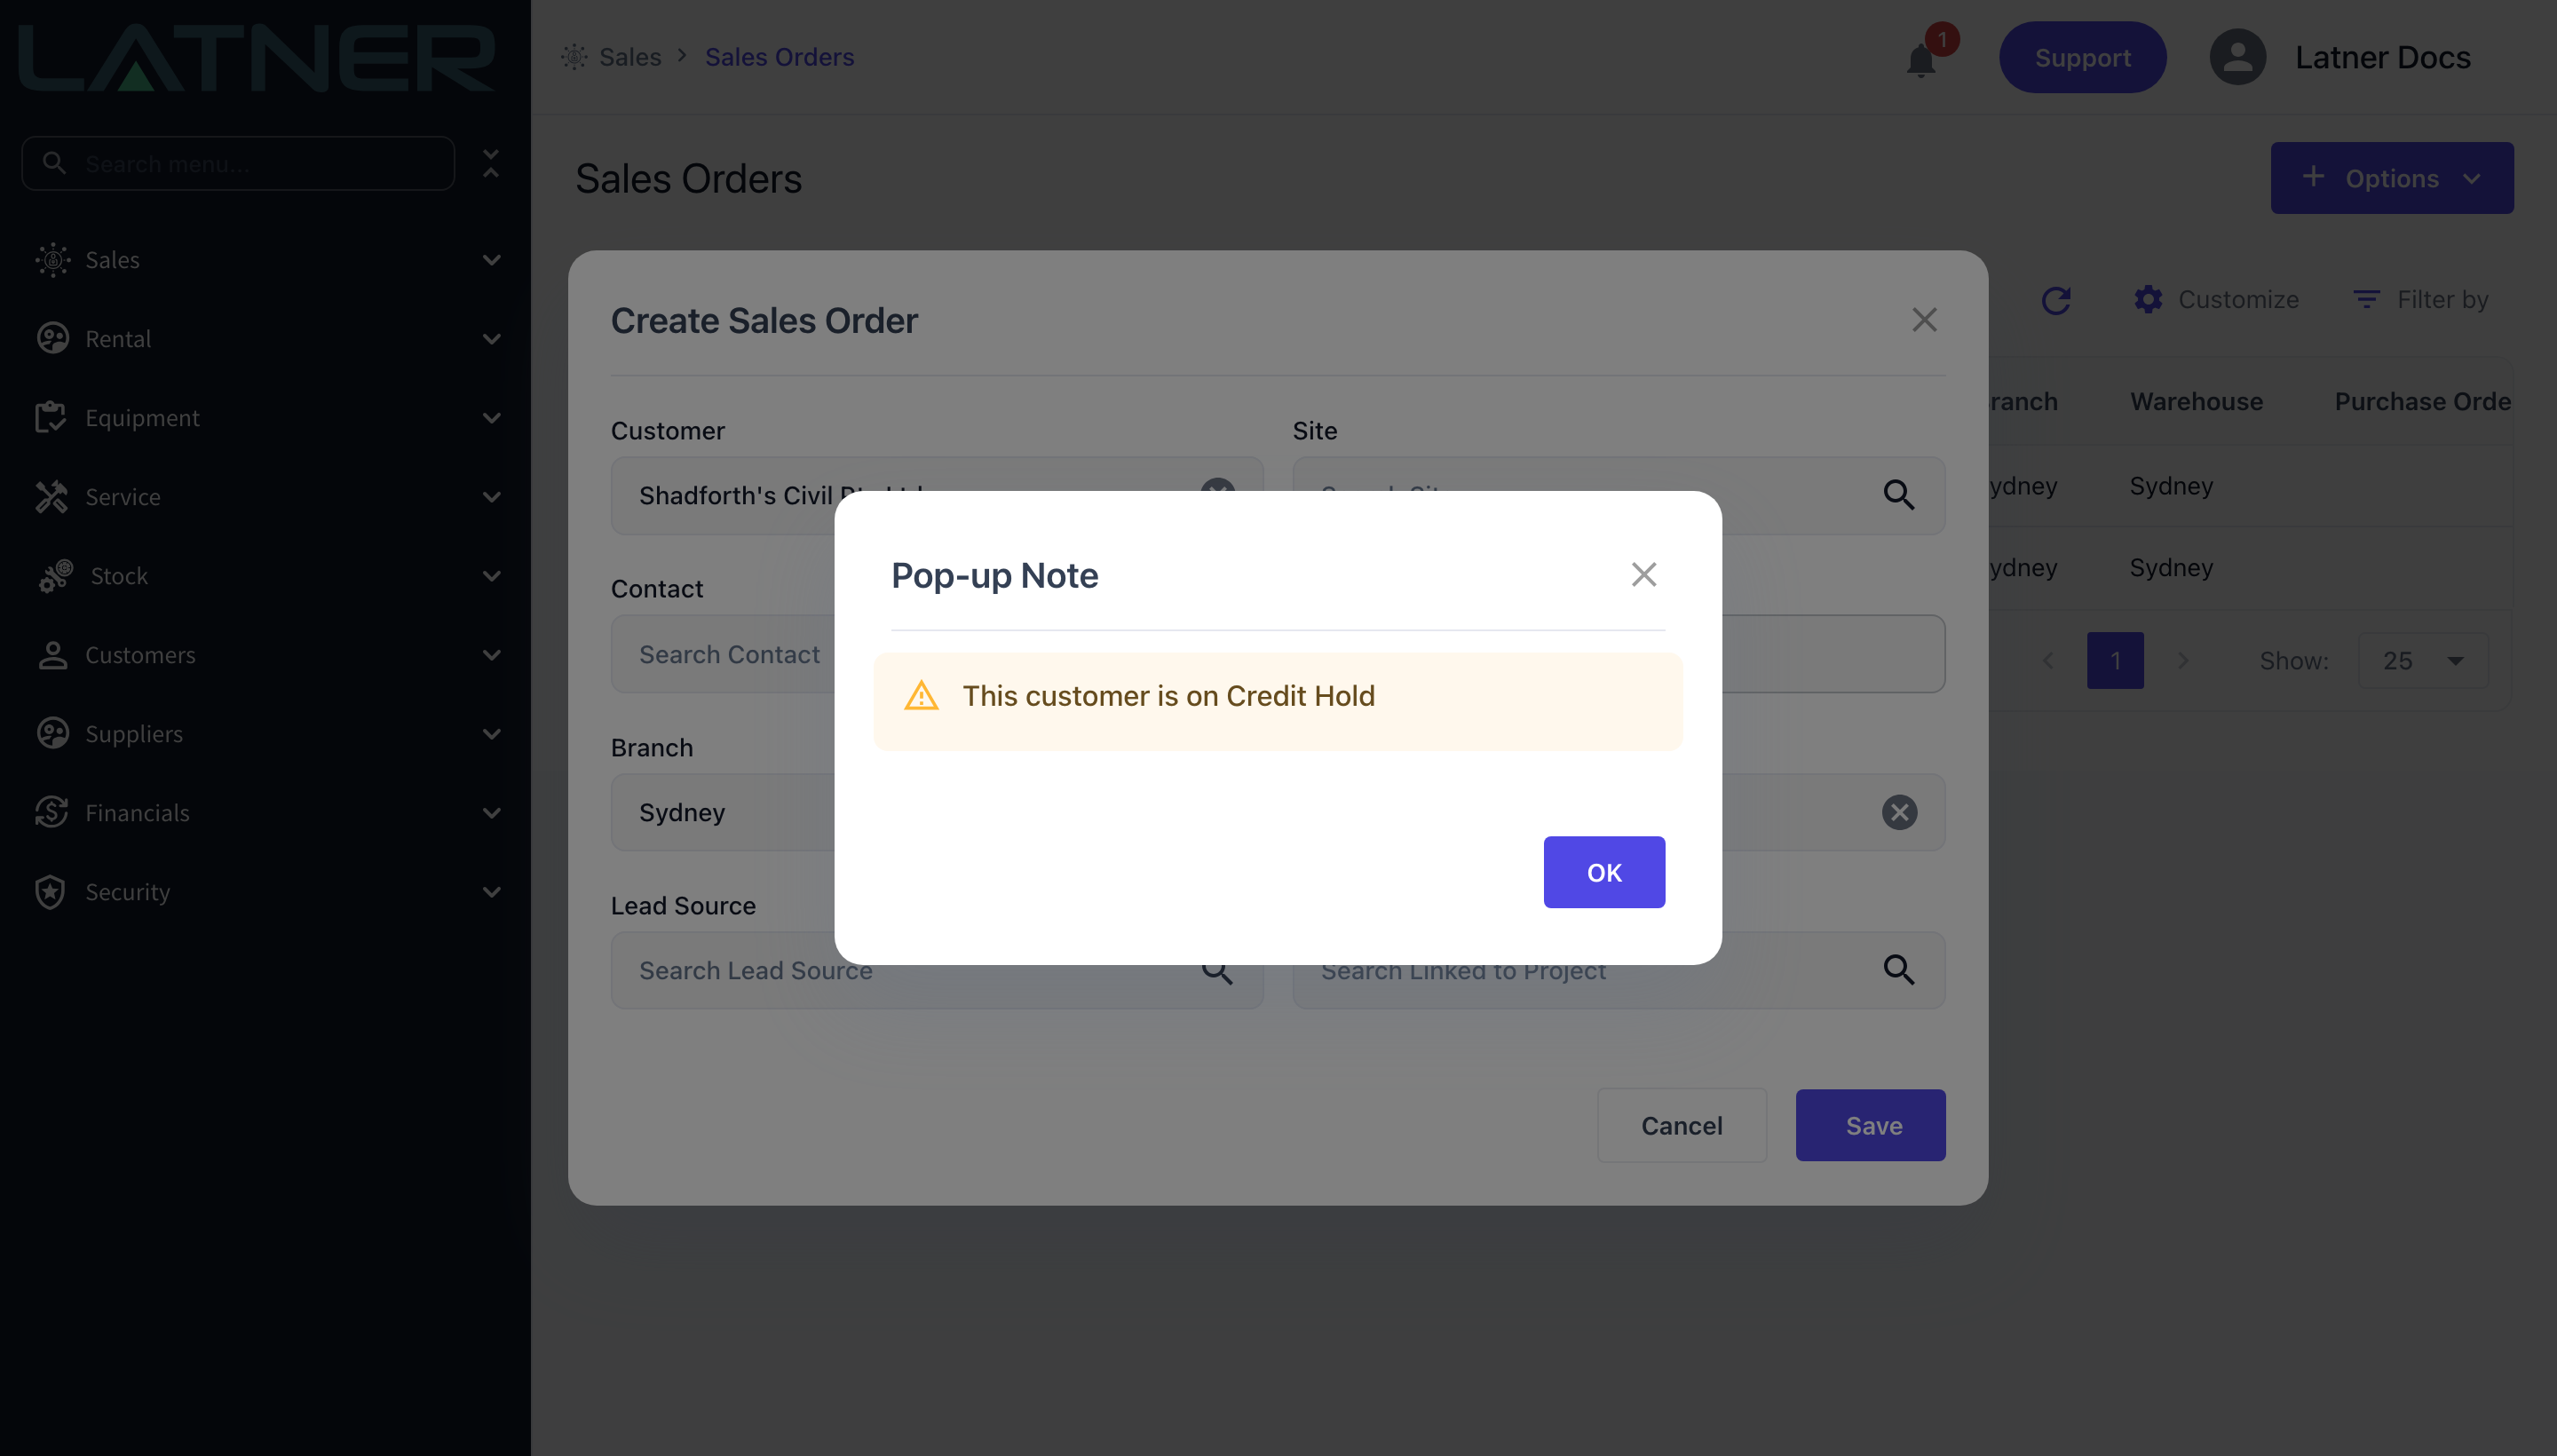
I picked a customer and a Pop-up Note appeared saying they are on credit hold. Can I still raise the sales order?
Yes. The pop-up is a warning, not a block - dismiss it with OK and carry on. It also appears for customers who have a pop-up note recorded against them, so read it before you continue.
Watch the Demo
Prefer to watch it? Step through the same flow here.