
Once your assets are set up, depreciation is calculated one asset at a time or across the whole fleet in a Depreciation Run, then posted and synced to your accounting system.
Overview
A depreciation run is not a single button. It is four steps, and only the last two change anything you cannot walk away from - which is deliberate, because you get to look at the numbers before you commit to them.
-
Depreciation is calculated monthly, one line per calendar month per asset.
-
Each asset picks up from where it left off, so a newly set-up asset generates its whole catch-up in one run while an up-to-date one generates a single month.
-
The bulk run goes Preview → Create → Post → Sync. Preview writes nothing to your assets.
-
Posting aggregates the lines into a journal and pushes it to every active accounting integration.
-
The tax book is calculated in a separate run and is never posted or synced.
Before You Begin
|
Requirement |
Where to Find It |
|---|---|
|
Activate Asset Management and Depreciation is switched on |
Security › Settings › Global › Financials |
|
The Assets permission |
Security › Configuration › Permission Groups › Financials › Screen |
|
The Asset Financial Details permission, to see purchase prices and book values |
Security › Configuration › Permission Groups › Financials › Field |
|
Assets set up and Active |
Financials › Assets, using the Requires Setup quick filter |
|
An accounting integration, if you want journals to sync |
Financials › Configuration › Accounting Integration |
Depreciation cannot be reversed. Once lines have been created they cannot be deleted, and once they have been posted the journal has already gone to your accounting system. Preview first, every time, and correct mistakes with Update Book Value rather than expecting an undo.
Calculating Depreciation for a Single Asset
Useful when you have just set one asset up and want to see it catch up without touching anything else.
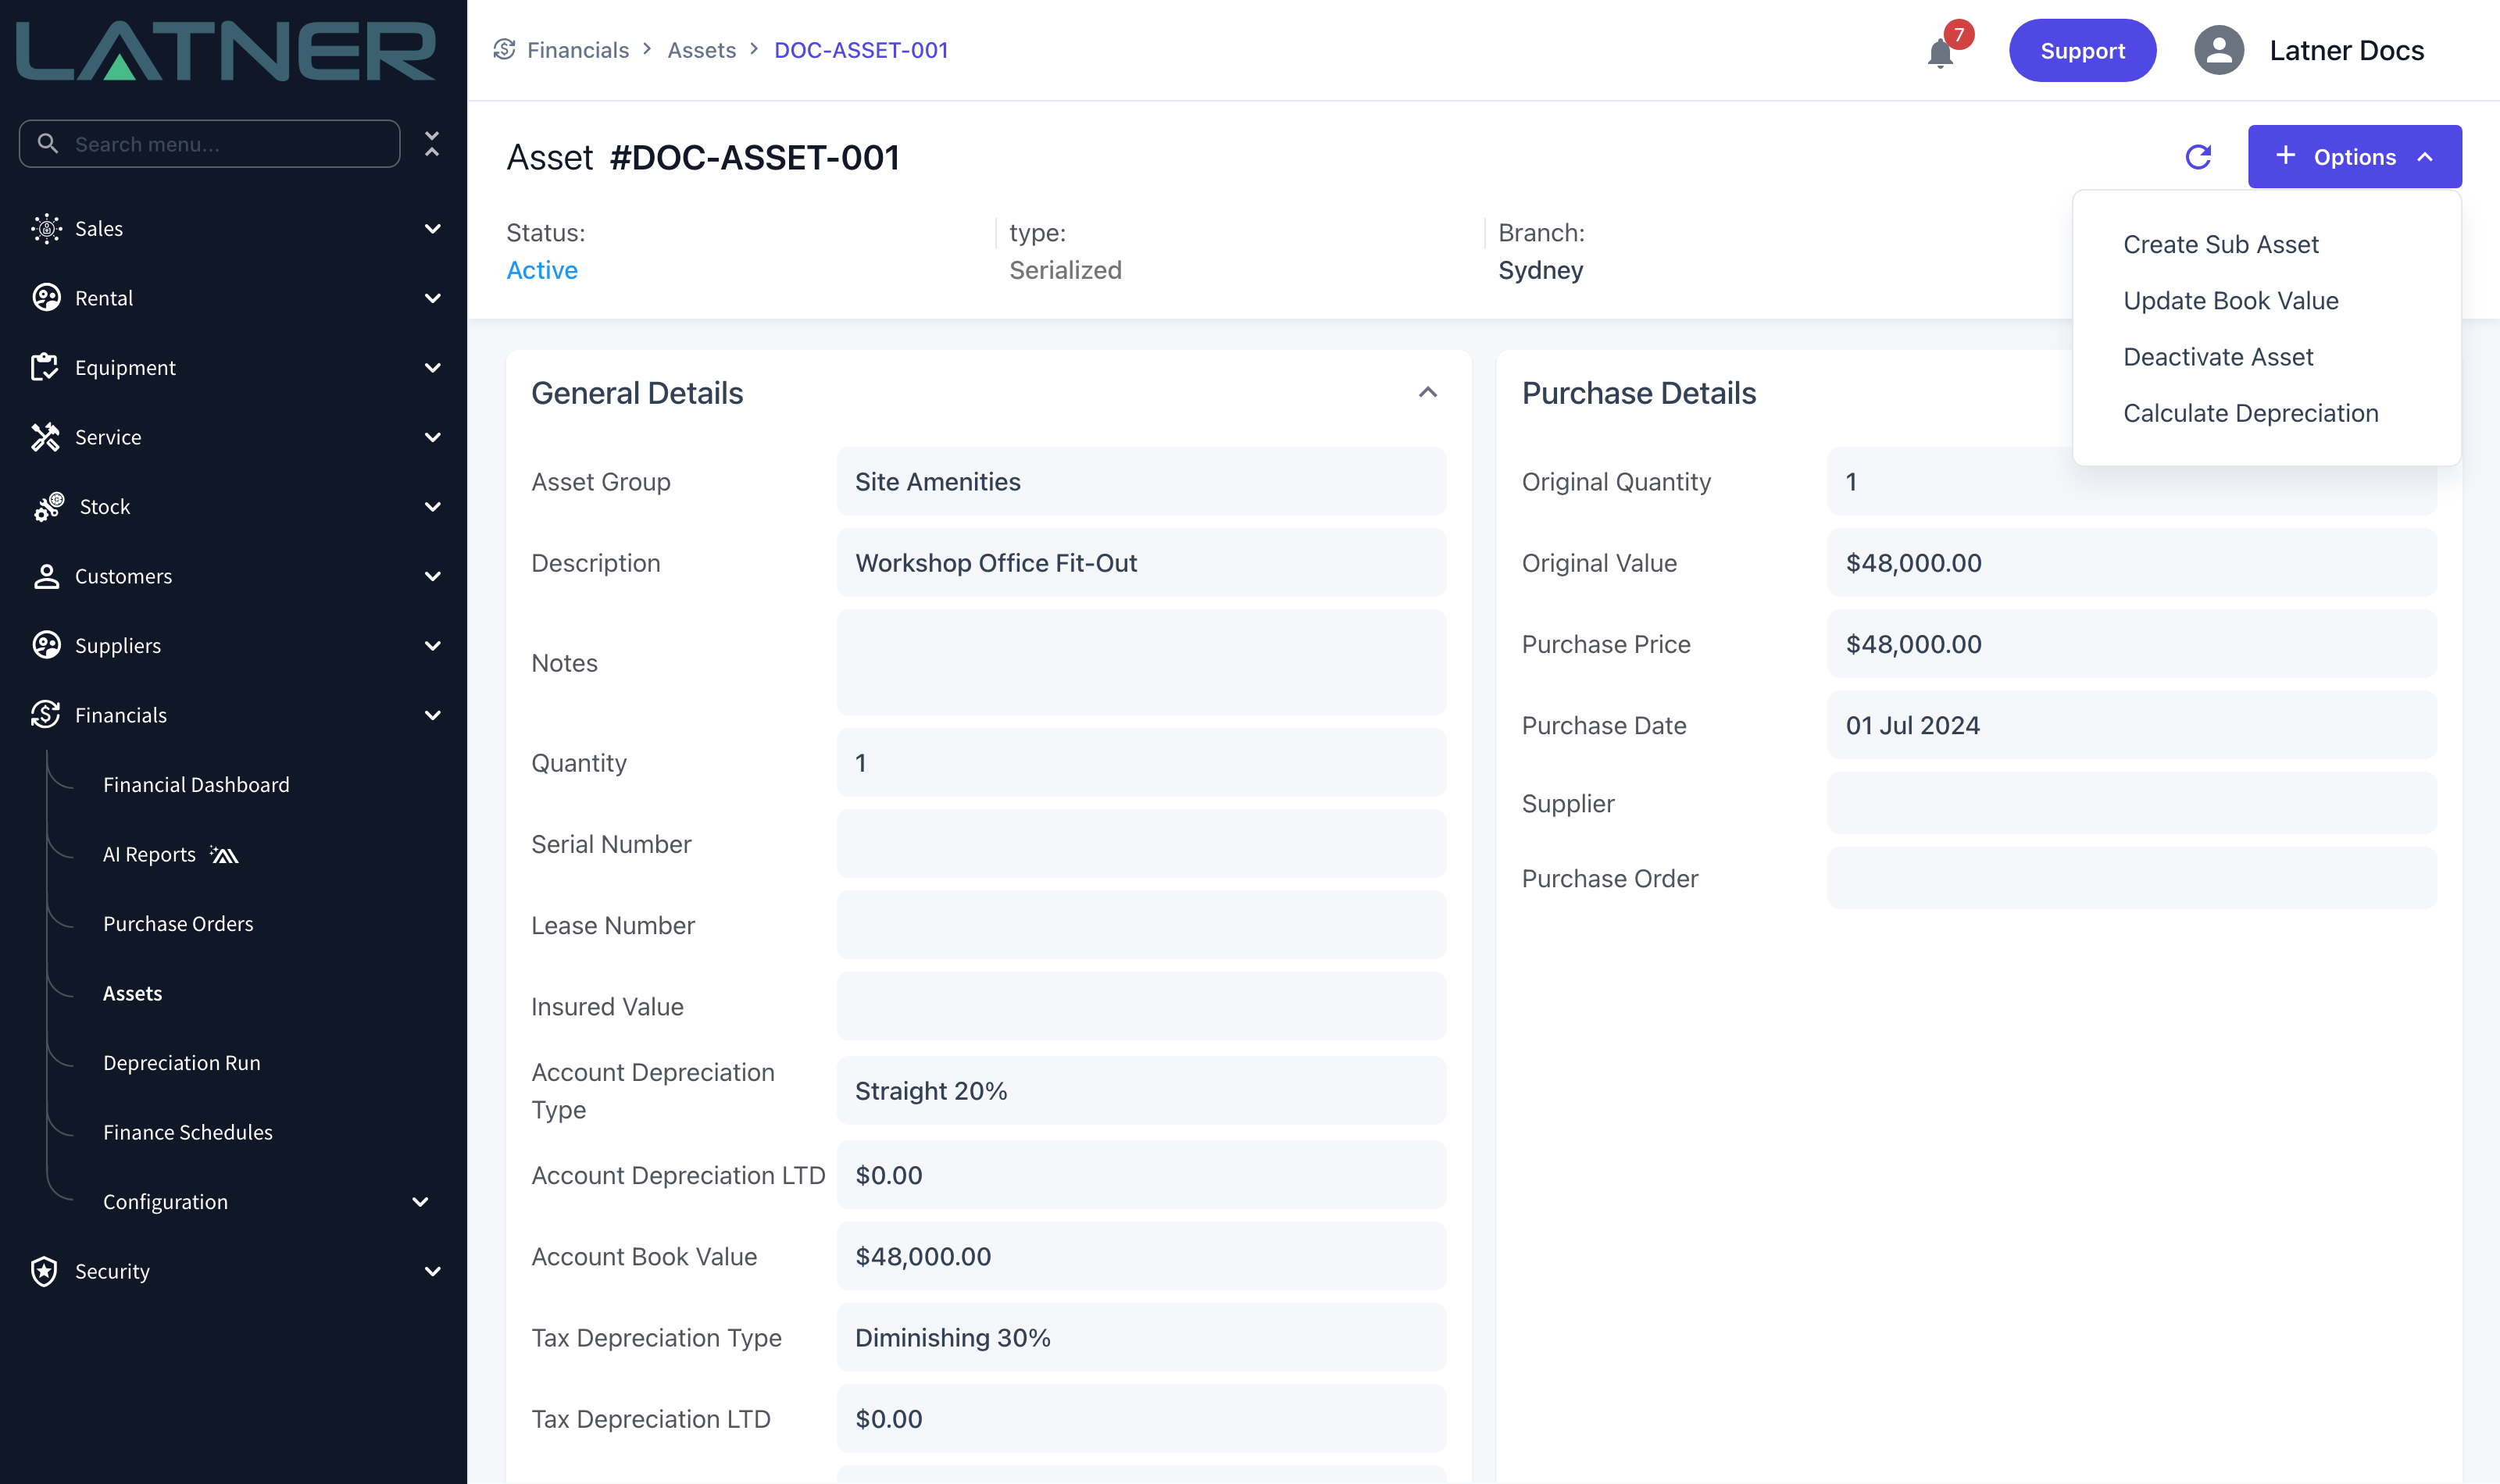
Step 1 - Open the asset and choose Calculate Depreciation
On the asset record, choose Options › Calculate Depreciation. The option is hidden on bulk header assets, because depreciation runs on their sub-assets.
Step 2 - Check the result
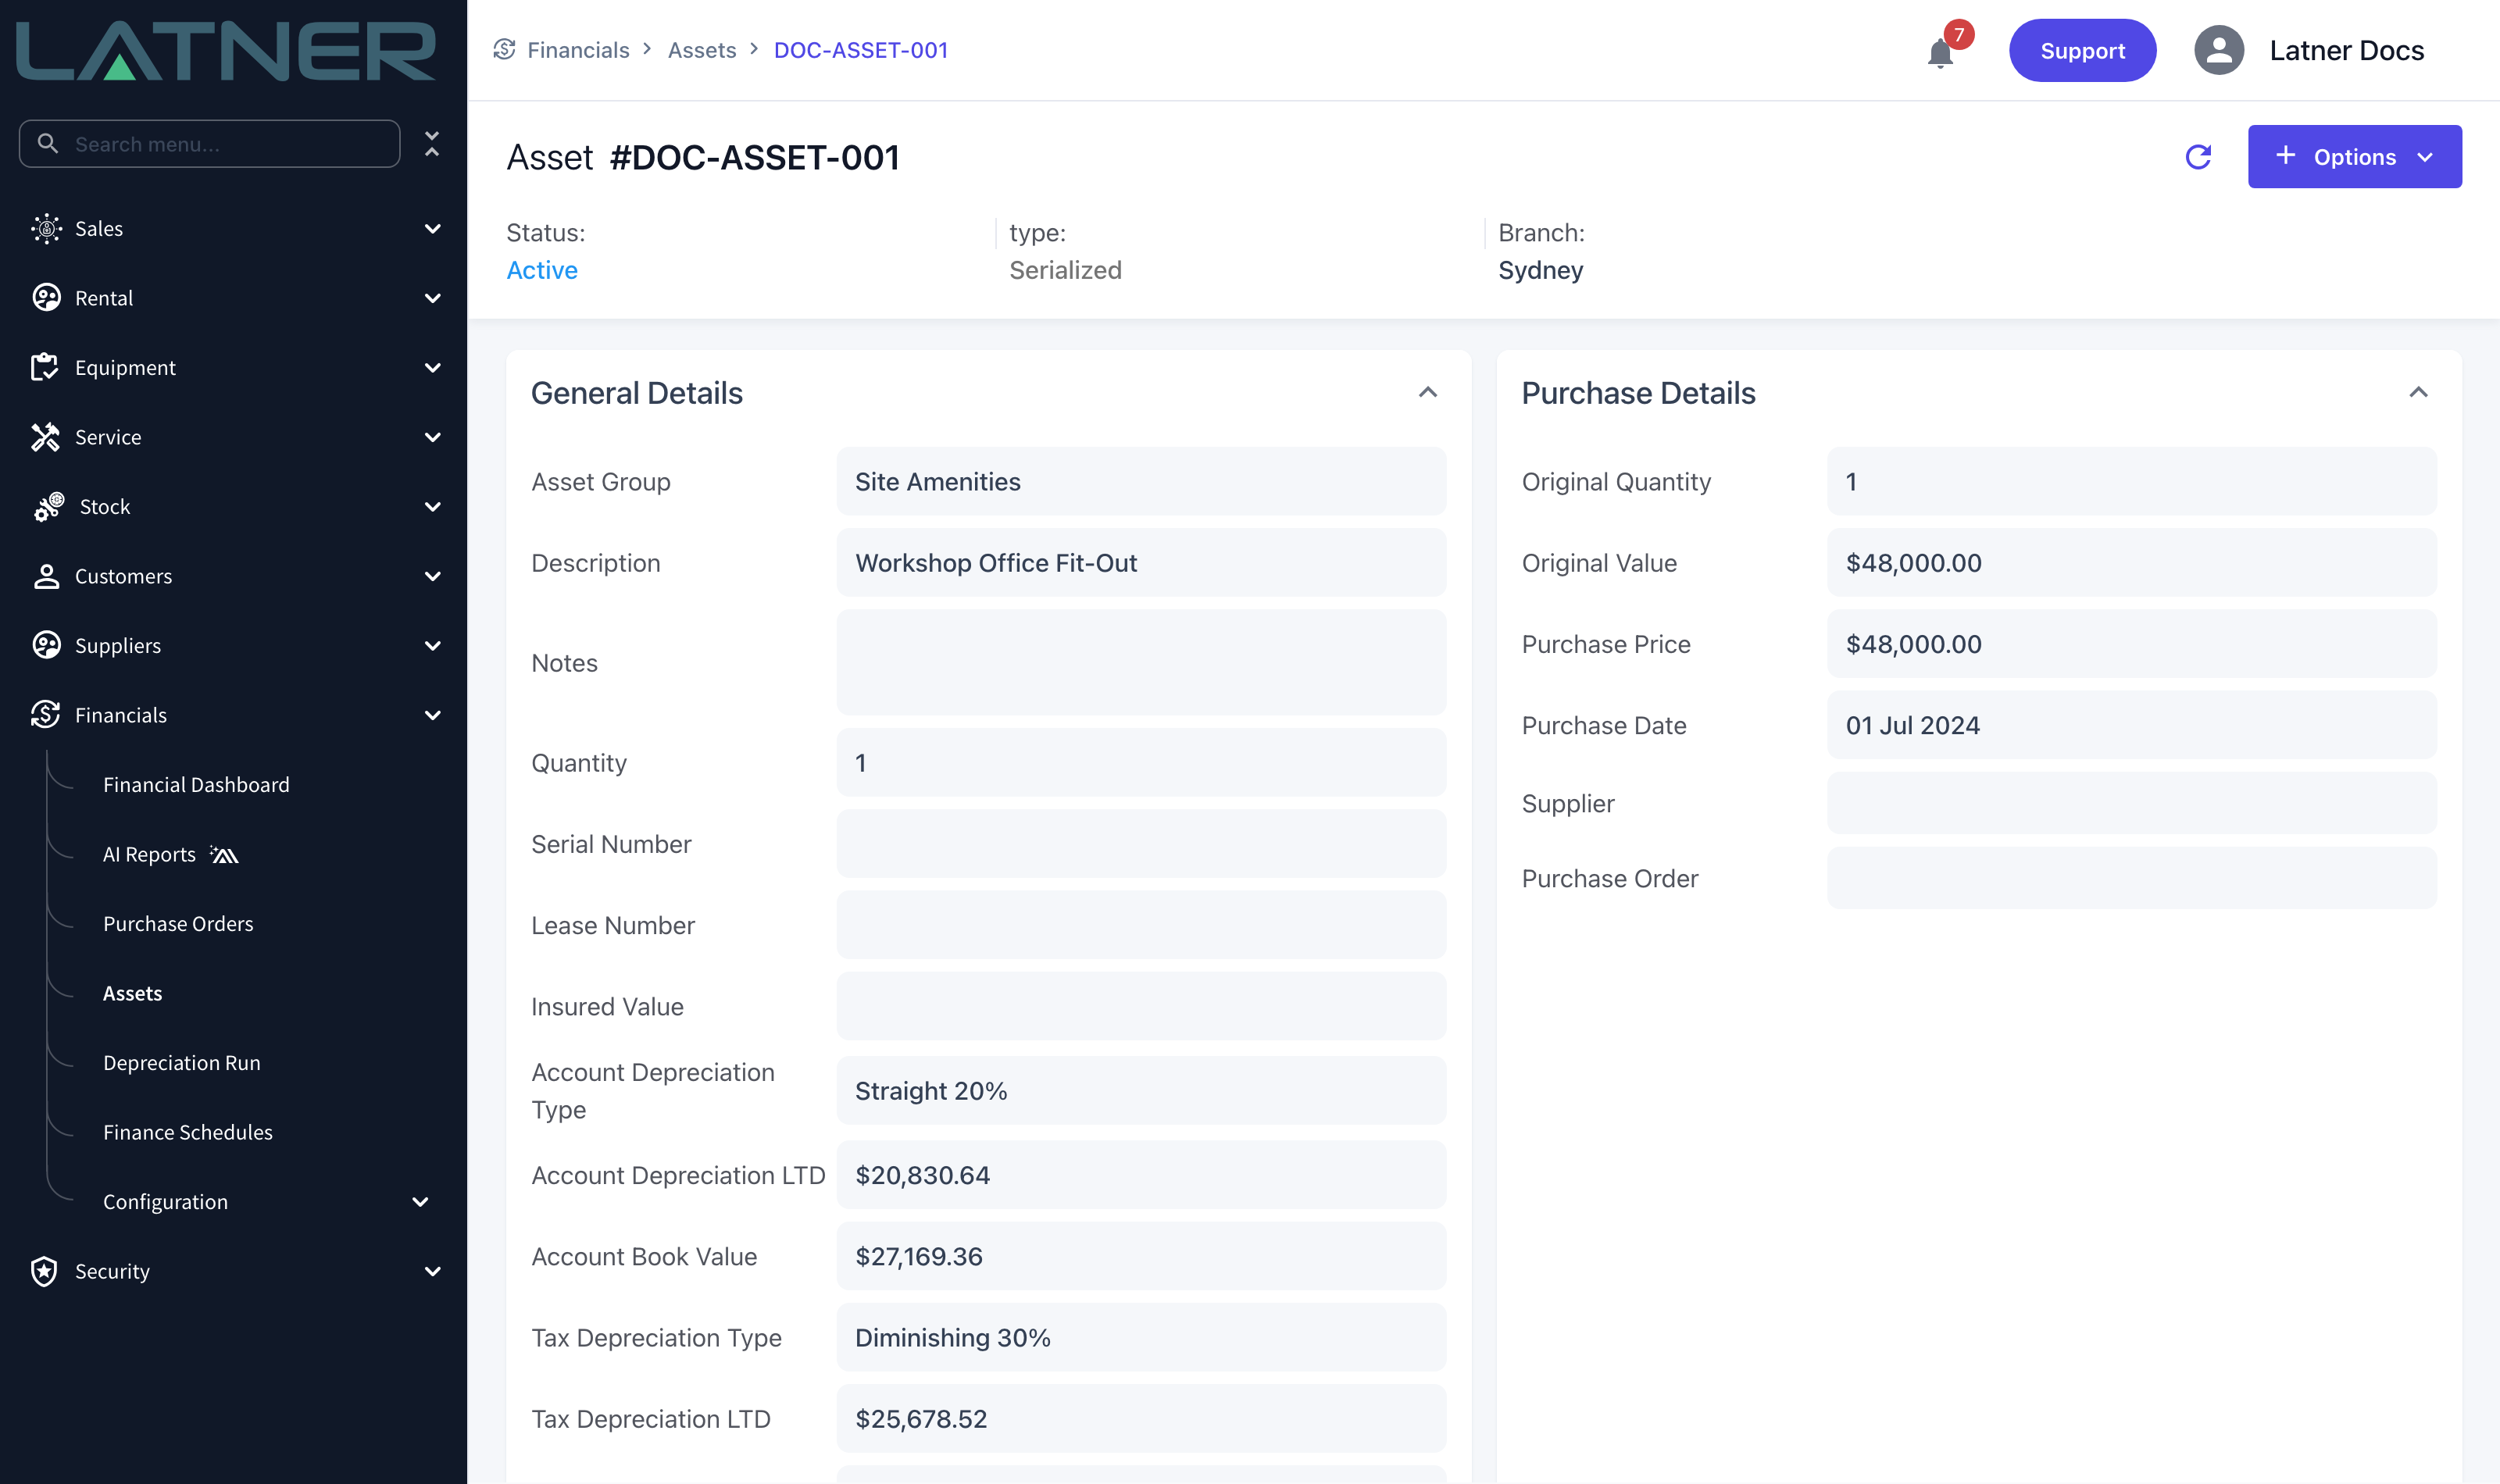
Latner generates one line per month from where the asset last got to, up to the end of last month. The current month is deliberately left out, because it is not finished yet.
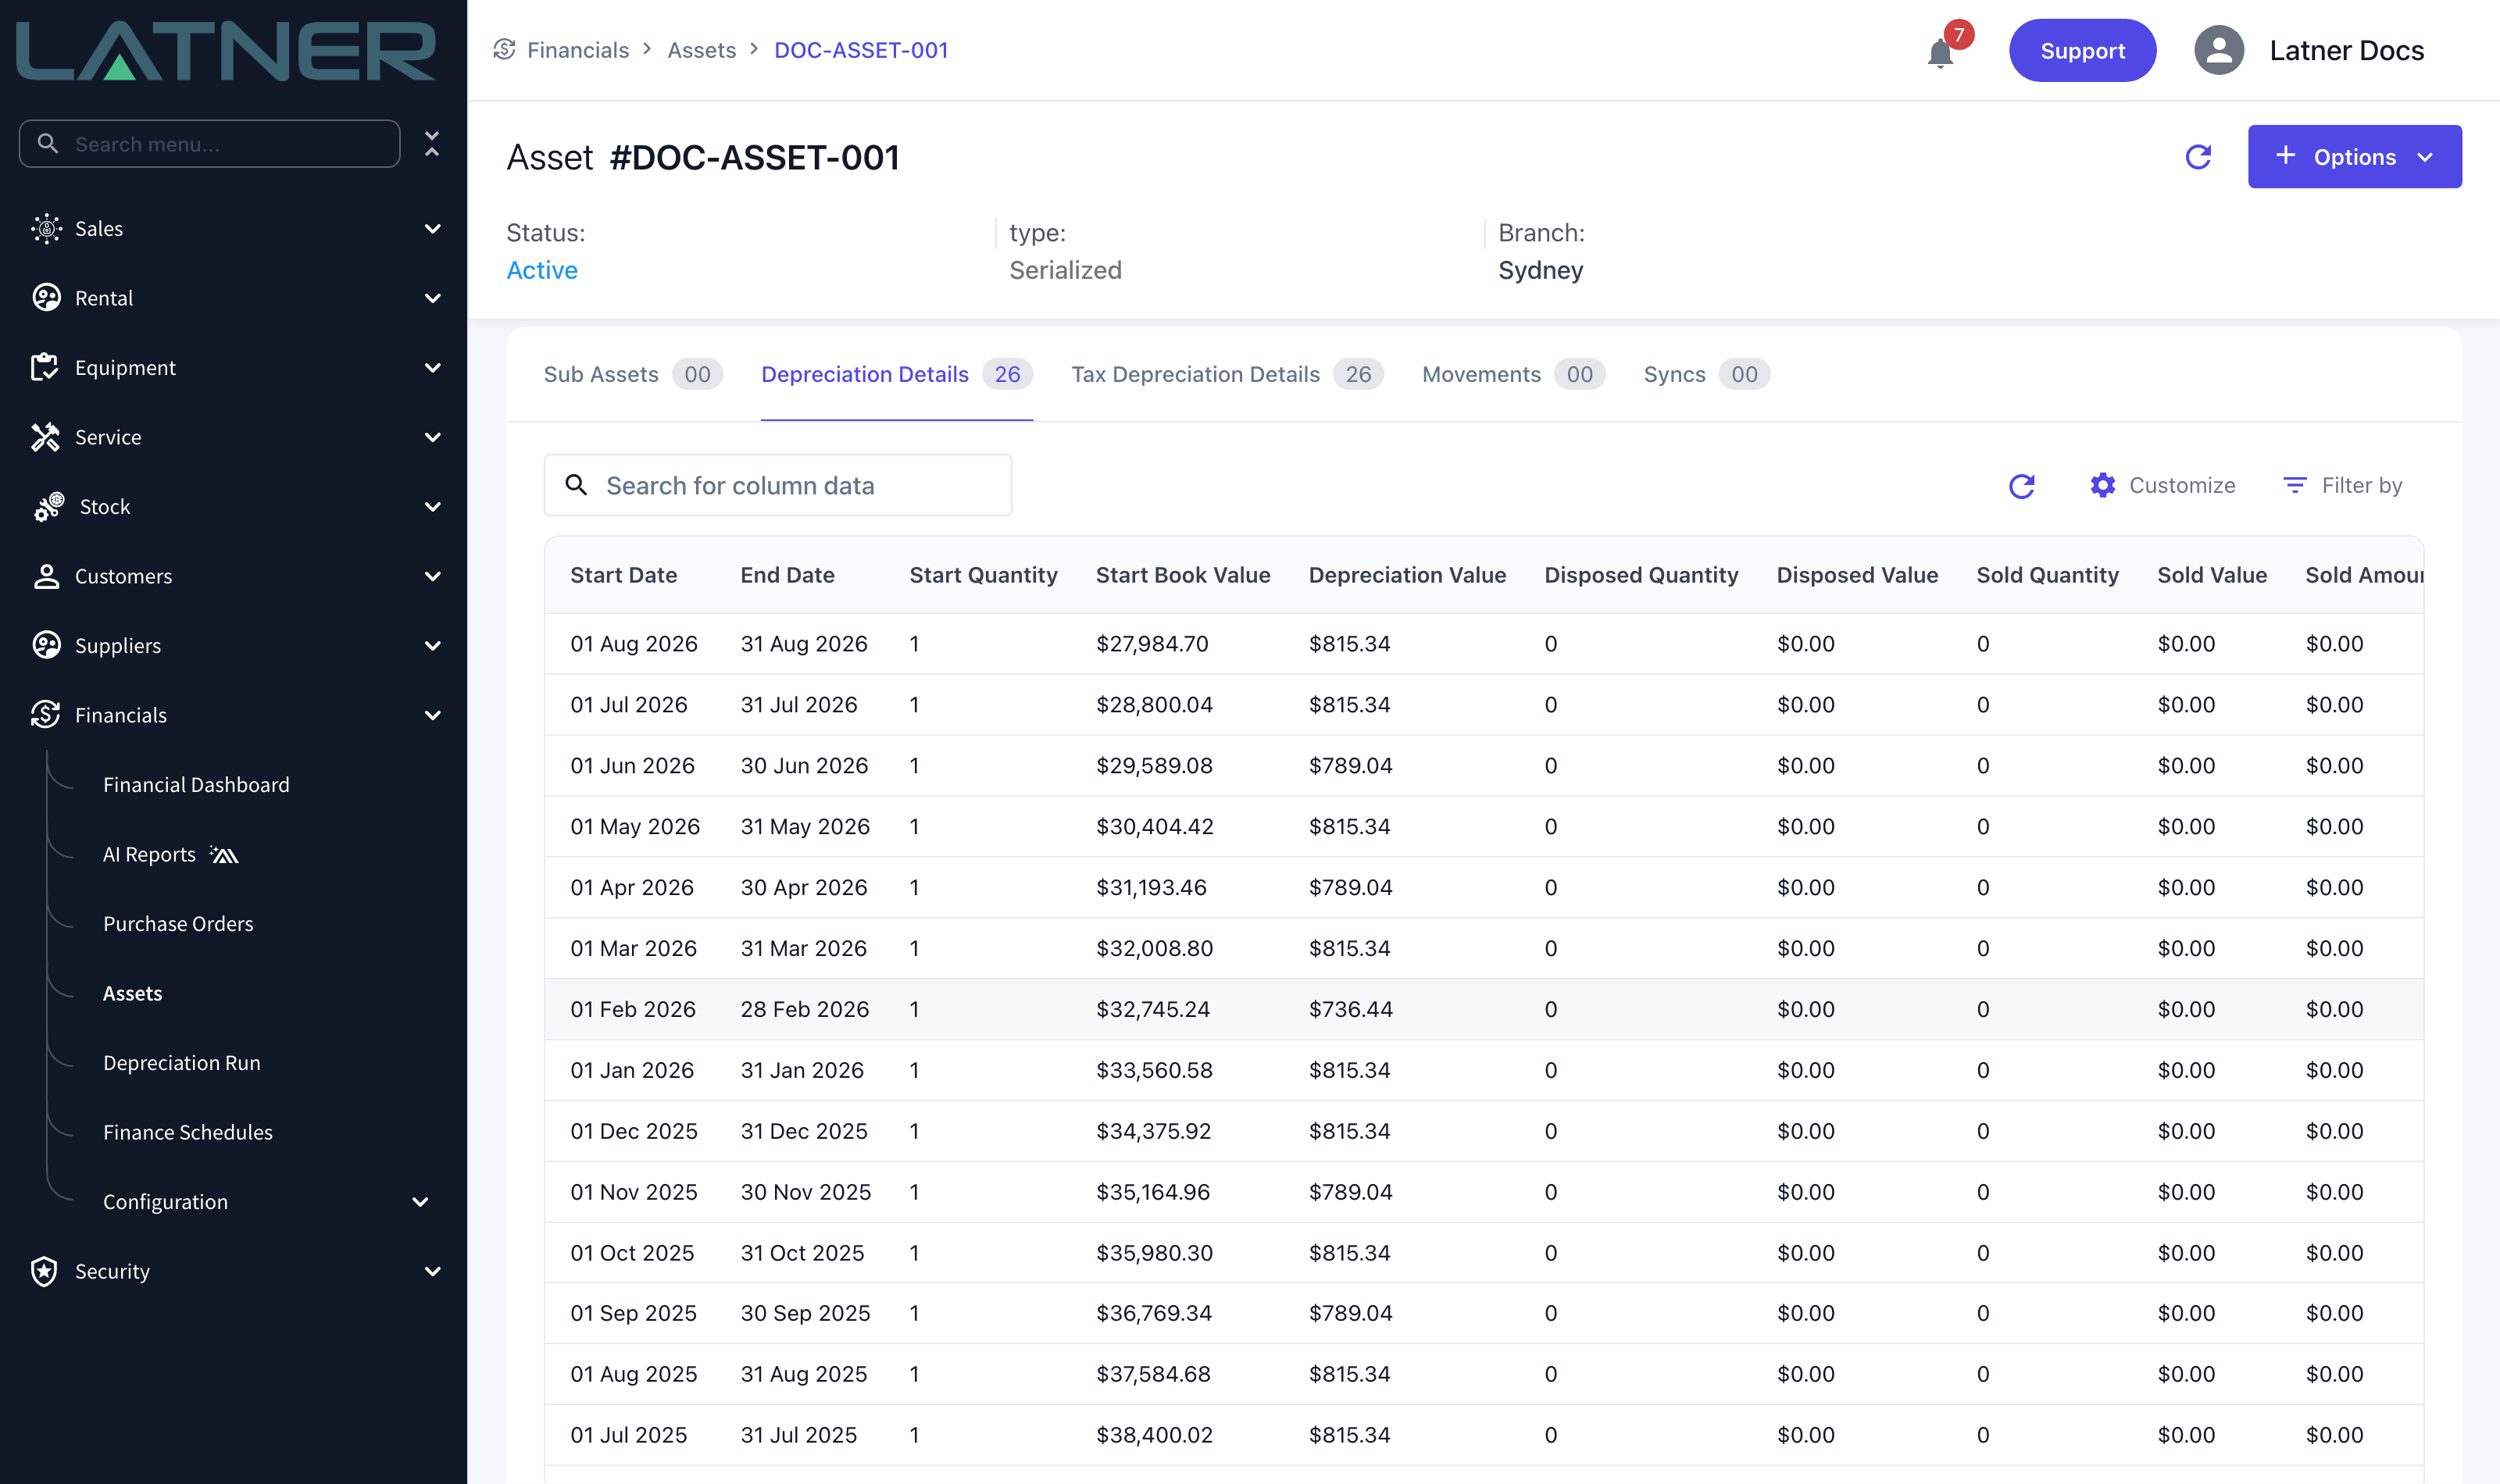
The Depreciation Details and Tax Depreciation Details tabs on the asset show every line: the period, the opening book value, the amount depreciated, and any disposed or sold quantity and value.
Three things will stop a single-asset calculation, and each gives you a clear message: the asset has no purchase price, the asset is not in a status that depreciates, or it has no depreciation type on either book.
Running Depreciation for the Whole Fleet
Go to Financials › Depreciation Run. The screen has four tabs, which follow the four steps in order.
Step 1 - Preview
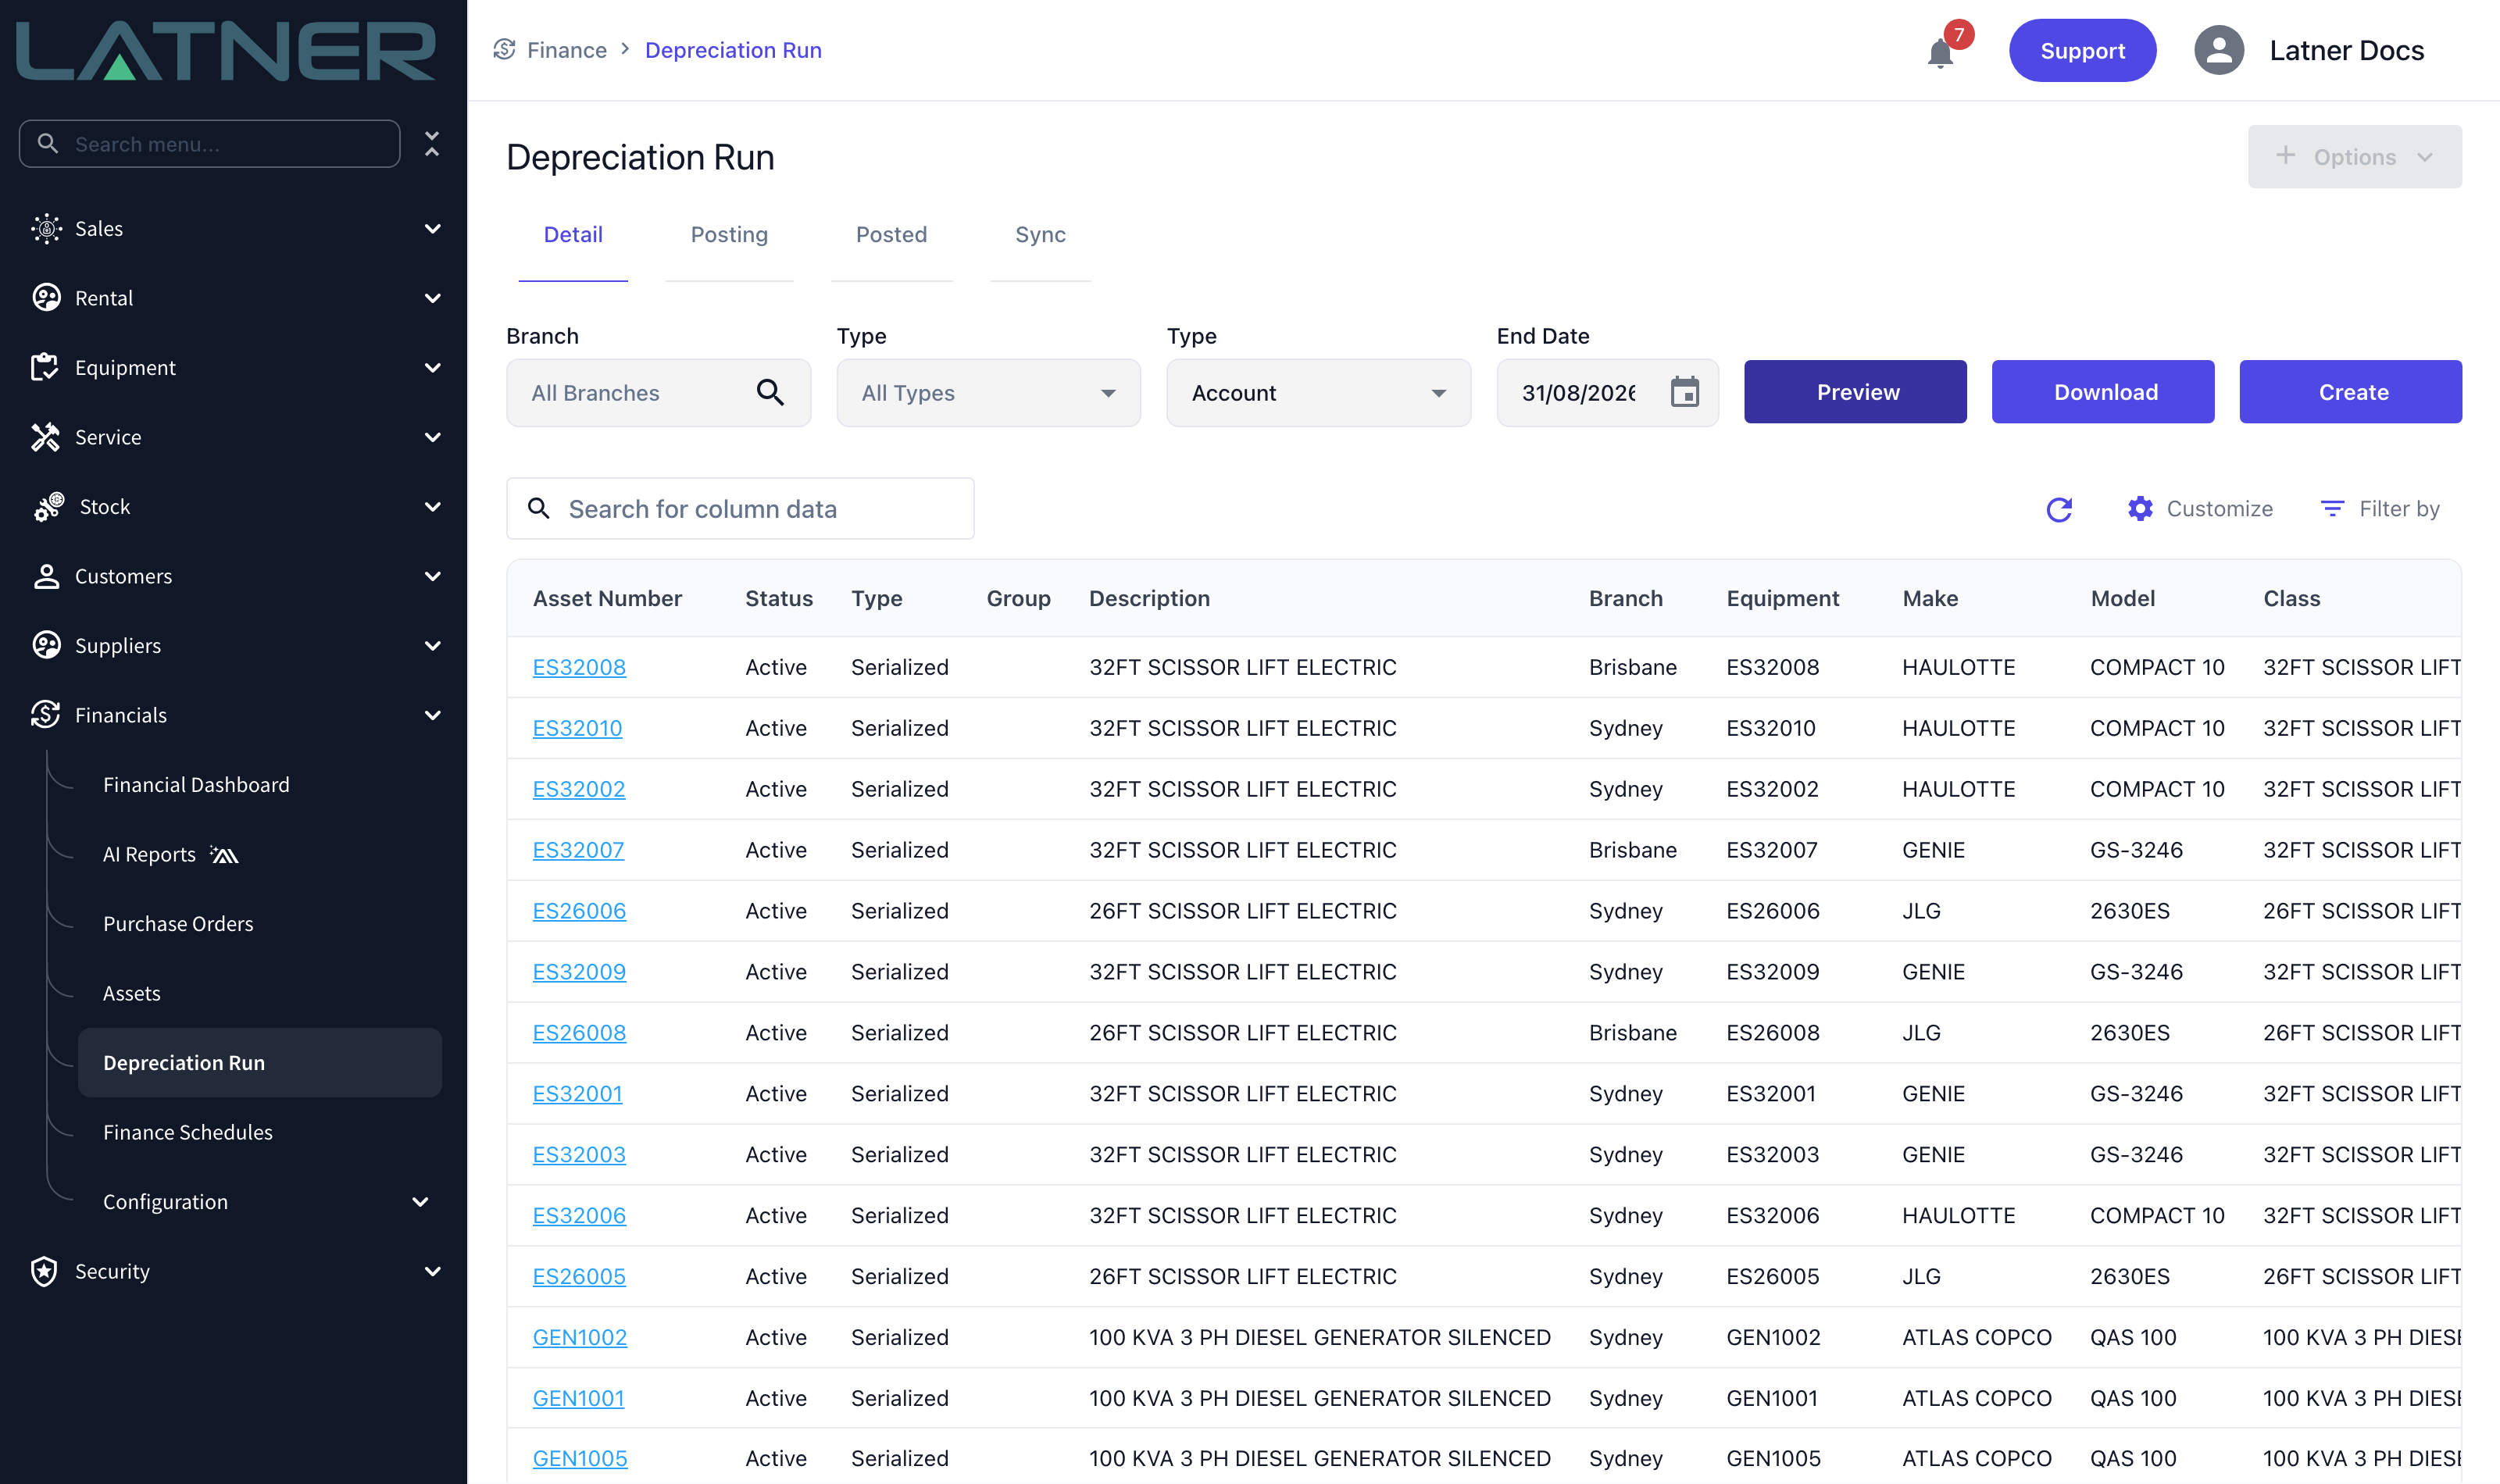
On the Detail tab, set the filters and select Preview.
-
Branch - optional. Leave blank for every branch.
-
Type (the first one) - optional asset type filter. Leave blank for all types.
-
Type (the second one) - Account or Tax. This picks which book you are running.
-
End Date - required. Depreciation is calculated up to this date.
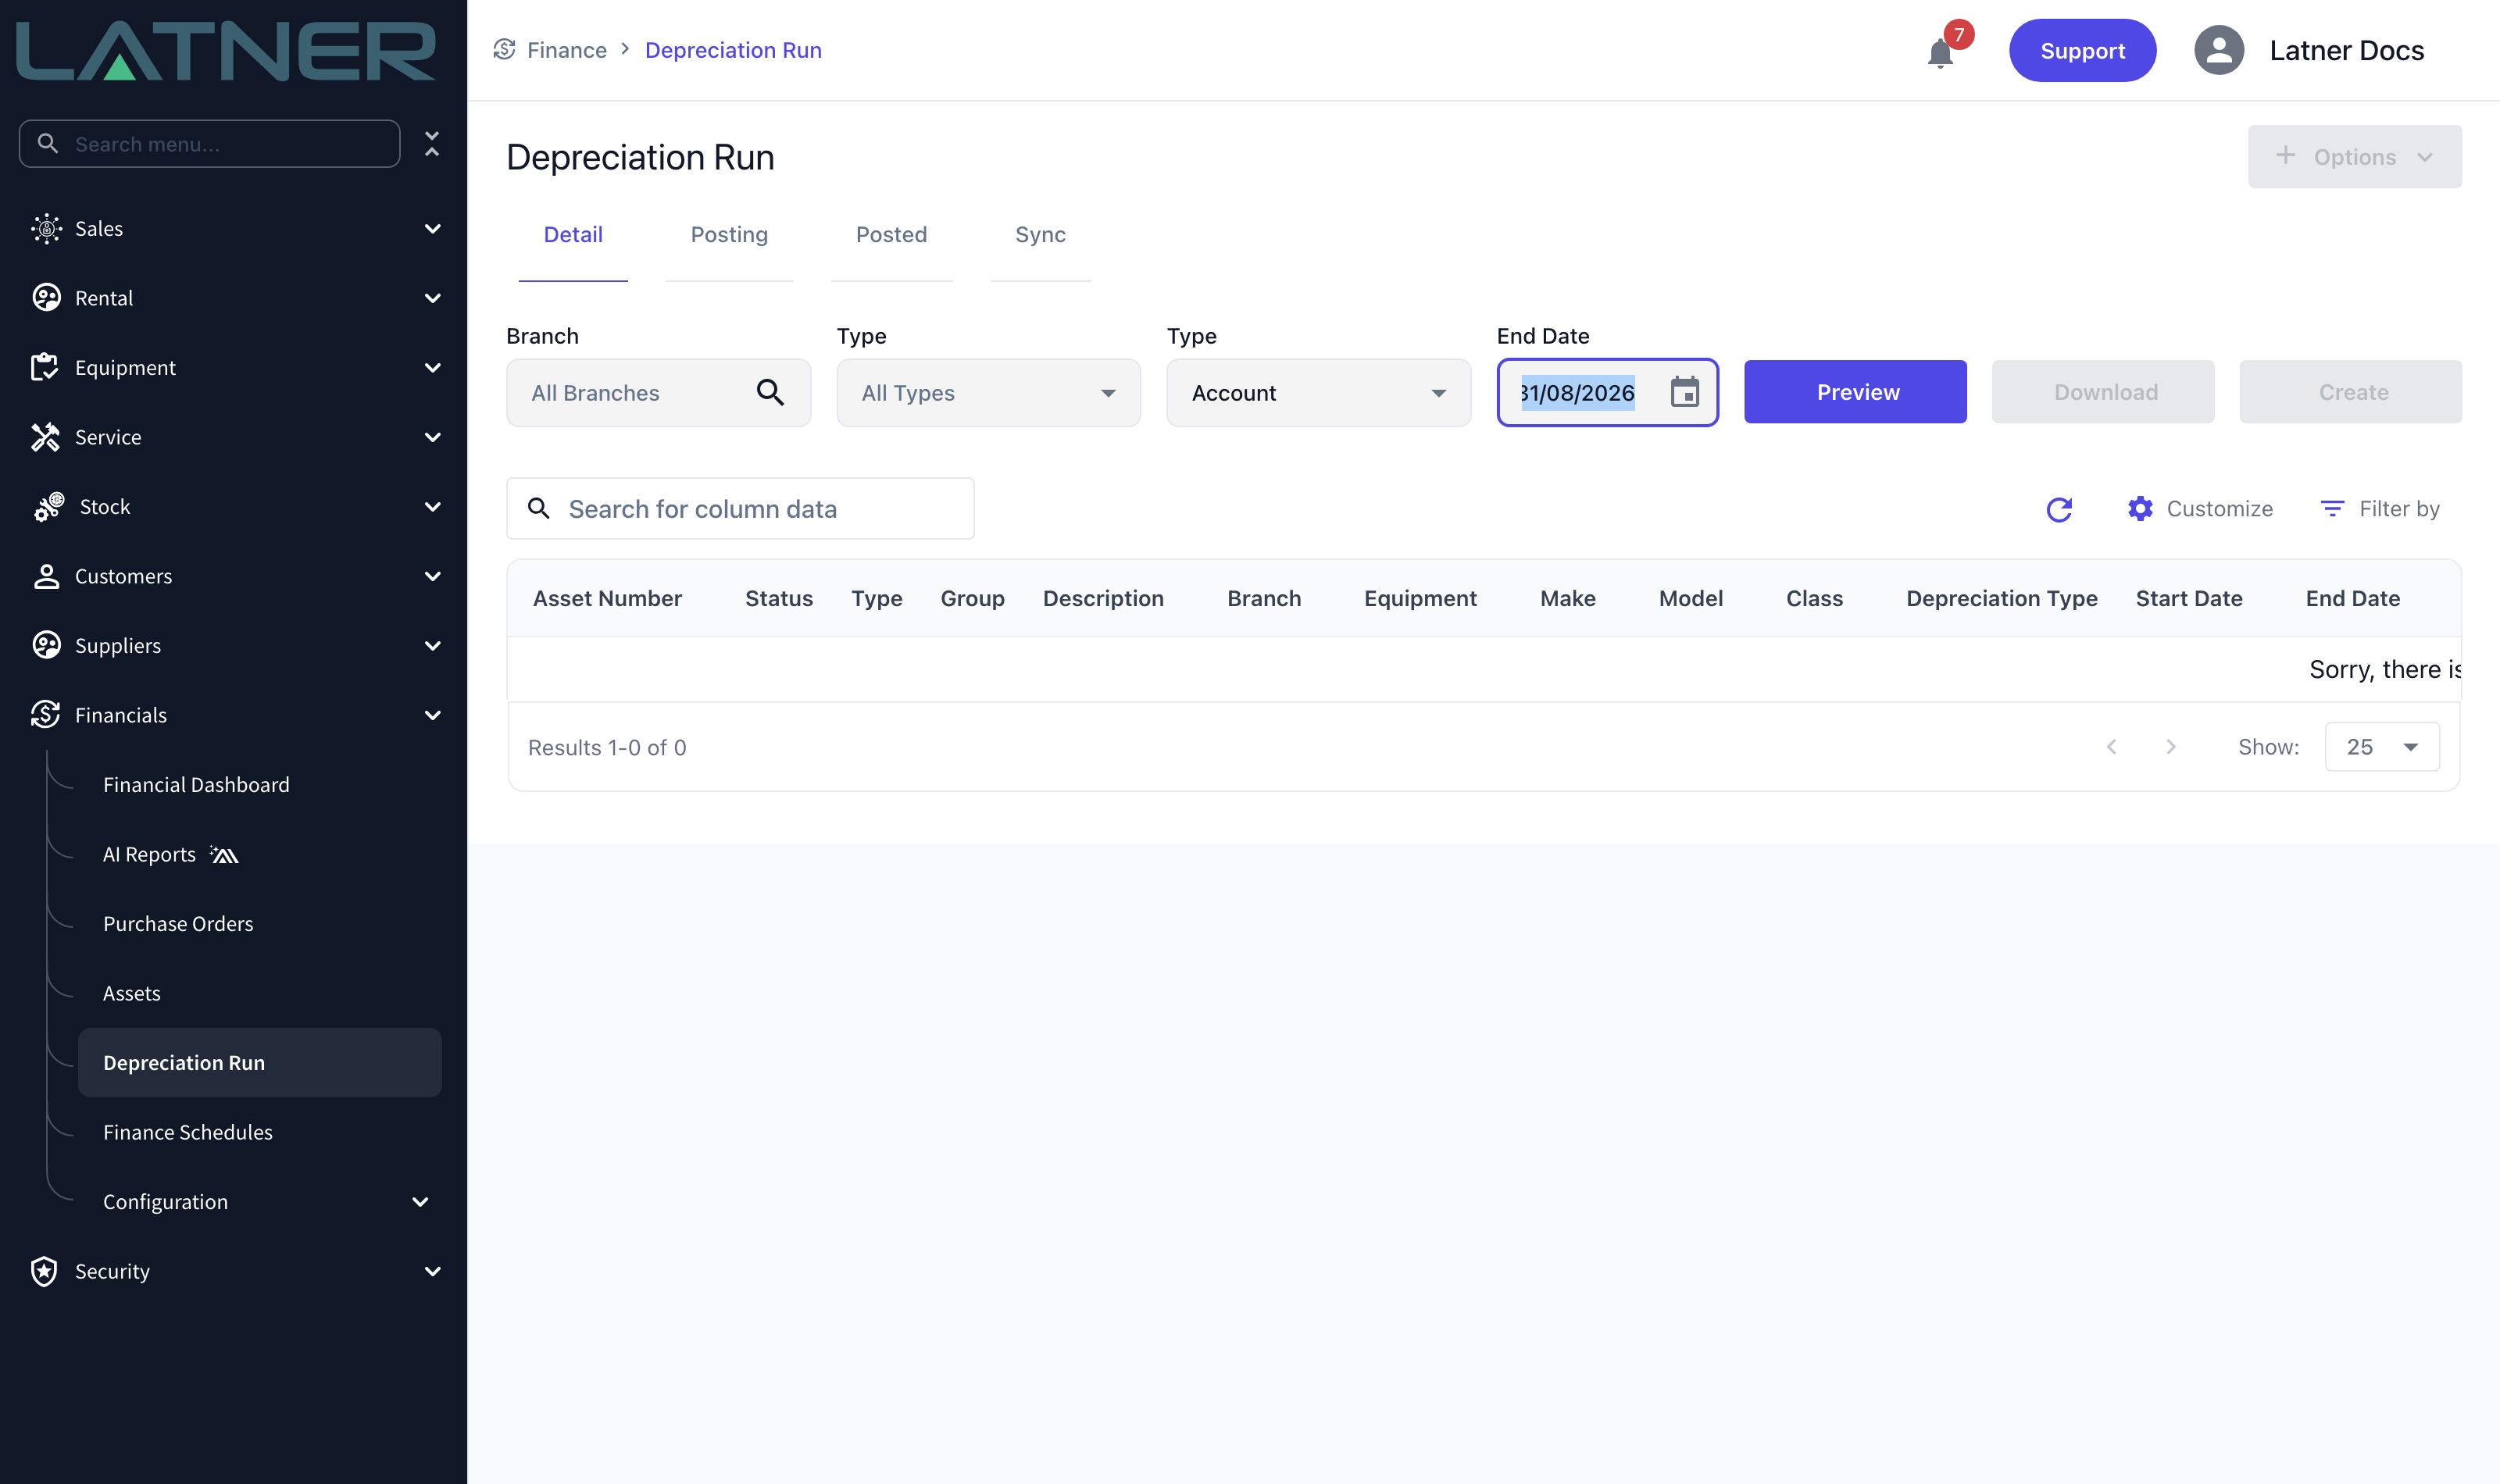
The preview runs in the background and the grid fills in when it is finished. Nothing is written to your assets at this stage - you can close the screen and walk away and no harm is done.
Only one preview exists at a time. Running a new preview clears the previous one, so if two people are working on this at once you will overwrite each other’s figures. Agree who is running it.
Step 2 - Download and check (optional)
Select Download to get the preview as a CSV, including the sold gain or loss, converted value and scrapped value per line. This is the last easy chance to check the numbers against your expectations.
Step 3 - Create
Select Create. Latner turns the previewed lines into real depreciation details and updates every affected asset’s book value, depreciation date and life-to-date total.
This is the point of no return for the asset values. Created depreciation lines cannot be deleted, and the book values they wrote cannot be rolled back. The only way to correct them is Update Book Value on each affected asset.
Step 4 - Post
Move to the Posting tab. It shows every depreciation line that has been created but not yet posted, aggregated the way your journal will be. Select Post to commit them.
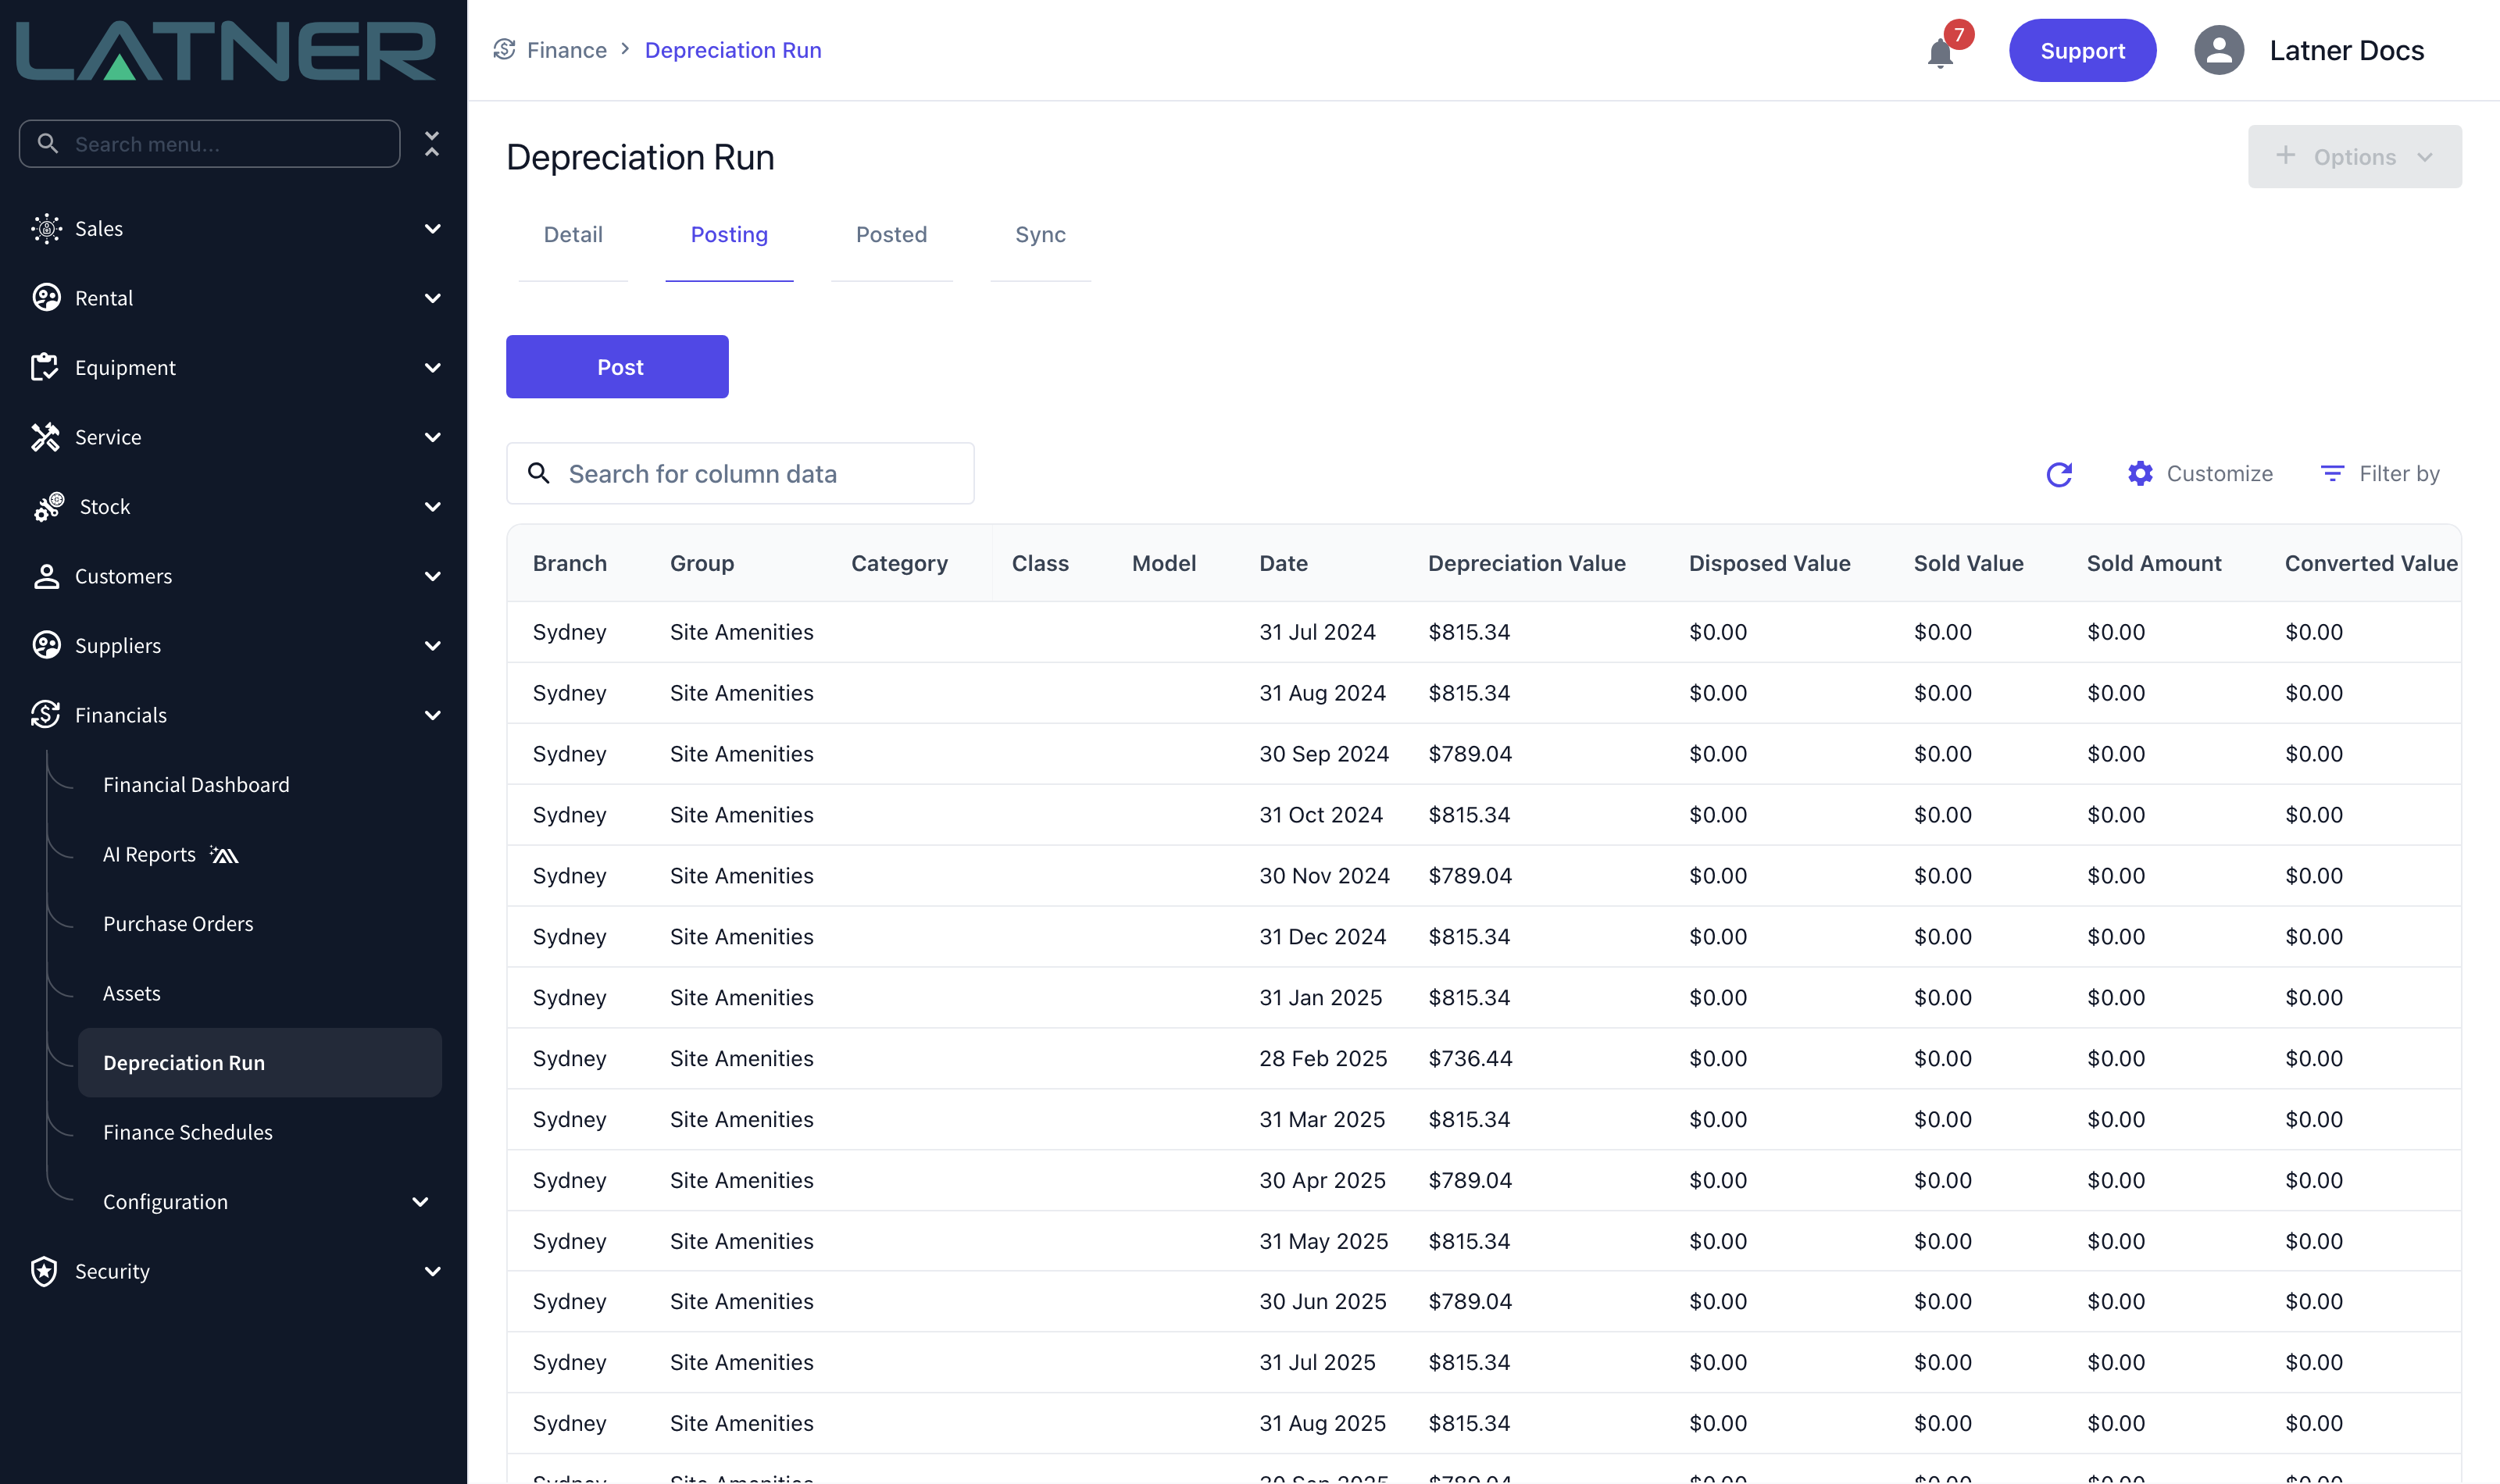
Posting does three things: it aggregates the lines by company, branch, asset group and month, it marks the source lines as posted, and it queues the journal to every active accounting integration on the company.
Post is not scoped to your run. It posts every unposted depreciation line in the system, whoever created it and whenever. If someone else has created lines you were not expecting to post, they will go too - so check the Posting tab before you press it.
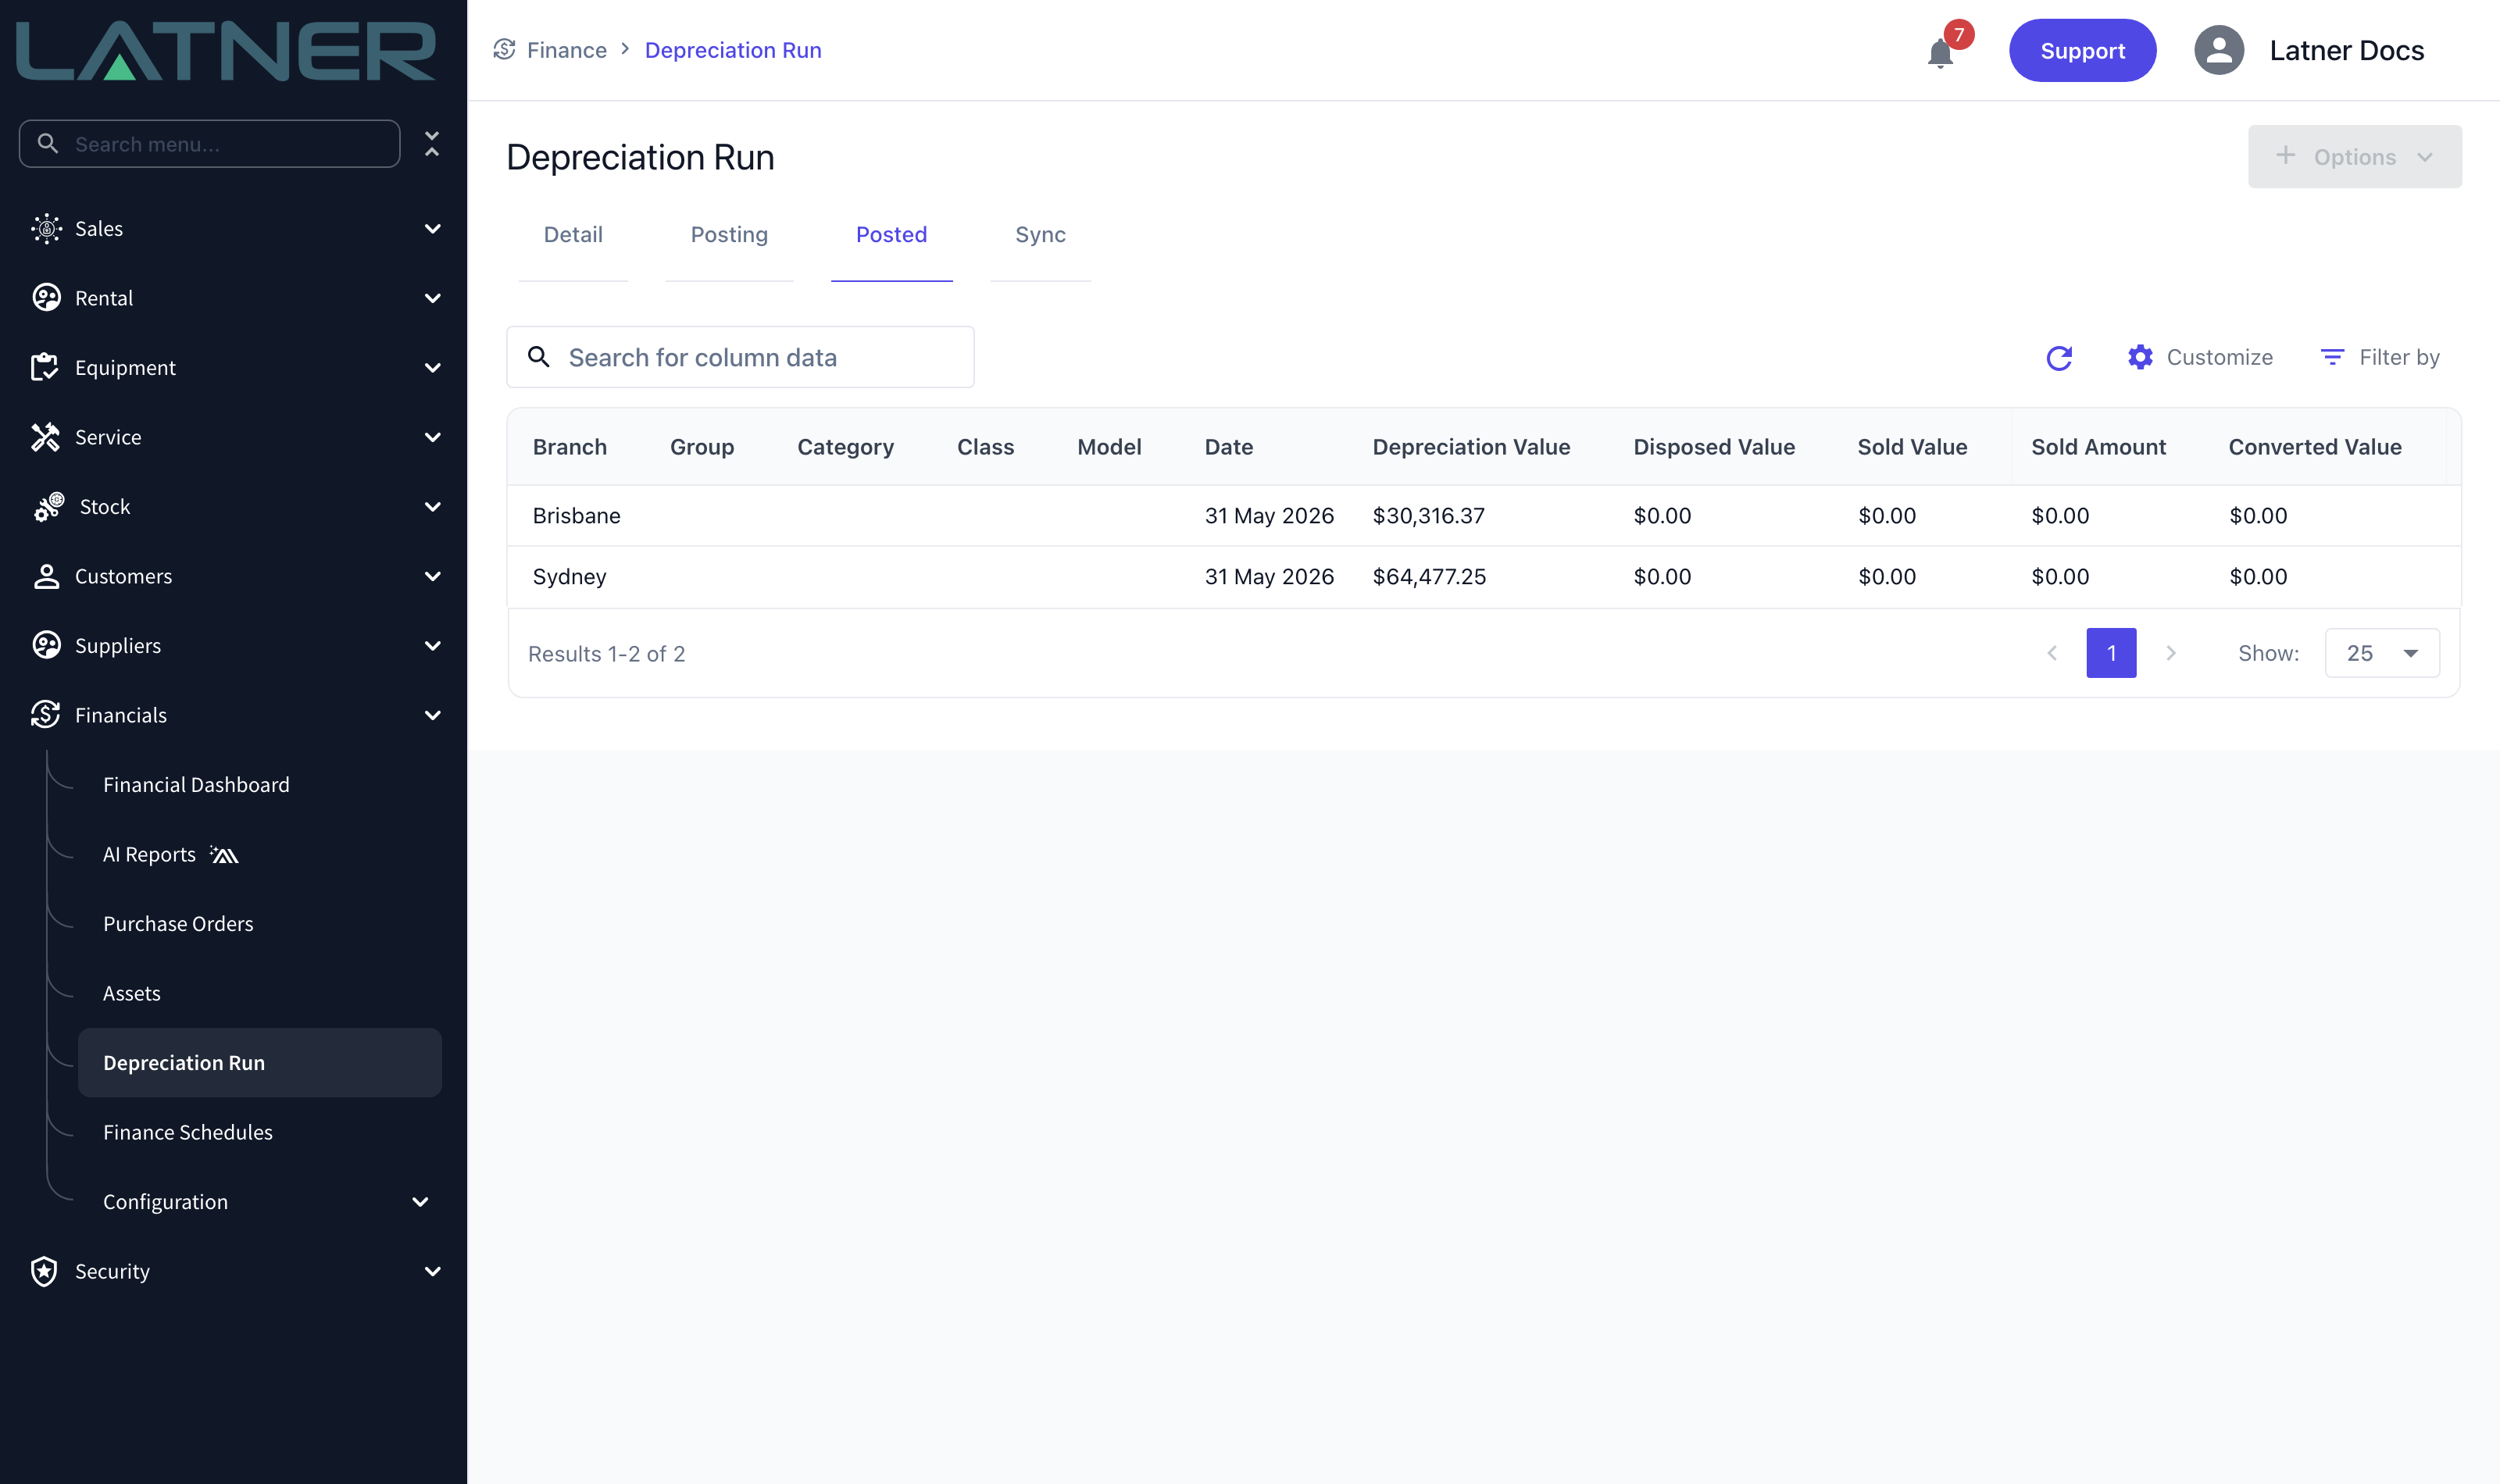
The Posted tab is the permanent record of what was posted and when. It is read only.
Step 5 - Check the sync
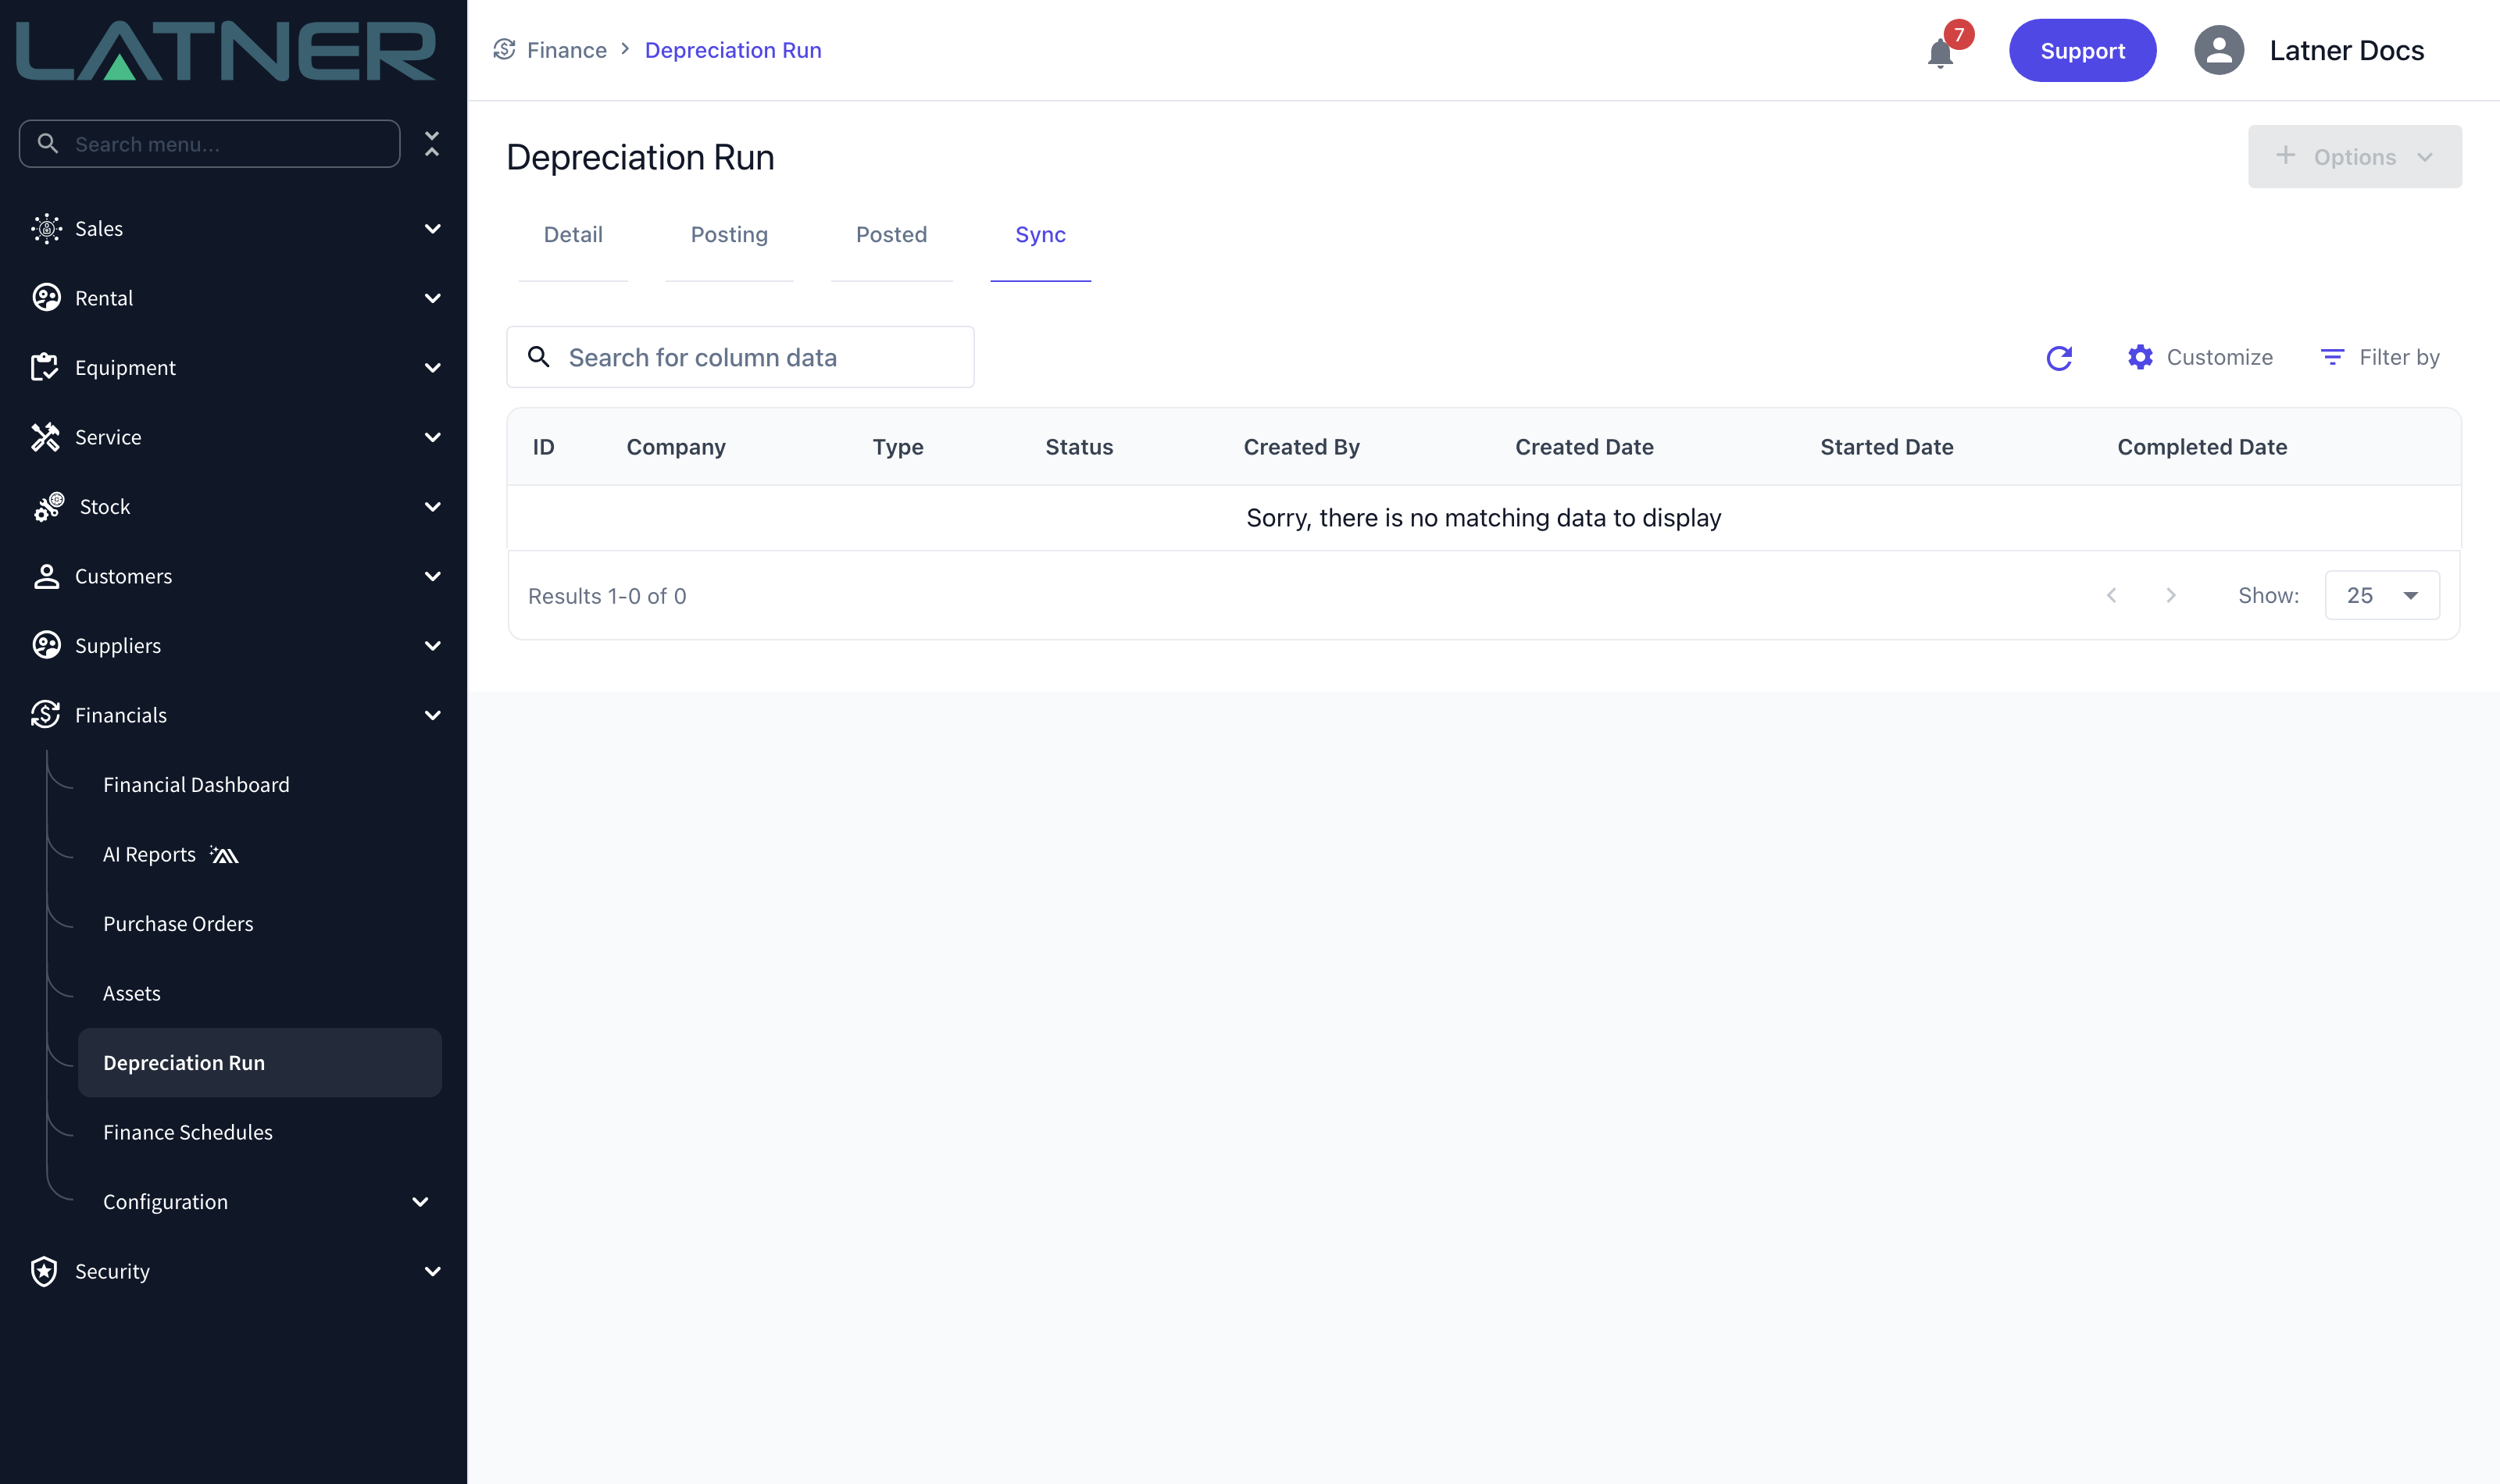
The Sync tab shows one row per push to an accounting integration, with a status of Pending, Completed or Failed. A failed row carries the error returned by the accounting system, so you can see what to fix.
Each run produces a single journal per integration, dated to the latest depreciation date in the batch and narrated with the run number. Depreciation, disposals and sales all become lines on that one journal.
How Sales and Disposals Are Handled
You never record a disposal on the asset. When equipment is sold, disposed of or converted, Latner attaches the movement to the matching asset and sets its status. The next depreciation run then does the arithmetic.
-
The month is split at the movement date, so the asset is depreciated up to the day it left, and only then is its value written off.
-
Gain or loss on a sale is the sale amount less the written-down value at that date. It is not stored on the asset - it is shown on the depreciation line and in the run download as Sold Gain/Loss.
-
Disposals always post to the loss account. Only sales can produce a gain.
-
For bulk assets, quantity is consumed from the sub-assets oldest purchase first.
Correcting a Book Value
Capitalised costs, part disposals, corrections and revaluations all change what an asset is really worth. Since depreciation cannot be reversed, this dialog is how you put things right.
On the asset record, choose Options › Update Book Value. The dialog shows the current values on the left and the new ones on the right, and covers both books: Book Value, Depreciation Date, Depreciation Quantity and EOFY Value, plus a tax equivalent of each.
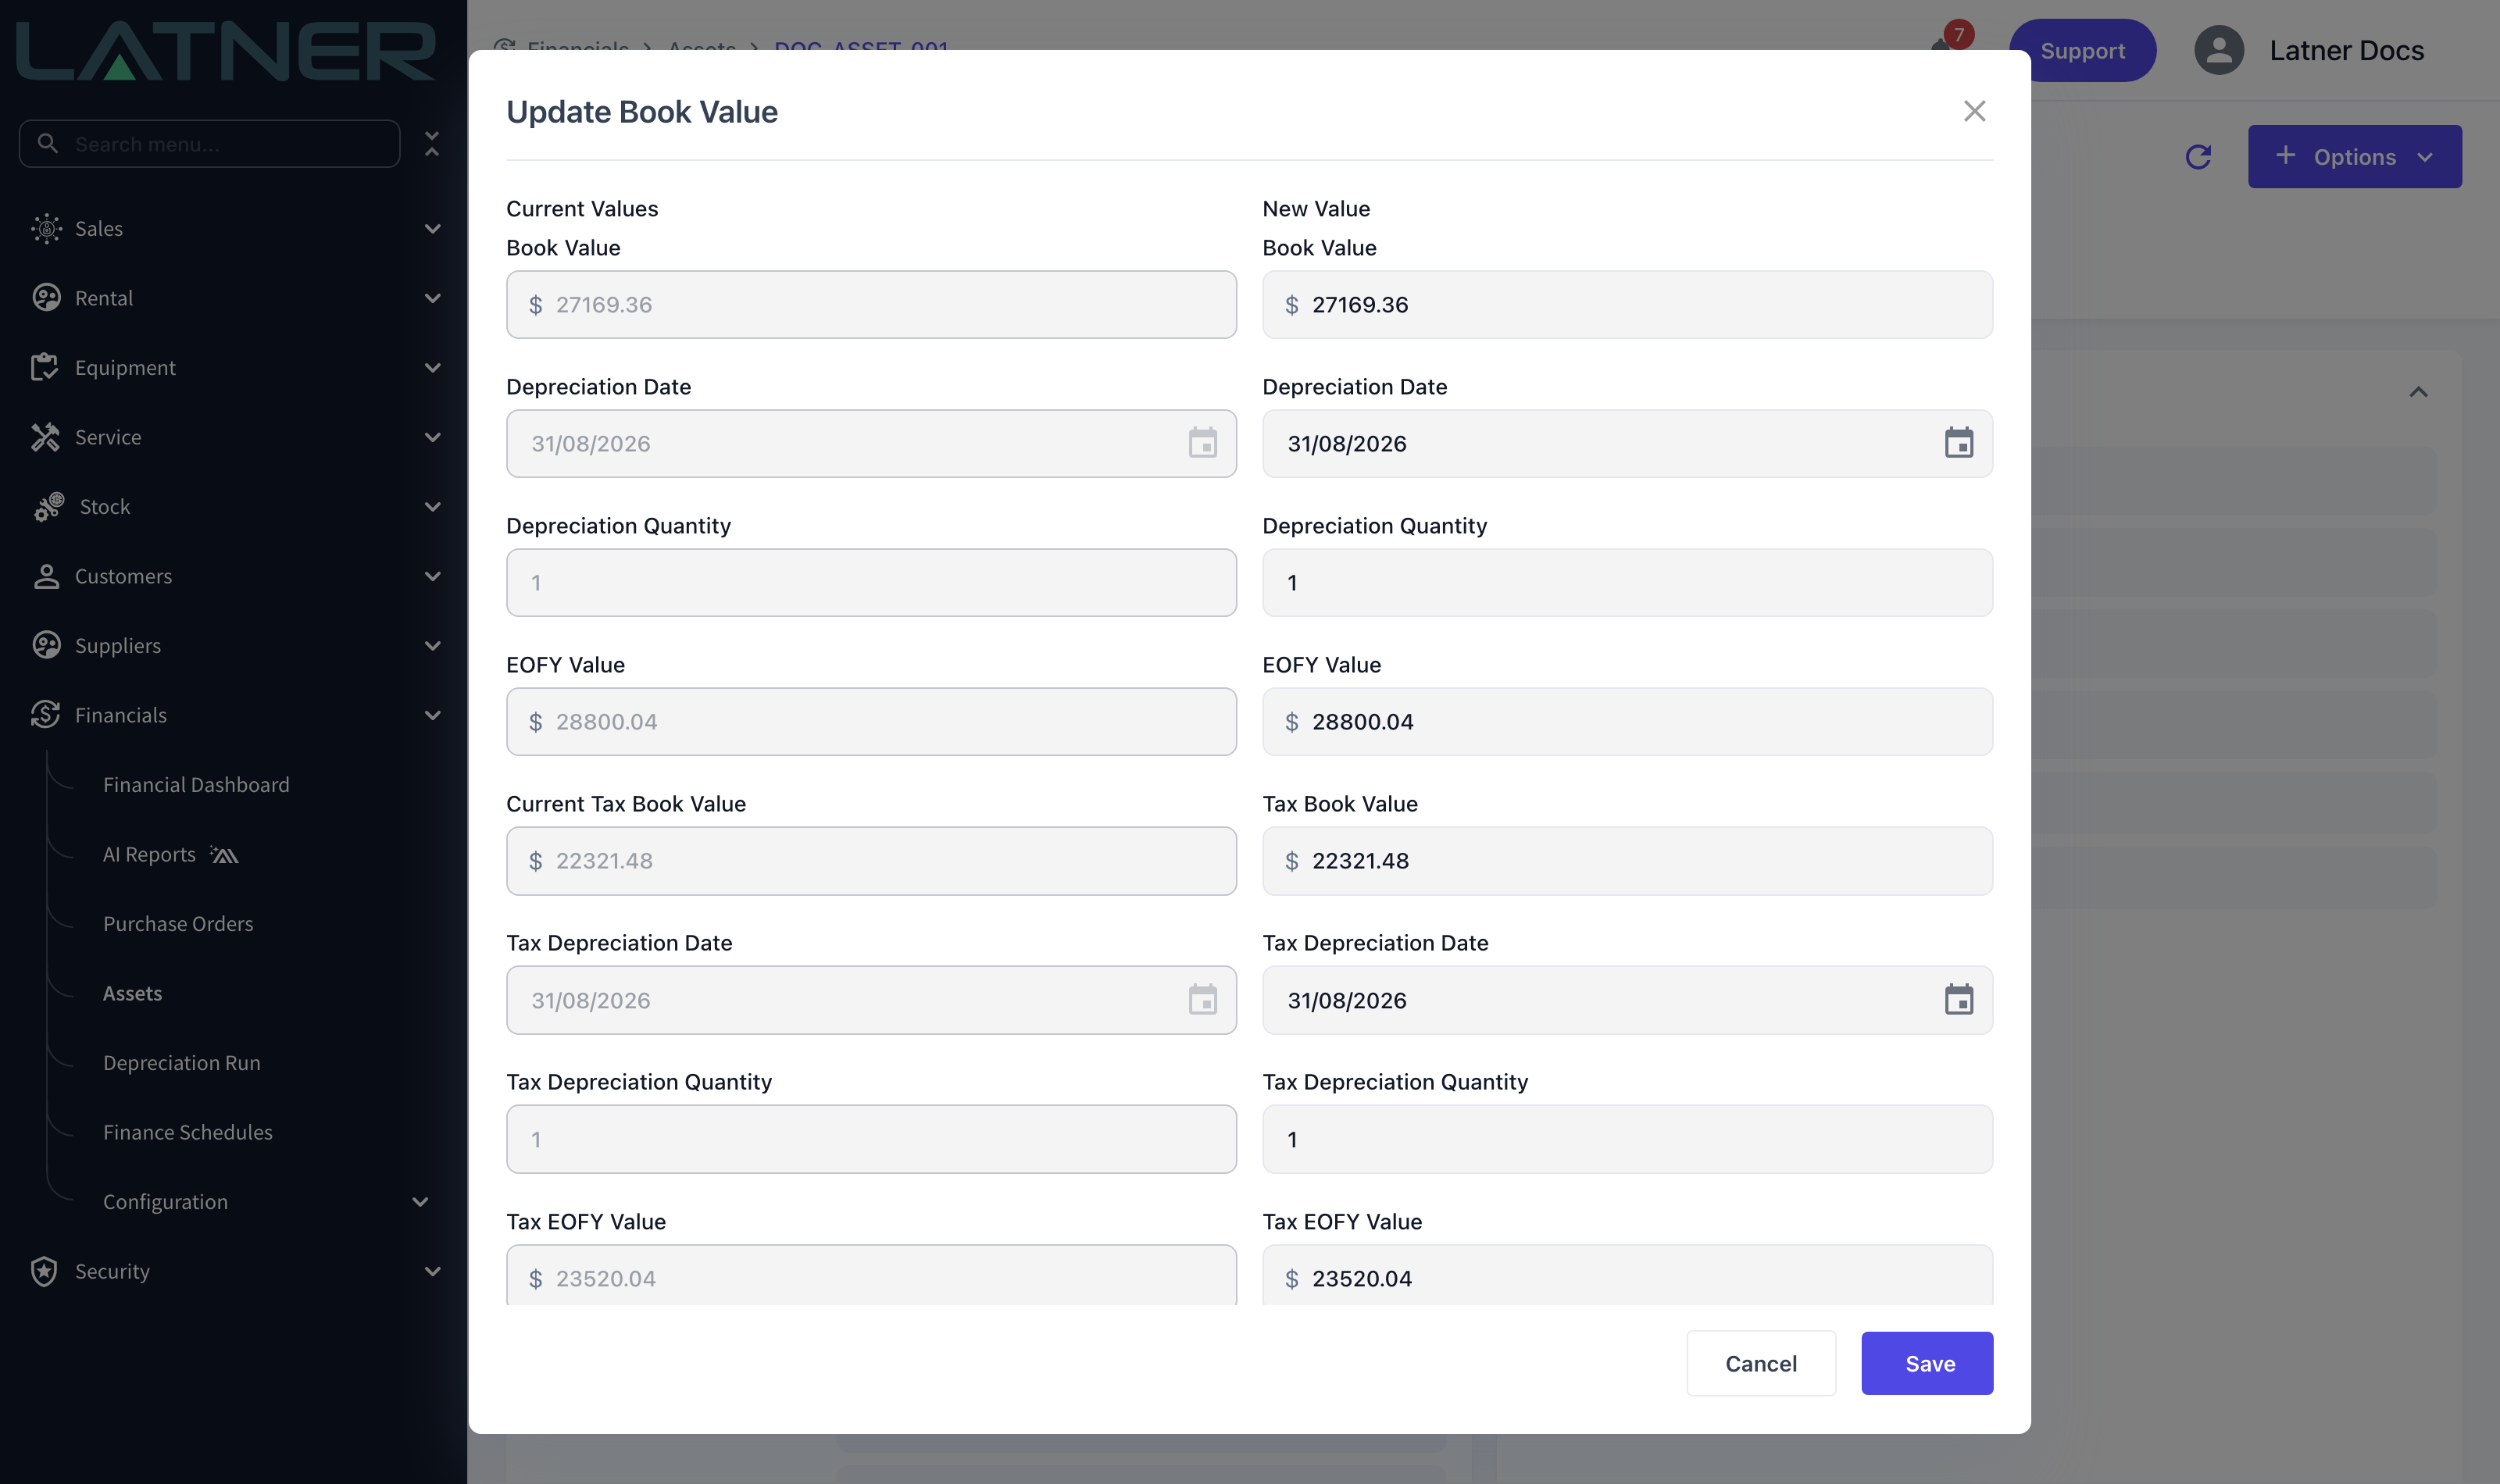
Check the tax column before you save, even if you only came here to fix the account book. The dialog pre-fills the tax depreciation quantity from the account quantity, so saving without looking can overwrite a tax quantity that was already correct.
Moving the Depreciation Date back will cause the next run to recalculate the months after it, producing a second set of lines for periods already depreciated. Change it only when you mean to.
FAQs
Watch the Demo
Prefer to watch it? Calculating depreciation for a single asset.
Running depreciation in bulk.
And updating a book value.