
The CRM screen keeps every account your sales team works on in one list - the prospects you are still chasing and the customers you already trade with - so you can see who owns each account, what has happened on it, and what stage it has reached.
Overview
A prospect isn't a different kind of record in Latner. It is the same account wearing a different label, which is why nothing has to be re-keyed when a deal comes off.
-
One record, two screens. Sales › CRM is the sales view of an account and Customers › Customers is the trading view. Both open the same underlying record, so a change made on one shows up on the other.
-
Type says where the account sits. Every account is either Prospect or Customer. Type only ever changes through Convert to Customer - you cannot edit it directly.
-
Status is a separate thing from type. An account is Active, Pending Approval or Inactive. A freshly converted account sits at Pending Approval until someone approves it.
-
Credit status is separate again. Ok, Immediate Payment or Credit Hold. There is no separate "on hold" switch - putting an account on hold means setting its credit status to Credit Hold.
-
The Customer screen hides prospects by default. It opens with the Customer and Active quick filters already on. The CRM screen opens with none, so it shows both types side by side.
-
Some fields lock to the Customer screen once the account trades. After conversion, CRM refuses changes to the billing address, billing contact and status and tells you to go to the Customer screen.
Before You Begin
Managing accounts needs no system settings to be switched on, but the permissions decide how much of the record you can touch.
|
Requirement |
Where to Find It |
|---|---|
|
CRM screen permission |
Security › Configuration › Permission Groups › your group › Sales › Screen |
|
Create Account - this one permission covers both creating and editing an account from CRM |
Security › Configuration › Permission Groups › your group › Sales › Option |
|
Customers screen permission |
Security › Configuration › Permission Groups › your group › Customers › Screen |
|
Edit Customer, or Edit Cash (COD) Customer for accounts on COD payment terms |
Security › Configuration › Permission Groups › your group › Customers › Option |
|
Manage Credit Status, for putting accounts on and off credit hold |
Security › Configuration › Permission Groups › your group › Customers › Option |
|
Change Customer Code, for renaming an account's code |
Security › Configuration › Permission Groups › your group › Customers › Option |
|
Change Sales Rep, for reassigning ownership |
Security › Configuration › Permission Groups › your group › Customers › Field |
|
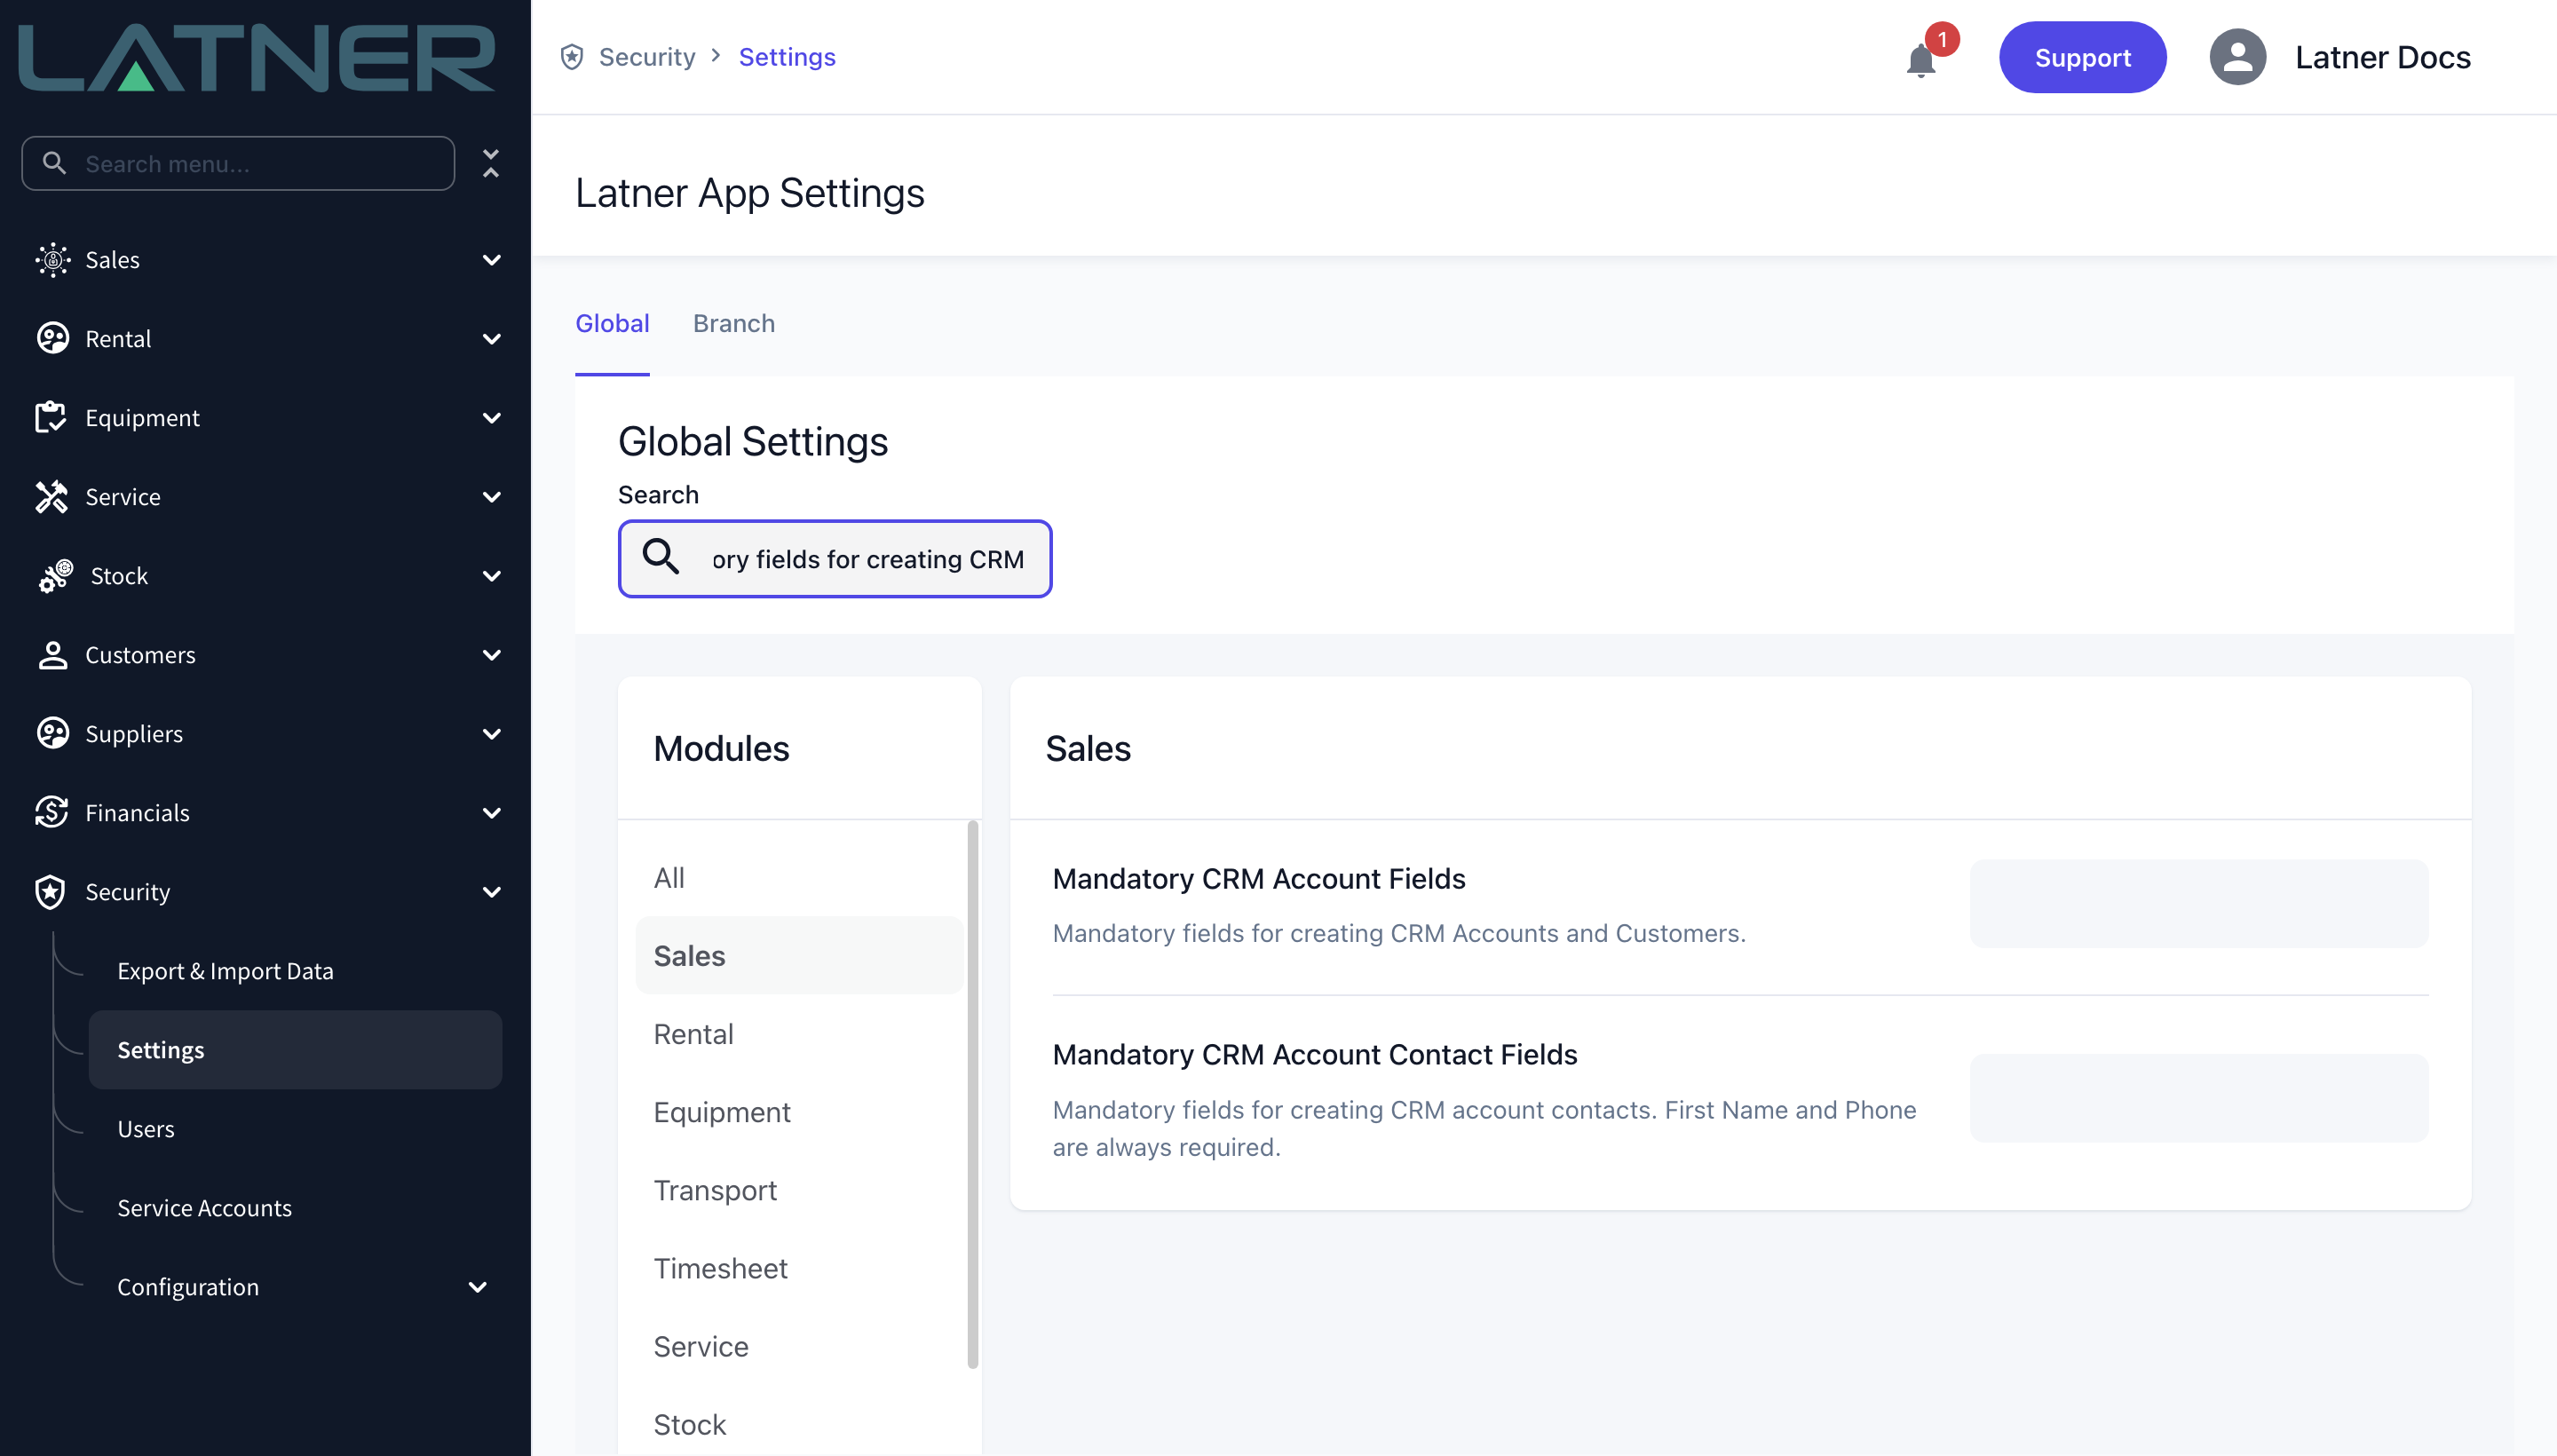
Mandatory CRM Account Fields setting, if you want to force fields such as lead source or industry to be filled in |
Security › Settings › Sales |
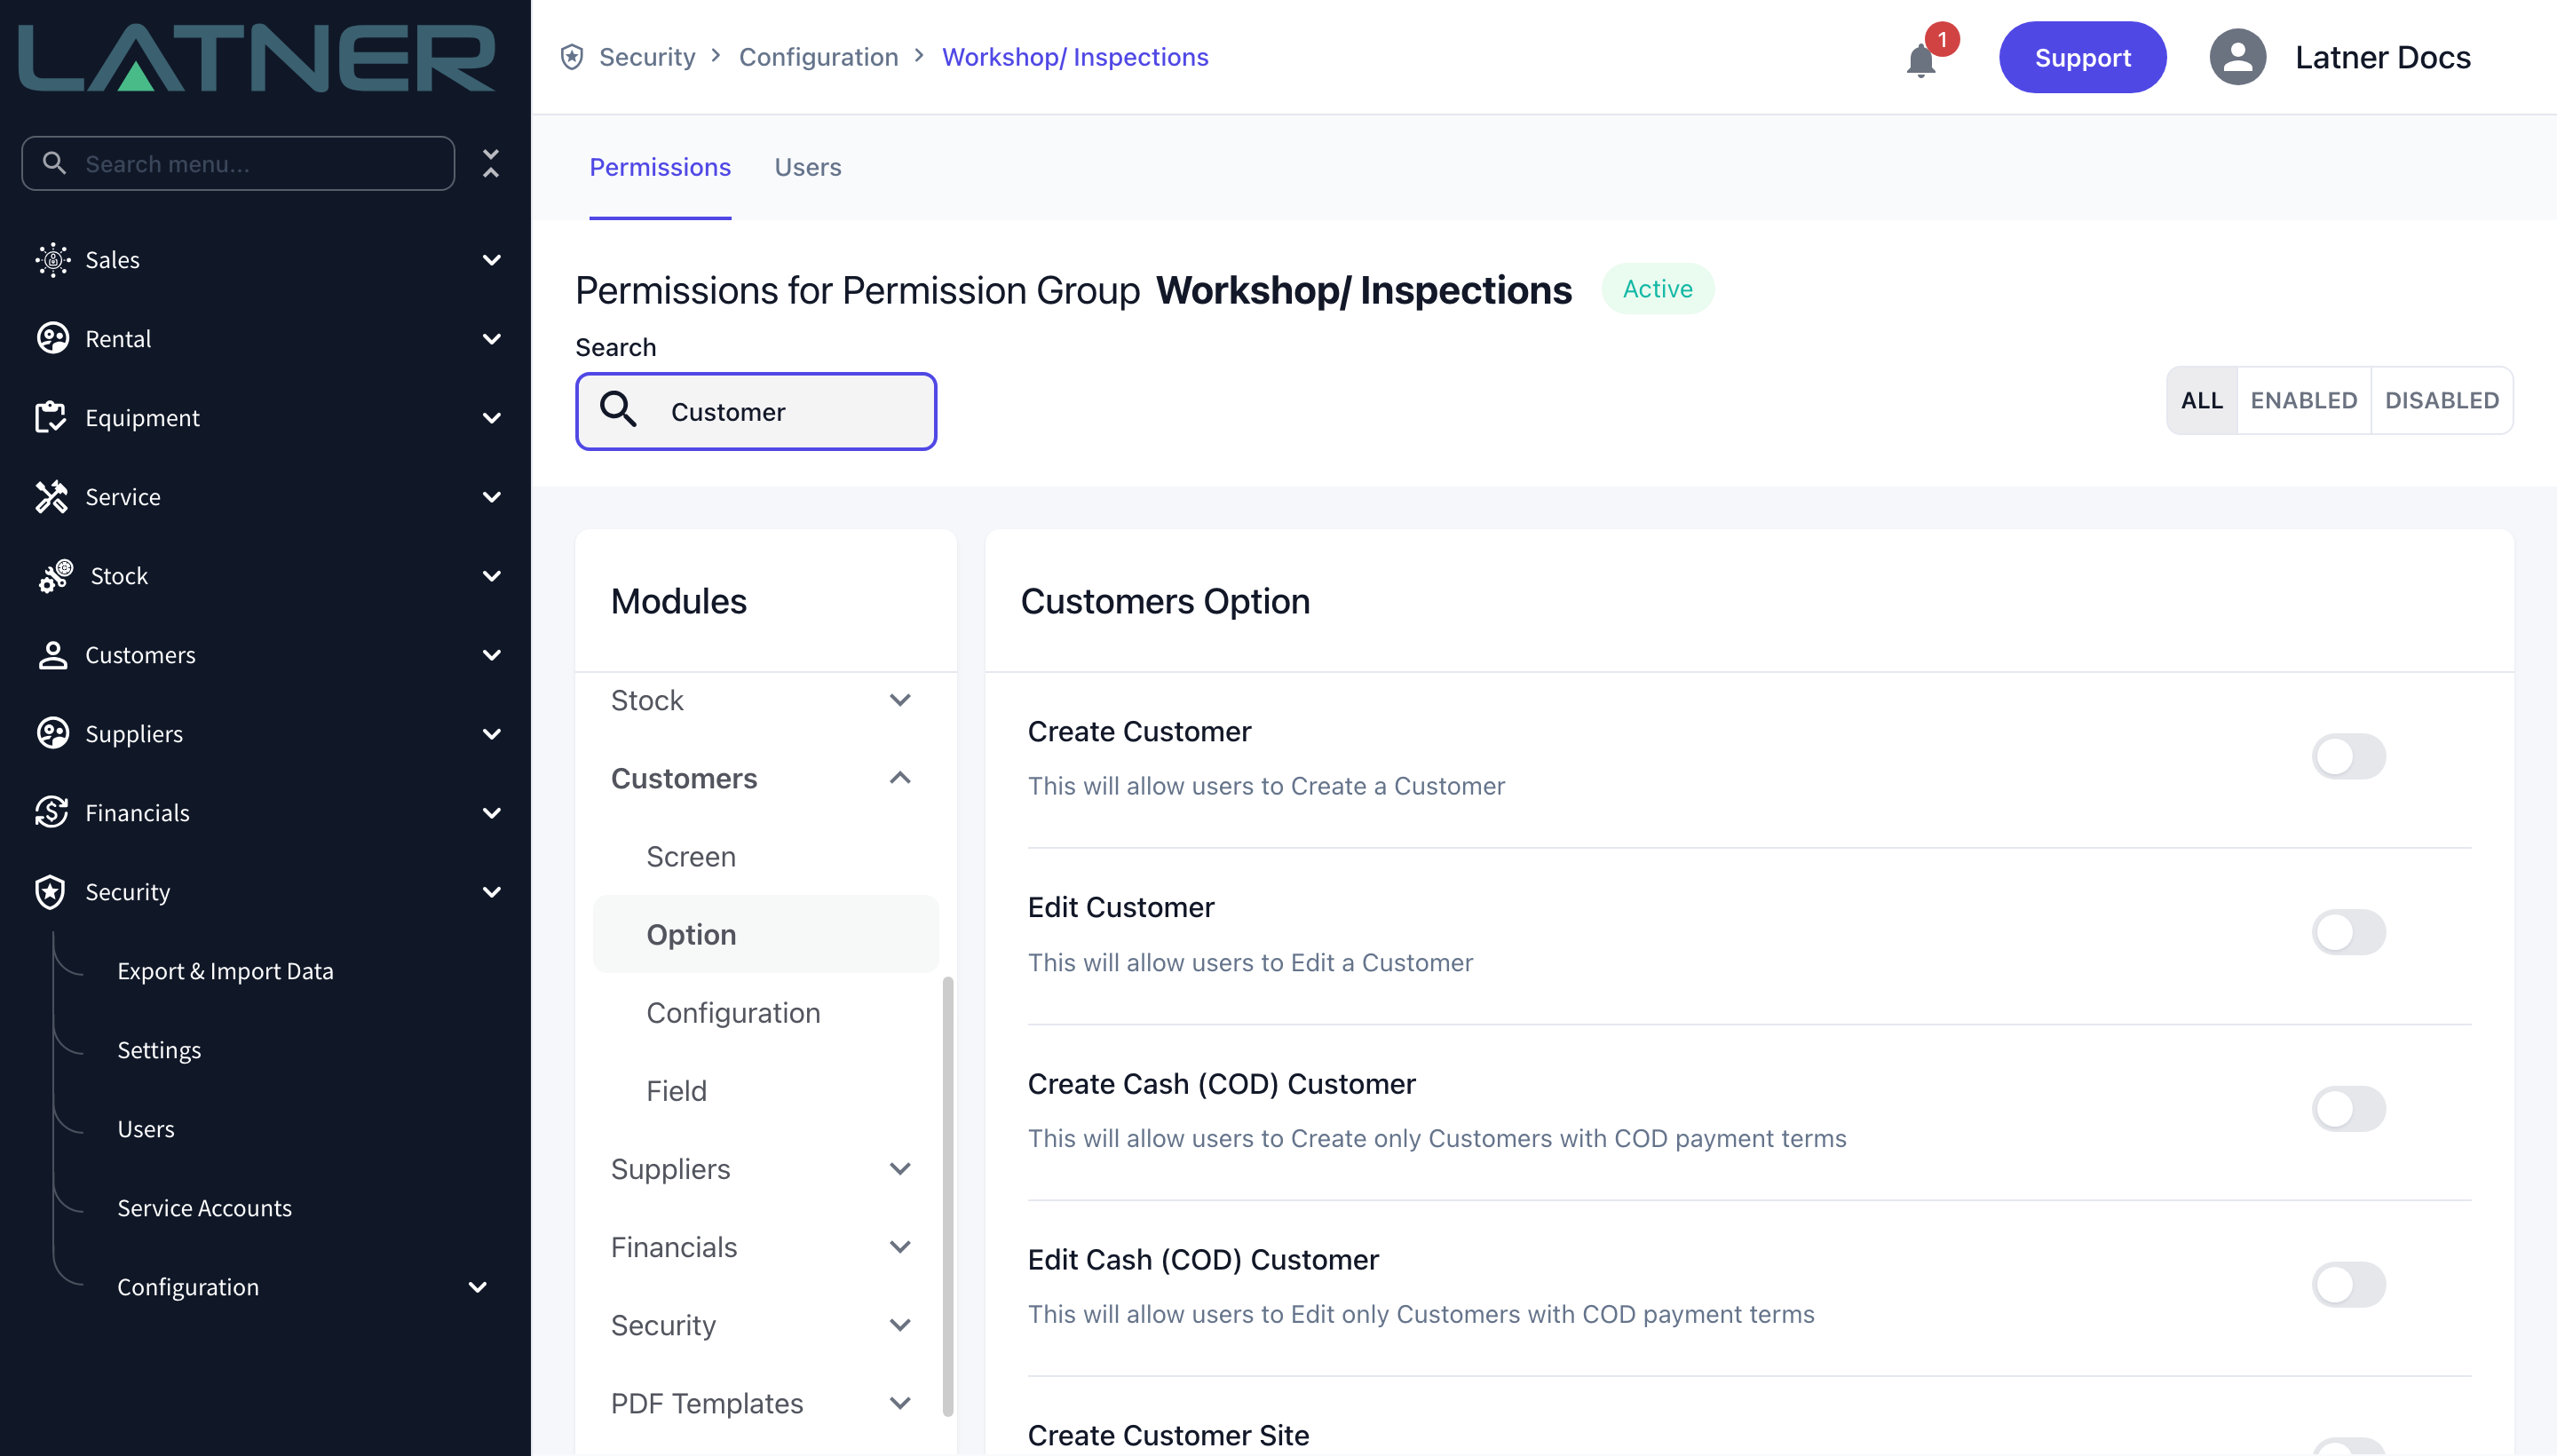
The permissions are checked per branch. If you can see an account but the General Details card refuses to go into edit mode, check that your permission group grants Edit Customer for that account's branch and not just your own.
Finding the Right Account
Step 1 - Open the CRM screen
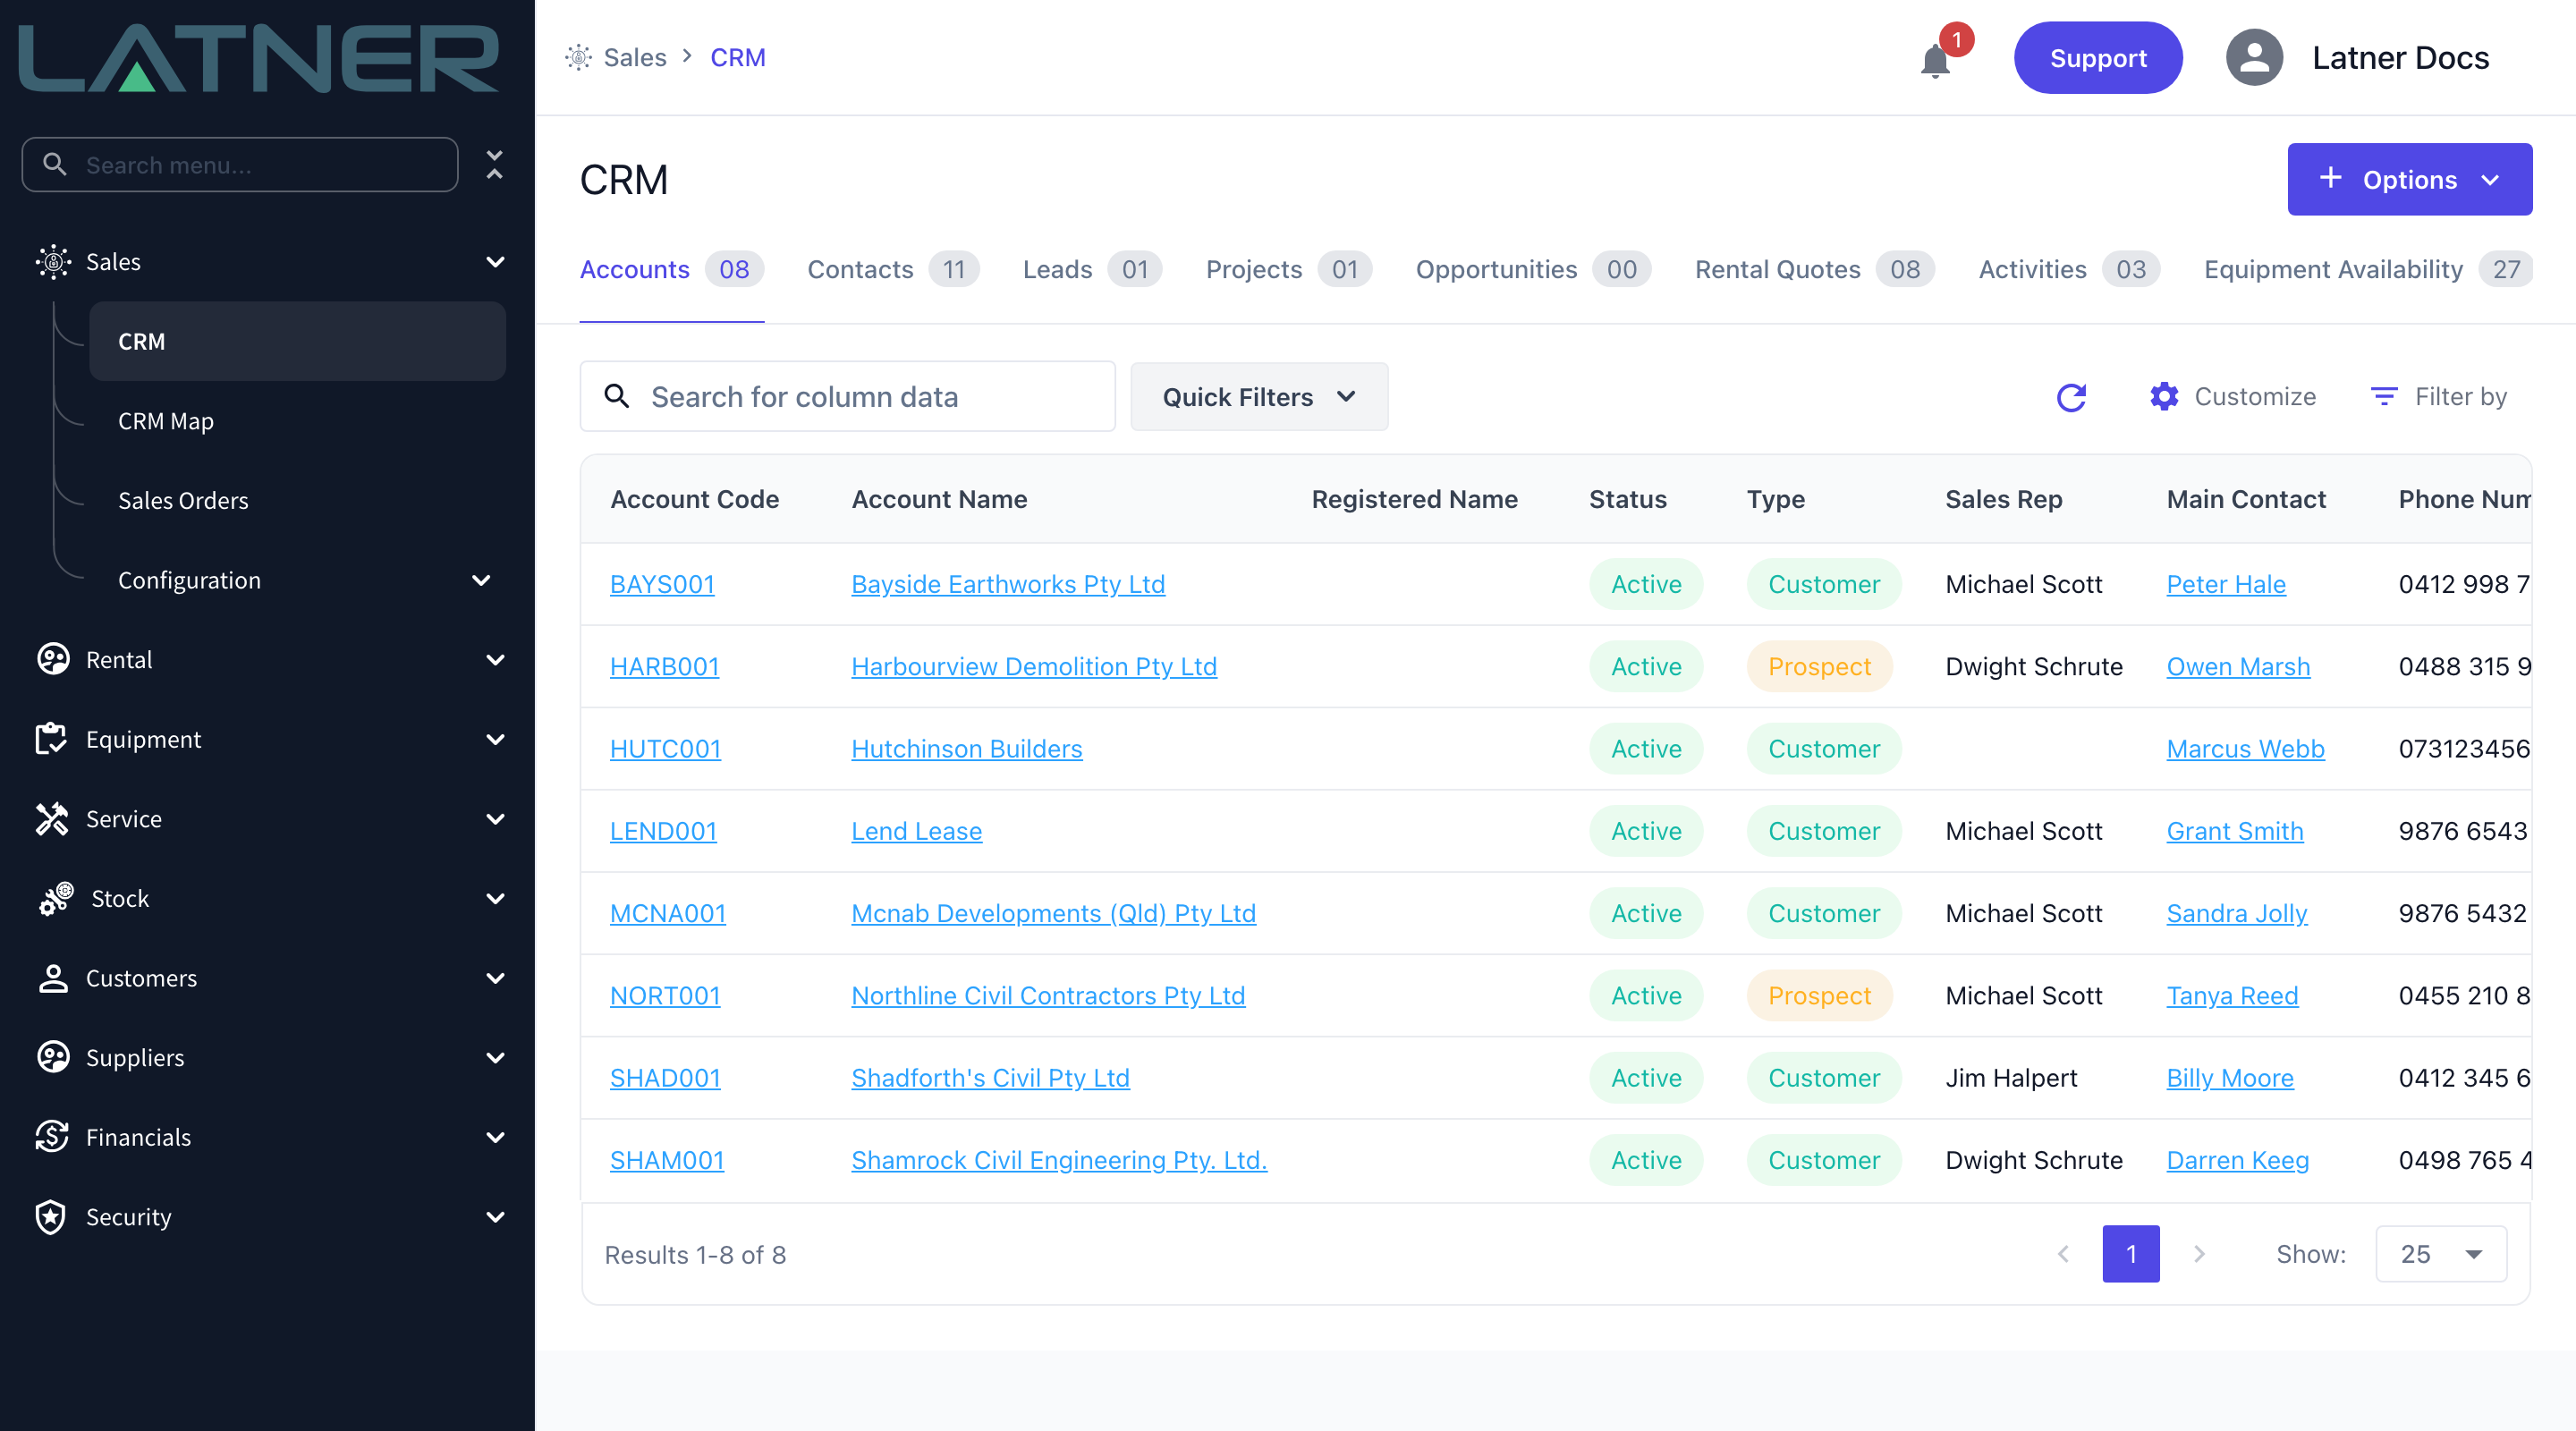
Go to Sales › CRM. The Accounts tab lists prospects and customers together, with the Type column telling you which is which and the Status column showing where each one sits. The tabs across the top - Contacts, Leads, Projects, Opportunities, Rental Quotes and the rest - are the same list seen from a different angle, and each carries its own record count.
Step 2 - Narrow the list with quick filters
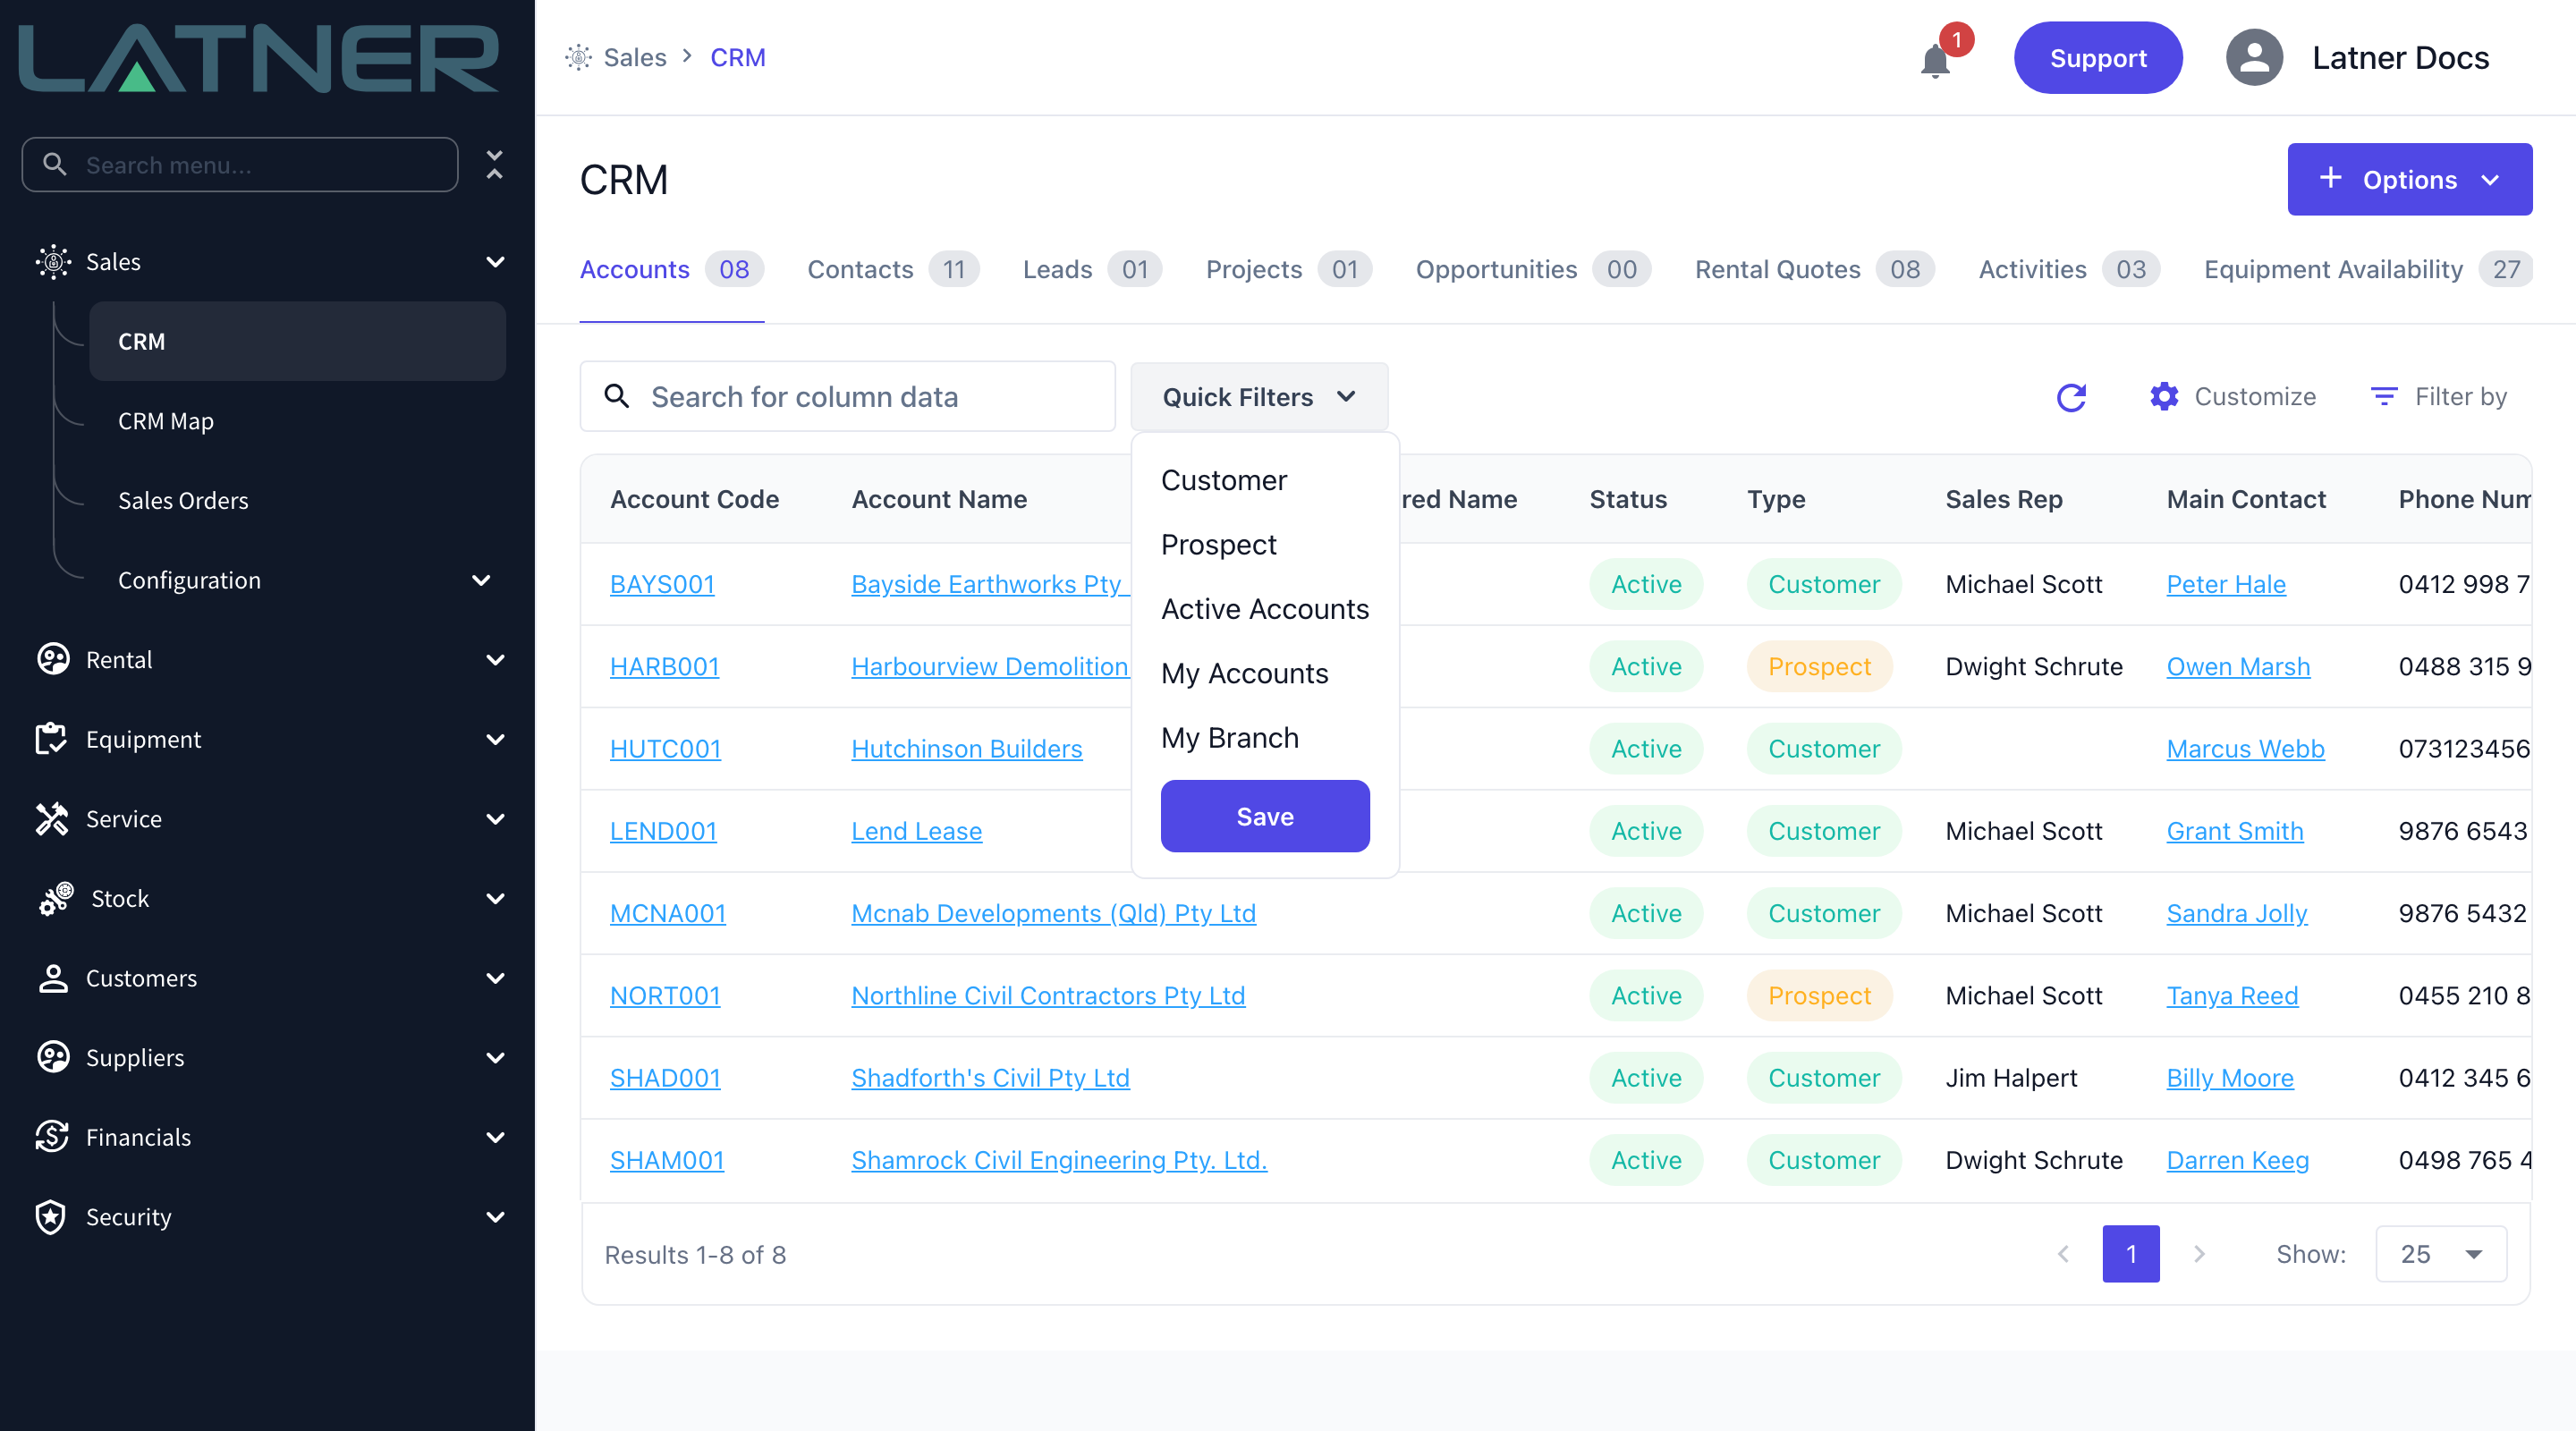
Click Quick Filters and pick the ones you want. On the Accounts tab you get Customer, Prospect, Active Accounts, My Accounts and My Branch. My Accounts matches accounts whose sales rep is linked to your own user, which is the fastest way to get to the ones you are responsible for.
Filters that look at the same thing widen the list rather than narrowing it, so turning on both Customer and Prospect shows you everything. Filters that look at different things stack, so My Accounts plus Prospect gives you your own prospects only. Each active filter appears as a chip next to the button; click a chip to switch it off again.
Once the list looks the way you want it, click Save inside the Quick Filters menu. That stores the selection against your own user, so the screen opens the same way next time.
Step 3 - Open the account
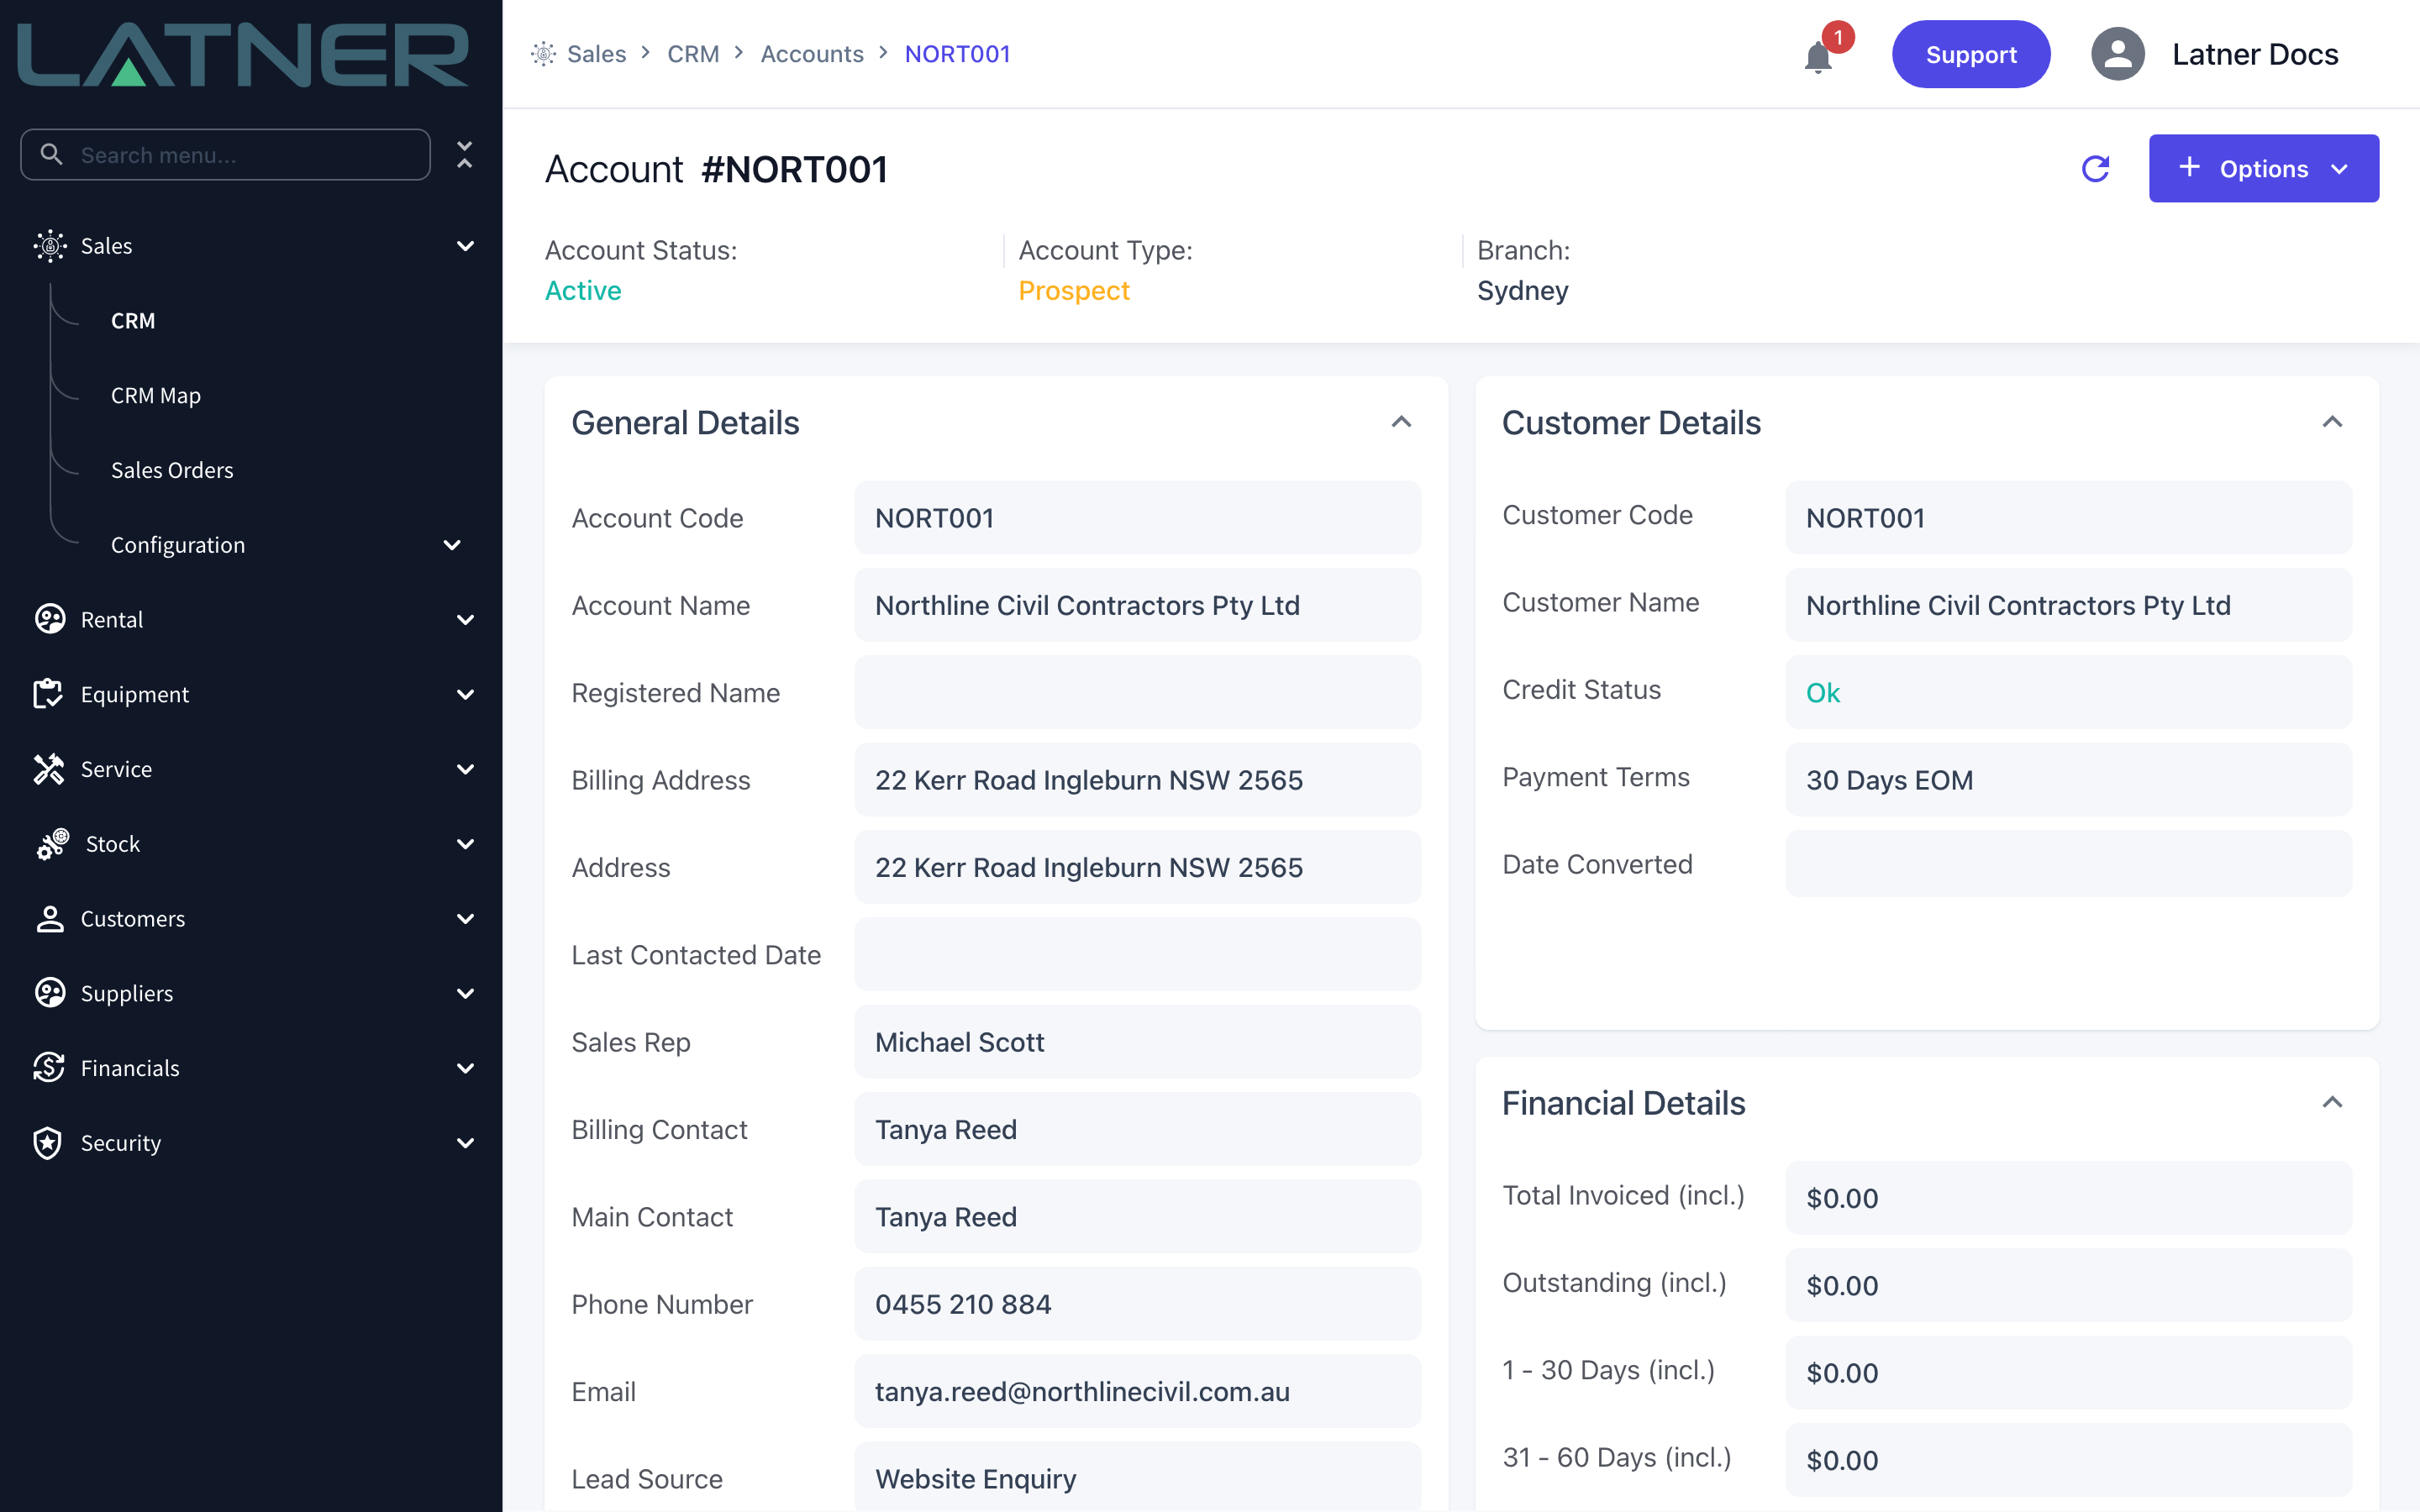
Click the account code or name, or double-click anywhere on the row. The account opens with its status, type and branch in a strip under the title, and three cards below: General Details, Customer Details and Financial Details.
Customer Details is the trading summary - customer code, credit status, payment terms and Date Converted, which stays blank while the account is still a prospect. Financial Details is the aged balance, and reads as zeros until the account starts being invoiced.
Keeping the Account Up to Date
Step 4 - Edit the General Details card
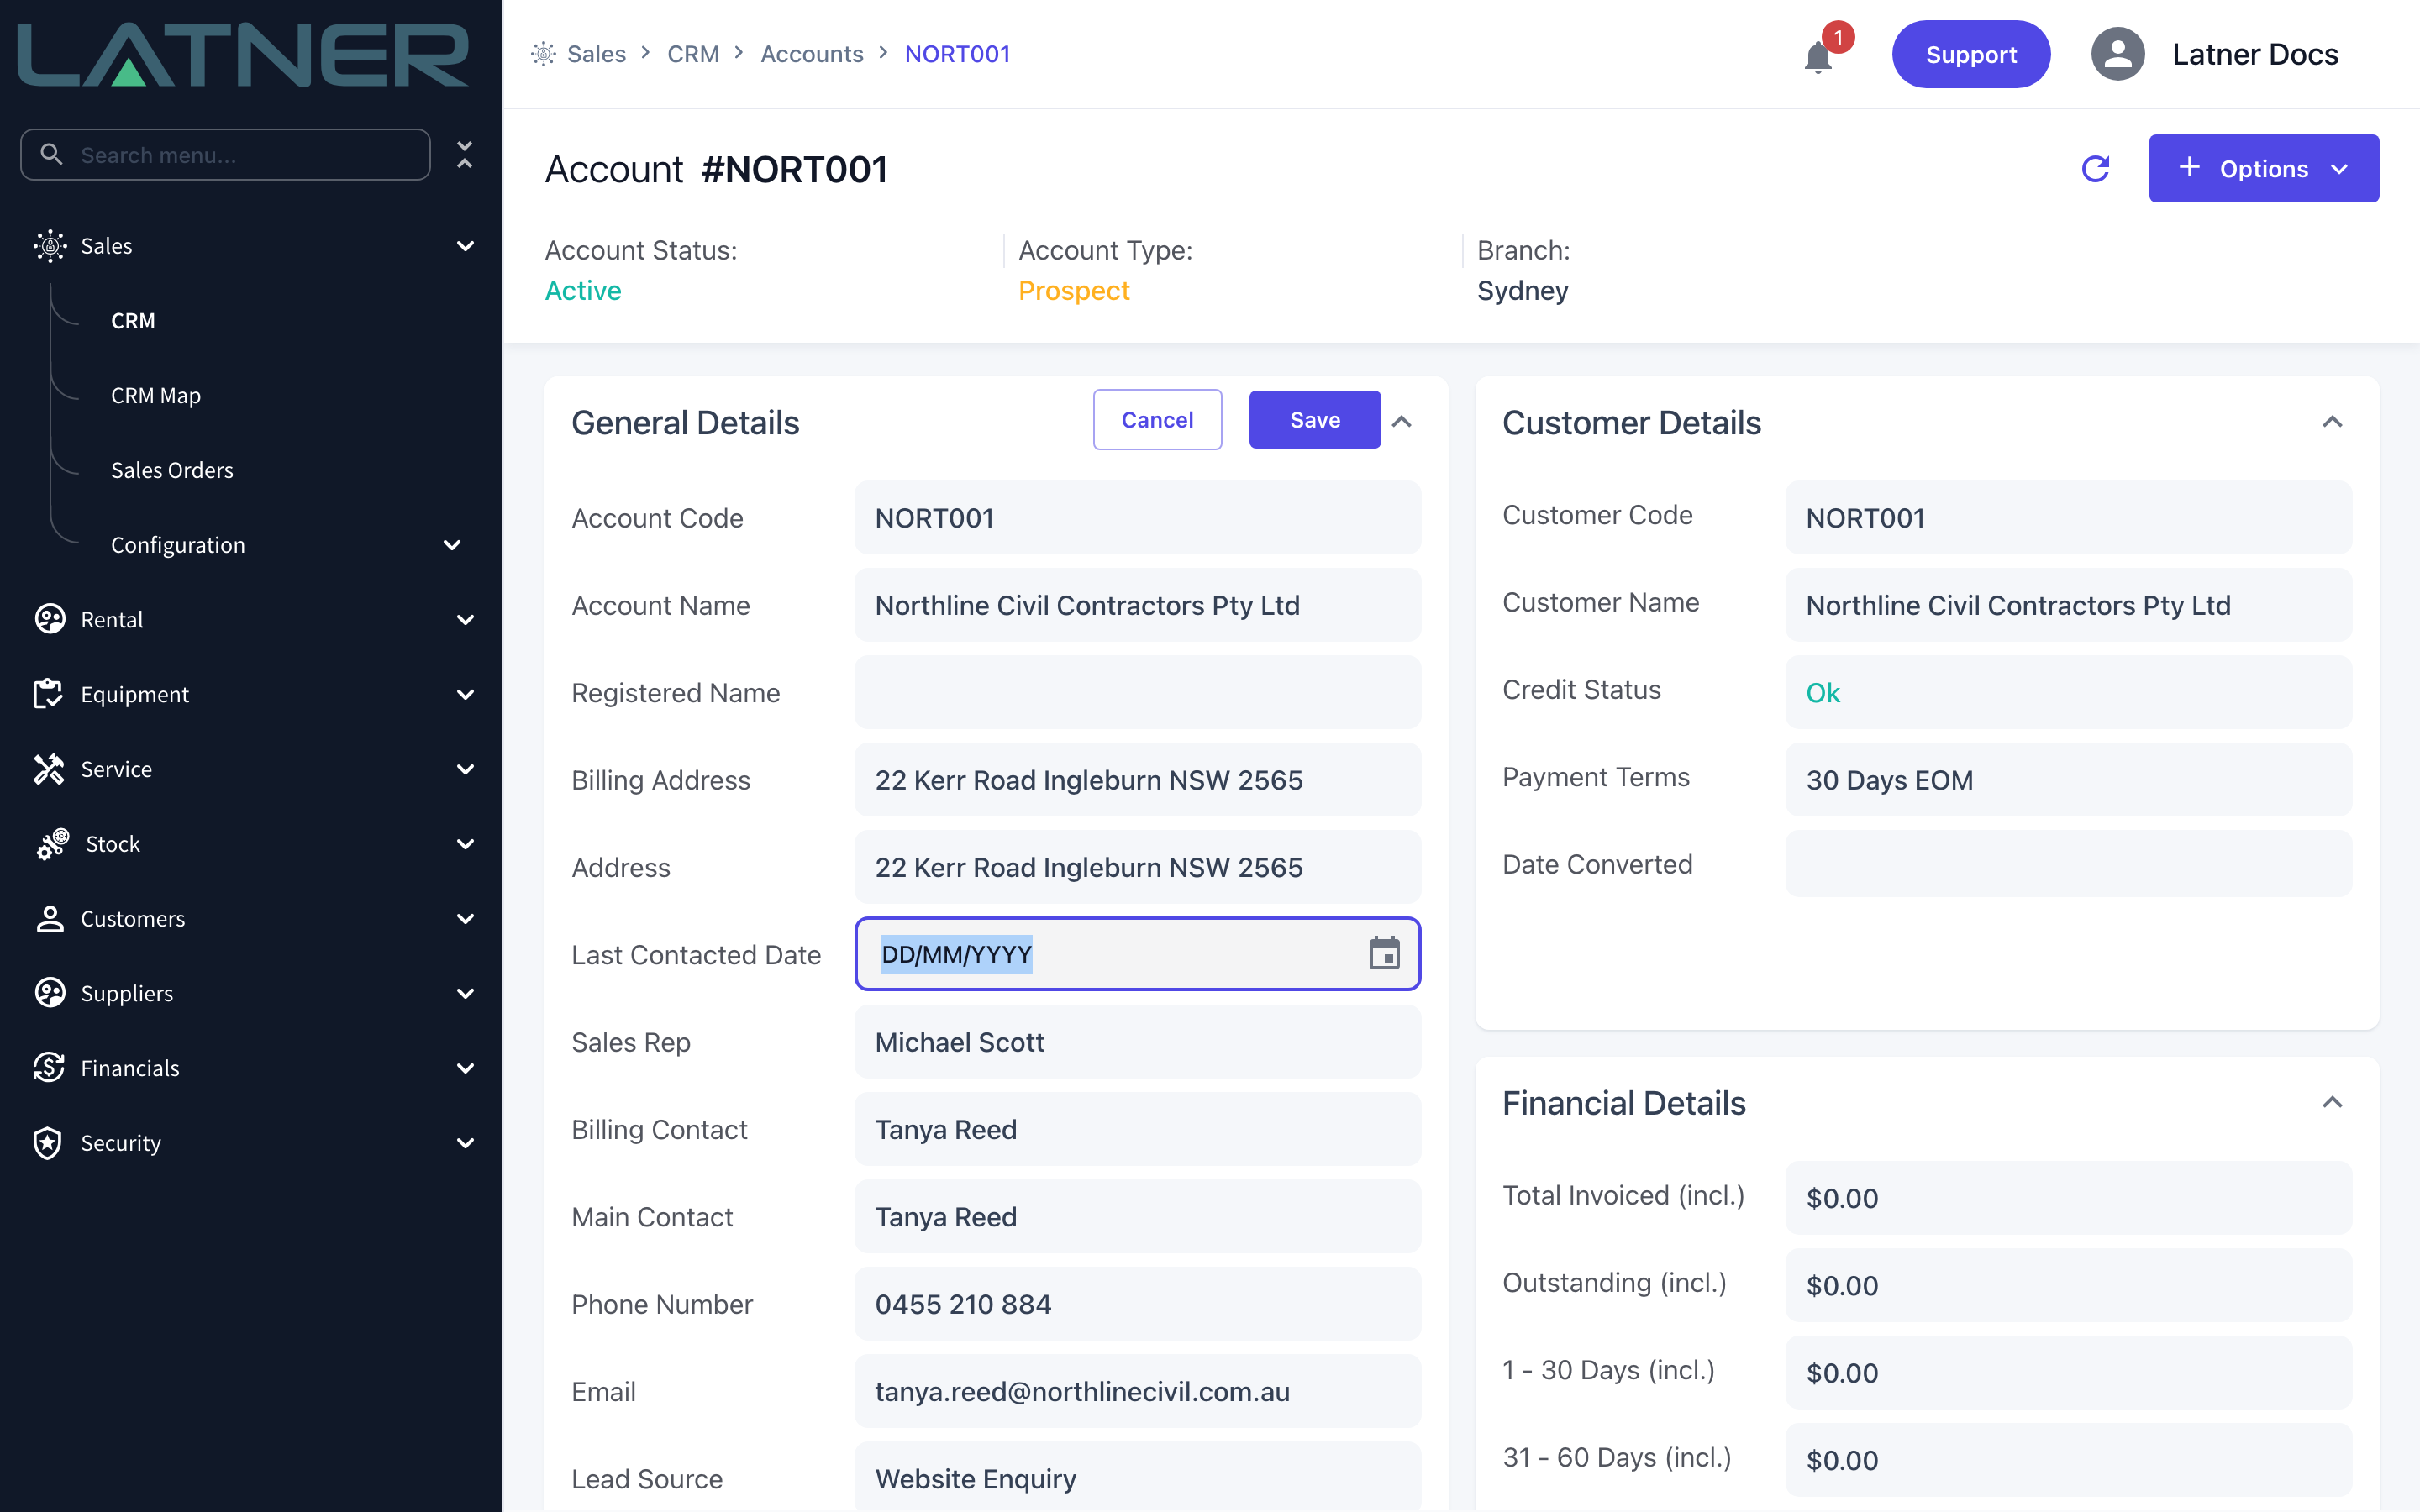
There is no edit button on this card. Click the value next to any field and the whole card switches into edit mode, with Cancel and Save appearing in the card header. Change what you need across the card, then click Save once.
The fields worth keeping current are:
-
Last Contacted Date - when someone last spoke to them. Nothing sets this for you, so it is only as good as the habit of filling it in.
-
Sales Rep - who owns the account. This is what My Accounts filters on, and changing it needs the Change Sales Rep field permission.
-
Lead Source and Industry - how the account came to you and what sort of business it is. These drive your CRM reporting, so they are worth setting even though they are optional unless you have made them mandatory.
-
Main Contact, Phone Number and Email - the person your team actually rings.
-
Registered Name and ABN - the legal entity behind the trading name, ready for when the account starts being invoiced.
Account Code is deliberately read-only here. To change it, use Options › Change Customer Code on the Customer screen.
Step 5 - Work the account's related records
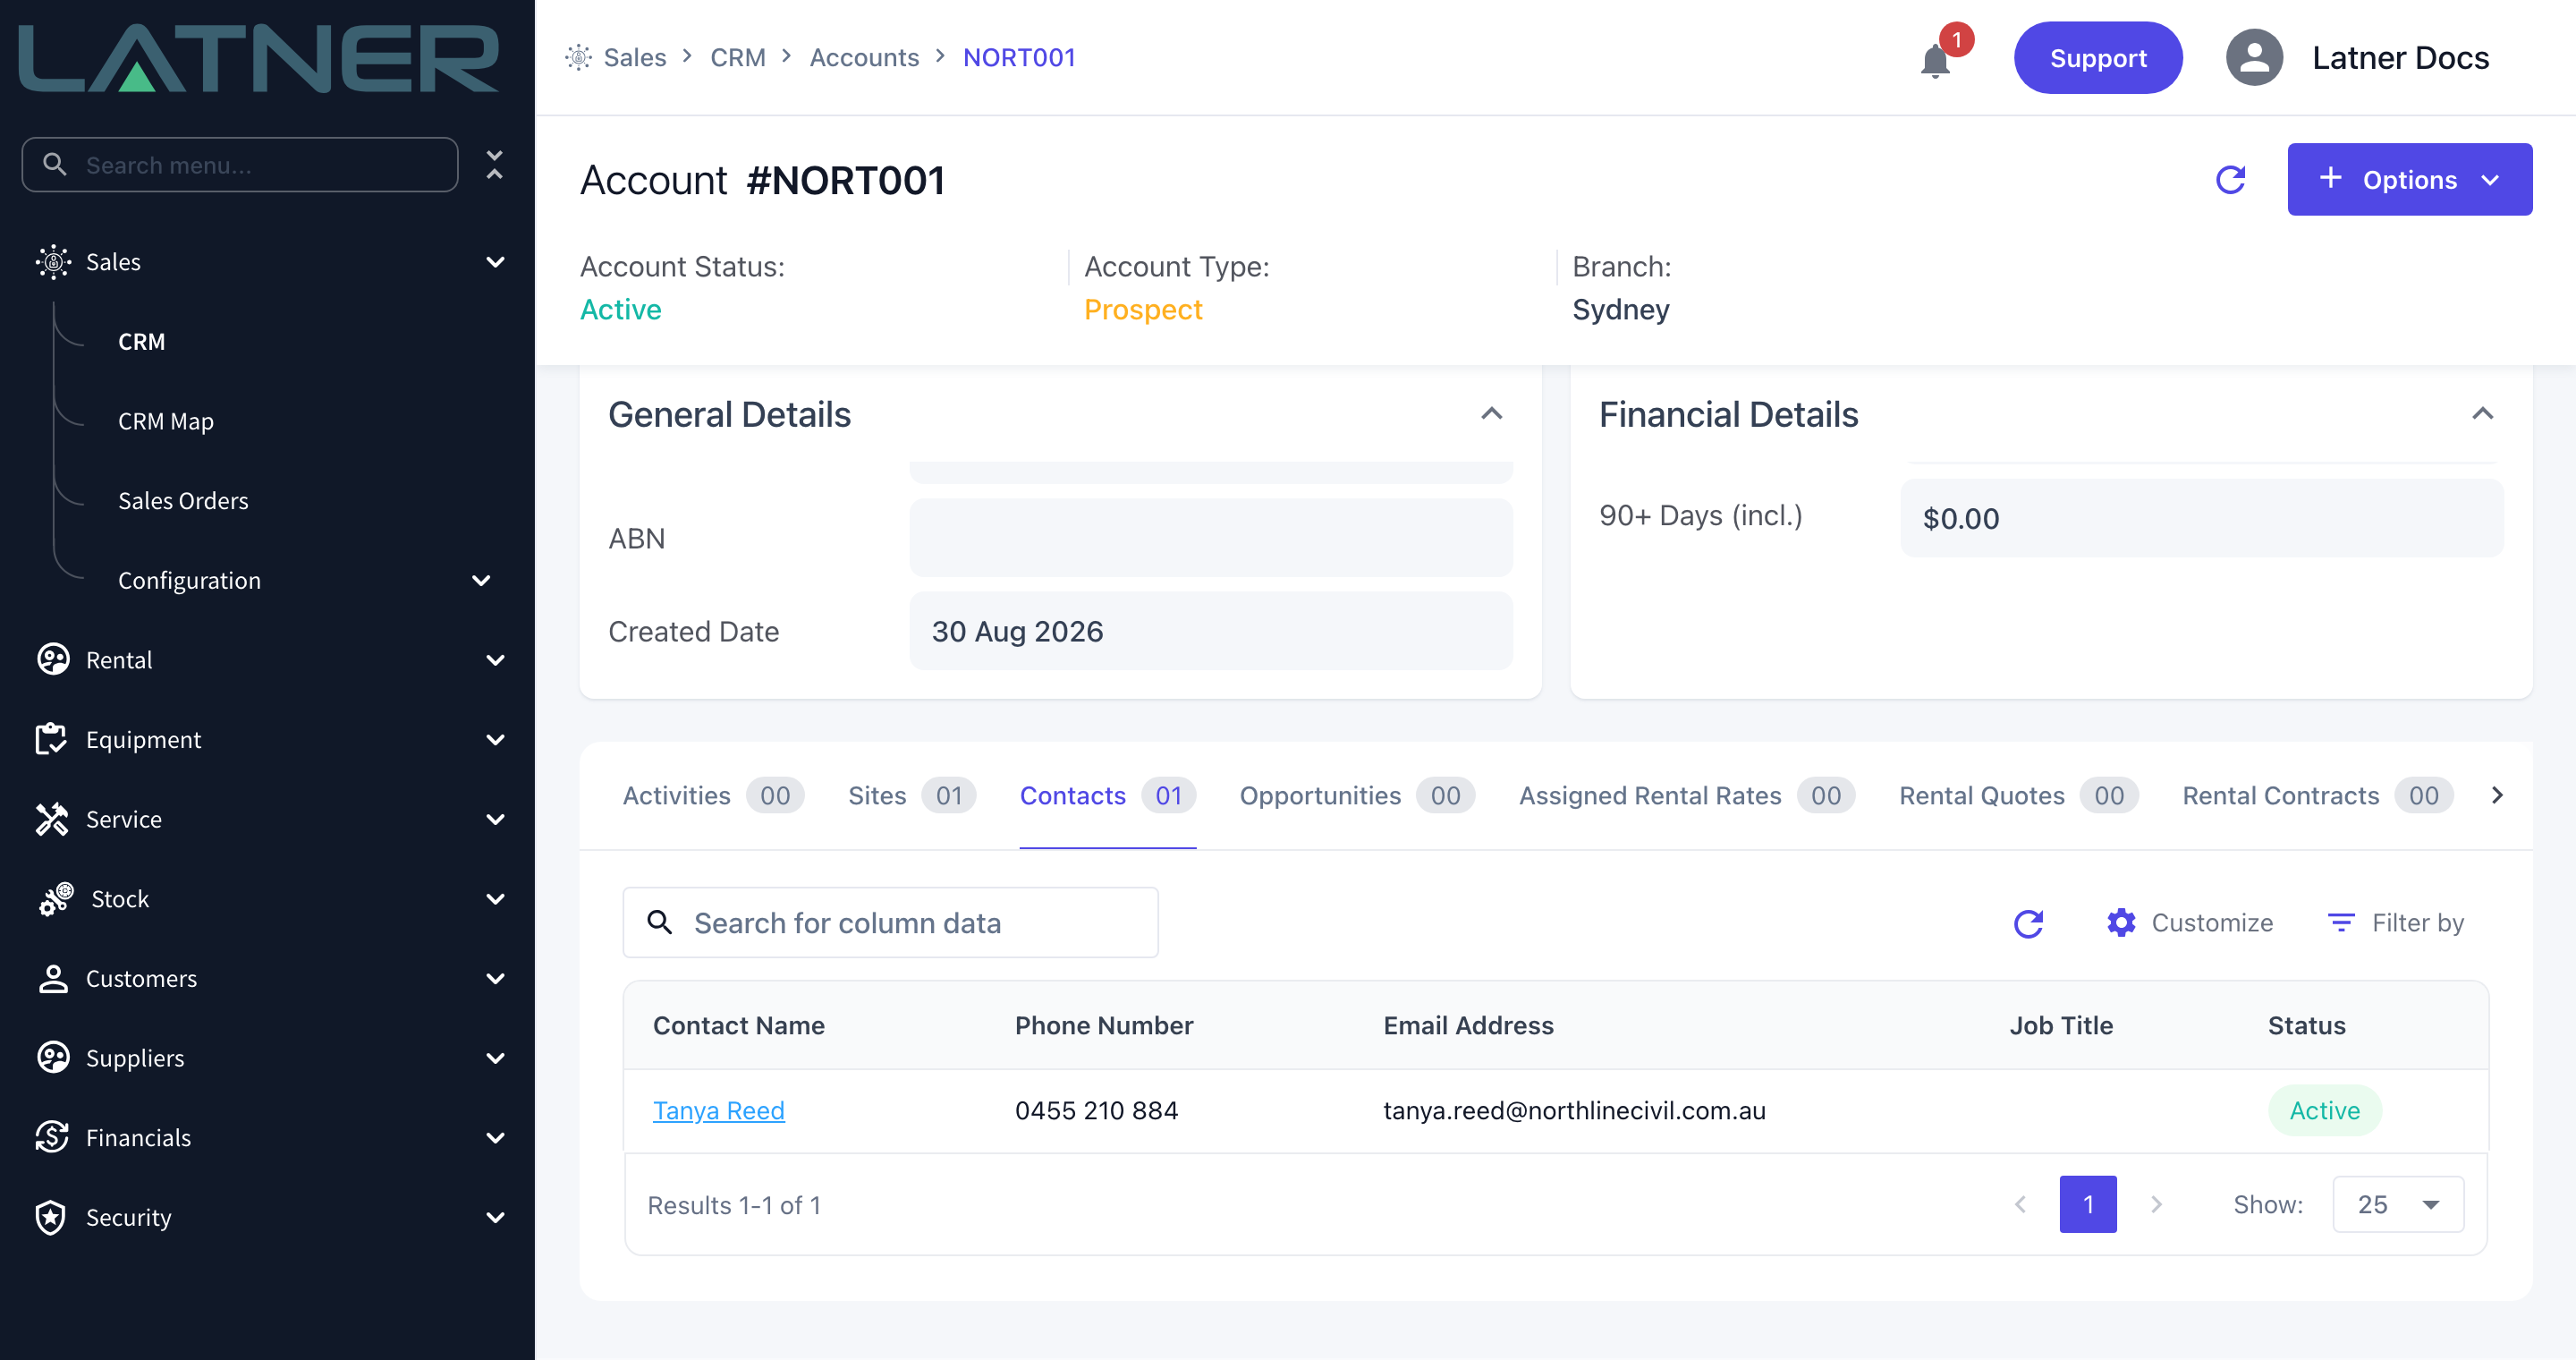
Scroll down to the tab strip. Activities, Sites, Contacts, Opportunities, Assigned Rental Rates, Rental Quotes, Rental Contracts, Work Order Quotes and Work Orders each show what is attached to this account, with a count on the tab so you can see at a glance where the activity is.
Every new account starts with one contact and one site, both created for you from what you entered when the account was set up. Add more from the Options menu rather than from the tabs.
Step 6 - Use the Options menu on the account
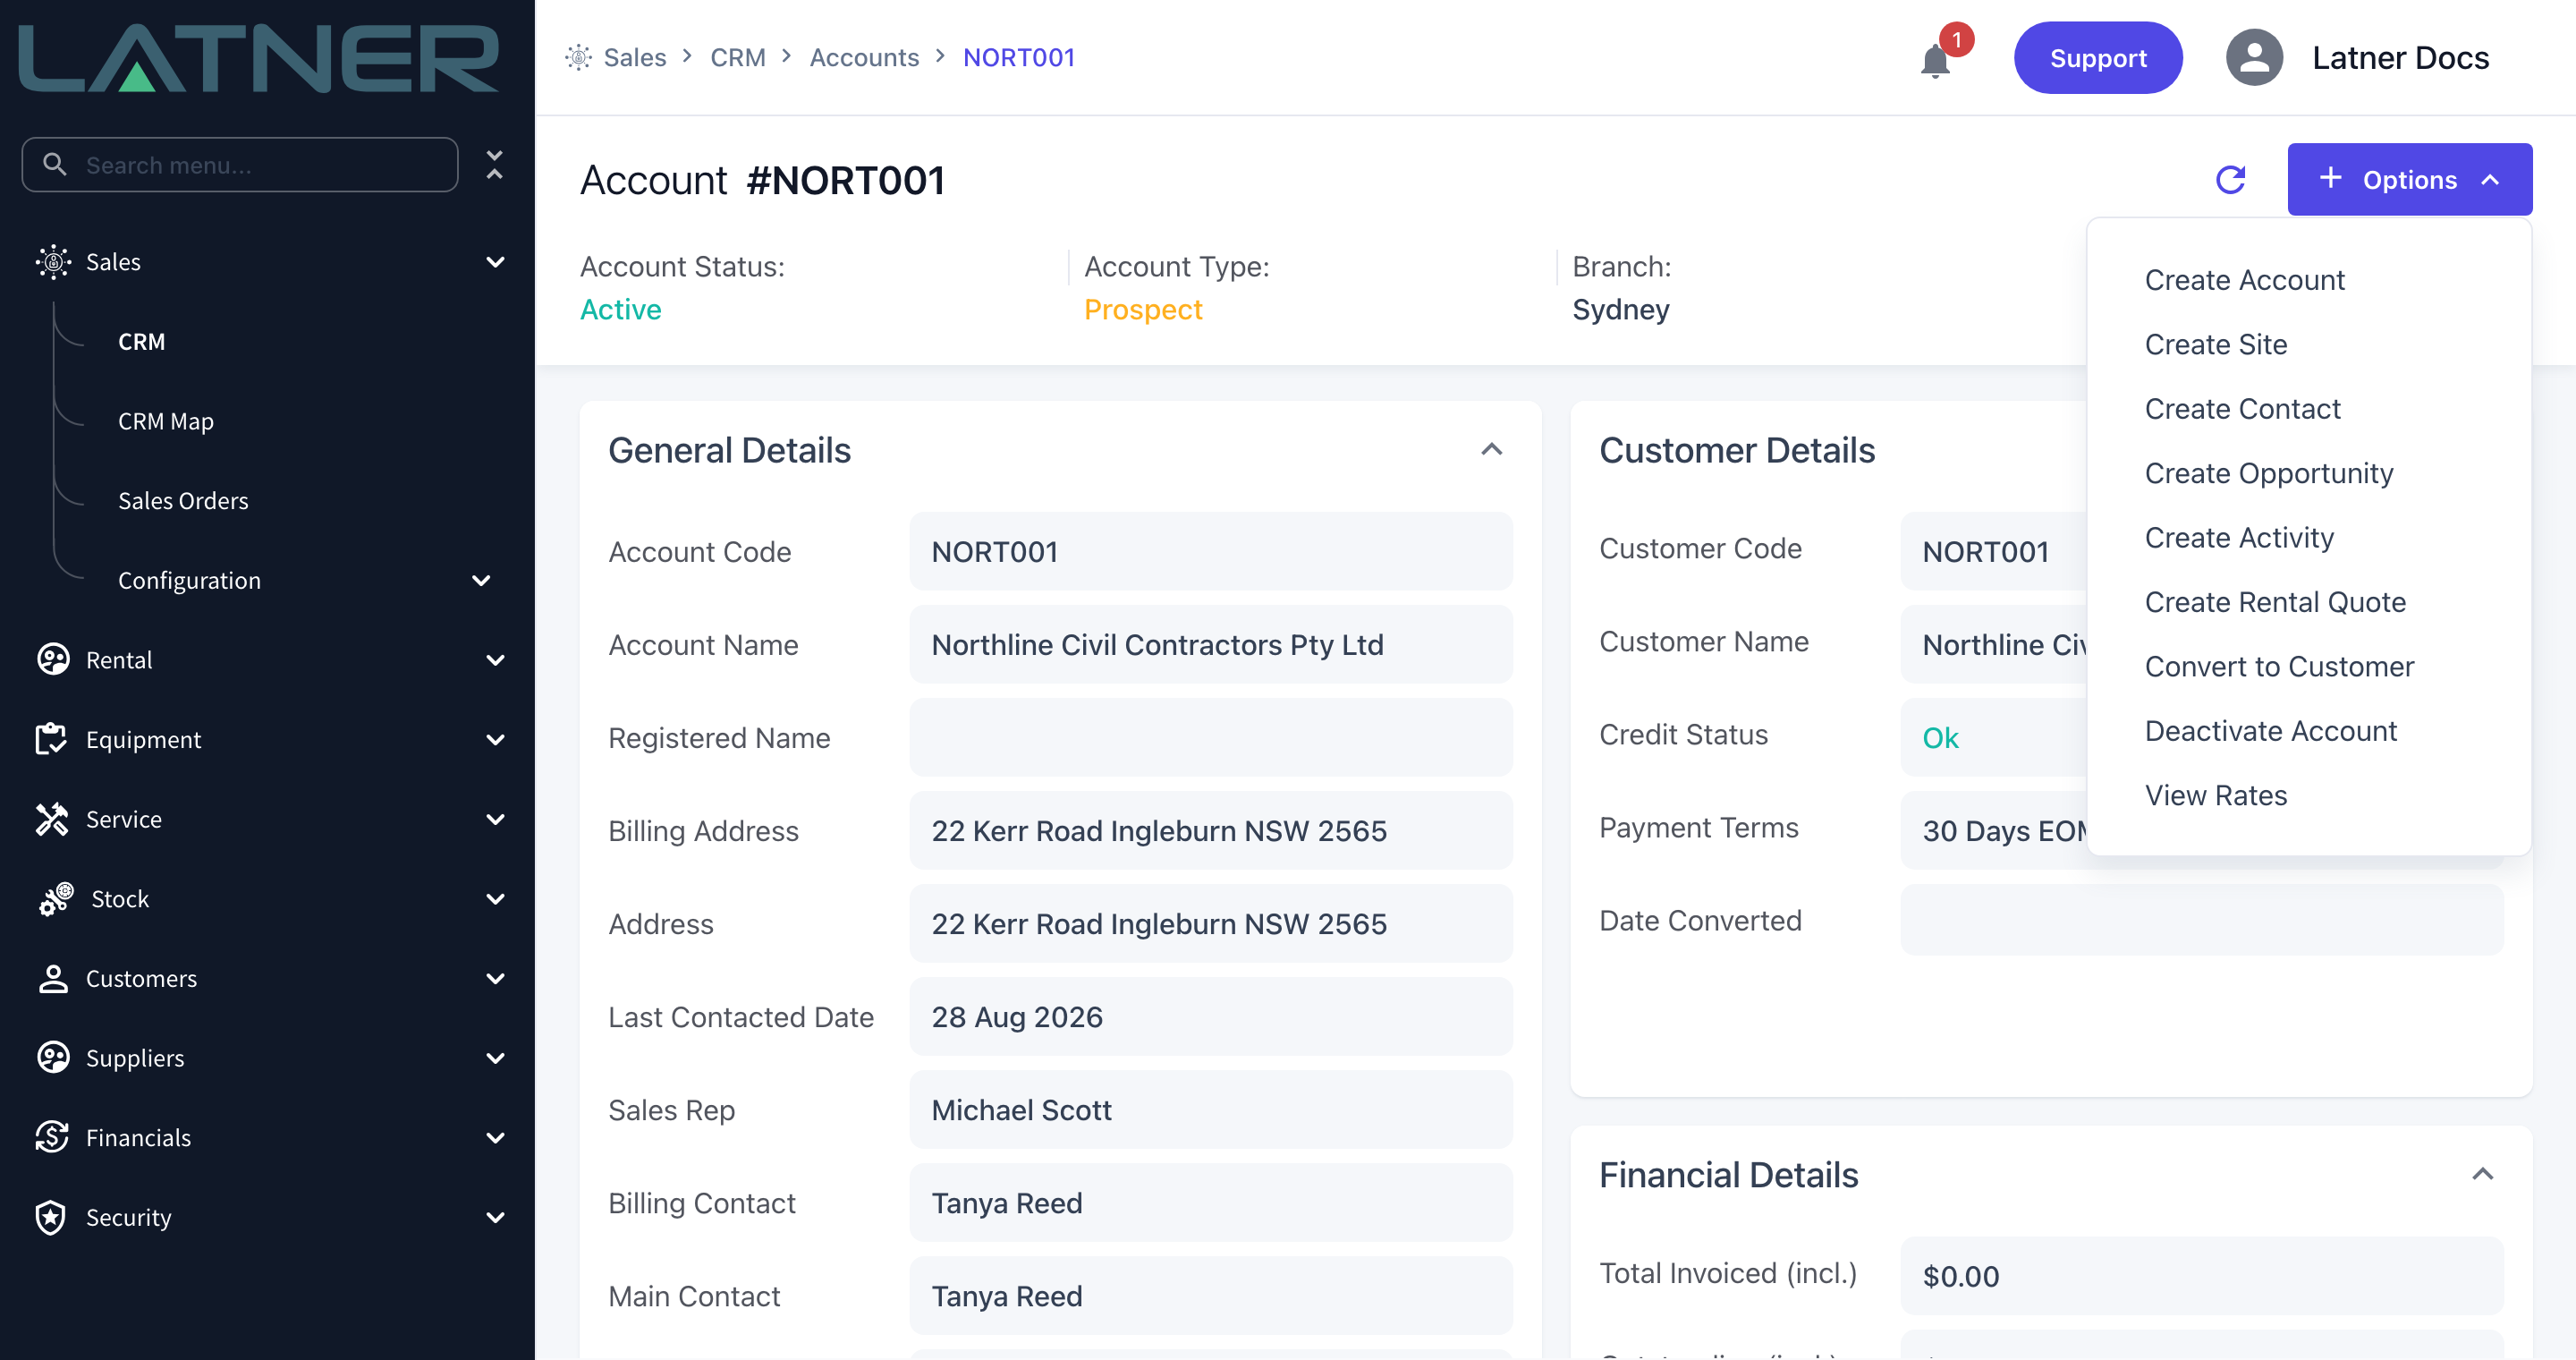
Options in the top right is where the actions live:
-
Create Site and Create Contact - add the delivery locations and the people you deal with.
-
Create Activity - log a call, meeting or follow-up against the account.
-
Create Opportunity and Create Rental Quote - move the account along the pipeline. Both work fine against a prospect.
-
Convert to Customer - turn the prospect into a trading account. This is covered in its own article.
-
Deactivate Account - retire a prospect you are no longer chasing. The label flips to Activate Account once it is inactive.
-
View Rates - jump to the rental rates that apply to this account.
Managing the Account Once It Trades
Step 7 - Open the Customers screen
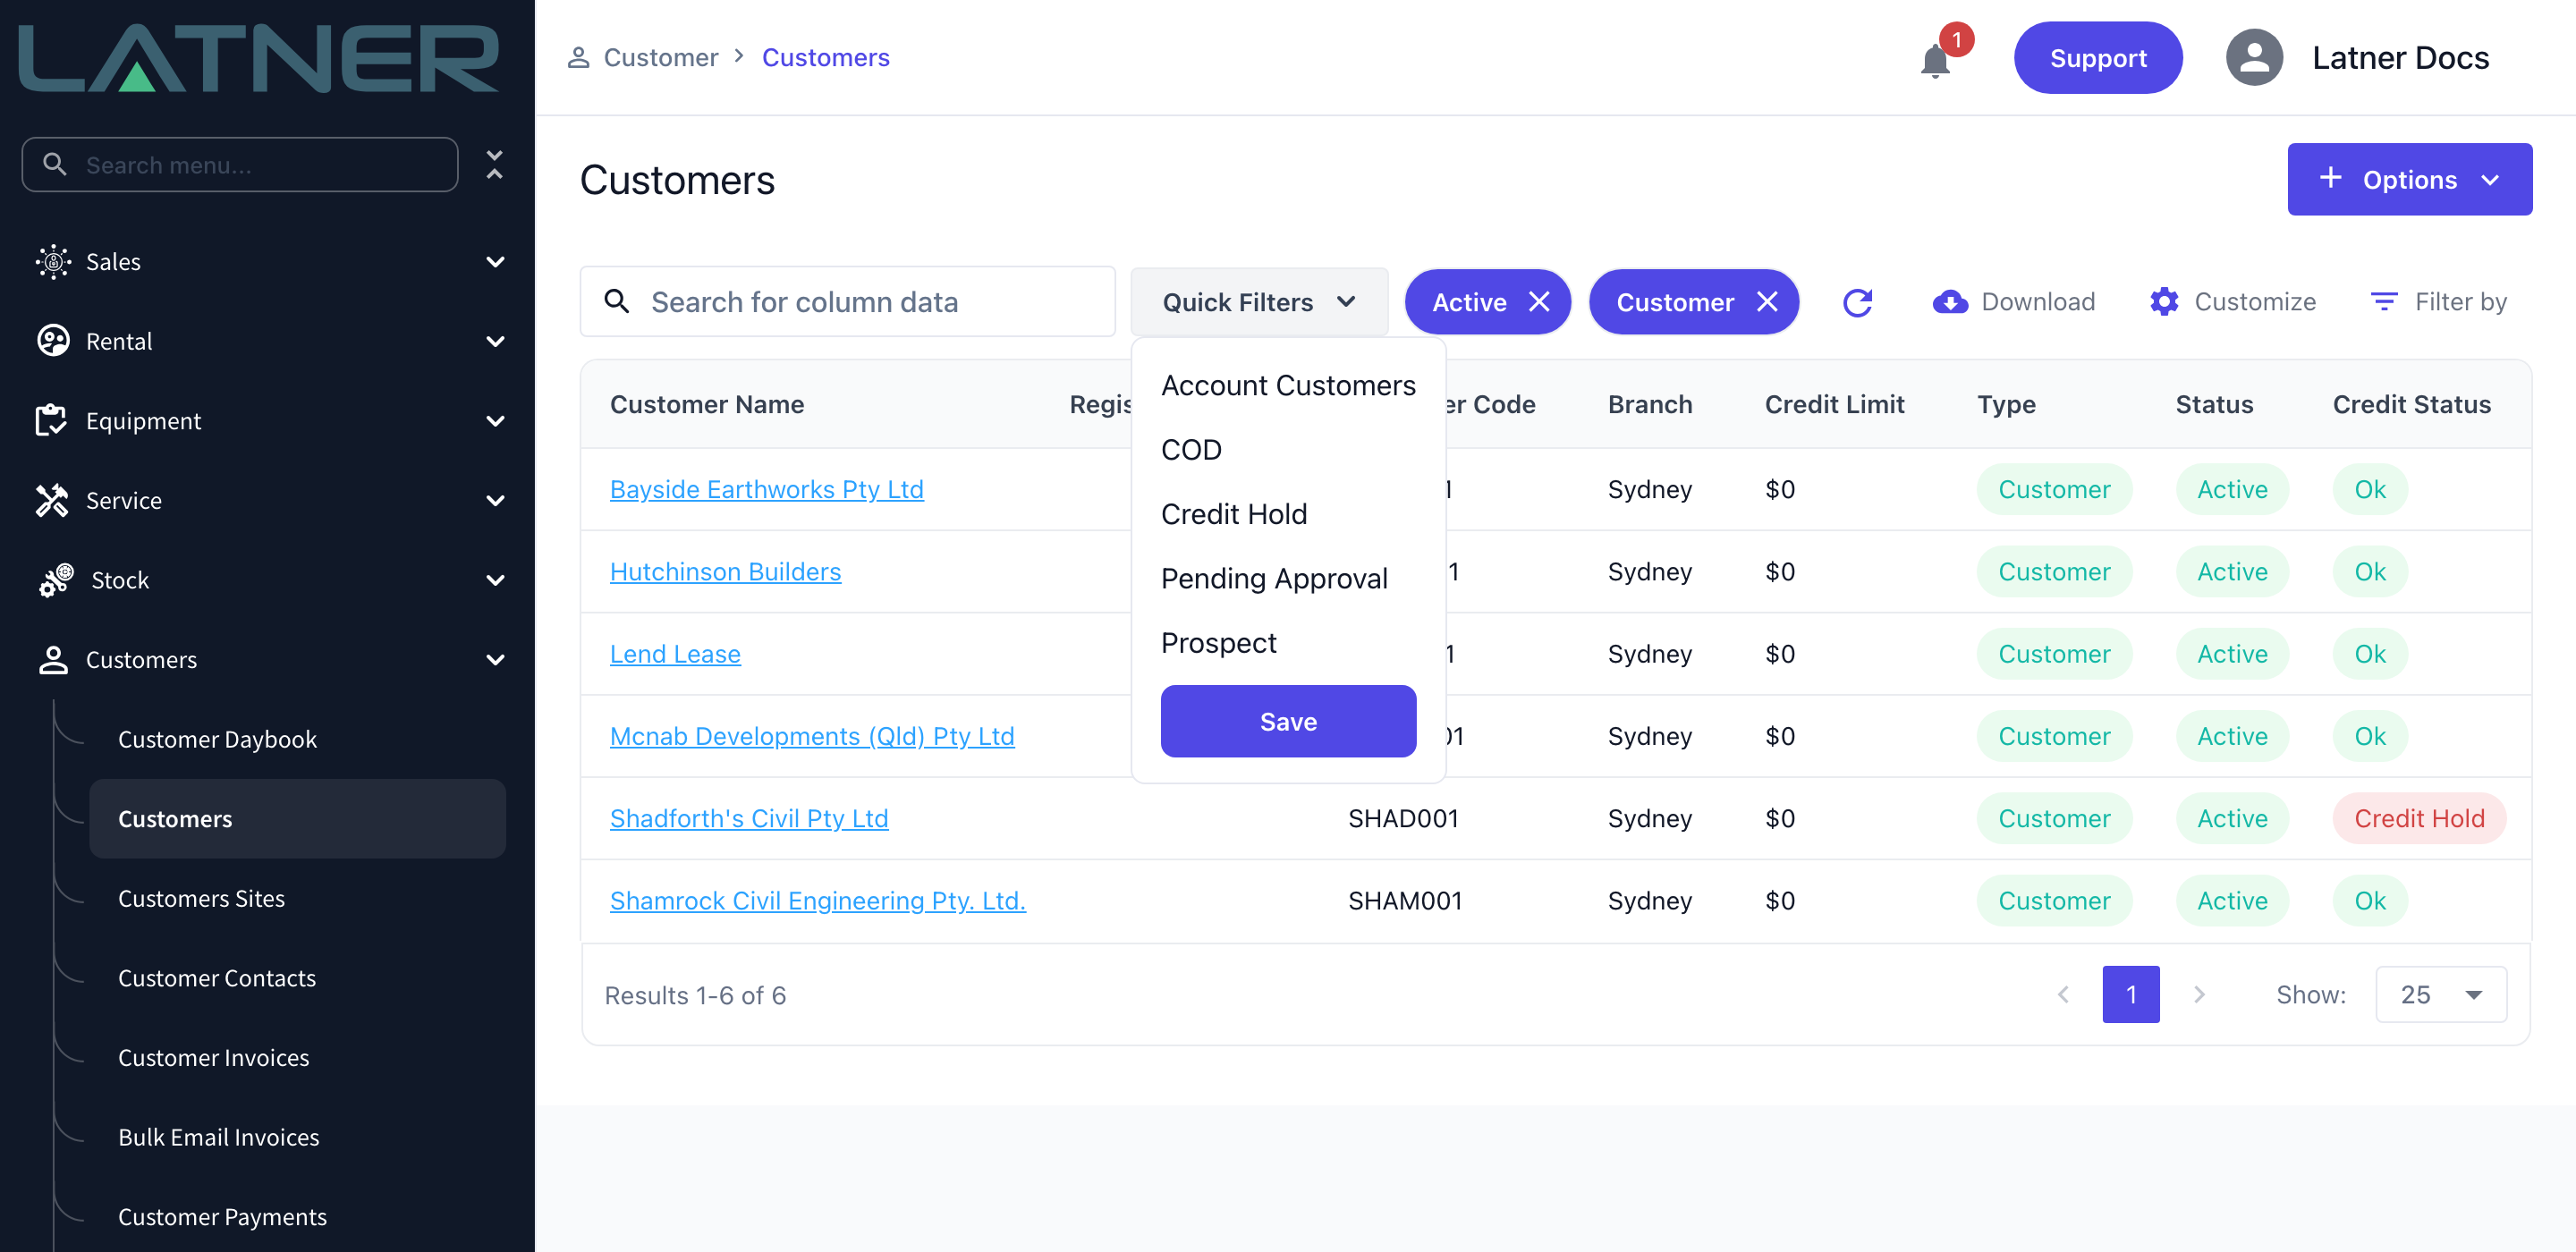
Go to Customers › Customers. This screen opens with the Customer and Active quick filters already applied, which is why prospects are missing from it until you add the Prospect filter. Its other quick filters - Account Customers, COD, Credit Hold and Pending Approval - are the ones an accounts team reaches for.
Pending Approval is the one worth checking regularly: it lists accounts that have been converted but not yet approved, and they cannot be put on rental contracts until someone approves them.
Step 8 - Review the customer record
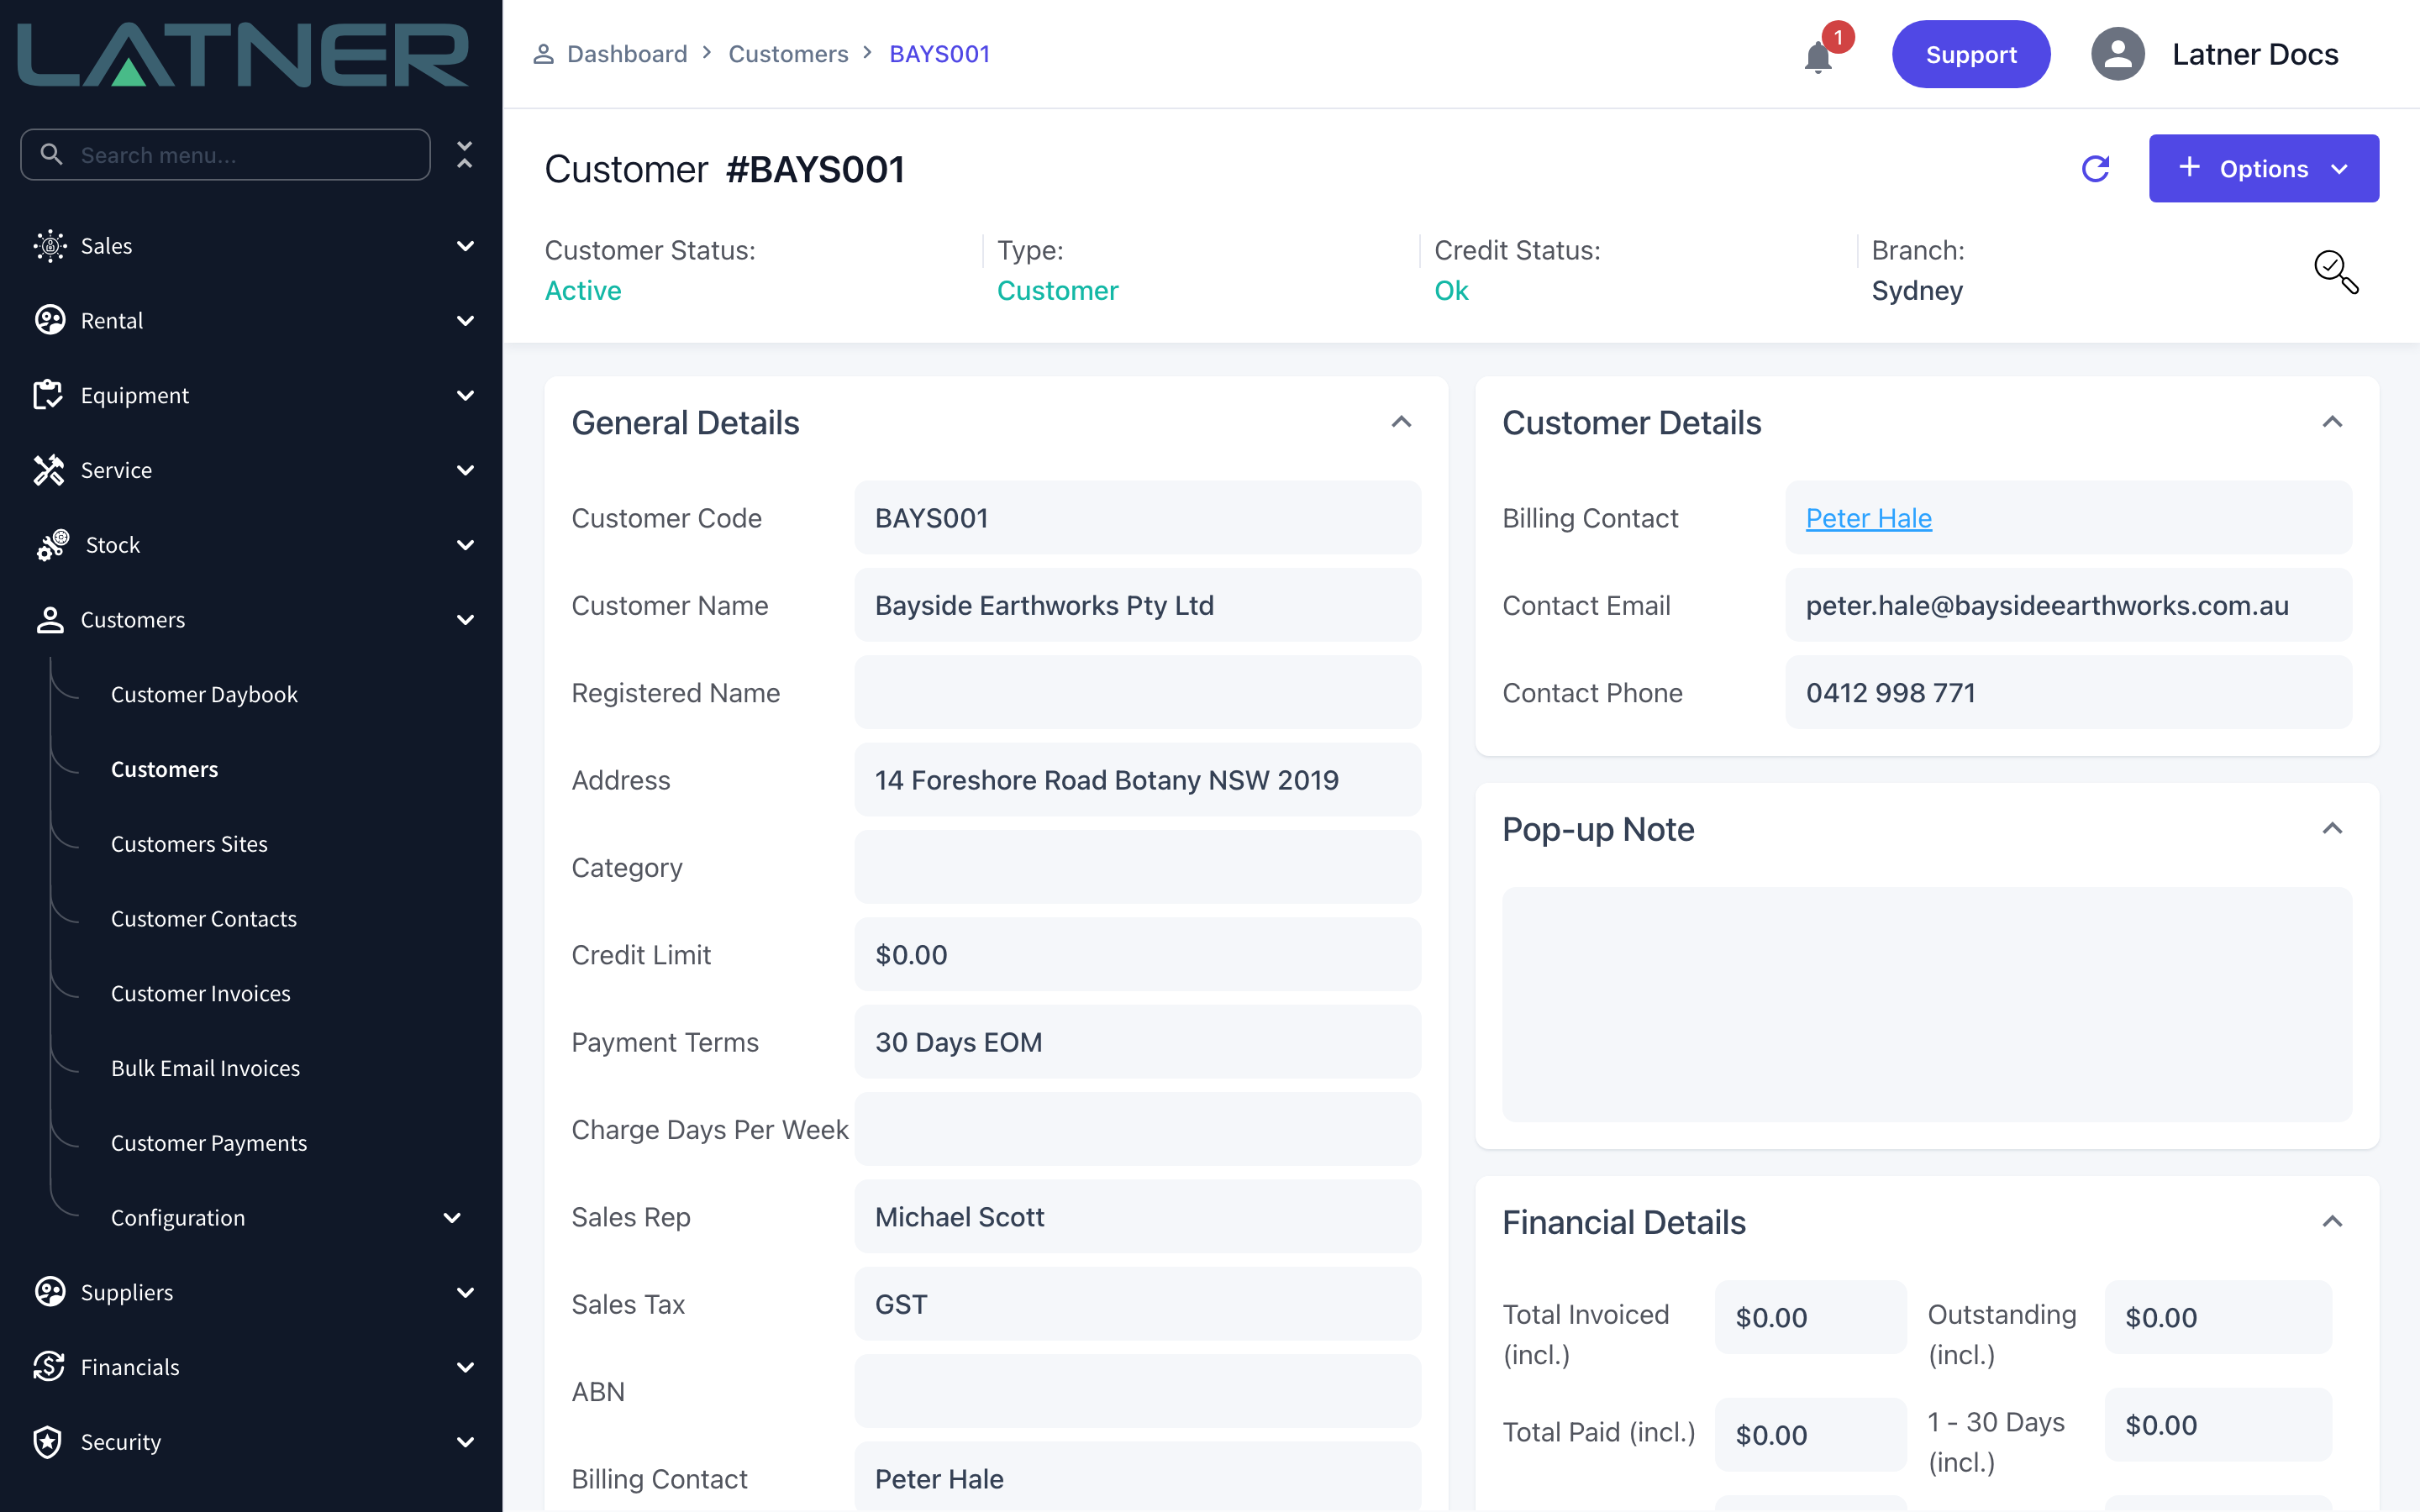
The Customer screen carries everything the Account screen does plus the commercial detail: Credit Limit, Payment Terms, Charge Days Per Week, Sales Tax, Damage Waiver, Environmental Levy and Purchase Order Required. Edit them the same way - click a value, change what you need, click Save.
Two panels are worth knowing about:
-
Pop-up Note - anything typed here is shown to the user when a rental quote or rental contract is created for this customer. It is the right place for "always requires a purchase order" or "site inductions needed".
-
Financial Details - the aged balance, credits and total outstanding, all read-only and driven by the customer's invoices and payments.
The tab strip is longer here too, adding Sales Orders, Invoices, Payments, Insurance, Documents, Saved Cards, Rental Rates, On Rent Reports, Integration Syncs and Billing Settings.
Step 9 - Use the Options menu on the customer
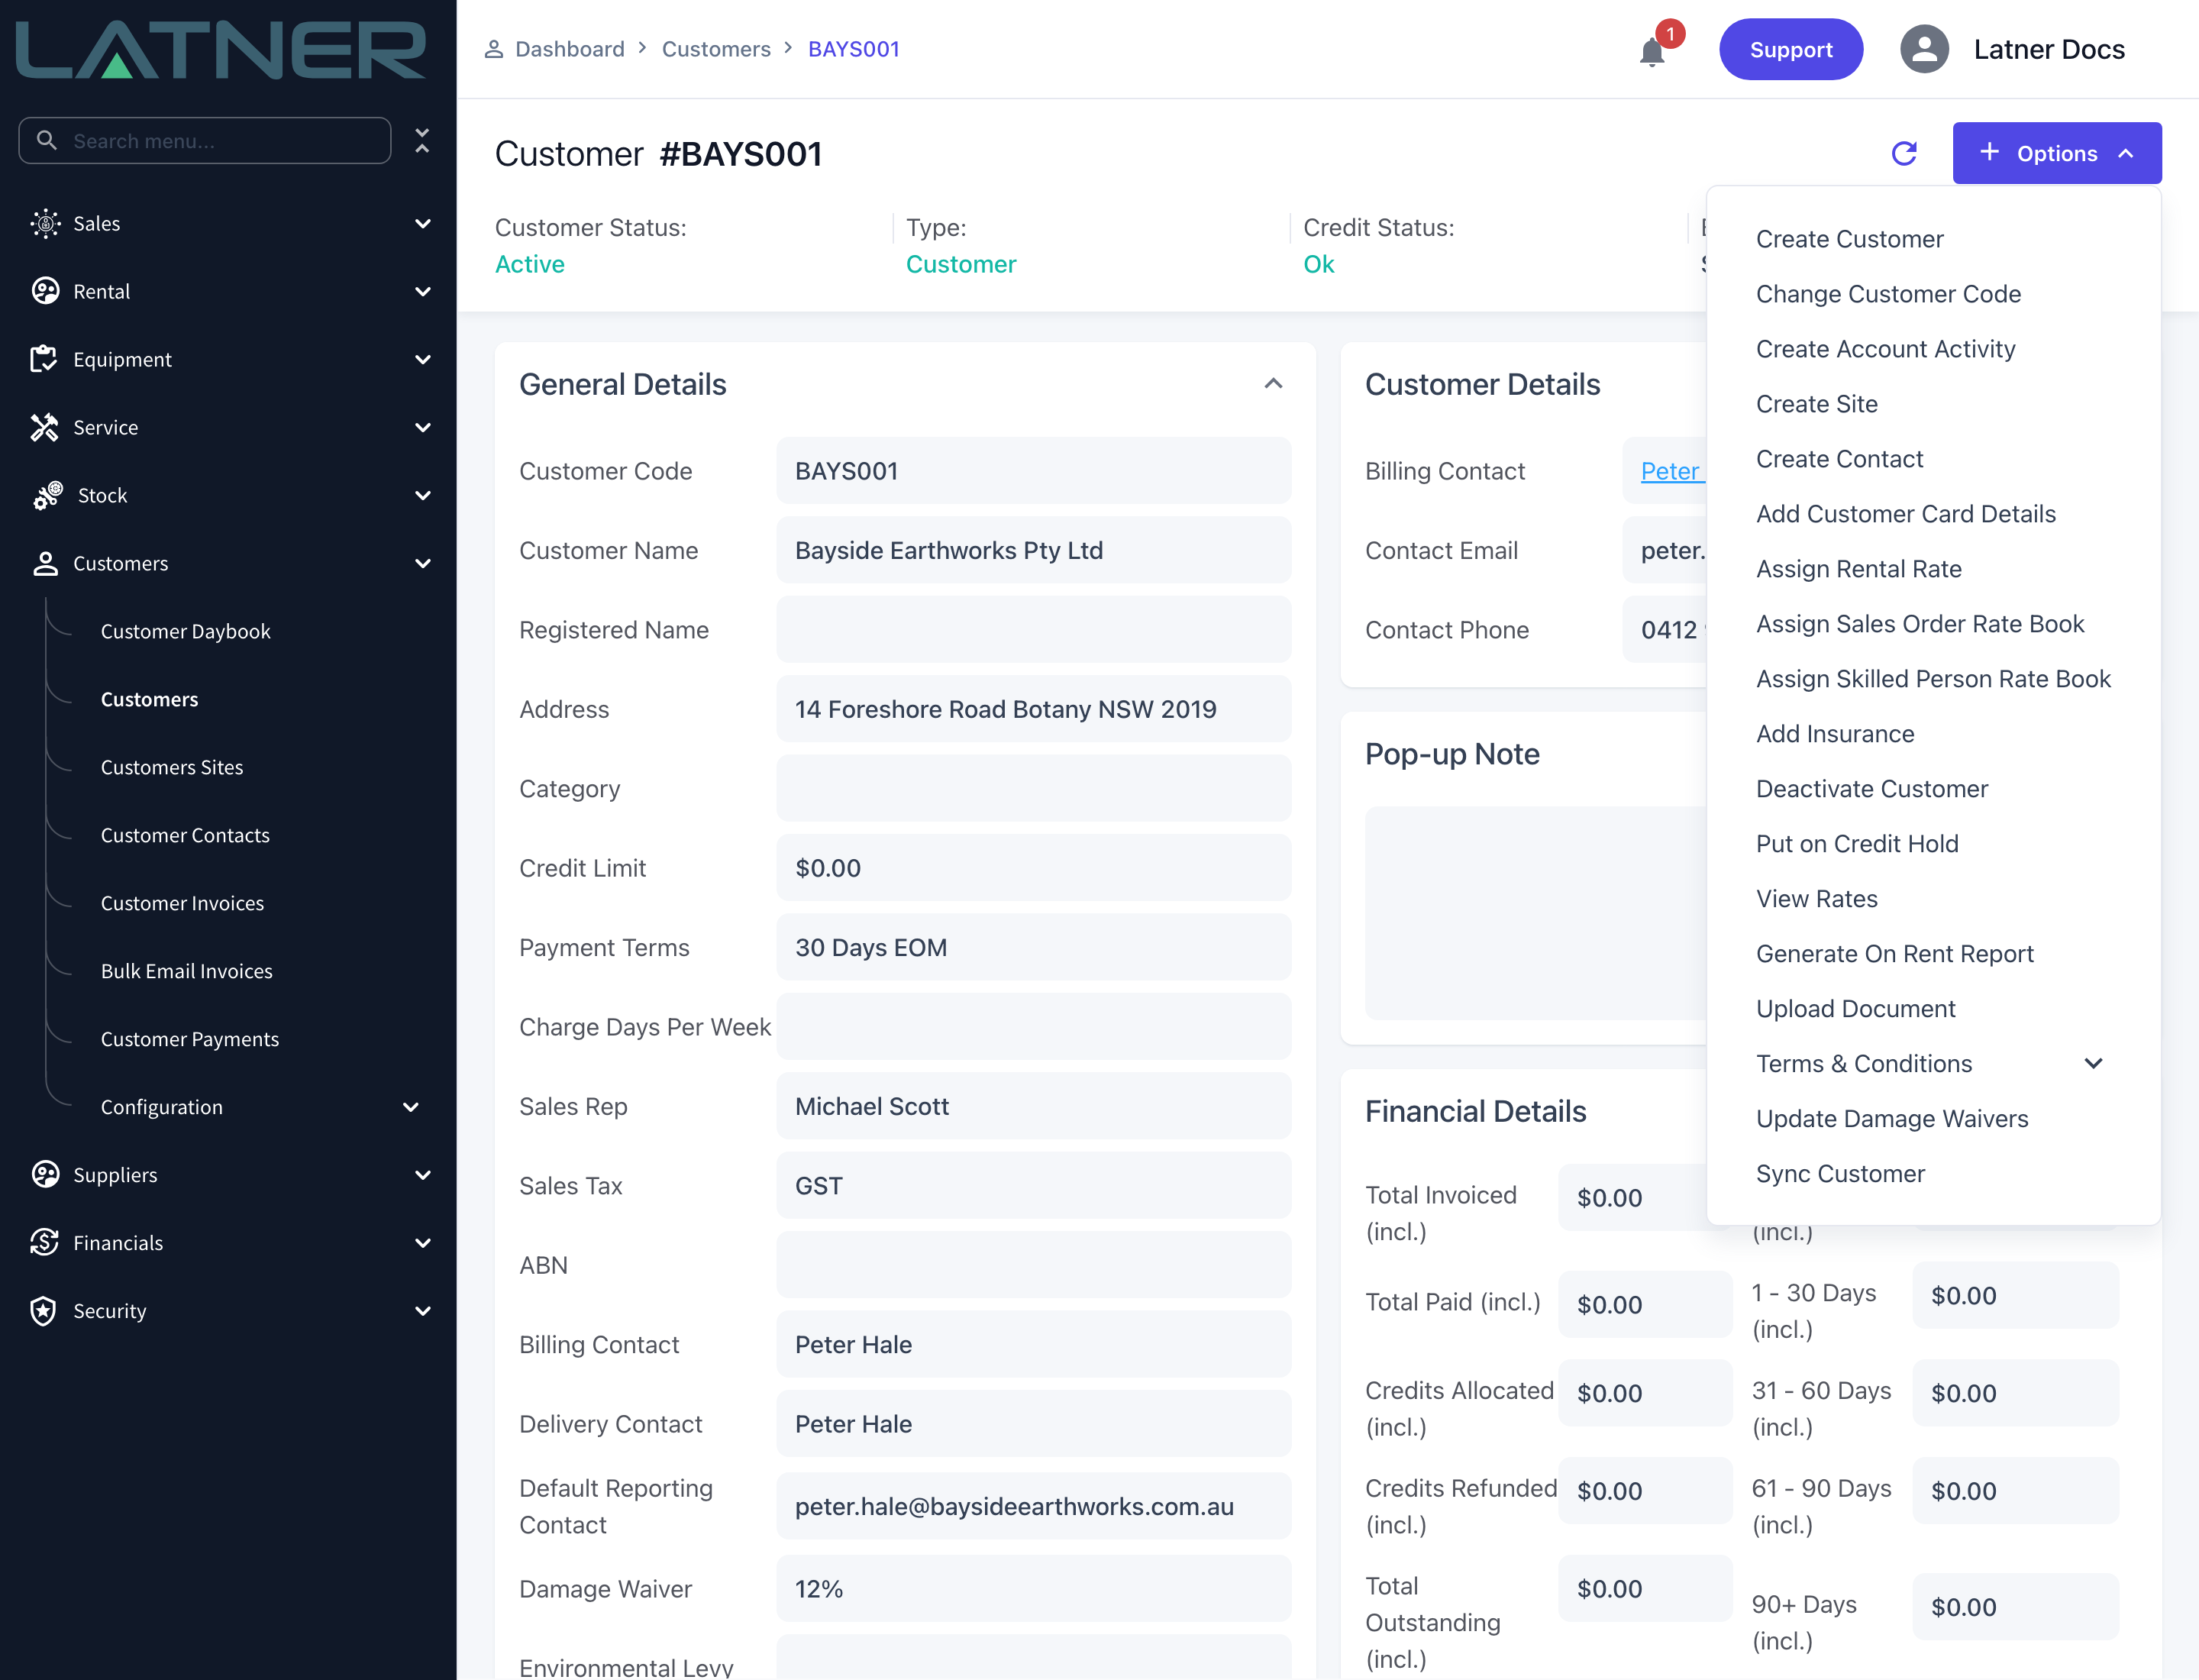
The Customer Options menu is where the account-management actions live. The ones you will use most:
-
Change Customer Code - the only way to change the code, and it needs its own permission.
-
Put on Credit Hold / Remove Credit Hold - the label swaps depending on where the account currently sits.
-
Deactivate Customer / Activate Customer - retire an account that has stopped trading.
-
Approve Customer - only appears while the account is at Pending Approval, and moves it to Active.
-
Assign Rental Rate, Assign Sales Order Rate Book and Assign Skilled Person Rate Book - attach the pricing this customer gets.
-
Update Damage Waivers - push a changed damage waiver percentage out to the customer's open rental quotes and live rental contracts.
-
Sync Customer - push the account to your accounting integration. Only available while the customer is Active.
-
Terms & Conditions - upload or clear the quote and contract T&C PDFs used on this customer's paperwork.
Convert to Customer is missing from this menu on an account that is already a customer - that is expected, not a permission problem.
Step 10 - Put an account on credit hold
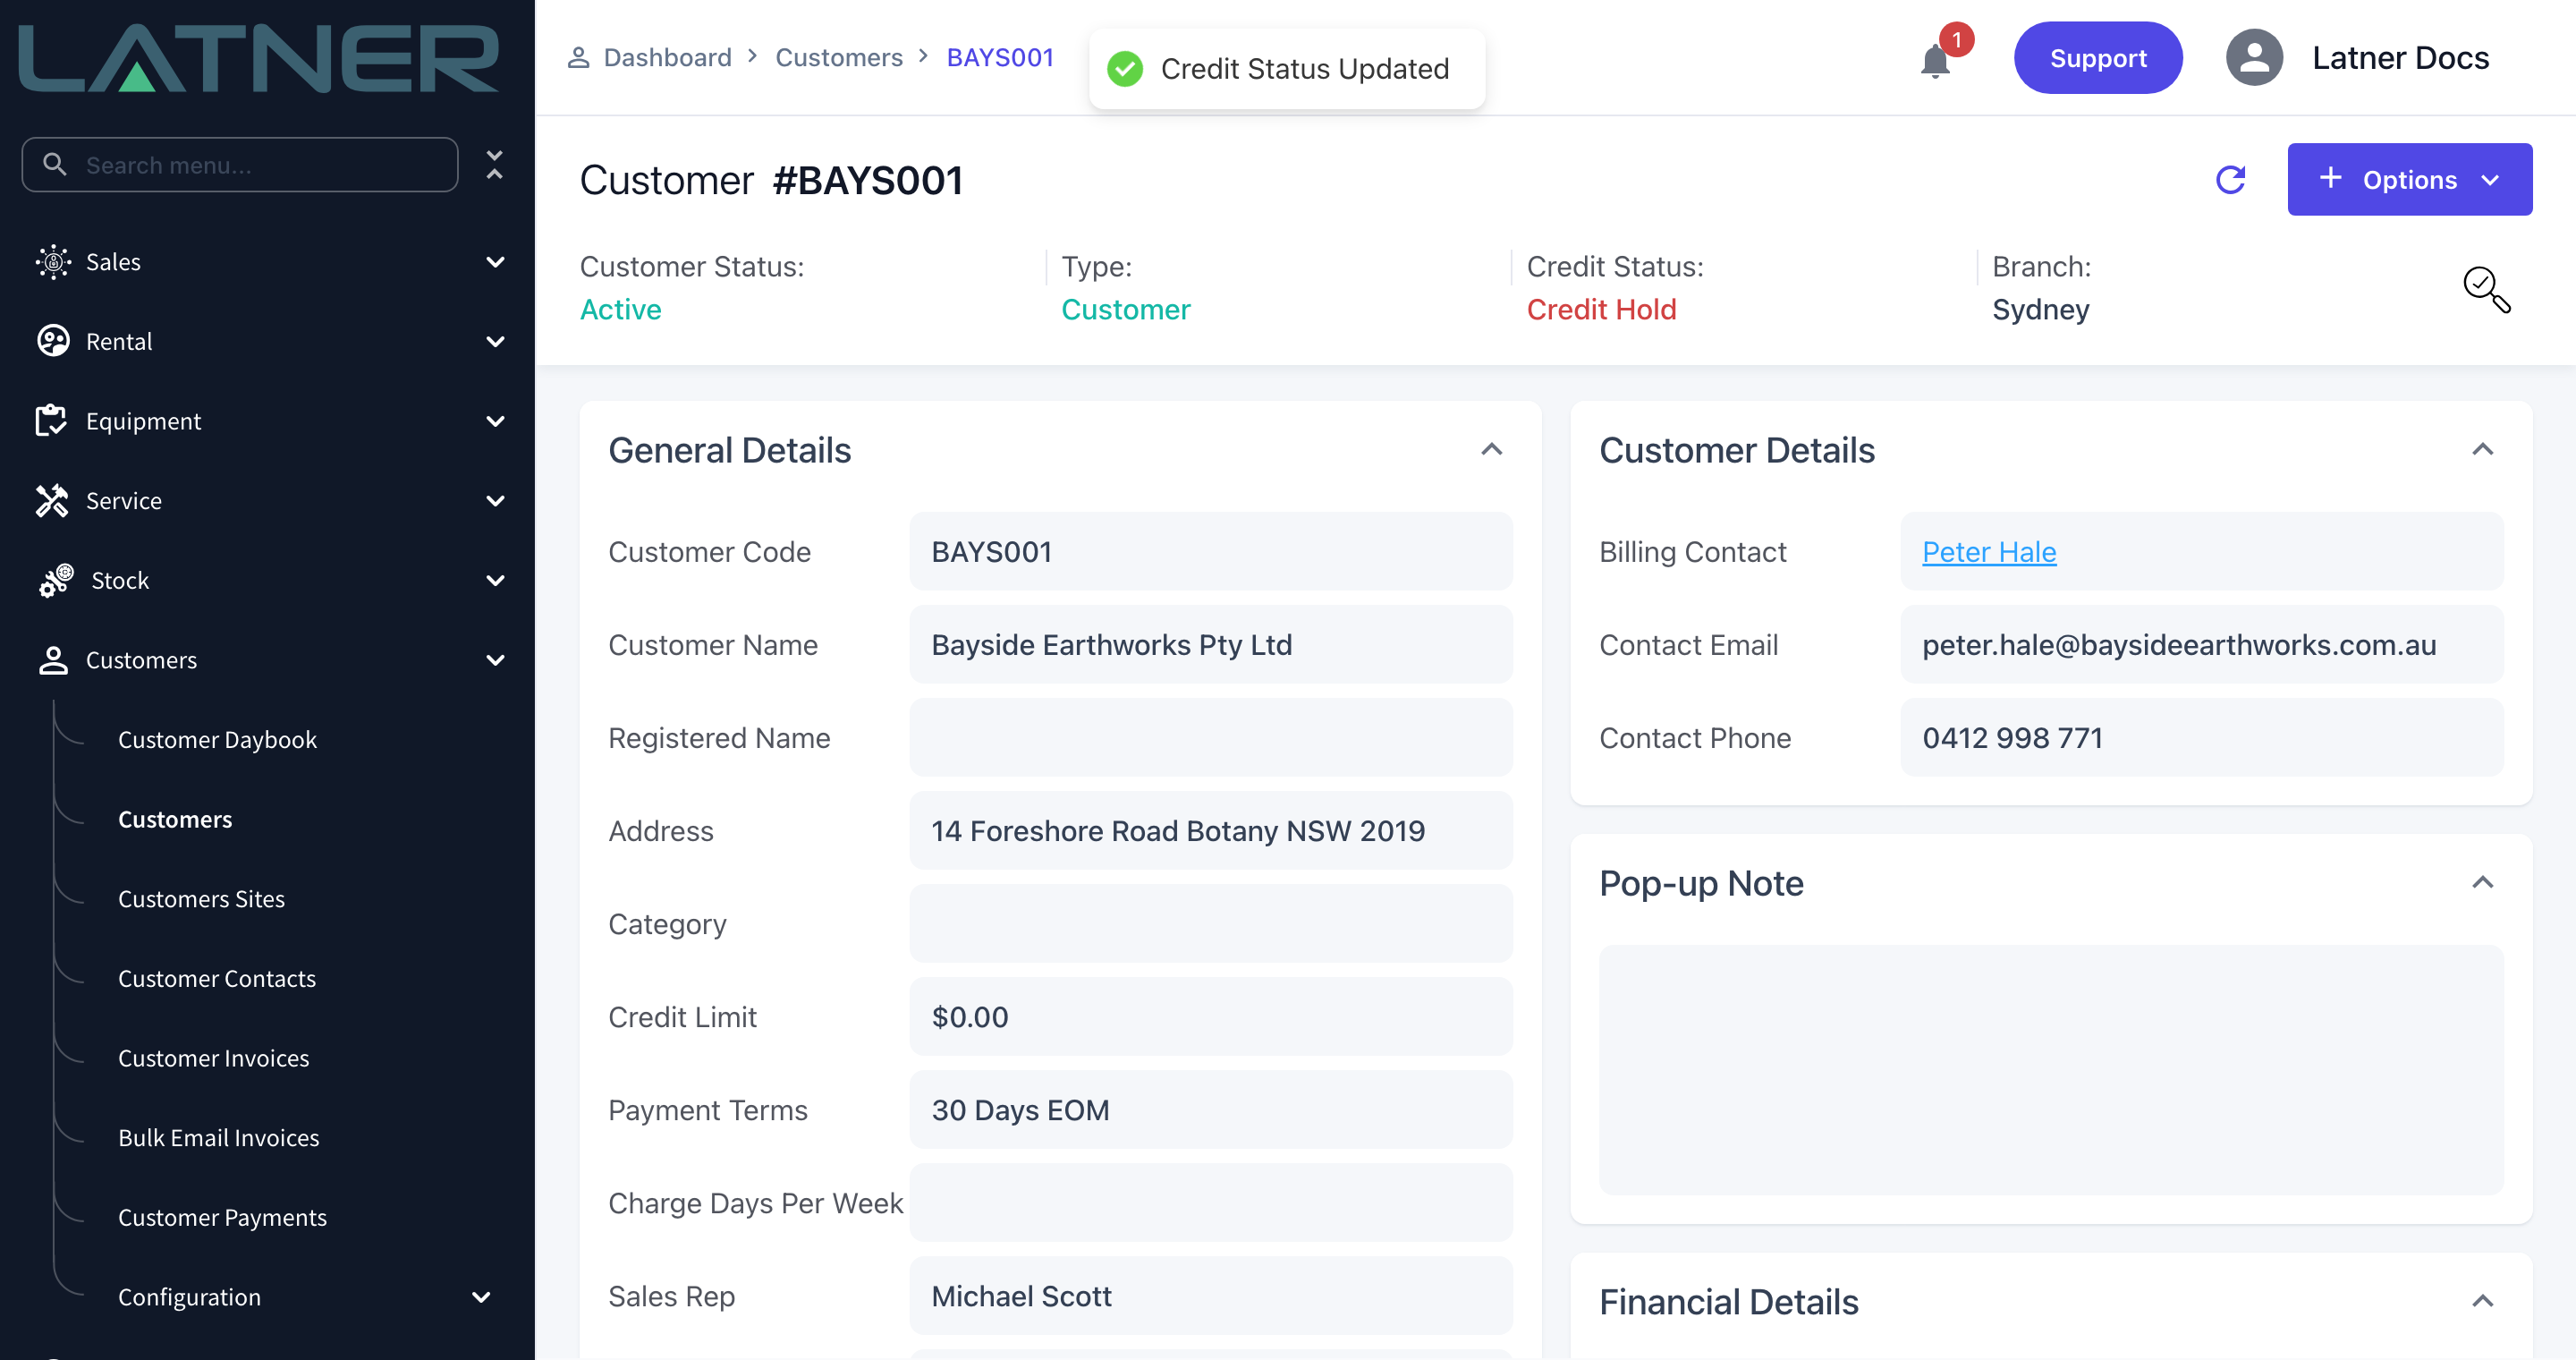
Choose Options › Put on Credit Hold. There is no confirmation step - the change is applied straight away, a Credit Status Updated message appears, and the status strip switches to Credit Hold in red.
To lift it, choose Options › Remove Credit Hold. The account goes back to Immediate Payment if it is on COD payment terms, and to Ok otherwise.
After You Make Changes
-
Both screens update together. Editing the sales rep from CRM changes it for the Customer screen too, because there is only one record underneath.
-
Credit hold bites straight away. A customer on credit hold is refused for new rental contracts and transport dockets until the hold is lifted.
-
Moving an account onto COD payment terms resets its credit. The credit limit is forced to zero and the credit status becomes Immediate Payment, and you cannot then set a credit limit above zero while it stays on COD.
-
Customer codes are shared with suppliers. A code already used by a supplier is rejected with "A Supplier with the Code ... already exists. Customer and Supplier codes cannot overlap".
-
Deactivating a customer is checked against live work. Latner refuses the deactivation if the account has active sales orders, active rental contracts, or open chargeable or customer damage work orders, and tells you which one is in the way.
Conversion is one-way. Once an account's type is Customer there is no option to turn it back into a prospect, and CRM will refuse to change its billing address, billing contact or status. If an account was converted by mistake, deactivate it from the Customer screen rather than trying to reverse it.
FAQs
Watch the Demo
Prefer to watch it? Step through the same flow here.