
A prospect is a business you are chasing but have not sold to yet, and creating one in Latner gives that opportunity a home for its contacts, quotes and activities long before any money changes hands.
Overview
Not every account in Latner is a customer yet. A prospect is the same kind of record as a customer, just flagged differently, which is why the CRM screen labels the option Create Prospect (Account). Creating one early means the enquiry, the site visit and the quote all hang off a real record instead of living in someone's inbox.
-
A prospect is an Account with its Type set to Prospect. Customers are the same record with the type set to Customer.
-
Saving the form creates three things at once: the account, its main contact, and a main site named after the account code (for example FULT001_Main).
-
The account code is generated for you from the account name, so you do not need to invent one.
-
You can quote a prospect straight away. You do not have to convert it to a customer first.
-
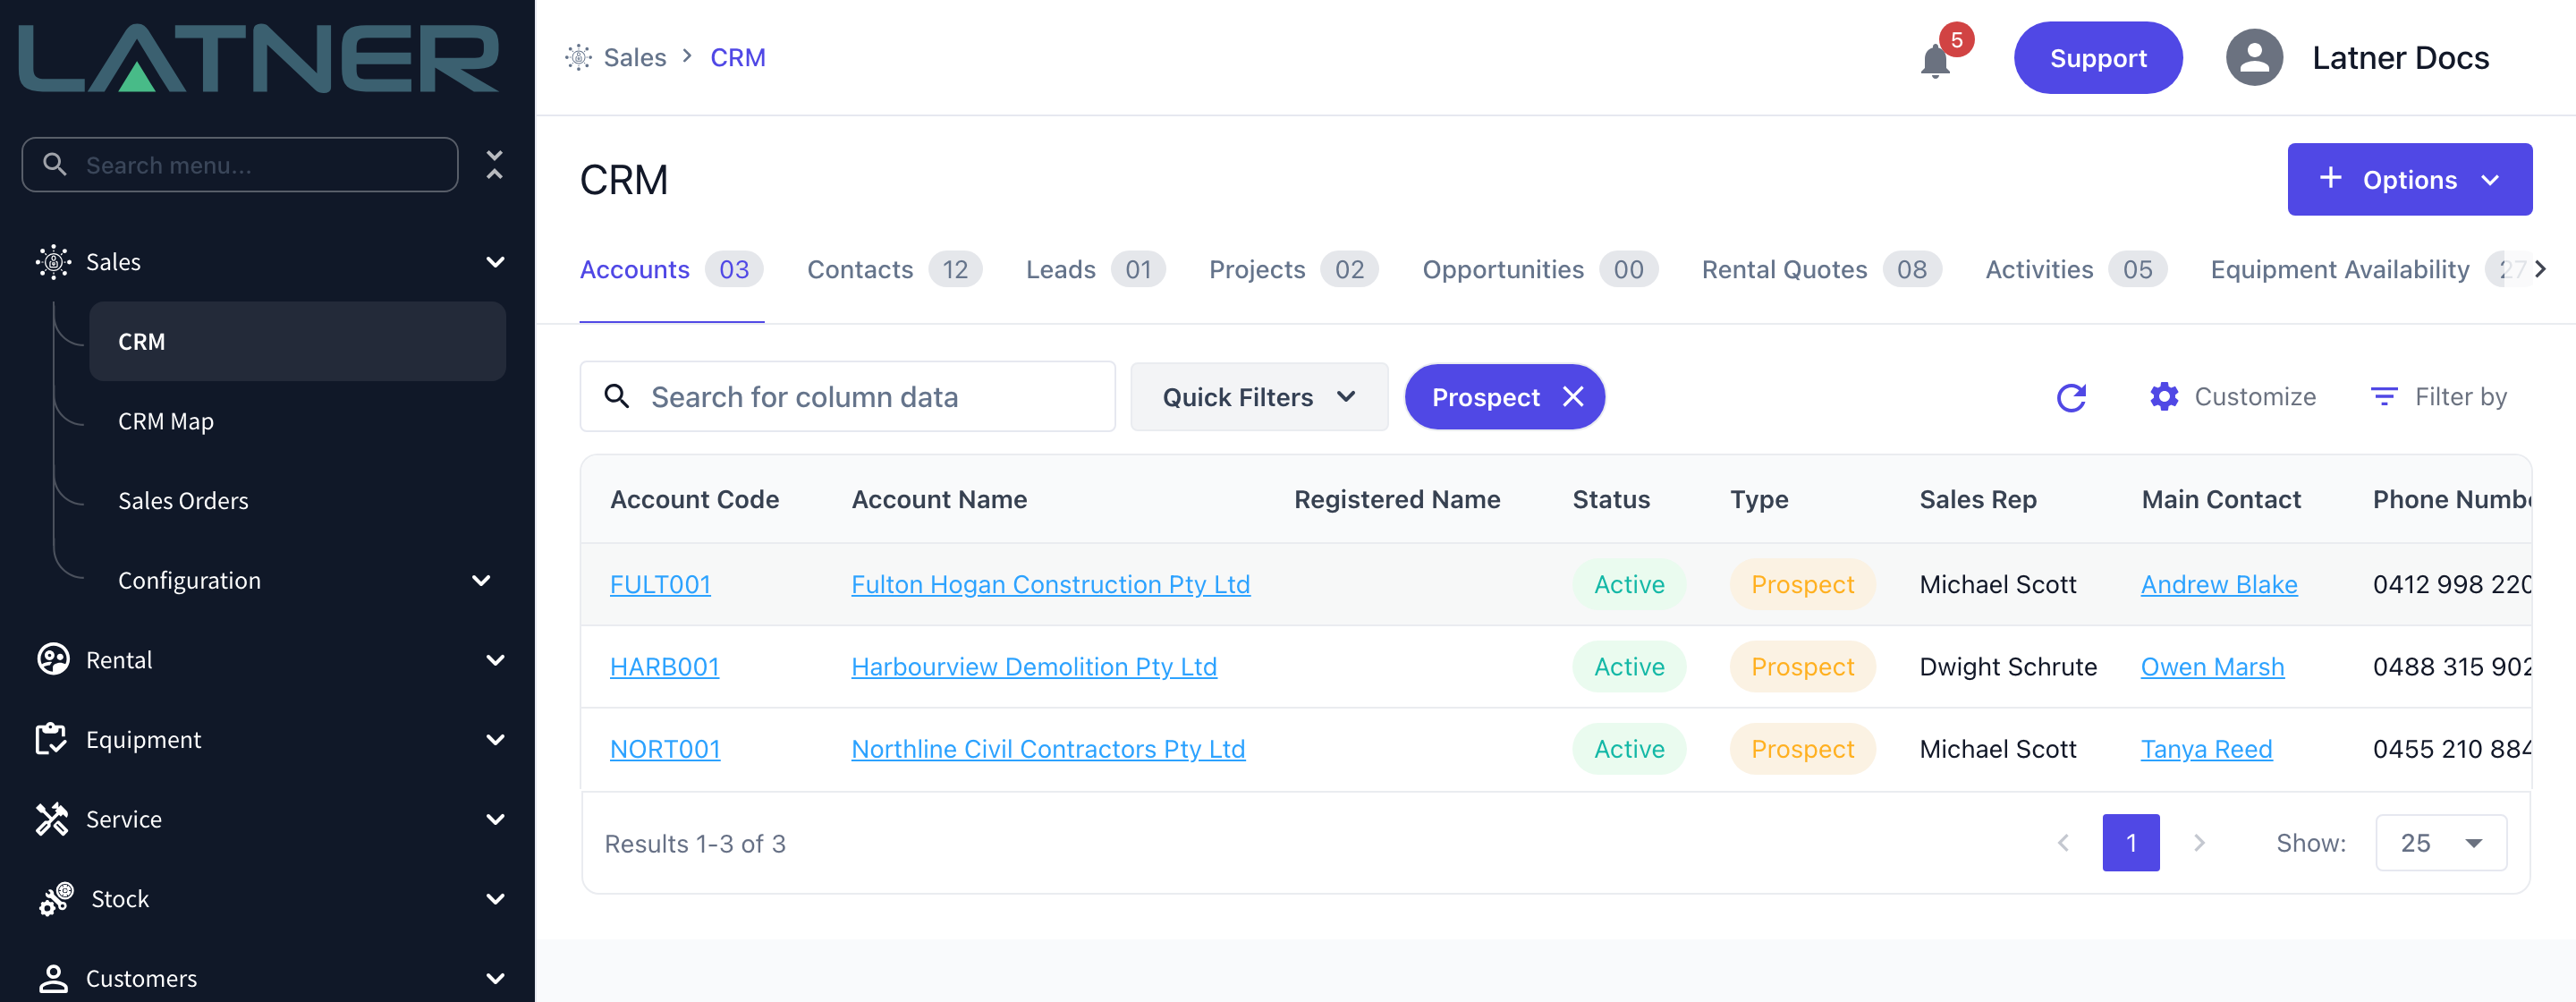
Prospects show on the CRM screen and on the Customers screen, and both have a Prospect quick filter.
-
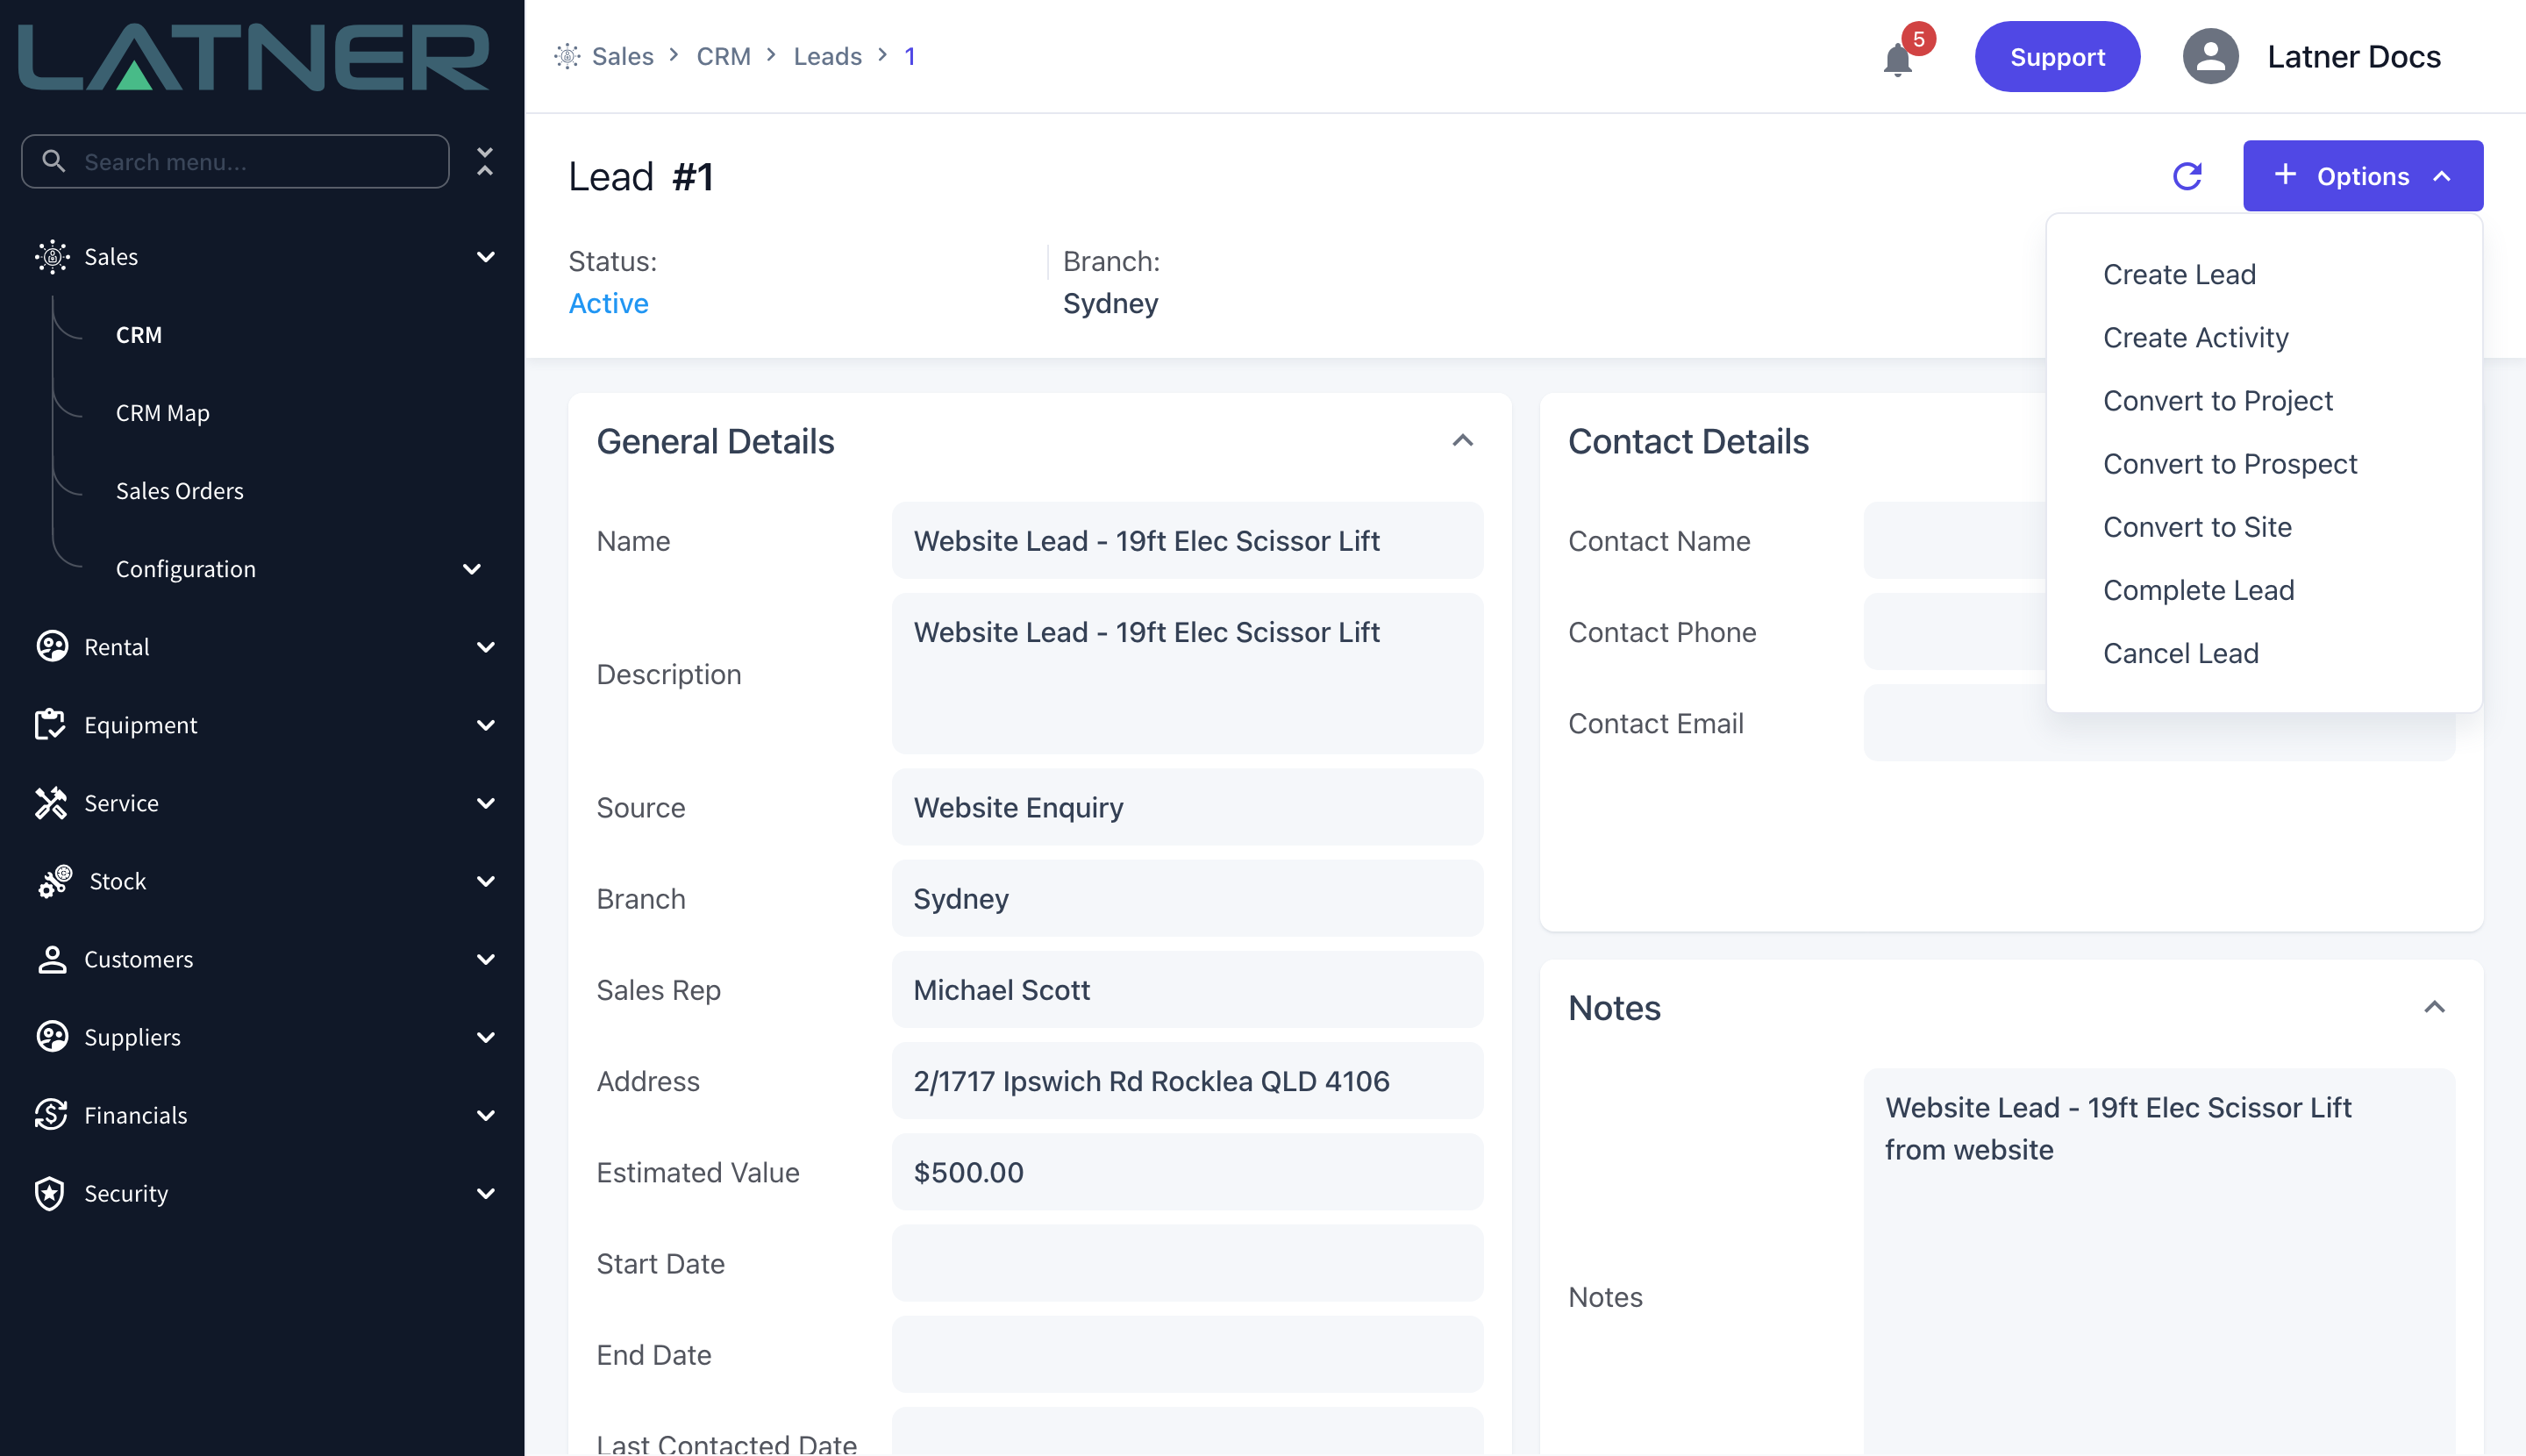
When the work is won, Convert to Customer turns the prospect into a customer awaiting approval.
Before You Begin
Creating a prospect needs two permissions, and two optional settings decide how much of the form you must fill in.
|
Requirement |
Where to Find It |
|---|---|
|
CRM screen permission |
Security › Configuration › Permission Groups, Sales module, Screen |
|
Create Account permission |
Security › Configuration › Permission Groups, Sales module, Option |
|
Mandatory CRM Account Fields (optional) |
Security › Settings › Sales - choose Source and/or Industry |
|
Mandatory CRM Account Contact Fields (optional) |
Security › Settings › Sales - choose Last Name, Job Title and/or Email |
|
Lead sources to pick from |
Rental › Configuration › Lead Sources |
|
Industries to pick from |
Sales › Configuration › Industries |
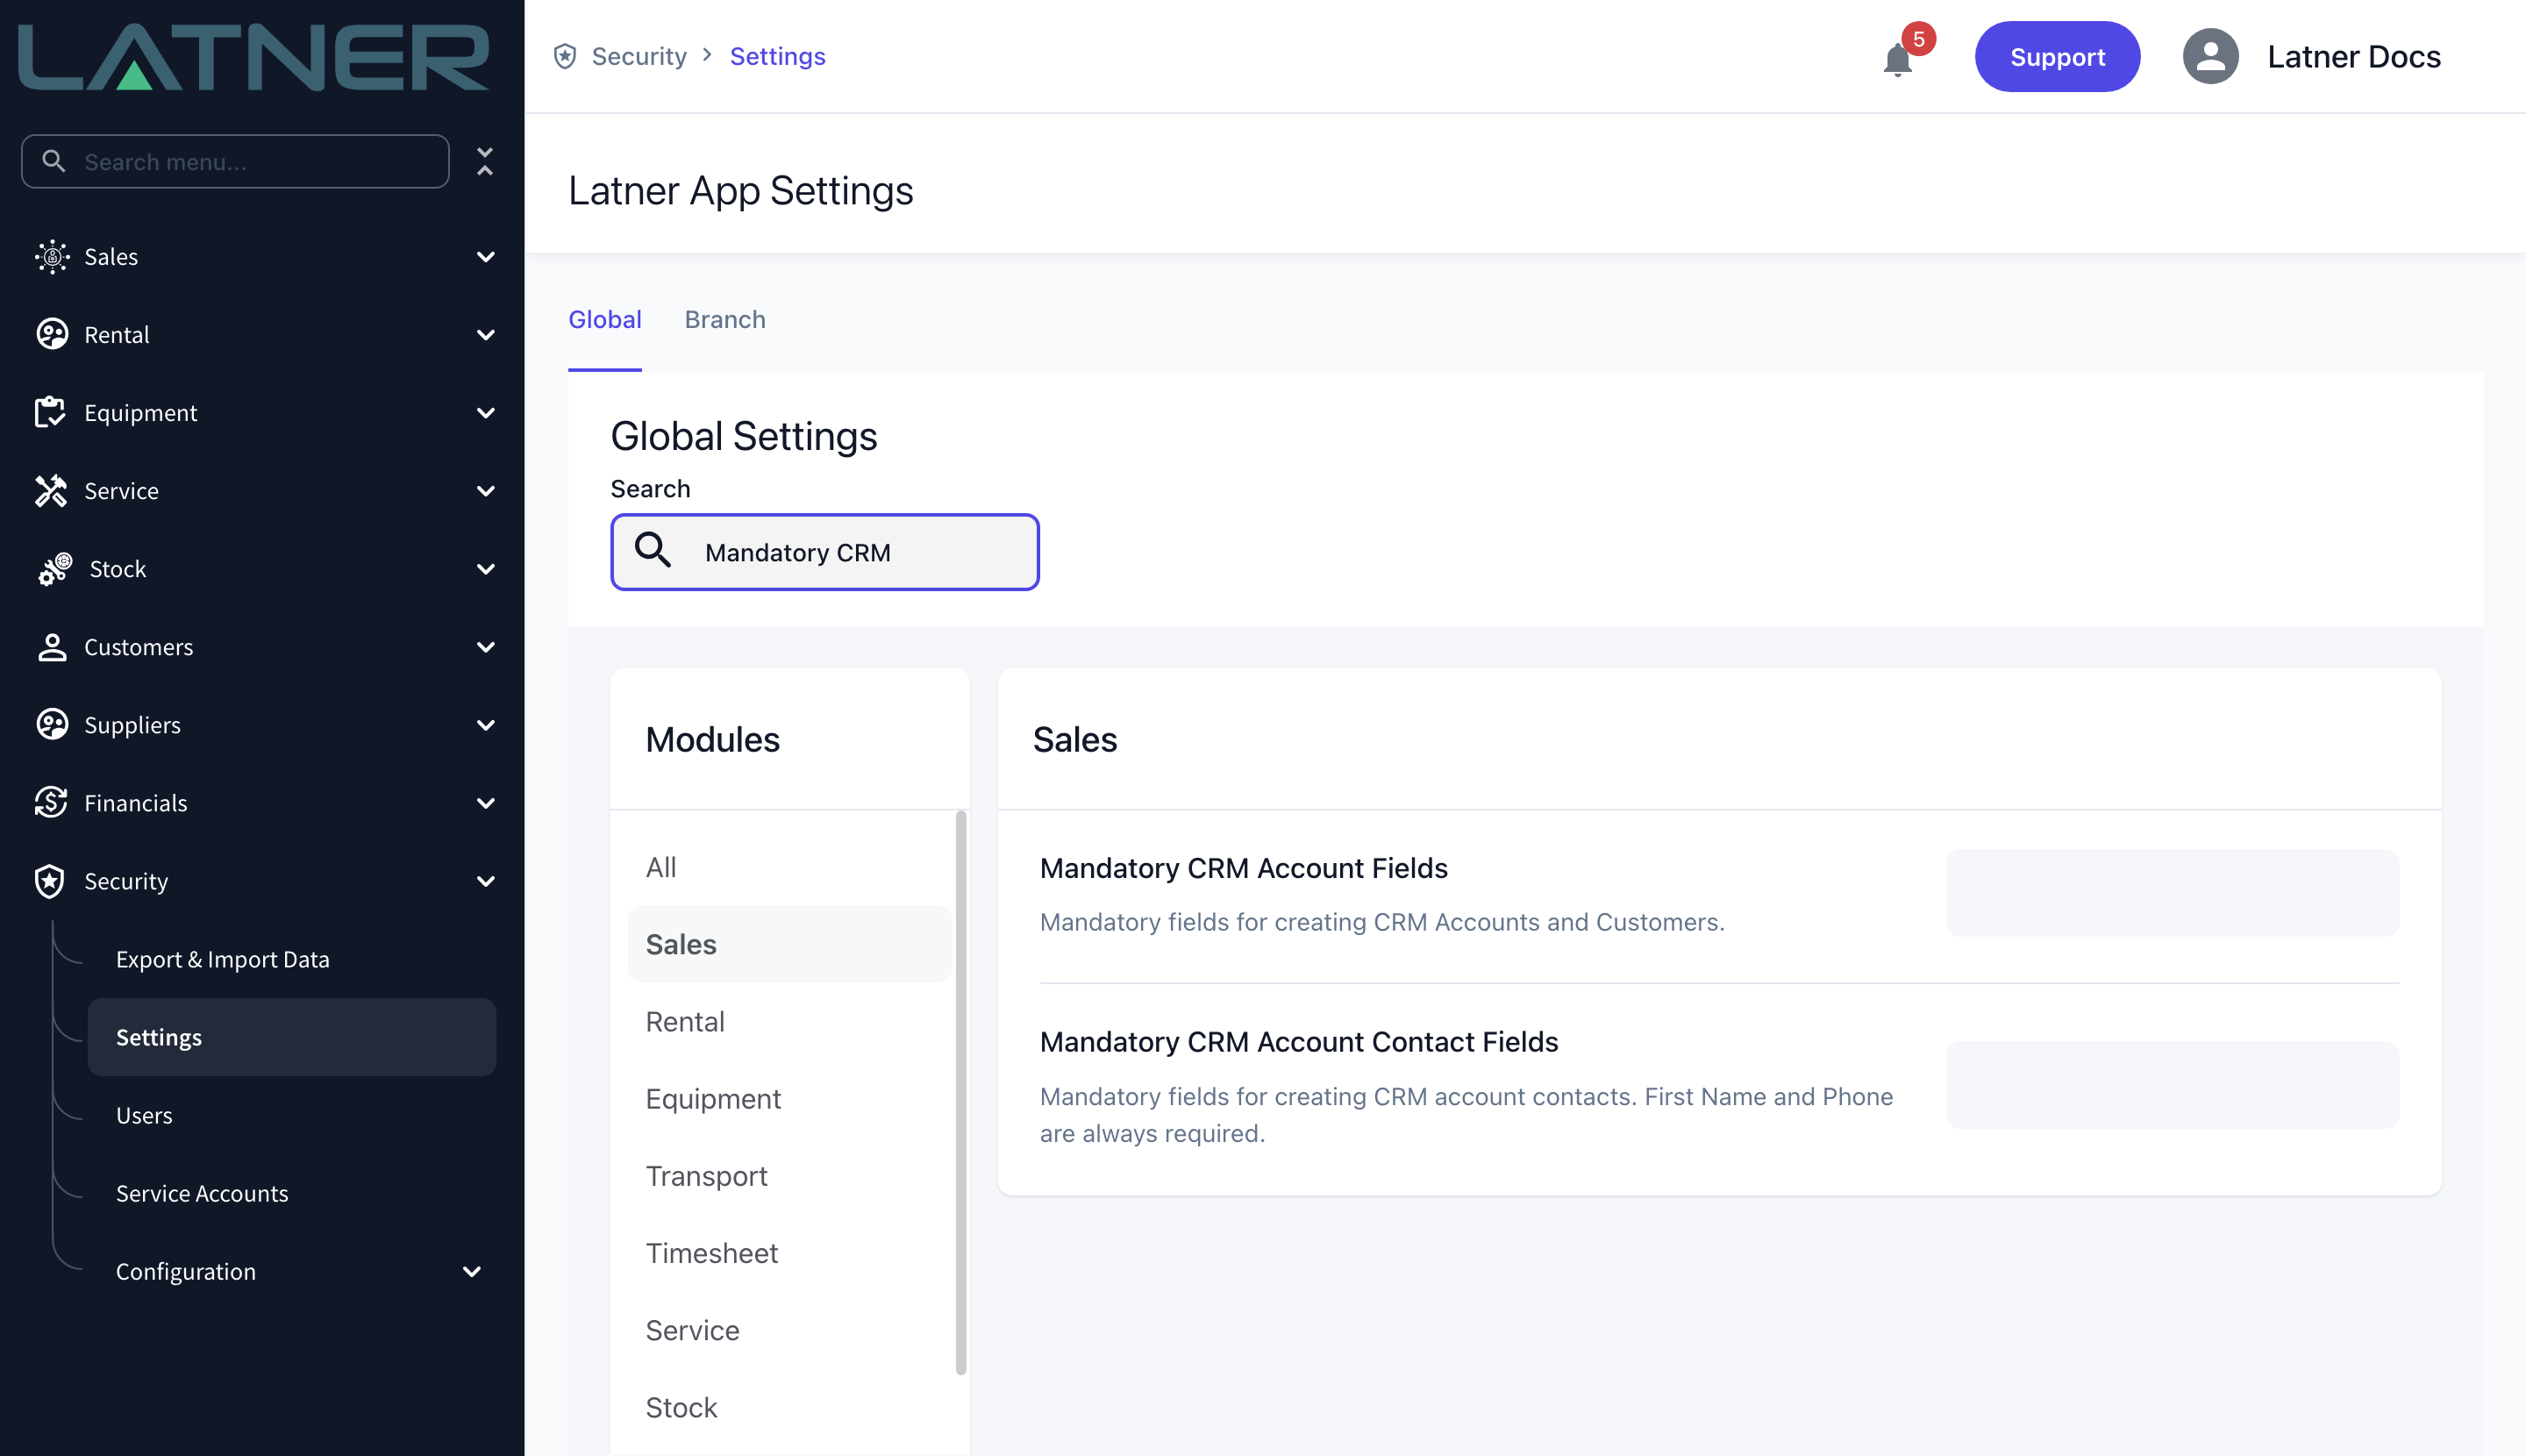
Both settings apply to customers as well as prospects, and they are enforced when the record is saved, not just in the form. If you add a field to one of them later, existing prospects are untouched, but the next edit that clears the field will be rejected.
Creating the Prospect
Step 1 - Open the Create Prospect form
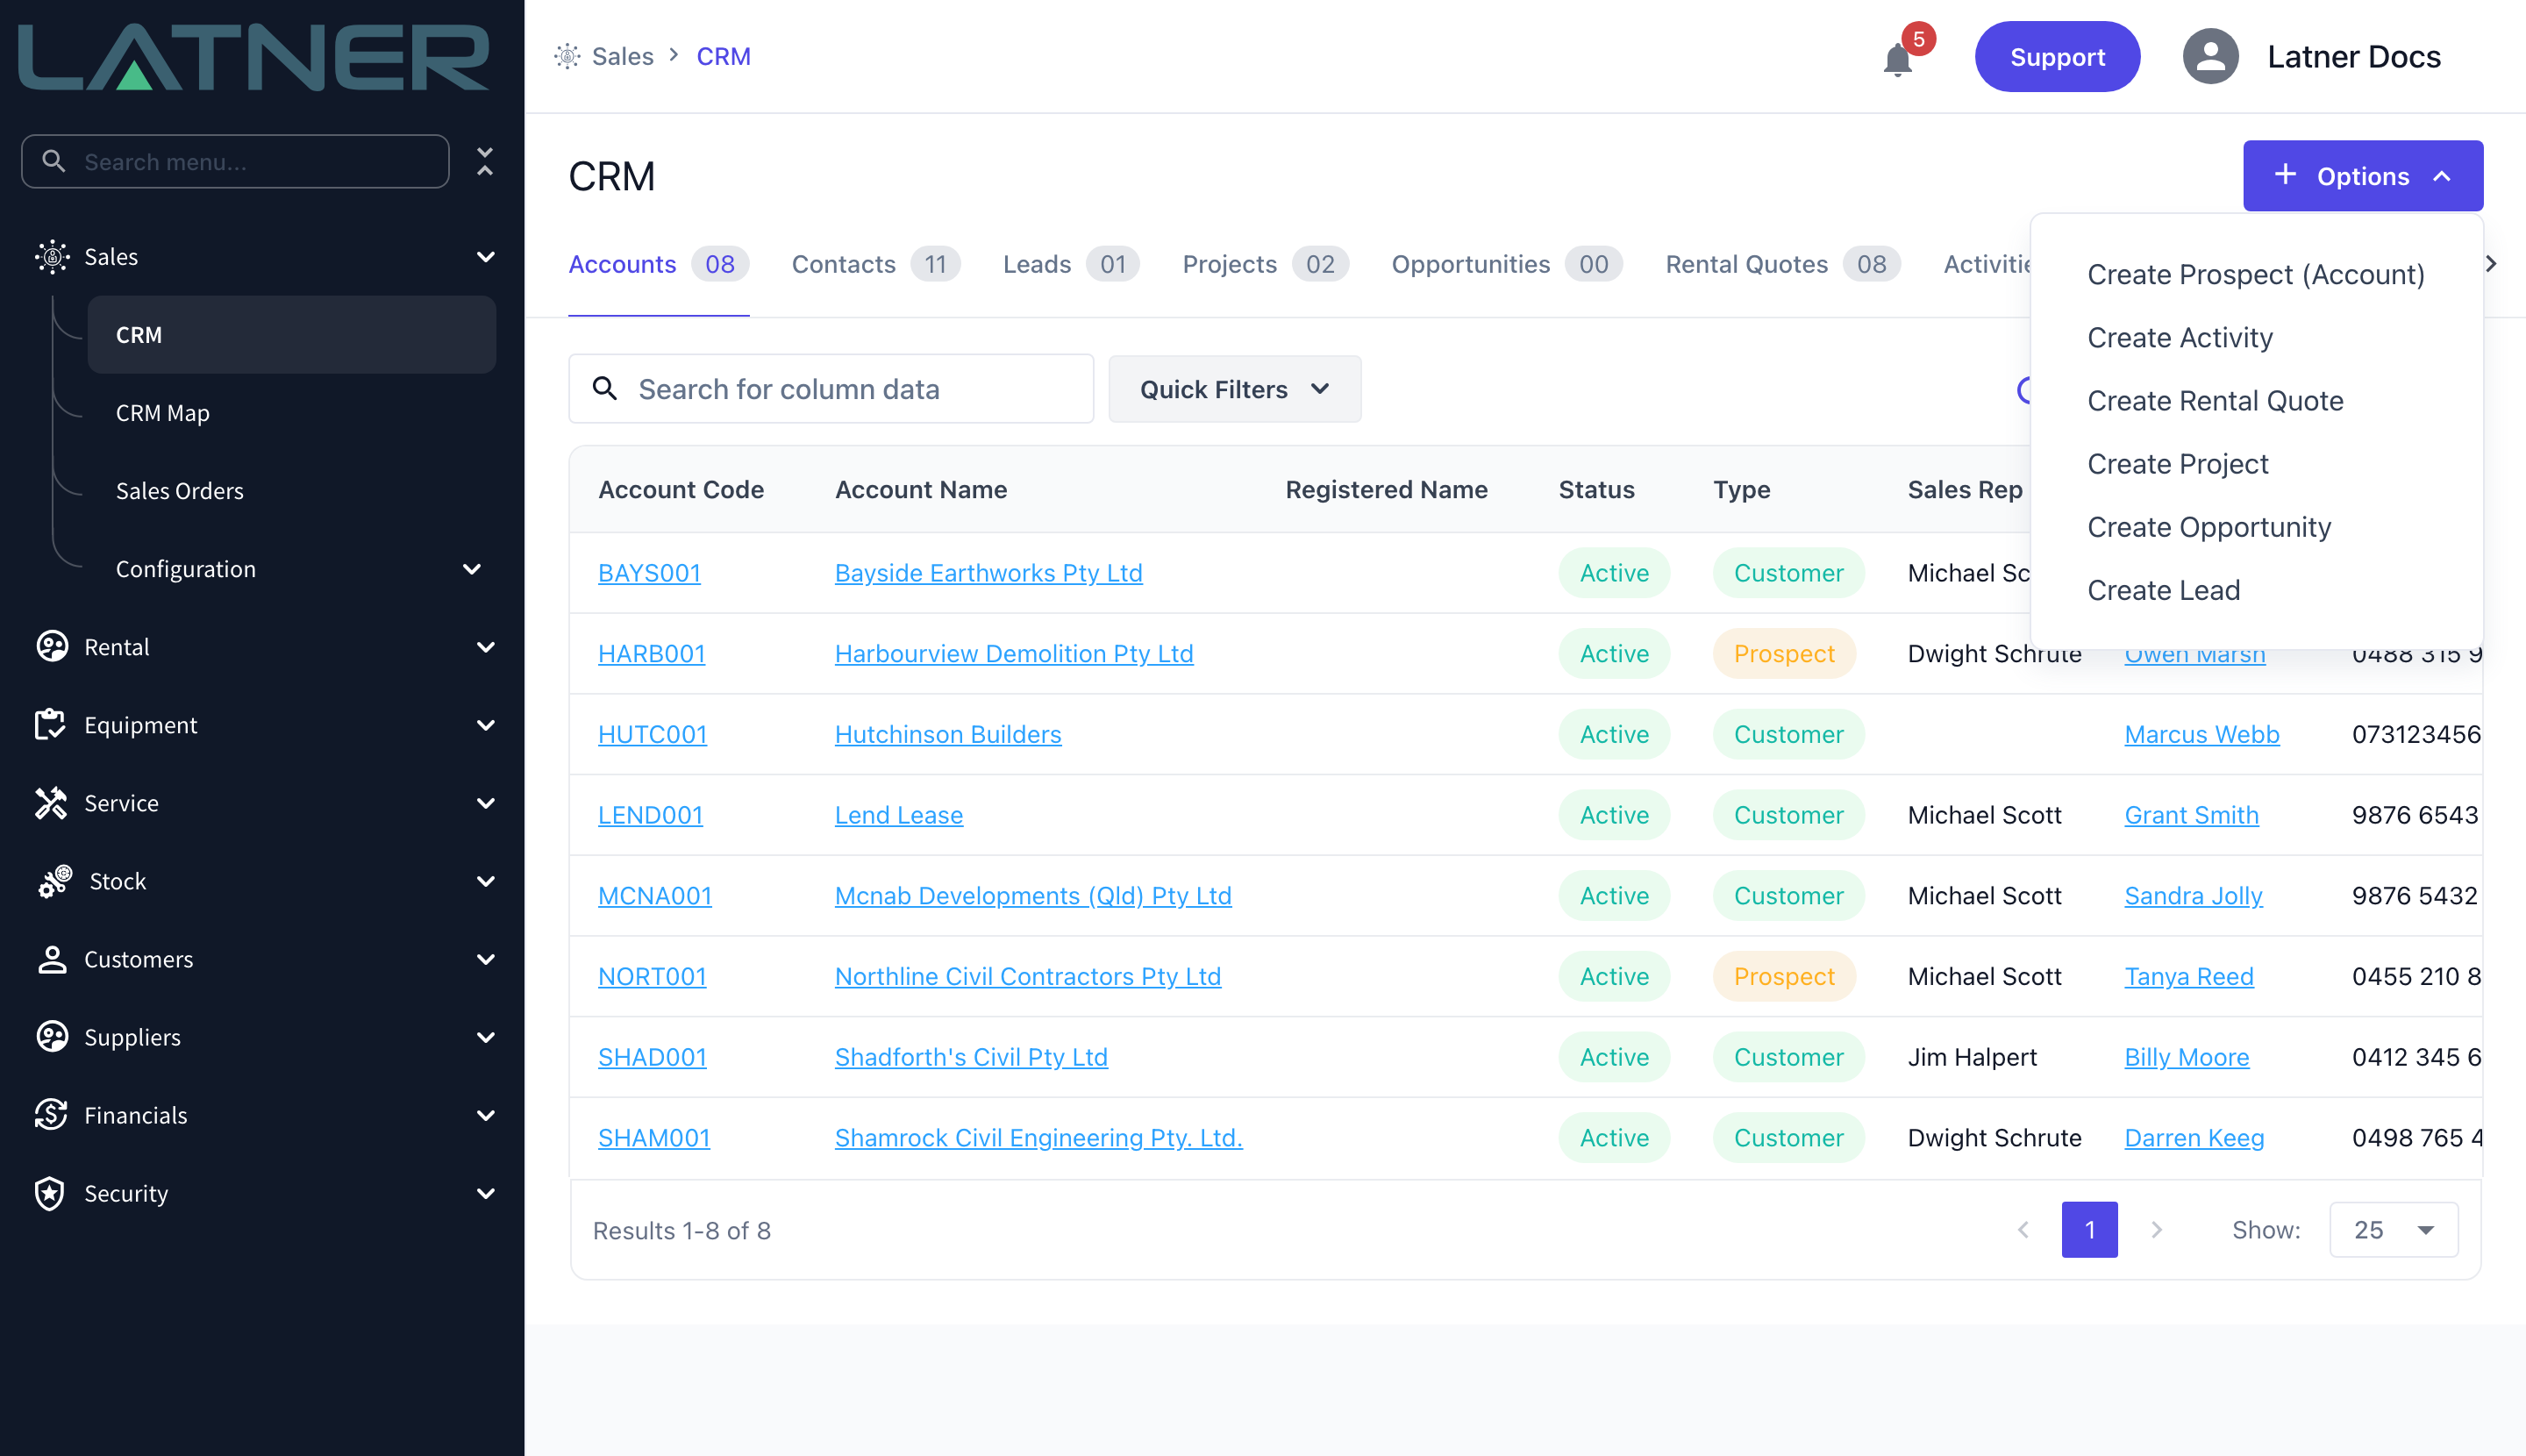
Go to Sales › CRM and stay on the Accounts tab. Select Options › Create Prospect (Account).
Step 2 - Choose Business or Individual
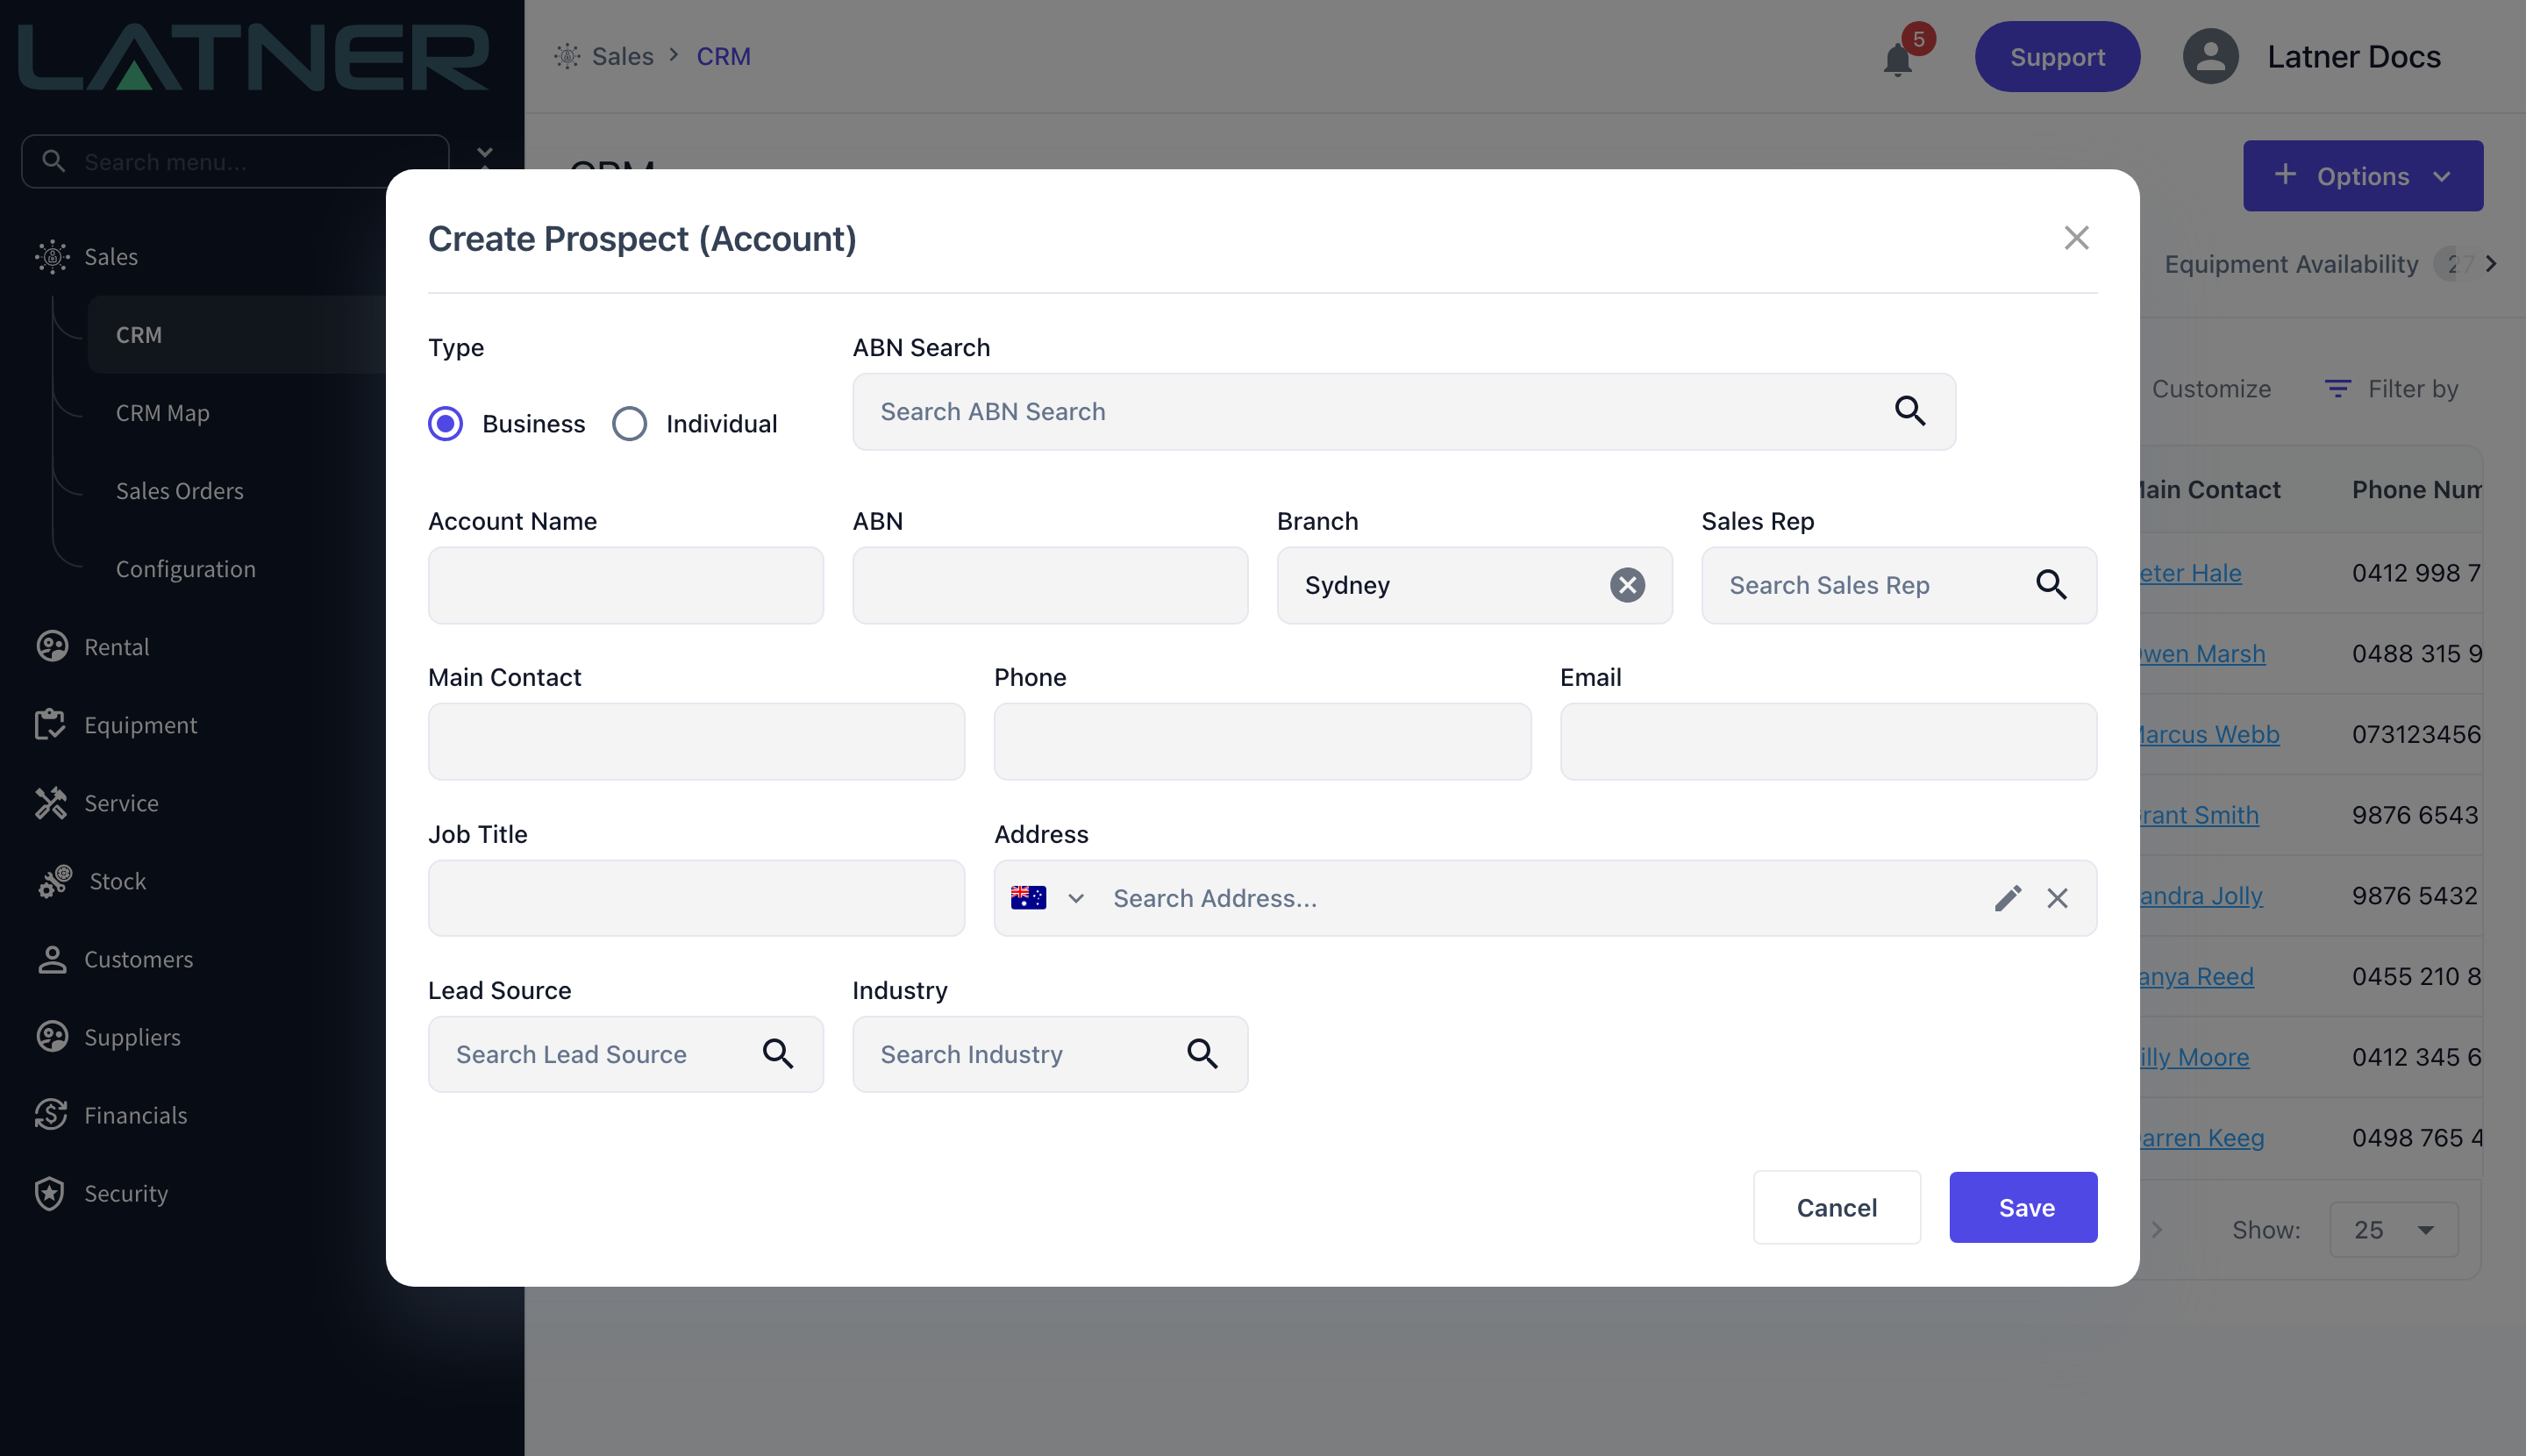
Type is the first thing on the form and it changes what you see. Business gives you the ABN Search box; Individual hides it, because a sole trader you are quoting for a weekend hire will not usually be looked up by name in the business register.
Step 3 - Look the business up in the ABN register
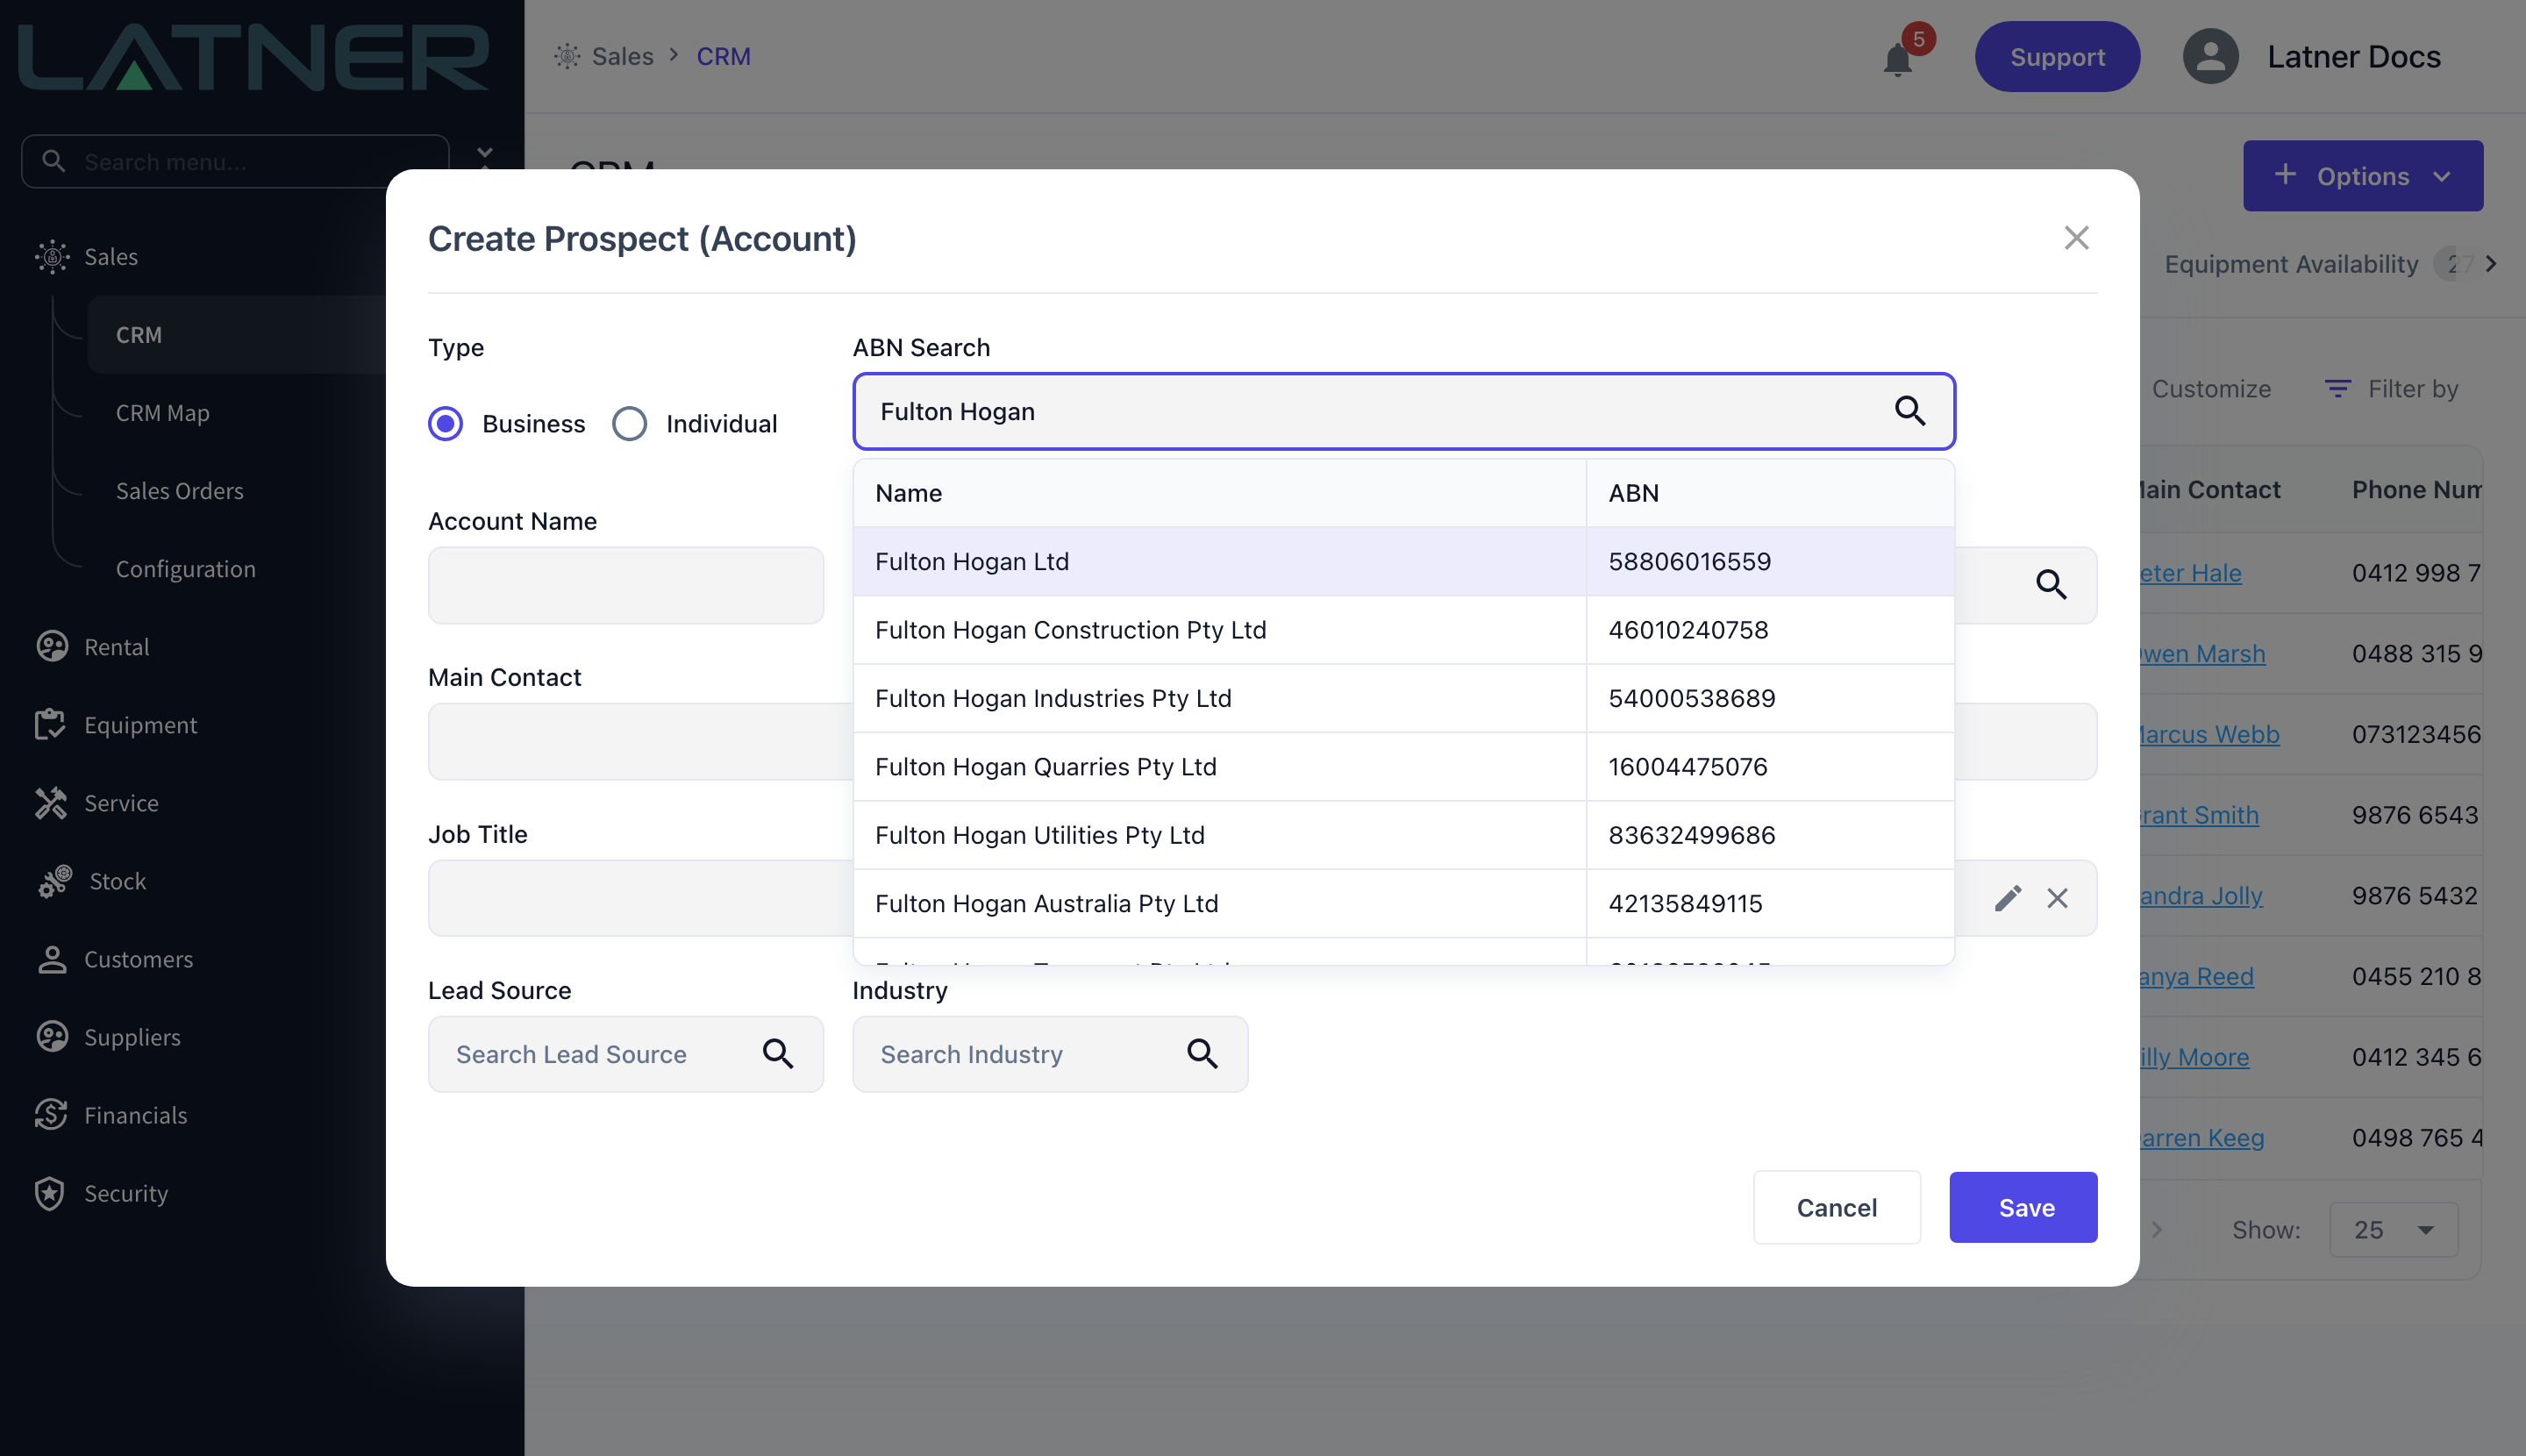
Type a trading name into ABN Search and Latner searches the Australian Business Register live. Pick the right entity from the list and both Account Name and ABN are filled in for you, spelled the way the register spells them.
The search is a shortcut, not a requirement. If the business is not in the register, or you are creating an Individual, just type the Account Name yourself and leave ABN blank or enter its 11 digits.
Step 4 - Check the branch and sales rep
Branch defaults to your own branch and is required. It decides which branch the prospect and its main site belong to, so change it if you are creating the record on someone else's behalf.
Sales Rep is optional but worth setting - it is what drives the My Accounts quick filter and the sales rep reporting on the CRM dashboard.
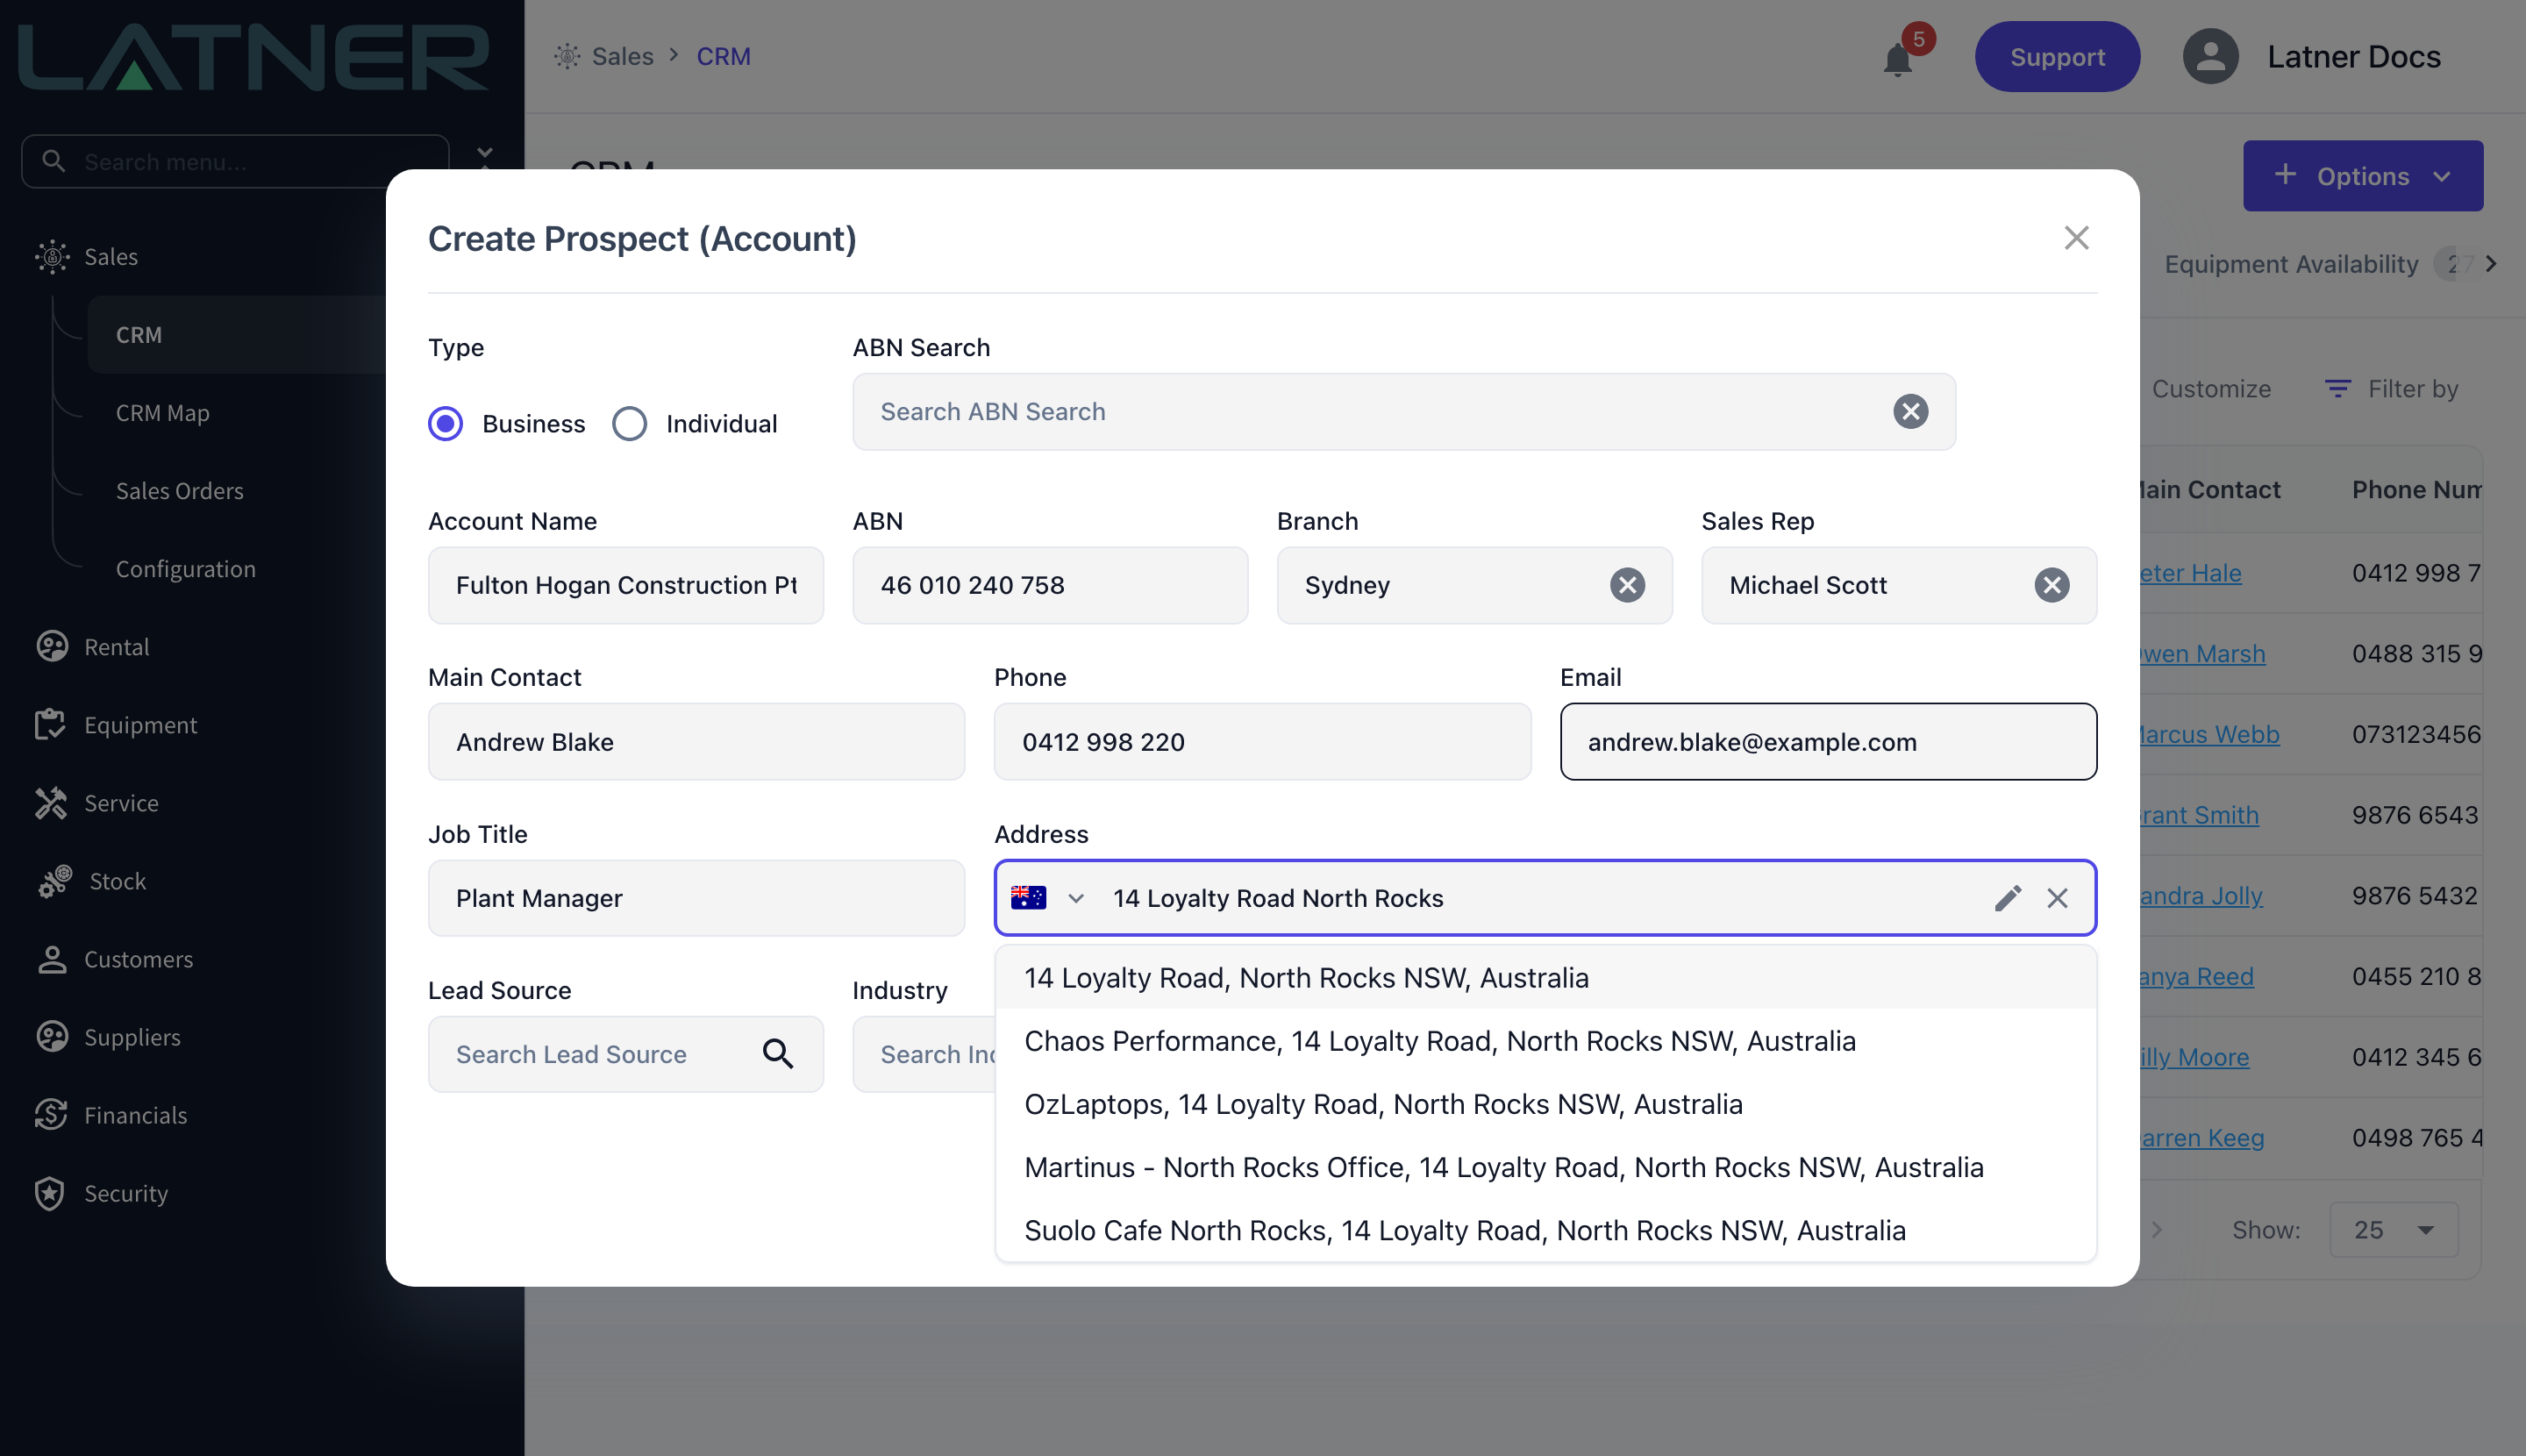
Step 5 - Add the main contact and address
These are the fields you cannot skip. Latner creates a contact record from what you enter here and makes it the account's main contact.
-
Main Contact - required. Enter the full name. The first word becomes the contact's first name and the second becomes the last name, so keep it to two words unless you want the extras dropped.
-
Phone - required.
-
Email - validated when you enter one, and required only if Email is listed in Mandatory CRM Account Contact Fields.
-
Job Title - required only if it is listed in that same setting.
-
Address - required. Start typing and pick from the suggestions, or use the pencil to enter the address by hand.
Step 6 - Record where the lead came from
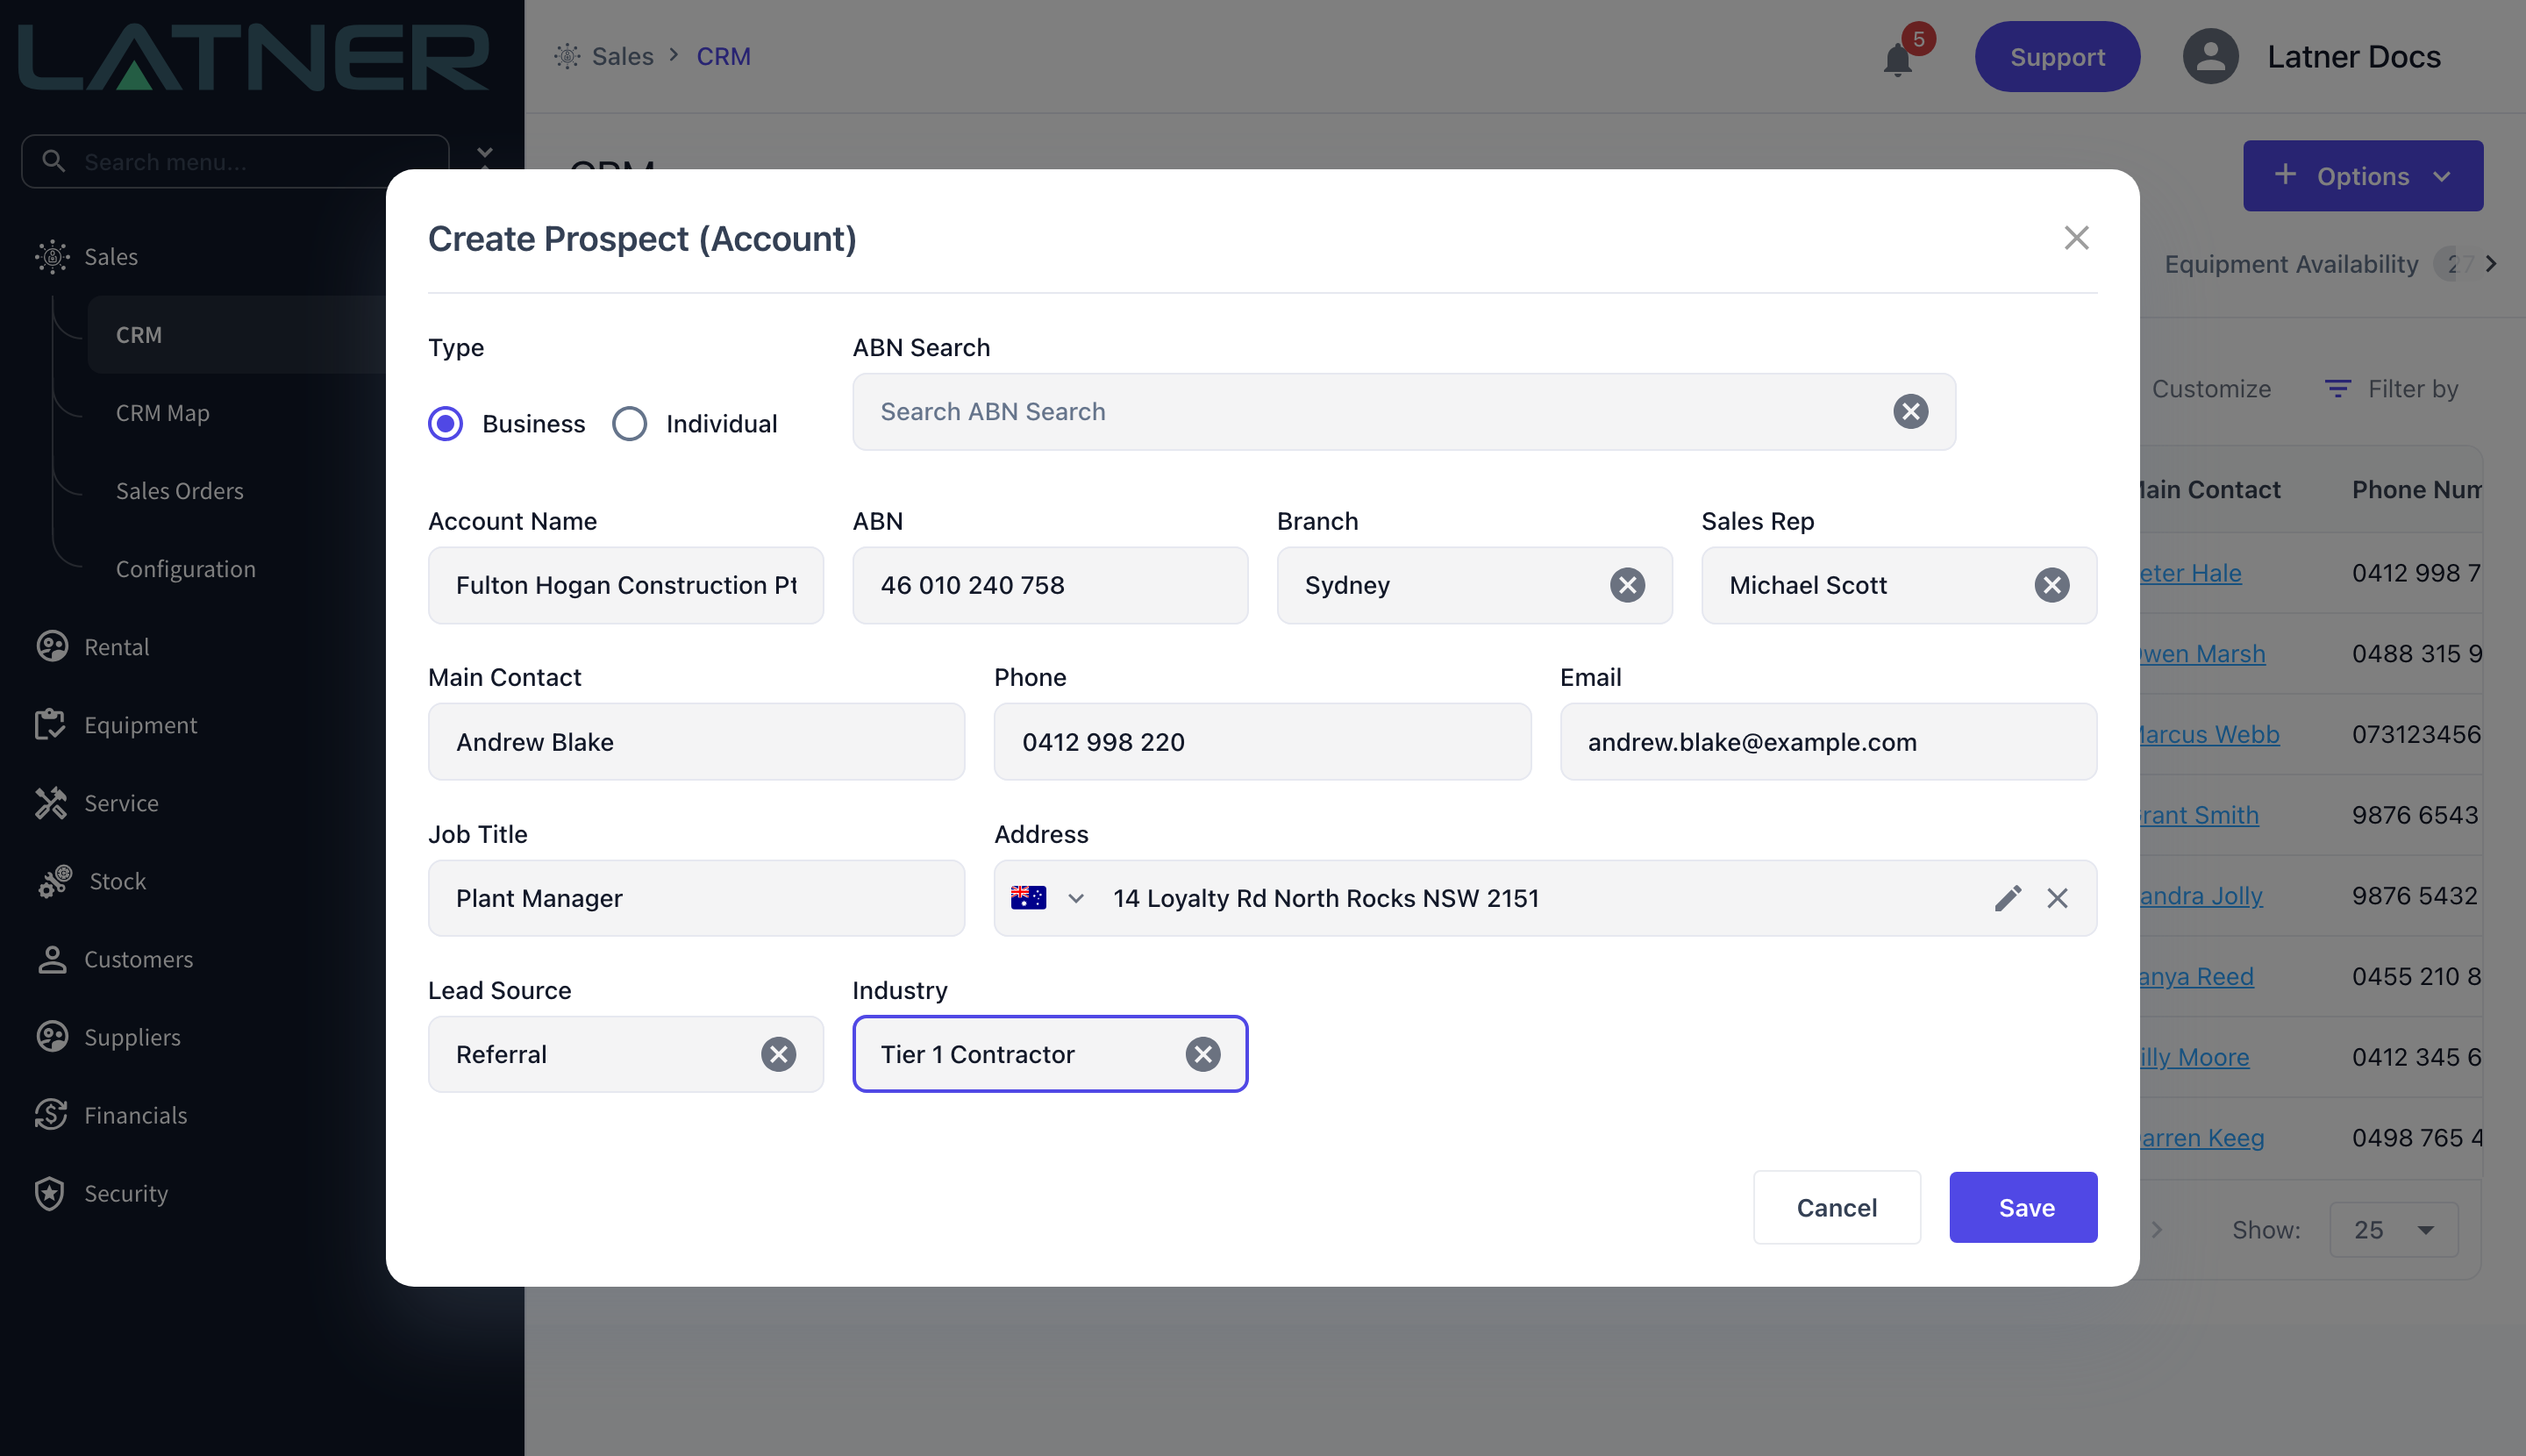
Lead Source and Industry are optional unless your Mandatory CRM Account Fields setting says otherwise. They are worth filling in anyway - lead source is what lets you report on which channels actually turn into revenue, and industry drives the segment breakdowns on the CRM dashboard.
Step 7 - Save
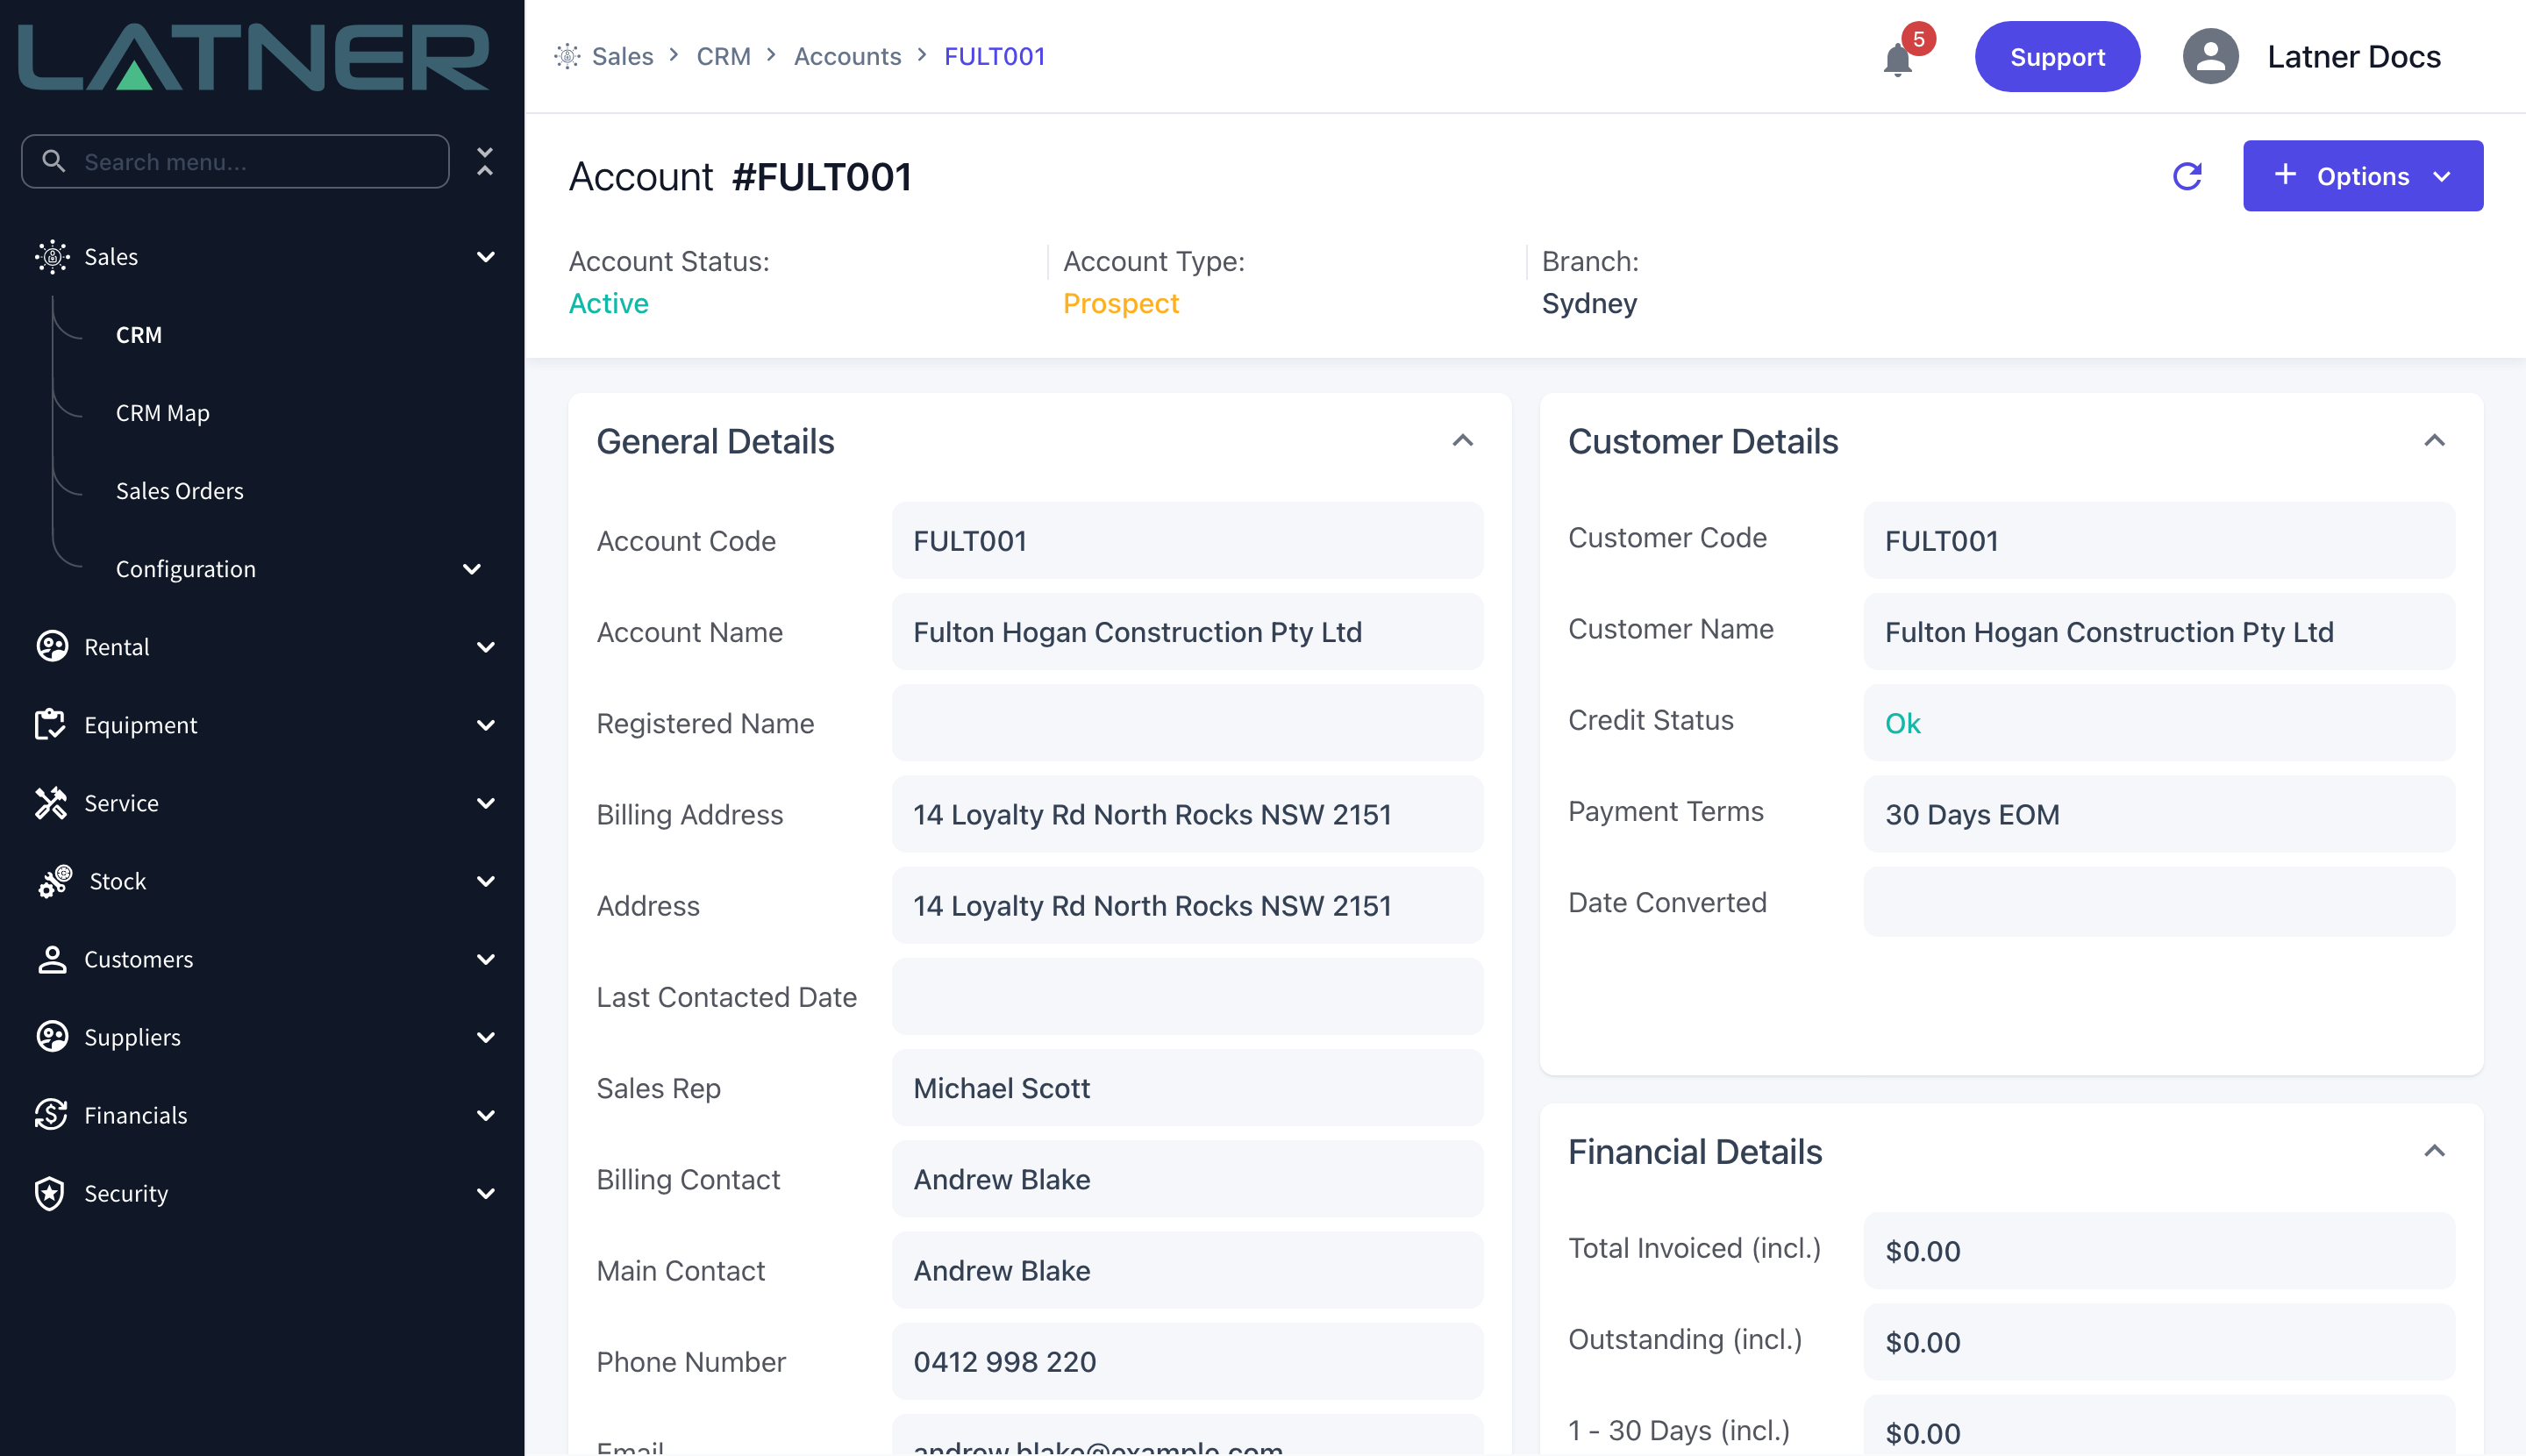
Select Save. Latner creates the prospect and takes you straight to its account page.
After Creation
-
The Account Code is generated from the account name (Fulton Hogan Construction becomes FULT001). It doubles as the customer code, and codes cannot be shared with a supplier.
-
A main site is created automatically, named after the account code with _Main on the end, using the address and contact you entered. It is what rental quotes and contracts will deliver to.
-
The person you entered as Main Contact becomes an account contact and appears on the Contacts tab of the CRM screen.
-
Payment Terms are set from your default payment term setting and the credit limit starts at zero - real trading terms are agreed when the prospect becomes a customer.
-
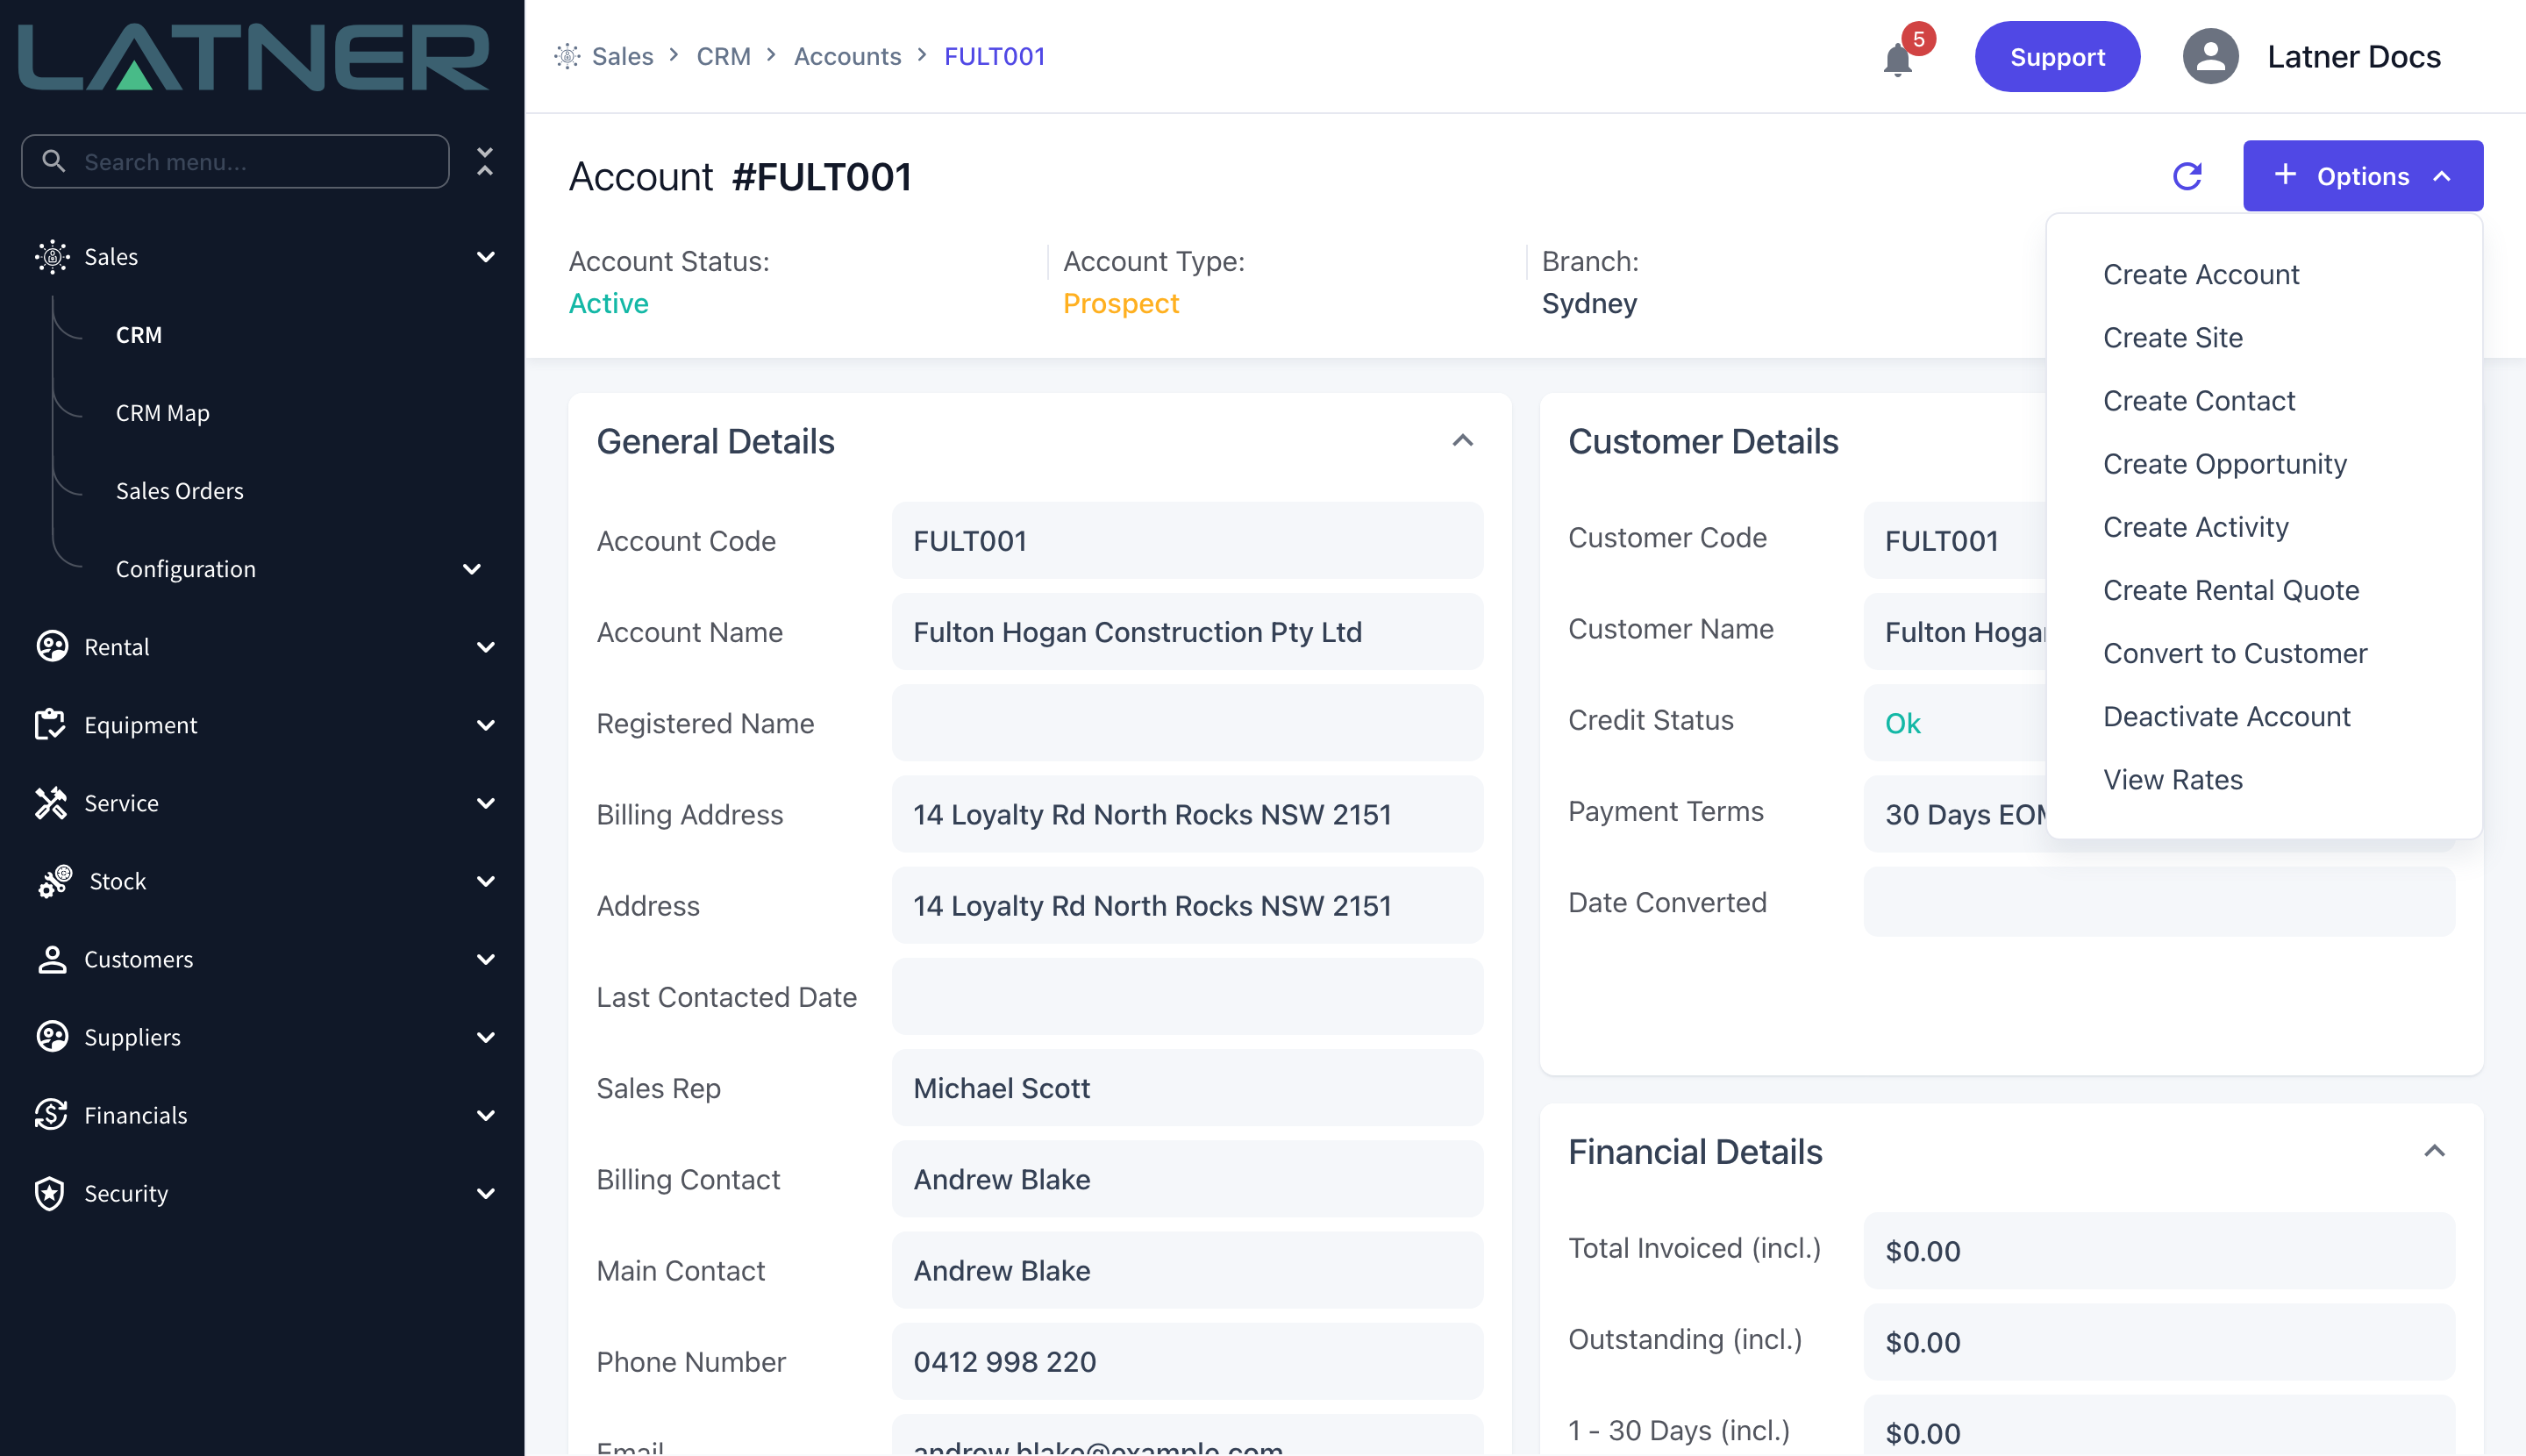
The prospect's Options menu is where the rest of the sales cycle starts: Create Contact, Create Site, Create Activity, Create Opportunity, Create Rental Quote and, when you win the work, Convert to Customer.
To find your prospects again later, open Sales › CRM and apply the Prospect quick filter on the Accounts tab.
Converting a prospect to a customer is a one-way trip. Latner will not let you convert the same account twice, and once it is a customer you can no longer change its billing address, billing contact or status from the CRM screen - those live on the customer record. If you converted the wrong account, deactivate it and create the right one rather than trying to reverse the conversion.
FAQs
Watch the Demo
Prefer to watch it? Step through the same flow here.