
An Activity records an interaction with a customer - a site visit, a phone call, a quote follow-up - and creating one straight from the customer's record keeps that history where the rest of your dealings with them already live.
Overview
Your team already talks to customers all day. An Activity is how that conversation becomes something the next person can see.
-
Create an activity from any customer record with Options › Create Account Activity - the customer is filled in for you and can't be changed.
-
Log something that has already happened, or schedule something that still needs doing, by setting the Status.
-
Narrow it down with a Site, Contact, Opportunity, Sales Order, Rental Quote or Rental Contract - each of these only offers records belonging to that customer.
-
Assign a Sales Rep so the activity counts as their work, and tick Add to My Calendar to have the invite emailed out.
-
Completing an activity updates the Last Contacted Date on the customer, the contact and the site.
-
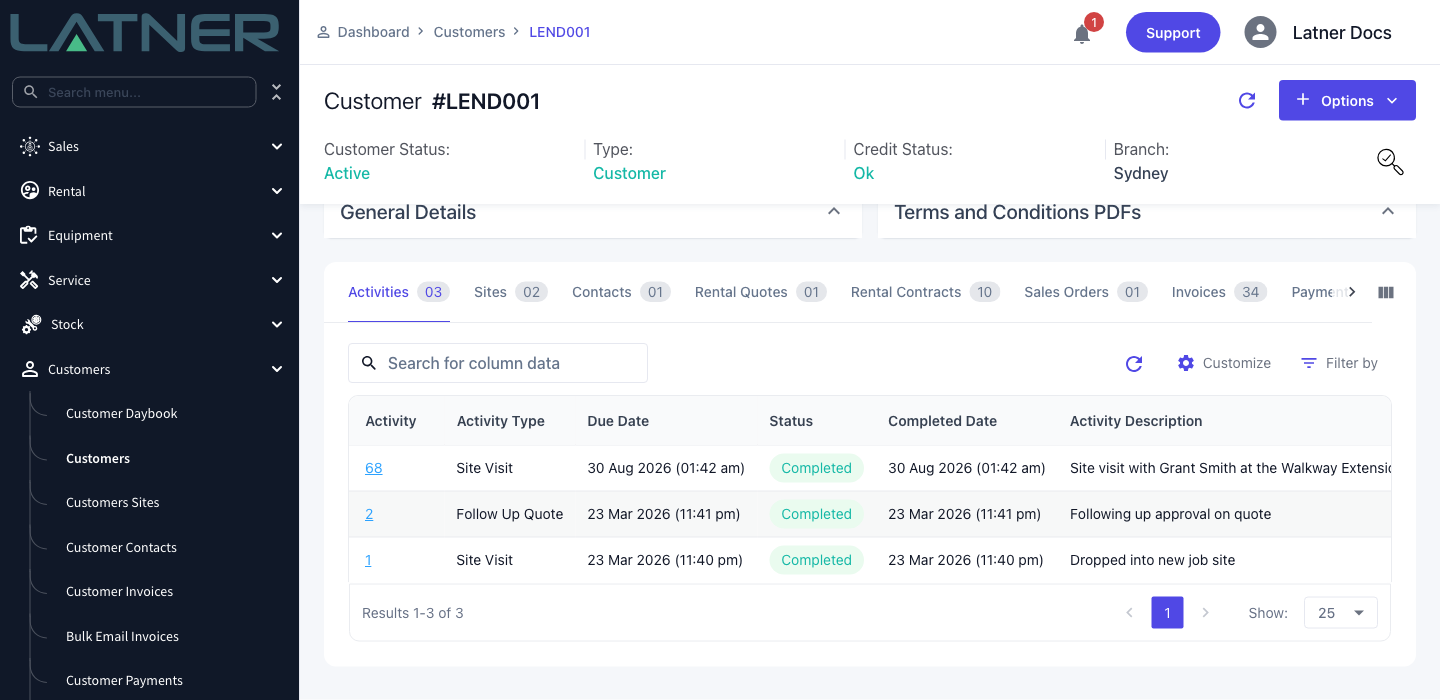
Every activity you create shows on the customer's Activities tab.
Before You Begin
You need two permissions and at least one activity type to choose from.
|
Requirement |
Where to Find It |
|---|---|
|
Create Activity permission |
Security › Configuration - under the Sales module, Option permissions |
|
Customers screen permission |
Security › Configuration - under the Customers module, Screen permissions |
|
At least one active Activity Type |
Sales › Configuration › Activity Types |
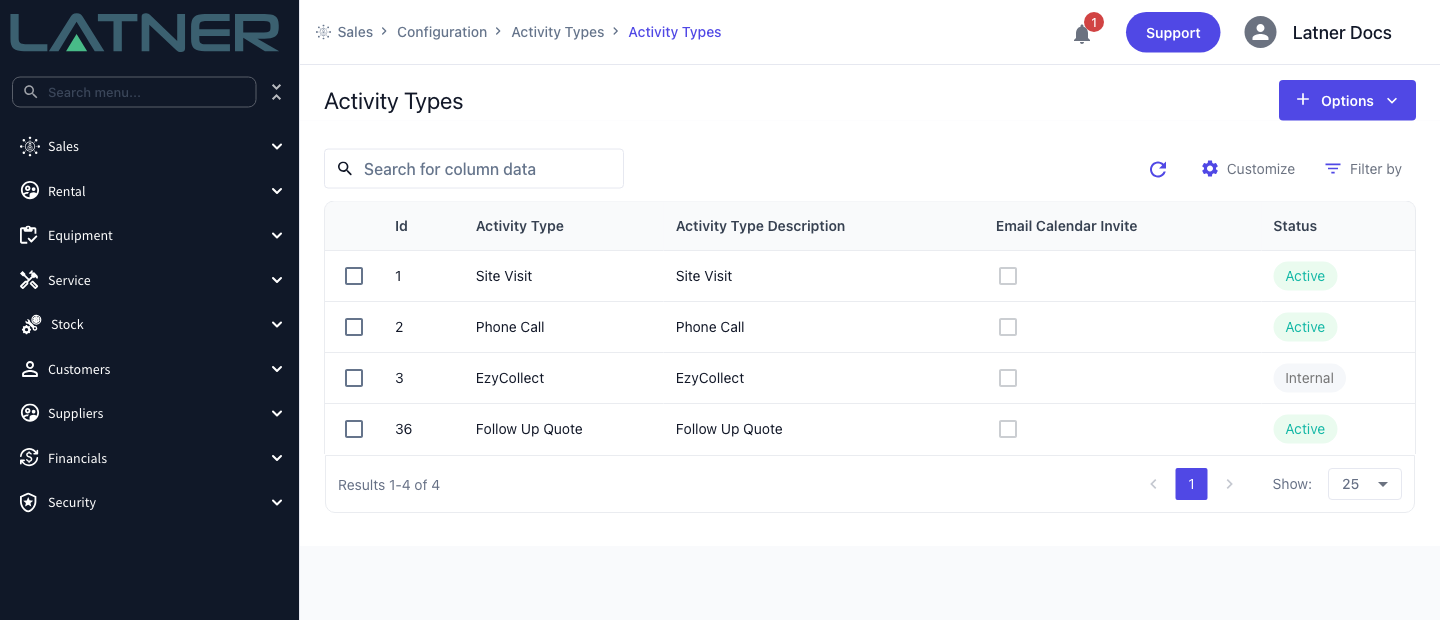
Without the Create Activity permission the Create Account Activity option simply isn't in the customer's Options menu. If you can open the customer but can't see the option, that's the permission to ask for.
Creating the Activity
Step 1 - Open the customer
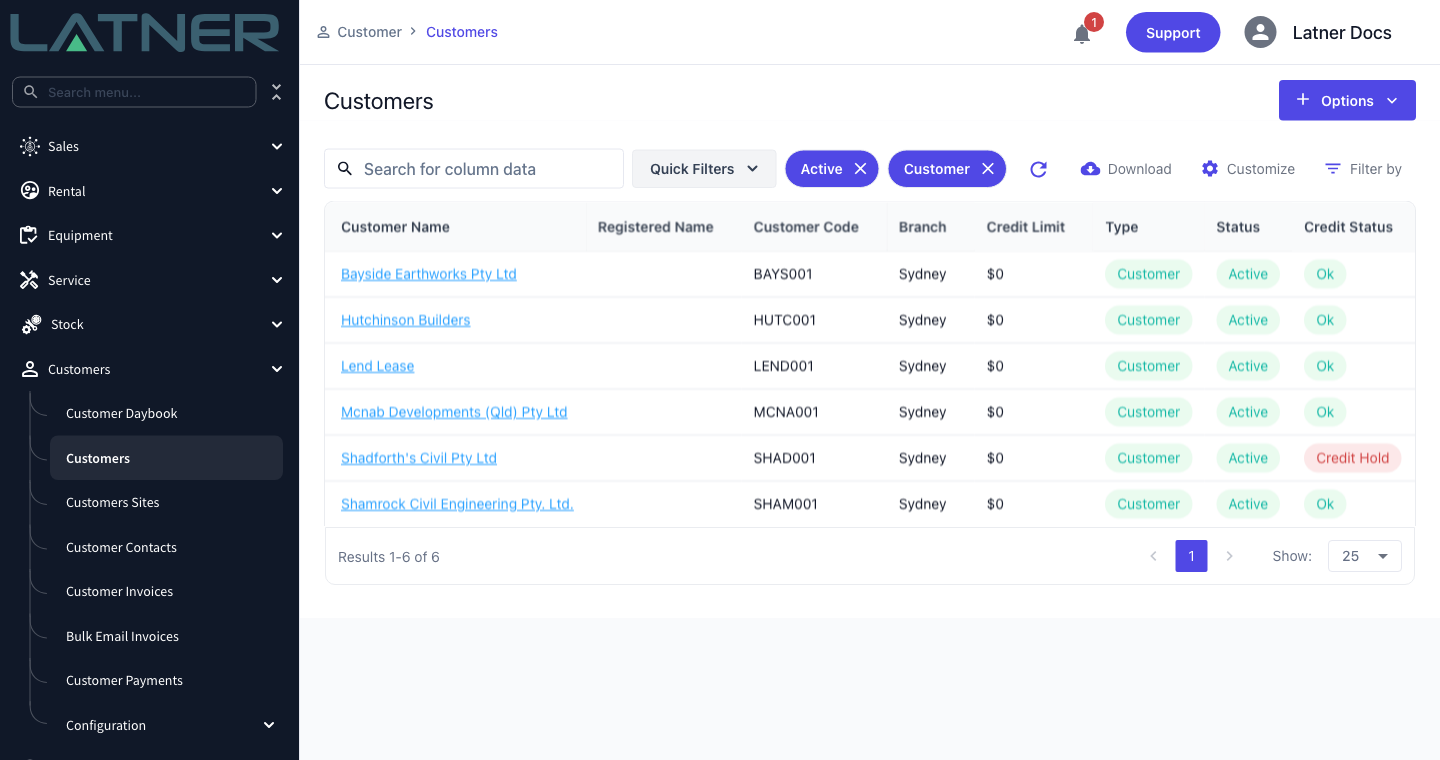
Go to Customers › Customers and select the customer you've been dealing with. The list opens filtered to Active customers, so clear the quick filters if you're looking for an inactive one.
Step 2 - Choose Create Account Activity
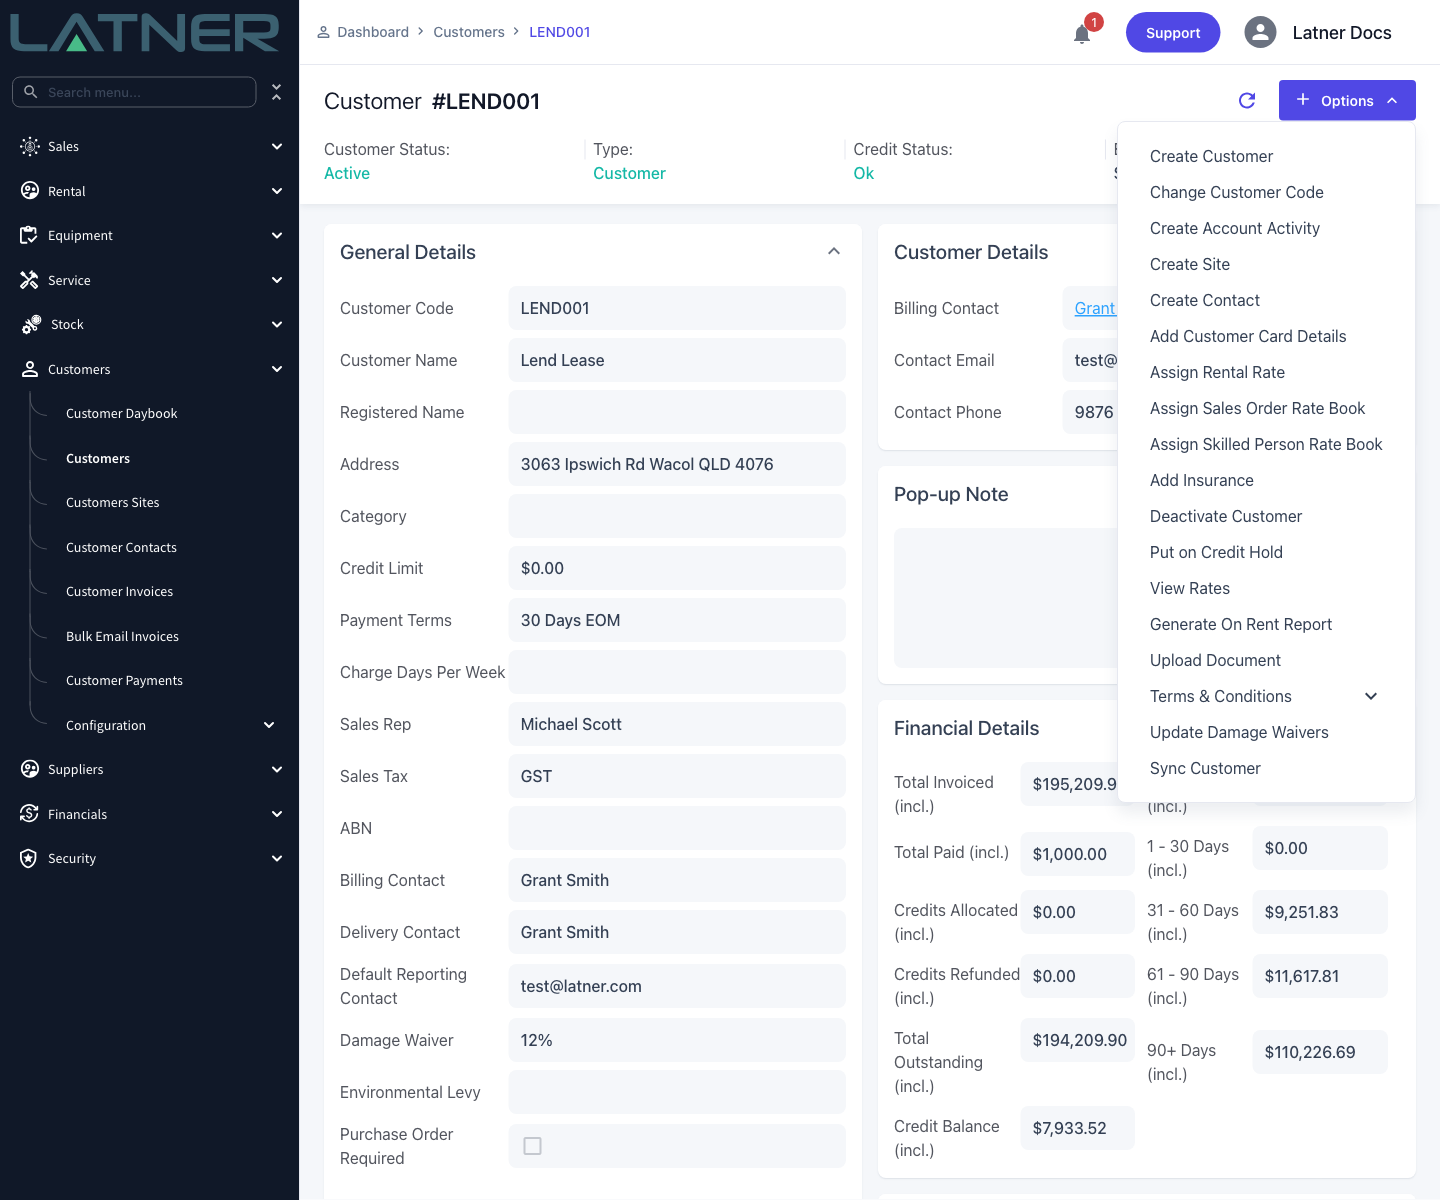
On the customer record, select Options and then Create Account Activity. On the CRM, contact, opportunity, sales order, quote and contract screens the same option is simply called Create Activity - it opens the same form.
Step 3 - Check the Account and set the type
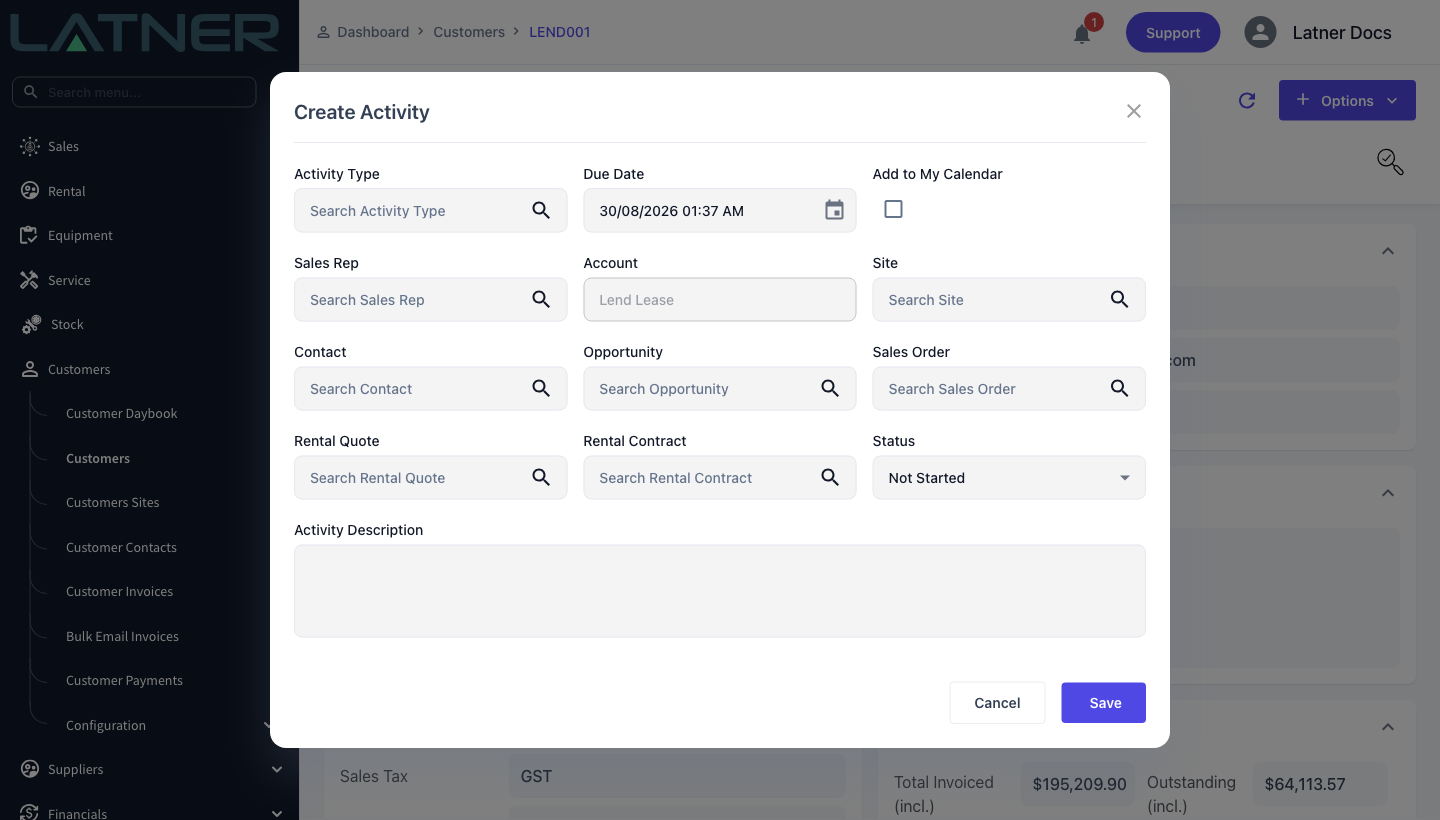
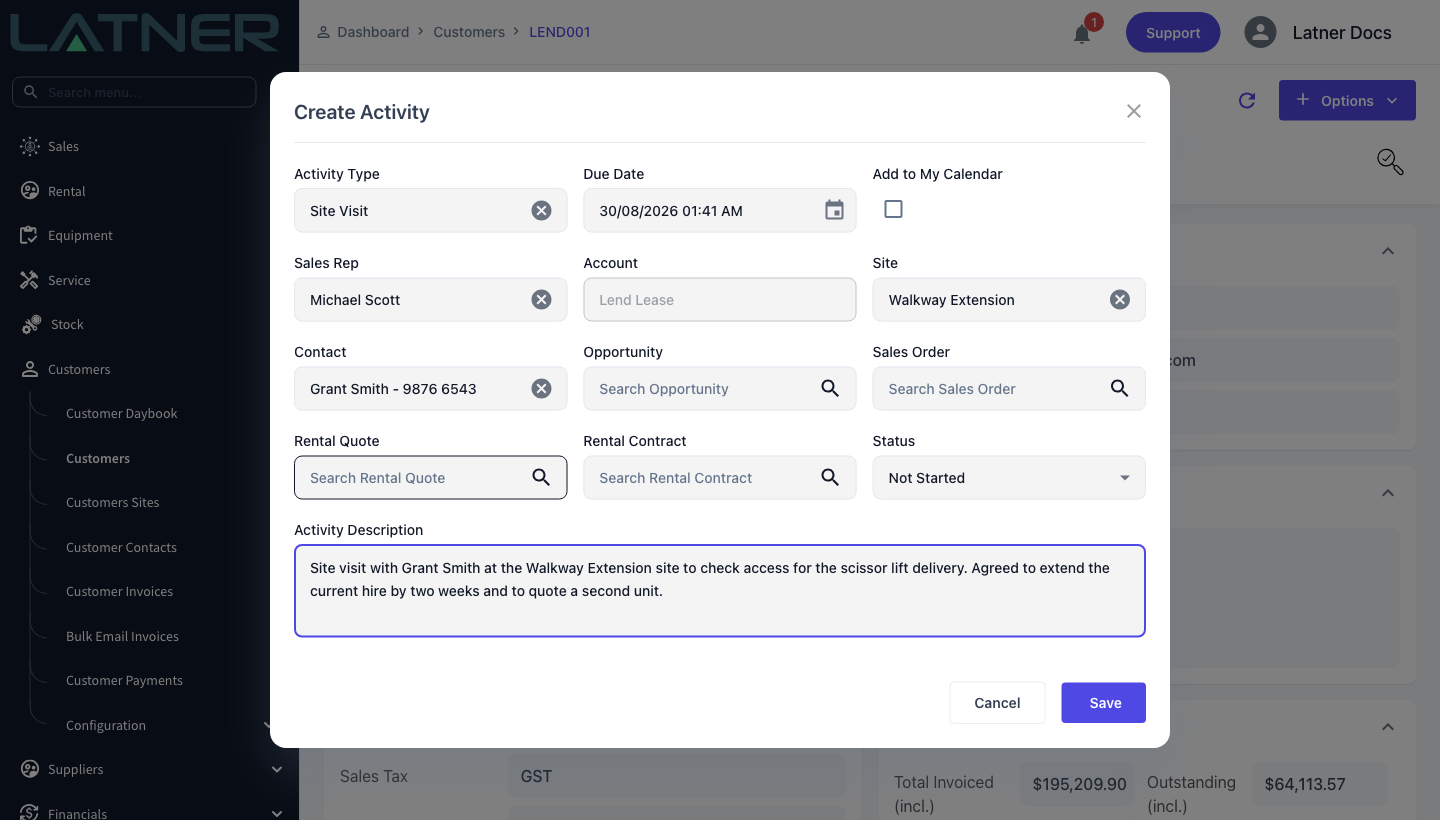
The Create Activity form opens with Account already filled in with the customer you started from. It's greyed out on purpose - an activity created this way always belongs to that customer. Pick your Activity Type and confirm the Due Date.
-
Activity Type (required) - only types with a status of Active are offered.
-
Due Date (required) - defaults to the current date and time in your branch's timezone.
-
Add to My Calendar - ticks itself on or off to match the activity type you chose. It's unavailable once the status is Completed.
-
Sales Rep - defaults to your own sales rep record if you have one. This is who the calendar invite goes to.
Step 4 - Link the activity to the right records
The remaining lookups all filter themselves to the customer on the form, so you only ever see that customer's records. Fill in whichever apply - none of them are required.
-
Site - the customer site the interaction relates to. Only sites with a status of Active appear.
-
Contact - the person you dealt with. If they're not there yet, use Create New at the bottom of the search to add them without leaving the form.
-
Opportunity, Sales Order, Rental Quote, Rental Contract - link the activity to a specific piece of work, so it also shows against that record.
Then write the Activity Description. This is required, and it's what your colleagues actually read, so say what was discussed or what still needs doing.
Step 5 - Set the status
Choose the Status that describes where the activity stands:
-
Not Started - the default. Something scheduled that hasn't happened yet.
-
In Progress - under way.
-
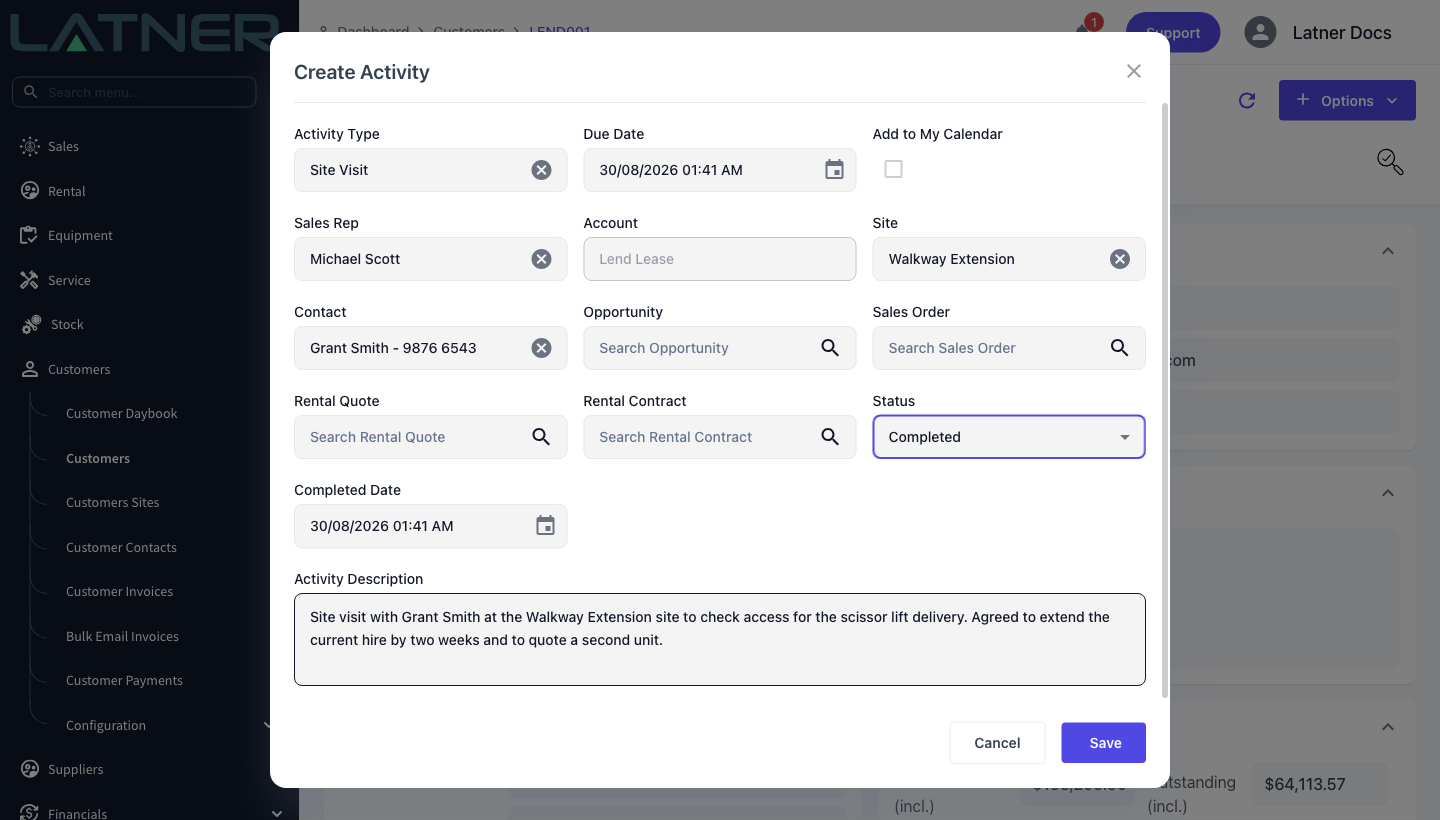
Completed - already done. Choosing this reveals a required Completed Date, pre-filled with the current date and time, and greys out Add to My Calendar (there's no point inviting someone to something that has already happened).
Step 6 - Save
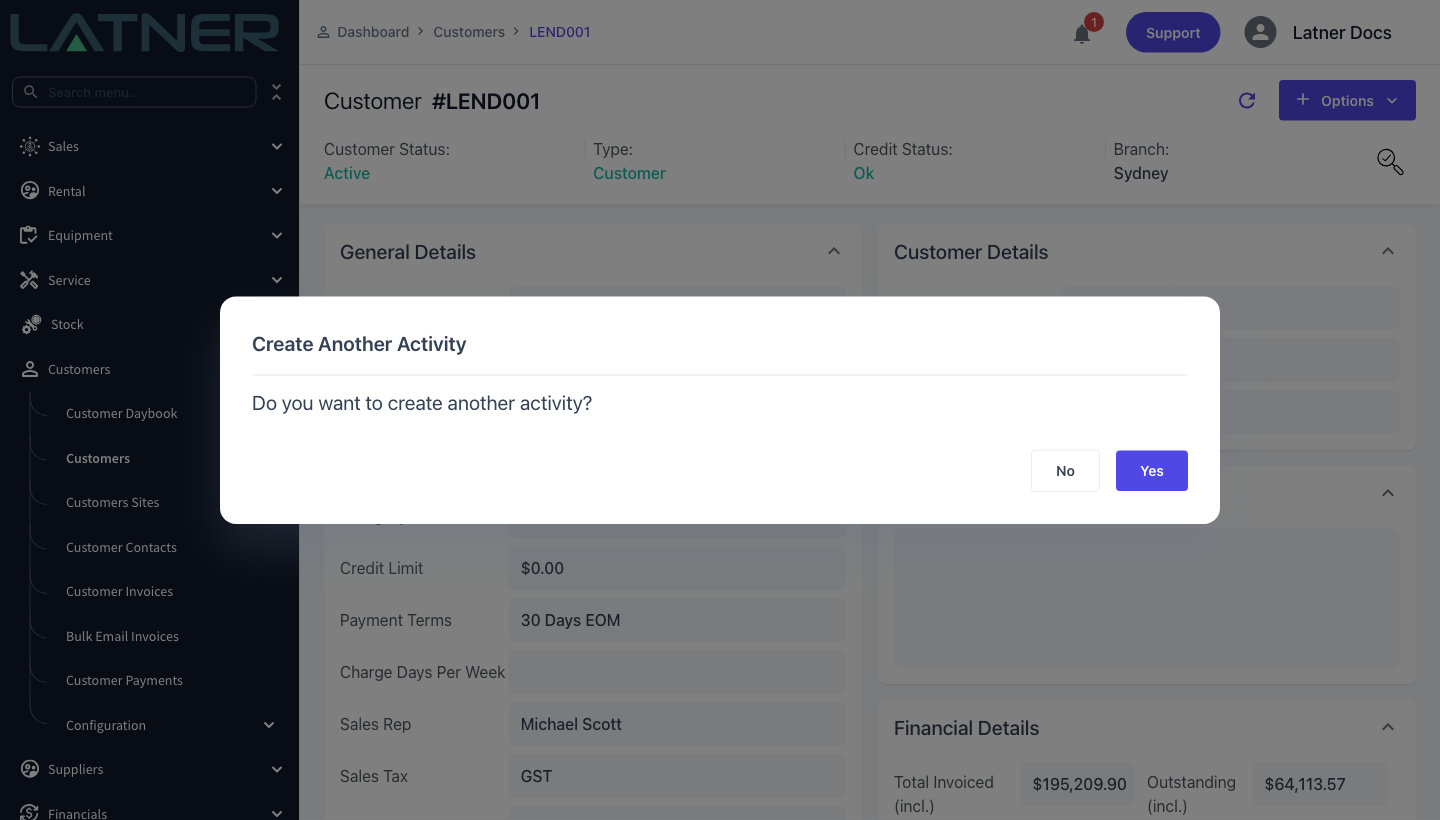
Select Save. A confirmation message appears with a link straight to the new activity, and Latner then asks whether you'd like to create another one against the same customer - handy after a visit that produced two or three follow-ups. Choose No to finish.
After Creation
-
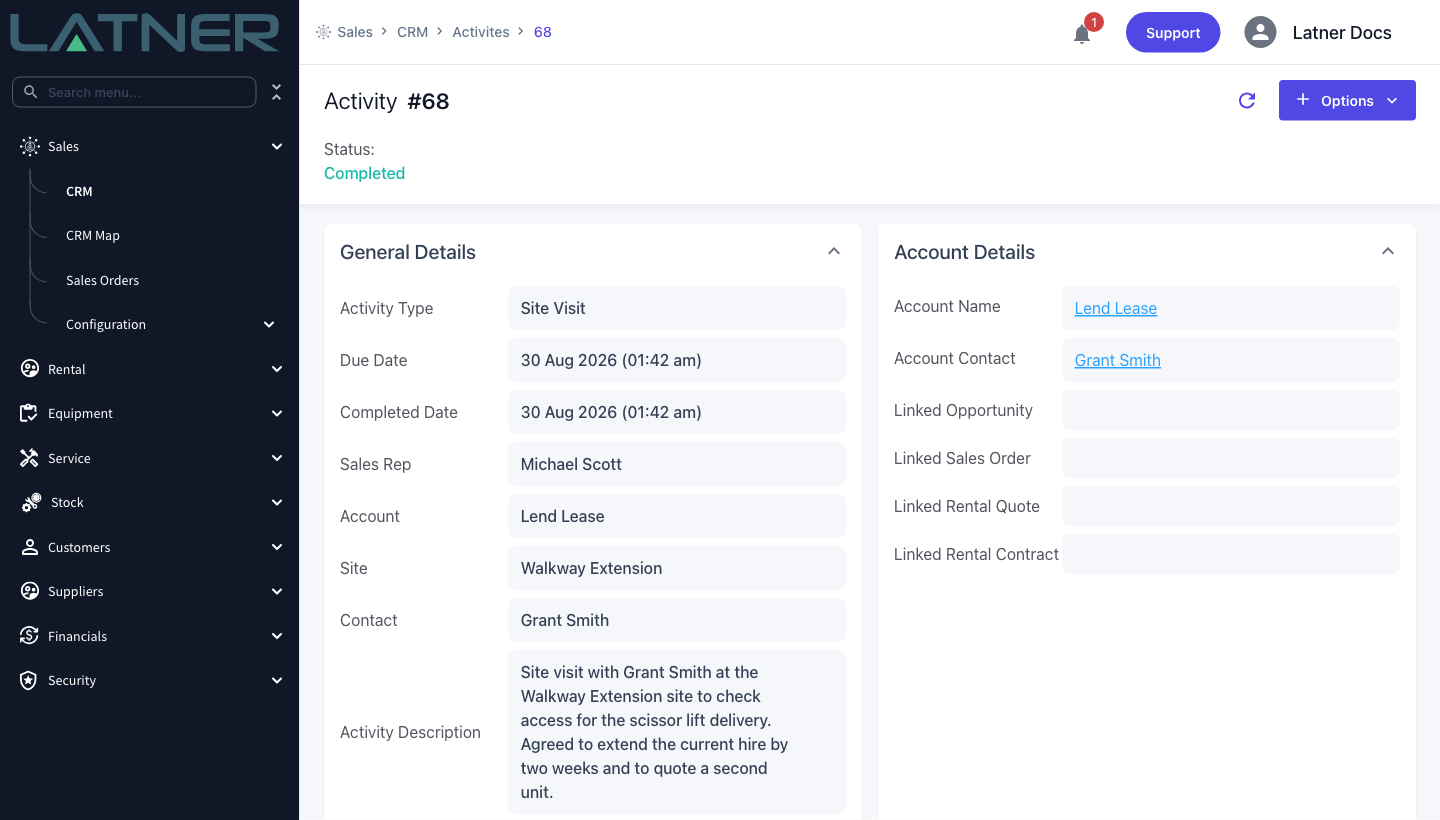
The activity appears on the customer's Activities tab, and on the detail page of any opportunity, sales order, quote or contract you linked it to.
-
Select the activity number to open it. Its General Details can be edited in place, and the Options menu lets you move it between statuses or choose Complete Activity.
-
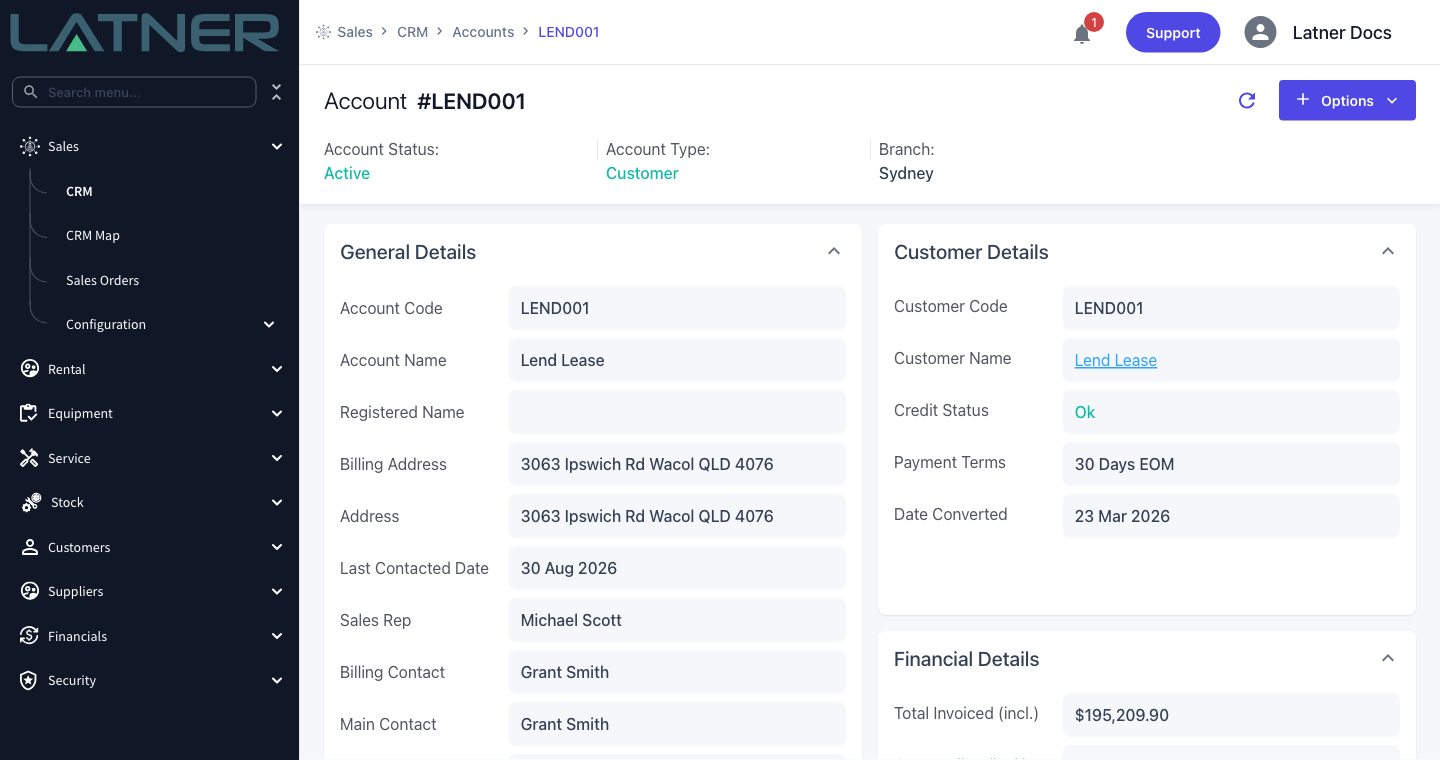
Completing an activity - now or later - stamps the Completed Date and rolls the Last Contacted Date forward on the customer, the linked contact and the linked site, but only when this activity is more recent than what's already recorded there.
-
The Last Contacted Date is shown on the customer's CRM account record at Sales › CRM, and on the CRM Map the site's own Last Contacted Date is what colours a marker as recently visited.
-
If Add to My Calendar was ticked and the activity isn't Completed, the assigned Sales Rep is emailed a 30-minute calendar invite starting at the Due Date.
There's no option to delete an activity - it stays as a permanent record of contact. If one was logged in error, edit its details or change its status instead.
FAQs
Watch the Demo
Prefer to watch it? Step through the same flow here.