
Search Screens in Latner provide a list of all records within a particular module. For example, selecting Rental Quotes will display a list of every rental quote in the system. These lists can be refined using search and filter tools to help you quickly locate the information you need.

Searching and Filtering Data
Every search screen includes tools to help narrow down results:
-
Search Box - Enter keywords to search across the list.
-
Quick Filters - Apply a preset of commonly used filters with a single click.
-
Filter By Button – Located on the right side of the screen, this allows you to apply filters to refine the data set.
Filters and search can be used together. For screens with detailed arrows, the search function works at both the header and detail level, giving you precise control over results.
Saving Quick Filters as Your Default View
If your filters keep resetting every time you come back to a screen, save them. Save, at the bottom of the Quick Filters menu, stores the quick filters you currently have on as your default view for that screen, so Latner remembers your filter and applies it each time you open the screen. It works the same way on every search screen that has a Quick Filters button - Work Orders, Customers, Equipment, Rental Contracts and the rest.
-
Per screen and per tab - each screen keeps its own saved view. On screens with tabs (such as Equipment and Customer Owned Equipment on the Equipment screen), each tab keeps its own saved view too.
-
Saved against your own login - the view is stored on your user, so it persists between sessions and follows you to any computer you log in on. Nobody else’s view changes, and no special permission is needed.
-
Only quick filters are saved - filters set on the table columns through Filter by are not saved. They reset when you navigate away and come back.
-
Unsaved changes don’t stick - this is the usual reason a default view resets. Turning quick filters on or off without pressing Save only lasts while you stay on the screen. Next time you open it, your saved view (or the screen’s standard default if you have never saved one) comes back.
For example, to make Service › Work Orders open on open work orders across all branches instead of just your own:
Step 1 - Open the screen
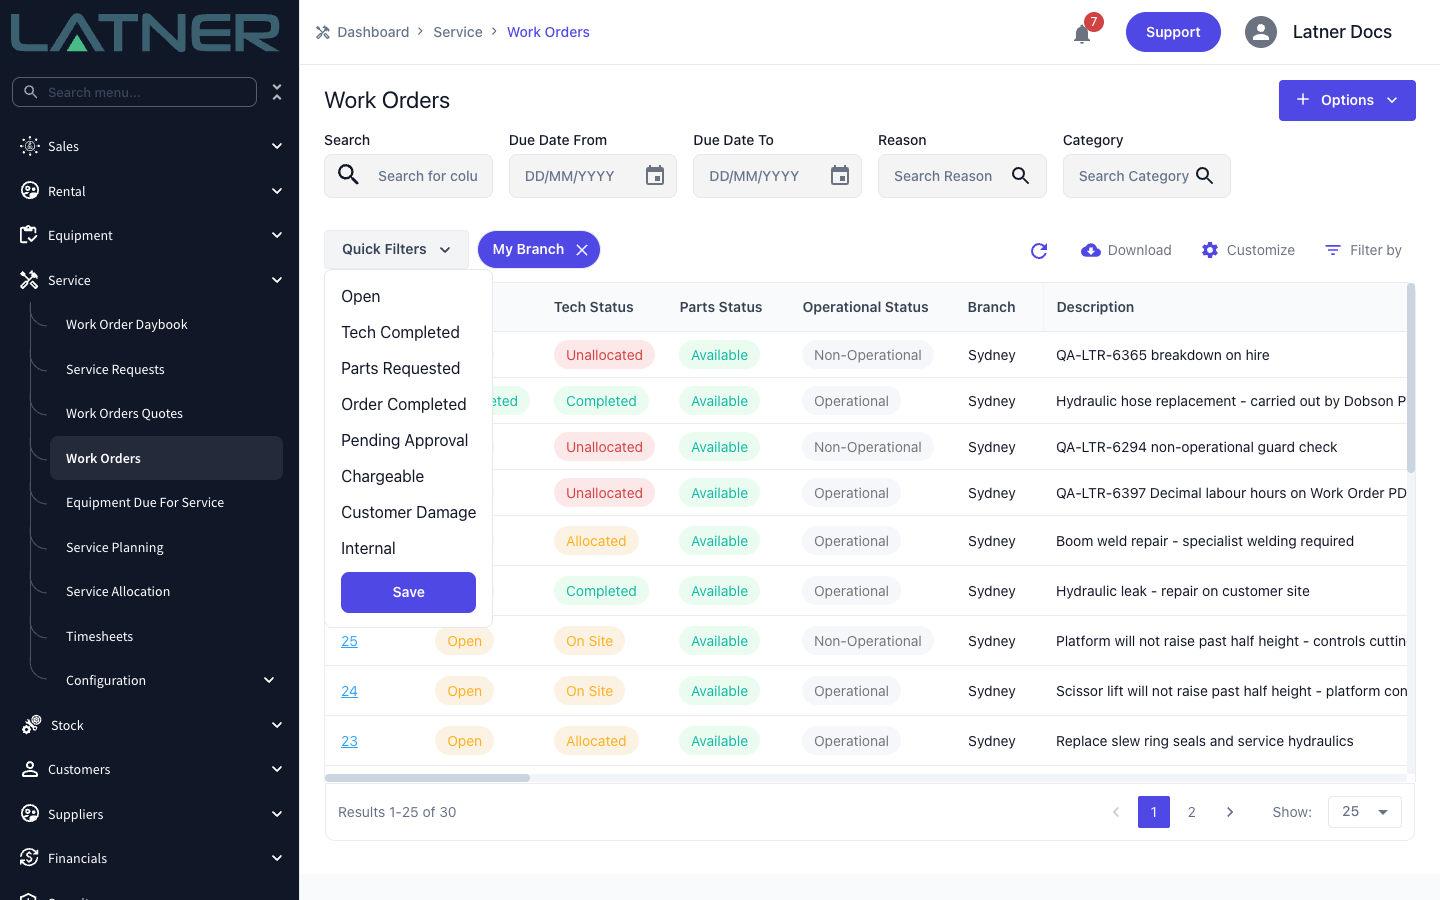
Go to Service › Work Orders. Quick filters that are on show as highlighted chips beside the Quick Filters button. By default Work Orders opens with My Branch on.
Step 2 - Turn off My Branch
Click the X on the My Branch chip. The list refreshes to show work orders from every branch.
Step 3 - Turn on Open
Click Quick Filters and select Open. The menu only lists quick filters that are currently off, and selecting one closes the menu and applies it straight away.
Step 4 - Save
Click Quick Filters again and click Save at the bottom of the menu. The menu closes and Open (without My Branch) is now your default view for Work Orders.
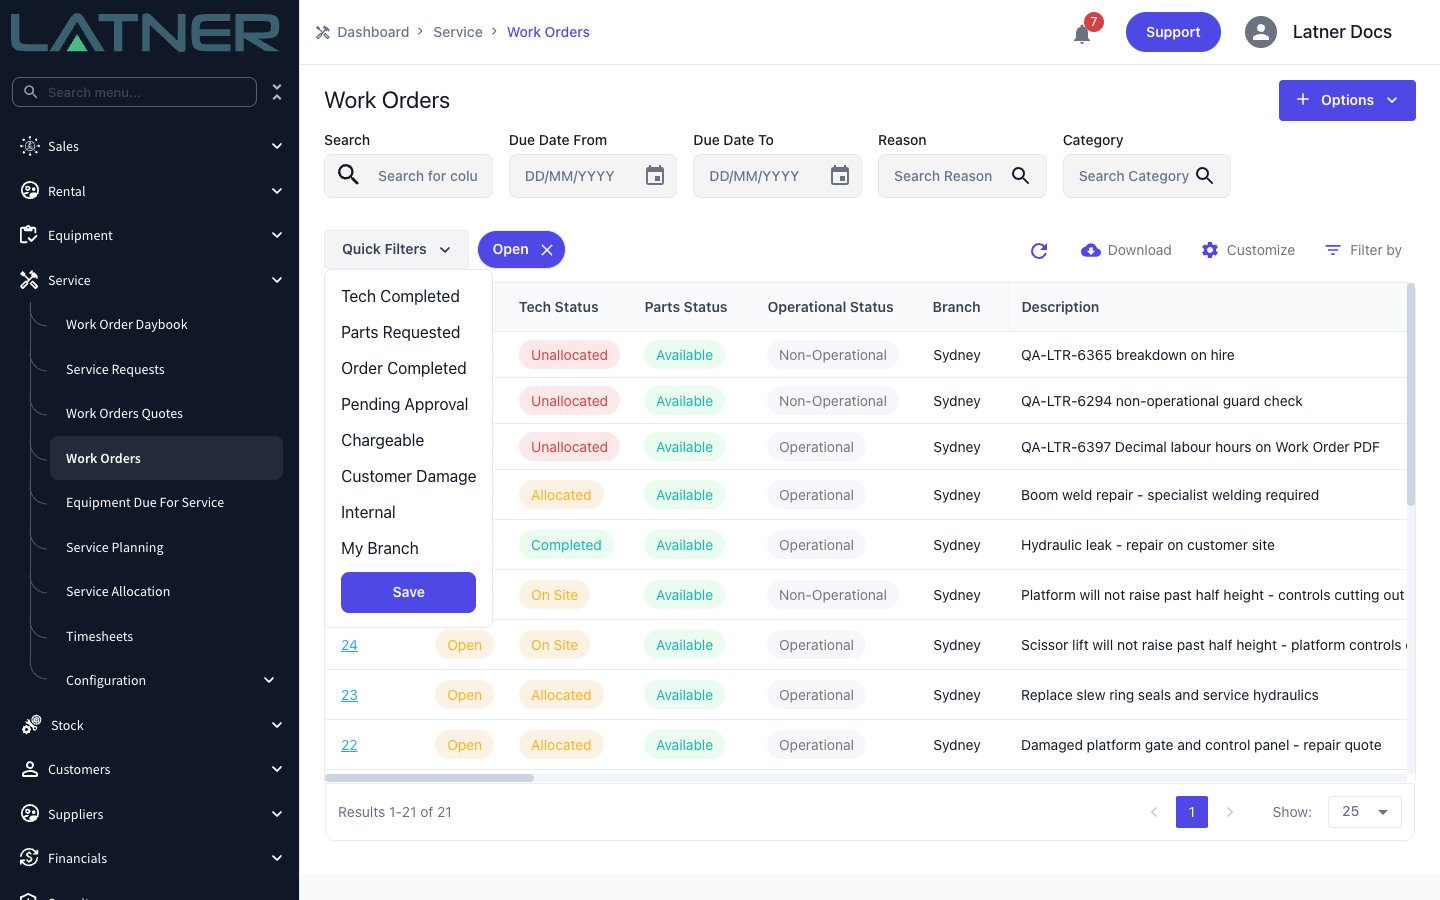
Leave Work Orders and come back, or log out and in again, and the screen opens with Open already applied. Any Filter by selections you made before leaving are cleared.
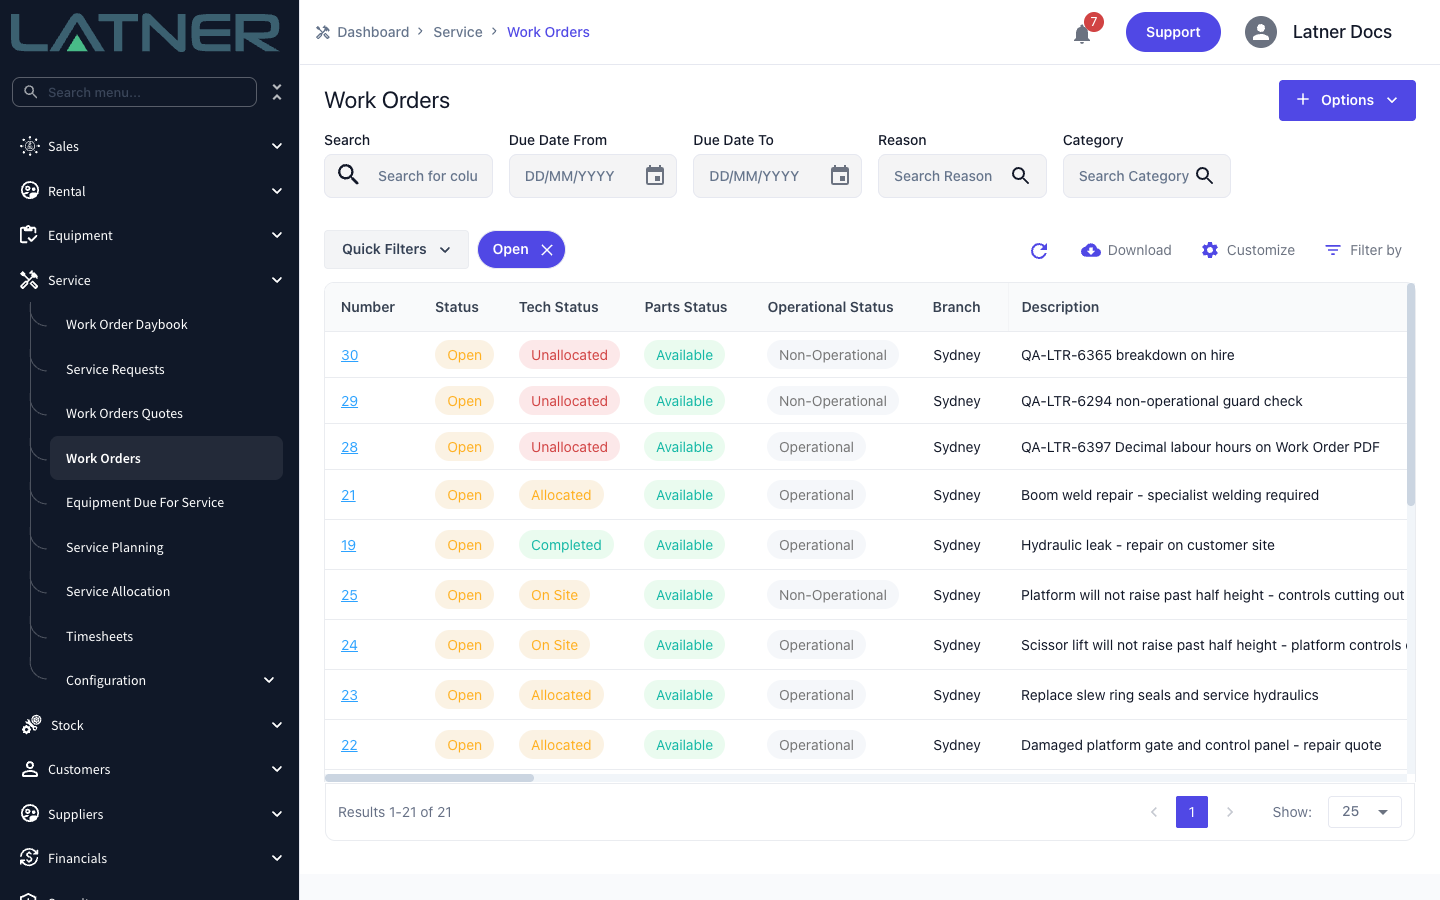
To see every record by default, remove all the quick filter chips and click Save - an empty selection is saved too. There is no reset button: to go back to the screen’s standard default, turn its original quick filters back on (for Work Orders, My Branch) and save again.
Customizing your View
Users can adjust how data is displayed by selecting the Customize option on the right side of the screen. This allows you to:
-
Hide or show specific columns
-
Change the order of columns to suit your workflow
Following Links for More Detail
Within any search screen, text that appears blue and underlined is a clickable link. Selecting a link will get you to Using a Detail Screen for that record to view or edit detailed information.
In some Search Screens, you’ll notice a small arrow next to the link. Clicking this arrow expands the record so you can view its related details directly within the search screen. This allows you to quickly check detail information such as line items without needing to open the full detail screen.
