
On a field service Work Order, Latner hides the whole job behind a Take 5: the technician cannot enter any work, or complete the Work Order, until they have completed the safety checklist on site.
Overview
This is the part your technicians actually see, and it is deliberately hard to walk past. The checklist comes before the work, not after it.
-
It all happens on the phone, in Mobile Work Orders.
-
A field service Work Order gains an extra step - Accept, then Arrive On Site, then Complete - so the Take 5 lands at the moment the technician is standing in front of the job.
-
While a Take 5 is outstanding, the work entry sections are hidden entirely, not just disabled.
-
The Take 5 is created on demand. Nothing appears on the job until the technician taps Add Take 5.
Before You Begin
A Take 5 only appears on a Work Order when all of this is true:
|
Requirement |
Detail |
|---|---|
|
A Take 5 template is selected |
Security › Settings › Service › Work Order Take 5 Checklist. See How to Set Up Take 5 Safety Checklists. |
|
The Work Order's Location Type qualifies |
Controlled by Take 5 Work Order Location Types. Field Service only, unless you have changed it. |
|
The Work Order is still Open |
Completed and cancelled Work Orders are never asked for one. |
|
The technician can edit the Work Order |
Either it is allocated to them, or they hold Assign Work Order Technician. |
Workshop Work Orders do not require a Take 5 out of the box. If a workshop job is not asking for one and you expected it to, that is the Location Types setting rather than a fault.
Completing the Take 5
Step 1 - Accept, then travel to site
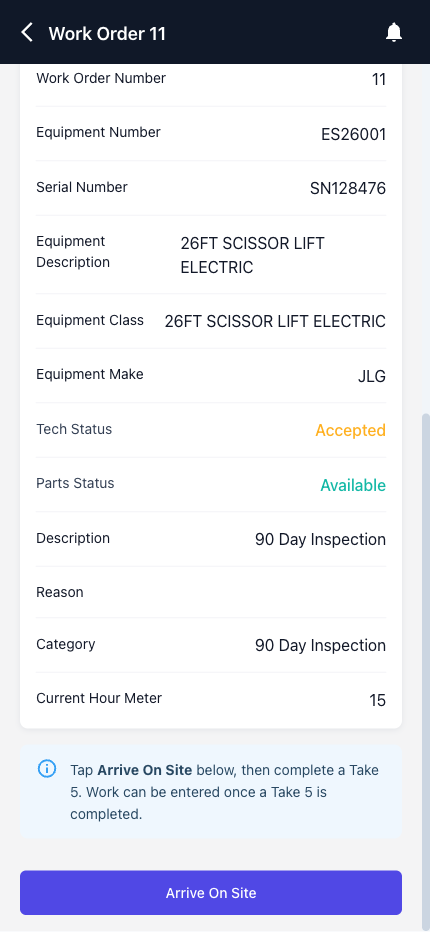
The technician opens the job and taps Accept Work Order. On a field service Work Order, Latner then inserts a step that workshop jobs do not have: instead of offering Complete Work Order, the footer offers Arrive On Site, and a prompt explains why.
Step 2 - Arrive on site
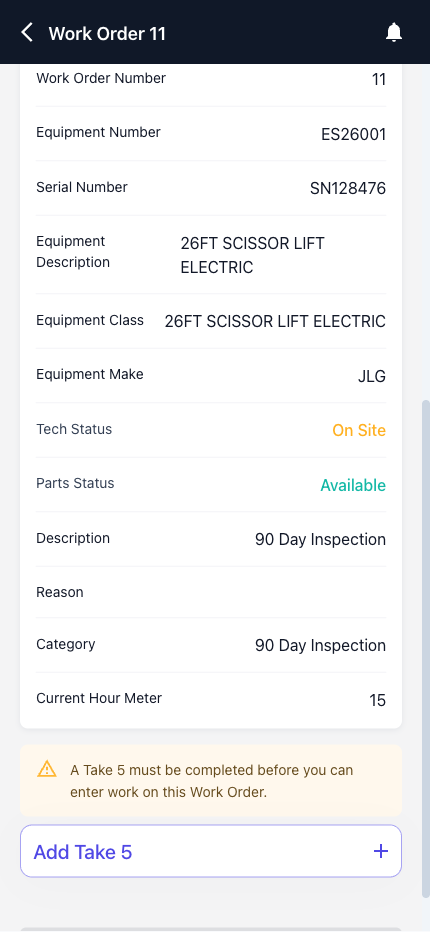
Tapping Arrive On Site moves Tech Status to On Site and the Take 5 section appears, with a warning that work cannot be entered until a Take 5 is completed. Everything the technician would normally fill in - timesheets, parts, expenses, meter reading, signature - stays hidden.
Step 3 - Start the Take 5
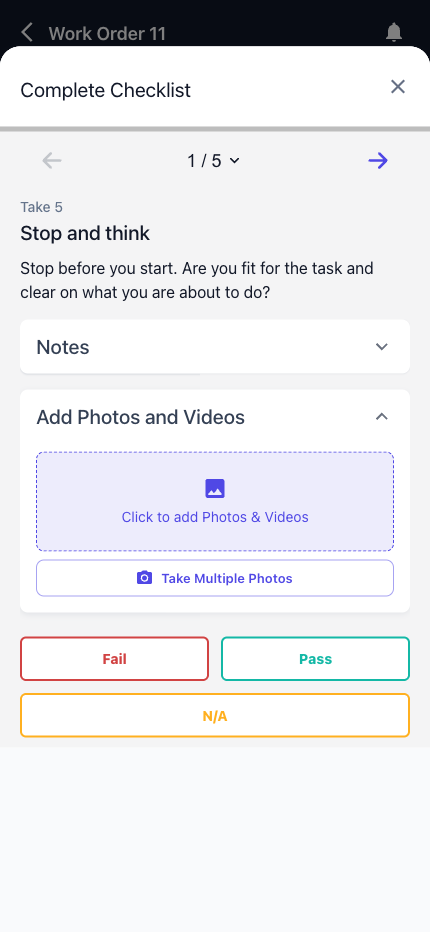
Tapping Add Take 5 creates the checklist from your template and opens it straight away. The technician works through one task at a time, tapping a response to move to the next.
-
The response buttons come from the template's Default Response.
-
Notes are optional on every task, and worth encouraging on anything answered Fail.
-
Answering the last task completes the Take 5 automatically and closes the drawer. There is no separate submit.
Step 4 - Attach photos where they are required
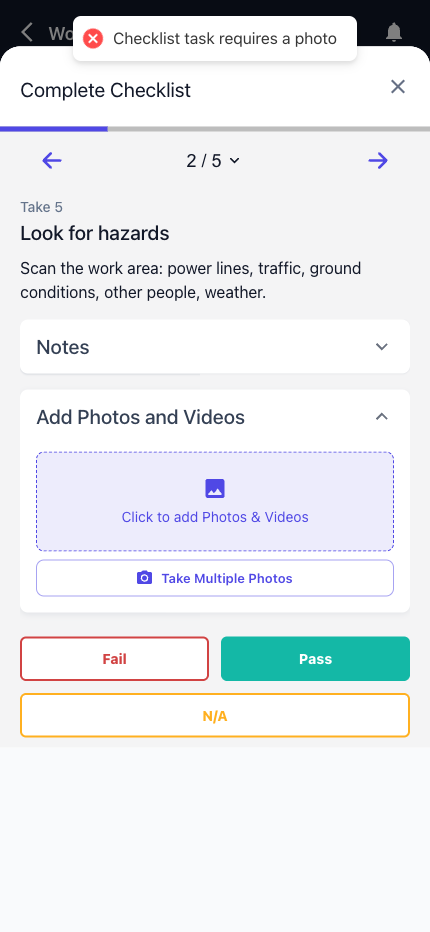
On any task marked Photo Required in the template, tapping a response without a photo is refused with "Checklist task requires a photo". The technician attaches a photo, then answers as normal.
Step 5 - Get on with the job
The moment one Take 5 is completed, the Work Order unlocks: work entry appears, and Complete Work Order becomes available. The Take 5 stays on the job as a completed record, and Add is offered again so the technician can run another one if conditions change - a second Take 5 after lunch, or after the weather turns.
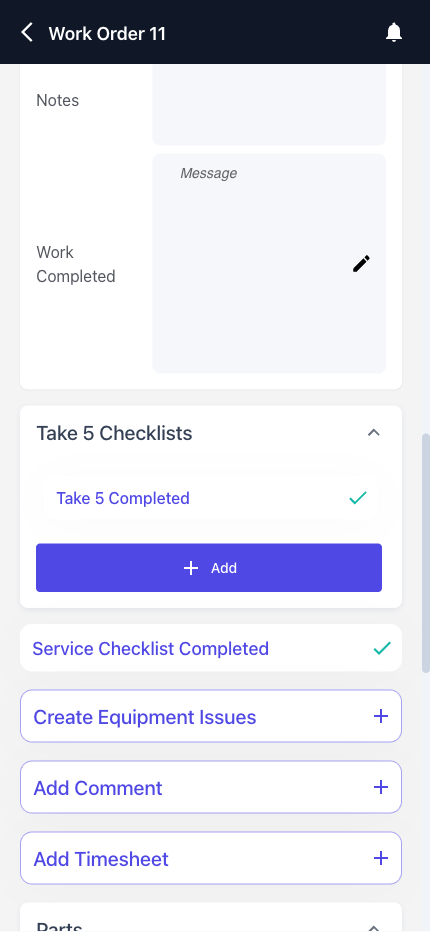
Starting a second Take 5 and leaving it unfinished does not re-lock the job. Latner asks whether a completed Take 5 exists, not whether an unfinished one does.
What an Outstanding Take 5 Blocks
On a Work Order that requires one, until a Take 5 has been completed:
-
Setting Tech Status to Completed from the mobile app is refused with "Work Order cannot be completed until a Take 5 has been completed".
-
Completing the Work Order from the office is refused by the same rule - the desktop Complete Work Order action is not a way around it.
-
Work entry on mobile is hidden rather than merely disabled.
Note that the check is for a completed Take 5, not for the absence of an unfinished one. A Work Order where nobody ever started a Take 5 is blocked just as firmly as one where a Take 5 was left half done.
A supervisor holding Complete Work Order without Take 5 can complete the job anyway. That permission is off in most standard groups - see How to Set Up Take 5 Safety Checklists.
After Completion
Every completed Take 5 is a permanent record on the Work Order:
-
It appears on the Checklists tab, with type Take 5, a Pass and Fail tally, and who completed it and when.
-
Expanding the row lists every task with the response given, any notes, and any photos attached.
-
Selecting the row offers Generate Take 5 PDF, for a printable record to send to a client or a safety officer. The action only appears for a Take 5, and only works once it is completed.
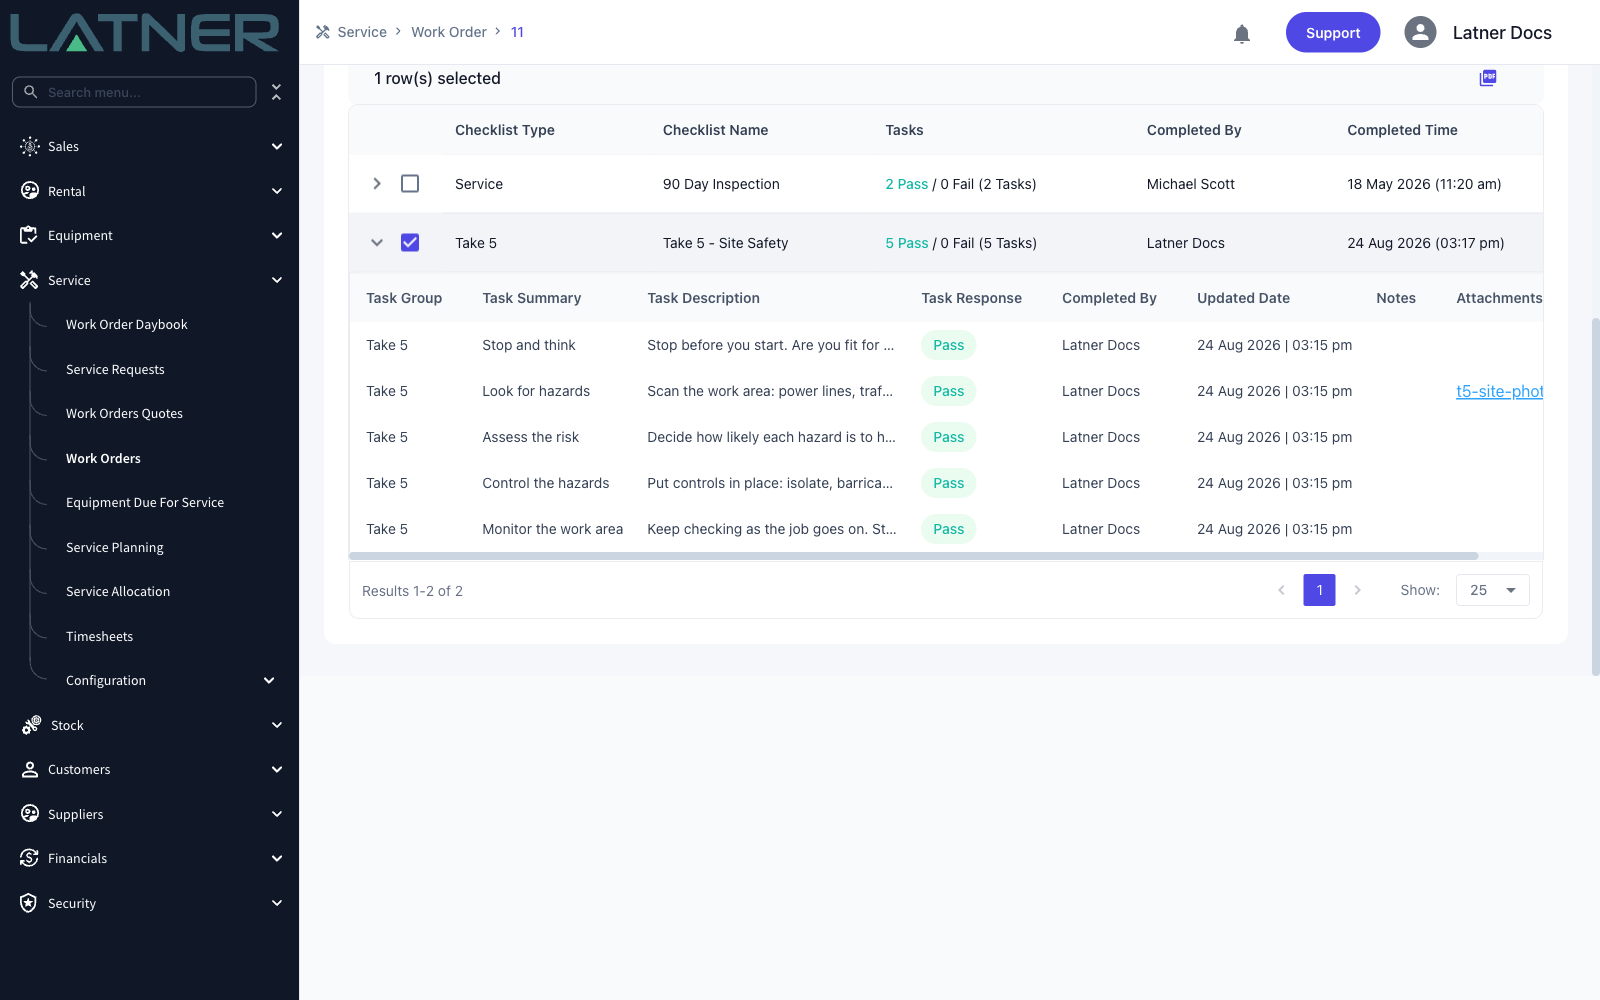
Office staff can also answer a Take 5 task from this tab by right clicking it and choosing a response. It is the practical way to correct a mistake, but note that it bypasses the photo requirement, so a task deliberately marked Photo Required can be answered here without one.