
Scheduled Jobs let Latner do routine work for you on a timetable - such as emailing every customer their Customer On Rent Report each Monday morning - so nobody has to remember to send it.
Overview
Some reports are only useful if they turn up regularly. Rather than generating and emailing them by hand, set up a scheduled job once under Security › Configuration › Scheduled Jobs and Latner runs it daily, weekly or monthly from then on.
-
There are two job types: Customer On Rent Report emails each customer a report of the equipment they currently have on rent, and Monthly Revenue Forecast recalculates the Monthly Forecast on the Revenue Forecast dashboard tab.
-
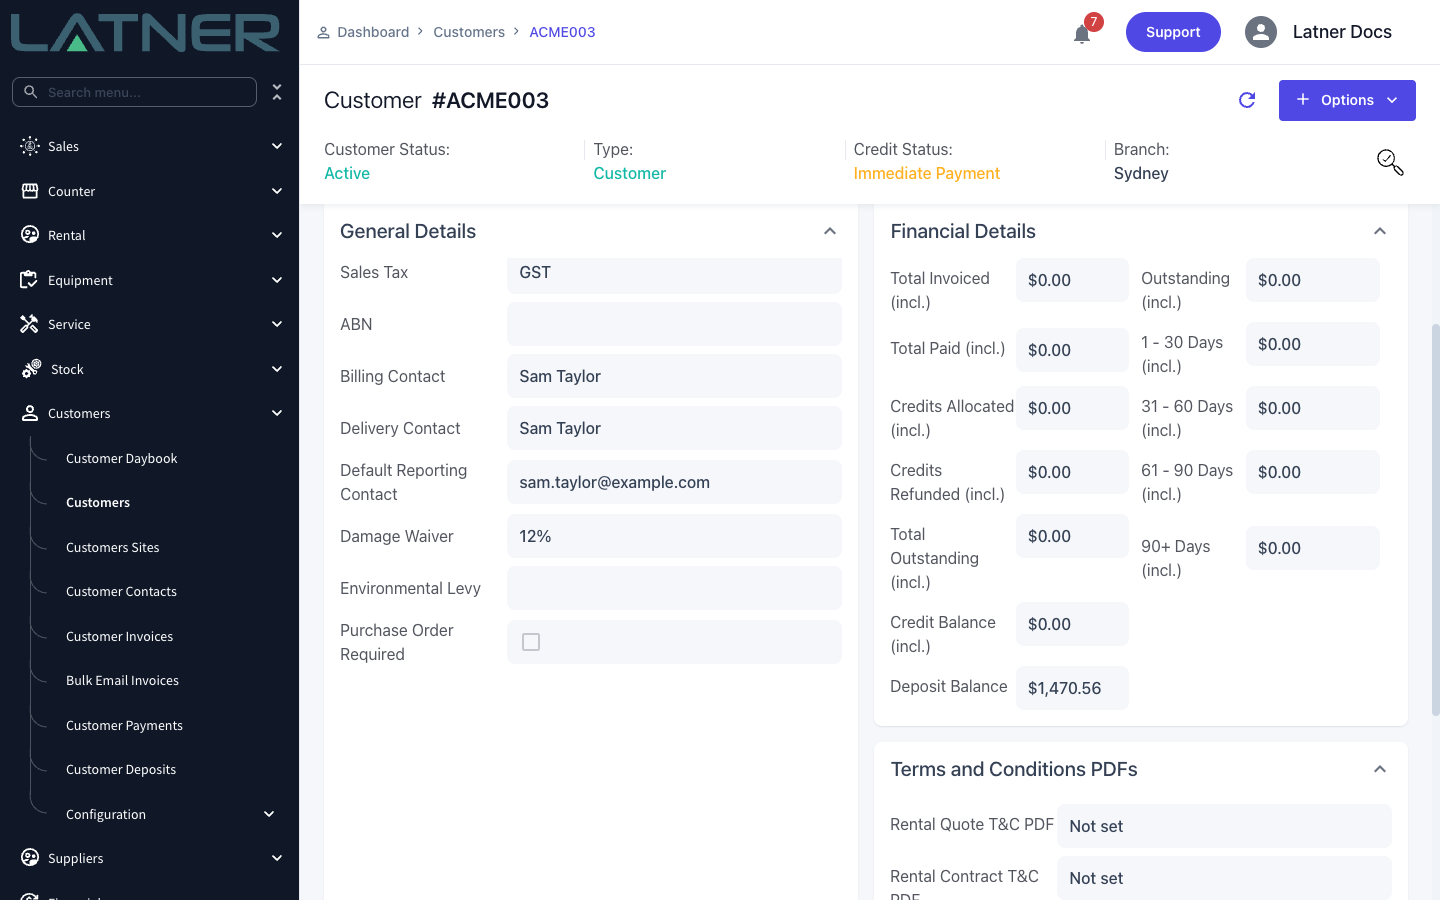
Customer On Rent Report emails go to each customer's Default Reporting Contact. A customer without one is skipped.
-
You choose which customers to include, or leave the list blank to cover every customer with equipment on rent.
-
Reports can be sent as a PDF or a CSV.
-
Any job can also be run straight away with Options › Run Job, and every run, scheduled or manual, is recorded on the Run History tab.
Before You Begin
Check these are in place before you create a Customer On Rent Report job.
|
Requirement |
Where to Find It |
|---|---|
|
Scheduled Jobs permission - to see the screen and its Run History |
Security › Configuration › Permission Groups (Security module, Screen permissions) |
|
Create Scheduled Jobs permission - to create and edit jobs |
Security › Configuration › Permission Groups (Security module, Configuration permissions) |
|
Run Scheduled Jobs permission - to run a job on demand with Run Job |
Security › Configuration › Permission Groups (Security module, Option permissions) |
|
The Customer On Rent Report email settings: Customer On Rent Report Email - Subject, - Body, - From Name and - From Email (all four required), plus - CC Email (optional) |
Security › Settings › Email, on the Global tab |
|
A Default Reporting Contact with an email address on each customer who should receive the report |
The customer's detail screen, under General Details |
The Subject and Body can include {{customer.name}}, which is replaced with each customer's name. The From Email is the address customers' replies go to; the email itself is sent from your SendGrid Sender Email (or no-reply@latner.app if that isn't set). Your default email signature is added to the end of the body.
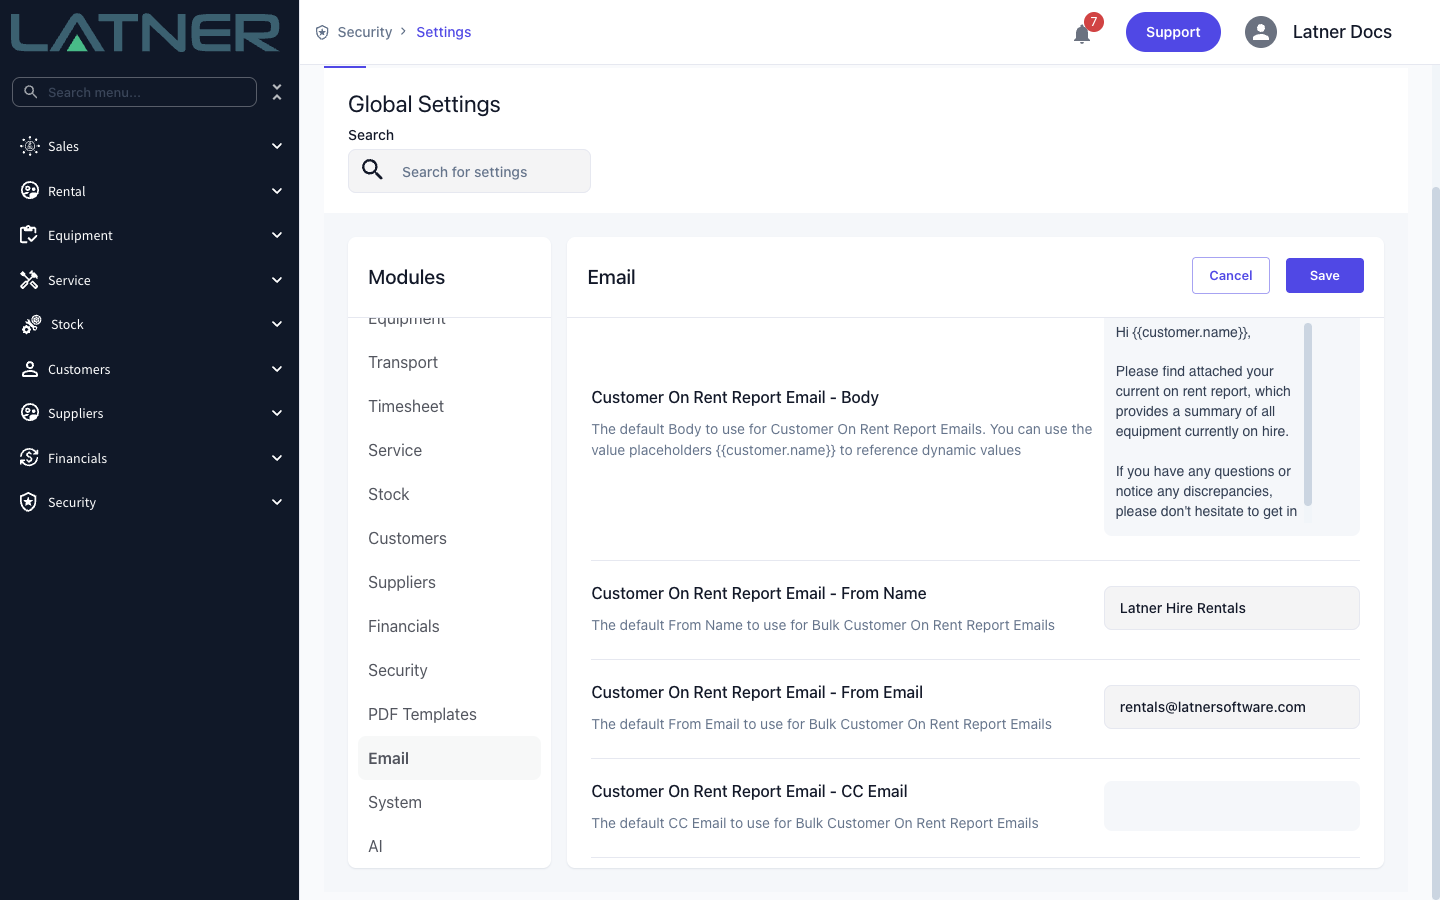
If any of the four required email settings is blank, the job doesn't send anything: the run is marked Failed with the message Missing required Customer On Rent Report Email template settings for: followed by the settings that are missing. Scheduled jobs only read the Global values of these settings, so fill them in on the Global tab even if you also use branch-level email settings.
Creating a Scheduled Job
Step 1 - Open the Scheduled Jobs screen
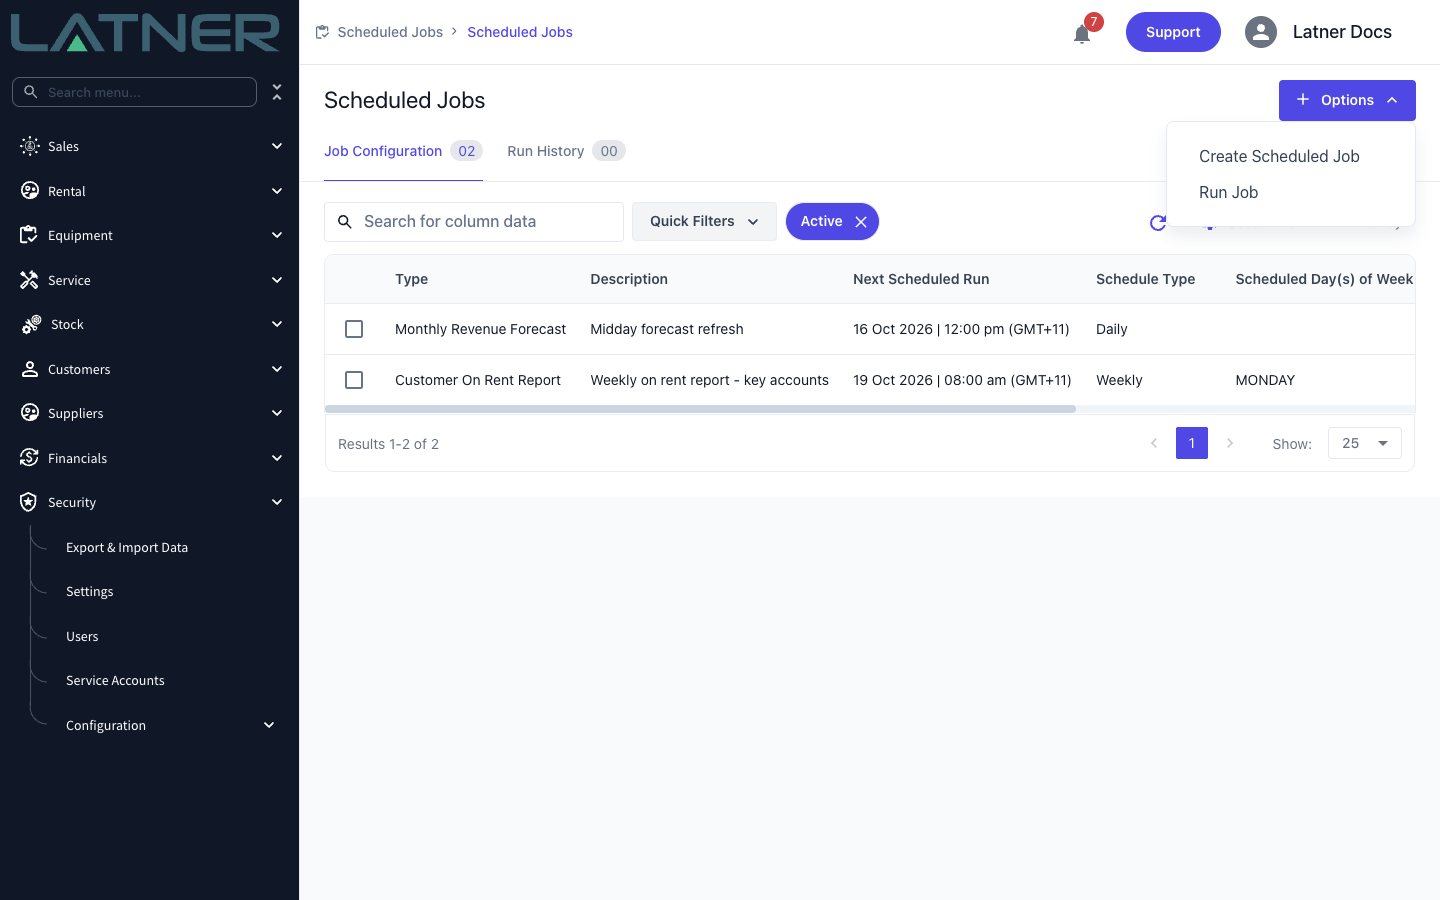
Go to Security › Configuration › Scheduled Jobs. The Job Configuration tab lists your jobs and when each will next run. Click Options › Create Scheduled Job.
Step 2 - Choose the Job Type
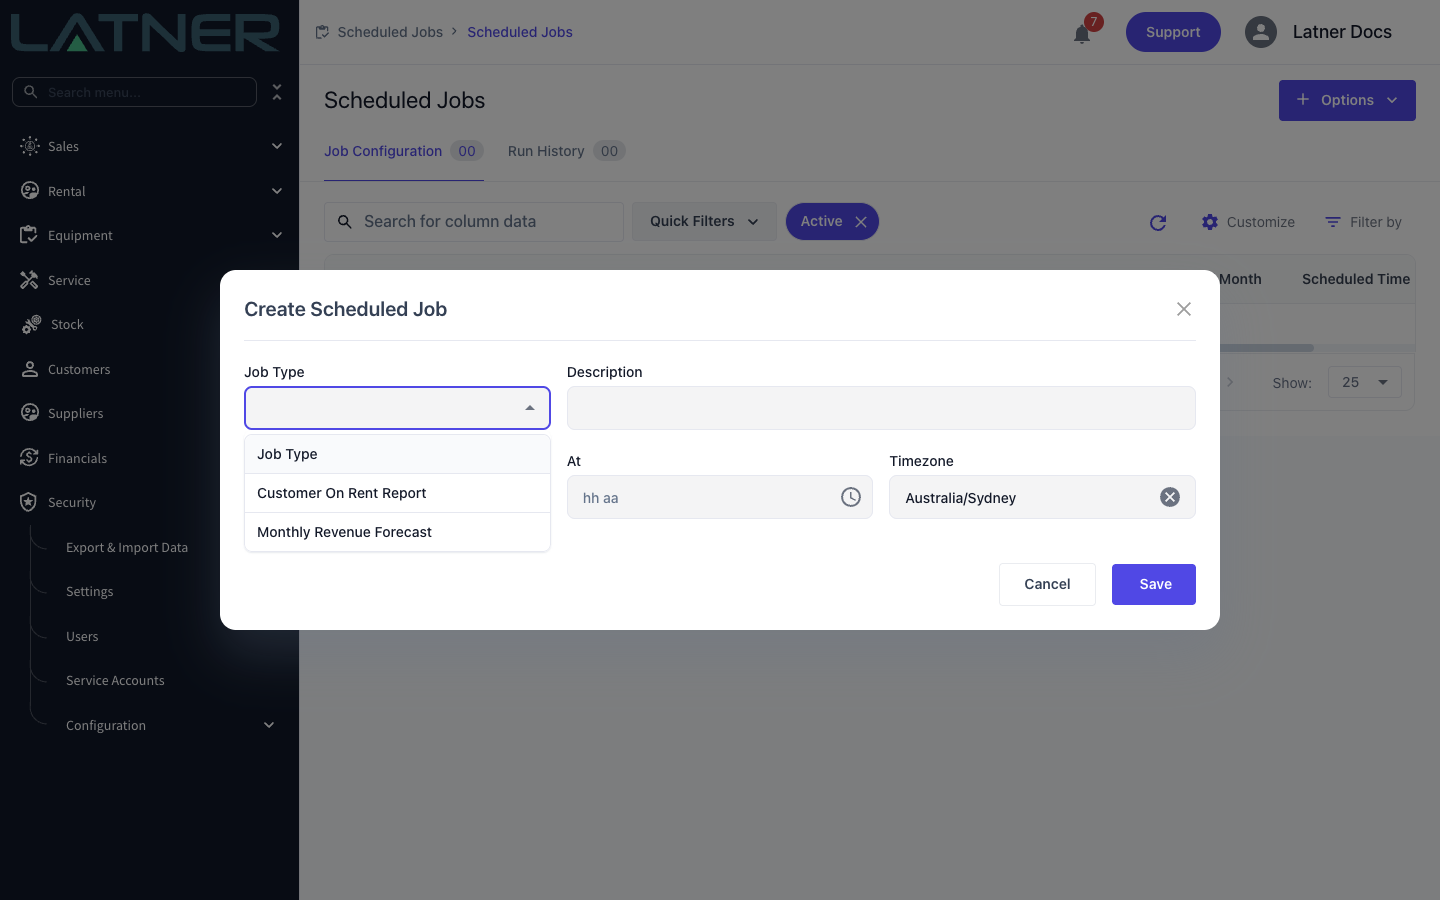
Pick the Job Type:
-
Customer On Rent Report - emails each included customer a report of the equipment they have on rent on active rental contracts (equipment and sub hire equipment lines).
-
Monthly Revenue Forecast - recalculates the Monthly Forecast shown on the Revenue Forecast dashboard tab. Latner already does this automatically every night, so you only need this job if you want the forecast refreshed at an extra time of day.
Step 3 - Fill in the job and its schedule
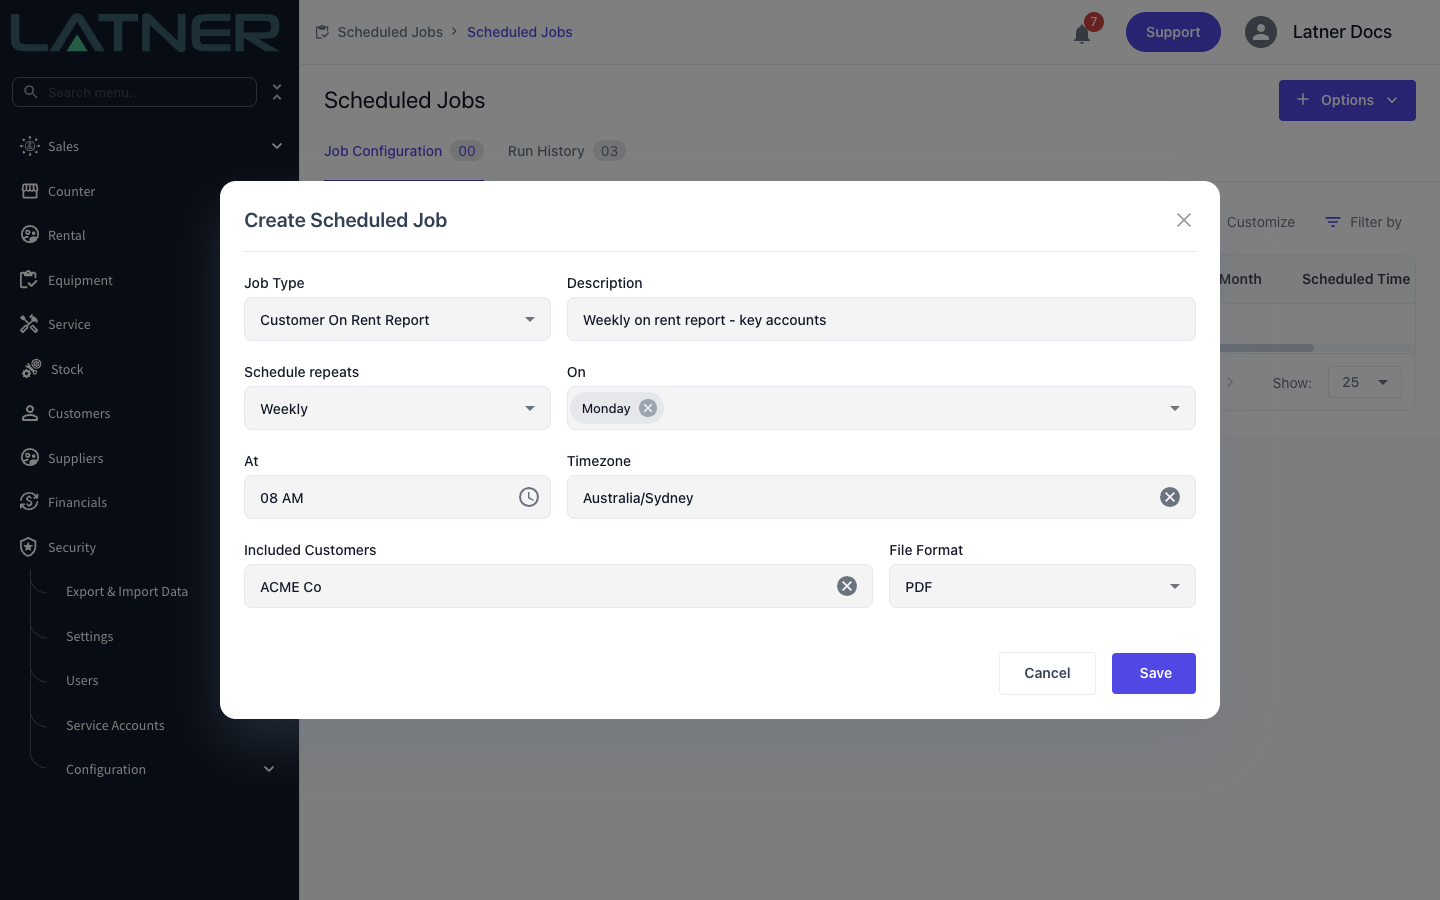
Complete the dialog:
-
Job Type - required, as above.
-
Description - optional, but worth filling in: it's how you'll tell jobs apart in the list, in Run Job and in Run History.
-
Schedule repeats - required. Daily, Weekly or Monthly.
-
On - appears for Weekly and Monthly, and is required for both. For Weekly, pick one or more days of the week; for Monthly, pick one or more days of the month (1 to 28).
-
At - required. The hour the job runs. Jobs run on the hour, so only whole hours can be chosen.
-
Timezone - required. Defaults to your branch's timezone; the At time is read in this timezone.
For a Customer On Rent Report job, two more fields appear:
-
Included Customers - optional. Pick the customers who should get the report. Leave it blank to send it to every customer that has equipment on rent when the job runs. Customers you pick who have nothing on rent at the time aren't sent anything.
-
File Format - required, defaults to PDF. Choose CSV for customers with a lot of equipment on rent. If a PDF can't be generated, Latner sends that customer a CSV instead.
Step 4 - Save
Click Save. New jobs are created Active, and the Next Scheduled Run column shows when the job will first run.
After Creation
-
The job runs automatically at each scheduled time for as long as its Status is Active.
-
Each customer gets their own email with their own report attached, sent to their Default Reporting Contact and copied to the CC Email if one is set.
-
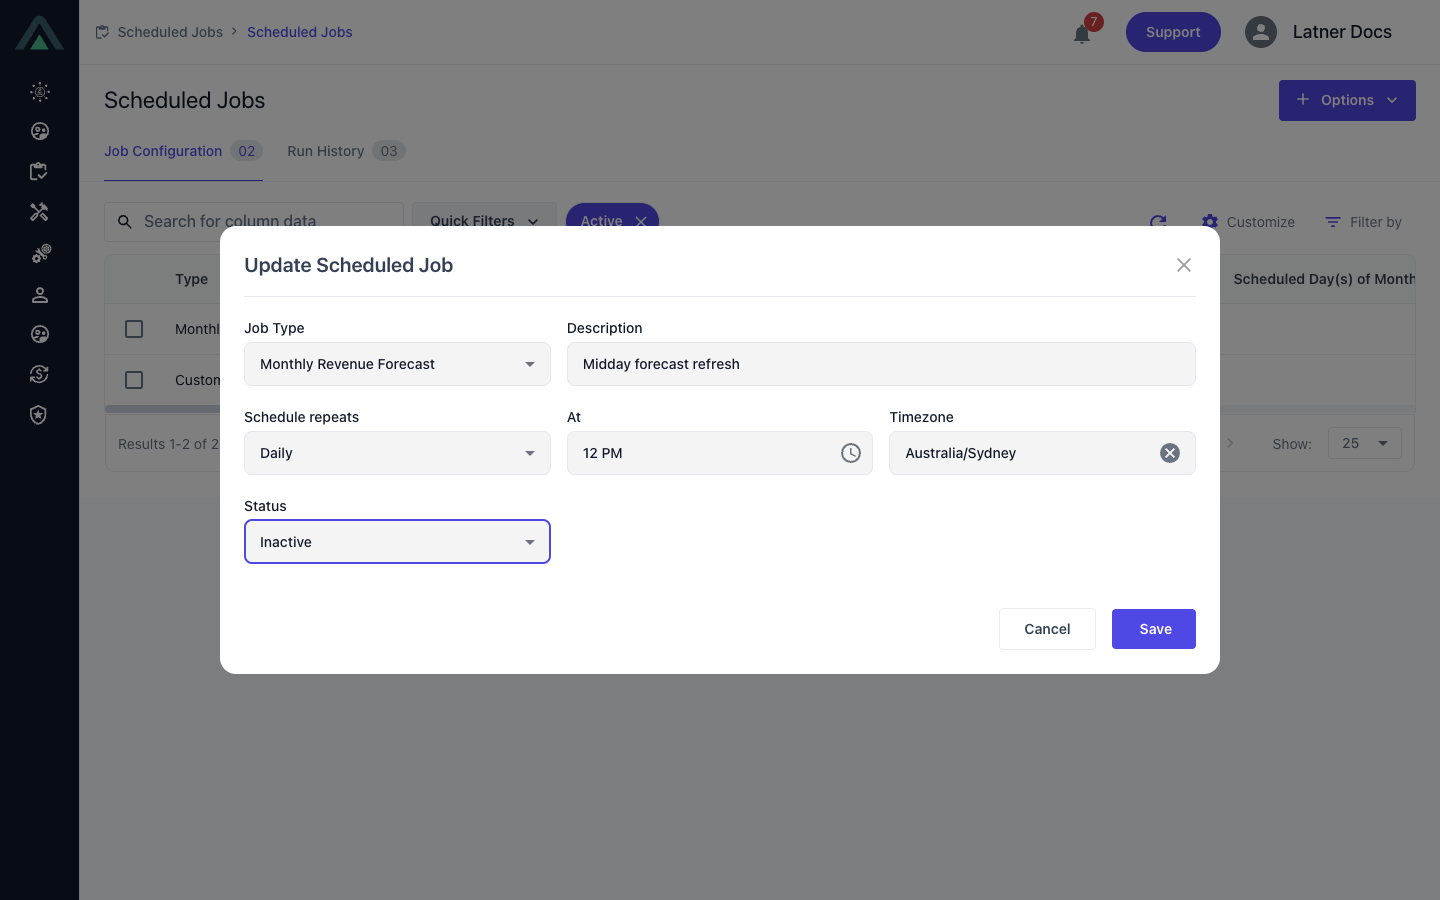
To change a job, double-click it on the Job Configuration tab. The Update Scheduled Job dialog has the same fields plus Status.
-
To stop a job without losing its setup, set its Status to Inactive. The Job Configuration tab shows Active jobs by default, so remove the Active quick filter to see inactive ones.
Running a job now
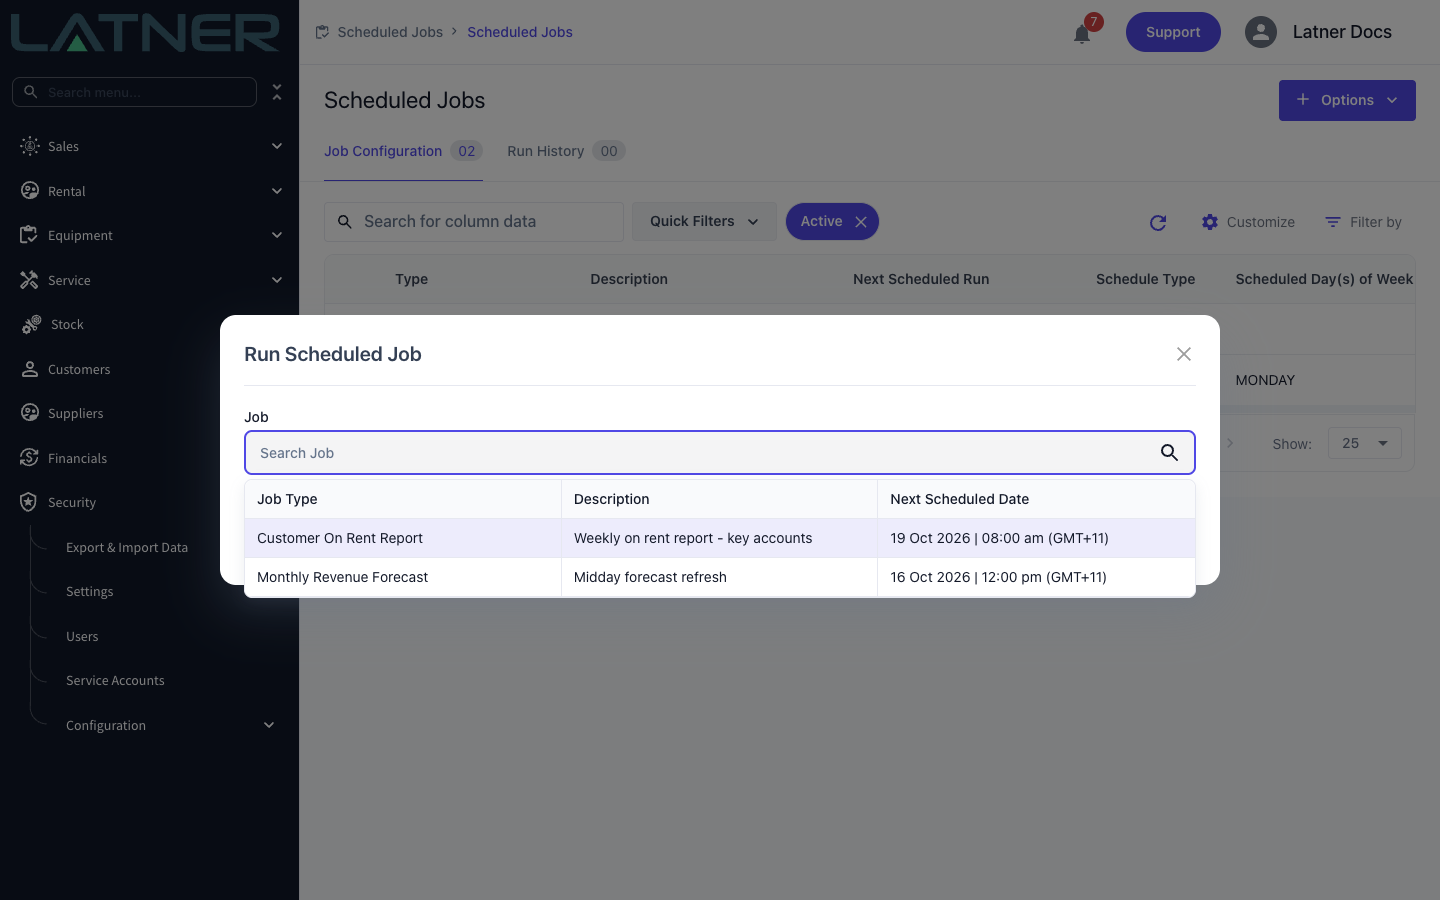
To run a job straight away - to test it, or to resend after fixing a setting - click Options › Run Job, pick the job and click Run. Only Active jobs are listed. A manual run doesn't change the job's schedule.
Checking the Run History
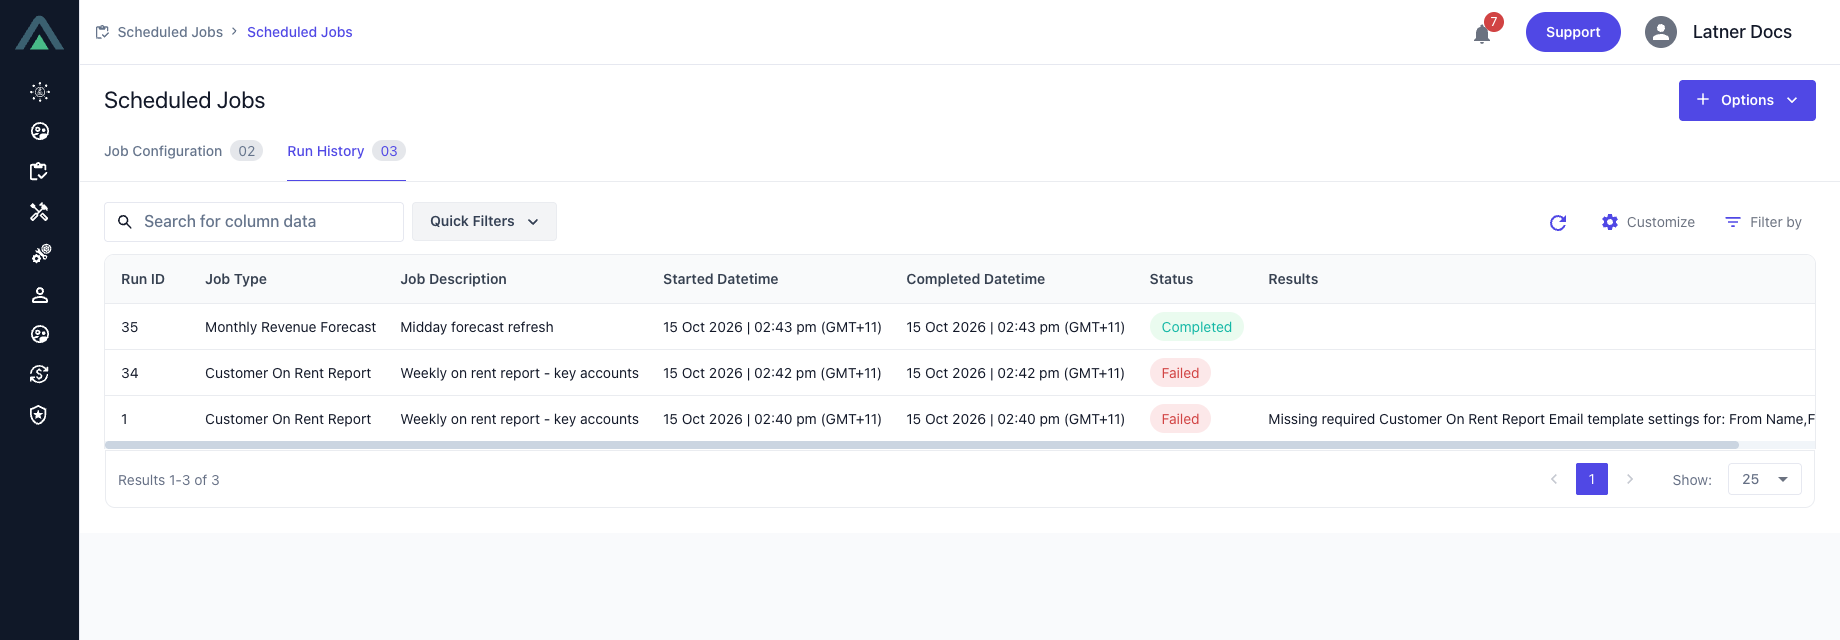
The Run History tab records every run, scheduled or manual, with its start and completion times and a Status:
-
Running - the job is still in progress.
-
Completed - the run finished. Customers without a Default Reporting Contact are skipped without failing the run.
-
Failed - the run hit a problem. If the whole job couldn't start, such as a missing email setting, the reason is shown in Results. A Failed run with no message means the report for at least one customer couldn't be generated or emailed; the other customers in the run are still sent theirs.
Emails that have been sent can't be recalled. Before you activate a job with Included Customers left blank, check your customers' Default Reporting Contacts - every customer with equipment on rent will get the report. To try a job safely, include just one customer whose contact is your own address, use Run Job, then widen the list.