
Stock Types, Groups and Sub Groups are the labels you hang on every stock item, so your parts catalogue stays easy to search, easy to report on and correctly coded to your accounts.
Overview
Nobody wants to scroll through four thousand part numbers looking for a filter. Stock is organised into a simple hierarchy so it can be located, reported on and managed effectively, while staying flexible enough to suit different businesses.
-
Stock Type → an independent label that doesn’t control what sits beneath it. Optional on a stock item.
-
Stock Group → a major system or area, the first structural layer. Required on a stock item.
-
Stock Sub Group → breaks a group into more specific components. Required on a stock item, and each one belongs to exactly one group.
-
Stock Item → the unique part number.
A few things worth knowing before you start naming things:
-
Names must be unique across the whole system - two groups can’t both be called Filters, and neither can two sub groups, even under different groups.
-
Create your groups first. A sub group can’t be saved without a parent group to sit under.
-
Group and Sub Group feed your accounting integration’s account code mapping. Stock Type doesn’t.
-
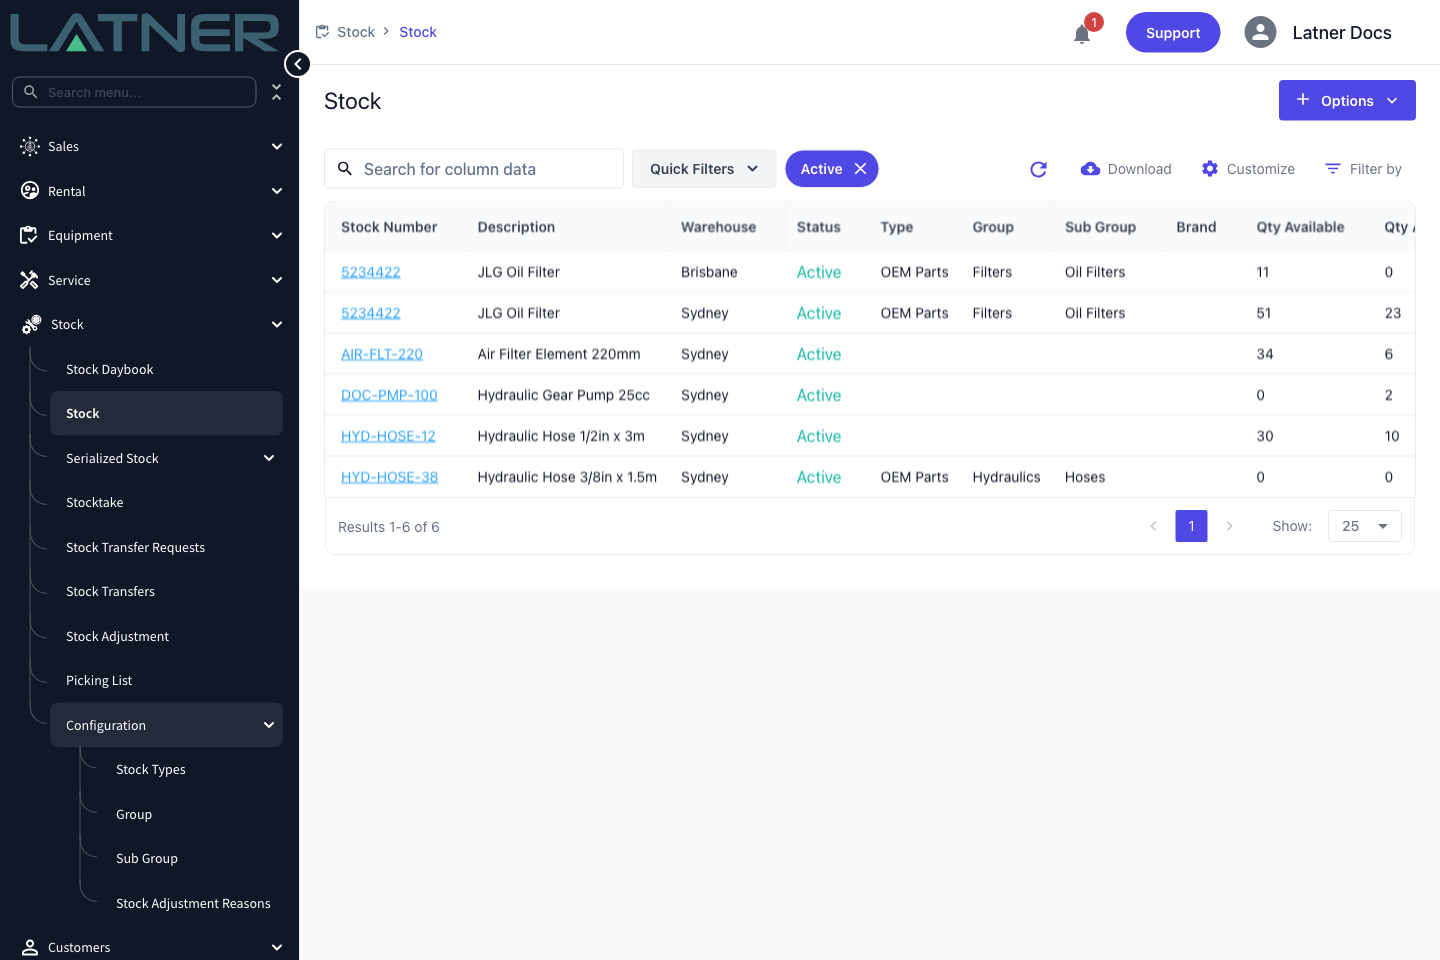
All three appear as columns and filters on the Stock screen, and all three are matched by the stock search box.
Planning Your Structure
You can mix and match Types and Groups/Sub Groups to suit your business. Here are the most common approaches:
|
Stock Types |
Groups and Sub Groups |
|---|---|
|
Source
|
System
|
|
Equipment Applicability
|
Location
|
Putting It Together
You’ll usually combine one Group/Sub Group with one Type to describe stock clearly.
-
Example 1: Choosing Source + System
-
OEM Filter
-
Aftermarket Filter
-
-
Example 2: Choosing Equipment + System
-
Scissor Batteries
-
Telehandler Batteries
-
-
Example 3: Choosing Source + Location
-
OEM Tyres
-
Aftermarket Tyres
-
-
Example 4: Choosing Equipment + Location
-
Scissor Tyres
-
Vehicle Tyres
-
Because sub group names have to be unique, a plain Filters sub group can only exist once. If more than one group needs it, name them for the group they serve - Engine Filters and Hydraulic Filters.
Before You Begin
No system settings control these screens. Access is purely a matter of permissions, and each of the three records needs two of them - one to reach the screen, one to create a record on it.
|
Requirement |
Where to Find It |
|---|---|
|
Stock Type, Stock Group and Stock Sub Group permissions |
Security › Configuration › Permission Groups › your group › Stock › Configuration. These put the three screens on the Stock menu. |
|
Create Stock Type, Create Stock Group and Create Stock Sub Group permissions |
Security › Configuration › Permission Groups › your group › Stock › Option. These put the Create action in each screen’s Options menu. |
|
At least one Stock Group, before you create any Sub Group |
Stock › Configuration › Group |
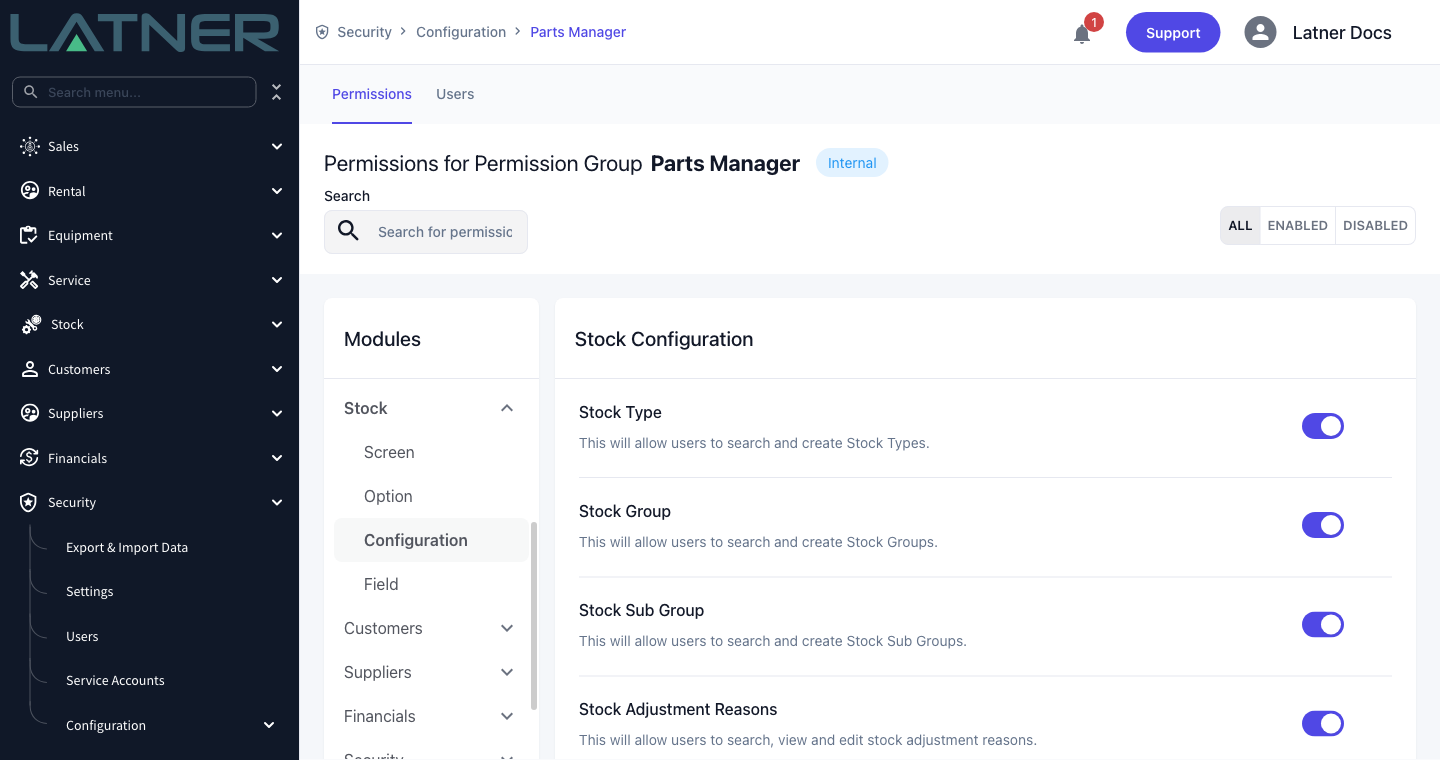
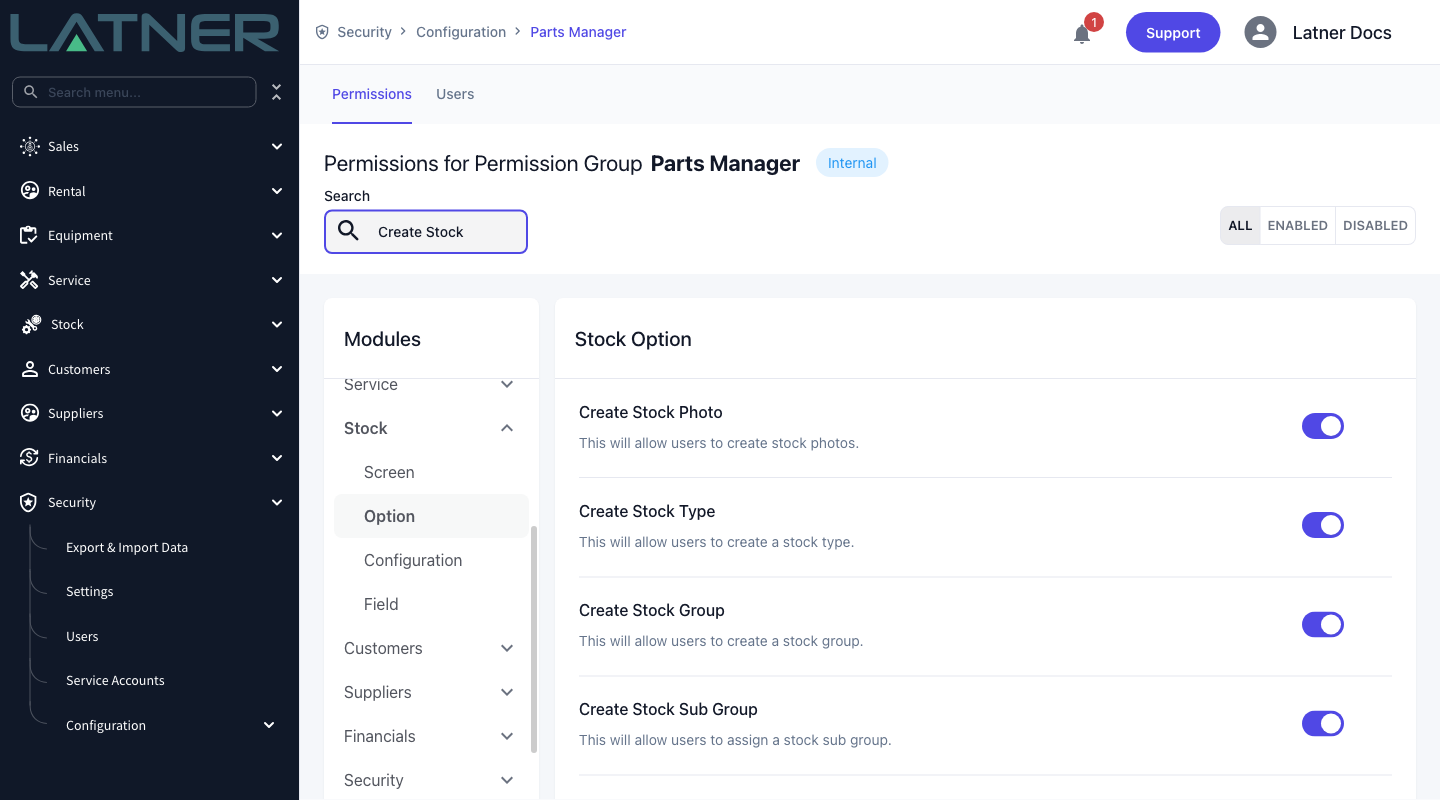
The two permissions are independent. A user with only the Configuration permission can open the screen and search it, but sees nothing to click in Options.
Creating a Stock Group
Groups come first, because a sub group has nowhere to sit without one.
Step 1 - Open the Group screen
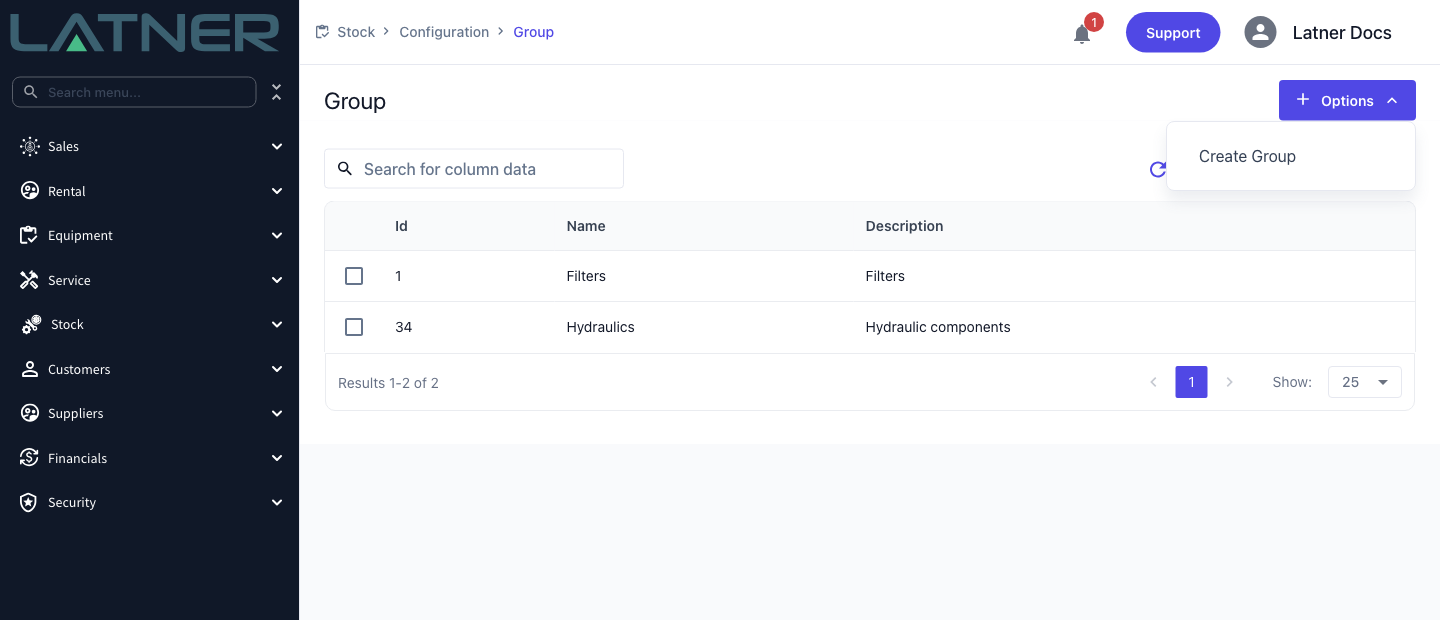
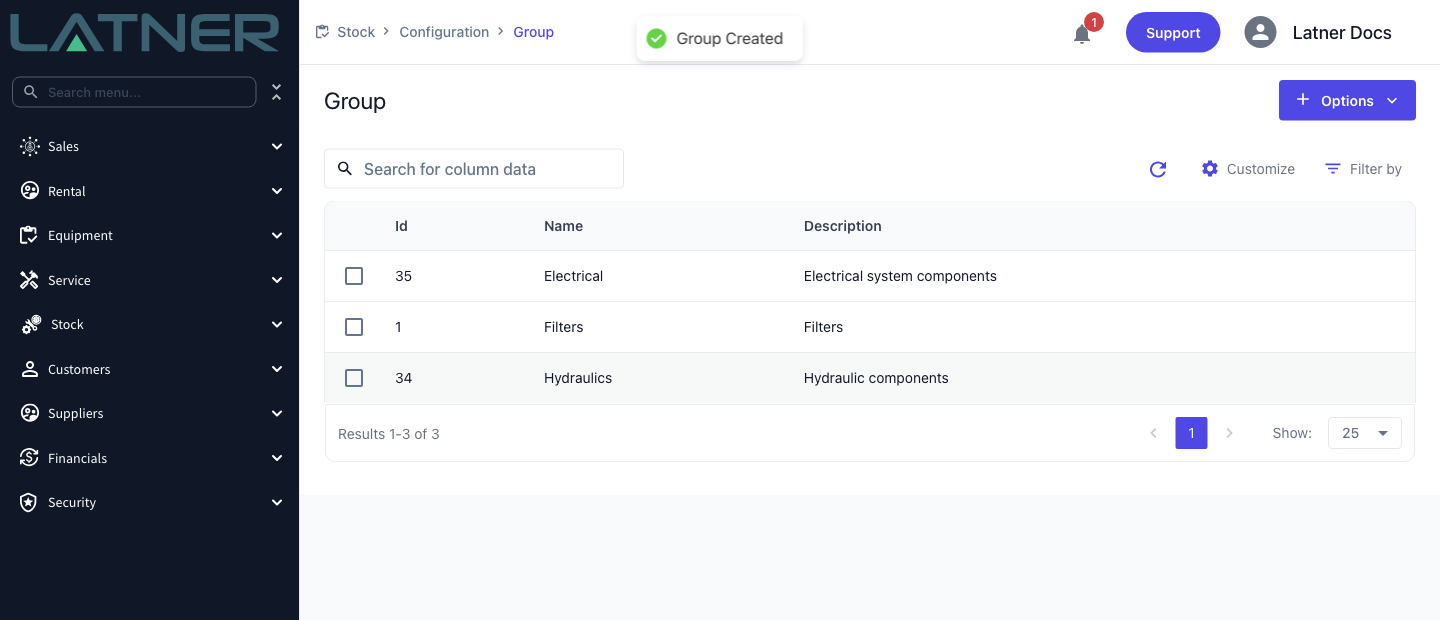
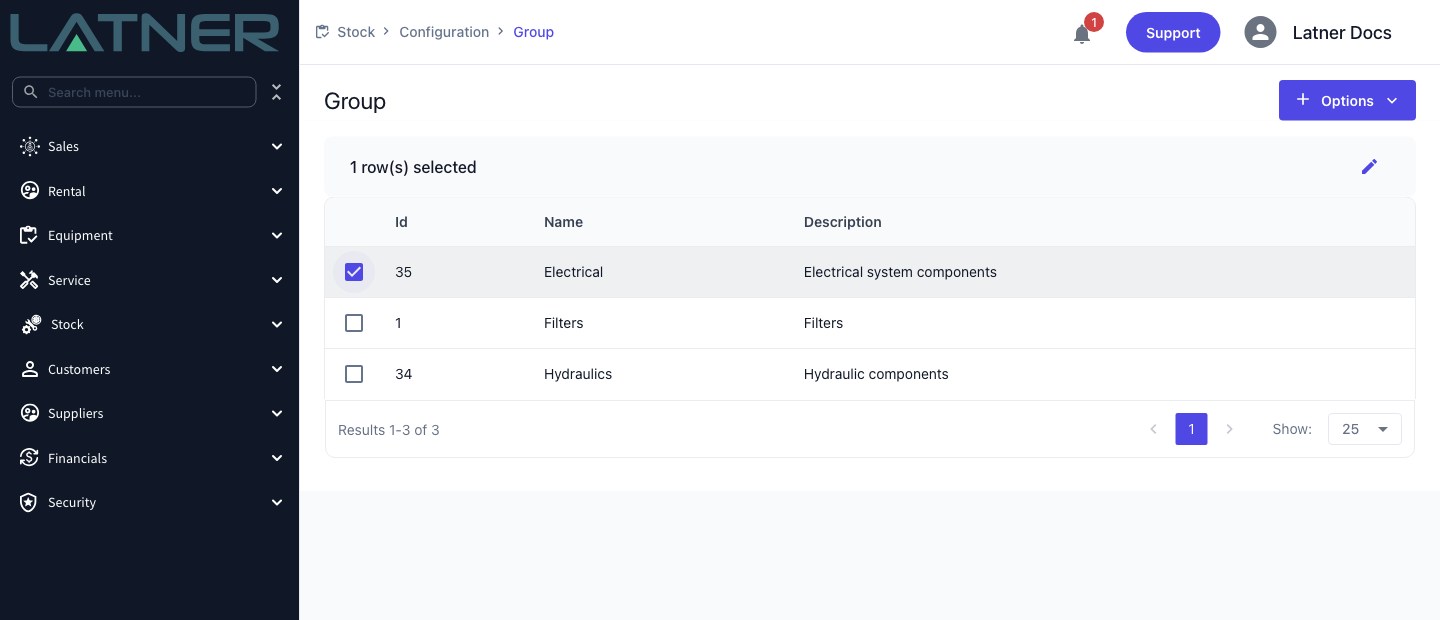
Go to Stock › Configuration › Group. The list shows every group you already have, with its Id, Name and Description.
Step 2 - Start a new group
Select Options in the top right, then Create Group.
Step 3 - Name and describe the group
Both fields are required.
-
Name - what the group is called throughout Latner. It must be unique across all stock groups, and it’s what people will search on, so keep it short and recognisable.
-
Description - a fuller explanation. It shows on the list screen and in the Stock Group picker on the Sub Group form, so it’s worth writing something more useful than a repeat of the name.
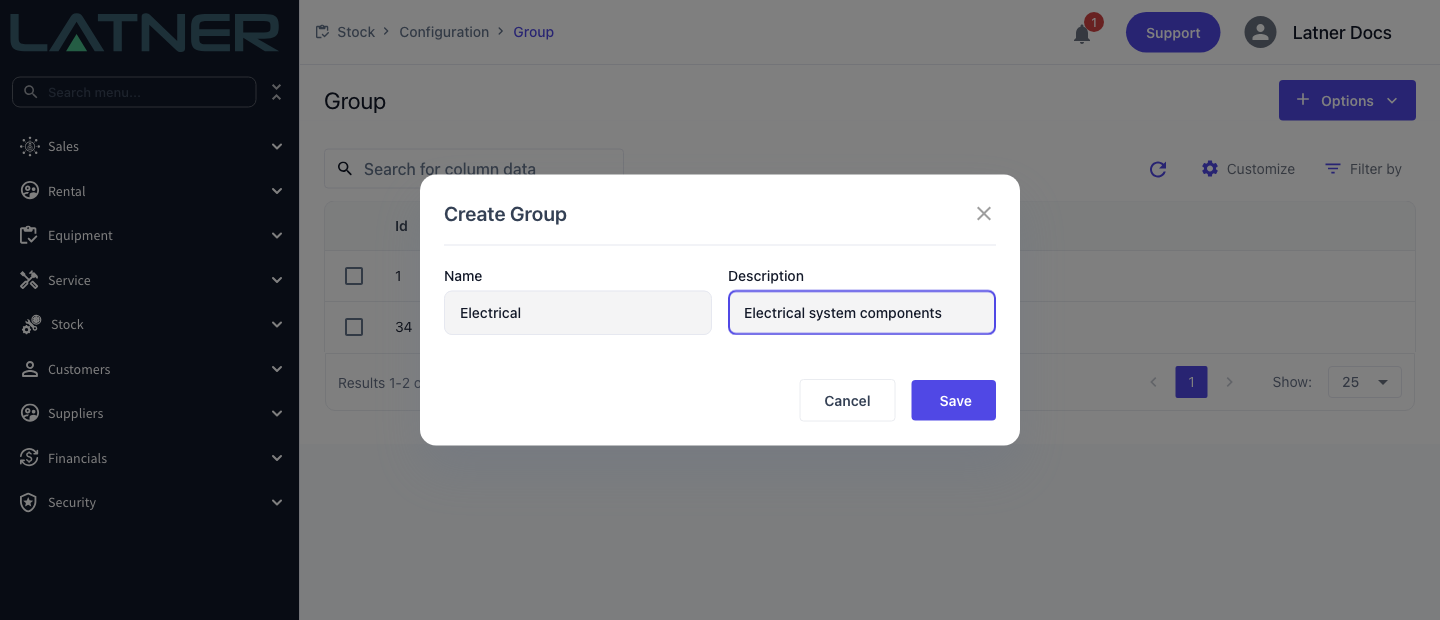
Step 4 - Save
Select Save. Latner confirms with a Group Created message and the new group appears in the list, ready to use straight away.
Creating a Stock Sub Group
Step 1 - Open the Sub Group screen
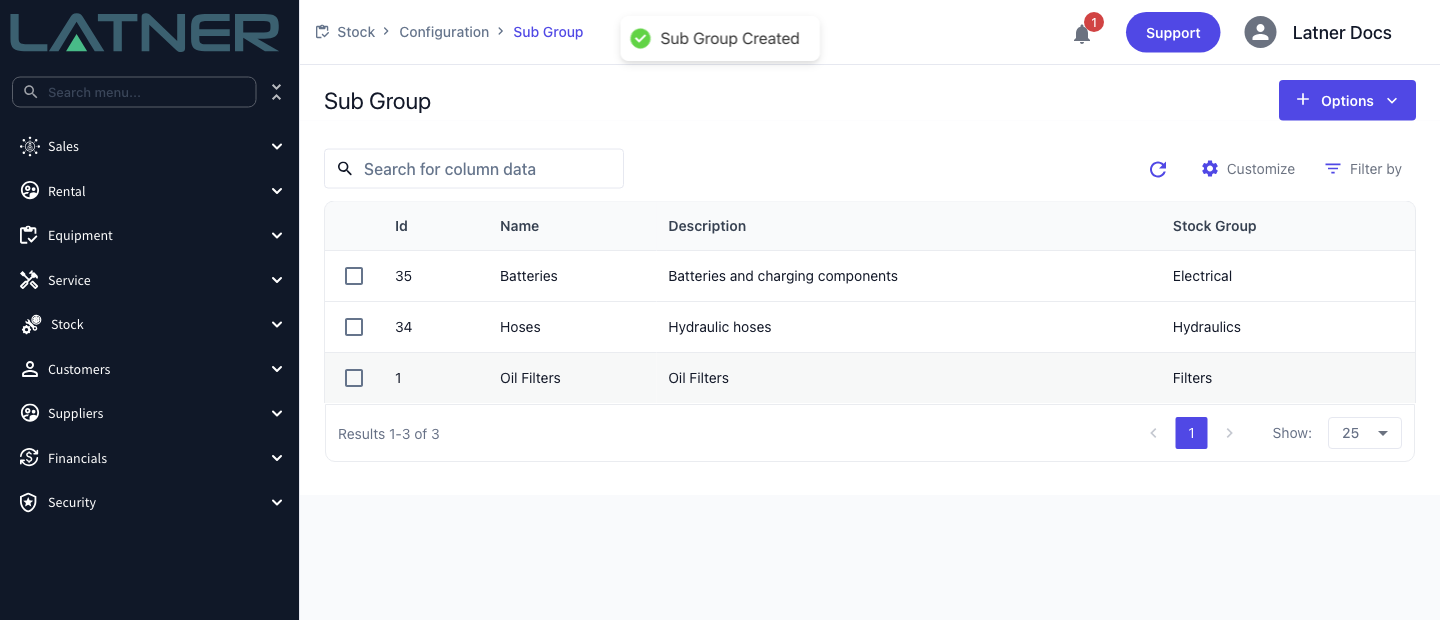
Go to Stock › Configuration › Sub Group, then select Options › Create Sub Group. The list on this screen carries an extra Stock Group column so you can see the whole hierarchy at a glance.
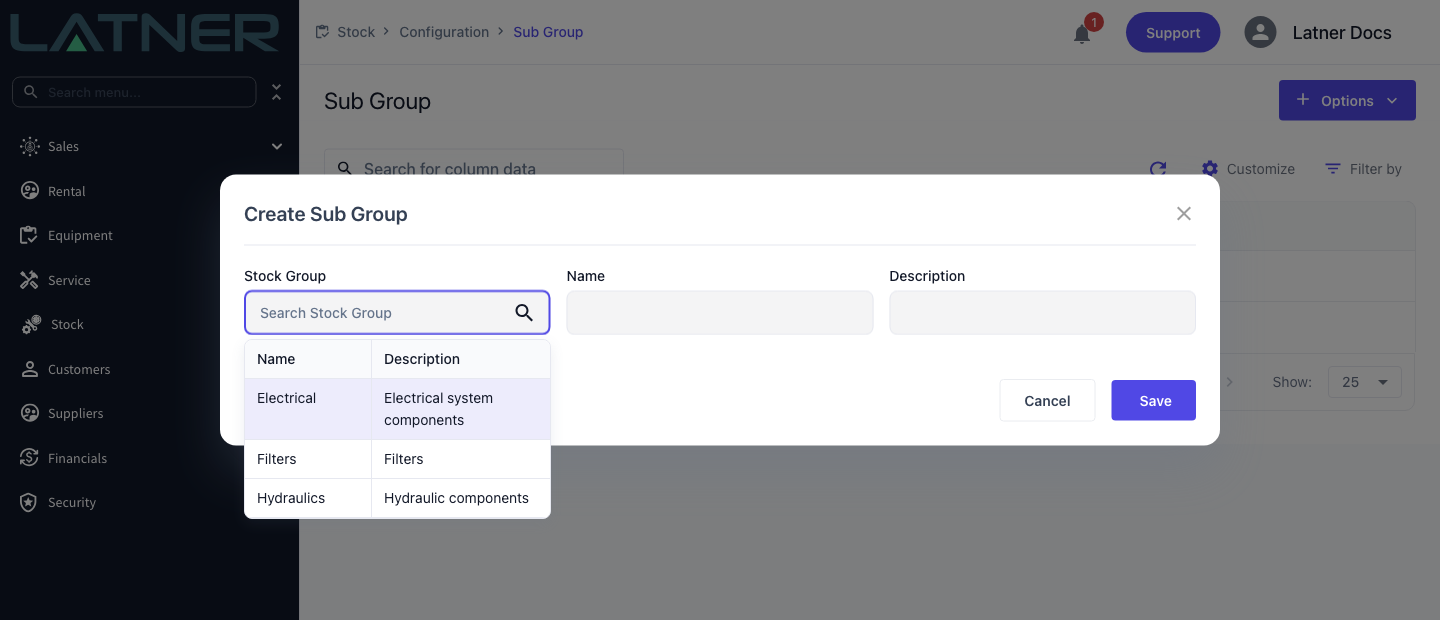
Step 2 - Choose the parent Stock Group
Select the Stock Group field and pick the group this sub group belongs to. The picker searches on both name and description. A sub group can’t be saved without one.
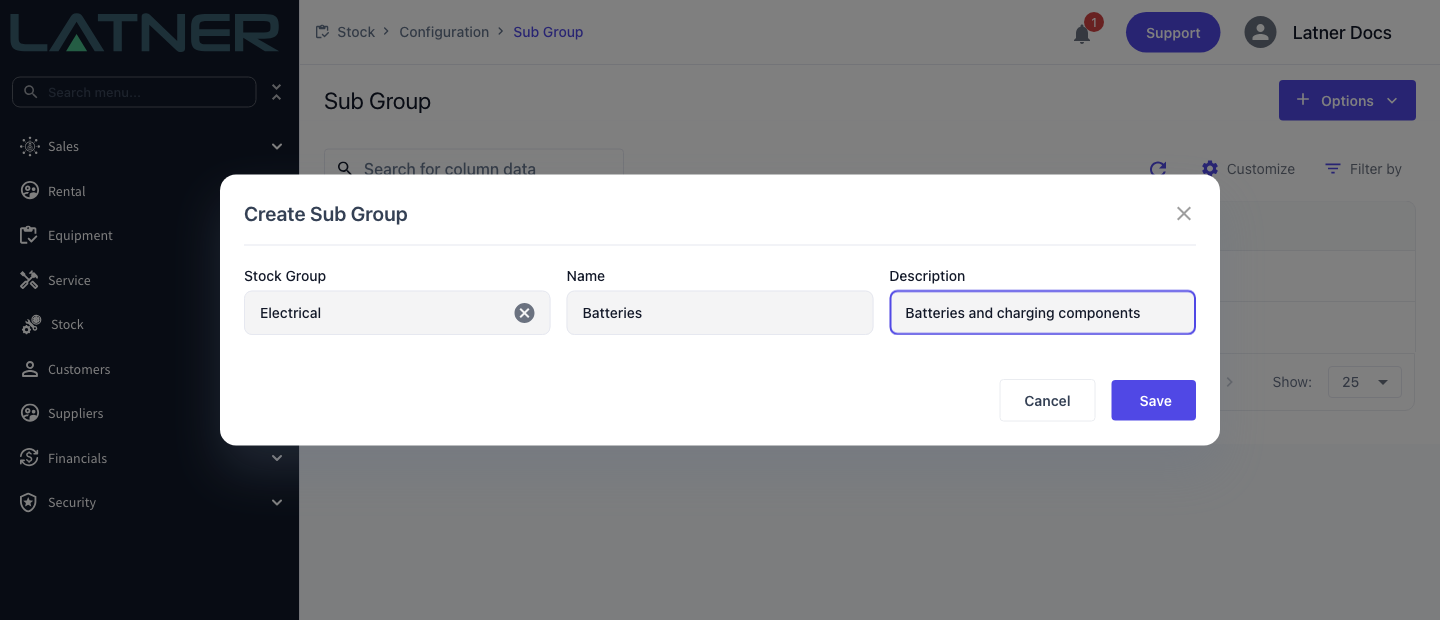
Step 3 - Name and describe the sub group
As with groups, Name and Description are both required, and the name must be unique across all sub groups - not just within the parent group.
Step 4 - Save
Select Save. Latner confirms with a Sub Group Created message.
Creating a Stock Type
Types are the flat, independent layer. They have no parent and no children, which is exactly what makes them useful as a second, cross-cutting label.
Step 1 - Open the Stock Type screen
Go to Stock › Configuration › Stock Types, then select Options › Create Stock Type.
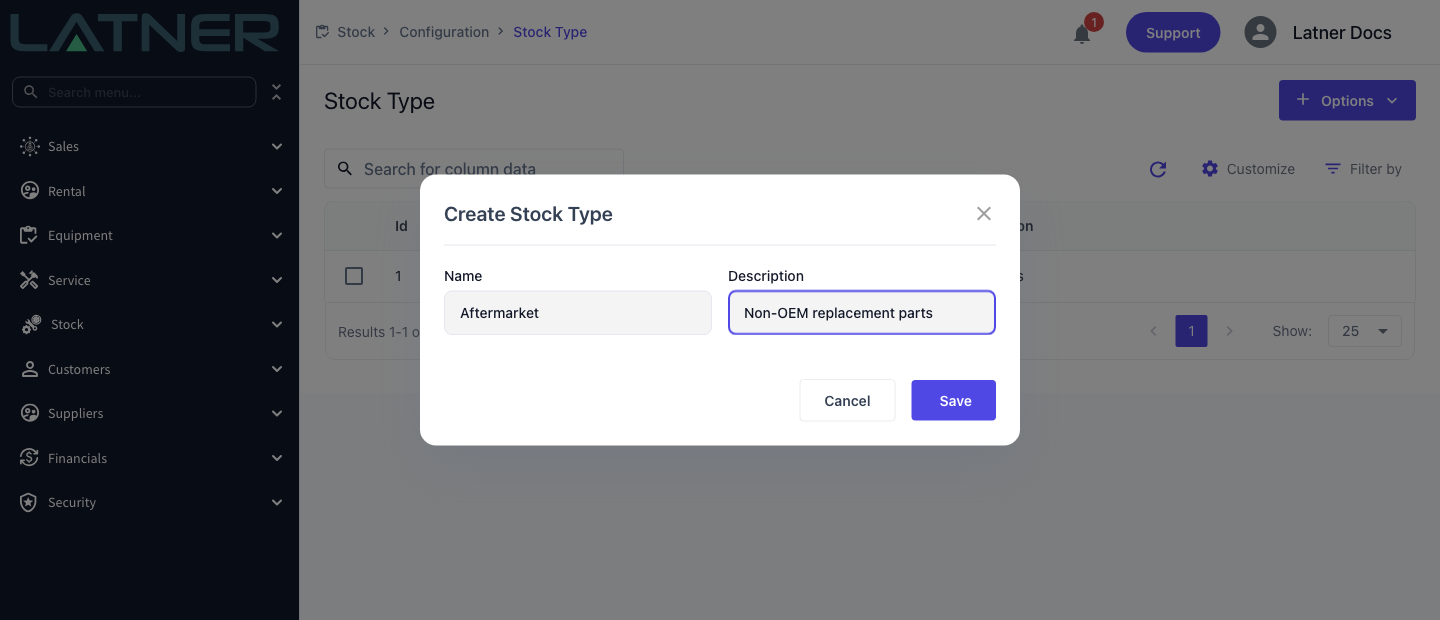
Step 2 - Name and describe the type
Name and Description are both required, and the name must be unique across all stock types.
Step 3 - Save
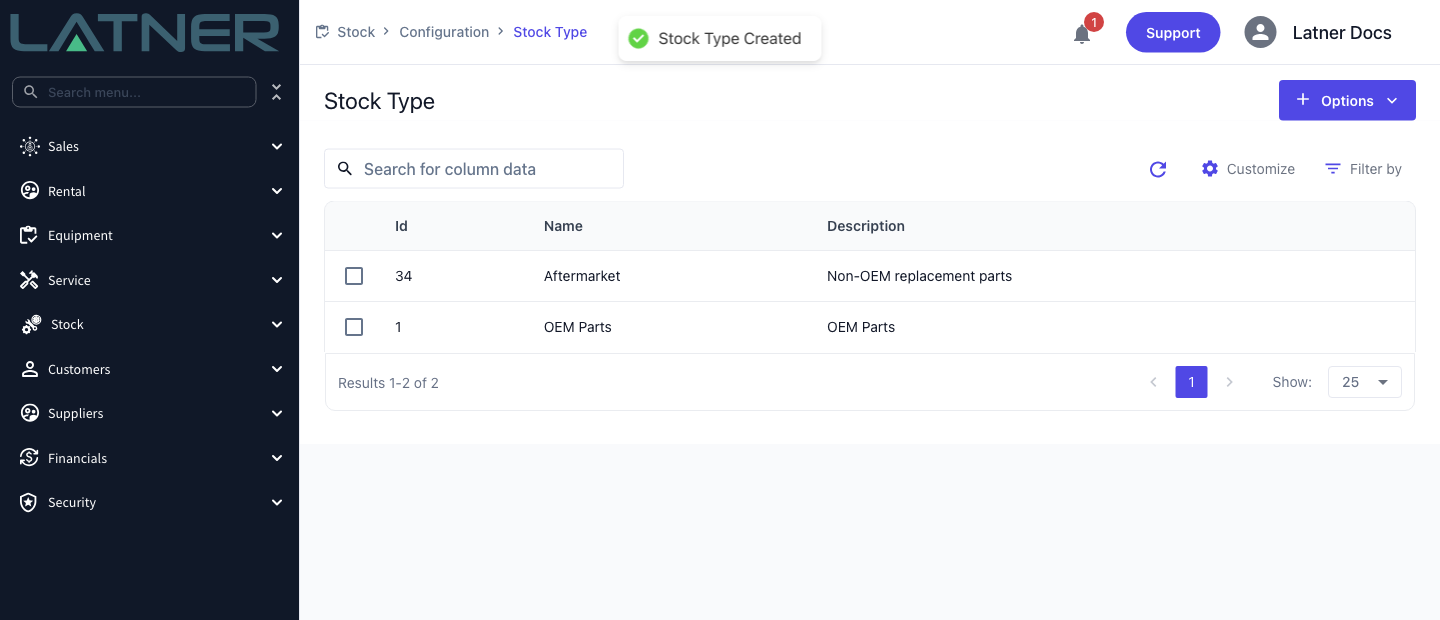
Select Save. Latner confirms with a Stock Type Created message.
After Creation
All three records are available immediately - there’s nothing to activate and no approval step.
-
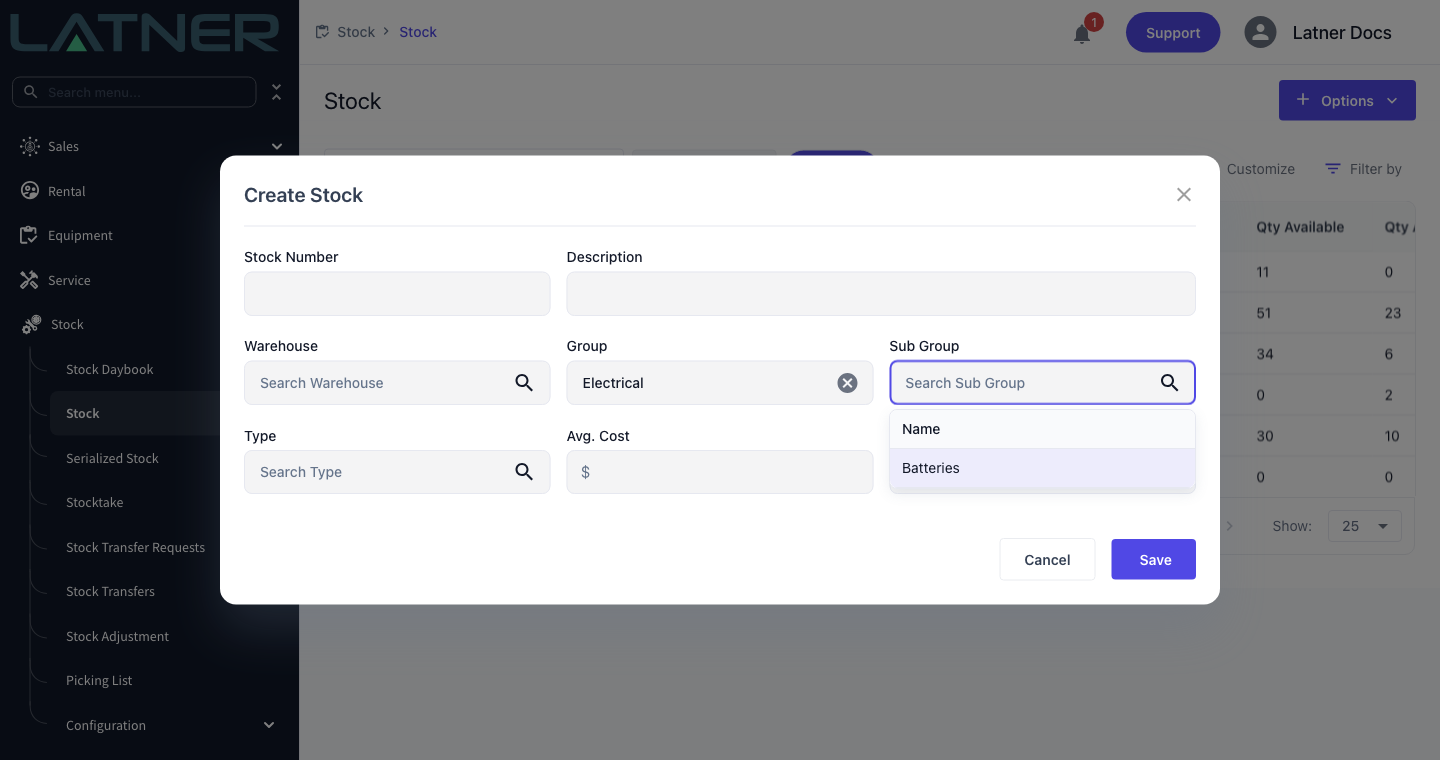
They appear in the Group, Sub Group and Type fields on Stock › Stock › Options › Create Stock. Group and Sub Group are required on a stock item; Type is optional.
-
On that form the two work together: choosing a Group narrows the Sub Group list to that group’s sub groups, changing the Group clears whatever Sub Group was selected, and choosing a Sub Group first fills in its Group for you.
-
They become columns and filters on the Stock screen, so you can list, for example, every Aftermarket part in the Electrical group.
-
Their names are matched by the Stock screen’s search box, so searching Batteries returns every stock item in that sub group even when the word isn’t in the part description.
-
They can be used to scope revenue, expense and inventory account codes in Financials › Configuration › Accounting Integration. Latner picks the most specific match: a Stock Sub Group rule wins over a Stock Group rule, which wins over the general stock line rule. Stock Types are not used for account codes.
-
The stock import matches its Type, Group and Sub Group columns against records that already exist, by Id first and then by name. It never creates them, so set them up before you import a catalogue.
To change one later, open the relevant screen, tick the record’s row and select the pencil in the selection bar (double-clicking the row does the same thing). The same form reopens in update mode, so you can rename it, reword the description, or move a sub group to a different group.
Stock Types, Groups and Sub Groups can’t be deleted - the configuration screens offer editing only. If one falls out of use, rename it or simply stop assigning it to new stock rather than expecting to remove it.
FAQs
Watch the Demo
Prefer to watch it? Step through the same flow here.