
A stock adjustment lets you correct the quantity, average cost or retail price Latner holds for a part in one warehouse, so your stock figures match what is really on the shelf.
Overview
Stock drifts. A pump gets damaged in the racking, a carton turns up that was never receipted, or a cost lands wrong on a purchase order. A stock adjustment is how you put that right, and it leaves a permanent record of what changed, who changed it and why.
-
Each adjustment changes one thing - the Quantity, the Cost or the Price.
-
An adjustment applies to a part in a single warehouse. The same part in another warehouse is untouched.
-
Every adjustment records the old value, the new value, the reason, and the date and time it applies from.
-
Quantity adjustments also write a stock movement, so the change appears in the part's movement history and flows through to your accounting system.
-
Adjustments can't be edited or deleted. You correct one with another adjustment.
Before You Begin
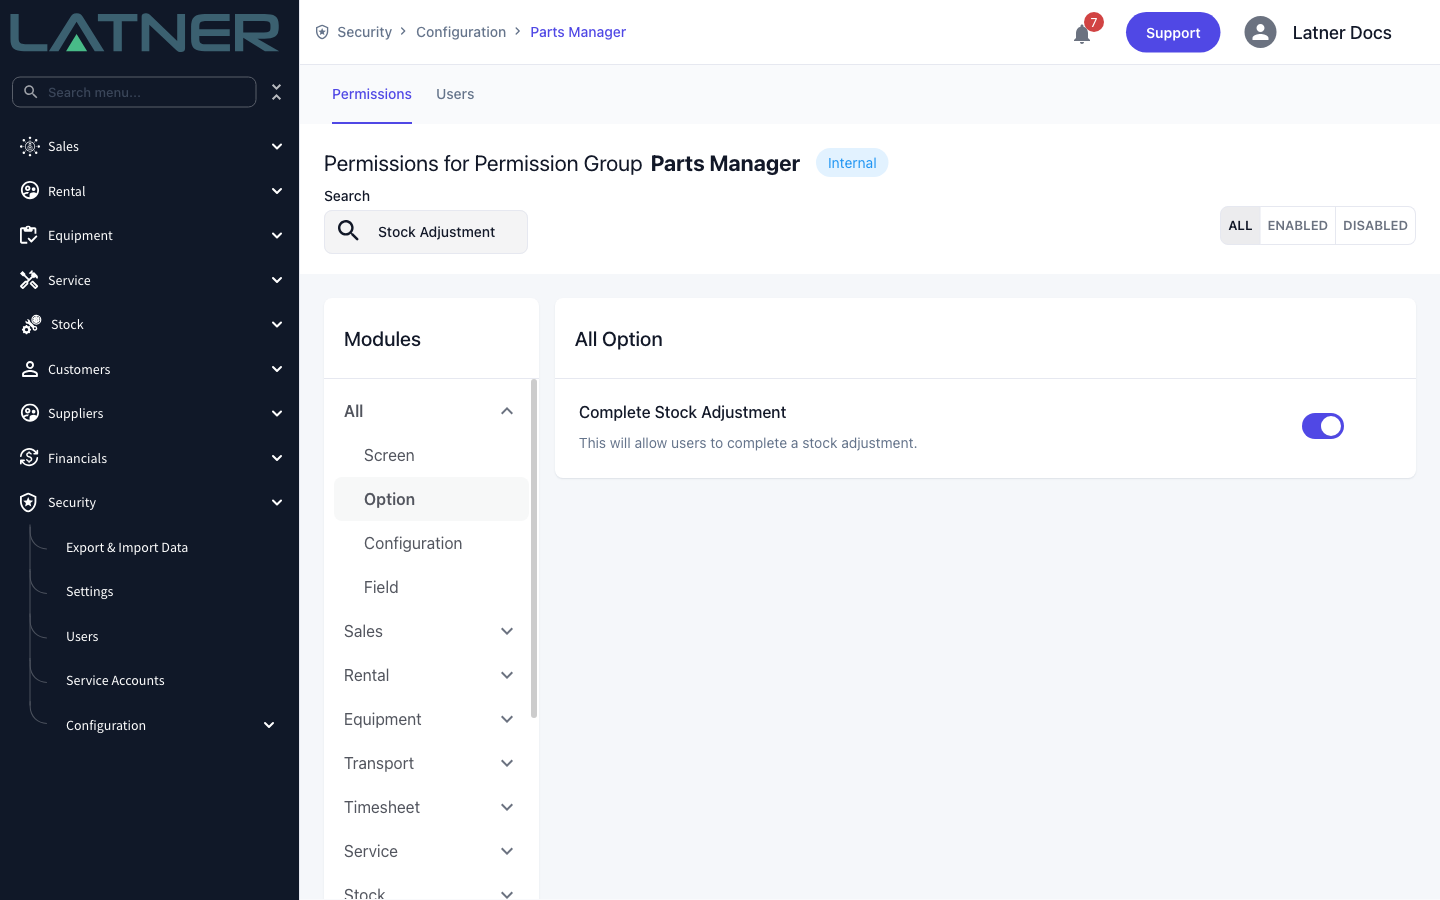
Stock adjustments are permission controlled, and you need at least one reason to choose from.
|
Requirement |
Where to Find It |
|---|---|
|
Complete Stock Adjustment permission - lets you save an adjustment |
Security › Configuration › Permission Groups › your group › Option |
|
Stock Adjustments permission - shows the Stock Adjustment entry in the Stock menu |
Security › Configuration › Permission Groups › your group › Screen |
|
Stock Adjustment Reasons permission - lets you set up the reasons themselves |
Security › Configuration › Permission Groups › your group › Configuration |
|
At least one stock adjustment reason |
Stock › Configuration › Stock Adjustment Reasons |
Reasons are what make the adjustment history worth reading later, so set up the ones your team actually uses - damaged stock, freight variances, supplier shortfalls - each with a name, a description and a status.
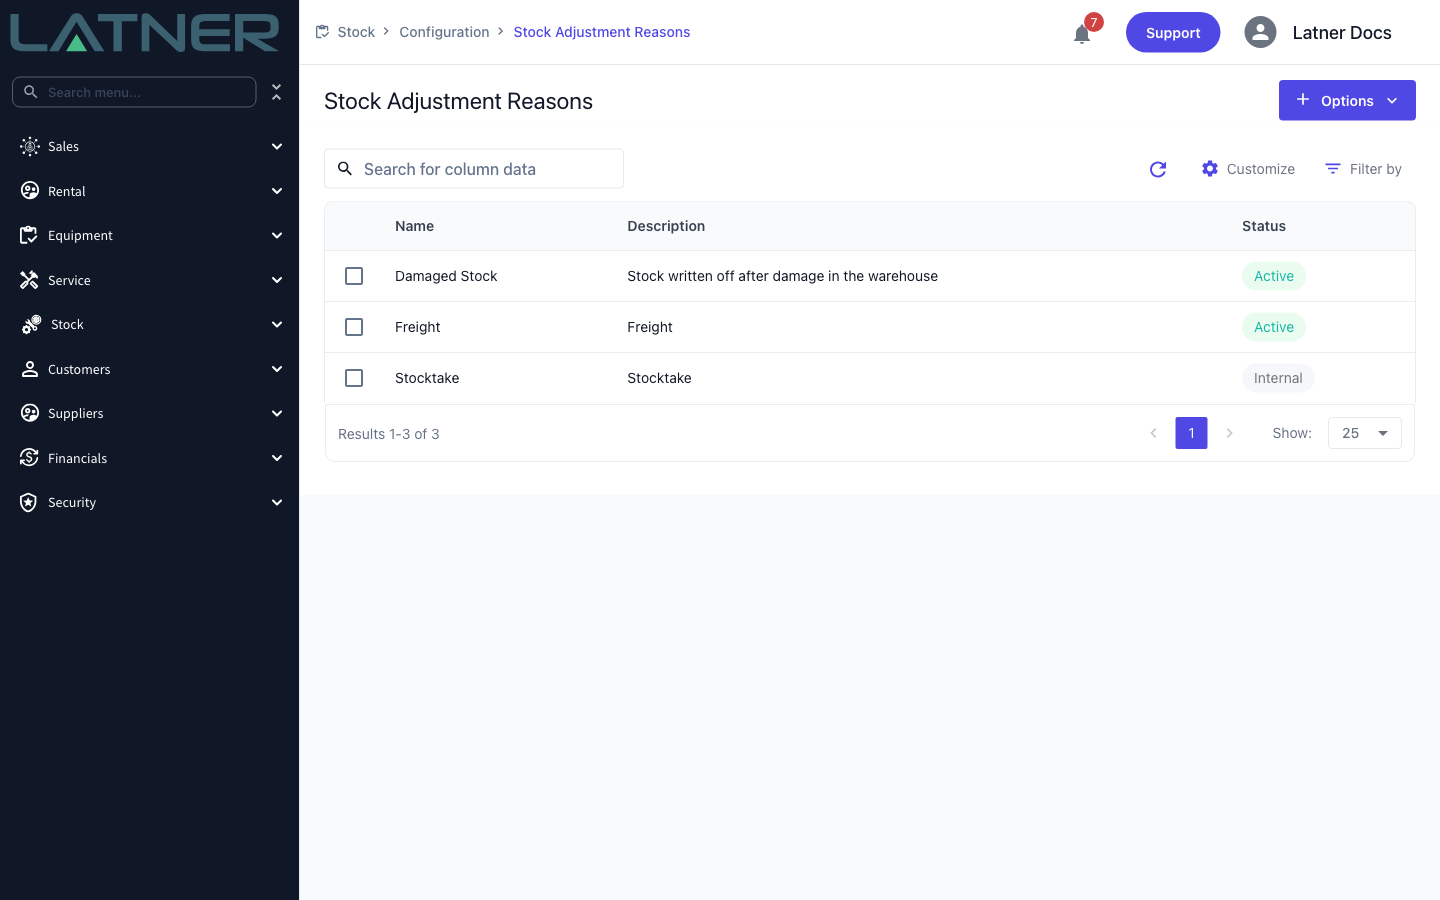
Latner ships with two reasons, Freight and Stocktake. Stocktake is an Internal reason that Latner applies itself when a stocktake is completed - you can't create or edit reasons with that status. The Reason picker on the adjustment form lists every reason on file, whatever its status, so keep the list short and specific.
Completing a Stock Adjustment
Step 1 - Open the Stock Adjustment form
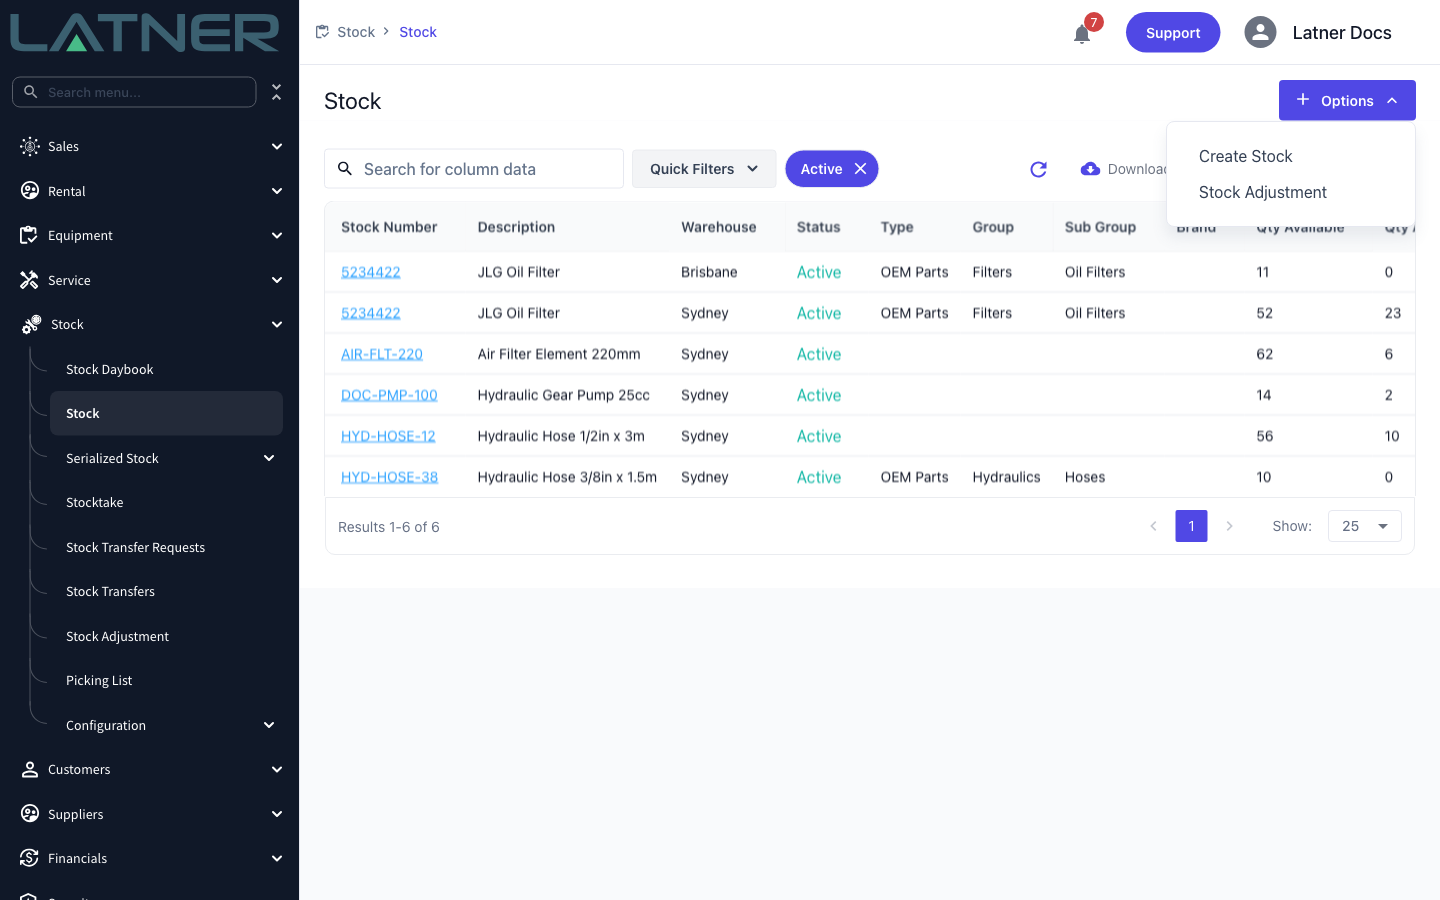
Go to Stock › Stock and choose Options › Stock Adjustment. The same form is also on the menu at Stock › Stock Adjustment, so you can start an adjustment from anywhere in Latner without opening the part first.
Step 2 - Choose the warehouse and the stock item
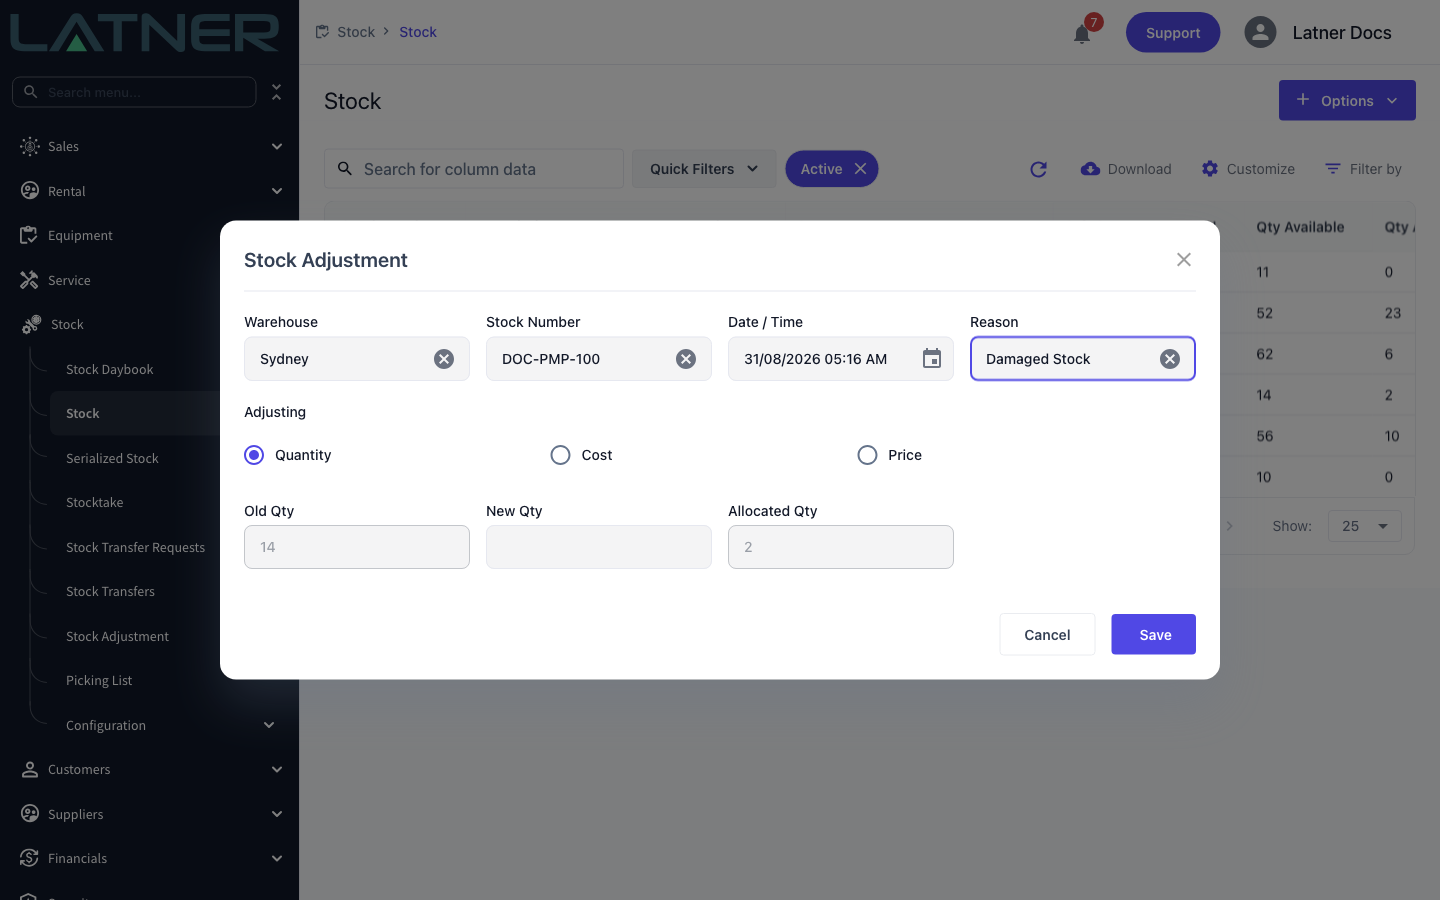
Fill in the four fields across the top of the form. All of them are required.
-
Warehouse - the warehouse holding the stock you're correcting. Choose this first, because it decides which set of figures you're adjusting.
-
Stock Number - the part. Search by stock number or description.
-
Date / Time - when the adjustment takes effect. It comes pre-filled, and it sets the date of the resulting stock movement, converted into the time zone of the warehouse's branch.
-
Reason - why you're adjusting. This is what the adjustment history and any later query will be read against.
As soon as both the warehouse and the stock number are set, the read-only fields below fill in with the values Latner currently holds for that part in that warehouse.
Step 3 - Choose what you're adjusting
The Adjusting options decide which fields appear underneath. Quantity is selected by default.
-
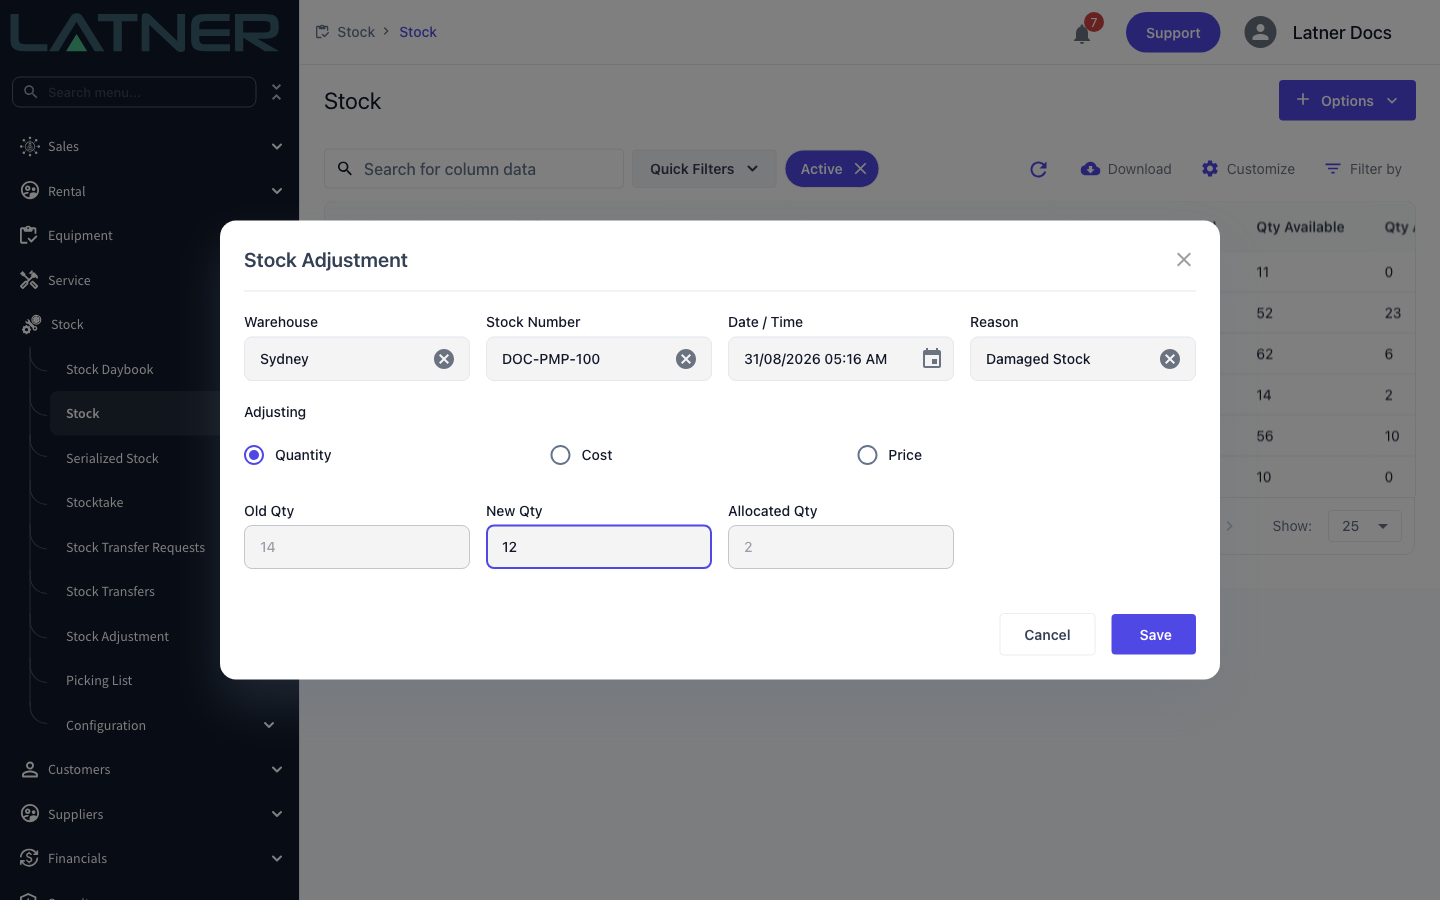
Quantity - shows Old Qty, New Qty and Allocated Qty. Use this for counts that are wrong: damage, shrinkage, stock found on the shelf.
-
Cost - shows Avg Cost and New Avg Cost. Use this when the average cost Latner has built up from receipts is wrong.
-
Price - shows Retail Price and New Retail Price. Use this to reset the sell price held for that warehouse.
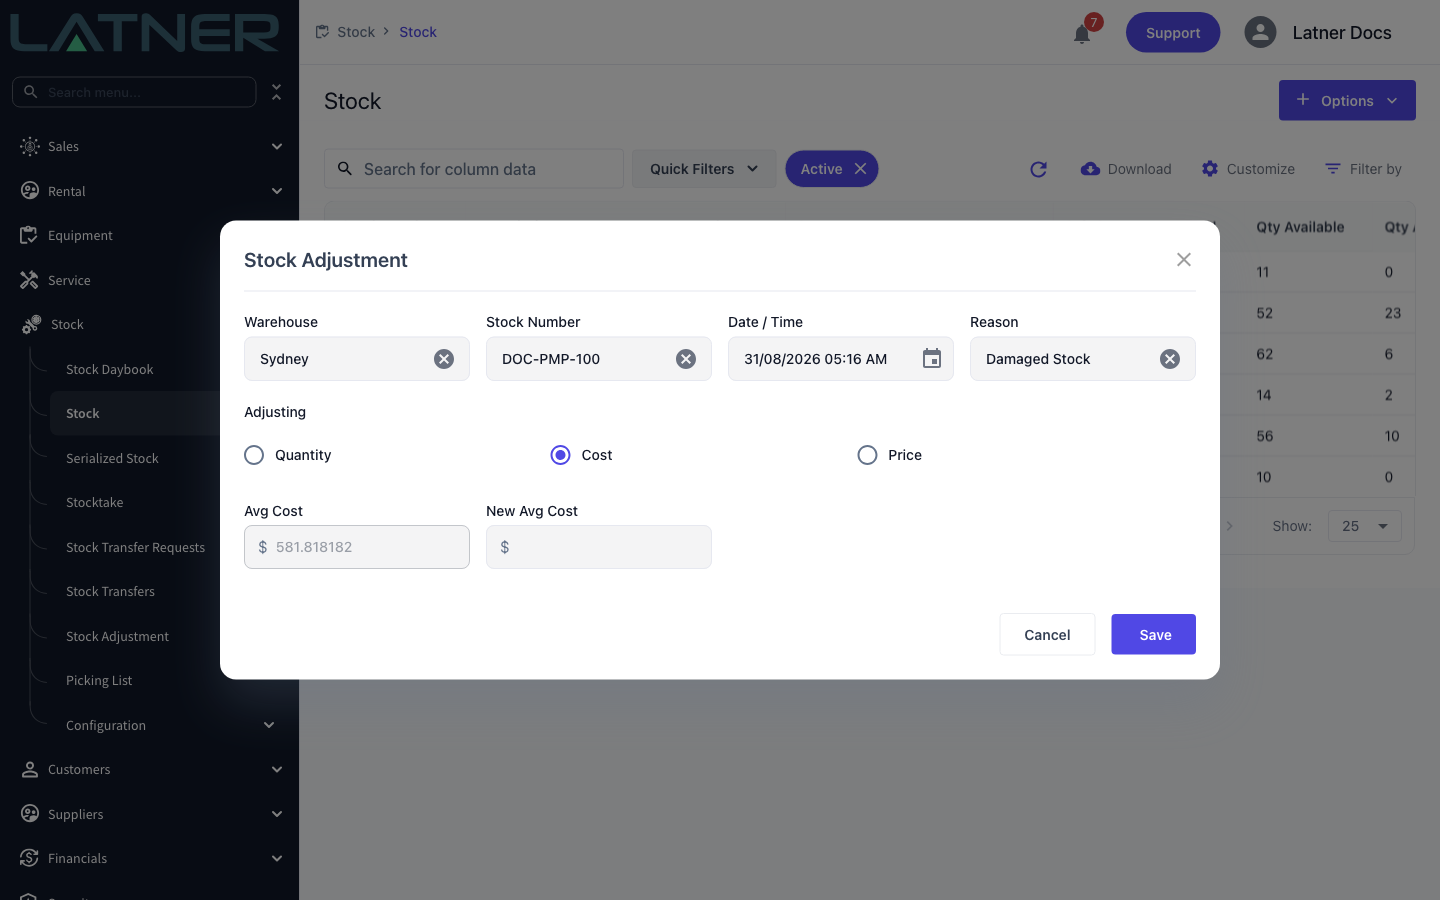
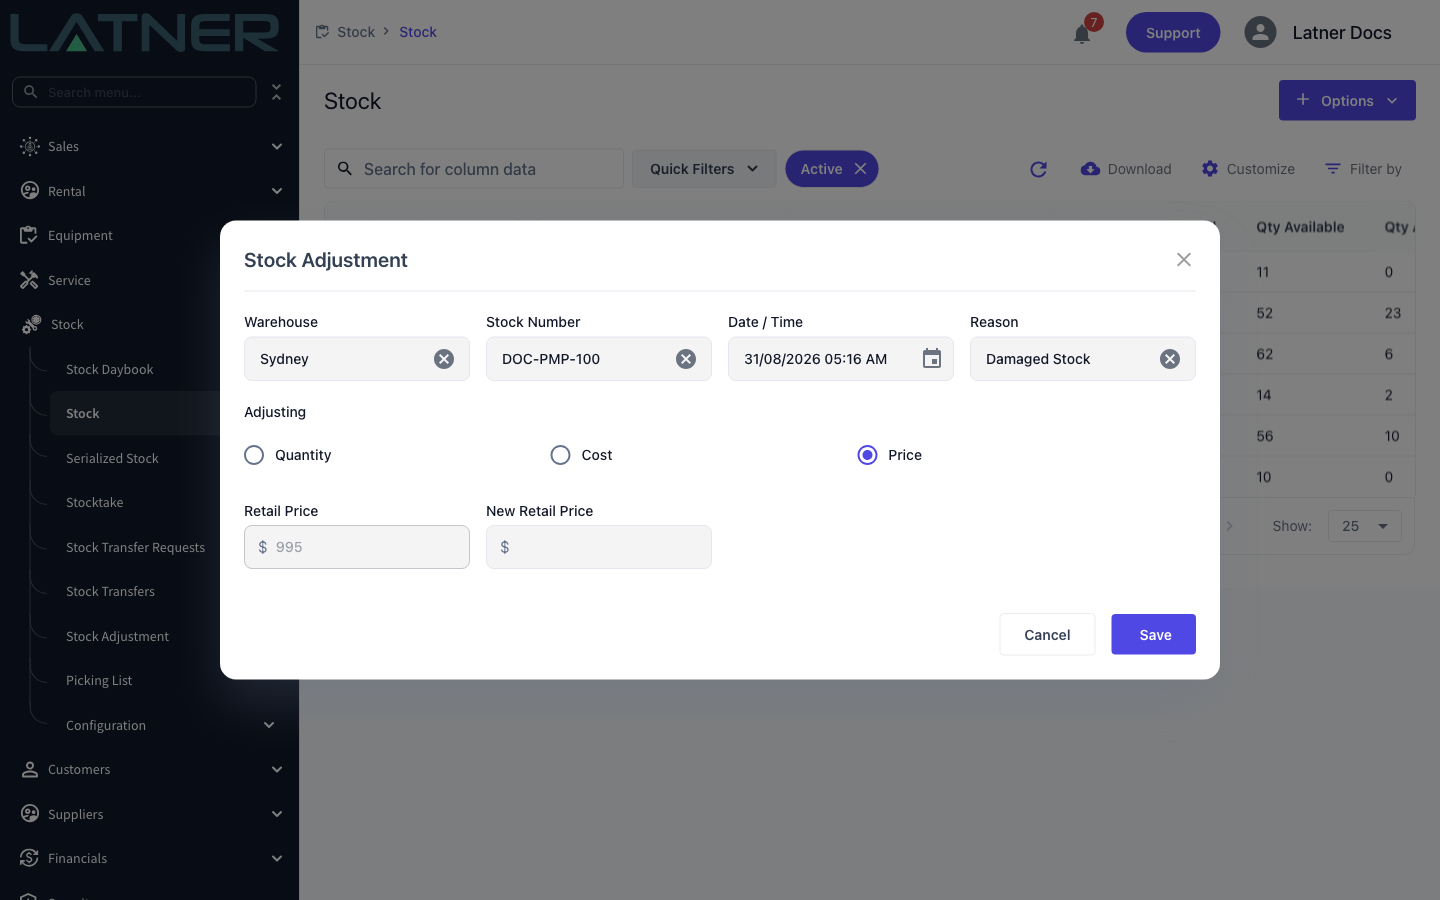
One adjustment changes one value. If the quantity and the cost are both wrong, complete two adjustments.
Step 4 - Enter the new value
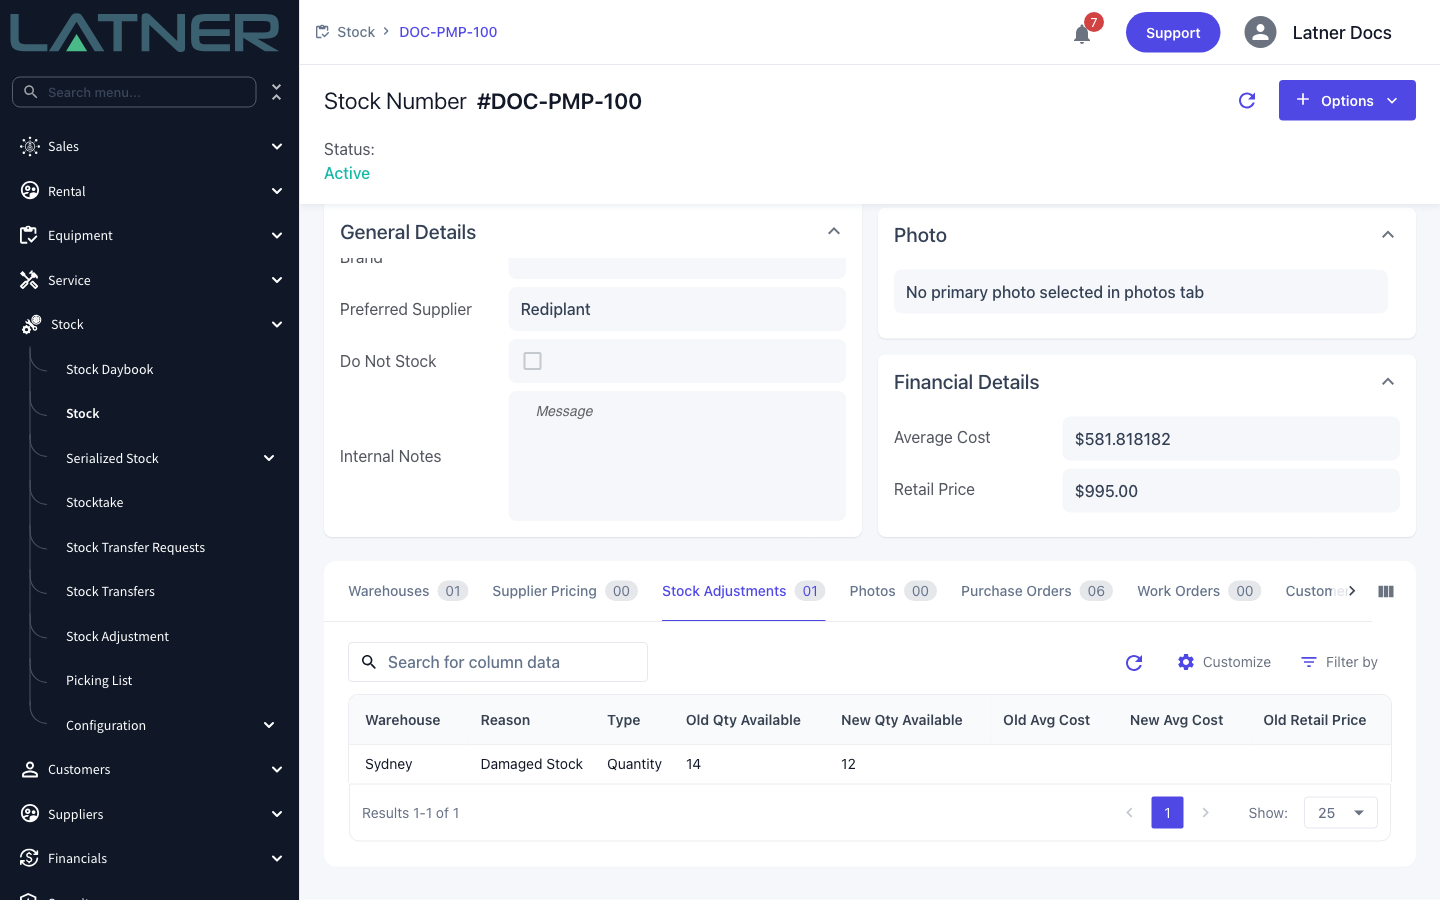
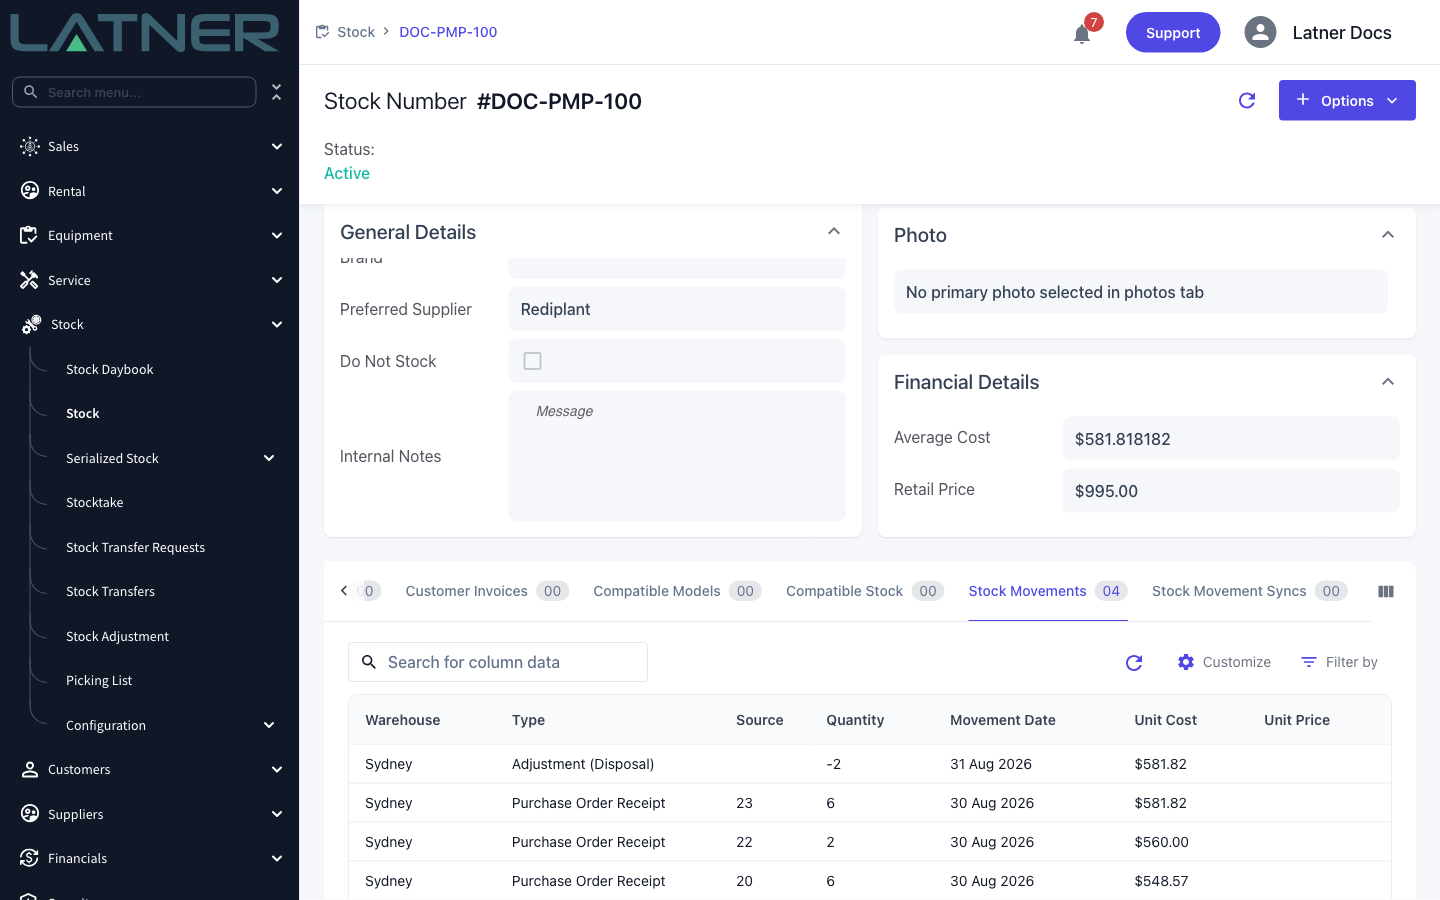
Type the value you want the part to end up with, not the difference. Setting New Qty to 12 against an Old Qty of 14 writes two units off; it does not remove twelve. The old value beside it stays read-only so you always have the before-and-after in view.
Step 5 - Save
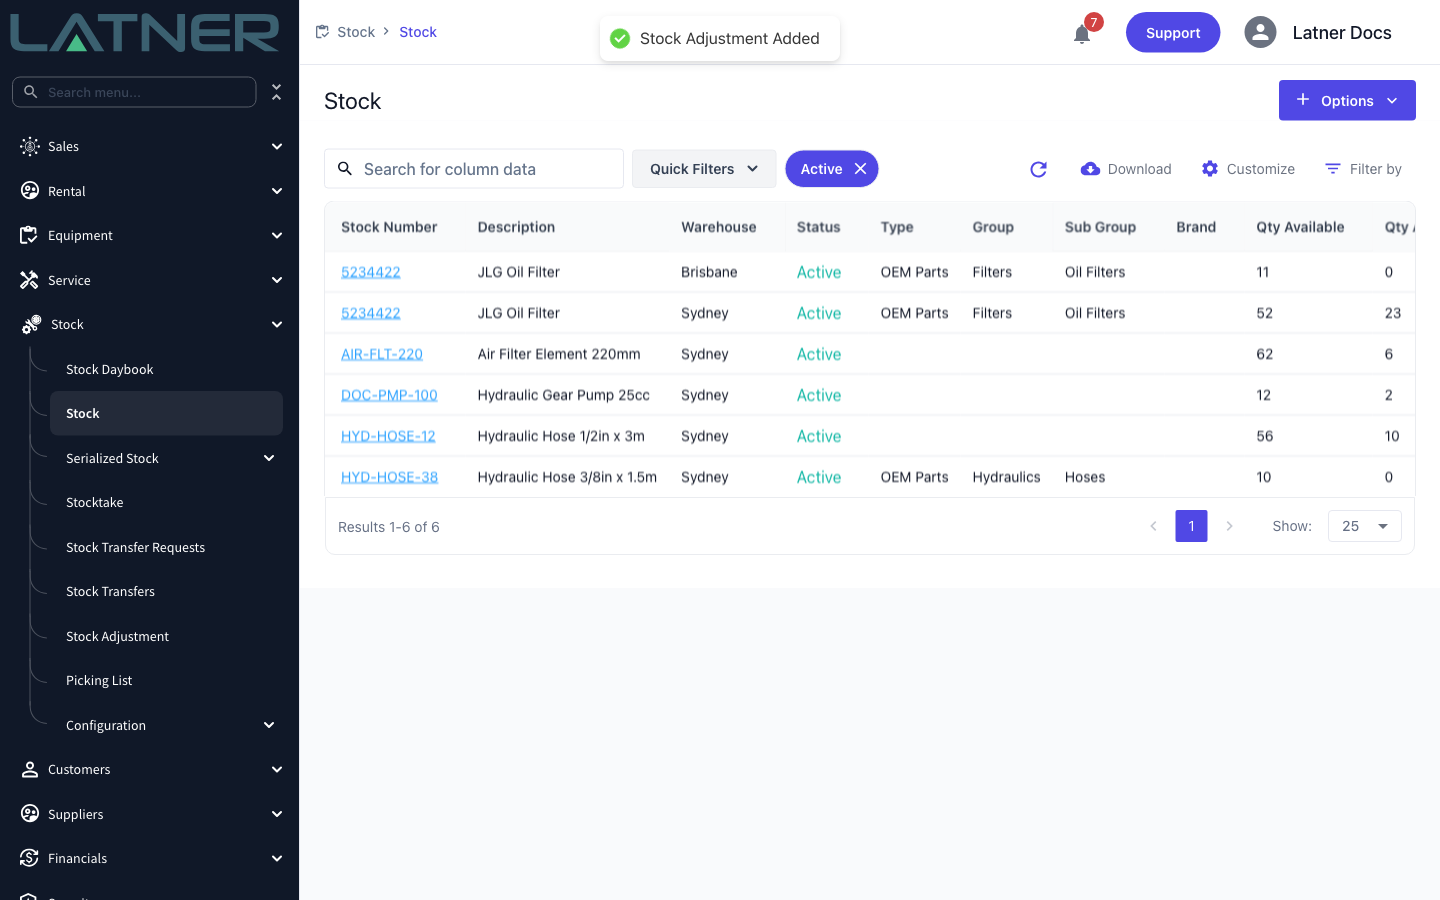
Select Save. Latner confirms with Stock Adjustment Added and applies the change straight away - the Stock screen behind the form already shows the new quantity.
After the Adjustment
-
The part's warehouse record is updated on the spot - Qty Available, Avg Cost or Retail Price, depending on what you adjusted.
-
A row is added to the Stock Adjustments tab on the part, showing the warehouse, the reason, the type and both the old and the new value.
-
A quantity adjustment also writes a row on the Stock Movements tab - Adjustment when the count goes up, Adjustment (Disposal) when it goes down - valued at the part's average cost and dated from the Date / Time you entered.
-
If your accounting system is connected, that movement posts across as a stock adjustment gain or loss. Parts flagged Do Not Stock are left out of that sync.
-
Cost and price adjustments don't create a stock movement - nothing has physically moved - so they don't post a journal.
-
Allocated Qty is never touched by an adjustment. Stock committed to a contract, sales order or work order stays committed.
A saved adjustment can't be edited, reversed or deleted - it is the audit trail, and the stock movement behind it may already have reached your accounting system. If you get one wrong, complete a second adjustment that puts the value back, with a reason that explains the correction.