
Stock is how Latner tracks the parts and consumables you buy, hold and sell, so every filter, hose and fitting has its own number, its own price and a warehouse to sit in.
Overview
A stock number is not one quantity in one place. Latner keeps a single header record for the part itself and a separate row for every warehouse that holds it, which is why the same number can show up more than once on the Stock screen.
-
Create Stock sets up the header record and the first warehouse row in one step.
-
Stock Numbers are unique across your whole system, so a number can only be used once.
-
Group and Sub Group are mandatory, and the Sub Group list is filtered to the Group you pick.
-
The Avg. Cost and Retail Price you enter are written to both the header and the first warehouse row.
-
New stock is created with a status of Active and no quantity on hand.
-
Extra warehouse rows are added for you the first time the part is received or transferred into another warehouse.
Before You Begin
You'll need a few permissions and some configuration in place before the option appears.
|
Requirement |
Where to Find It |
|---|---|
|
Stock permission (Screen) |
Security › Configuration › Permission Groups, then Stock › Screen |
|
Create Stock permission (Option) |
Security › Configuration › Permission Groups, then Stock › Option |
|
At least one warehouse |
Financials › Configuration › Warehouse |
|
A stock group and sub group |
Stock › Configuration › Group and Stock › Configuration › Sub Group |
|
A stock type (optional) |
Stock › Configuration › Stock Types |
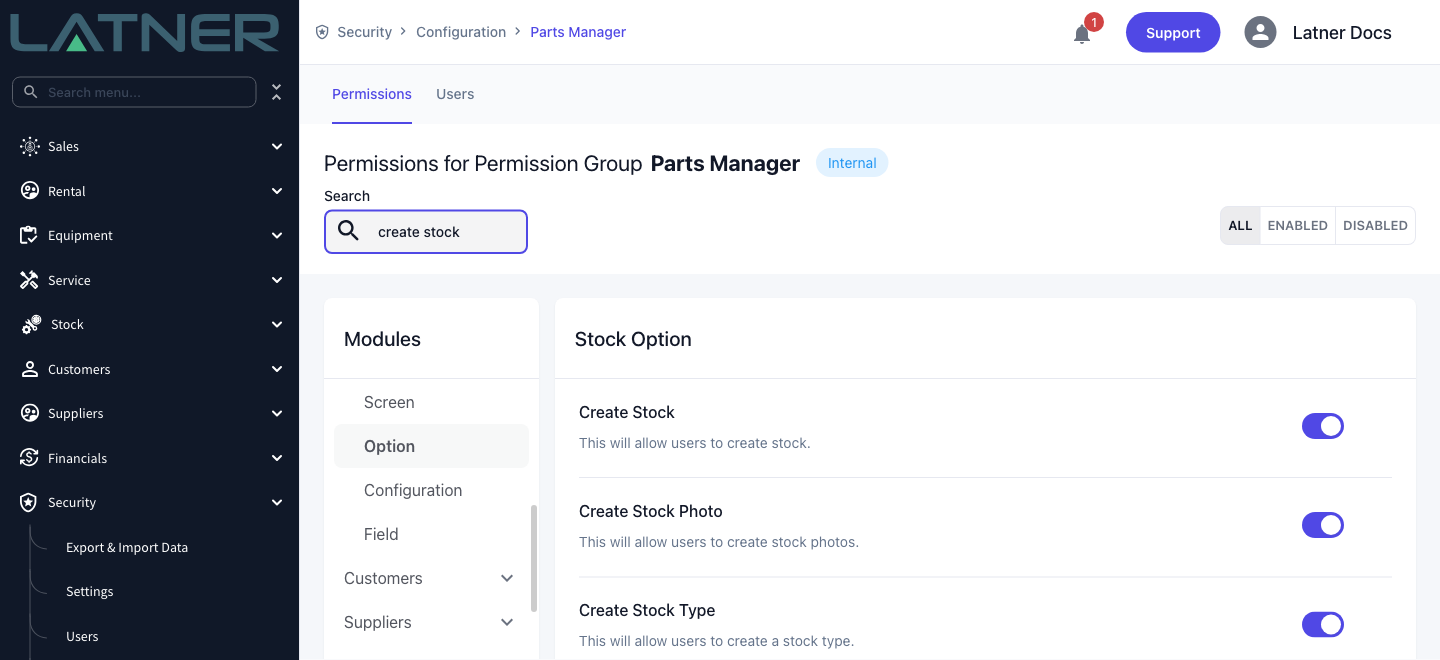
Group and Sub Group are both required on the form and neither can be created from it, so set them up first. A Sub Group always belongs to a Group, which is what lets Latner narrow the list for you while you type.
Creating the Stock Number
Step 1 - Open the Stock screen
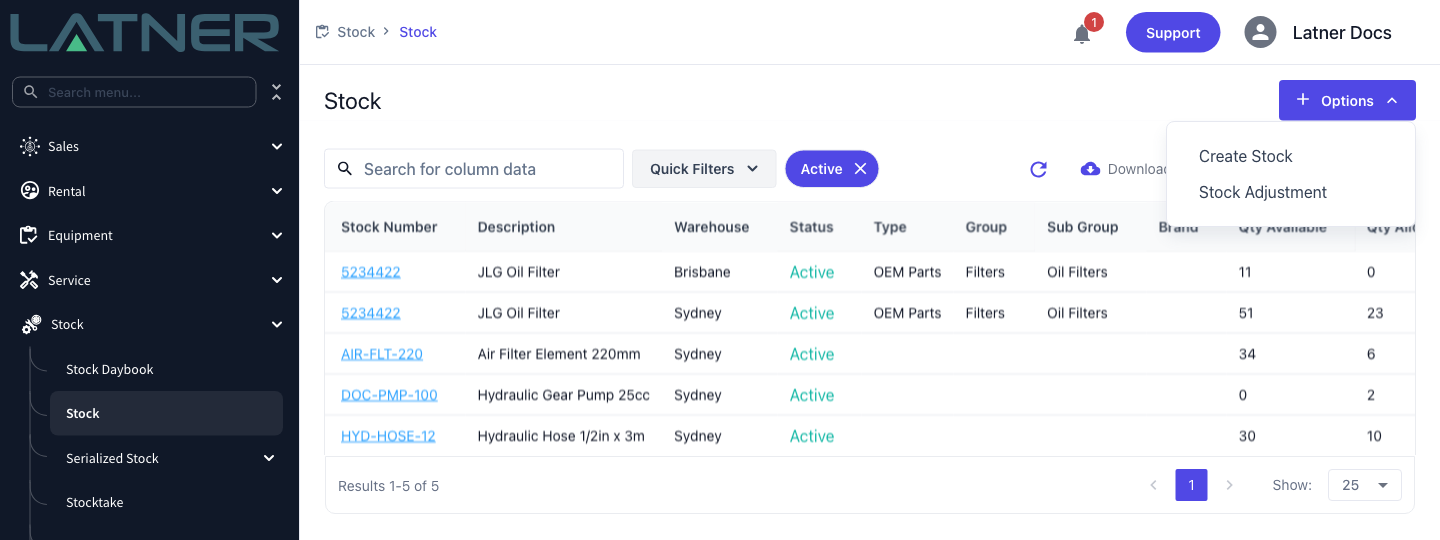
Go to Stock › Stock, then choose Options › Create Stock. The same option is on the Options menu of any existing stock record, so you can add the next part without going back to the list.
Step 2 - Enter the stock number and description
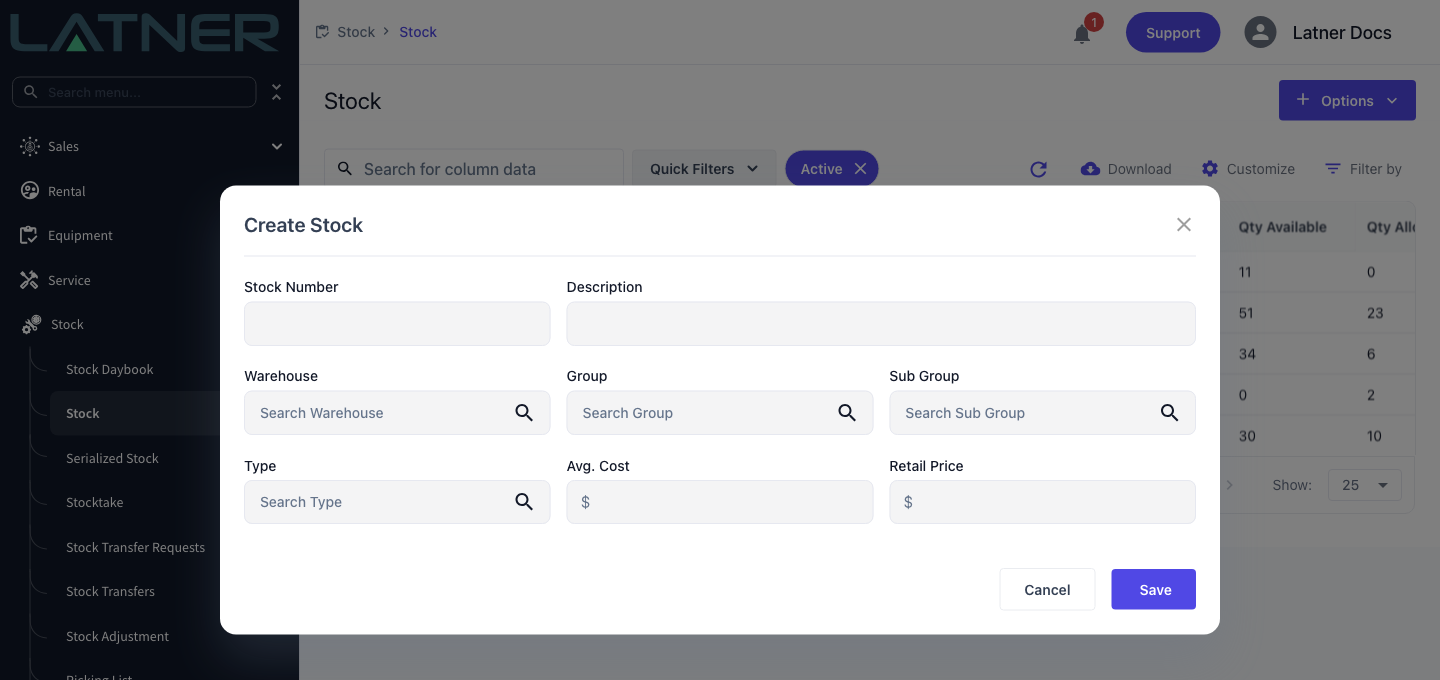
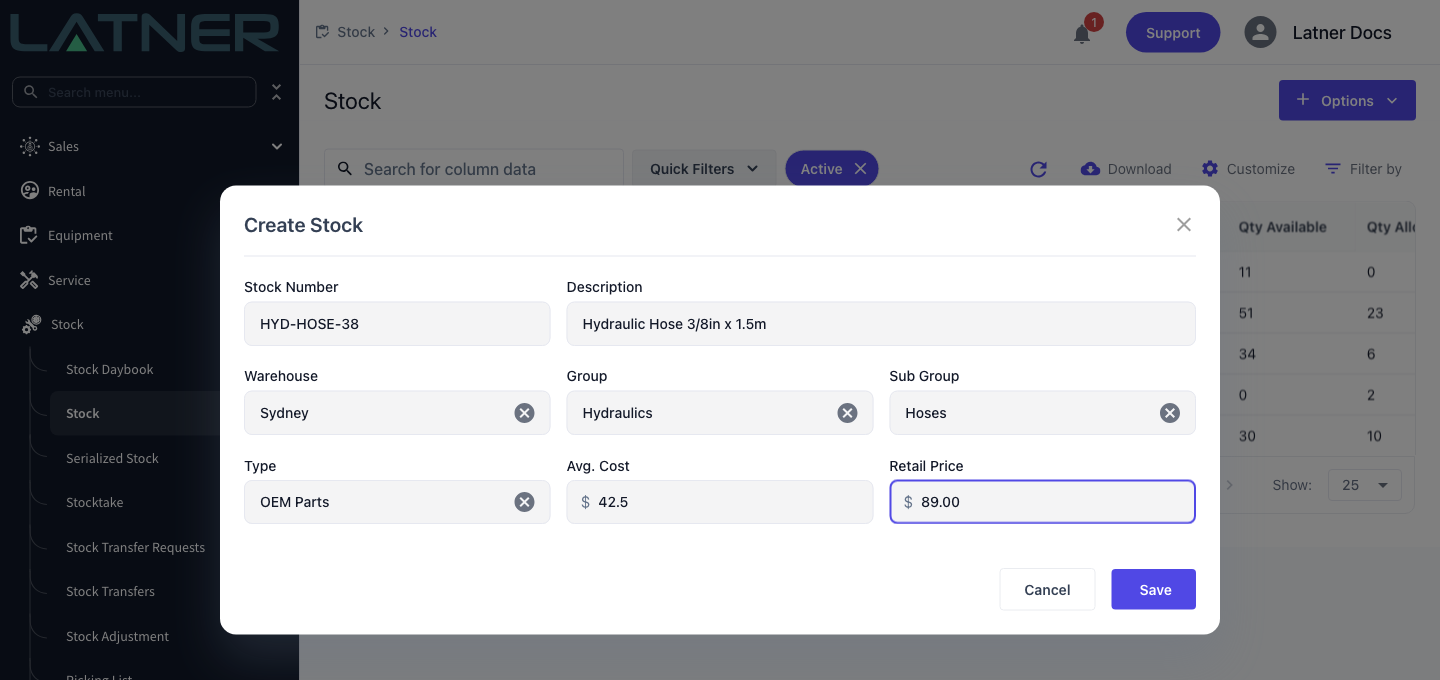
The Create Stock form is short on purpose - it captures just enough to open the record, and everything else is filled in afterwards on the stock record itself.
-
Stock Number - required, and unique across your system. This is what users search on and what prints on the barcode label, so use your parts numbering convention rather than a description.
-
Description - required. What the part actually is.
Step 3 - Choose the warehouse, group and sub group
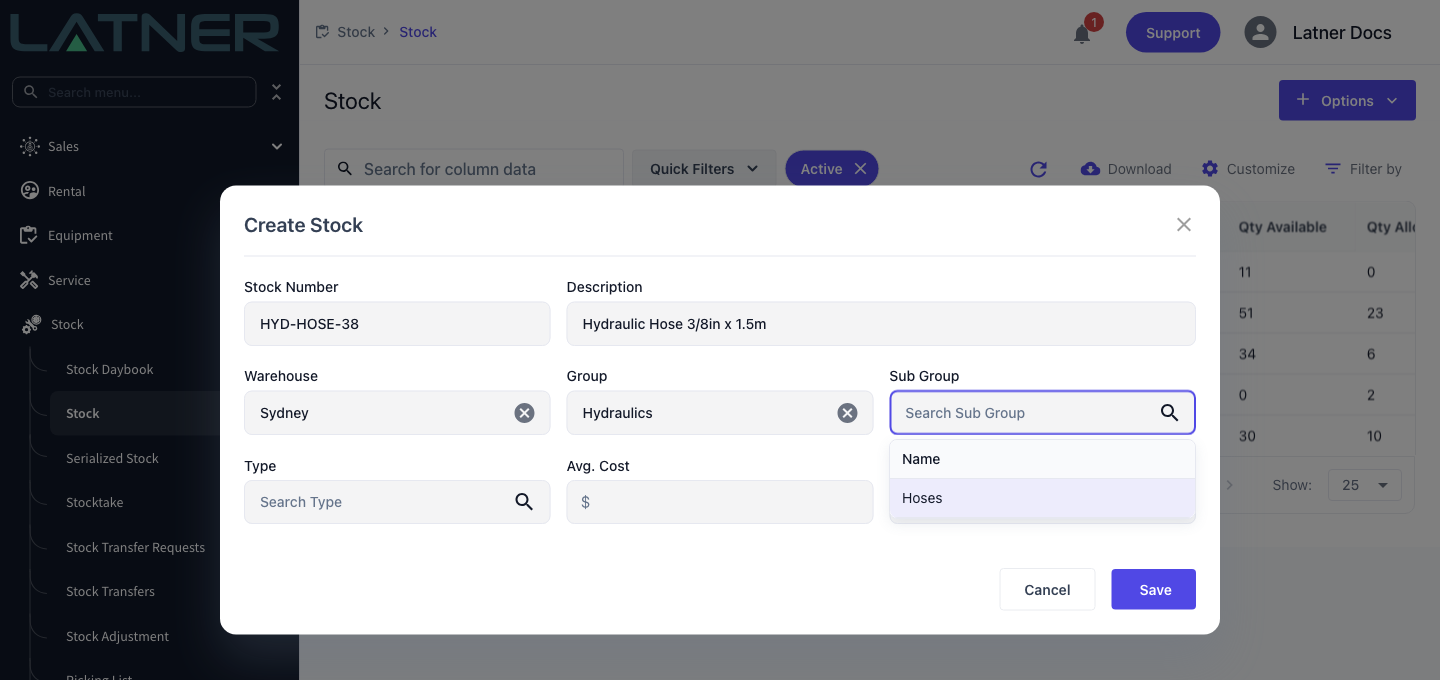
All three are required. The warehouse you pick here becomes the part's first warehouse row.
-
Warehouse - required. Where the part will be held first.
-
Group - required. The broad category, such as Filters or Hydraulics.
-
Sub Group - required. Only sub groups belonging to the chosen Group are offered. Change the Group and the Sub Group clears; pick the Sub Group first and Latner fills the Group in for you.
Step 4 - Add the type and opening prices
These last three fields are optional and can be left blank if you don't know them yet.
-
Type - the stock type, such as OEM Parts. Useful for reporting and for supplier invoice account coding.
-
Avg. Cost - what the part costs you.
-
Retail Price - what you charge for it on work orders, sales orders and rental contracts.
Step 5 - Save
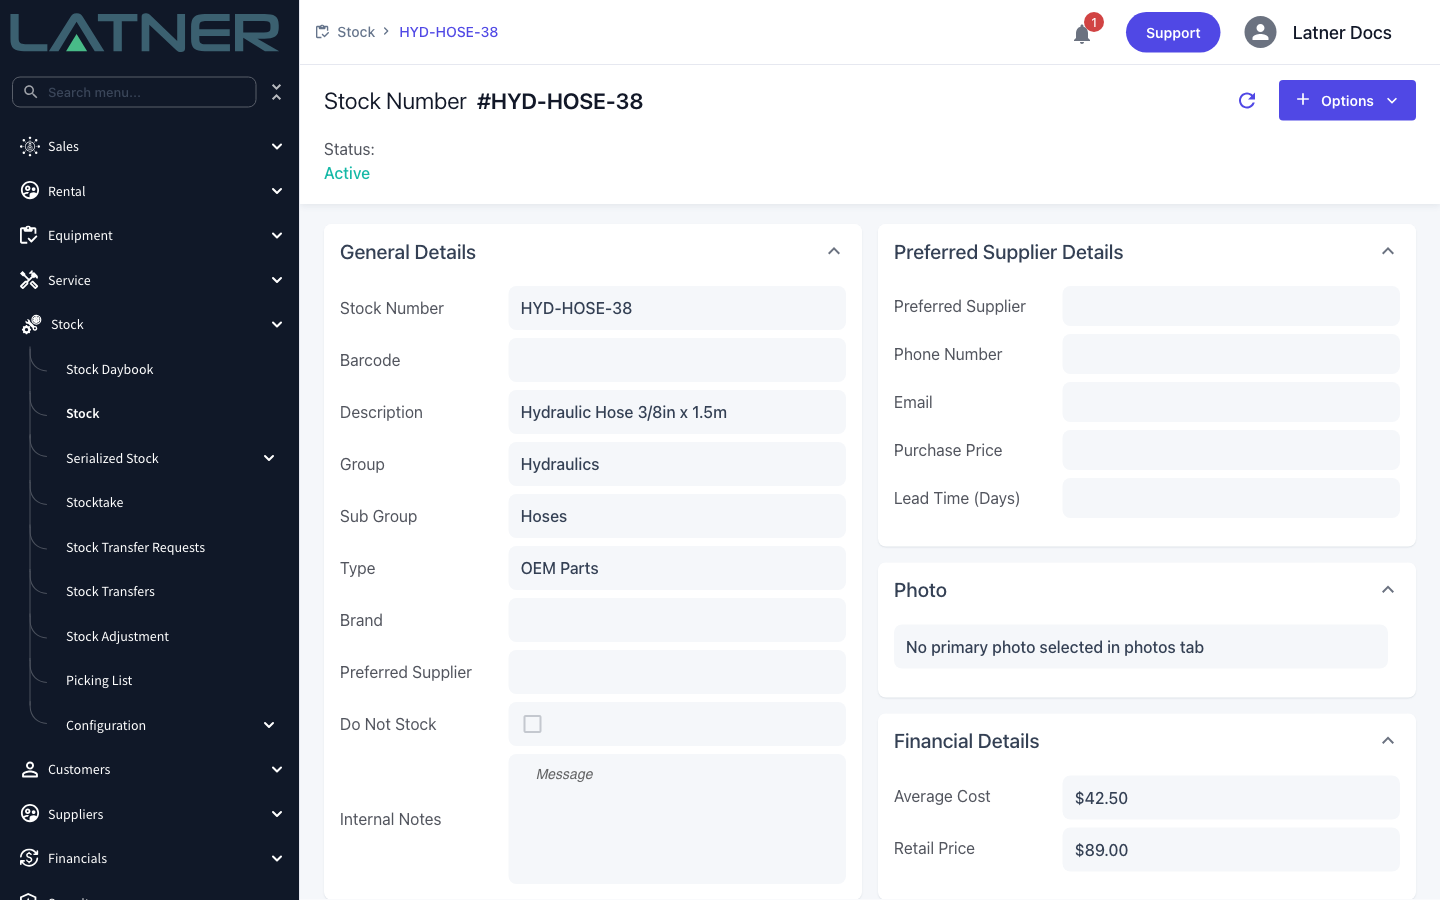
Click Save. Latner creates the stock record and takes you straight to it.
After Creation
-
The stock record opens with a status of Active and appears on the Stock screen straight away.
-
A single warehouse row is created for the warehouse you chose, with Qty Available, Allocated, Backordered, Used and Sold all at zero. Creating a stock number does not put any stock on hand - quantity arrives through a purchase order receipt, a stock transfer or a stock adjustment.
-
The Avg. Cost and Retail Price you entered are copied onto that warehouse row as well as the header.
-
Fields the form doesn't ask for - Barcode, Brand, Preferred Supplier, Do Not Stock and Internal Notes - are filled in by clicking straight into the General Details card on the record.
-
The record's Options menu is where the rest of the setup lives: Add Supplier Pricing, Assign Compatible Model, Assign Compatible Stock, Upload Stock Photo and Update Financial Details.
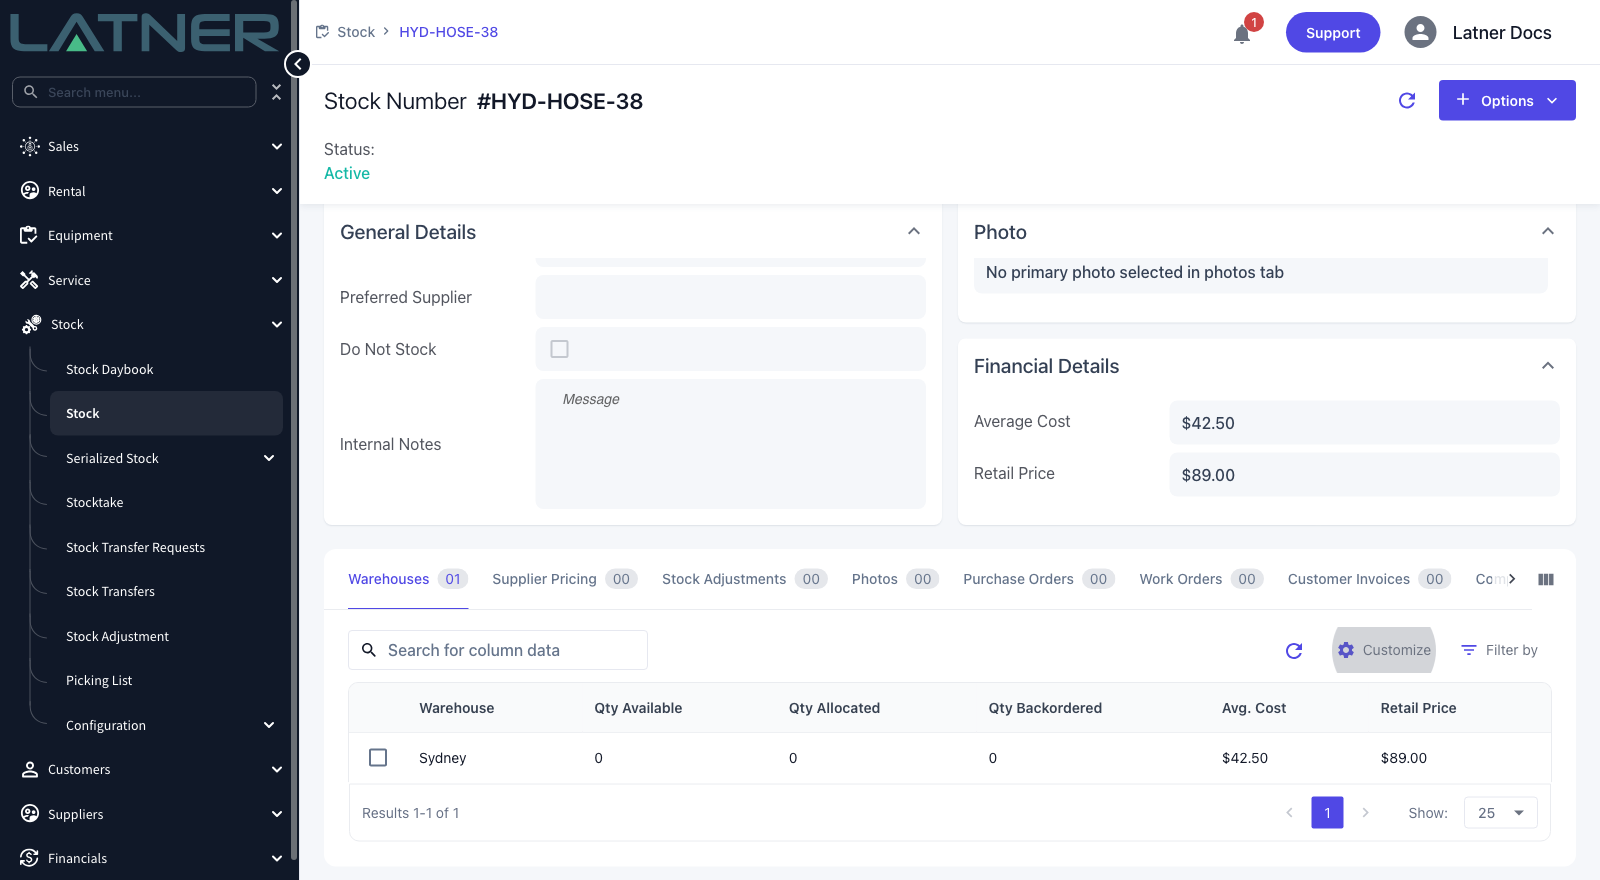
The header Average Cost is a calculated figure. Once the part starts moving, Latner recalculates it across every warehouse row, so editing it by hand isn't the way to correct a cost. Use Options › Update Financial Details on the stock record, or a stock adjustment, and let the calculation follow the movements.
FAQs
Watch the Demo
Prefer to watch it? Step through the same flow here.