
Latner can wear your company's brand colours and logo instead of ours.
Overview
Out of the box Latner looks like Latner. It doesn't have to. A few settings swap our logo and colours for yours, so the system your team signs into every morning looks like your business rather than your software vendor's. On top of that, each person can flip their own screens to dark mode without affecting anyone else.
-
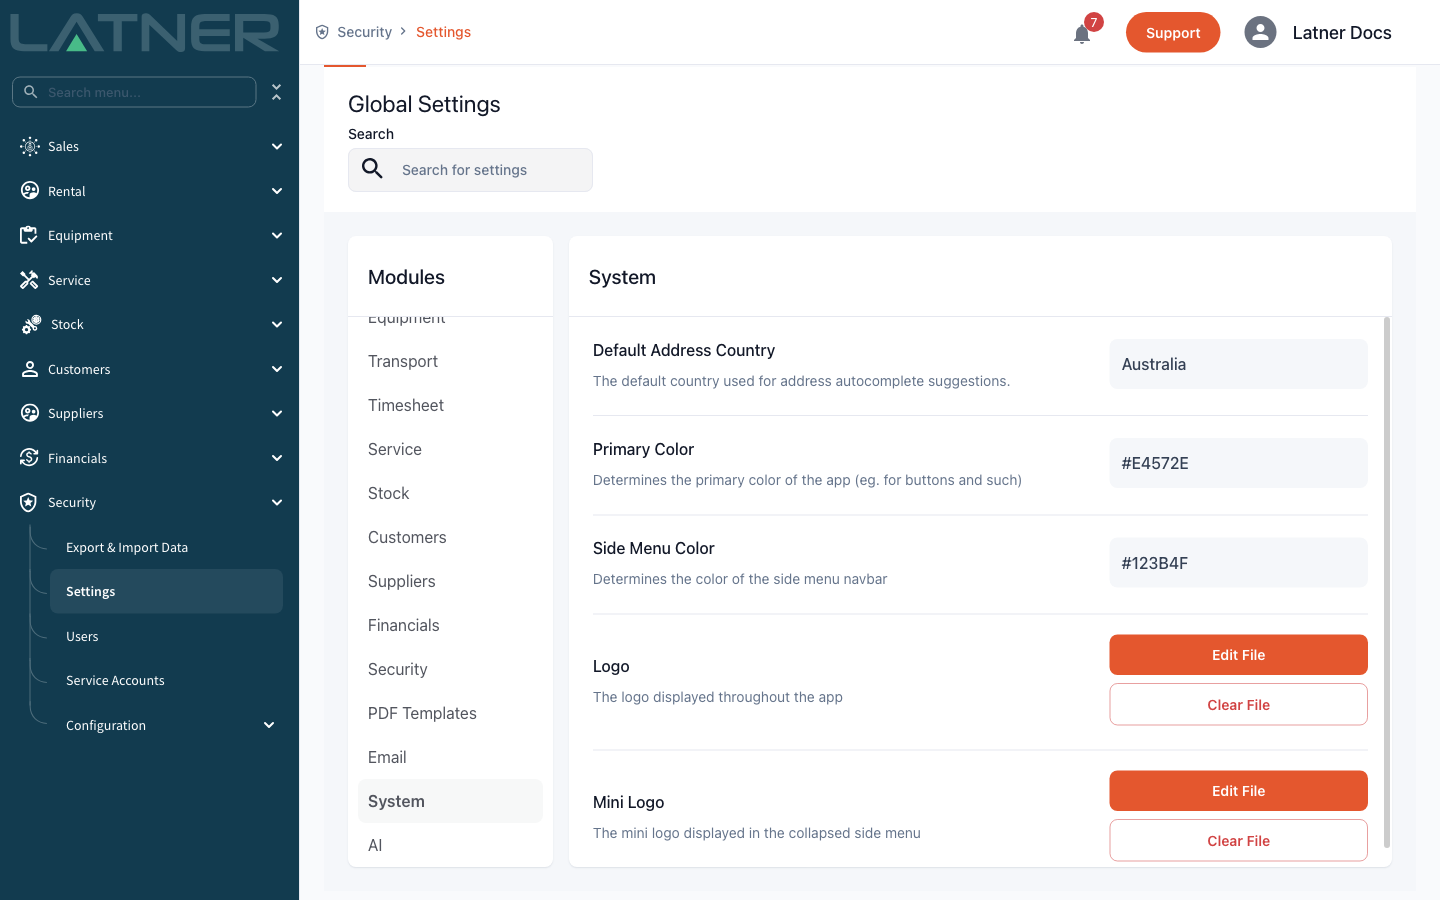
Four settings control your branding: Primary Color, Side Menu Color, Logo and Mini Logo.
-
Branding is system wide. When you change it, everyone in your business sees the same thing - there is no per-user or per-branch version of these four settings.
-
Colours are entered as hex codes, including the # (for example #E4572E). Anything that isn't a valid hex code is ignored and the standard colour stays.
-
Logos are image files, up to 10 MB each.
-
Dark Mode is the opposite: it's personal, it needs no permission, and it only applies to the browser you switch it on in.
-
Branding on generated PDFs is separate - see the FAQs.
Before You Begin
You need one permission and a couple of things prepared.
|
Requirement |
Where to Find It |
|---|---|
|
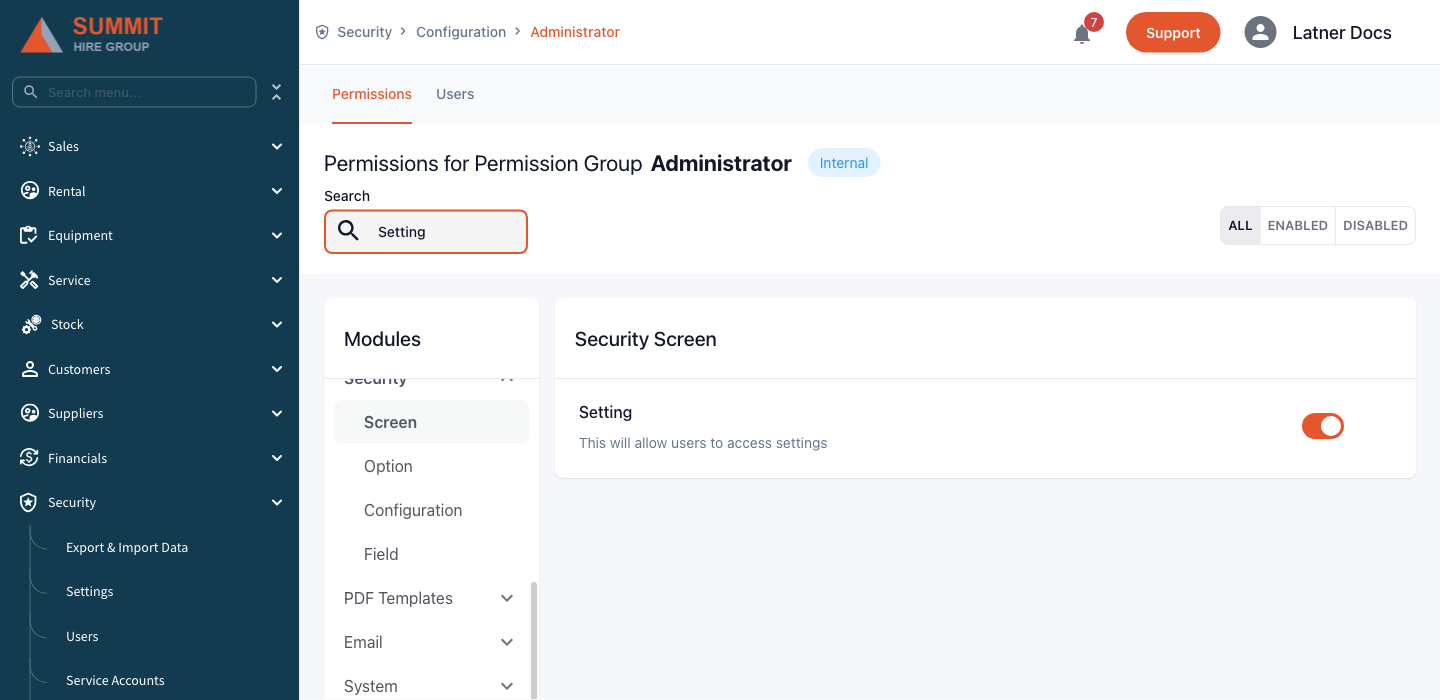
The Setting permission ("This will allow users to access settings") |
Security › Configuration › Permission Groups, then the group, then Security › Screen |
|
Your logo as an image file, under 10 MB |
Your marketing or brand folder. A transparent PNG works best |
|
A square version of your logo (just the mark, no wording) |
Used when the side menu is collapsed |
|
Your brand colours as hex codes |
Your brand guide, or a colour picker |
Dark Mode is the exception to all of this. It needs no permission and no setting, so every user can turn it on for themselves from day one.
Changing Your System's Branding
Step 1 - Open the System settings
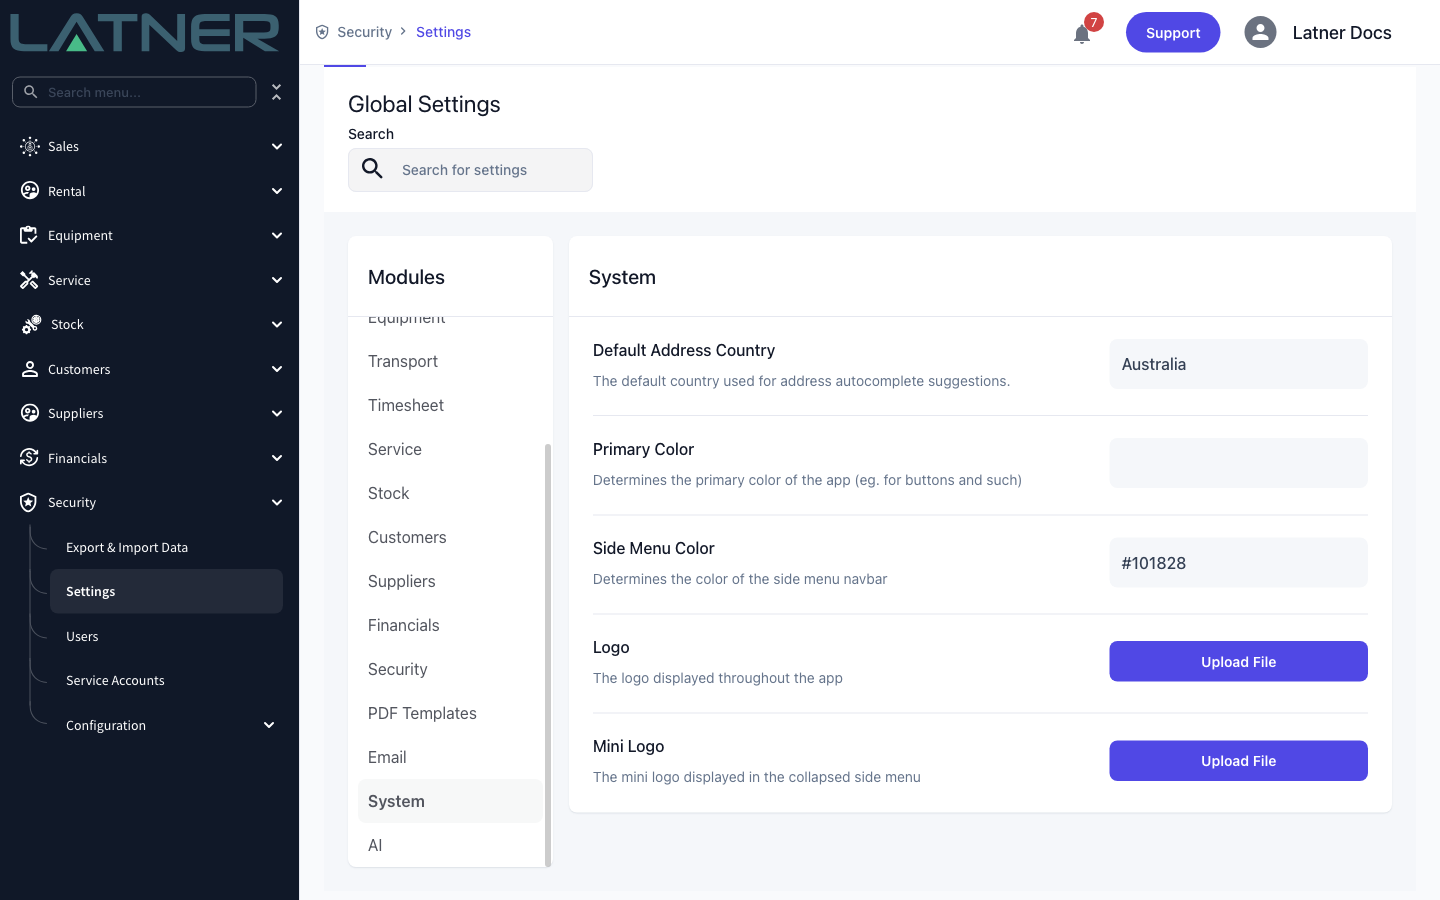
Go to Security › Settings. In the Modules panel on the left, scroll down and click System. The four appearance settings sit together under the heading:
-
Primary Color - "Determines the primary color of the app (eg. for buttons and such)". This is the colour of buttons, links, selected menu items and other highlights.
-
Side Menu Color - "Determines the color of the side menu navbar". This is the background of the navigation panel down the left.
-
Logo - "The logo displayed throughout the app". Shown at the top of the side menu.
-
Mini Logo - "The mini logo displayed in the collapsed side menu".
Step 2 - Set your brand colours
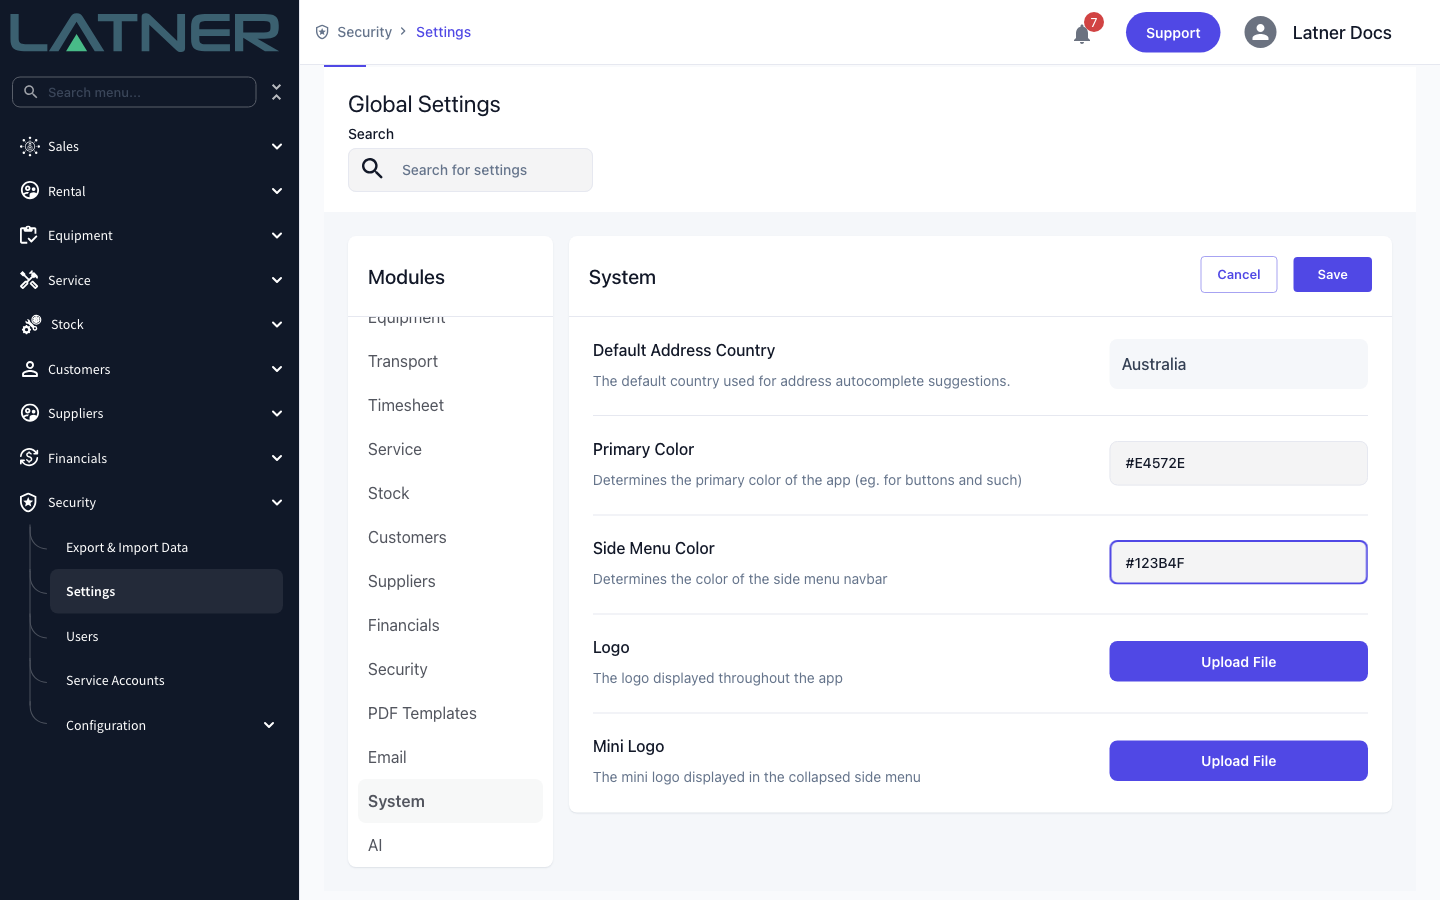
Click the value box beside Primary Color and type your hex code, then do the same for Side Menu Color. Both fields can be edited at once - Cancel and Save appear in the card header, and one Save commits everything you've changed.
Include the #. Six-digit codes (#E4572E) and three-digit shorthand (#E42) both work; anything else is quietly ignored and the standard colour is kept.
Step 3 - Upload your logo
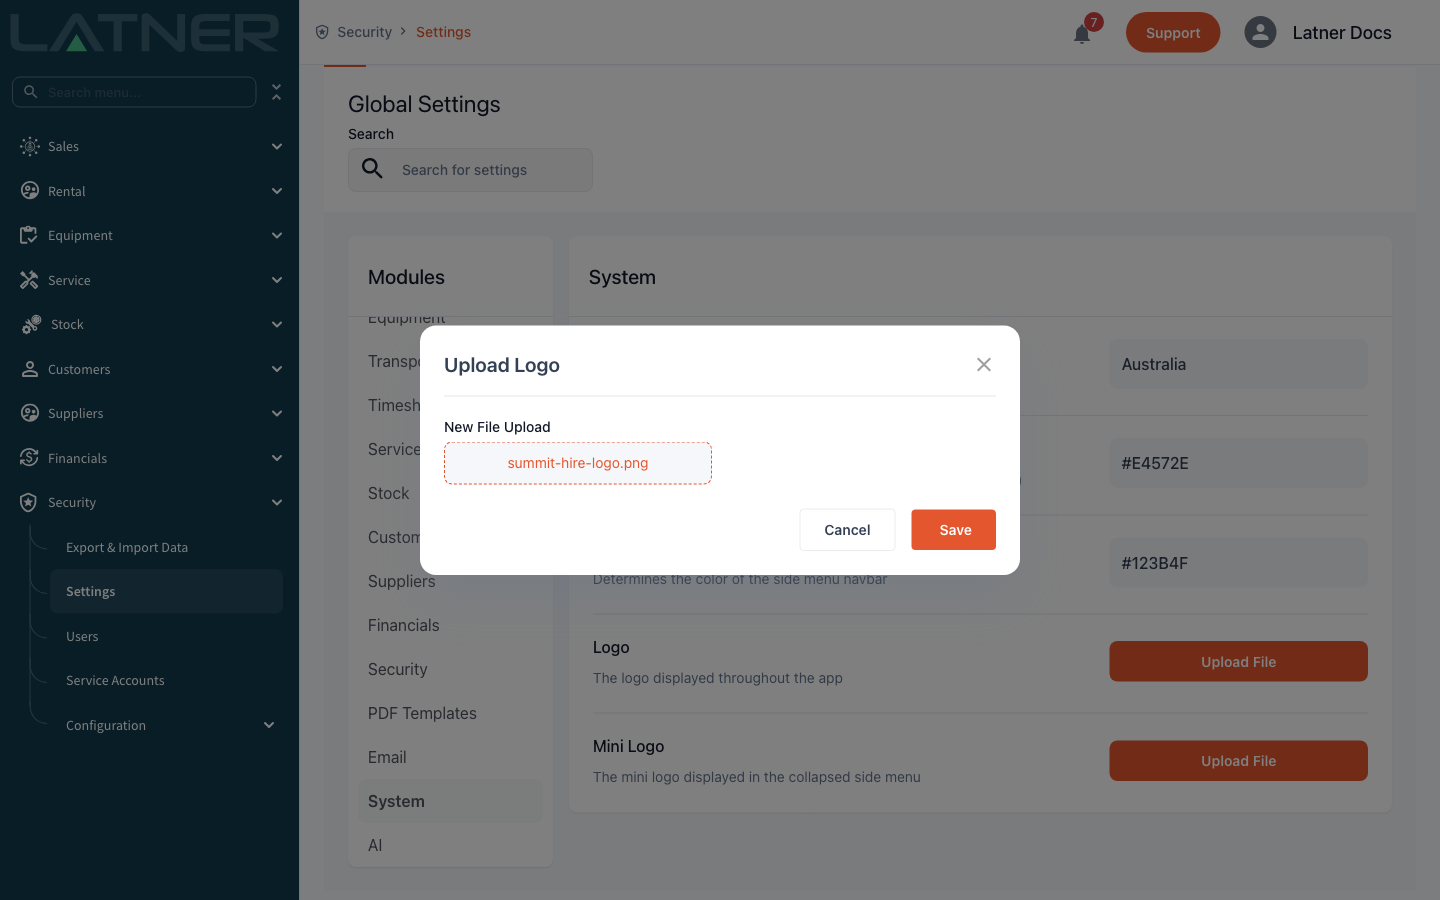
Click Upload File beside Logo. The Upload Logo window opens with a single New File Upload box - click it, pick your image, then click Save. You'll get a "File Upload Successful" message when it lands.
Latner fits the logo into a space roughly 280 by 70 pixels and scales it to fit, so a wide, landscape image works best. The side menu is dark by default, so make sure your logo is still readable against your Side Menu Color.
Step 4 - Upload your mini logo
Repeat the same steps against Mini Logo, using a square version of your mark. This is what shows when someone collapses the side menu, and the space is only about 50 pixels wide, so a full wordmark shrinks to nothing there.
Once a file is saved, the button changes from Upload File to Edit File and a Clear File button appears underneath it.
Step 5 - Refresh to see the change
Colours and logos are read when Latner loads, so refresh the page (or navigate to another screen and back) to see your branding applied. Everyone else picks it up the next time their browser loads Latner.
After the Change
-
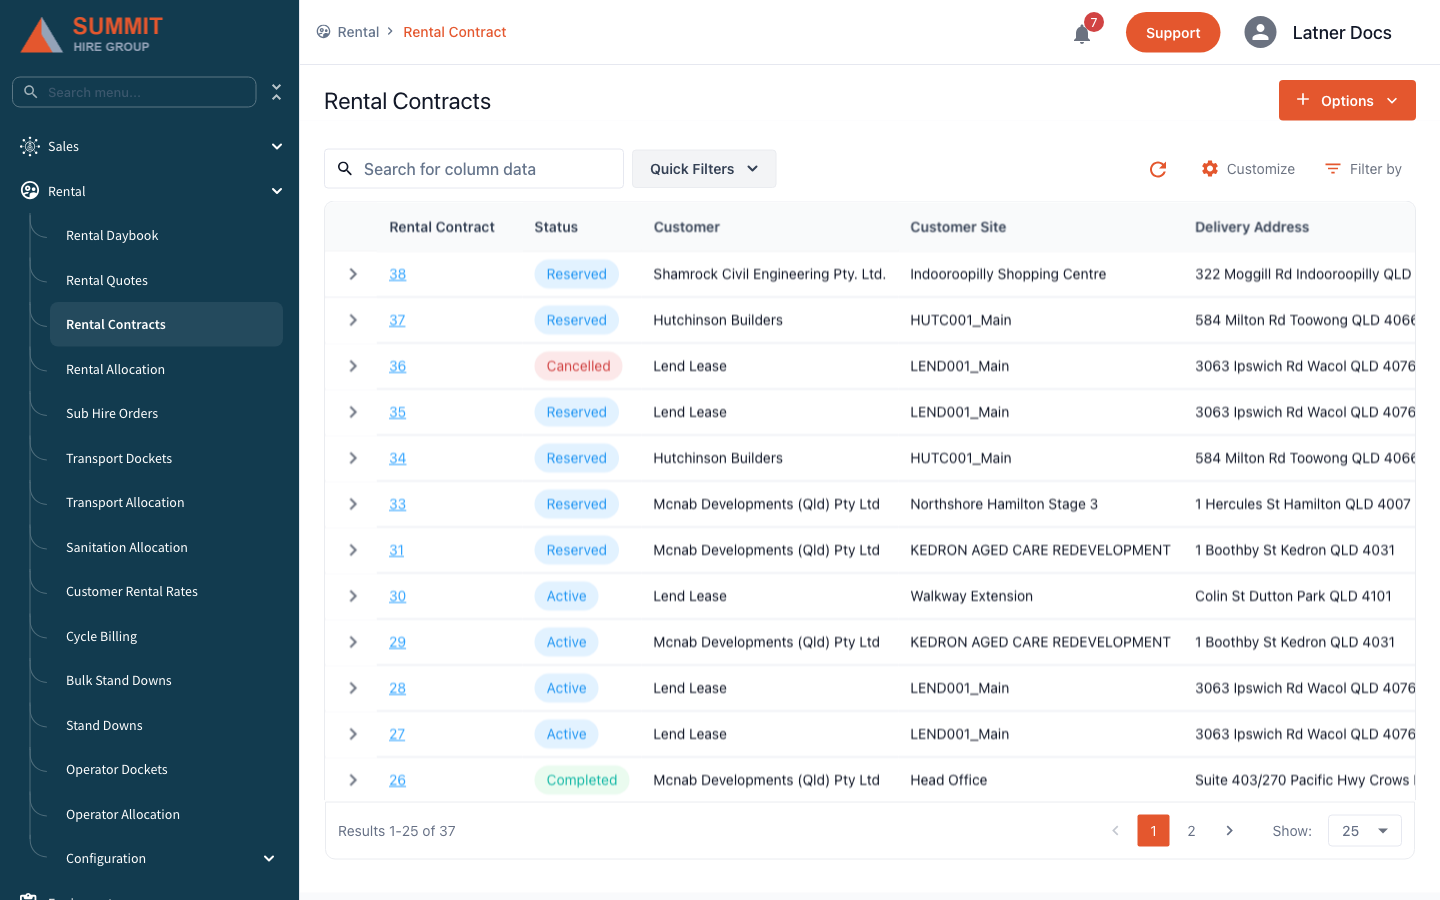
Your Logo replaces the Latner logo at the top of the expanded side menu.
-
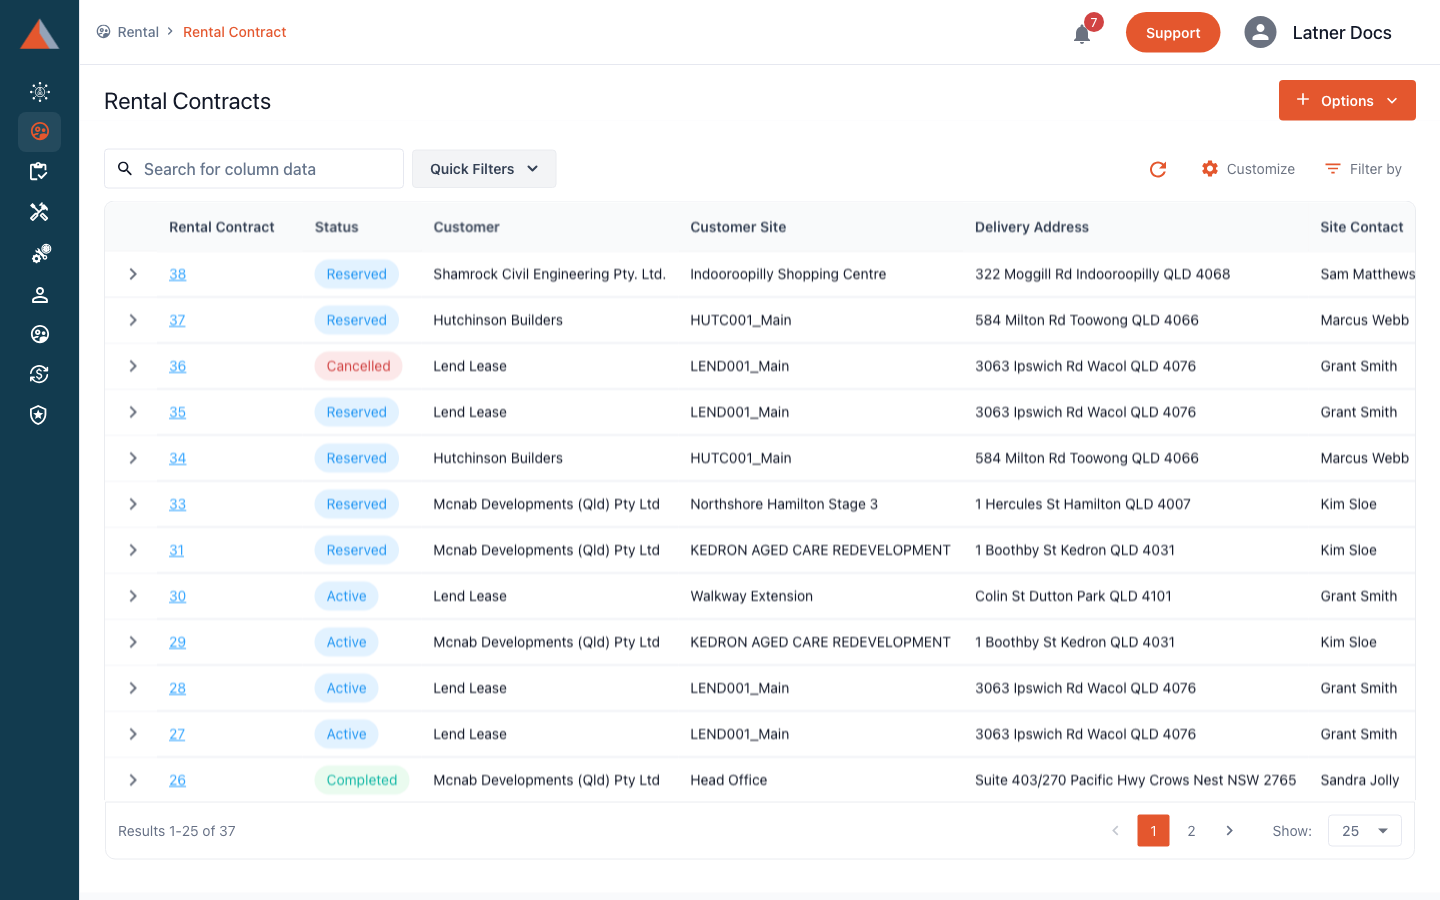
Your Mini Logo takes over when the side menu is collapsed. If you haven't uploaded one, Latner falls back to the full Logo, which usually looks squashed in that small square.
-
Your Primary Color flows through buttons, links, tabs, pagination and other highlights across every screen.
-
From your Side Menu Color, Latner works out the hover and sub-menu shades, and picks either white or near-black menu text so the labels stay readable against whatever colour you chose.
-
The change applies to every user in your business, on every screen, at once.
Clear File removes a logo permanently - Latner asks "Are you sure you want to clear this file? This cannot be undone." and there is no way to bring the old file back from within Latner. Keep your own copy of the image before you clear it, and use Edit File when you simply want to replace one logo with another.
FAQs
Watch the Demo
Prefer to watch it? Step through the same flow here.