
Mobile Inspections let your yard and field staff carry out equipment inspections from a phone, so run-up, return, pre-sale and manual checks can be completed on the machine instead of back at a desk.
Overview
An inspection is a structured check on a piece of equipment, usually backed by a checklist. Many inspections are raised automatically as equipment moves through its rental life, and the mobile screen is where the person on the ground picks them up, works through the checklist, records readings and photos, and marks them complete.
-
Inspections come in several types: Run Up (before a machine goes out), Return Inspection (when a machine comes back), Pre Sale Inspection, Equipment Transfer Inspection and Manual.
-
Most inspections are created automatically by settings as equipment is reserved, returned, transferred or added to a sale. You can also raise one yourself on mobile with Create Inspection.
-
Each inspection carries a status: Open, Completed, Pending Approval, Incomplete or Cancelled.
-
Where a checklist template is configured for the equipment and inspection type, the checklist is attached automatically and must be worked through on the mobile screen.
-
Completing an inspection records who did it and how long it took, generates a checklist PDF, and updates the equipment and its rental contract.
To complete an inspection on desktop, or to see exactly what blocks completion, see How to Complete an Inspection.
Before You Begin
A few permissions and settings control what you can see and do on the mobile inspection screen.
|
Requirement |
Where to Find It |
|---|---|
|
The Mobile Inspection permission, to open the mobile inspection screen at all. |
Security › Permission Groups, under the Equipment module. |
|
The Create Inspection and Complete Inspection permissions, to raise and finish inspections. |
Security › Permission Groups, under the Equipment module. |
|
A checklist template configured for the equipment class, model or serialized stock and the inspection type, so a checklist appears automatically. |
Checklist configuration for the equipment record. |
|
Enforce Meter Reading Entry in Inspections, if you want a meter reading to be mandatory before completing. |
Security › Settings › Equipment. |
|
Completed Checklists Required For Inspections, if every checklist task must be answered before the inspection can be completed. |
Security › Settings › Equipment. |
|
Failed Inspection Checklist Points Require Approval, to route inspections with a failed point to Pending Approval. |
Security › Settings › Equipment. |
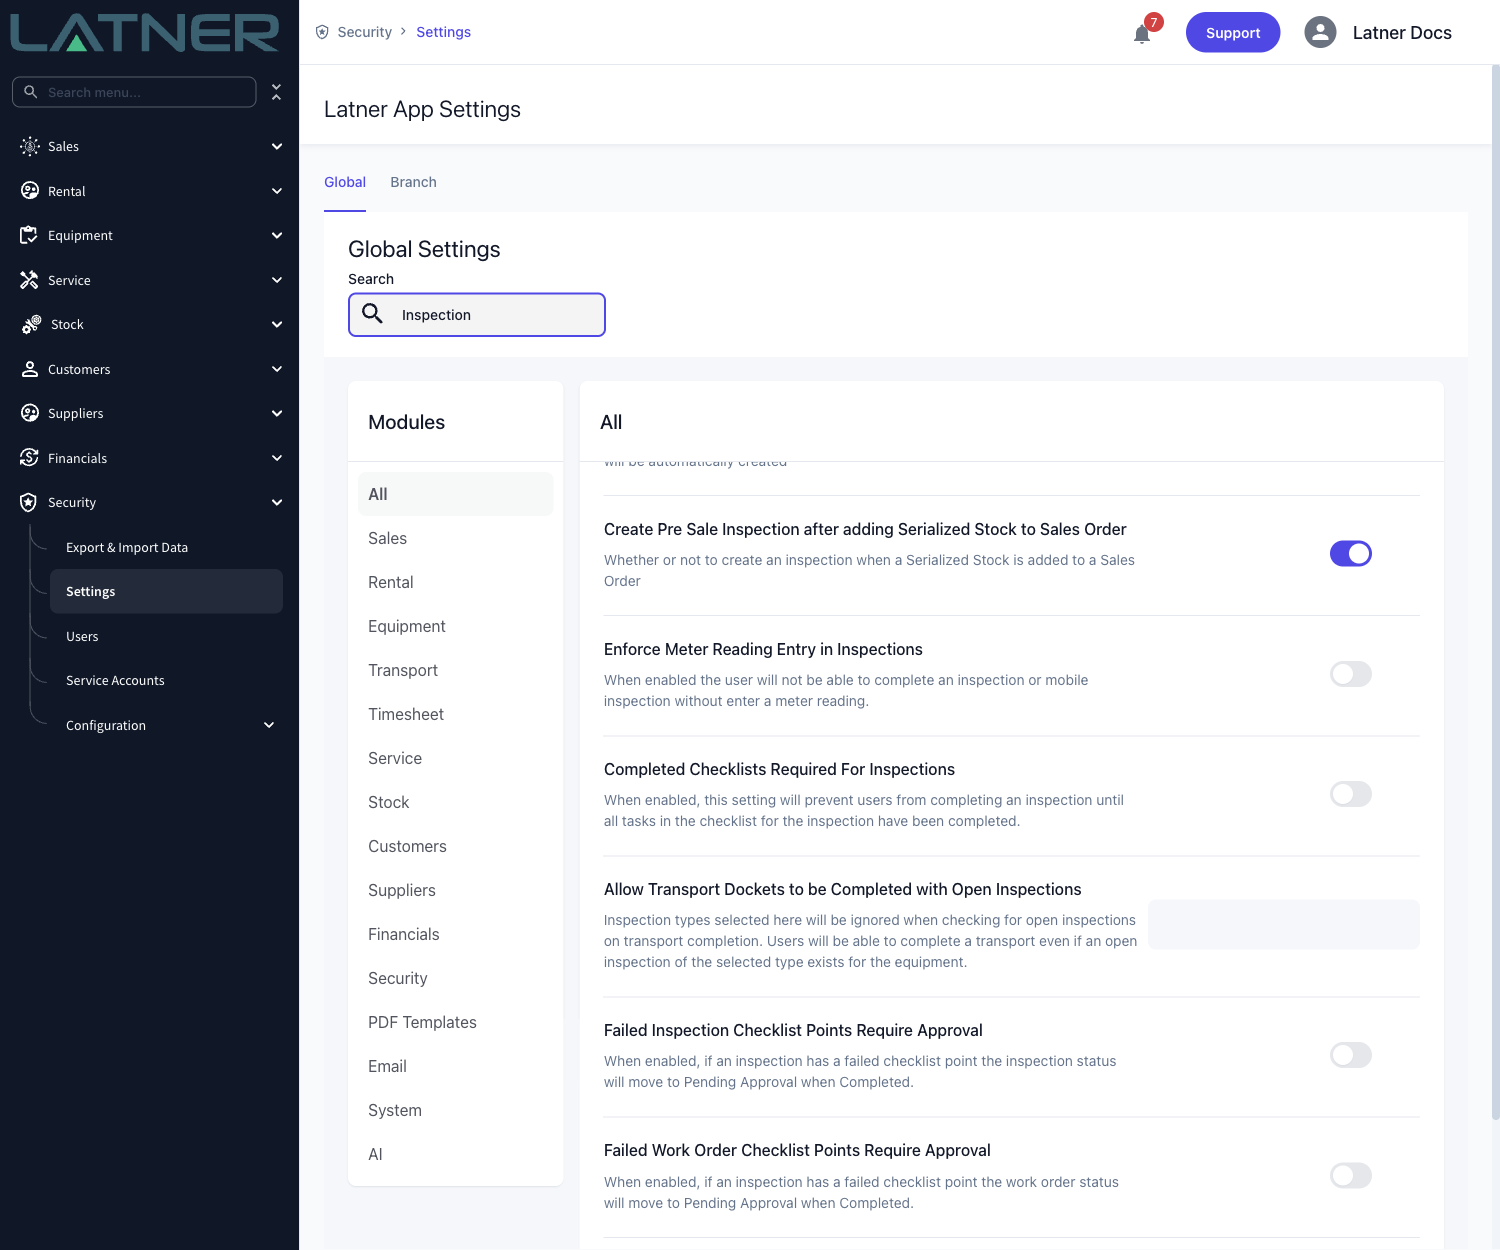
These settings change what the mobile screen requires at completion time. With Completed Checklists Required For Inspections switched on, the Complete Inspection button stays out of reach until every task in the checklist has a response, so if a check can't be tapped, look for an unanswered checklist task first.
Opening Mobile Inspections
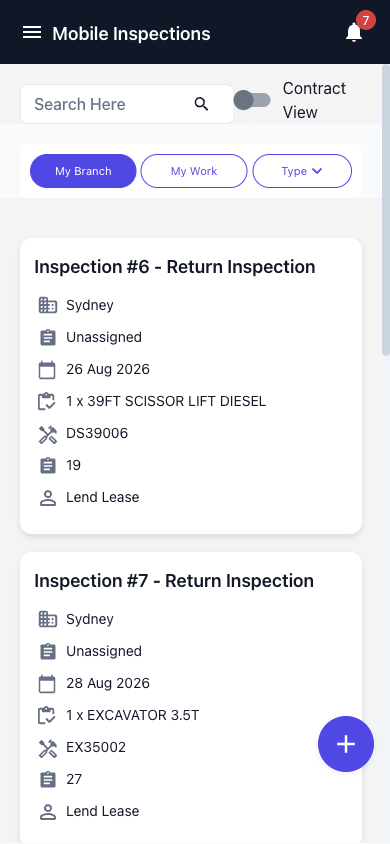
From the mobile menu, open Mobile Inspections. The list shows open inspections, with the quick-filter tabs across the top:
-
My Branch - inspections at your branch (the default view).
-
My Work - inspections assigned to you as the inspector.
-
Type - narrow the list to Return, Run Up or Pre Sale.
Each card shows the inspection number and type, the branch, who it's Assigned to (or Unassigned), the scheduled or inspection date, the equipment, the linked rental contract or sales order, and the customer. Turn on Contract View to group open inspections under their rental contracts instead.
Creating an Inspection
Most inspections appear on their own, but you can raise one manually when you need to.
Step 1 - Open the Create Inspection form
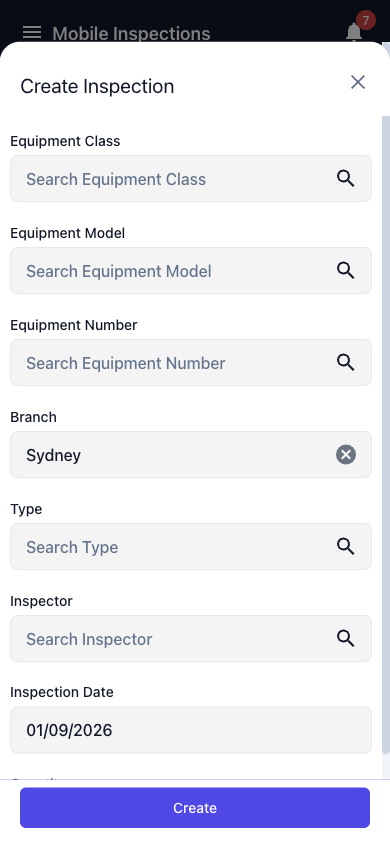
Tap the Create Inspection action (the add button) at the bottom of the list.
Step 2 - Fill in the inspection details
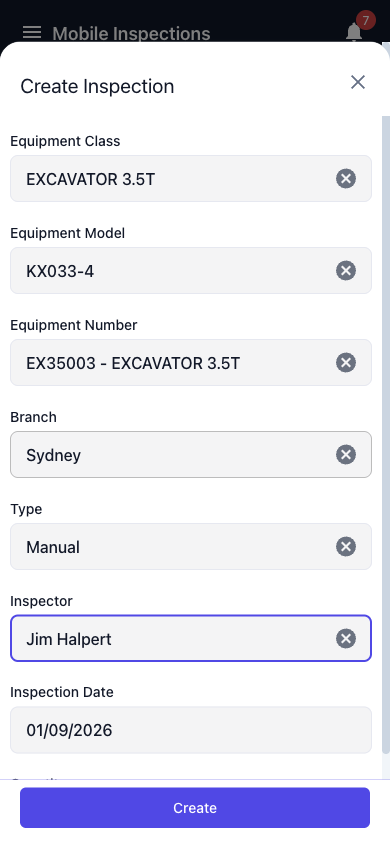
Complete the form. Fields marked required must be filled before you can save:
-
Equipment Class - required.
-
Equipment Model - optional; the list is filtered to the class you chose.
-
Equipment Number - required for every type except Run Up, where it can be left blank. This field reads QR codes.
-
Branch - required; defaults to your branch.
-
Type - required; choose the inspection type.
-
Inspector - optional; the person who will carry out the inspection.
-
Inspection Date - required; defaults to today.
-
Quantity - defaults to 1, and can only be changed for bulk equipment.
Choosing an Equipment Number fills in its model and class for you. Tap Create to save, and Latner opens the new inspection.
Completing the Checklist
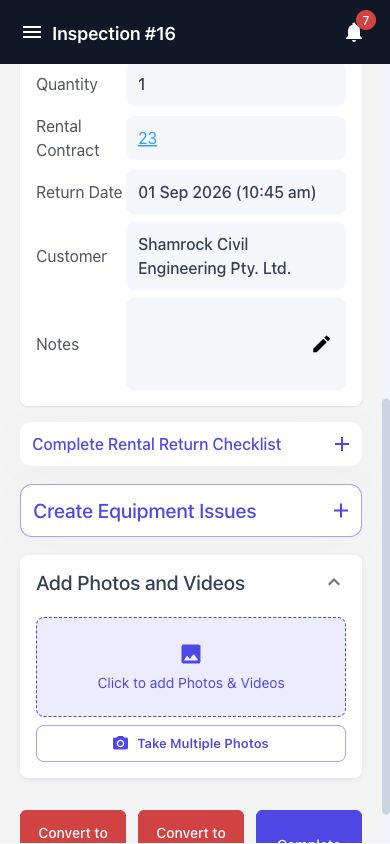
Open an inspection to see its detail screen: the equipment, assigned inspector, dates, linked rental contract and notes. If a checklist is attached, it appears just below those fields as a Complete [Type] Checklist button.
Step 1 - Confirm the equipment
Select the Equipment Number (or Serial Number for serialized stock) at the top of the detail screen before you start the checklist. If you don't, Latner prompts you to Select an Equipment Number before completing the Checklist.
Step 2 - Work through the checklist
Tap Complete [Type] Checklist to open the checklist. Each task is presented one at a time, showing its group, summary and description. For each task, choose a response, and add Notes or attach photos where needed. Your responses save as you move through the tasks, so you can stop and pick up where you left off.
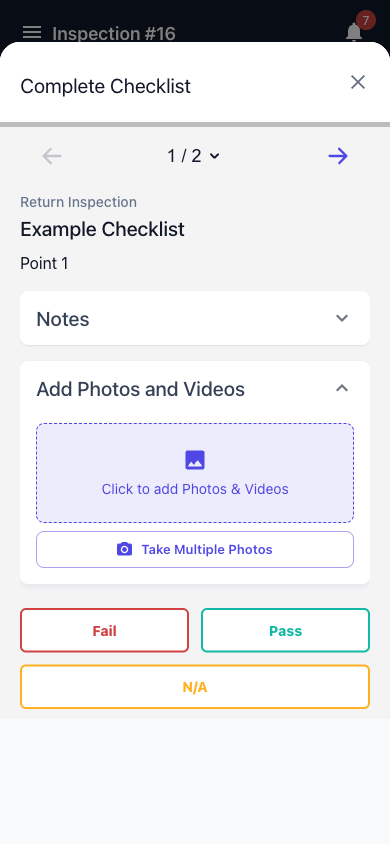
When every task has a response, the button changes to [Type] Checklist Completed with a tick. You can also raise faults from Create Equipment Issues, and attach photos and videos to the inspection itself from the Add Photos and Videos section.
Completing the Inspection
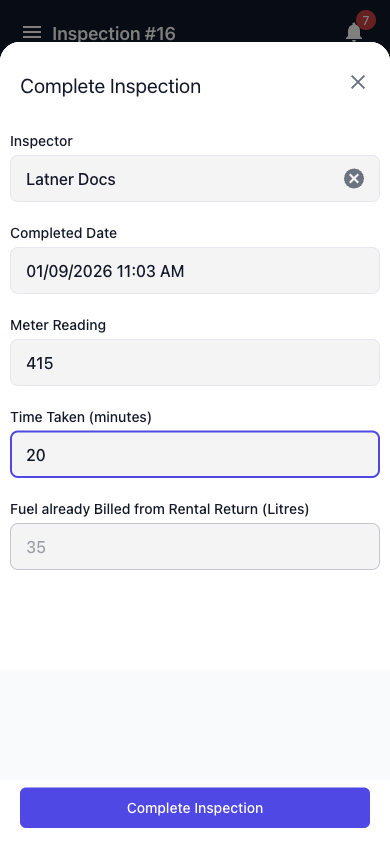
With the checklist done, tap Complete at the bottom of the inspection to open the Complete Inspection form.
-
Inspector - required; defaults to you.
-
Completed Date - defaults to now.
-
Meter Reading - shown when the equipment has a meter type; required if Enforce Meter Reading Entry in Inspections is switched on.
-
Time Taken (minutes) - required; defaults from the equipment model or class.
-
Fuel to Bill (Litres) - shown for return inspections where the equipment has a fuel type and fuel is recorded at the return inspection; required if Return Inspection Fuel to Bill Required is on.
-
Fuel already Billed from Rental Return (Litres) - read only, and only shown when the rental return already billed fuel for this equipment, so you don't charge for it twice.
Tap Complete Inspection to finish.
After Completion
Once you complete an inspection:
-
Its status becomes Completed, or Pending Approval if a checklist point was failed and Failed Inspection Checklist Points Require Approval is switched on.
-
A checklist PDF is generated and stored against the inspection.
-
A timesheet entry is created for the inspector from the time taken.
-
The equipment's rental status and the linked rental contract are updated to reflect the completed check.
Completing an inspection can't be undone from the mobile screen. If an inspection lands in Pending Approval because of a failed checklist point, an authorised user reviews and approves it from the desktop Inspection screen. To scrap an inspection entirely, use Cancel on the desktop, which needs a cancellation reason.
FAQs
Watch the Demo
Prefer to watch it? Step through the same flow here.