
A Detail Screen displays all the information relating to a specific record within a module. For example, opening a Rental Quote detail screen will show both the header information (such as customer, dates, and status) and the associated details (such as line items, pricing, and linked documents).
Navigating from Search Screen to Detail Screen
To open a detail screen, you must first start from a Search Screen. Learn more on Accessing a Search Screen
On any search screen, text that appears blue and underlined indicates a link to a detail screen. Clicking this link will open the Detail Screen for that record.
When you enter a detail screen, the screen journey is displayed in the top banner. This breadcrumb trail shows you where you are in the system and allows you to return to the previous screen at any time by clicking on the relevant step.

Breaking Down the Detail Screen
Each Detail Screen is organised into two main areas:
-
Detail Group Blocks
-
At the top area of this screen, you’ll find grouped sections containing the key information for the record.
-
These blocks display the generic information relevant to the module, such as Customer Details, General Details, or Financial Summaries.
-
The layout is designed to give you a clear overview of the record at a glance.
-

-
Tabbed Detail Tables
-
At the bottom of the screen, detailed information is organised into tabs for easy navigation.
-
The tabs display detailed information related to the record. This information is usually presented in tables or lists, and may also include links to other connected screens.
-
The information here are set up in the same way as Search Screens, allowing you to search, apply filters, and customise the view to suit your needs
-

This structure ensures that high‑level information is always visible at the top, while detailed data is neatly organised into tabs below.
Rich Text Notes Fields
Some fields on a detail screen are rich text fields. As well as plain text, they can hold formatting such as bold, coloured text and lists, and clickable hyperlinks, so you can keep a link to a service manual, a supplier's product page or a shared document right on the record.
You'll find rich text fields in places like these:
-
Notes on equipment and sales orders
-
Internal Notes and External Notes on rental quotes, rental contracts and invoices
-
Internal Notes on stock items
The Formatting Toolbar
Click a rich text field to edit it, just like any other field on the detail screen. A formatting toolbar appears underneath the text box, and Cancel and Save buttons appear in the heading of the group the field belongs to. The toolbar only shows while you're editing - once the field is saved, you see the formatted text.

From left to right, the toolbar buttons are:
-
Bold, Italic and Underline
-
Font size - choose a size from 8px to 28px
-
Text colour (the underlined A) - pick a colour for the selected text
-
Hyperlink (the chain icon) - turn the selected text into a clickable link
-
Numbered list and Bullet list
-
Pop-out (the box with an arrow, on the far right) - open the field in a larger editor. Click Ok to bring your changes back to the detail screen.
Some fields have extra buttons. For example, External Notes on rental quotes and rental contracts has a Standard Notes button (the book icon) that inserts one of your saved standard notes - see How to Set Up and Use Standard Notes.
In a narrow field, such as equipment Notes, the toolbar wraps onto two lines and the hyperlink button moves to the start of the second line. If the field feels cramped, use the Pop-out button to edit in a larger window.
Link Not Clickable? Check the URL in Notes
A rich text field doesn't turn web addresses into links automatically. If you type a URL in notes, or paste one in as plain text, it's saved as ordinary text: it isn't blue or underlined, and clicking it does nothing. Whether a pasted address comes across as a link depends on where you copied it from - copying a link out of a web page or an email usually keeps it as a link, but copying the bare address often doesn't.
The quick check: while you're editing, a working hyperlink is blue and underlined. If your URL is plain black text, that's why the link isn't clickable once you save - add the hyperlink yourself with the steps below.
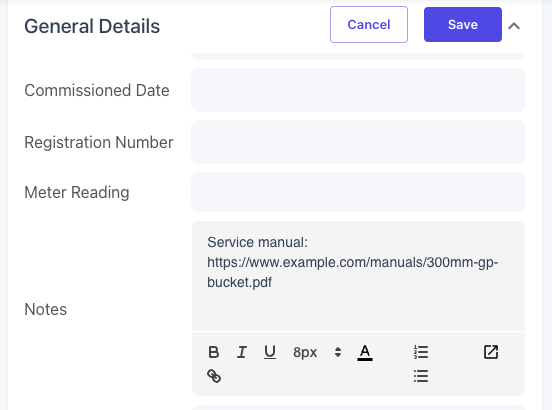
Inserting a Hyperlink
Step 1 - Open the field and select the text
Click the notes field to start editing. If the field is narrow, click Pop-out on the far right of the toolbar to open a larger editor - this gives the link box room to display in full. Then highlight the text you want to turn into a link. That can be the URL itself, or descriptive words such as "Service manual".
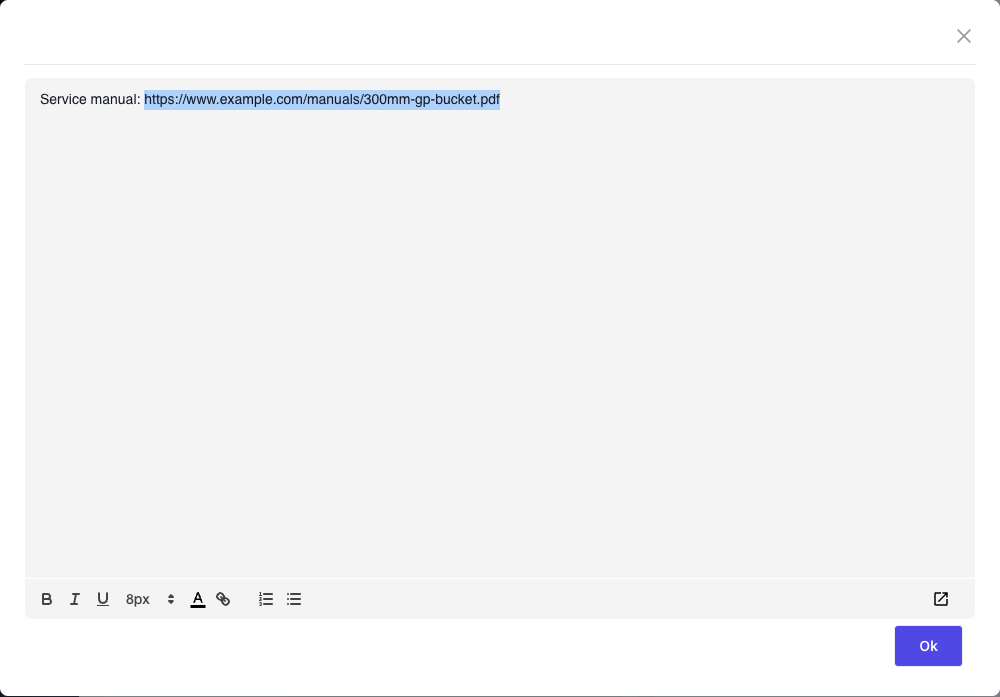
Step 2 - Click the hyperlink button and enter the address
Click the Hyperlink button (the chain icon) in the toolbar. An Enter link: box opens next to the text. If the text you selected is a web address, it's filled in for you; otherwise type or paste the full address. Click Save in the box, or press Enter.
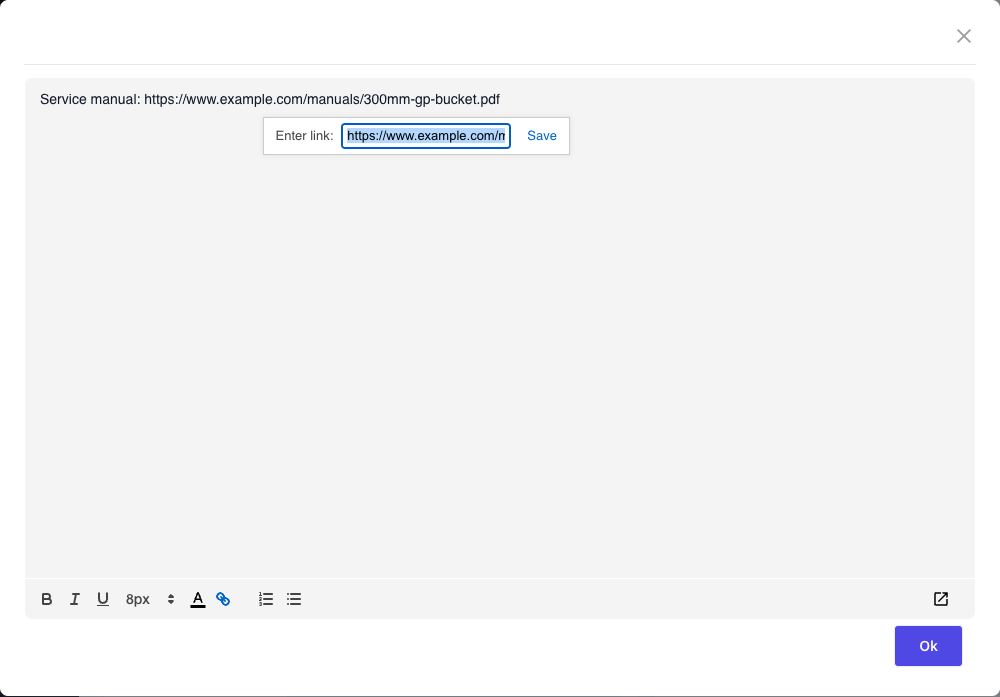
Always include the https:// at the start of the address. A link entered as just www.example.com is treated as a page inside Latner rather than an outside website, so it won't open the site you meant. If you select text and nothing happens when you click the hyperlink button, check that some text is actually highlighted - the button needs a selection to work.
Step 3 - Check the link
The linked text turns blue and underlined. If you're in the pop-out editor, click Ok to return to the detail screen.
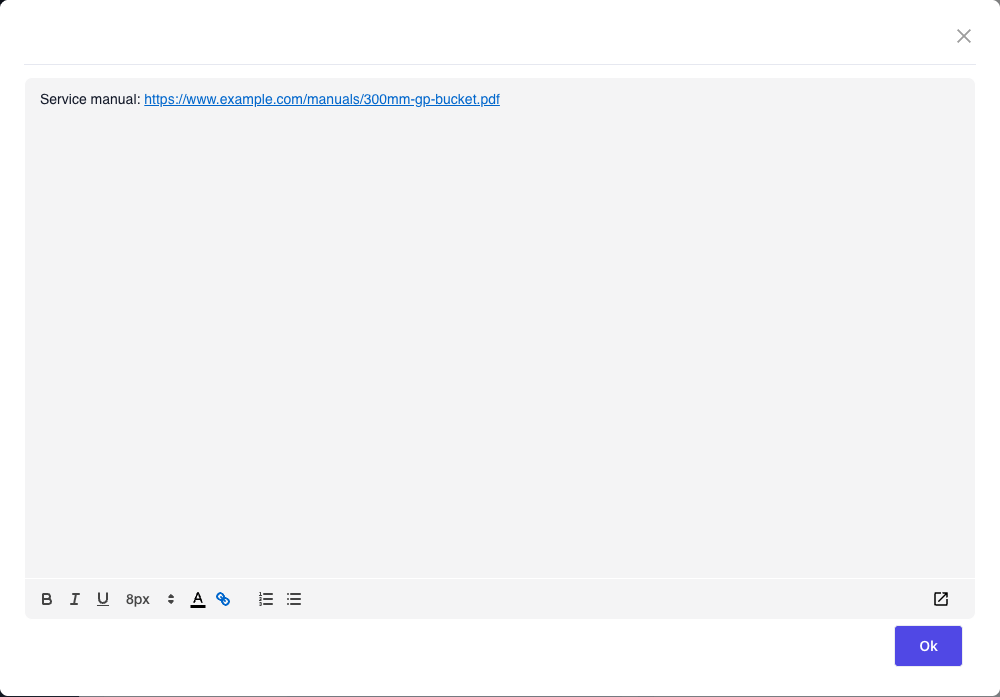
Step 4 - Save
Click Save in the heading of the group the field belongs to. Nothing is saved to the record until you do - clicking Cancel discards the change, link included.
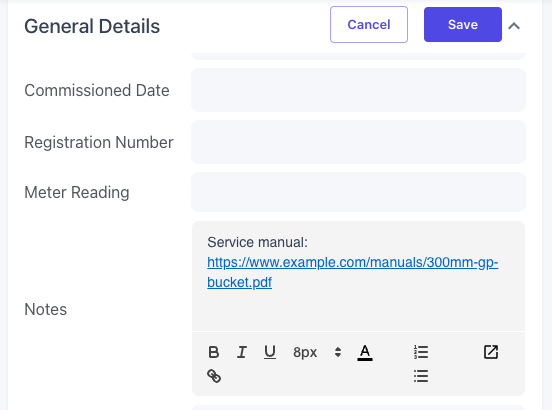
Once saved, the hyperlink is clickable and opens in a new browser tab.
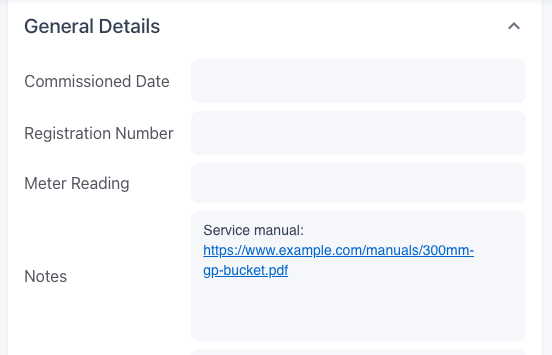
Clicking a link in a saved notes field also opens the field for editing, because clicking anywhere in a field does that. If you only wanted to visit the link, click Cancel when you come back.
Changing or Removing a Hyperlink
While you're editing the field, click anywhere in the linked text. A box shows the link's address with Edit and Remove options. Click Edit to change the address, then Save in the box; or click Remove to turn the link back into plain text. Then click Save in the group heading as usual.