
The CRM Map plots your customers, prospects and leads on a Google map so you can see your patch at a glance and plan a day of visits around where everyone actually is.
Overview
A list of accounts tells you who your customers are. It doesn't tell you that three of them are within five minutes of each other, or that the prospect you keep meaning to call is two streets from a site you're already visiting. The CRM Map answers that question instead.
-
Every marker is a customer site, not a customer, so a customer with four sites gets four markers.
-
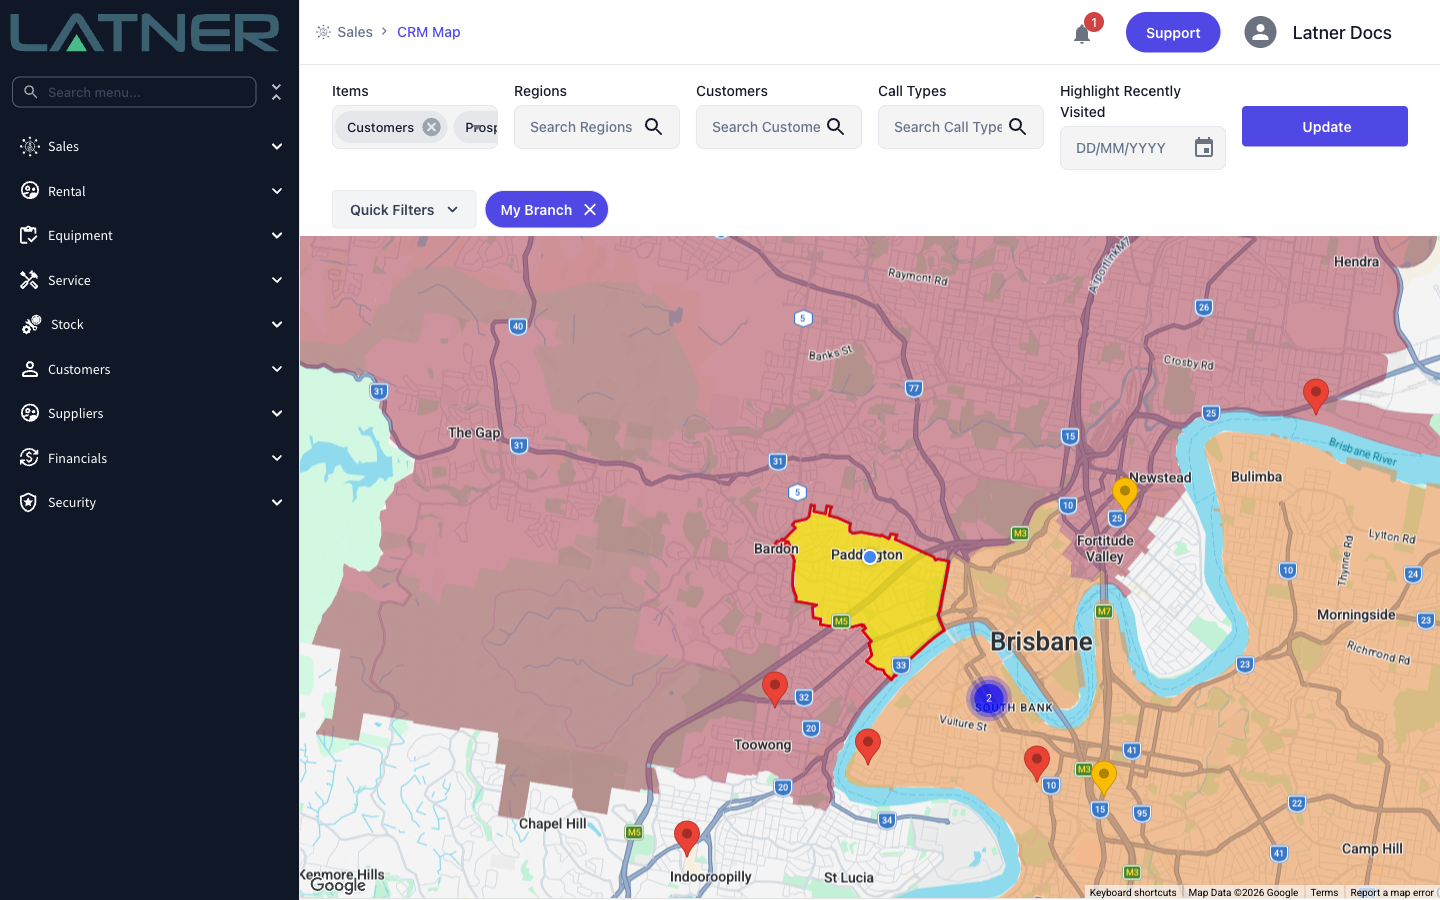
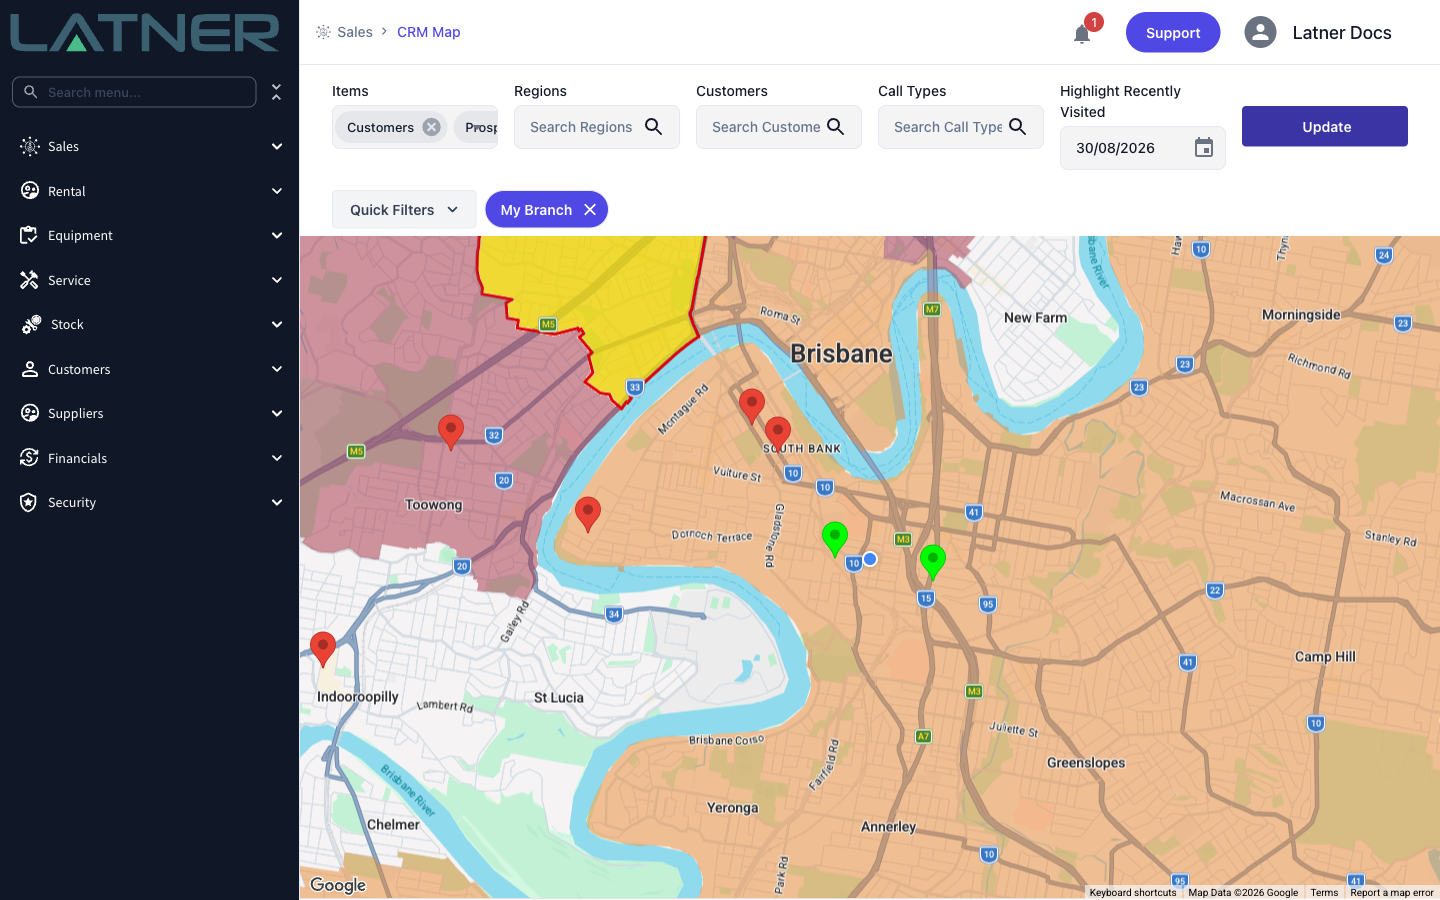
Markers are colour coded: red for customers, amber for prospects, pink for leads, and green for anything visited since a date you choose.
-
Your sales regions are shaded over the map in their own colours, using the postcodes assigned to each region.
-
Clicking a marker opens a card with the account's status, contacts, other sites and recent activities, without leaving the map.
-
From that card you can raise an opportunity, start a rental quote or log an activity, with the account and site already filled in.
-
The map only plots addresses that have coordinates, which are captured when an address is chosen from the address search.
Before You Begin
The CRM Map is a separately enabled feature, and it draws on data from three different screens.
|
Requirement |
Where to Find It |
|---|---|
|
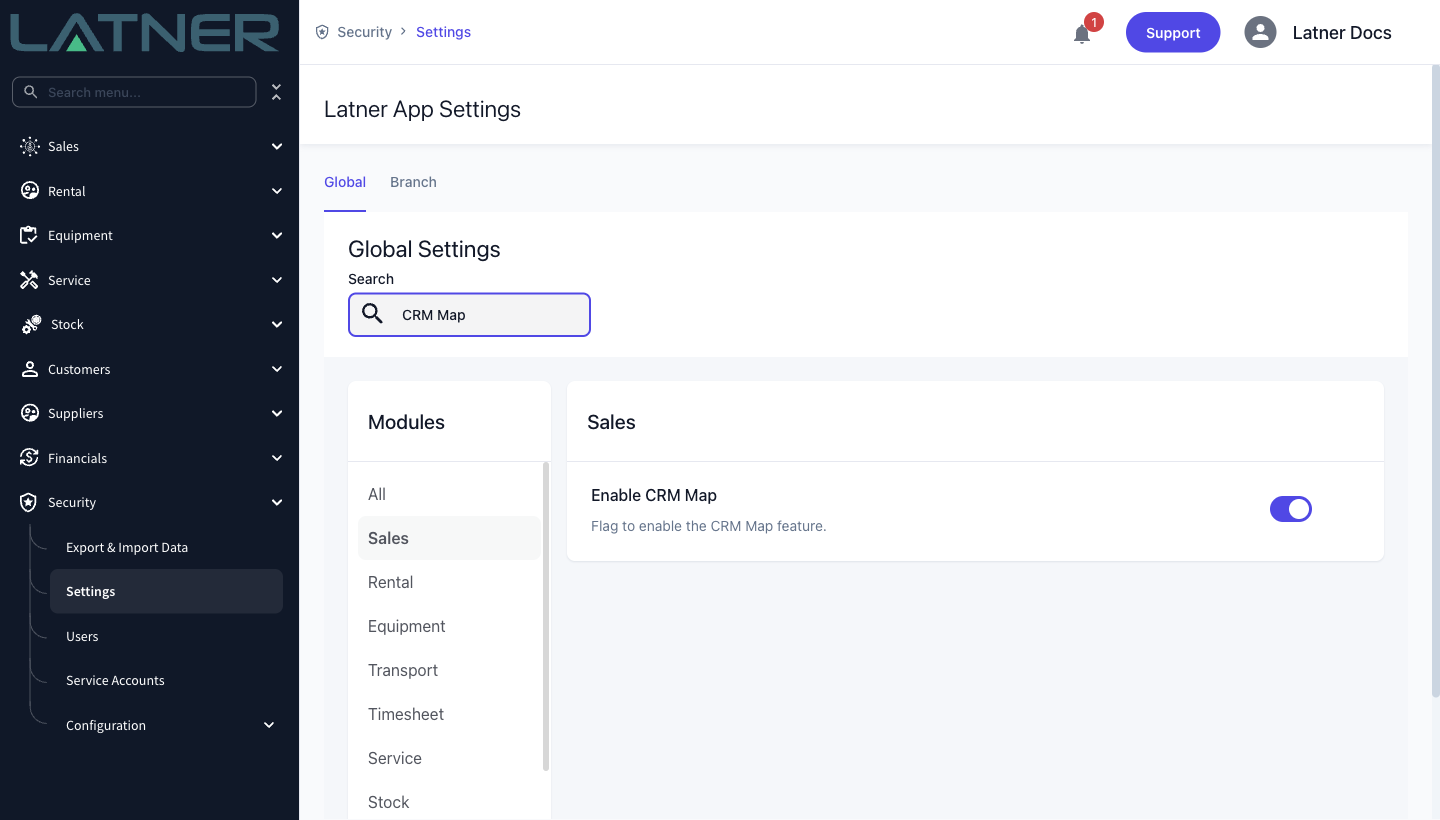
Enable CRM Map turned on |
Security › Settings › Sales. Only Latner staff can change this one, so contact Latner support if the CRM Map menu item isn't there. |
|
CRM permission |
Security › Configuration › Permission Groups › Sales. This puts CRM Map in the Sales menu and lets you see lead markers. |
|
Customer Sites and Customers permissions |
Security › Configuration › Permission Groups › Customers. Without these you get an empty map, because the markers are customer sites. |
|
Site addresses with coordinates |
Customers › Customers Sites. Pick the address from the address search rather than typing it by hand. |
|
Regions with postcodes and a sales rep |
Sales › Configuration › Regions. Optional, but without them the map has no shading and the Regions filter is empty. |
Your browser will ask to share your location the first time you open the map. Allowing it puts a small blue dot on your current position and centres the map there, which is what makes the map useful on the road. Declining it doesn't break anything - the map simply centres on your branch address instead.
Using the CRM Map
Step 1 - Open the CRM Map
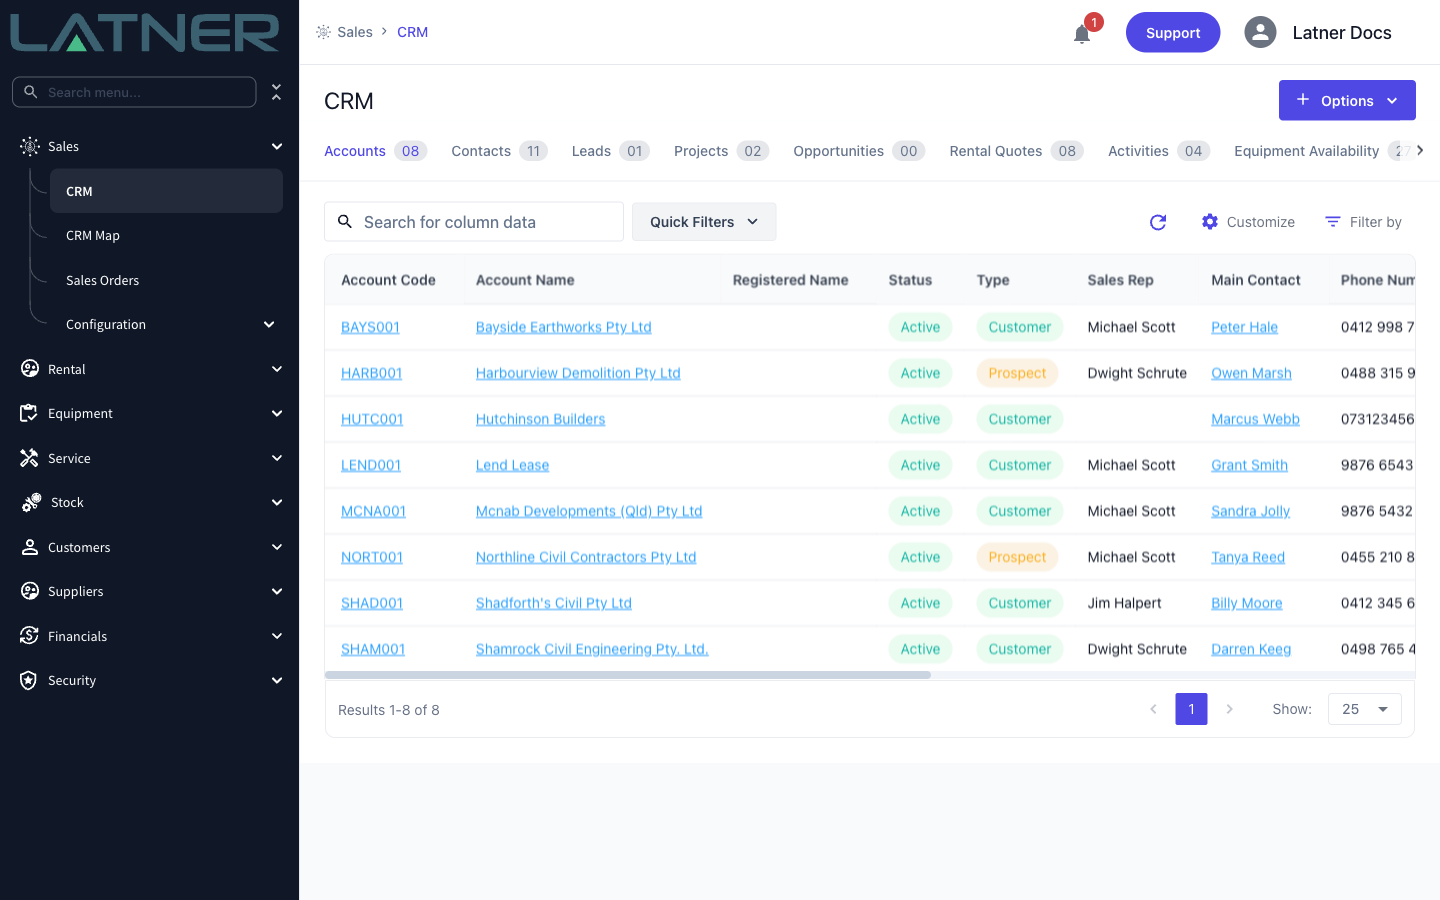
Go to Sales › CRM Map. The map opens centred on your location, or on your branch address if location sharing is off.
Step 2 - Read the markers and the shading
Markers are coloured by what the record is:
-
Red - a site belonging to an account whose Type is Customer.
-
Amber - a site belonging to an account whose Type is Prospect.
-
Pink - a lead.
-
Green - visited on or after the Highlight Recently Visited date, which overrides the other three colours.
The shaded areas behind the markers are your sales regions, drawn from the postcodes assigned to each region and filled with that region's colour. Where two regions claim the same postcode, that postcode is shaded yellow with a red outline, so overlaps are easy to spot and fix. Markers that sit close together collapse into a numbered blue circle; zoom in and they separate.
Step 3 - Set your quick filters
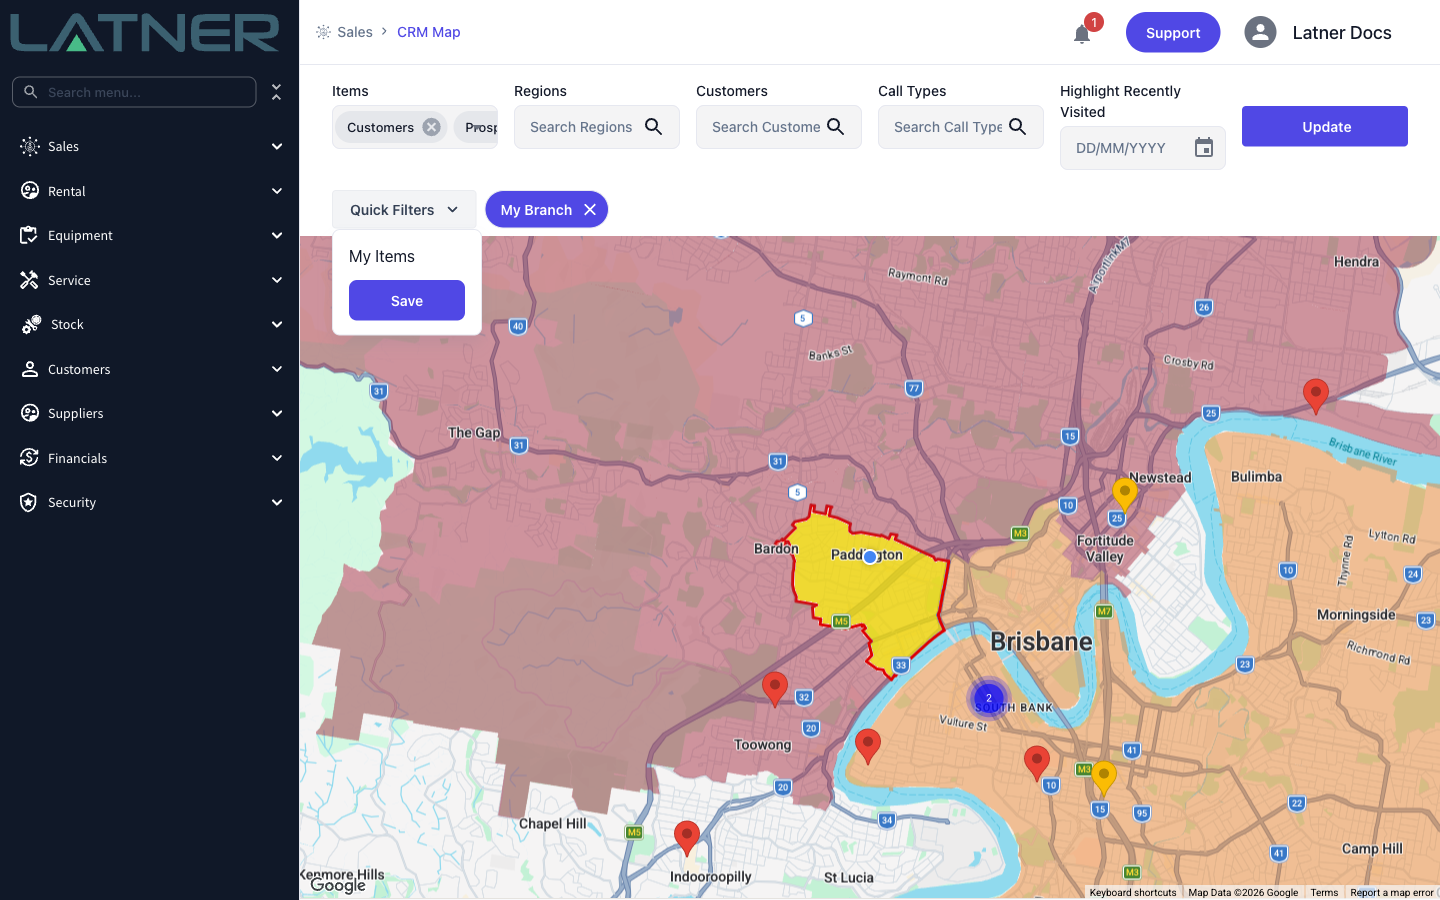
Two quick filters sit under the filter bar and apply straight away:
-
My Branch - limits the map to sites in your branch. It's on by default.
-
My Items - limits the map to accounts where you are the sales rep.
Click a chip to turn that filter off, or open Quick Filters to turn one on. Clicking Save inside the Quick Filters panel remembers the combination for you, so the map opens that way next time.
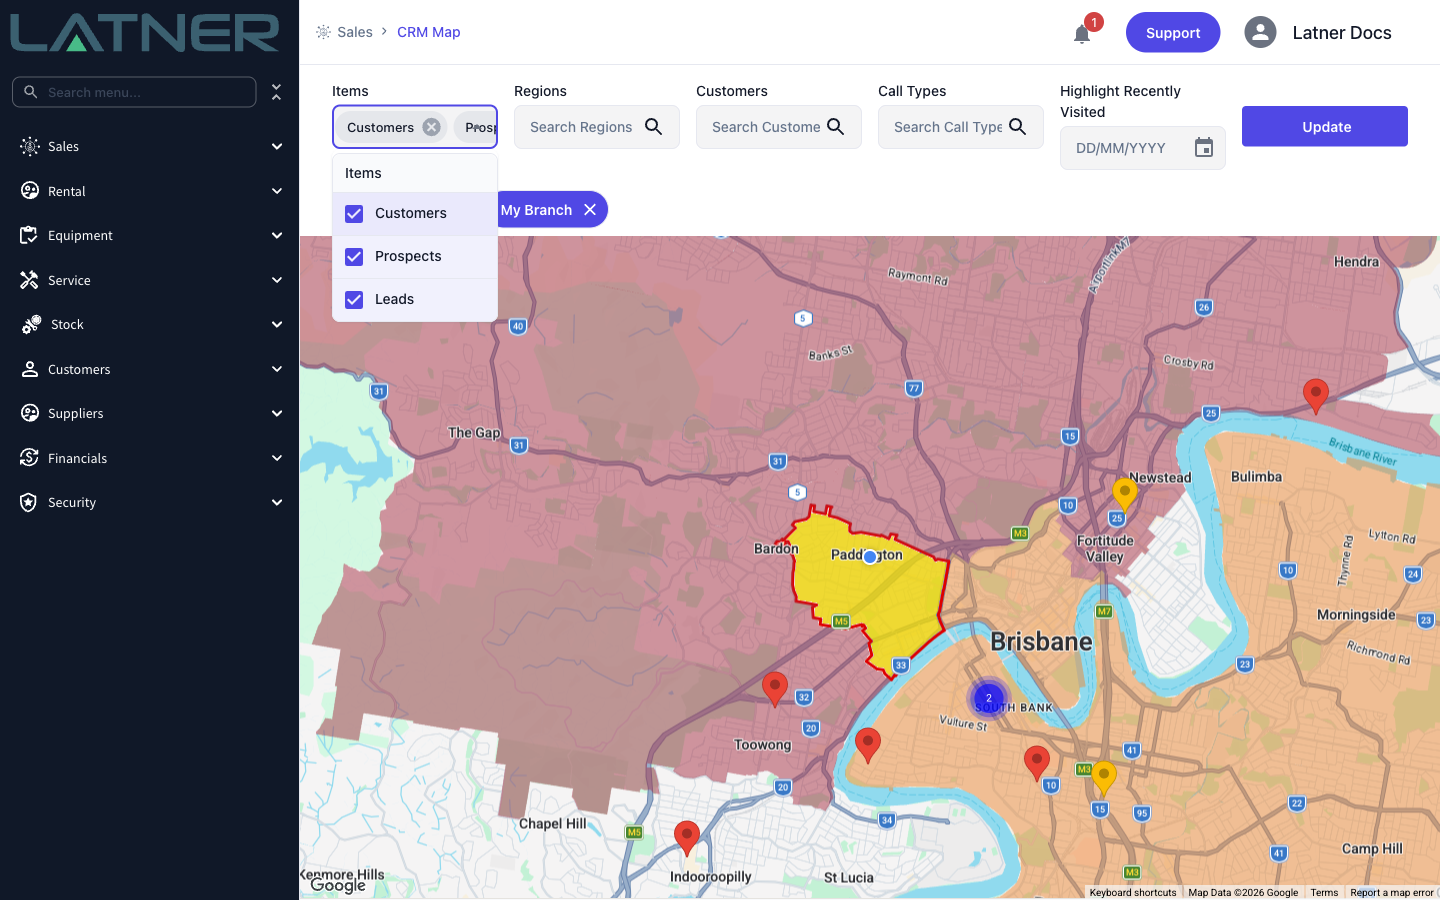
Step 4 - Choose which items to plot
Items controls which of the three record types appear. All three are ticked when the map opens. Untick Customers and Prospects to leave just your leads, or untick Leads to concentrate on the accounts you already have.
Step 5 - Filter to a region
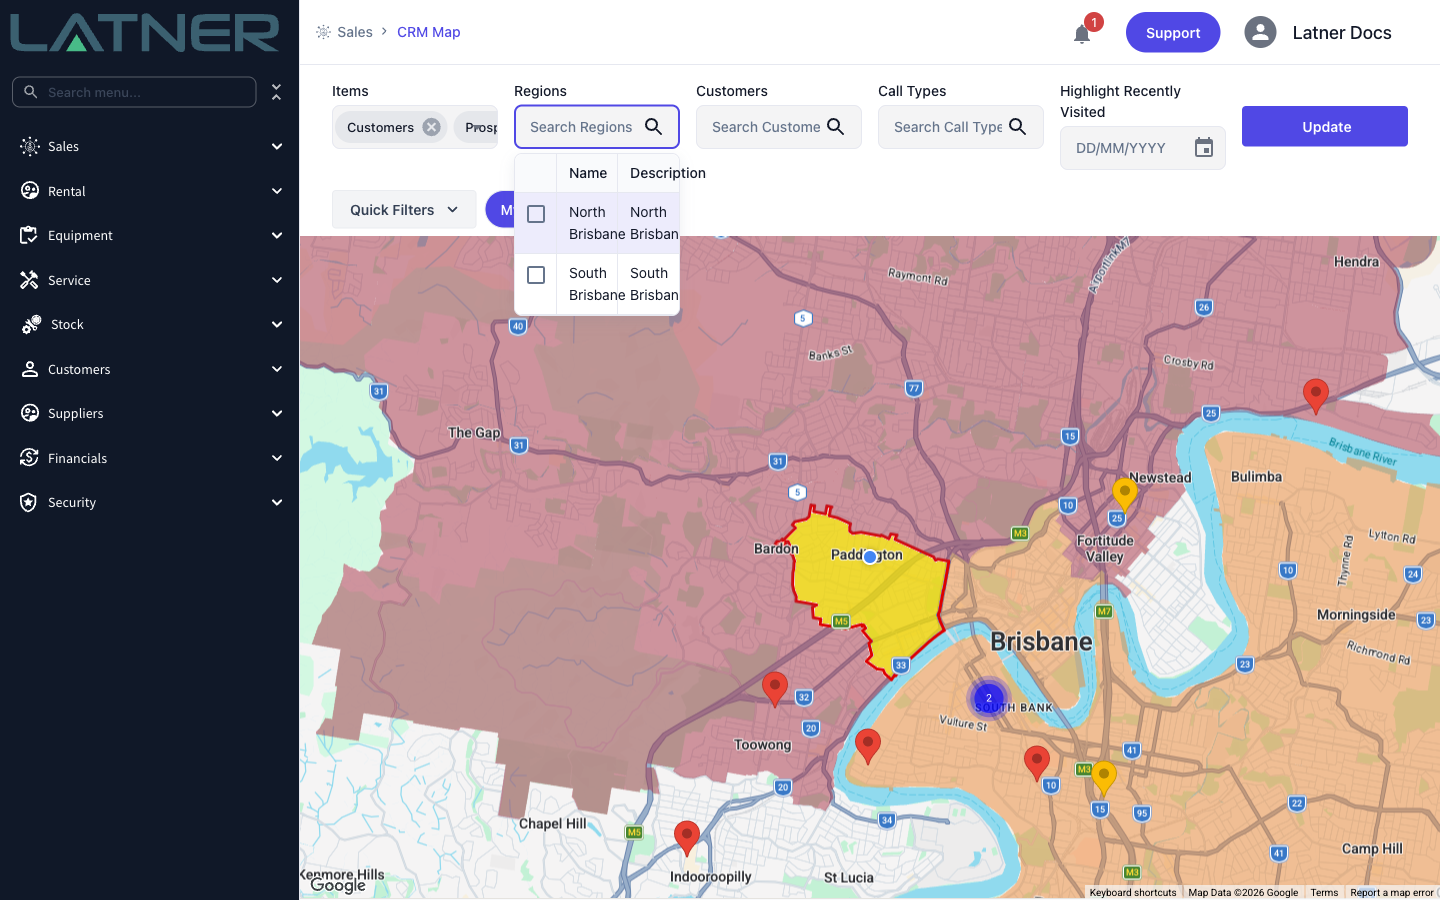
Regions lists the regions your sales rep record is assigned to. Tick one or more and the map only plots sites and leads whose postcode belongs to those regions.
The region filter matches on postcode, not on the shaded area you can see. A site sitting just outside a shaded boundary is still included if its address postcode is on the region's list, and a site inside the shading is excluded if its address has no postcode.
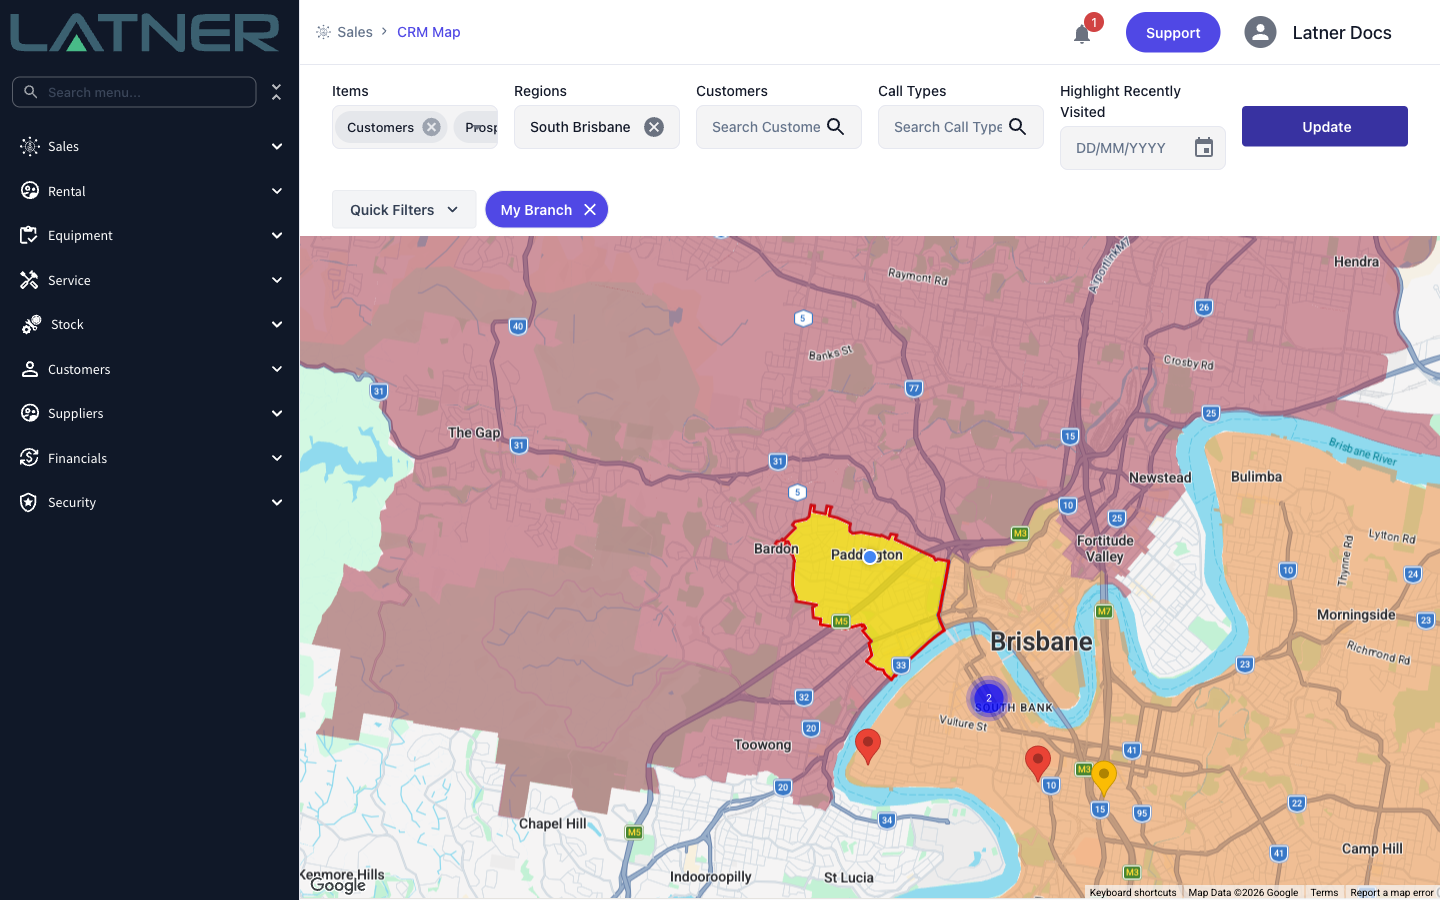
Step 6 - Click Update to apply the filter bar
Unlike the quick filters, the fields in the filter bar do nothing until you click Update. This is deliberate - it lets you set several filters at once and reload the map a single time.
Step 7 - Narrow by customer or call type
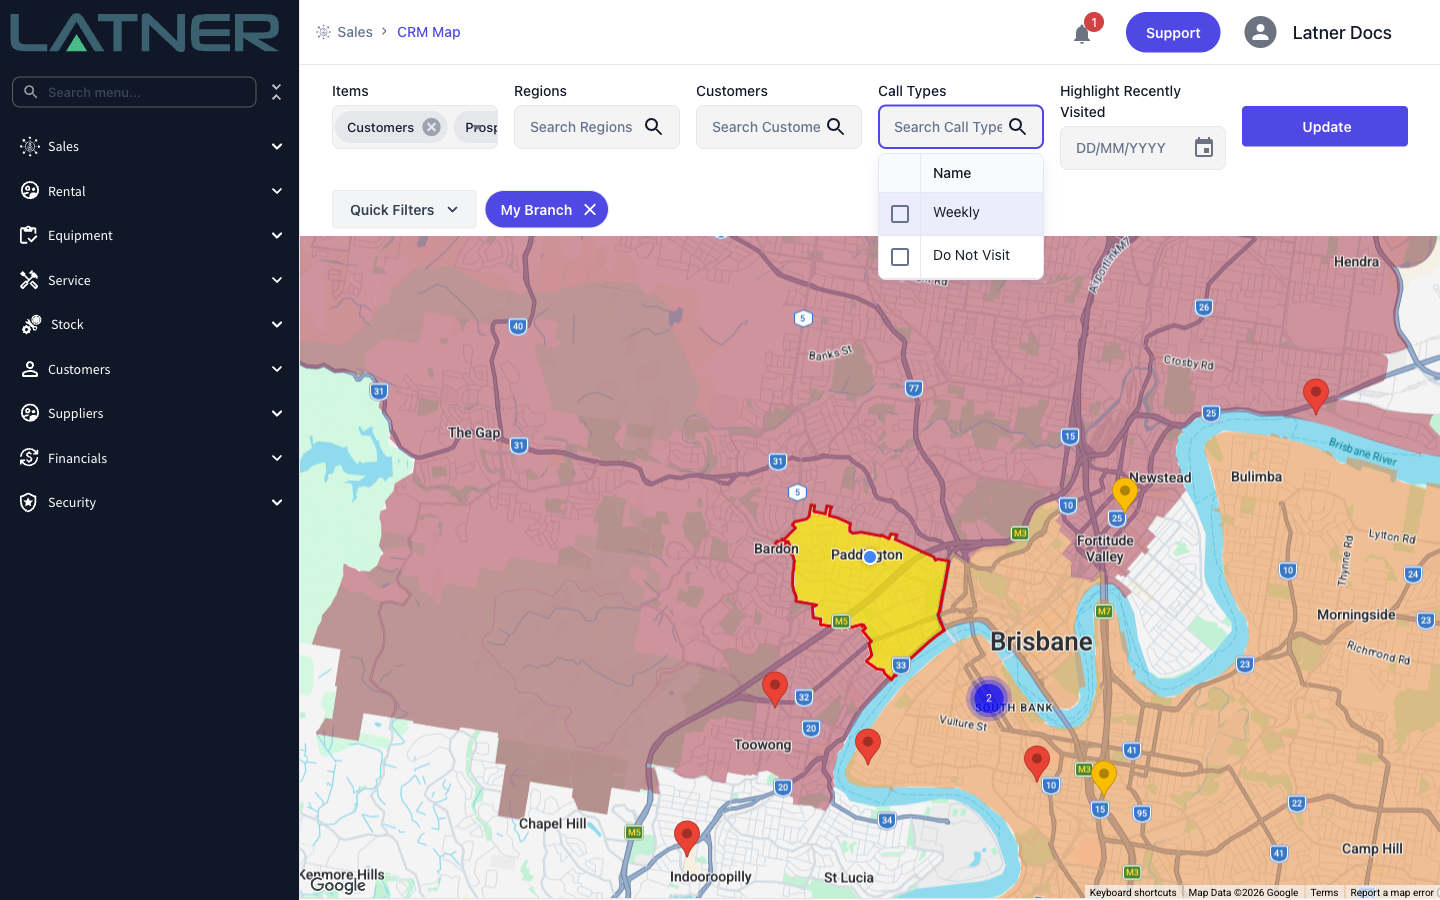
Two more filters sit alongside Regions:
-
Customers - plot only the sites of the accounts you pick. Useful when a single customer has sites scattered across the city.
-
Call Types - plot only sites and leads with the call types you pick, for example everyone on a weekly call cycle.
The Call Types list only offers call types with a status of Active. Picking one also overrides the usual Show on Map rule described in What the map leaves out below, so a call type that is normally hidden will appear once you select it explicitly.
Step 8 - Highlight who you've already seen
Put a date in Highlight Recently Visited and click Update. Any site or lead whose Last Contacted Date falls on or after that date turns green. Set it to the start of the month to see your coverage for the month, or to today's date to see who you've already called on.
Last Contacted Date is maintained for you: completing an activity against an account rolls the date forward on the account, the site and the contact.
Step 9 - Open a customer or prospect from a marker
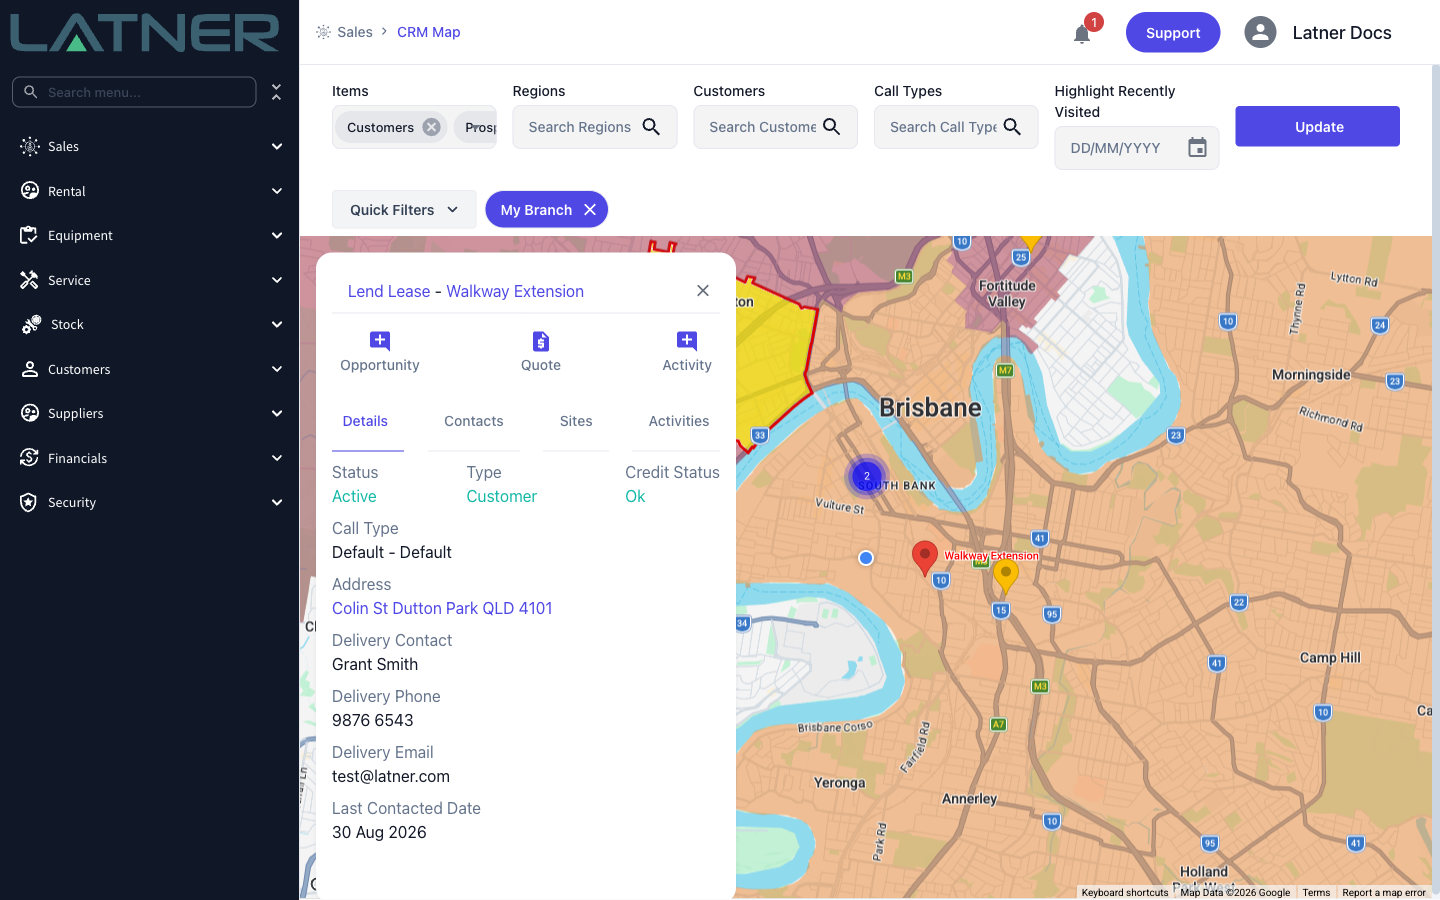
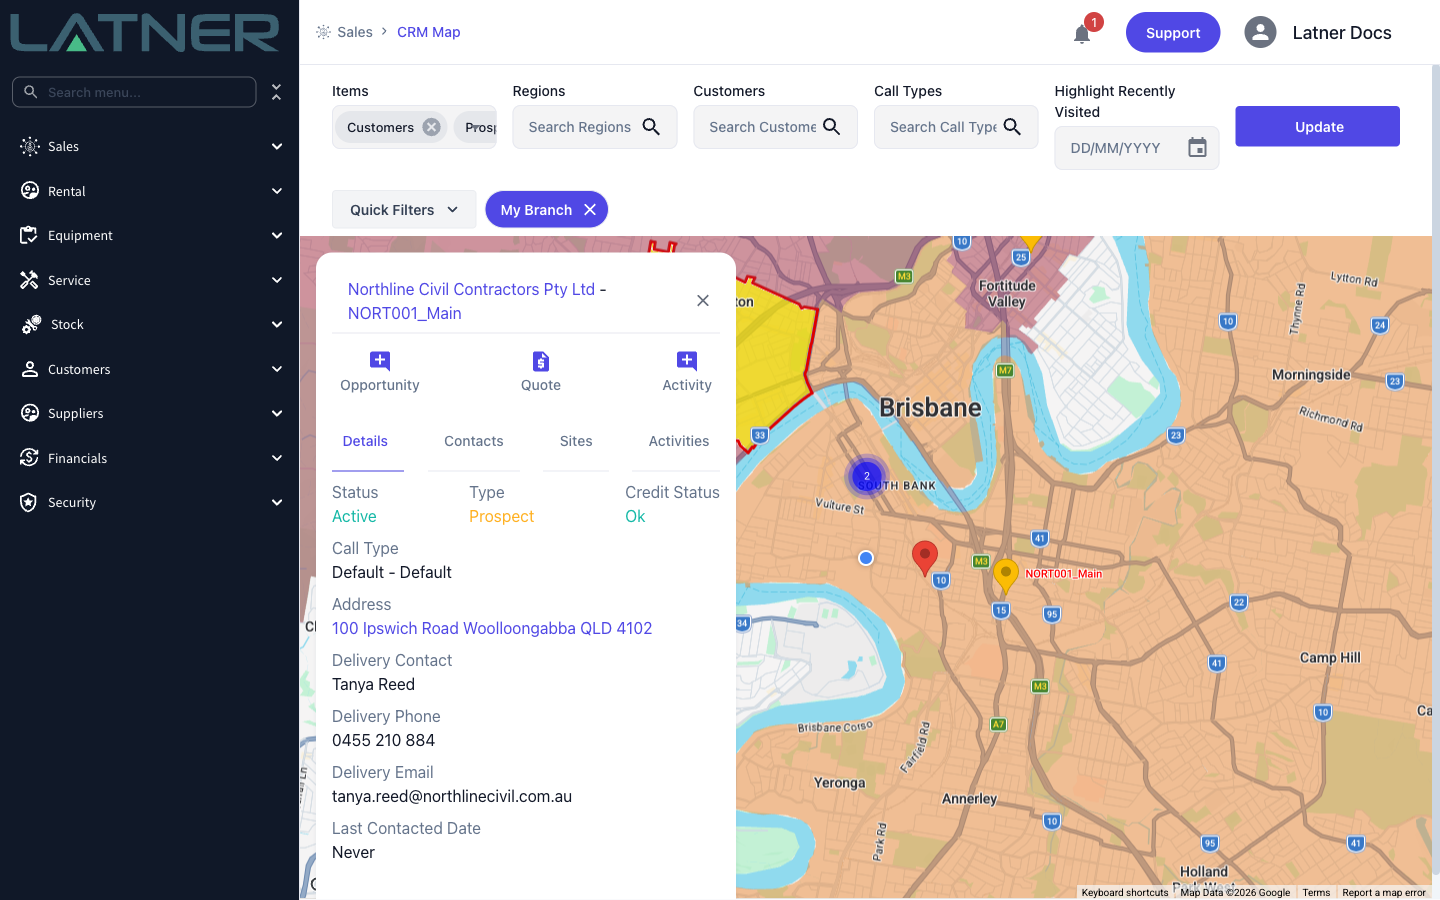
Click any marker to open its card in the top left of the map. The heading shows the account name and the site name, and both are links that open the CRM Account and the Customer Site in a new tab.
The Details tab gives you what you need before knocking on the door:
-
Status - the account's status, Active, Inactive or Pending Approval.
-
Type - Customer or Prospect, the same value that decides the marker colour.
-
Credit Status - worth a glance before you promise anything.
-
Call Type - the site's call cycle, name and description.
-
Address - a link that opens the site in Google Maps for directions.
-
Delivery Contact, Delivery Phone and Delivery Email - the site contact.
-
Last Contacted Date - or Never if nobody has logged a completed activity yet.
Step 10 - Check contacts, sites and history
Three more tabs sit next to Details:
-
Contacts - the active contacts for this site, each with their phone, email and own last contacted date.
-
Sites - the account's active sites, so you can see what else is nearby before you drive off.
-
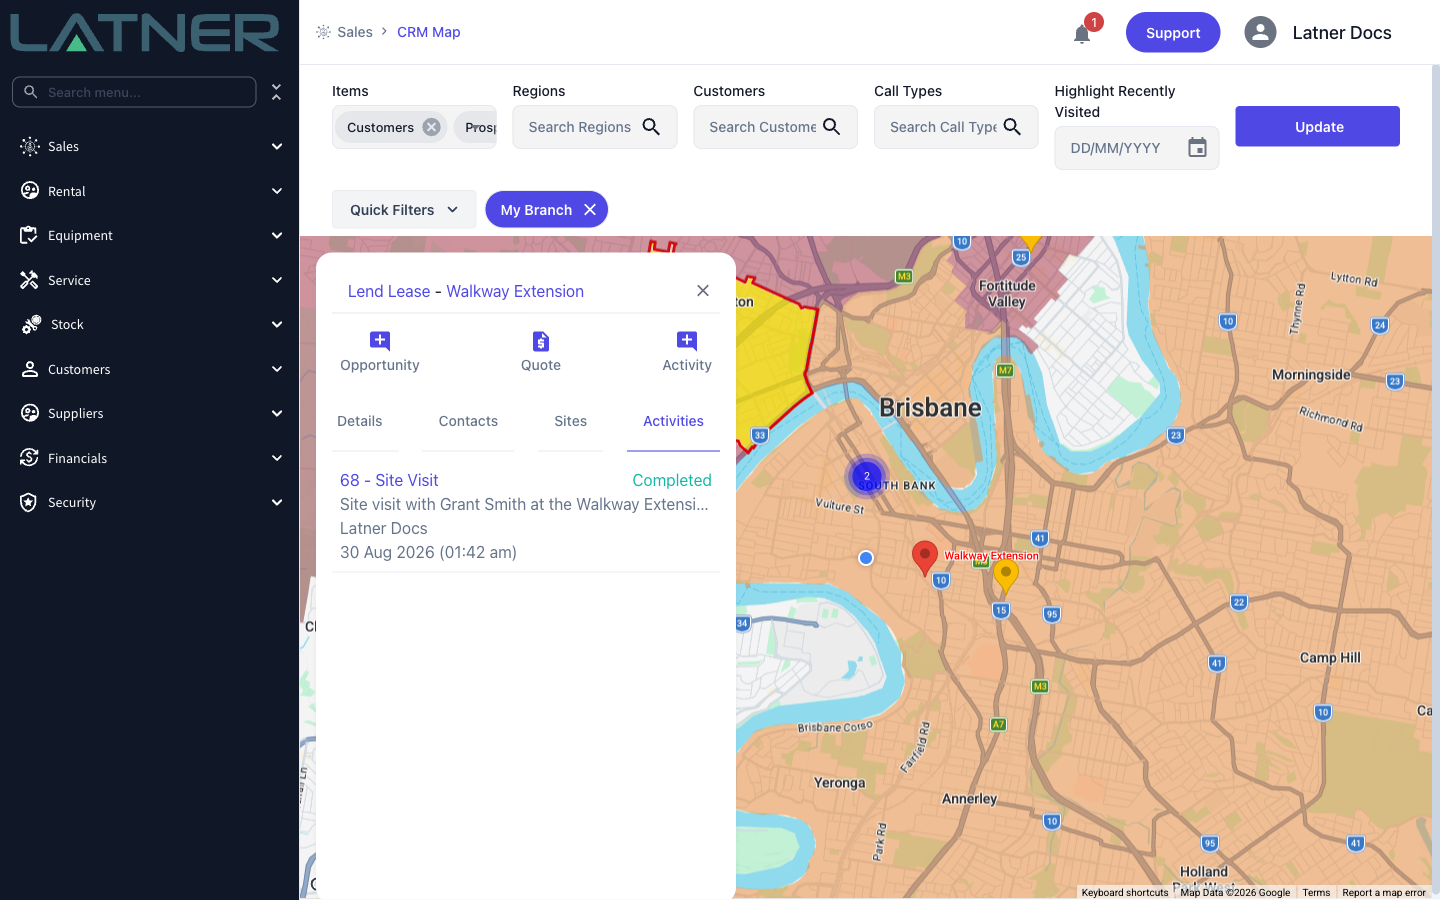
Activities - the ten most recent activities for this account and site, newest first.
Step 11 - Raise an opportunity, quote or activity
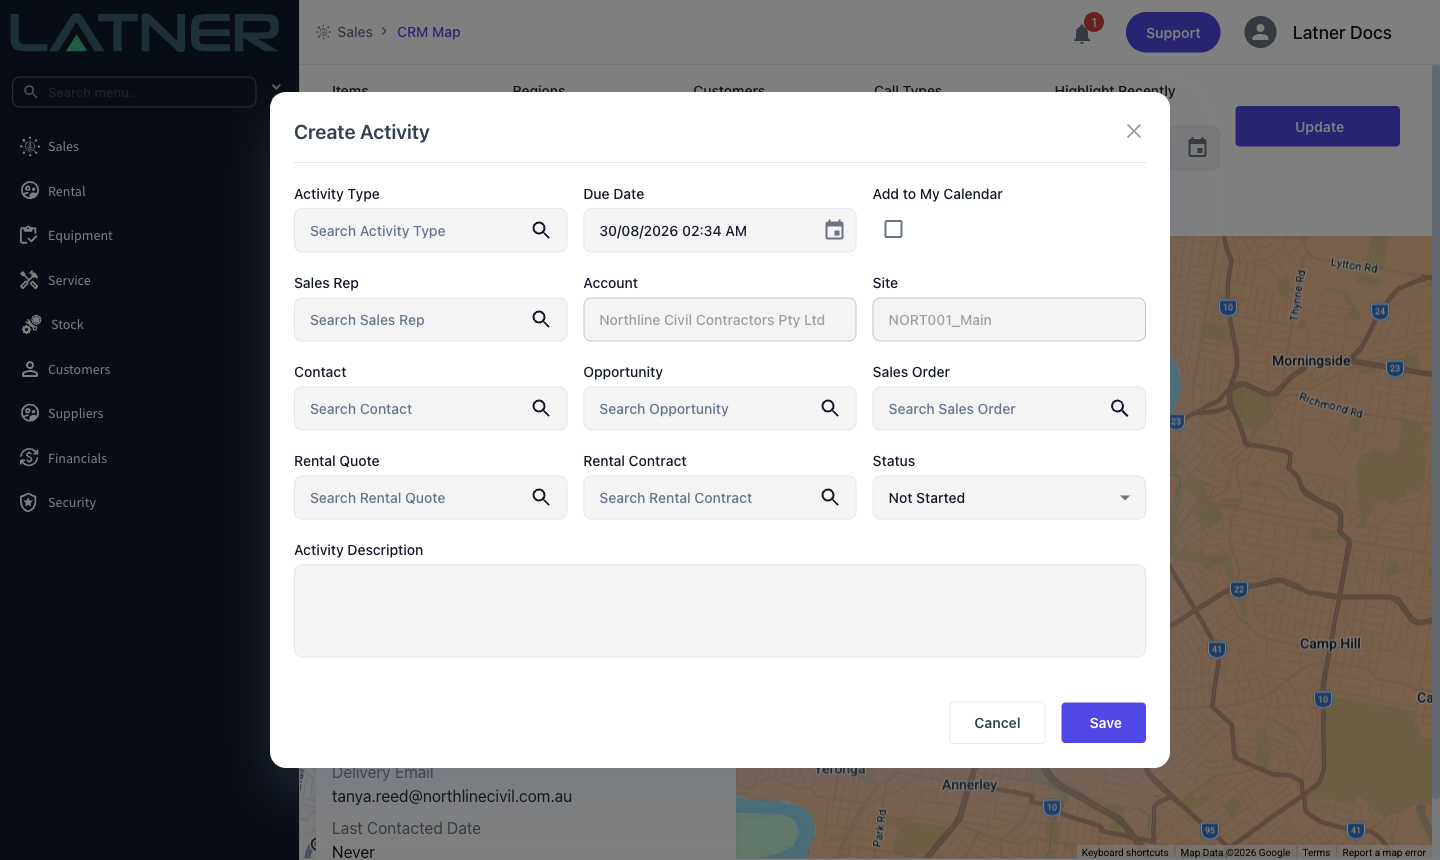
Three buttons sit above the tabs, and each opens the standard dialog with the account and site already filled in and locked:
-
Opportunity - create a deal against the account.
-
Quote - start a rental quote for this customer and site.
-
Activity - log a call, a site visit or a follow up.
Saving an activity with a status of Completed refreshes the card and updates the site's Last Contacted Date immediately, so the marker turns green as soon as you apply a Highlight Recently Visited date that covers today.
Step 12 - Open a lead from a marker
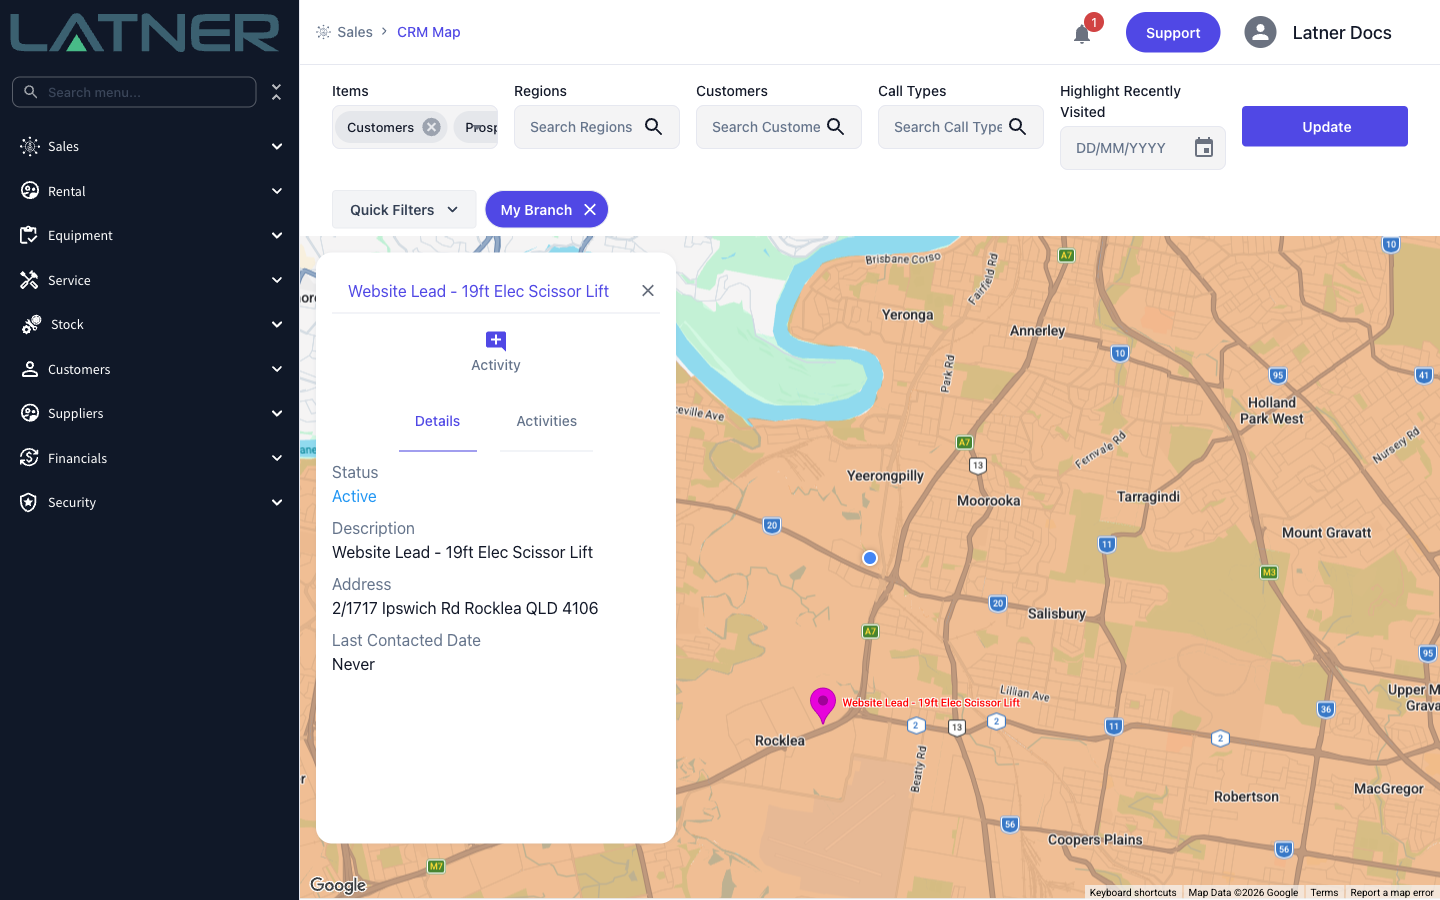
Pink markers are leads, and their card is a simpler one. It shows the lead's Status, Description, Address and Last Contacted Date, with Details and Activities tabs and a single Activity button. There's no quote or opportunity option, because a lead has no account to raise them against yet.
What the Map Leaves Out
The map is deliberately selective. A record is only plotted when all of the following are true:
-
Its address has coordinates. Coordinates are captured when the address is chosen from the address search - an address typed in by hand has none, and a record with no coordinates is never plotted.
-
It is inside the area currently on screen. Panning or zooming out loads the records for the wider area.
-
For a site: the site's status is Active and its account's status is Active or Pending Approval.
-
For a lead: the lead's status is Active.
-
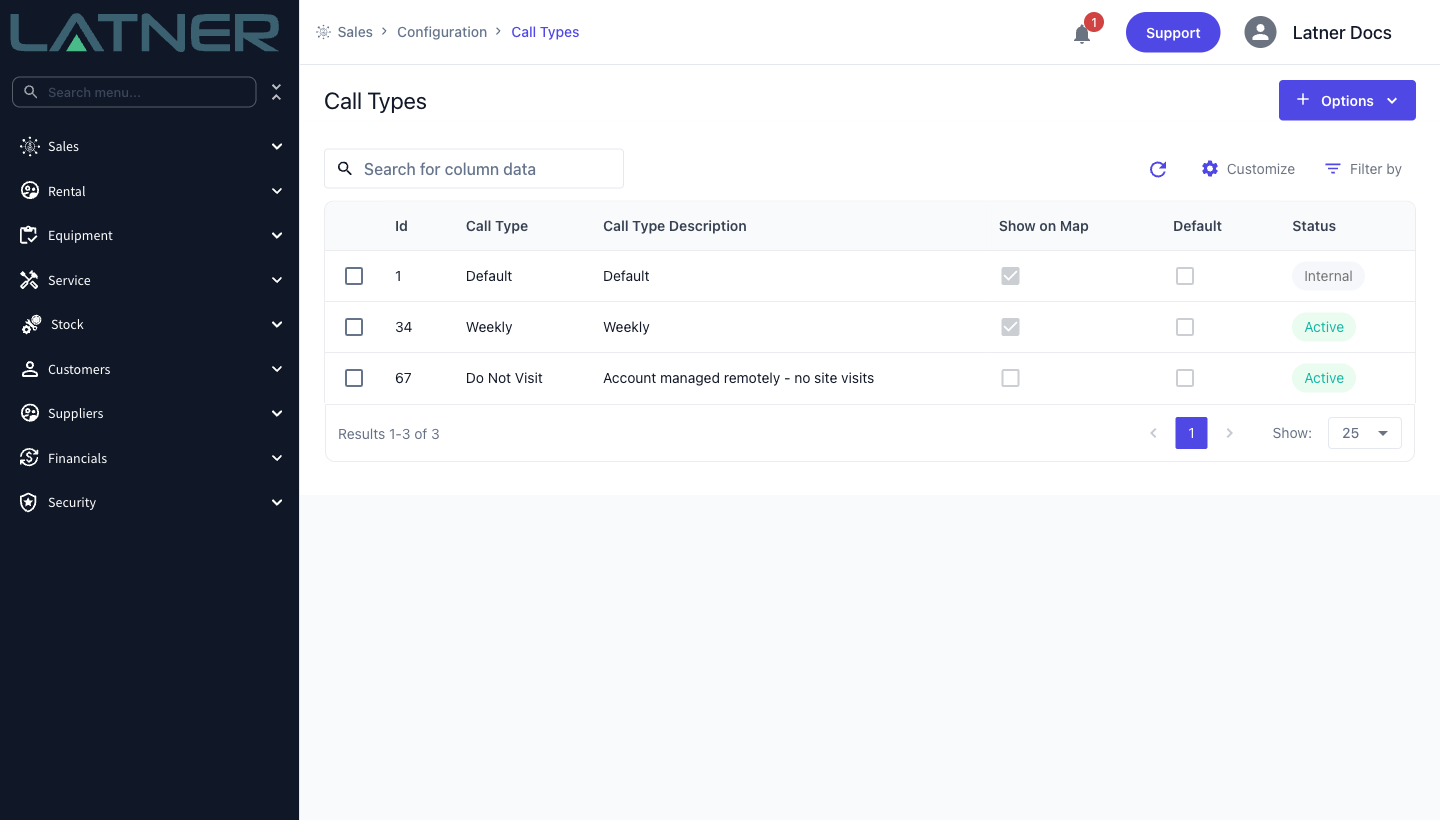
Its call type has Show on Map ticked, unless you have picked that call type in the Call Types filter.
Show on Map is set per call type at Sales › Configuration › Call Types. Unticking it is how you keep whole categories of account off the map - head office billing addresses, or accounts that are managed remotely and never get visited.
Coordinates are stored against the address, not the customer site, so editing the text of an address is not enough to put a missing marker back. Re-pick the address from the address search on the customer site and let it resolve to a suggestion. If a whole batch of imported addresses is missing coordinates, contact Latner support rather than re-entering them one by one.
FAQs
Watch the Demo
Prefer to watch it? Step through the same flow here.