
Projects let you group everything you rent, quote, buy and invoice for one job site under a single record, so you can see what a job is worth to you without adding up contracts by hand.
Overview
A big job is rarely one customer and one contract. The head contractor signs the deal, three sub-contractors hire off you separately, and the paperwork ends up spread across a dozen records with nothing joining them. A Project is that missing join.
-
A Project belongs to one branch and has one Main Contractor, plus as many Sub-Contractors as you need.
-
Opportunities, rental quotes, rental contracts, sales orders, customer invoices, purchase order lines and supplier invoice lines can all be attached to a Project.
-
Latner adds up what is attached and shows you the running Opportunity, Quoted, Invoiced, Purchase Order and Supplier Invoiced value against your estimate.
-
Each record belongs to at most one Project, so nothing is double counted.
-
Projects live on the Projects tab of the CRM screen, alongside Accounts, Leads and Opportunities.
Before You Begin
Check that you have the access and settings below.
|
Requirement |
Where to Find It |
|---|---|
|
CRM permission |
Security › Configuration › Permission Groups › Sales › Screen. Lets you open the CRM screen and see the Projects tab. You only see Projects for branches this permission covers. |
|
Create CRM Project permission |
Security › Configuration › Permission Groups › Sales › Option. Needed to create a Project and to change any of its details, including completing or cancelling it. |
|
Show Link to Project Field When Creating ... settings |
Security › Settings › Sales. Six separate toggles, one each for Rental Quotes, Rental Contracts, Sales Orders, Opportunities, Purchase Order Details and Supplier Invoice Details. Optional, but they let people pick the Project while they create the record. |
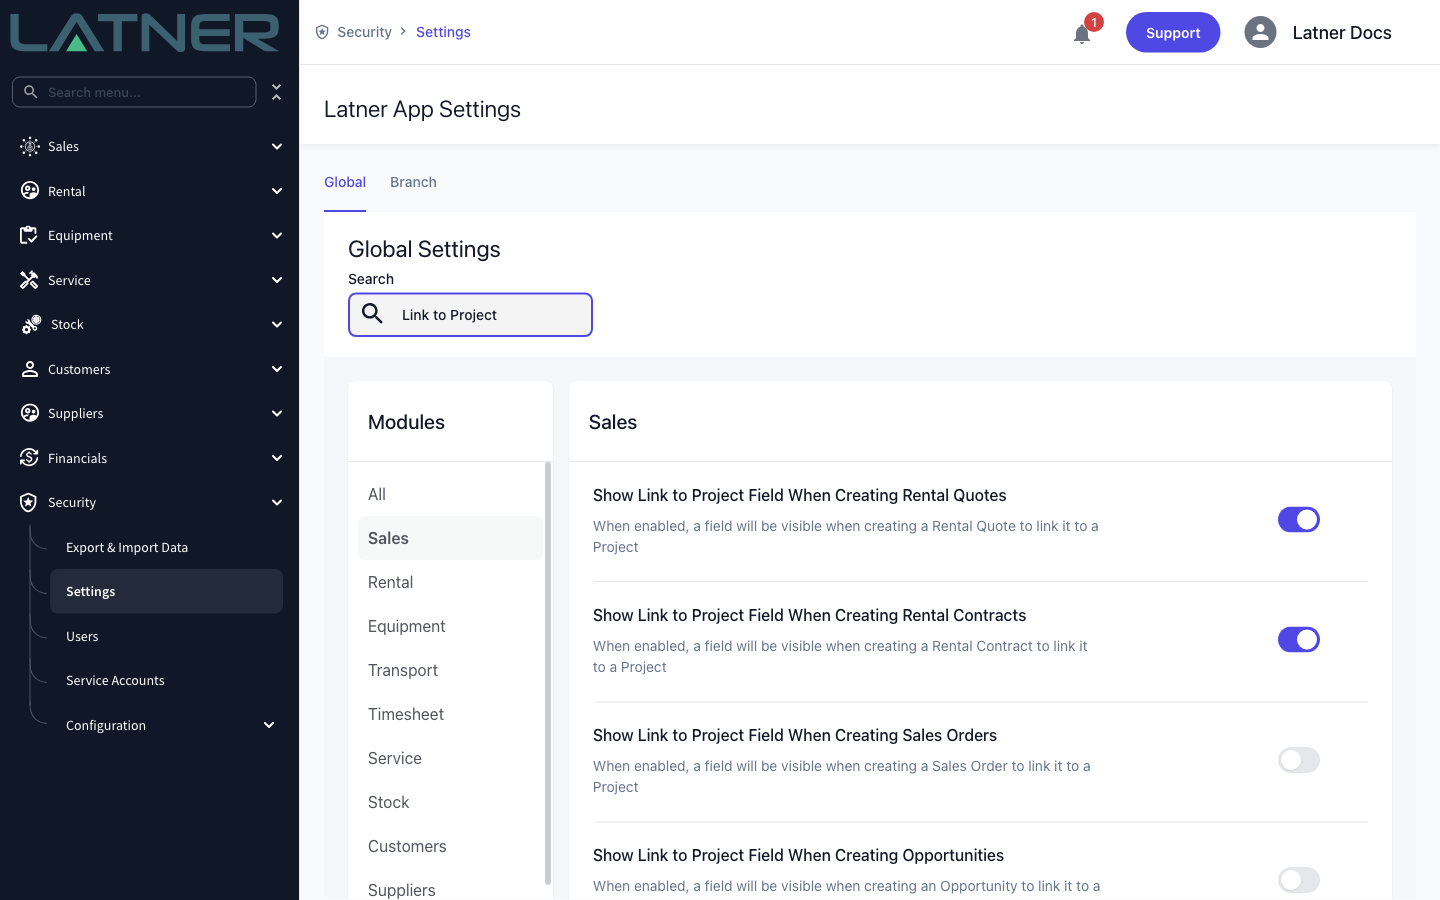
You don't need any of these settings on to use Projects. With them all off you can still attach records to a Project from the Project itself, using the Options menu covered below. The settings only add a Linked to Project field to the create form, which saves a step later.
Creating a Project
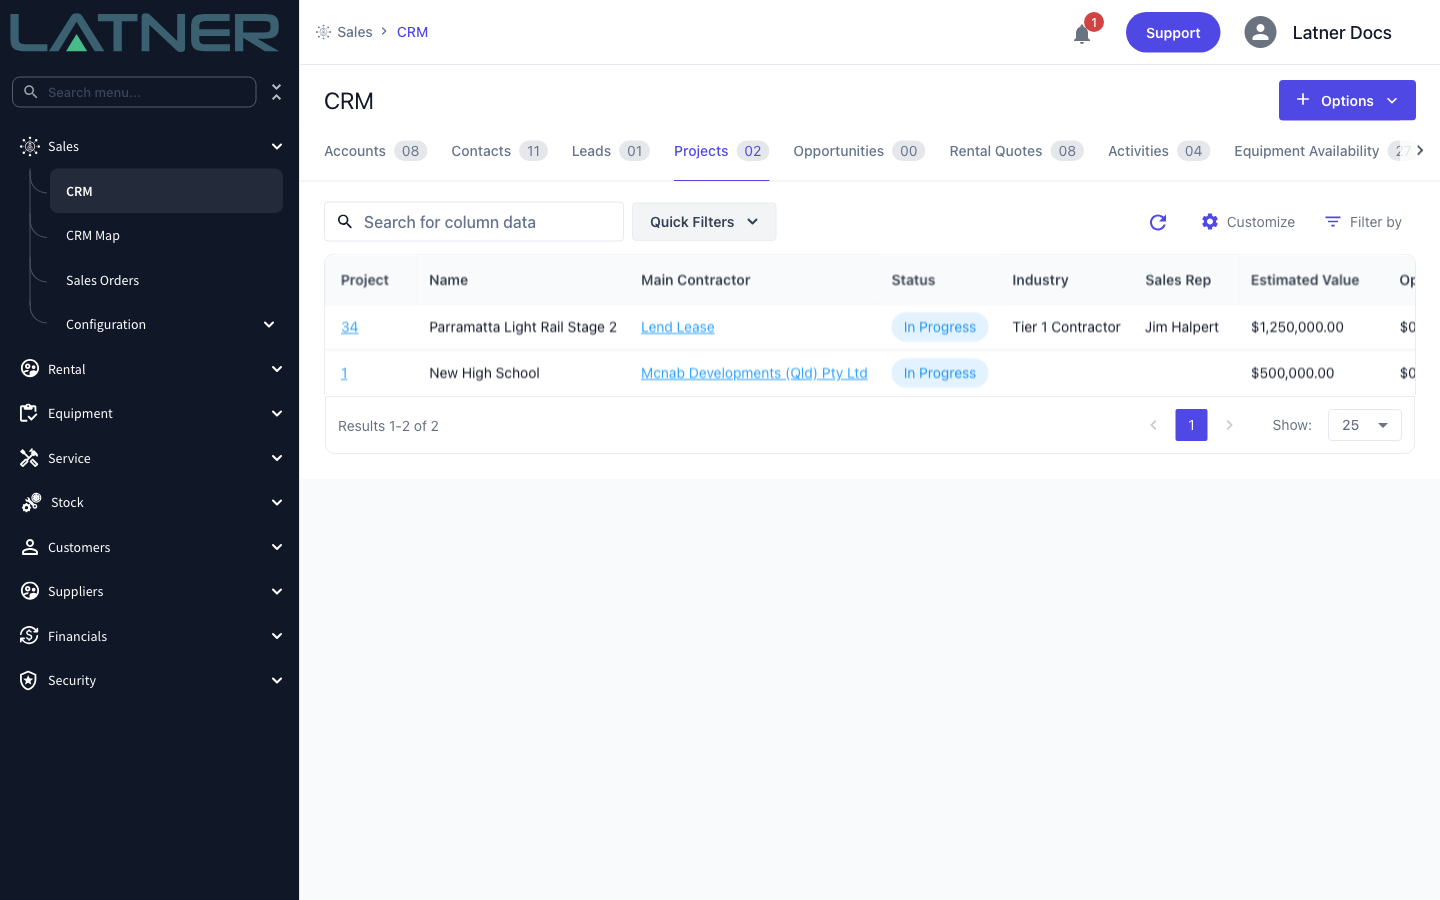
Step 1 - Open the Projects tab
Go to Sales › CRM and select the Projects tab. The list shows every Project you can see, with its Main Contractor, status and the running values Latner has calculated. Use Quick Filters for My Branch and My Projects to narrow it down.
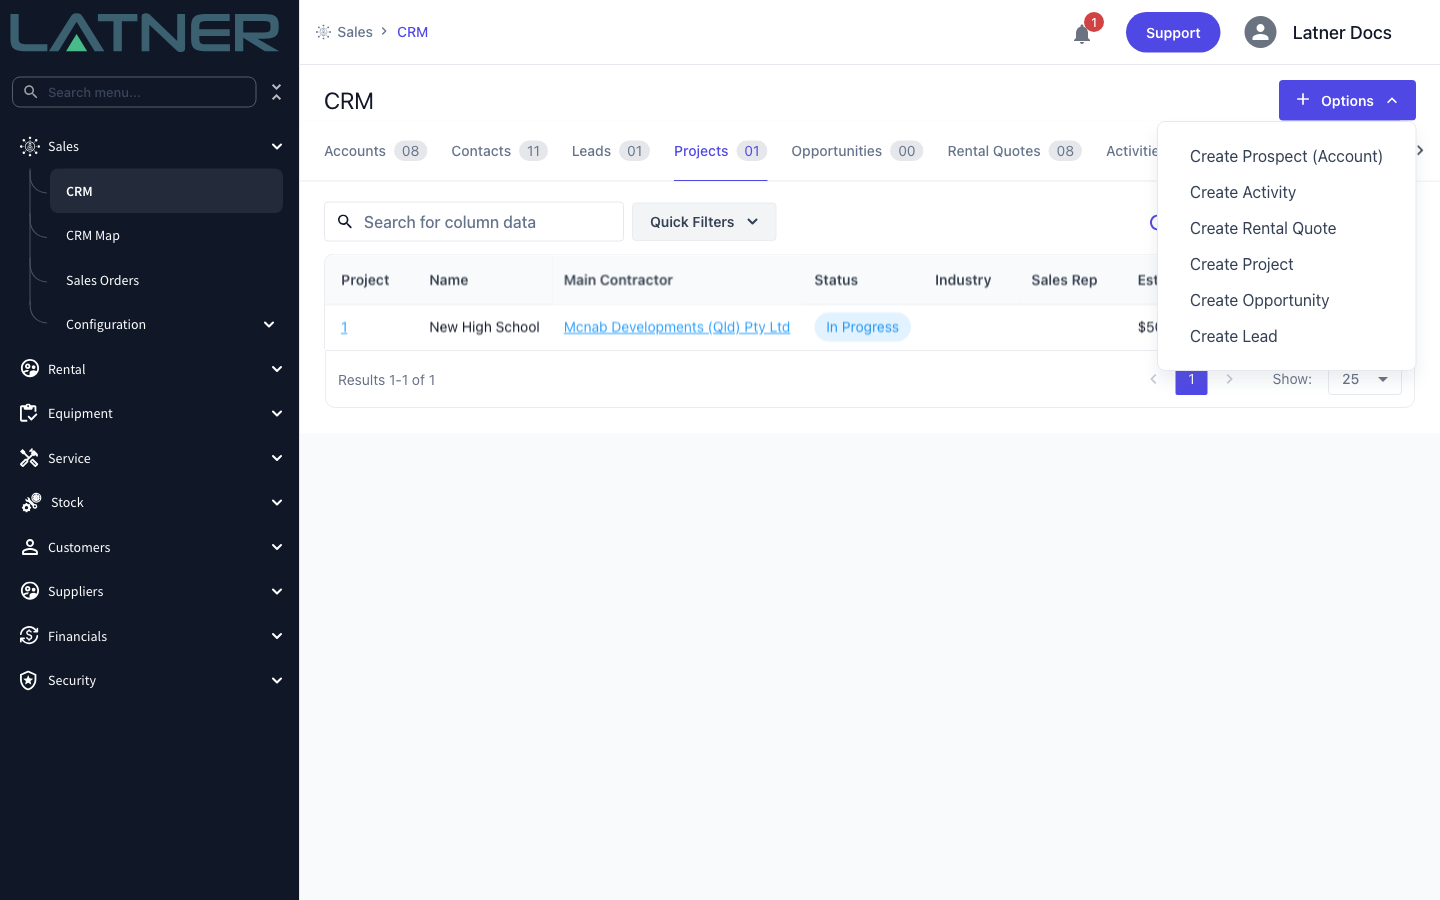
Step 2 - Choose Create Project
Select Options › Create Project. The same option is available from the Options menu on any existing Project.
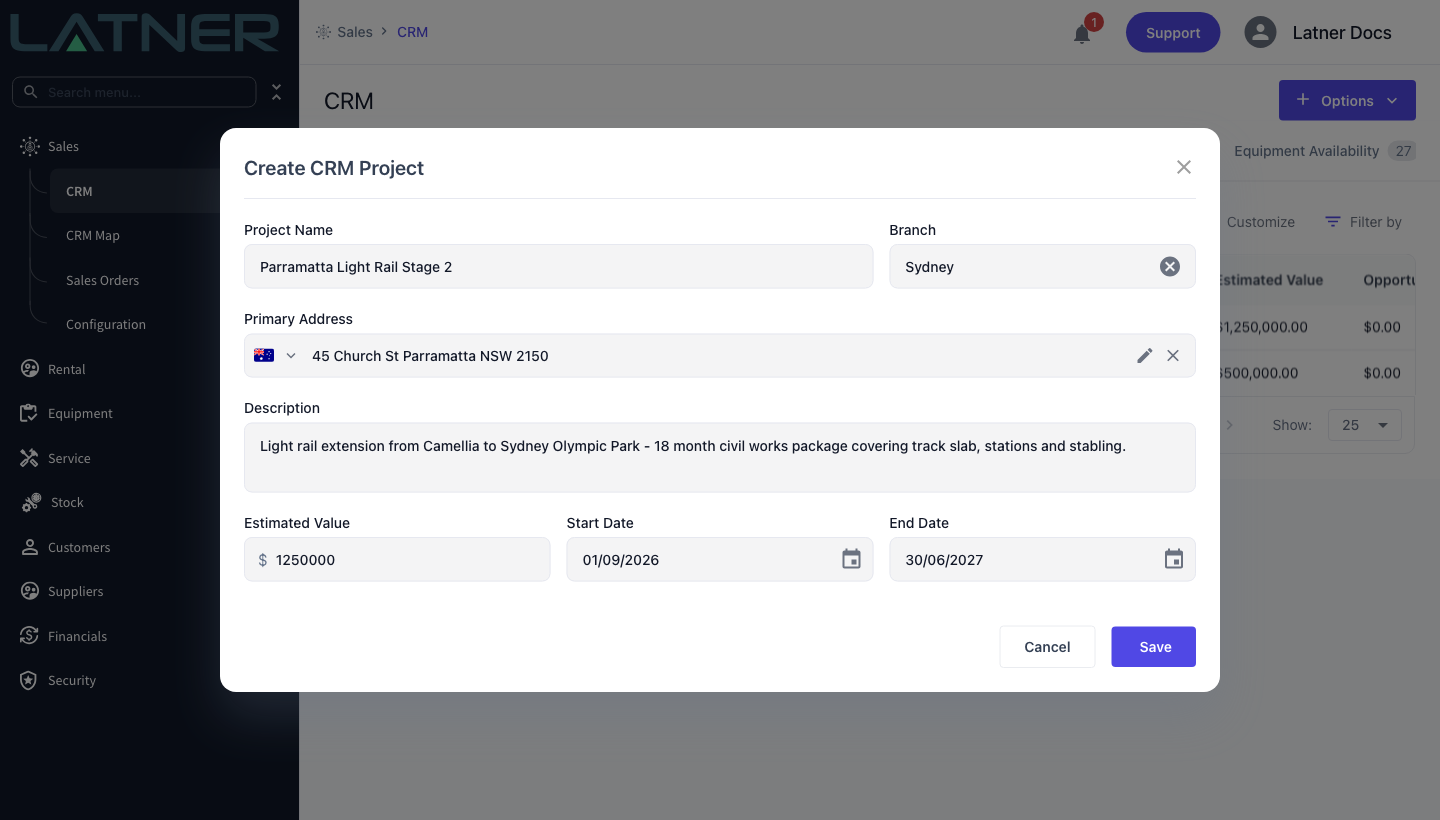
Step 3 - Fill in the Project
Complete the Create CRM Project form. Everything except Estimated Value and End Date is required.
-
Project Name - required, and it must be unique. Latner rejects a second Project with the same name, so use something you'll recognise on a report, such as "Parramatta Light Rail Stage 2".
-
Branch - required. Defaults to your own branch.
-
Primary Address - required. Start typing and pick the address from the suggestions.
-
Description - required. A sentence or two on what the job is.
-
Estimated Value - optional. What you expect the job to be worth to you, which the Project's financials are later measured against.
-
Start Date - required.
-
End Date - optional.
Select Save. Latner creates the Project as In Progress and takes you straight to it.
Step 4 - Check the new Project
The Project opens on its own screen, numbered Project #<id>. Main Contractor, Industry and Sales Rep are empty at this point, and every figure in Financial Details is zero except your estimate.
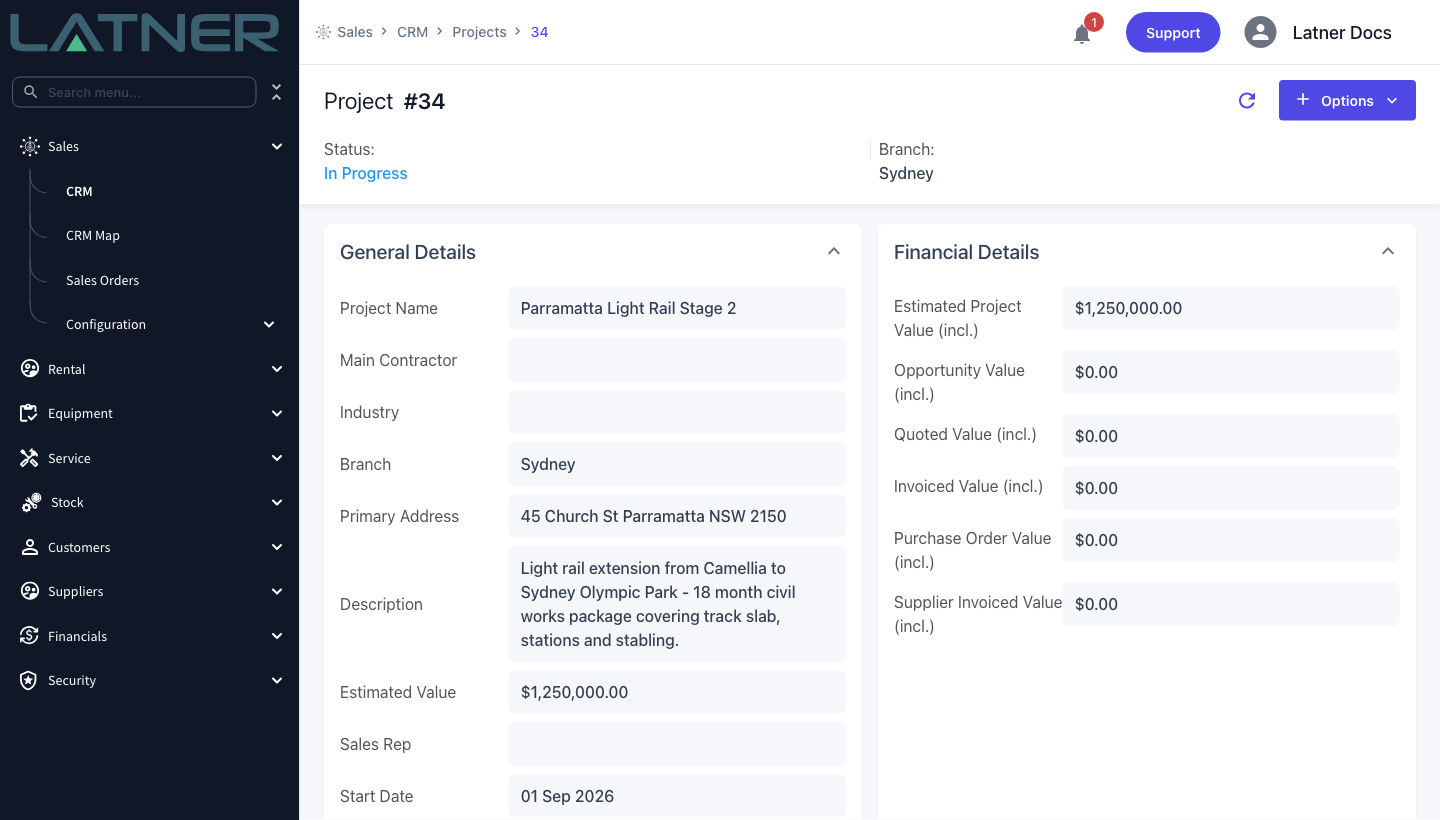
Step 5 - Set the Main Contractor, Industry and Sales Rep
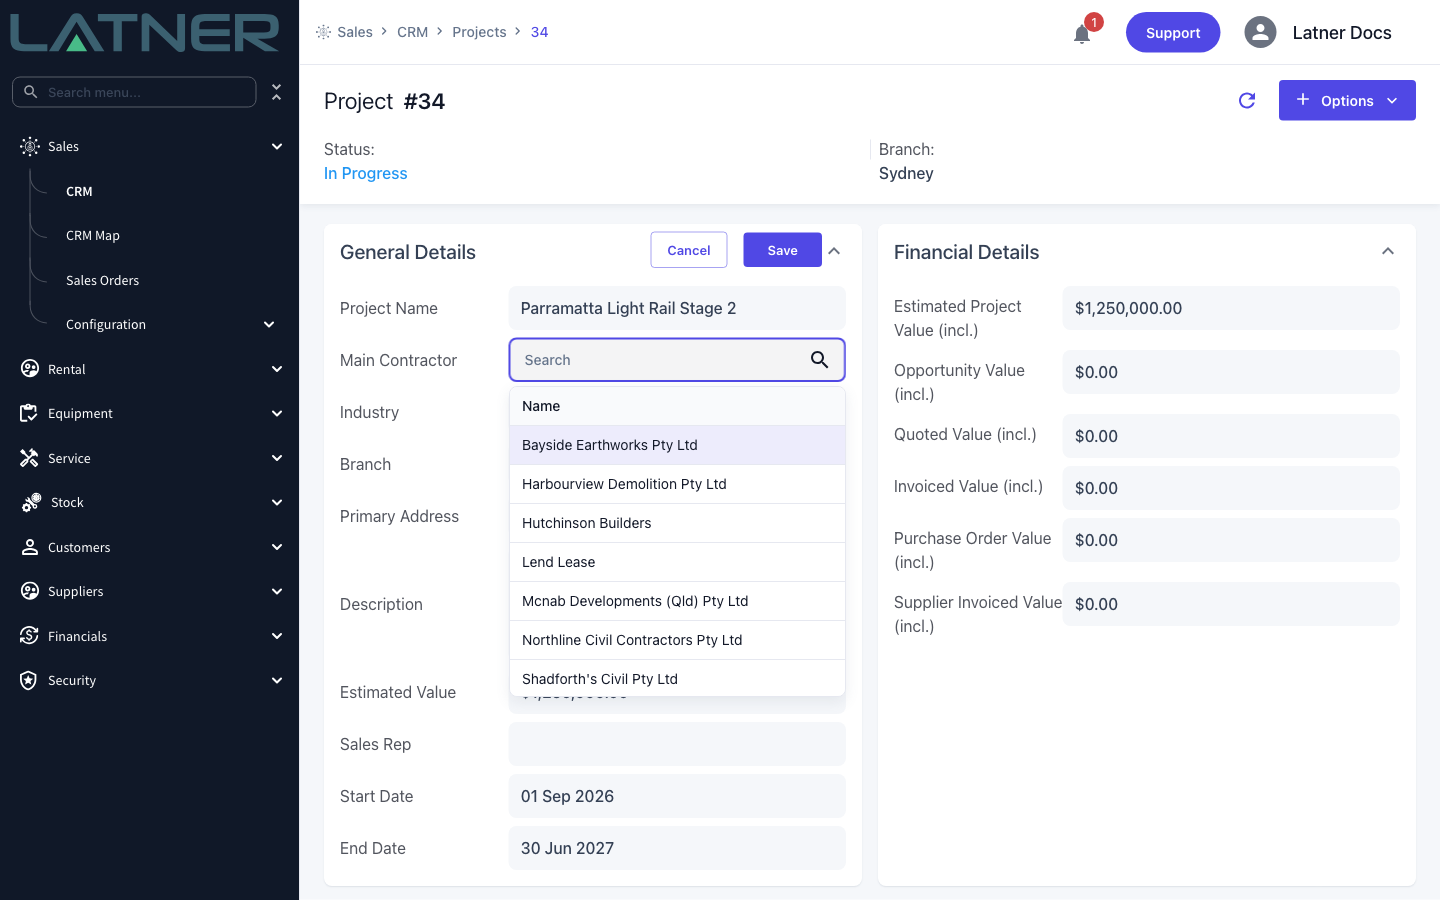
In the General Details panel, select the value next to a field to edit the panel, then fill in:
-
Main Contractor - required before you can save the panel. This is the customer running the job, and it's the search you use to find any customer on your account.
-
Industry - optional, and useful for reporting across jobs of the same kind.
-
Sales Rep - optional. Sales Reps are configured under Customers › Configuration.
Select Save in the panel header. Set the Main Contractor before you go any further, because the lists you'll use in the next section only offer records belonging to the Project's customers.
Starting from a Lead instead
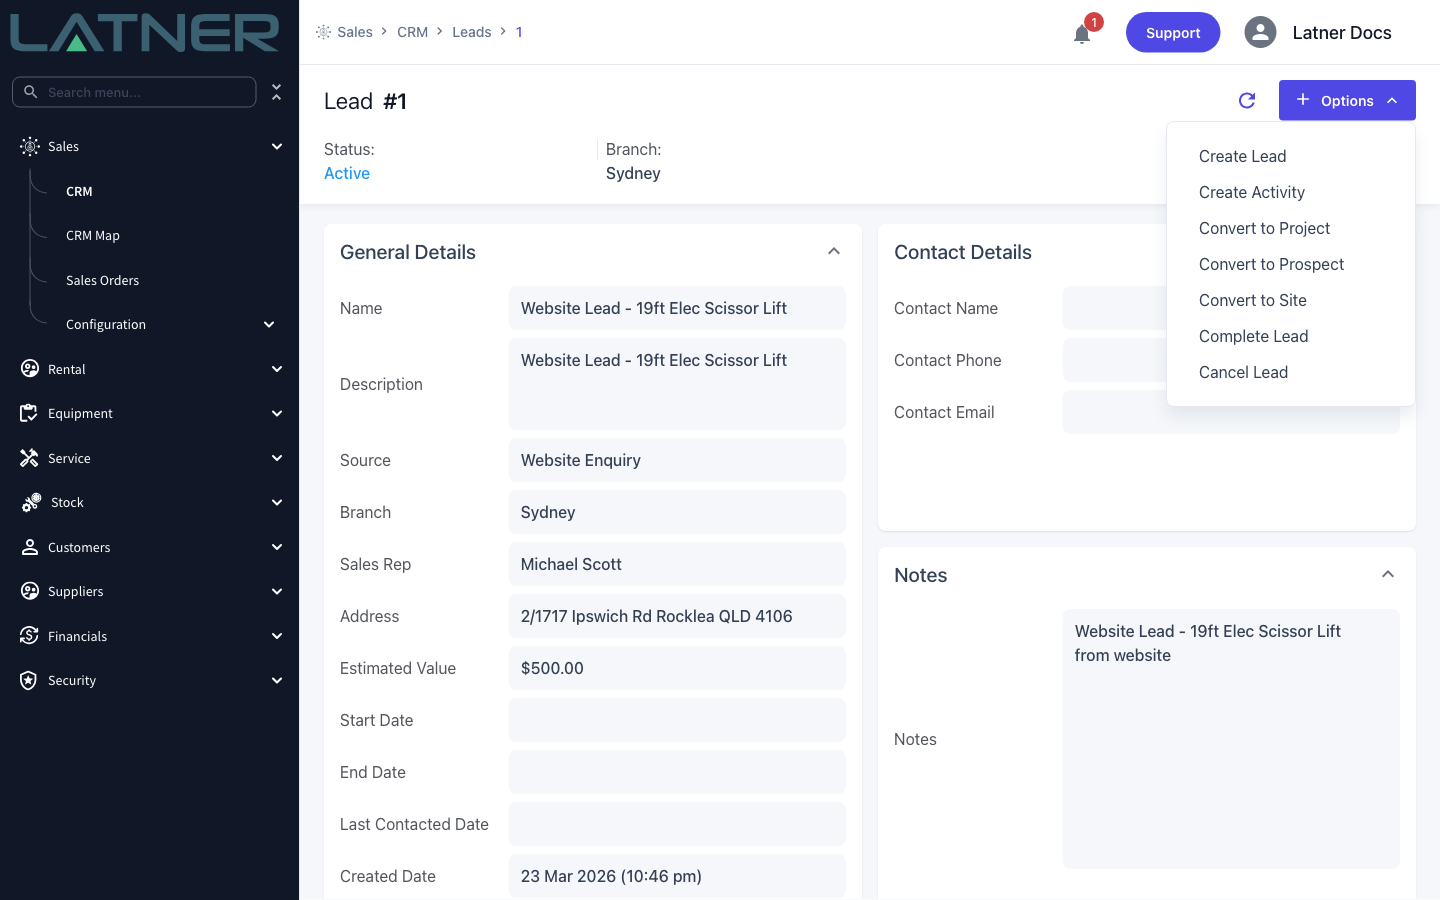
If the job came in as a Lead, open the Lead and select Options › Convert to Project. The Create CRM Project form opens pre-filled with the Lead's name, branch, address, description, estimated value and dates, so you only need to check them and save. Converting also marks the Lead as Completed and links the two records, so the Lead's Project Details panel points at the new Project.
Convert to Project only appears while the Lead is still Active and hasn't already been converted.
Linking Work to the Project
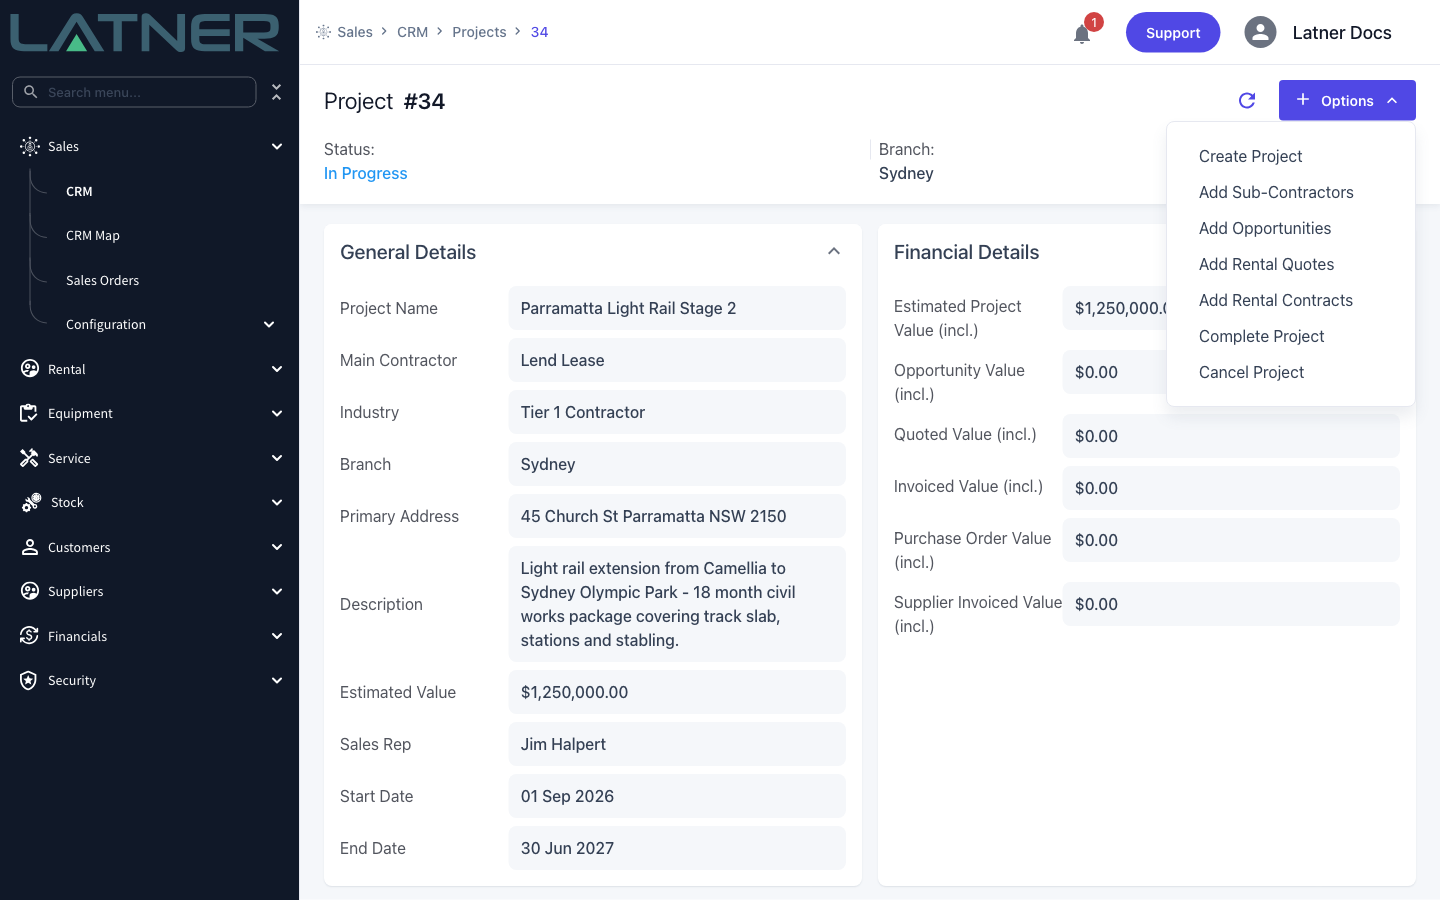
Everything is attached from the Project's own Options menu. Each option opens the same style of form: the Project is shown read-only at the top, and you tick the records you want underneath.
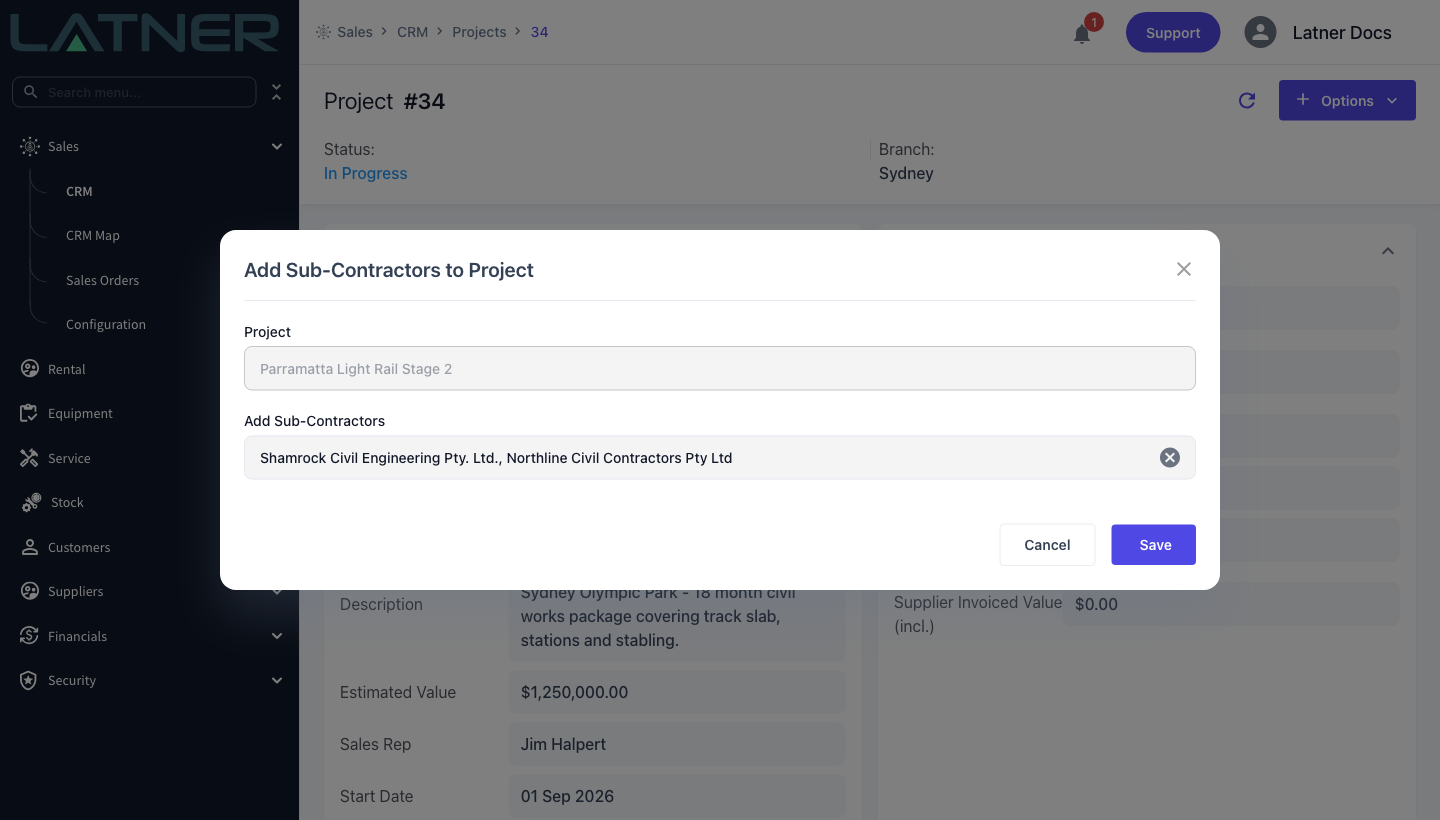
Add Sub-Contractors
Select Options › Add Sub-Contractors and pick one or more customers. The list offers any customer you haven't already added to this Project.
Do this first. The Main Contractor and the Sub-Contractors together are the Project's customers, and every other Add option below only offers records that belong to one of them. If a sub-contractor's quotes aren't showing up, it's almost always because the sub-contractor hasn't been added yet.
Add Opportunities
Select Options › Add Opportunities. The list shows opportunities belonging to the Project's customers that aren't already on another Project. You can also select Create New from the bottom of the list to raise a new opportunity that is linked to this Project from the outset. The rental quote list offers the same shortcut; the sub-contractor and rental contract lists don't.
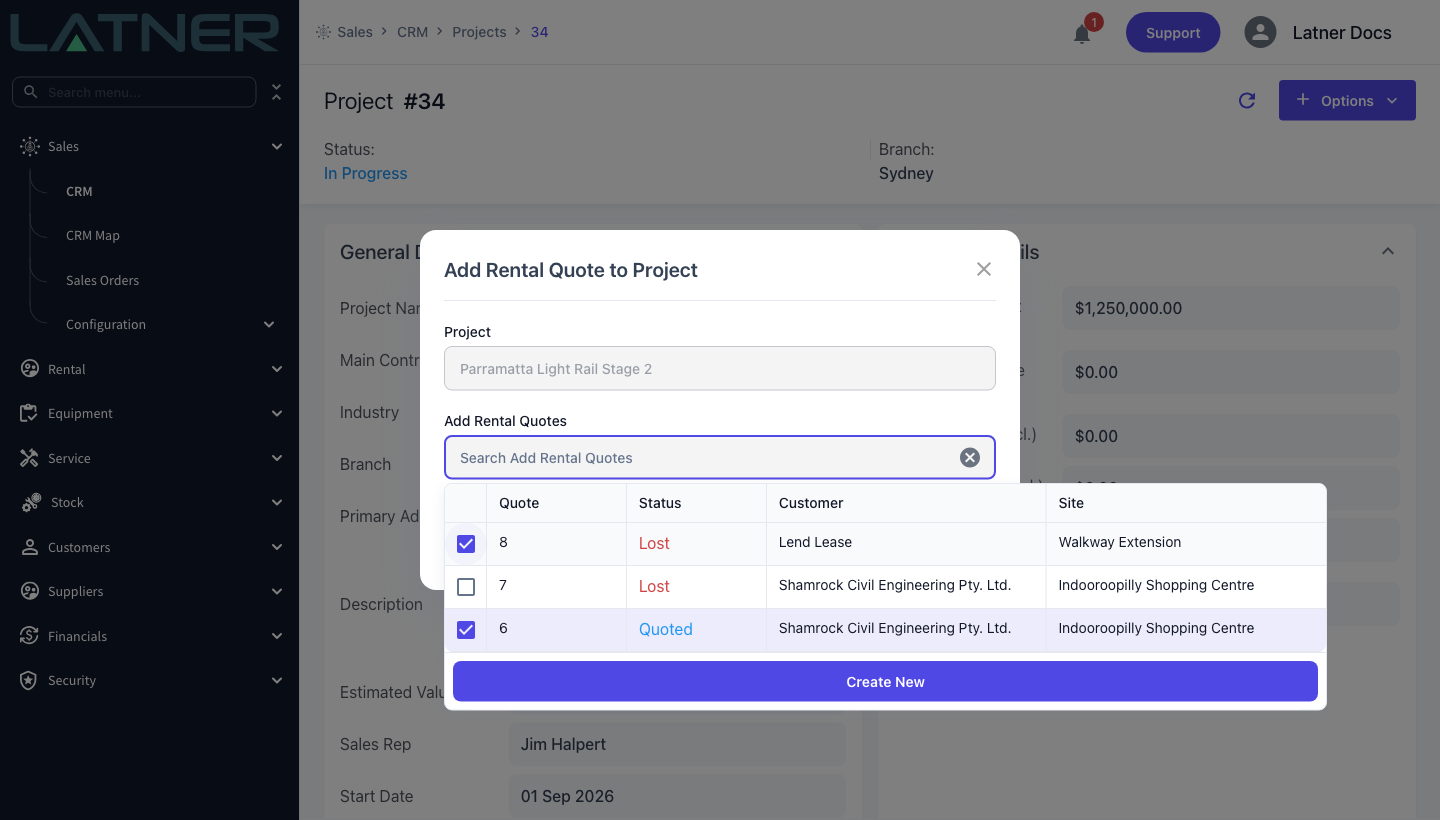
Add Rental Quotes
Select Options › Add Rental Quotes and tick the quotes to attach. The list shows the quote number, status, customer and site, and again it is limited to the Project's customers and to quotes that aren't on another Project.
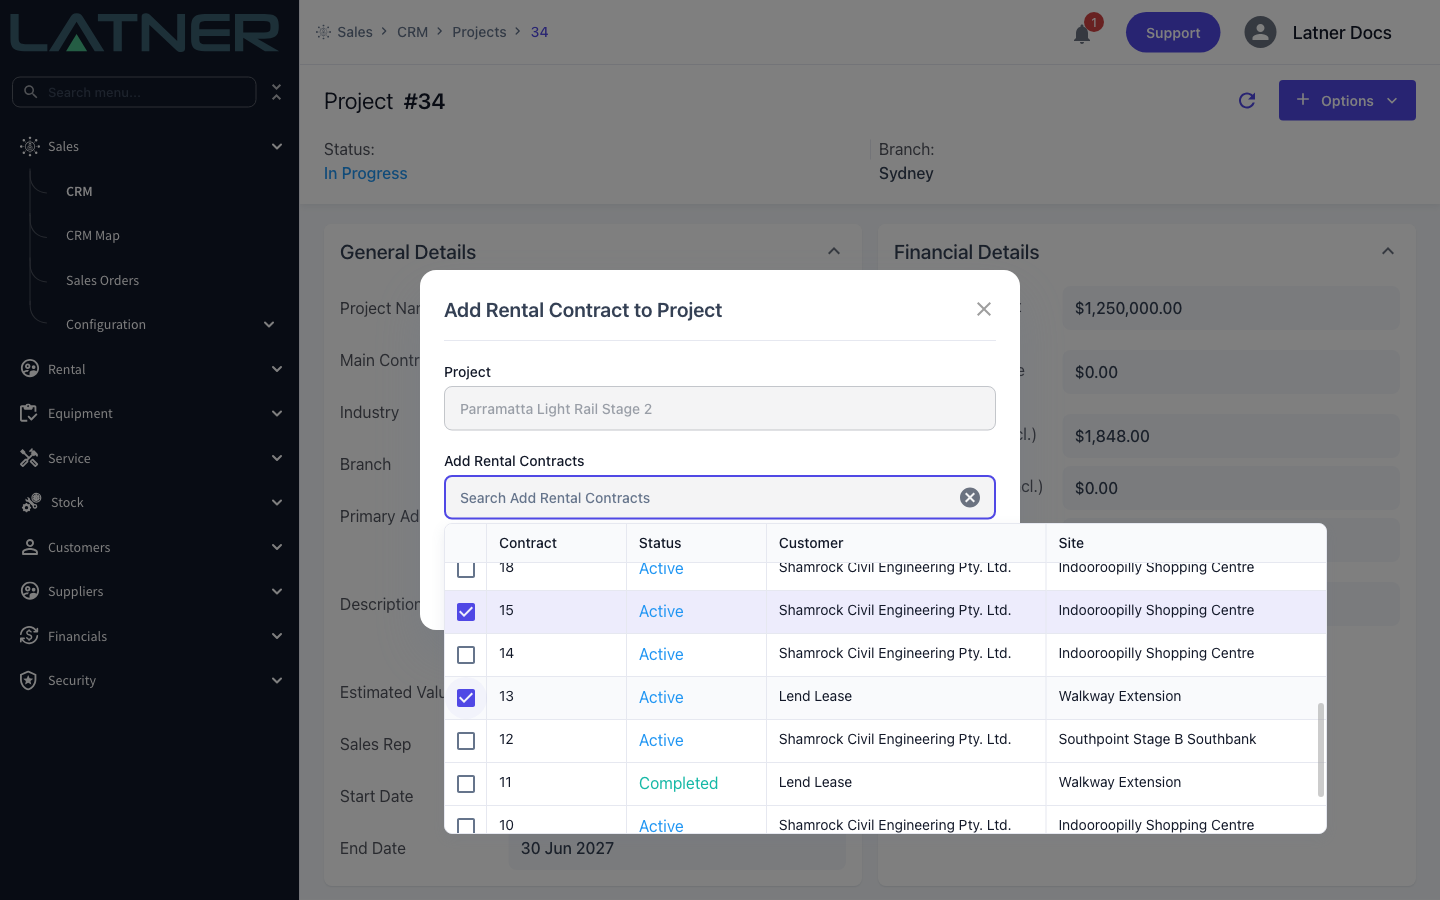
Add Rental Contracts
Select Options › Add Rental Contracts and tick the contracts to attach. This is the option that drives the Project's Invoiced Value, because invoices are counted through the contract they were raised against.
Linking as you create the record
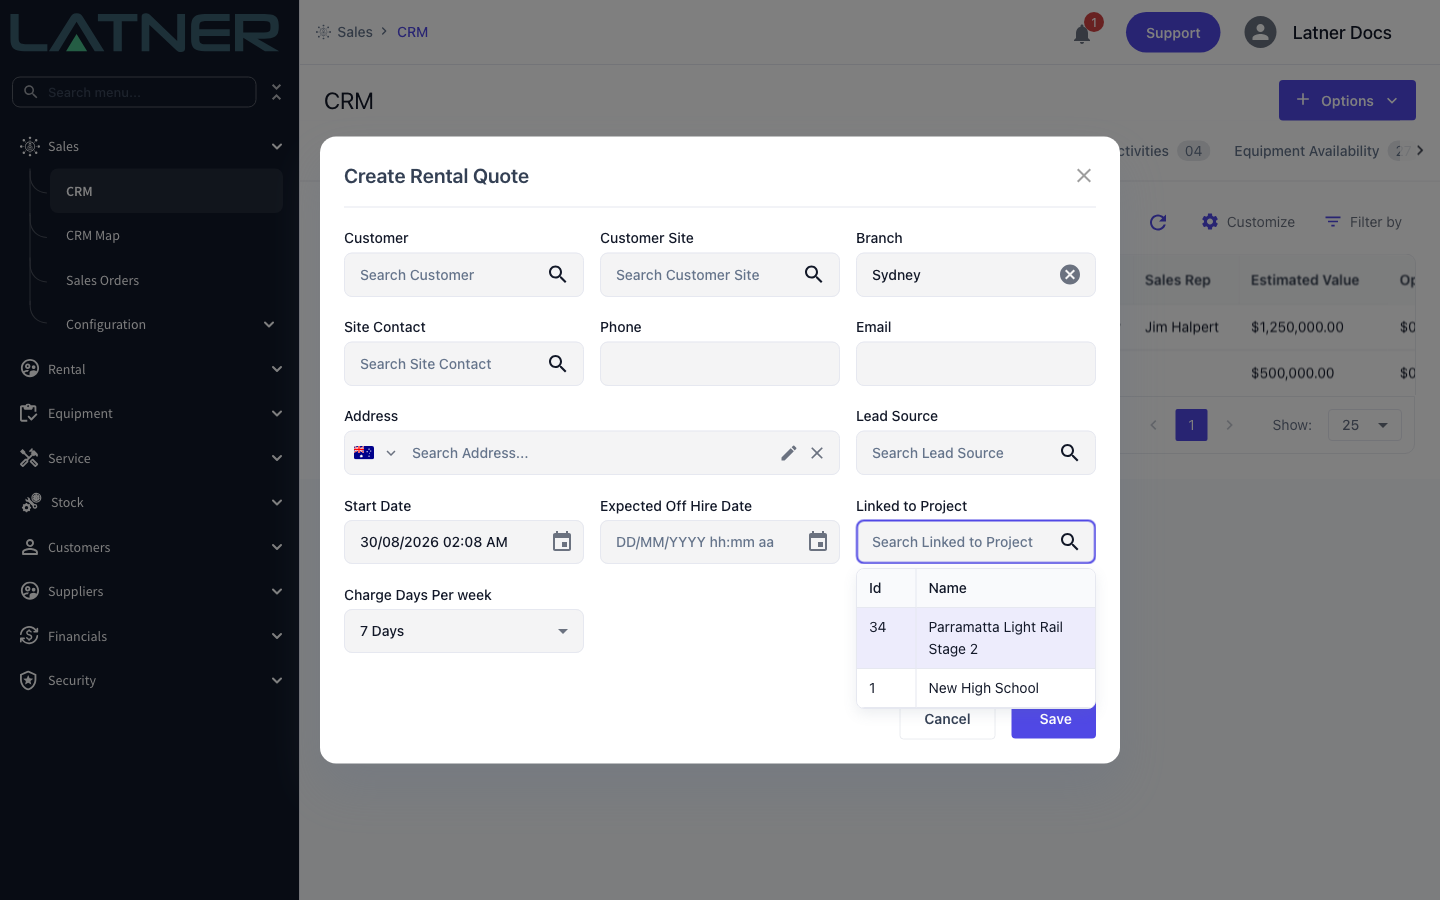
Where the matching setting from Before You Begin is switched on, a Linked to Project field appears on the create form for rental quotes, rental contracts, sales orders, opportunities, purchase order details and supplier invoice details. Picking the Project there saves you attaching it afterwards.
The field only offers Projects that are In Progress, so a completed or cancelled Project can't be picked up by mistake on new work.
Reading the Project
The tabs at the bottom of the Project show everything attached to it.
-
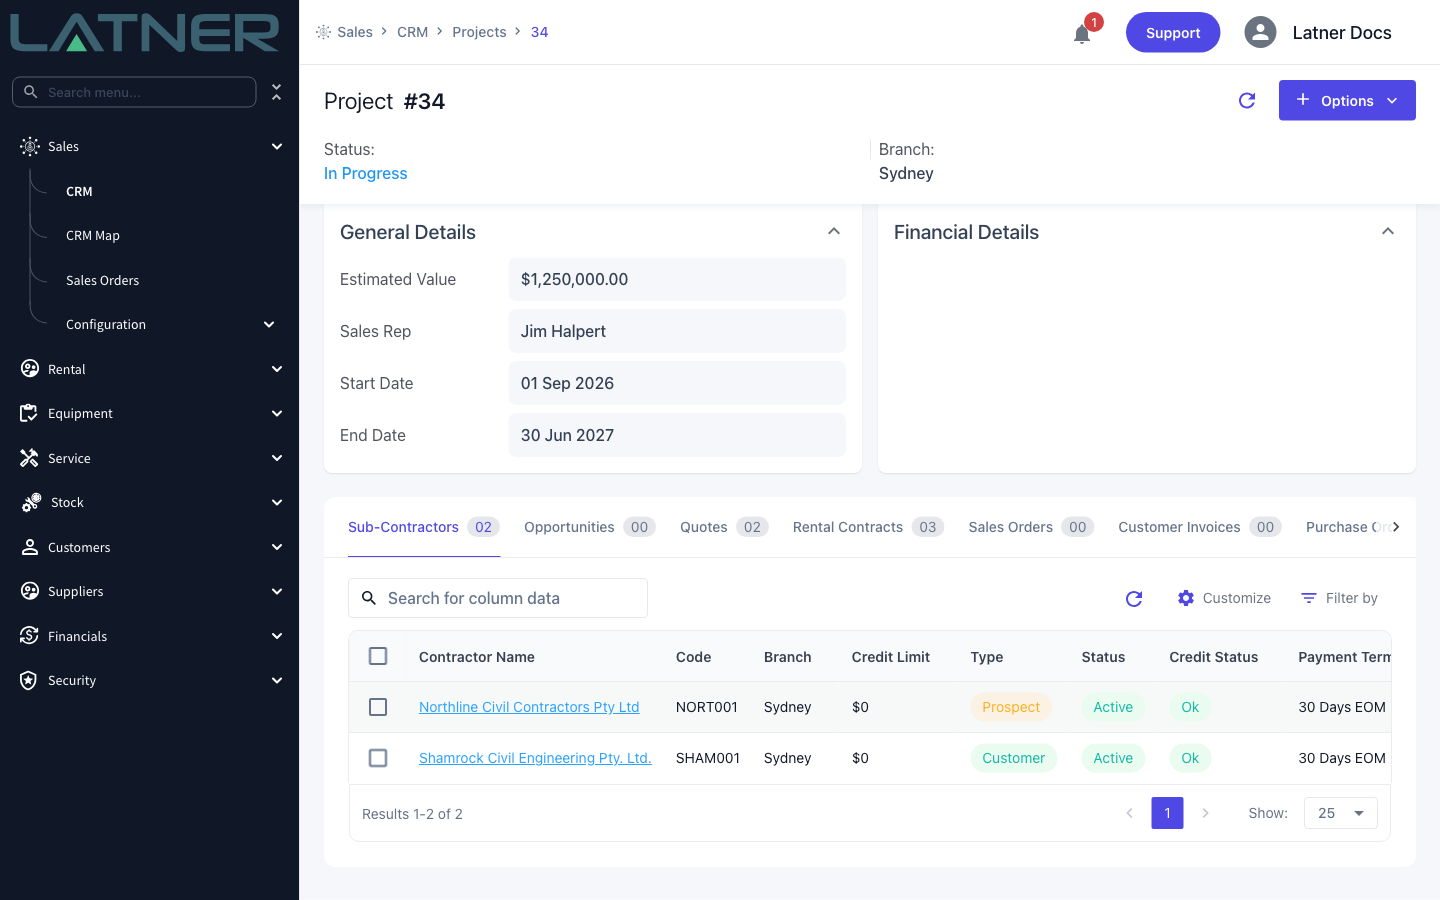
Sub-Contractors - the customers you added. The Main Contractor is not repeated here.
-
Opportunities, Quotes, Rental Contracts - what you attached from the Options menu.
-
Sales Orders, Customer Invoices, Purchase Orders, Supplier Invoices - these fill in on their own as records are linked to the Project from their own screens. There is no Add option for them on the Project.
Removing something from a Project
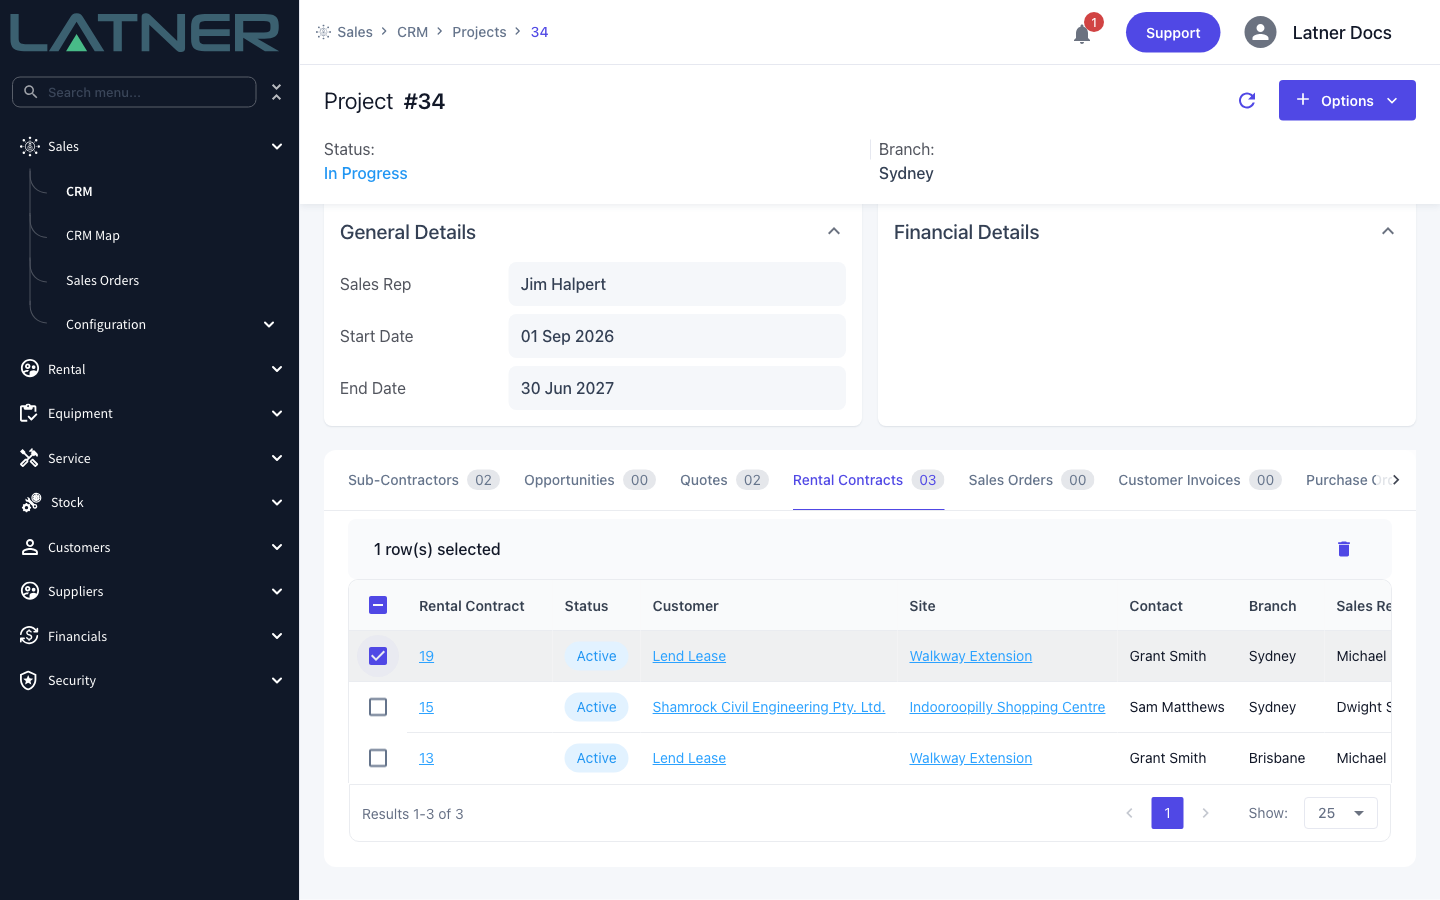
On the Sub-Contractors, Opportunities, Quotes and Rental Contracts tabs, tick the rows you want to detach and select the bin icon in the selection bar, then confirm. This only unlinks the record from the Project. The quote, contract, opportunity or customer itself is untouched and can be attached to another Project afterwards.
Financial Details
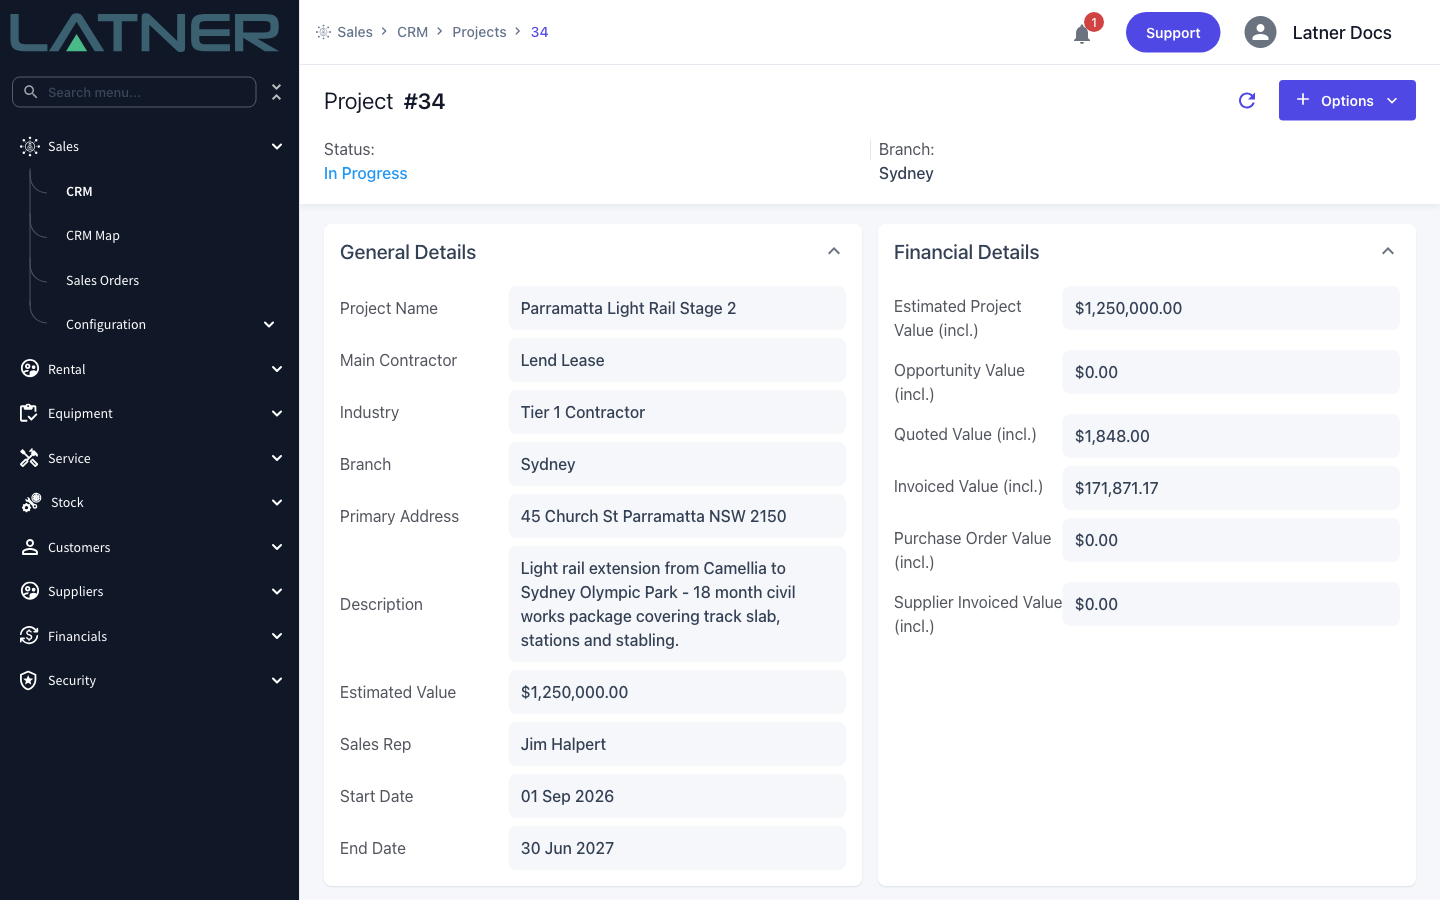
The Financial Details panel is recalculated every time you open the Project. Each figure counts a different thing:
-
Estimated Project Value (incl.) - the Estimated Value you typed on the Project. Nothing else feeds it.
-
Opportunity Value (incl.) - the value of the attached opportunities, excluding any marked Lost.
-
Quoted Value (incl.) - the attached rental quotes that are Quoted, Won, Customer Approved or Converted, plus attached sales orders that are Quoted, Partially Invoiced or Invoiced. Lost quotes are ignored.
-
Invoiced Value (incl.) - customer invoices raised against the Project's rental contracts and sales orders, counting only invoices that are Completed or Paid. Credit notes are subtracted.
-
Purchase Order Value (incl.) - purchase order lines linked to the Project, excluding lines on Open and Cancelled purchase orders.
-
Supplier Invoiced Value (incl.) - supplier invoice lines linked to the Project on Completed or Paid supplier invoices. Supplier credit notes are subtracted.
The same figures appear as columns on the Projects tab, so you can compare jobs without opening each one.
Completing or Cancelling a Project
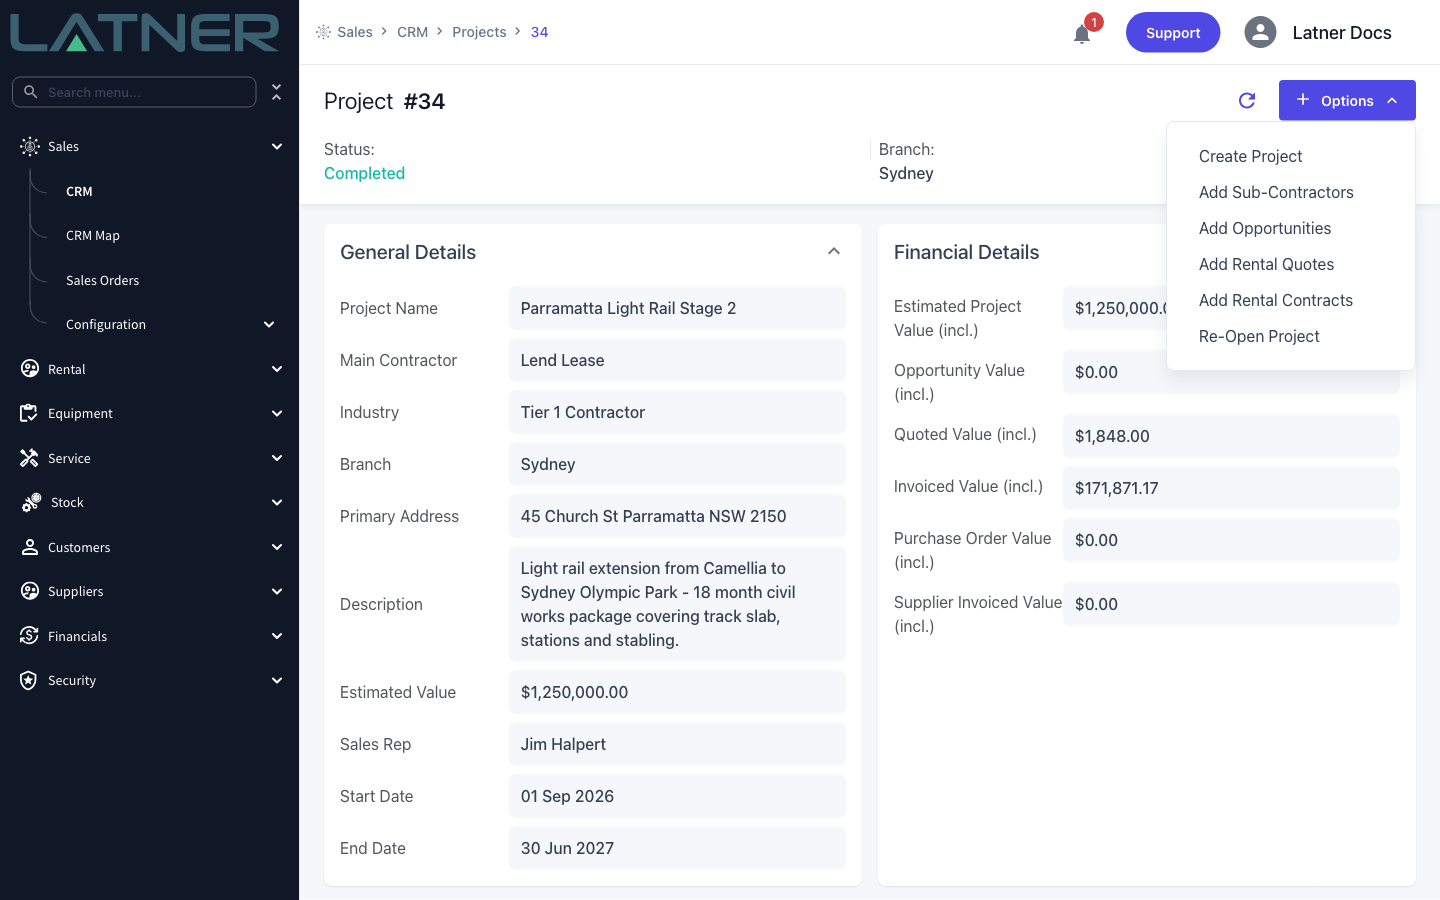
When the job is finished, open the Project and select Options › Complete Project. If it never went ahead, select Options › Cancel Project instead. Both change the status immediately, with no confirmation prompt.
Once a Project is Completed or Cancelled, those two options are replaced by Re-Open Project, which puts it back to In Progress.
Completing or cancelling a Project does not change any of the records attached to it. Contracts stay on hire, quotes stay open and invoices stay as they are. All it does is take the Project out of the Linked to Project lists on the create forms, so no new work is accidentally booked against a finished job. If you completed one too early, use Re-Open Project rather than creating a replacement.
FAQs
Watch the Demo
Prefer to watch it? Step through the same flow here.