
Operators record the hours they worked straight onto the operator docket from their phone, so a day of wet hire is priced from what actually happened on site rather than from a paper docket someone types up later.
Overview
The docket is the operator's own record of the day, and the timesheet is the part that gets paid for. Everything happens on the Operator Jobs screen in the mobile menu, and the whole thing takes about a minute once the machine is running.
-
You can only add time to a docket that is Open and has you as the operator. Someone else's docket is read only on your phone.
-
A pre-start checklist has to be completed on the docket before Add Timesheet becomes available.
-
How you enter the time depends on the Timesheet Input Type setting: either Hours and Minutes, or a Start Time and End Time.
-
Breaks are recorded separately and are subtracted from the total, so a 7:00 am to 3:30 pm day with a half hour break is 8 hours.
-
You can add more than one timesheet to a docket. Normal time and overtime on the same machine are two timesheets on the one docket.
-
The charge rate comes from the rental contract line, not from you, so there is nothing to price on the phone.
Before You Begin
A few things need to be in place before the docket will accept a time.
|
Requirement |
Where to Find It |
|---|---|
|
You are set up as a skilled person |
Service › Configuration › Skilled Persons - the docket's Operator is your own skilled person record and cannot be changed on the phone |
|
A rental contract line using Operator Pricing |
Rental › Rental Contracts › Options › Add Details, with Operator Pricing as the Pricing Method |
|
A Pre Start Checklist on the equipment model or equipment class |
Equipment › Configuration › Equipment Models (or Equipment Classes) - the model's template is used first, and the class is the fallback |
|
Mobile Operator Dockets permission |
Security › Configuration › Permission Groups › Rental › Screen |
|
Create Operator Dockets and Complete Operator Dockets permissions |
Security › Configuration › Permission Groups › Rental › Option |
|
Create Timesheet permission, plus Timesheet or Mobile Timesheet to read them back |
Security › Configuration › Permission Groups › Service › Option and › Screen |
|
Timesheet Input Type setting |
Security › Settings › Timesheet |
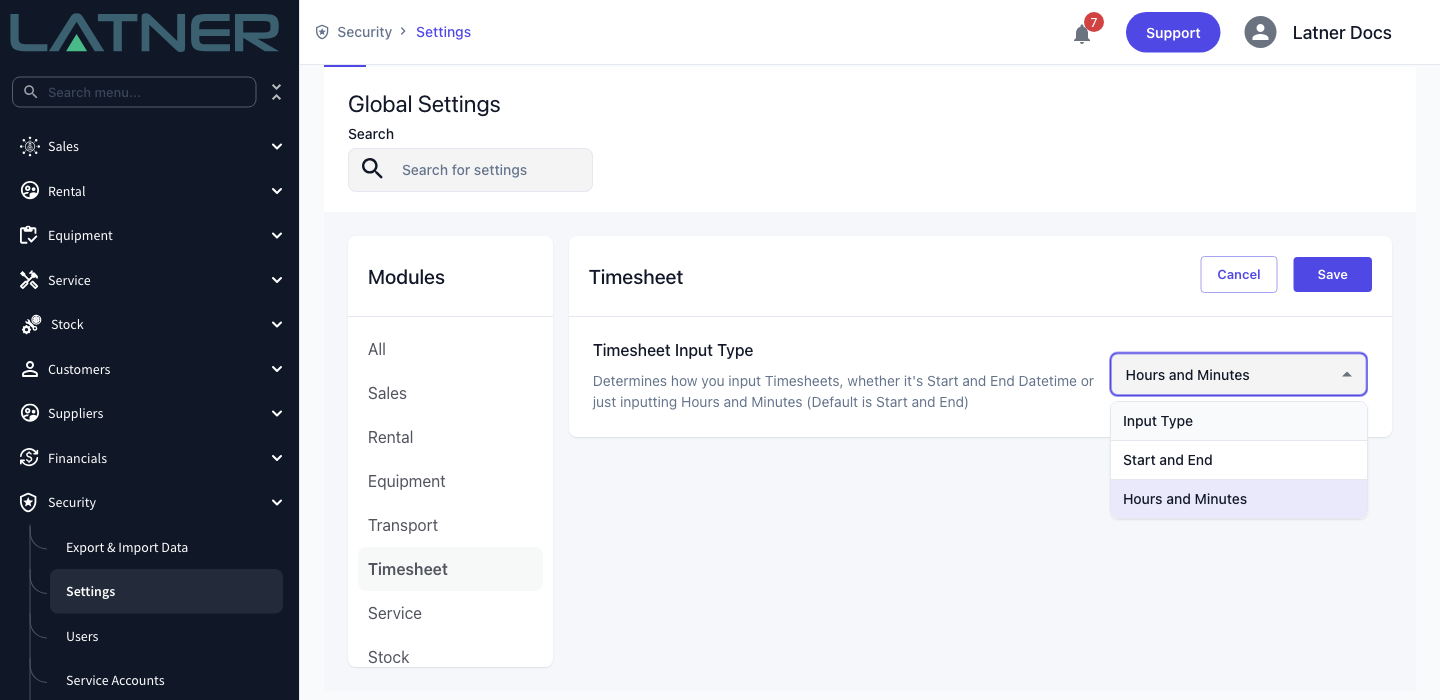
Timesheet Input Type changes the fields you see, not what gets stored. Start and End asks for the clock times you started and finished; Hours and Minutes asks only for how long you worked. Either way Latner keeps a total, and the customer is charged on that total.
Entering the Time
Step 1 - Open Operator Jobs
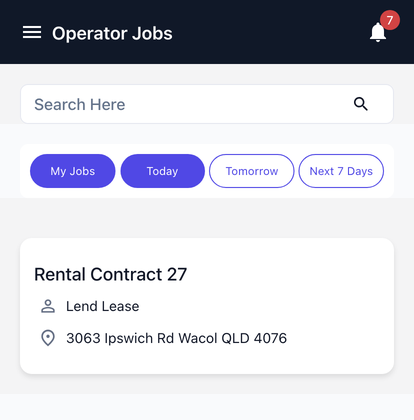
Tap the menu and choose Operator Jobs. The list shows the rental contracts you have operator work on, with the customer and the site address on each card. The My Jobs, Today, Tomorrow and Next 7 Days chips narrow it down, and My Jobs plus Today are on by default.
Step 2 - Pick the machine you were on
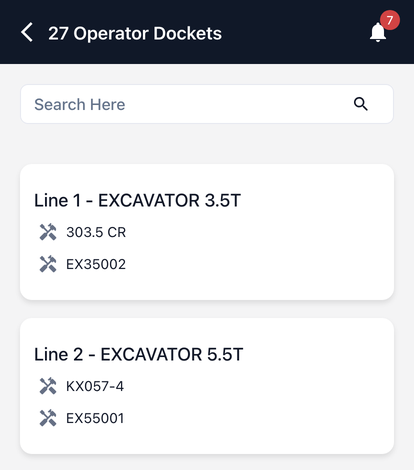
Tap the contract to see its operator lines. A contract can have several machines on it, so each line shows the equipment class, the model and the equipment number - match it to the plant you actually operated.
Step 3 - Open today's docket, or create it
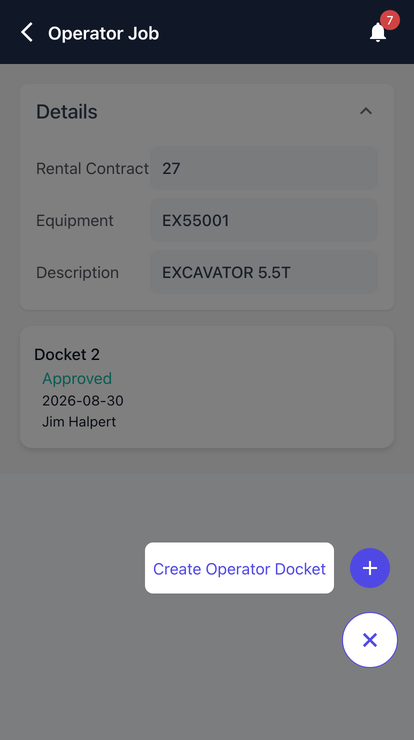
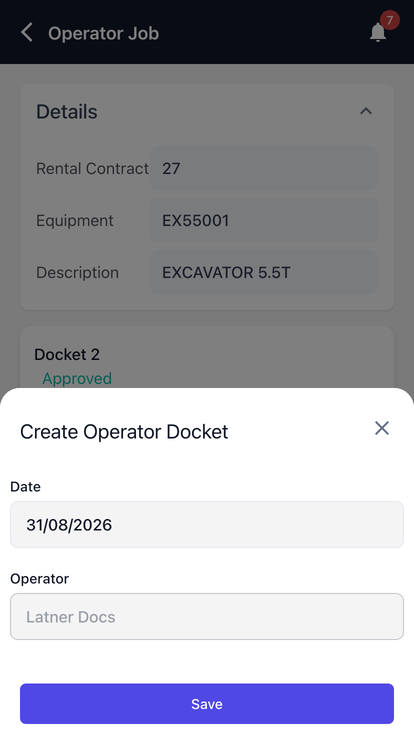
The line shows every docket raised against it, newest first, with its status, date and operator. If today's docket is already there, tap it and skip to step 4. If it isn't, tap the + button and choose Create Operator Docket.
The form only asks for two things, and one of them is filled in for you.
-
Date - the day you worked. Defaults to today, and a docket always covers a single date.
-
Operator - locked to you. Latner reads it from your skilled person record.
Tap Save. The docket is numbered automatically, opens on status Open, and Latner takes you straight to it.
Step 4 - Complete the pre-start checklist
On a new docket Add Timesheet is greyed out. That is deliberate: the pre-start has to be done before the day's hours can be recorded.
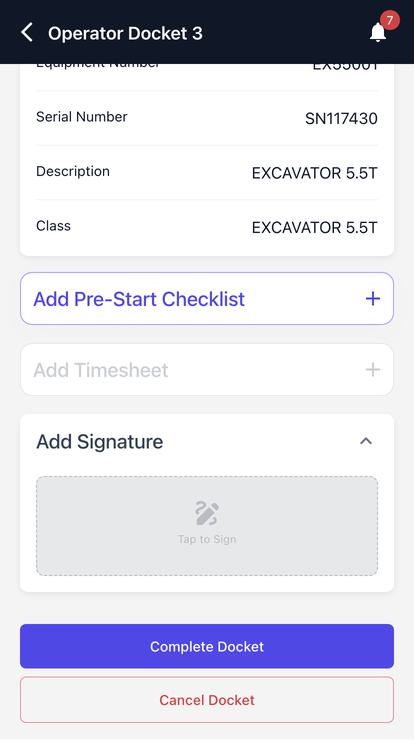
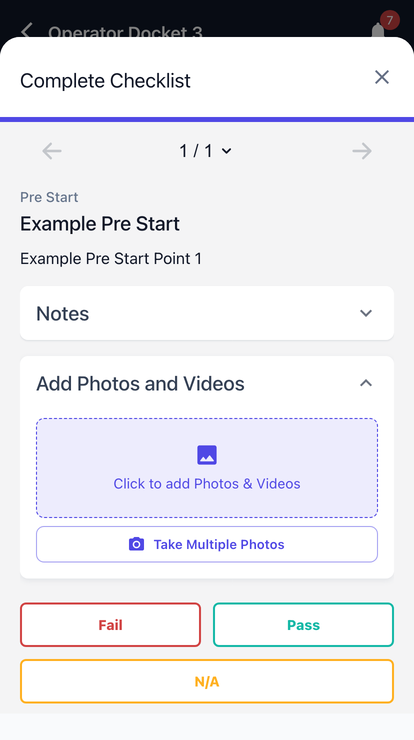
Tap Add Pre-Start Checklist. Latner pulls the checklist from the equipment model, or from the equipment class if the model doesn't have one, and attaches a copy to the docket. Tap Complete Pre Start Checklist, answer every task Pass, Fail or N/A, add notes or photos where they help, then close the drawer. The button changes to Pre Start Checklist Completed with a tick, and Add Timesheet comes to life.
Step 5 - Add the timesheet
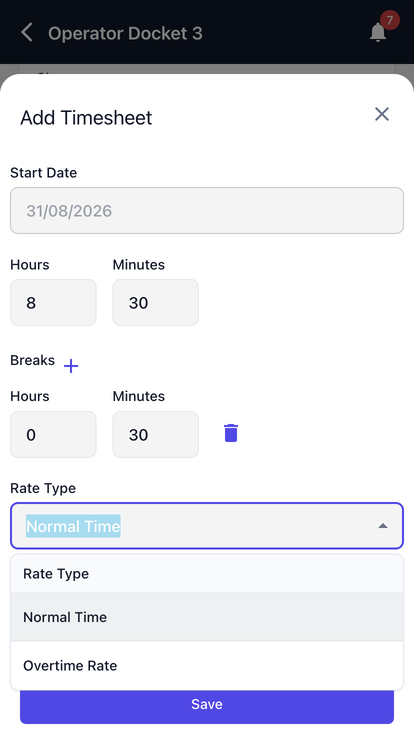
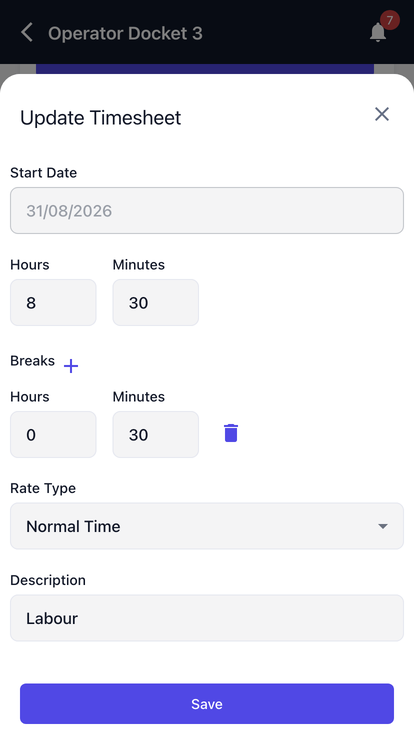
Tap Add Timesheet. Start Date is fixed to the docket's date, and the group and sub group are set for you to Operator Docket / Labour, so they are not on the form.
If your system uses Hours and Minutes, enter how long you were on the machine:
-
Hours - 0 to 23.
-
Minutes - 0 to 59.
-
Breaks - tap the + to add a break and enter its length the same way. Add one row per break; the bin icon removes a row.
-
Rate Type - Normal Time or Overtime Rate.
-
Description - defaults to Labour. Replace it with something the customer will recognise on their invoice.
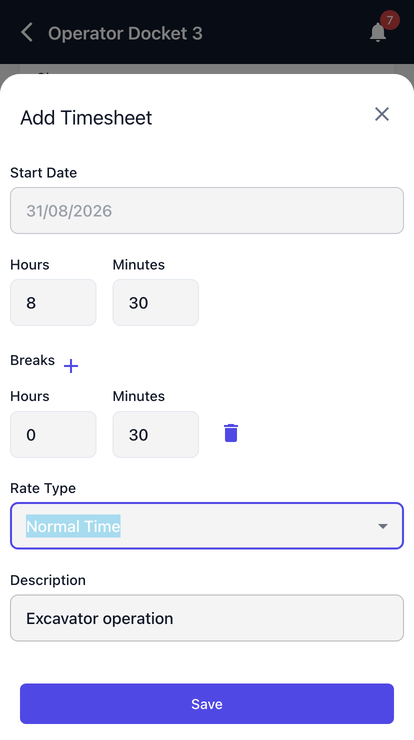
Rate Type decides which of the contract line's operator rates is charged: Normal Time uses the hourly rate, Overtime Rate uses the overtime rate. Call outs don't apply to operator dockets and aren't offered.
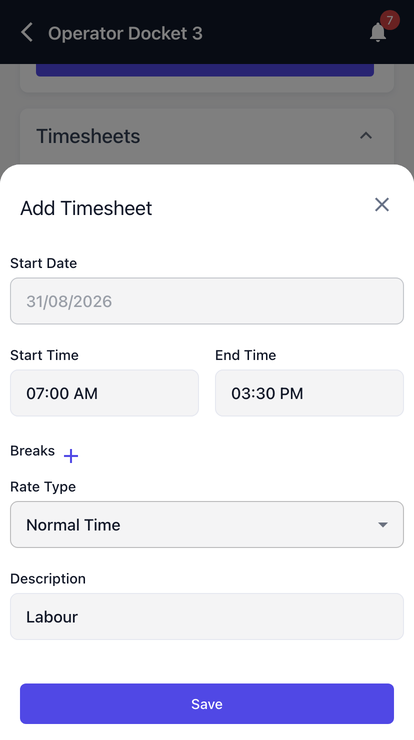
If your system uses Start and End instead, you get Start Time and End Time in place of Hours and Minutes, and breaks are entered as a start and an end too. Everything else on the form is the same.
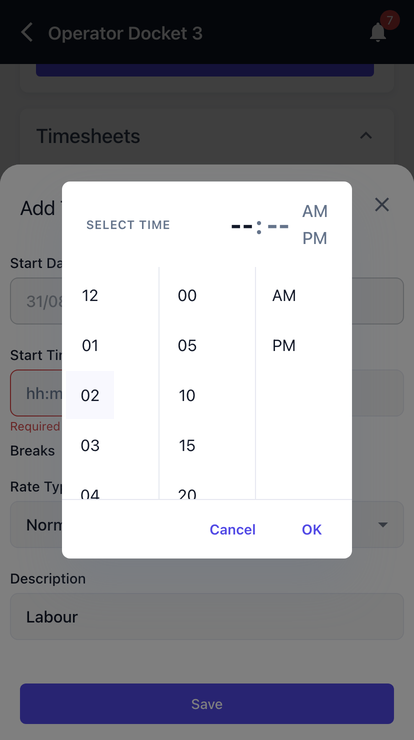
Tapping a time field opens the phone's time picker. Scroll to the hour, then the minutes, then AM or PM, and tap OK. Minutes step in fives, so round to the nearest five minutes.
Step 6 - Save and check the total
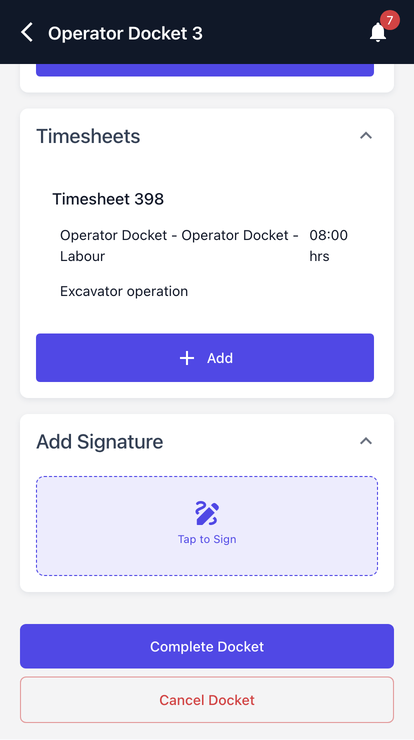
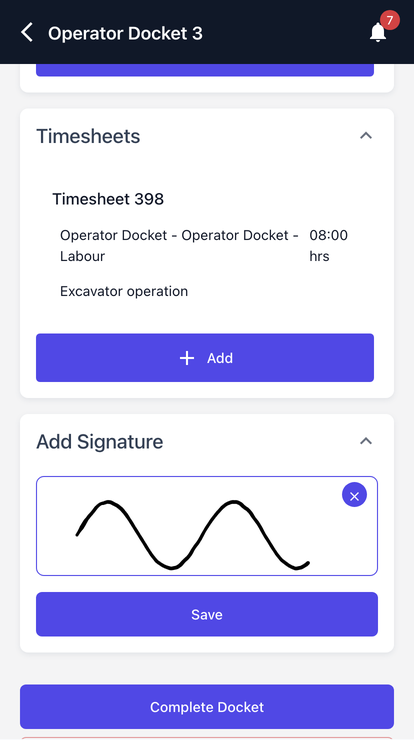
Tap Save. The timesheet appears under Timesheets on the docket with its number, its group, its description and the total hours. Check that total before you move on - it is the figure the customer is charged on.
Need a second block of time? Tap Add in the Timesheets section and record it the same way. A day that ran into overtime is one timesheet at Normal Time and another at Overtime Rate.
Step 7 - Correct a time you got wrong
While the docket is still Open, tap the timesheet in the list to reopen it as Update Timesheet, change the hours, the breaks or the rate type, and tap Save. Once the docket has been completed the timesheets are locked and someone in the office has to reopen the docket for you.
Step 8 - Get the docket signed
Once there is at least one timesheet on the docket, the signature pad unlocks. Hand the phone to the site contact, tap Tap to Sign, have them sign, then tap Save. The signature is stored on the docket and comes through on the docket PDF.
Step 9 - Complete the docket
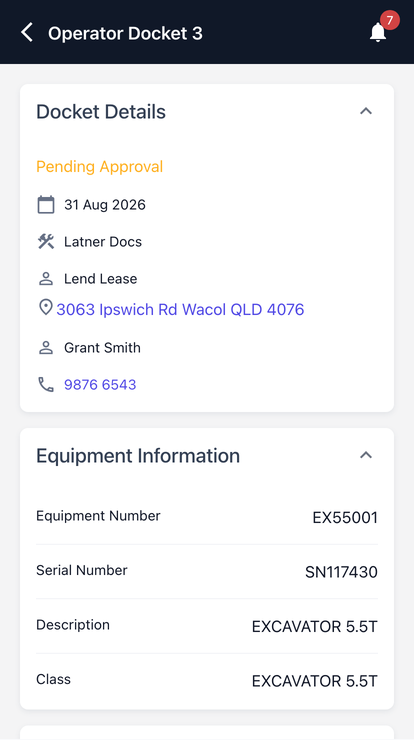
Tap Complete Docket. Latner moves the docket to Pending Approval and takes you back to the job. A docket with no timesheets can't be completed, so this is the check that the day's hours were actually recorded.
After You Complete the Docket
-
The docket sits on Pending Approval until someone in the office approves it from Rental › Operator Dockets. Nothing is charged before that.
-
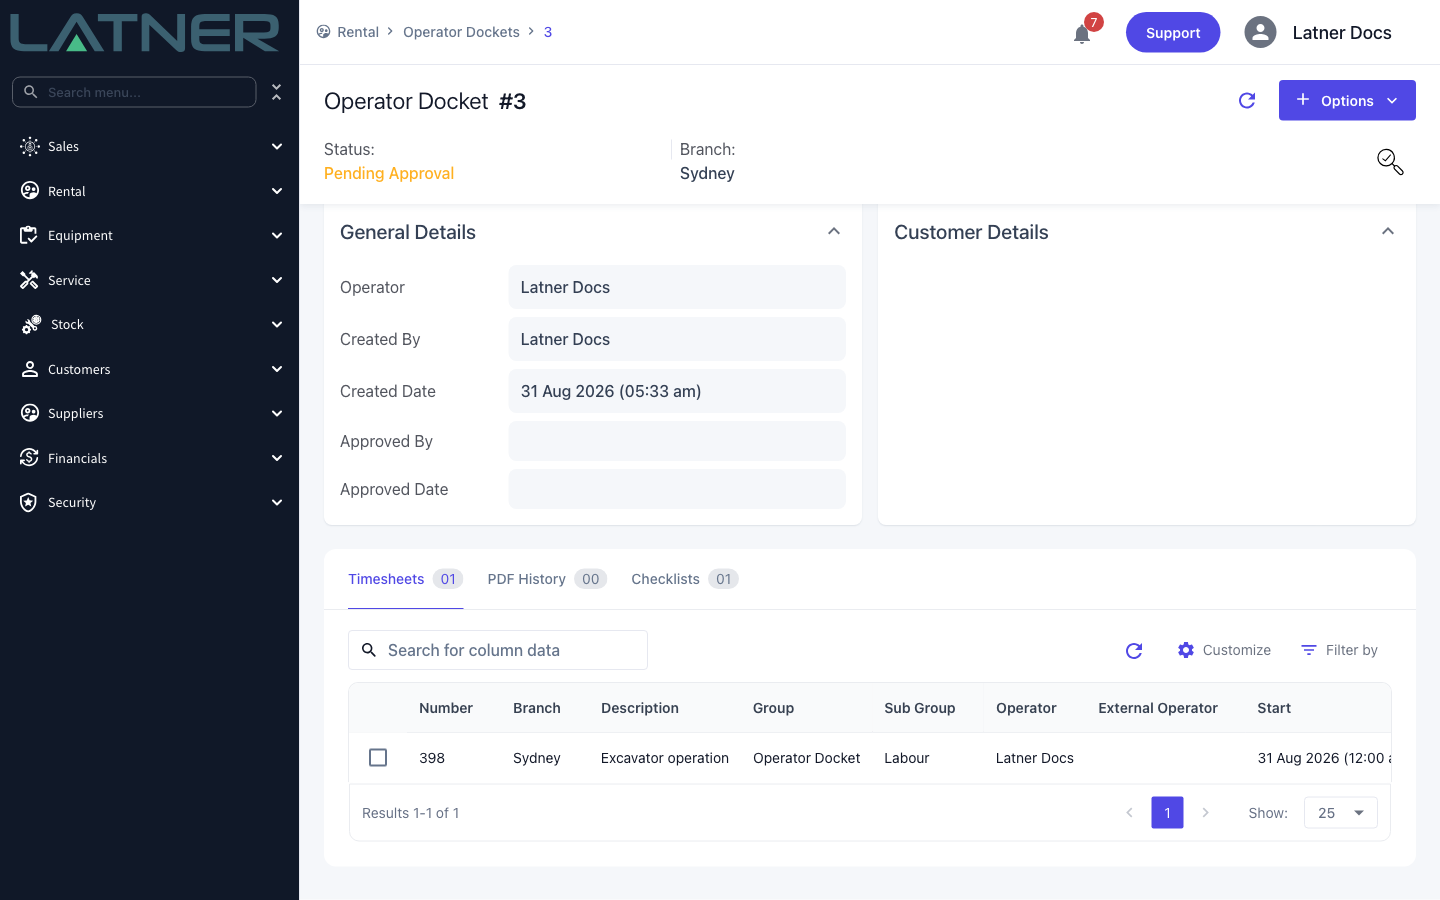
The timesheet is visible on the desktop docket's Timesheets tab, with the start and end, break hours, total hours, and the rate that came off the contract line.
-
The same timesheet counts towards your own timesheet totals under Service › Timesheets, sourced as Operator Docket.
-
Once approved, each timesheet becomes its own line on the customer's next invoice - the total hours as the quantity, the rate as the unit price.
-
Reopen Docket puts the docket back to Open so times can be fixed, as long as it hasn't been invoiced.
Once the docket has been invoiced it can't be reopened or cancelled at all. If the hours were wrong and the customer has already been billed, the invoice has to be cancelled or credited first - that puts the docket back to Approved - and only then can it be reopened and the times corrected.